Helios Electron Zuta LA 25 User manual
ZUTA amplifiers Powered by HELIOS ELECTRON
1
LA 25 User Manual rev 1.01
IMPORTANT SAFEGUARDS
CAUTION: TO REDUCE RISK OF ELECTRIC SHOCK, DO NOT REMOVE BOTTOM PLATE. NO
USER-SERVICEABLE PARTS INSIDE. REFER SERVICING TO QUALIFIED SERVICE PERSONNEL.
Refer to accompanying documents!
The exclamation point within an equilateral triangle is intended to alert the user to the presence of
important operating and maintenance (servicing) instructions in the literature accompanying the
product.
Risk of electric shock!
The lightning flash with arrowhead symbol, within an equilateral triangle is intended to alert
the user to the presence of uninsulated dangerous voltage within the product's enclosure
that may be of sufficient magnitude to constitute a risk of electric shock.
Hot parts!
Burned fingers when handling the parts.
Wait one-half hour after switching off before handling parts.
This product complies with the WEEE Directive (2002/96/EC) marking equipment.
The affixed product label indicates that you must not discard this electrical/electronic product
in domestic household waste.
By affixing the CE marking to a product, a manufacturer declares that the
product meets all the legal requirements for CE marking and can be sold throughout the EEA.
- WARNING: To reduce the risk of fire or electric shock, do not expose this product to rain or moisture.
This product should not be exposed to dripping or splashing. No objects filled with liquids, such as vases,
should be placed on or near theproduct.

ZUTA amplifiers Powered by HELIOS ELECTRON
2
WARNING! IMPORTANT SAFETY INSTRUCTIONS
-Read these instructions ! Keep these instructions ! Heed all warnings ! Follow all instructions !
-Do not use this apparatus near water. Clean only with dry cloth.
-Do not block any ventilation openings. Install in accordance with the manufacturer’s instructions.
-Do not install near any heat sources such as radiators, heat registers, stoves or other apparatus (including
amplifiers) that produce heat.
-Do not defeat the safety purpose of the polarized or grounding-type plug. A polarized plug has two blades with one
wider than the other. A grounding type plug has two blades and a third grounding prong. The wide blade of the third
prong are provided for your safety. If the provided plug does not fit into your outlet, consult an electrician for
replacement of the obsolete outlet.
-Protect the power cord from being walked on or pinched particularly at plugs, convenience receptacles and the
point where they exit from the apparatus. Only use attachments/accessories specified by the manufacturer.
-Unplug this apparatus during lightning storms or when unused for long periods of time.
-Refer all servicing to qualified service personnel. Servicing is required when the apparatus has been damaged in any
way, such as power-supply cord or plug is damaged, liquid has been spilled or objectives have fallen into the
apparatus, the apparatus has been exposed to rain or moisture, does not operate normally or has been dropped.
-To insure proper ventilation, always make sure there is at minimum 4 inches (101.6mm) of space behind the rear of
the apparatus. The ventilation should not be impeded by covering the ventilation openings with items, such as
newspapers, tablecloths, curtains, etc. Do not impede ventilation by placing objects on top of the apparatus which
extend past the rear edge of its cabinet.
-No naked flame sources, such as lighted candles, should be placed on the apparatus.
-The apparatus shall not be exposed to dripping or splashing and no objects filled with liquids, such as vases, shall be
placed on the apparatus.
-WARNING: To reduce the risk of fie or electric shock, do not expose this apparatus to rain or moisture.
-The AC plug is the mains disconnect. The plug should remain accessible after installation.
-Do not expose amplifier to direct sunlight or extremely high temperatures.
-Always insure the amplifier is properly grounded. Always unplug AC power cord before changing fuses, tubes or
removing chassis. Use only same type and rating when replacing fuse.
-Avoid direct contact with heated tubes. Keep amplifier away from children.
-To avoid damaging your speakers and other playback equipment, turn off the power of all related equipment before
making the connections.
-Do not use excessive force when handling buttons, switches and controls. Do not use solvents such as benzene or
paint thinner to clean the unit.
-Always connect to an AC power supply that meets the power supply specifications listed on the rear of the unit.
Export models: always insure unit is wired for proper voltage. Make certain grounding conforms with local
standards.
-YOUR AMPLIFIER IS LOUD! EXPOSURE TO HIGH SOUND VOLUMES MAY CAUSE PERMANENT HEARING DAMAGE!
Your ZUTA Amplifier is a professional instrument. Please treat it with respect and operate it properly.
ZUTA amplifiers Powered by HELIOS ELECTRON
3
READ AND FOLLOW INSTRUCTIONS OF PROPER USAGE.
-Before going any further, make sure that your amplifier is compatible with your mains electricity supply.
MAINS INPUT & FUSE:
-The specific mains input voltage rating that your amplifier has been manufactured for is indicated on the rear
panel of the amplifier. Your amplifier is provided with a detachable mains (power) lead, which should be connected
to the MAINS INPUT socket on the rear panel of the amplifier. The correct value and type of mains fuse is specified
on the rear panel of each amplifier. NEVER attempt to bypass the fuse or fit one of the incorrect value or type.
TRANSPORTING YOUR EQUIPMENT:
- Please ensure that your amplifier is switched off, unplugged from the mains electricity supply and that all
removable cables have been disconnected from your equipment before attempting to move it.
IMPORTANT SET UP INFORMATION:
-Failure to select the correct impedance may damage your amplifier. If connecting a speaker cabinet make sure
that you use a proper speaker cable. Never use a screened (shielded) guitar cable for this purpose.
1. Ensure that the MAINS (power) switch is set to the OFF position.
2. Connect the supplied mains (power) lead into the MAINS INPUT first and then into the mains electricity supply.
3. Ensure that the VOLUME controls on the front panel are set to zero.
4. Plug your guitar into an INPUT jack socket.
5. STANDBY switch on front panel right should be ON.
6. Turn the rear panel MAINS switch to the ON position.
7. Wait about 1-2 minutes and then set STANDBY switch to OFF.
8. Turn the VOLUME up to your preferred level and your amplifier is ready to play.

ZUTA amplifiers Powered by HELIOS ELECTRON
4
LA 25 User Manual rev 1.01
Please read safety instructions before operating this amplifier!
Thank you for purchasing the LA 25. As modern guitar amplifiers go, the LA is not the least expensive, so we assume
that you've listened very carefully to other amplifiers available on the market and we agree with you! The LA
combines the sonic characteristics of the best modern and vintage amps, while offering you the technological
advances you've come to expect from Zuta. This manual was designed to help you get the most from your new Zuta.
We have included some tips & uses you might not have thought of, so please take a few minutes to read it. Of
course, please feel free to call your Zuta dealer anytime you have questions. The LA 25 was designed with simplicity
& usability in mind. It was built with the finest materials the world has to offer so with just a tube change, the Zuta
LA 25 should provide you with the most wonderful sound for many, many years to come.

ZUTA amplifiers Powered by HELIOS ELECTRON
5
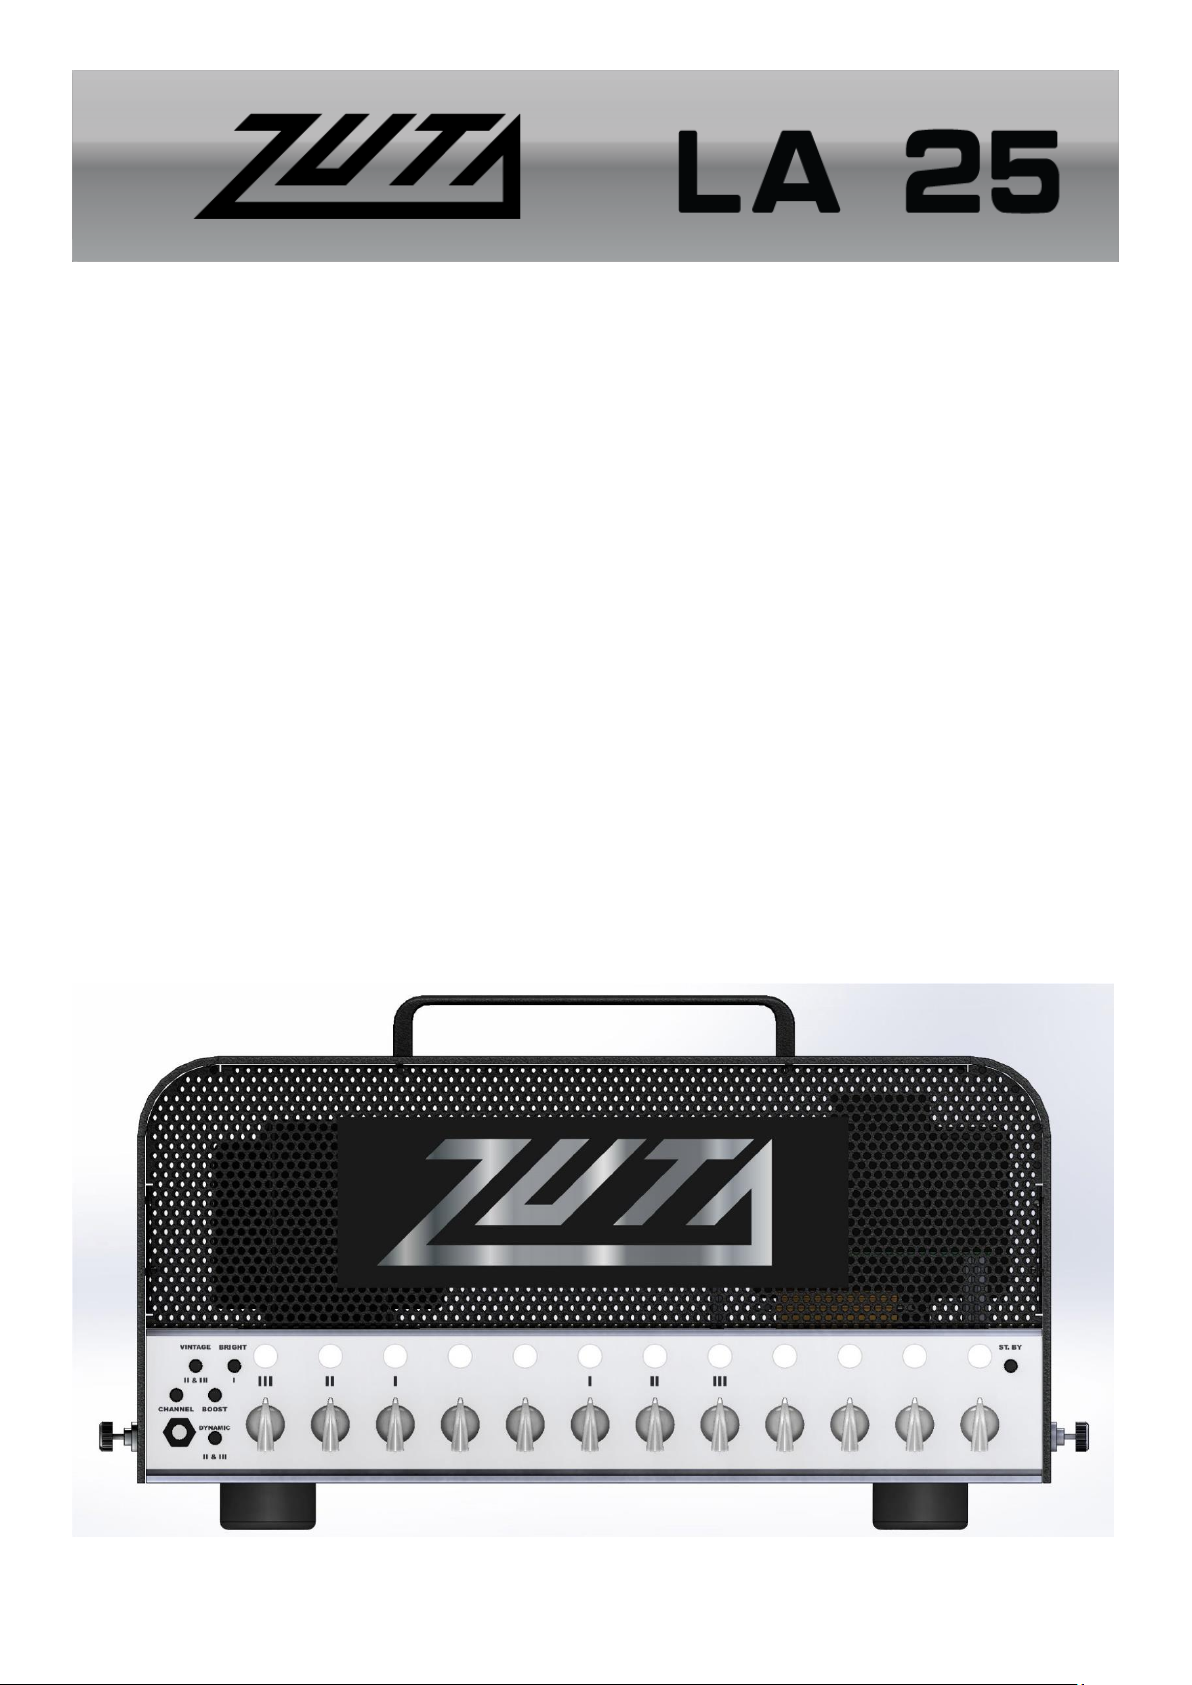
Features:
3 channel all tube design.
•Ch1: gain 1, bass, treble and volume 1 control and bright switch + master PRESENCE.
•Ch2: gain 2, volume 2 and vintage/modern mode, gain boost and dynamic switches plus shared with ch3
3 band EQ + master PRESENCE.
•Ch3: gain, volume and vintage/modern mode, gain boost and dynamic switches plus shared with ch3
3 band EQ + master PRESENCE.
•Ch2 & 3: common bass, middle and treble controls.
•MASTER presence control and Bite switch on the back panel.
•ACTIVE buffered series effects loop with a master volume, when loop is not switched on the whole circuit is
bypassed for the most pristine signal path.
•Functions on foot controller: Ch1, Ch2, Ch3, boost, FX loop.
•Built in REACTIVE LOAD that automatically engages when no speaker is plugged in.
•Professional virtual mic XLR output for studio or live recording.
•Line out for system expanding.
DIMENSIONS and WEIGHTS:
Are subject to change anytime.
If a Custom Case is being made, please measure your amp carefully and:
-Add 20 mm for each rubber feet, and 25 mm for handle.
-The head has two screws on each side to secure the aluminum top shell,
Please note they need clearance on each side.
Head: Height = 175 mm , Width = 375 mm , Depth = 190 mm , Weight = 8.5 kg.
INTENDED USE:
-This product is intended for use by guitar players, for amplifying and creating inspiring tones for live performances
as well as in the studio.
The Manual: Let's begin by hooking up a speaker to the Speaker jack on the back panel of the LA 25. You have the
choice of 16 Ω, 8 Ω or 4 Ω output impedance; please use the value which matches your speaker cabinet, use only
one speaker output. There is no need to hook up a speaker if you are using the direct out since the built in reactive
load will automatically engaged if no speaker is plugged in . If you're not sure what impedance your cab is, open the
back of the cabinet and call your dealer. There are many ways to wire a speaker cabinet and you need to
know what yours is rated at. Now plug the footswitch into the "FOOT SWITCH" connector on the back
panel,make sure you pay attention to the littl nose on the jack that shoul match the rotation location of the
footswitch plug it needs to point up. Next, with the standby button (front right panel) in the "standby" (pressed)
position, turn the Power switch to "1 - ON" position. Let the amp warm up for at least a minute or two! This will
stabilize the circuits and prevent a painful surge from flashing through your tubes. If you're kind to your amp, it will
reward you with grateful reliability. At this point, it might be helpful to understand the difference between Preamp
and Poweramp functions.

ZUTA amplifiers Powered by HELIOS ELECTRON
6
For instance, you are probably aware that the "presence" knob on most amps is a poweramp brightness control in
conjunction with the Bite switch located on the back panel both are altering the damping factor and frequency
feedback, while the "treble" knob is the preamp brightness control.Your new Zuta has been carefully laid out so that
you have options regarding how the preamp and power-amp respond, both together and separately. On the front
panel, turn down Vol.1, Vol.2 & Vol.3 (these are your channel masters). Plug your guitar into the Input jack on the
front panel and depress the "standby" button to OFF".
-Tap the CH1 button on the foot controller or press the “CHANNEL” button on front panel repeatedly until
CH1 lights will be on. You are now in channel 1 - the Clean Channel. Channel 1 has Gain 1, Bass, Treble, Vol.1
Control and bright switch button. By now you've noticed that, in addition to the light on the footswitch,
lights above controls that are active come up of that channel on the front panel. We encourage playing with
different ratios and combinations of Gain 1, Volume 1 and the bright switch to explore the whole
sonic palet of the very alive clean ch. Example A : VOL1 fully up, bright sw on and slowly bring up the gain
until You hear what You like Example B: VOL1 12 o’clock, bring gain up to where it starts to break up, switch
bright in and out Example c: VOL1 & GAIN fully cranked and start messing with the Presence, bass and treble
control this should produce some wide open vintage crunch tones.
-Tap the CH2 button on the footswitch or press the “CHANNEL” button on front panel repeatedly until CH2
light will be on. Now you are in Channel 2. Bring Gain 2 and Vol.2 up a little. Channels 2 and 3 have Gain,
Treble, Middle, Bass and Volume controls. Of course, 2 and 3 have the crunch and soaring gain that made
Zuta famous. Channels 2 and 3 share Bass, Middle, Treble controls, and a dynamic compressor effect with
button switch for it. Channels 2 and 3 are also enriched with a Vintage sound and button switch for it. The
Vintage channel is voiced to please players who love that wide open 60's British sound this also a great
platform push with Your favorite Pedal infront of the amplifier. Vintage MODE is a lower gain channel than
MODERN. Like the older amps it emulates, the louder you turn it up the better it sounds. IN VINTAGE MODE
CH2 is closer to a PLEXI. IN VINTAGE MODE ONLY CH3 HAS A BOOST FUNCTION available. A dynamic switch
in out position that EMULATES POWERAMP BREAK UP AND ADDS soft clipping AND COMPRESSION TO MAKE
UP FOR LACK OF POWERAMP breakup AT LOWER VOLUME SETTINGS. There will be a little drop in volume
when the switch is in the out position do to the added compression just turn up the volume a little to make
up the difference.
-Tap in CH 3, button on the footswitch or press the “CHANNEL” button on front panel repeatedly until CH3
light will be on. Bring Gain 3 and Vol.3 up a little. Now set gain and Ch.3. As explained above, Channels 2 and
3 share Bass, Middle, and Treble controls, a dynamic switch EMULATES POWERAMP BREAK UP AND ADDS
DISTORTION AND COMPRESSION TO MAKE UP FOR LACK OF POWERAMP DISTORTION AT LOWER VOLUME
SETTINGS, and a Vintage sound switch. Appropriate lights above the controls come up.
-Presence control is common for all tree channels.

ZUTA amplifiers Powered by HELIOS ELECTRON
7
-BITE switch is common for all tree channels., located on the back of the amp, in the out position You have a
bigger bass and loser feel and in the in position things are tighter and more in Your face with less extended
lows and more upper presence.
-VIRTUAL MIC MODULE
To avoid popping noise while powering up it is recommended to switch on the LA 25 Amplifier before
plugging in the XLR output to recording gear or live mixers.
LA 25 is equipped with a high-quality module called a virtual microphone placed on rear panel center.
Similar to a cabinet simulator, it serves for direct connection to mixing and recording devices via balanced
XLR connector. This feature will save you an expensive mic and accessories for it. You have controls for
POSITION and the AXIS of virtual mic and button switch for VOICE effect.In this way, your studio is richer for
another very useful feature and your stage will have less mess.
Some players use the Channels 2 as their crunch channel, and Channel 3 as their highest gain
channel. Other players like the Channels 2 and Channel 3 for lead. Different situations call for different sounds. With
your LA 25, you'll have them all.
Everything we've talked about so far, gain, tone shaping and such, have been Preamp Functions. Now let's talk a
little about where the signal goes from the Preamp. If the FX light on the foot controller is off, the preamp signal
flows from the Vol. 1, 2 & 3 controls into the power amp section. Naturally, you will want to get a balance between
the three channels. Do this now with the Vol. 1, 2 & 3 controls (the channel masters). If you want to put an effect in
the loop, plug a shielded cable from the Send jack on the rear panel to the input of your effect, and another shielded
cable from the out of the effect to the Return jack. If the effect has "level" switches, set them to "-20db". Tap the FX
button on the foot controller. You will notice that the "FX" light on the foot controller will come on. You have a knob
on the left rear panel with the words "RETURN LEVEL" above it. Slowly bring up the " RETURN LEVEL " Knob. You
should now hear your effect. In this mode use the balance control in your effect to balance dry signal with effected
signal. The RETURN LEVEL now is the Power Amp (return) Volume, and it only works if the loop is on. The RETURN
LEVEL knob allows you to match Loop on and Loop off volumes. Switch Loop off, listen to the volume, then switch
Loop on and match that volume with RETURN LEVEL. Of course, watch the input level on your effect. If the input
LED’s are in the red, turn down the input of the effect, and reset RETURN LEVEL. The Loop button on the Rear panel
is there to switch the loop in and out if you're for some reason without your foot controller. If there is no effect in
the Loop, Foot controller or not, the Loop button on the Rear panel must be set to "off", or the circuit from pre to
power amp is open. There is a additional internal trimm pot that is inside and can be accessed from the bottom of
the amp with a screwdriver to set the send signal. To reach the trim potentiometer one needs remove the rubber
foot closest to the fx loop. Remember if you SET IT TOO LOW YOU MIGHT NOT HAVE ENOUGH MAKE UP GAIN TO
REACH UNITY LEVEL WITH THE FX BYPASS SOUND LEVEL. Factory preset is about 80%.
Many pro players sometimes like to "slave" their amps by running a line out from their amplifiers, through effects, to
another stereo power amp. A "line out" is an output from the head that is line level, suitable for feeding the input of
an effect or power amp. This is also known as "slaving". The difference between a line out and a send, (which is also
line level) is: A send is a pre amp out and a line out comes after the power tubes.

ZUTA amplifiers Powered by HELIOS ELECTRON
8
The way this works is; run the LA 25 head to a speaker cab "dry" (speaker cable from speaker out to cab, nothing in
loop), then run a shielded cable from the line out jack (rear panel, middle right) to an effect input. Run two shielded
cables from the stereo outputs of the effect to the inputs of a stereo power amp. Run the speaker outs of the power
amp to two more cabs. Turn them all up and be blown away! You are now successfully "tri-amping". Some guys like
to mix only effect in their "wet" speakers, others like a little "dry" in there, too. Of course, it all depends on your
application. If the extra speakers are to be used as a guitar monitor for your drummer, you'll most assuredly want
some dry sound in it. If the speakers will all face the same general direction, you may not want dry in the effects
speakers. You decide. We like them both ways. You can also use the line out to feed a mixing board, a recorder or to
send signal to another amp to power more speakers. In this case it is best to use an EQ in between so you can shape
the tone.
There you have it! It’s all up to you now, be creative and push your musical imagination…
SPECIAL PROCEDURES
We recommend the following procedures to be made by qualified service personnel.
-Adjusting the FX send level:
1. First you need to remove the head cover.
2. Turn the amplifier so that it can stand on the transformers with the rear panel facing you.
3. Remove the left front rubber foot and below it you will see a trimmer opening and adjustment directions.
Remember to low of a send level could be a problem by not having enough make up gain on the return to match
unity volume when fx loop is switched off.
WARRANTY NOTES:
ZUTA LIMITED ONE (1) YEAR WARRANTY. Thank you for choosing ZUTA LA 25. ZUTA takes great pride in an extremely
thorough testing procedure which is implemented on each product prior to shipment. In the unlikely event that you
have a problem with your ZUTA product, please refer to warranty below.
ZUTA offers a limited One (1) Year warranty to the original purchaser that this ZUTA product will be free from
defects in material and workmanship. A dated sales receipt will establish coverage under this warranty, PLEASE KEEP
YOUR PROOF OF PURCHASE TO USE YOUR WARRANTY. This warranty does not cover service or parts to repair
damage caused by accident, neglect, abuse, normal wear & tear, disaster, misuse, abuse, overpowering, negligence,
inadequate packing or shipping procedures and service, repair or any modifications to the product which have not
been authorized or approved by ZUTA in writing. ANY MODIFICATION TO THE AMPLIFIER WILL VOID YOUR
WARRANTY. If this product is defective in materials or workmanship as warranted above, your sole remedy shall be
repair or replacement by ZUTA as provided below.
CAUTION: Do NOT attempt to repair, modify or service this ZUTA product by yourself!!! Please read the instruction
manual for all safety notifications, warnings and instructions. ZUTA utilizes tubes with extremely high voltages that
can cause serious injury or death. Do not remove the chassis cover from the amplifier. All repair and service work
must be performed by ZUTA or an authorized service center of ZUTA. ANY UNAUTHORIZED REPAIRS WILL VOID
YOUR WARRANTY.

ZUTA amplifiers Powered by HELIOS ELECTRON
9
TUBES: Zuta warrants the original purchaser that the specific tubes used in Zuta will be free from defects in material
and workmanship for a period of 90 days from the original date of purchase. A dated sales receipt will establish
coverage under this warranty. This tube warranty will automatically terminate 90 days after the original retail sales
date. This tube warranty is in lieu of all other expressed warranties. If tubes fail within the 90-day warranty period,
your sole remedy shall be replacement of tubes as provided below.
RETURN PROCEDURES: In the unlikely event that a defect occurs please email us. In most cases we can help you
diagnose the problem via email. If a product must be sent to us, please follow the procedure outlined below.
• Defective products must be shipped, together with proof of purchase, freight pre-paid and insured to the
Authorized ZUTA Service Center or directly to ZUTA.
• If a product must be returned to ZUTA for warranty replacement/repair, a Return Authorization Number must be
obtained from our Customer Service Department prior to shipping the product.
• Please contact ZUTA Customer Service Department for the Authorized ZUTA Service Center nearest you.
• Products must be shipped in their original packaging or its equivalent; in any case, the risk of loss or damage in
transit is to be borne by the purchaser.
• The Return Authorization Number must appear in large print directly below the shipping address.
• Always include a brief description of the defect, along with your correct return address and telephone
number. When calling to inquire about a returned product, always refer to the Return Authorization Number.
INCIDENTAL OR CONSEQUENTIAL DAMAGE: In no event will ZUTA be liable for any incidental or consequential
damages arising out of the use or inability to use of any ZUTA product, even if a ZUTA dealer has been advised of the
possibility of such damages, or any other claim by any other party. Some states do not allow the exclusion or
limitation of consequential damages, so the above limitation and exclusion may not apply to you. This warranty gives
you specific legal rights and you may also have other rights which may vary from state to state.
FOR YOUR PROTECTION: Please complete the warranty registration card within (10) ten days of the date of purchase
so that we may contact you directly in the event a safety notification issued in accordance with the 1972 Consumer
Product Safety Act.
CUSTOMER SUPPORT: Our dedicated and friendly staff is ready to help you with any warranty or product questions you may
have. Please call us. Thank you again for choosing ZUTA and we look forward to a long relationship!

ZUTA amplifiers Powered by HELIOS ELECTRON
10
FAVORITE SETTINGS :
1.
NOTES:
2.
NOTES:

ZUTA amplifiers Powered by HELIOS ELECTRON
11
3.
NOTES:
4.
NOTES:

ZUTA amplifiers Powered by HELIOS ELECTRON
12
ZUTA LA 25
TECHNICAL SPECIFICATION
GENERAL
Model Technology Channels
LA 25 Valve 3
ELECTRONICS
Output wattage Outputs Inputs
22W rms Speaker outputs: 3 x 1/4" jack 1 x 1/4" instrument jack
(16Ω load / 8Ω load / 4Ω load)
Line out +4 dB unbalanced 1/4" instrument jack
XLR balanced mic output
Controls FX loop
input gain x3, bass x2, Send/Return 2x 1/4" instrument jacks
treble x2, Presence,
middle, output x3,
channel select, Dynamic,
bright, boost,
vintage, fx, voice,
gnd lift, bite.
VALVES
Preamp valves Power amp valves
4 x ECC83 2 x EL84M
(low microphonic)
ACCESSORIES
Footswitch Cable
LA25FTSW551 Detachable power cable
included included
DIMENSIONS (EXCLUDING FEET AND HANDLE)
Width Height Depth Weight
375 mm 175 mm 190 mm 8.5 kg
Produced by Helioselectron
Slavej Planina 1
6330 Struga North Macedonia
phone: +389 46 704 337
Table of contents


