Hello Kitty KT2015 User manual

2.4 GHz DIGITAL CORDLESS PHONE
OWNER’S MANUAL
KT2015
SUBSCRIPTION TO CALLER ID SERVICE FROM YOUR LOCAL TELEPHONE COMPANY
IS REQUIRED FOR ALL CALLER ID FEATURES TO OPERATE CORRECTLY
PLEASE READAND FOLLOWTHIS MANUALBEFORE USINGYOUR
TELEPHONEAND KEEP ITFOR FUTURE REFERENCE

1
IMPORTANT SAFETY INSTRUCTIONS
This symbol is to alert you the important
operating or servicing instructions that may
appear in your owner’s manual. Always follow
basic safety precautions when using this product
to reduce the risk of injury, fire or electric shock.
When using your telephone equipment, basic safety precautions should always be followed to
reduce the risk of fire or electric shock and injury to persons including the following:
1. Read and understand all instructions.
2. Follow all warnings and instructions marked on the product.
3. Unplug this product from the wall outlet before cleaning. Do not use liquid or aerosol
cleaners. Use a damp cloth for cleaning.
4. Do not use this product near water, for example, near a bath tub, wash bowl, kitchen sink,
or laundry tub, in a wet basement, or near a swimming pool.
5. Do not place this product on an unstable cart, stand, or table. The product may fall, causing
serious damage to the product.
6. Slots and openings in the enclosure and the back or bottom are provided for ventilation to
prevent overheating. These openings must not be blocked or covered. The openings
should never be blocked by placing the product on a bed, sofa, rug, or other similar surface.
This product should never be placed near or over a radiator or heat register. This product
should not be placed in a built-in installation unless proper ventilation is provided.
7. This product should be operated only from the type of power source indicated on the
marking label. If you are not sure of the type of power supply to your home, consult your
dealer or local power company.
8. Do not allow anything to rest on the power cord. Do not locate this product where the cord
will be abused by persons walking on it.
9. Do not overload wall outlets and extension cords as this can result in the risk of fire or
electric shock.
10. Never push objects of any kind into this product through enclosure slots as they may touch
voltage points or short out parts that could result in a risk of fire or electric shock. Never
spill liquid of any kind on the product.
11. Do not disassemble this product. Take it to a qualified service technician or service center
when repair work is required. Opening or removing covers may expose you to voltage or
other risks. Incorrect reassembly can cause electric shock when the appliance is
subsequently used.
12. Unplug this product from the wall outlet and refer to qualified service personnel under the
following conditions:
A. When the power supply cord or plug is damaged or frayed.
B. If liquid has been spilled into the product.
C. If the product has been exposed to rain or water.
D. If the product does not operate normally by following the operating instructions. Adjust
only those controls that are covered by the operating instructions. Improper adjustment
of other controls may result in damage and may require extensive work by a qualified
technician to restore the product to normal operation.
E. If the product has been dropped or the enclosure has been damaged.
F. If the product exhibits a distinct change in performance.
13. Avoid using a telephone during an electrical storm. There may be a remote risk of electric
shock from lightning.
14. Do not use the telephone to report a gas leak in the vicinity of a leak.
15. Never install telephone wiring during a lightning storm.
-1-

2
16. Never install telephone jacks in wet locations unless the jack is specifically designed for
wet locations.
17. Never touch uninsulated telephone wires or terminals unless the telephone line has been
disconnected at the network interface.
18. Use caution when installing or modifying telephone lines.
19. Use only the power cord and batteries indicated in this manual. Do not dispose of batteries
in a fire. They may explode. Check with local codes for possible special disposal
instructions.
SAVE THIS INSTRUCTIONS
FCC INFORMATION
This equipment complies with Part 68 of the FCC Rules. The label affixed to this equipment
contains, among other information, the FCC Registration Number and Ringer Equivalence
Number (REN) for this equipment. We suggest that you review the following information
provided by the FCC.
NOTIFICATION TO THE TELEPHONE COMPANY
Notification to the telephone company is no longer required prior connecting the registered
equipment. However, upon request from the telephone company the user shall tell the
telephone company which line the equipment is connected to as well as the registration number
and the ringer equivalence of the registered protective circuitry. In most, but not all areas, the
sum of all REN’s should be 5.0 or less.
MALFUNCTION OF THE EQUIPMENT
If the device is not operating properly, the user should immediately disconnect it from the
telephone line as it may cause harm to the telephone network. In the event service is needed
the user should contact:
Service Department
Spectra Merchandising International, Inc.,
Chicago Industry Tech Park
4230 North Normandy Avenue,
Chicago, IL 60634, U.S.A.
Tel: (773) 202-8408 or call toll-free hotline 1-800-777-5331
TELEPHONE CONNECTION REQUIREMENTS
Except for ringers provided by telephone company, all connections to the telephone network
except for made through standard plugs telephone company provided jacks, or equivalent, in
such a manner as to allow for easy and immediate disconnection of the terminal equipment.
Standard jacks should be so arranged that, if the connected plug is withdrawn, no interference
to the operation of the equipment at the customer’s premises which remains connected to the
telephone network shall occur by reason of such withdrawal.
INCIDENCE OF HARM
Should terminal equipment or protective circuitry cause harm to the telephone network, the
telephone company shall, where practical, notify the customer that temporary discontinuance of
service may be required. However, where prior notices are not practical, the telephone
company may temporarily discontinue service if such action is deemed reasonable in the

3
circumstances. In the case of such temporary discontinuance, the telephone company shall
promptly notify the customer who has the right to bring a complaint to the FCC if he feels the
disconnection is not warranted.
Interference Information -- USA
This device complies with part 15 of the FCC Rules. Operation is subject to the following two
conditions: (1) This device may not cause harmful interference; and (2) This device must accept
any interference received, including interference that may cause undesired operation.
This equipment has been tested and found to company with the limits for a Class B digital
device, pursuant to part 15 of the FCC Rules. These limits are designed to provide reasonable
protection against harmful interference in a residential installation.
This equipment generates, uses, and can radiate radio frequency energy and, if not installed
and used in accordance with the instructions, may cause harmful interference to radio
communications. However, there is no guarantee that interference will not occur in a particular
installation.
If this equipment does cause harmful interference to radio or television reception, which can
be determined by turning the equipment off and on, the user encouraged to try to correct the
interference by one or more of the following measures:
Reorient or relocate the receiving antenna (that is, the antenna for radio or television that is
“receiving” the interference).
Reorient or relocate and increase the separation between the telecommunications equipment
and receiving antenna.
Connect the telecommunications equipment into an outlet on a circuit different from that to
which the receiving antenna is connected.
If these measures do not eliminate the interference, please consult your dealer or an
experienced radio/television technician for additional suggestions. Also, the Federal
Communications Commission has prepared a helpful booklet, “How To Identify and Resolve
Radio/TV Interference Problem”. This booklet is available from the U.S. Government Printing
Office, Washington, D.C. 20402. Please specify stock number 004-000-00345-4 when ordering
copies.
FCC RF Radiation Exposure Statement
This equipment complies with FCC RF radiation exposure limits set forth for an uncontrolled
environment. This equipment should be installed and operated with a minimum distance of 20
centimeters between the radiator and your body. This transmitter must not be co-located or
operated in conjunction with any other antenna or transmitter.
WARNING: Changes or modifications to this unit not expressly approved by the party
responsible for compliance could void the user's authority to operate the equipment.
Privacy of communications may not be ensured when using this phone.
NOTE: This equipment has been tested and found to comply with the limits for a Class B
digital device, pursuant to Part 15 of the FCC Rules. These limits are designed to provide
reasonable protection against harmful interference in a residential installation. For body
worn operation, this phone has been tested and meets the FCC RF exposure guidelines
when used with the belt clip supplied or designated for this product. Use of other
accessories may not ensure compliance with FCC RF exposure guidelines. This
equipment generates, uses and can radiate radio frequency energy and, if not installed
and used in accordance with the instructions, may cause harmful interference to radio
communications. However, there is no guarantee that interference will not occur in a
particular installation. If this equipment does cause harmful interference to radio or
television reception, which can be determined by turning the equipment off and on, the

4
user is encouraged to try to correct the interference by one or more of the following
measures:
• Reorient or relocate the receiving antenna.
• Increase the separation between the equipment and receiver.
• Connect the equipment into an outlet on a circuit different from that to which the receiver is
connected.
• Consult the dealer or an experienced radio/TV technician for help.
CHANGES IN TELEPHONE COMPANY EQUIPMENT OR FACILITIES
The telephone company may make changes in its communications facilities, equipment,
operations or procedures, where such action is reasonably required and proper in its business.
Should any such changes render the customer’s terminal equipment incompatible with the
telephone company facilities, the customer shall be given adequate notice to make
modifications to maintain uninterrupted service.
General
The FCC prohibits customer-provided terminal equipment to be connected to party lines or to
be used in conjunction with a coin telephone service.
Installation
This device is equipped with a USOC RJ11C standard miniature modular jack and is designed
to plug directly into a modular jack.
***THIS TELEPHONE HAS BEEN CERTIFIED AS HEARING AID COMPATIBLE ***

5
BATTERY CAUTIONARY INSTRUCTIONS
CAUTION – To Reduce the Risk of Fire or injury to Persons, Read and Follow these
instructions.
1. Risk of explosion if battery is replaced by an incorrect type.
2. Use only the supplied rechargeable battery pack: LEXEL, LH070-3A44C2BRML1P
Ni-MH AAA 700mAh 2.4V Battery Pack.
3. Do not dispose of the batteries in fire. The cell may explode. Check with local codes for
possible special disposal instructions.
4. Do not open or mutilate the batteries. Released electrolyte is corrosive and may cause
damage to the eyes and skin. It may be toxic if swallowed.
5. Exercise care in handling batteries in order not to short the batteries with conductor
material such as rings, bracelets, and keys. The battery or conductor may overheat and
cause burns.
6. Do not attempt to recharge the batteries provided with or identified for use with this
product by heating them. The batteries may leak corrosive electrolyte or explode.
7. Do not attempt to rejuvenate the battery provided with or identified for use with this
product by heating them. Sudden release of the battery electrolyte may cause burns or
irritation to eyes or skin.
8. All batteries should be replaced at the same time. Mixing fresh and discharged batteries
could increase internal cell pressure and rupture the discharged batteries.
9. When inserting batteries into this product, the proper polarity or direction must be
observed. Reverse insertion of batteries can cause charging, which may result in
leakage and explosion.
10.Remove the batteries from this product if it will not be used for a long period of time
(several months or more) since during this time the batteries could leak, damaging in the
product.
11.Discard “dead” batteries as soon as possible since “dead” batteries are more likely to
leak in a product.
12.Do not store this product, or the batteries provided with or identified for use with this
product in high-temperature areas. Batteries that are stored in a freezer or refrigerator for
the purpose of extending shelf life should be protected from condensation during the
storage and defrosting. Batteries should be stabilized at room temperature prior to use
after storage.
SAVE THESE INSTRUCTIONS

6
INTRODUCTION TO CALLER ID INSTRUCTIONS
Read this manual carefully before using this product and keep it for future reference.
Congratulations on your purchase of this product! The unit allows you to take advantage of the
Caller Identification service that may be offered by your local telephone company. Not all local
telephone companies provide Caller Identification service therefore you must make sure the
service is available.
IMPORTANT: For your Caller ID to function, you must first contact your local telephone
company to arrange to have Caller ID with Call Waiting service installed on your line.
There will be an extra charge added to your monthly telephone bill for this service.
Please consult with your local telephone company for the Caller ID service charge.
1. The Caller ID function can be used to screen unwanted calls, eliminate harassment from
annoying calls, or to return missed calls using the displayed speed dial feature.
2. When used with Caller ID service, the unit displays the name or the telephone number of the
person calling before you pick up your telephone.
3. Additionally, if you subscribe to Call Waiting combined with Caller ID service, this phone lets
you see who’s calling while you’re on another call (your telephone company must provide the
service needed for this feature to work).
FUNCTIONS AND CONTROLS
Handset Section
New Message LED
MENU / ▼Menu / down key
/ ▲CID / Menu/ Up key
INT / OK INT / OK key
C Cancel Key
Mute key
/ P Redial / Pause key
External call key.
R / Flash /Memory key
* / Asterisk / lock key
# Hash key

7
Base Section
PAGE Page key
IN USE In-use LED:
The In-use LED will be steadily on during off-hook. During the
period of incoming call, the In-use LED will also follow the ring
cadence to go on or off. When registering, it will flash as a special
cadence.
CHARGING Charging LED
LCD Display Section
Battery icon
Phone icon
EXT External call icon
INT Internal call icon
CID icon
No ring icon
Mute icon
Key lock icon
Aerial icon
▲Up arrow
▼Down arrow

8
PHONE INSTALLATION INSTRUCTIONS
1. Never install telephone wiring during a lightning storm.
2. Never install telephone jacks in wet or damp locations.
3. Never touch un-insulated telephone wires or terminals unless the telephone line has been
disconnected at the network interface.
4. Use caution when installing or modifying telephone lines.
GETTING STARTED
Connecting the Base Station and Power Plug
Connect one end of the telephone line cord and the AC adaptor to the corresponding sockets in
the base station (they can not be connected incorrectly because the sockets and plugs are
designed prevent reverse poling). Lay the cable under the telephone to the rear. Plug the
telephone line in the telephone connection socket. Insert the power plug at the other end into
the power outlet. The base station in now ready to operate.
Only use the connection
cable supplied.
The base station has no power switch. Ensure that a Mains power outlet is
close by and that the power plug is easy to access. Check that the voltage
specified on the power adaptor corresponds to that supplied by the local
power network.
9
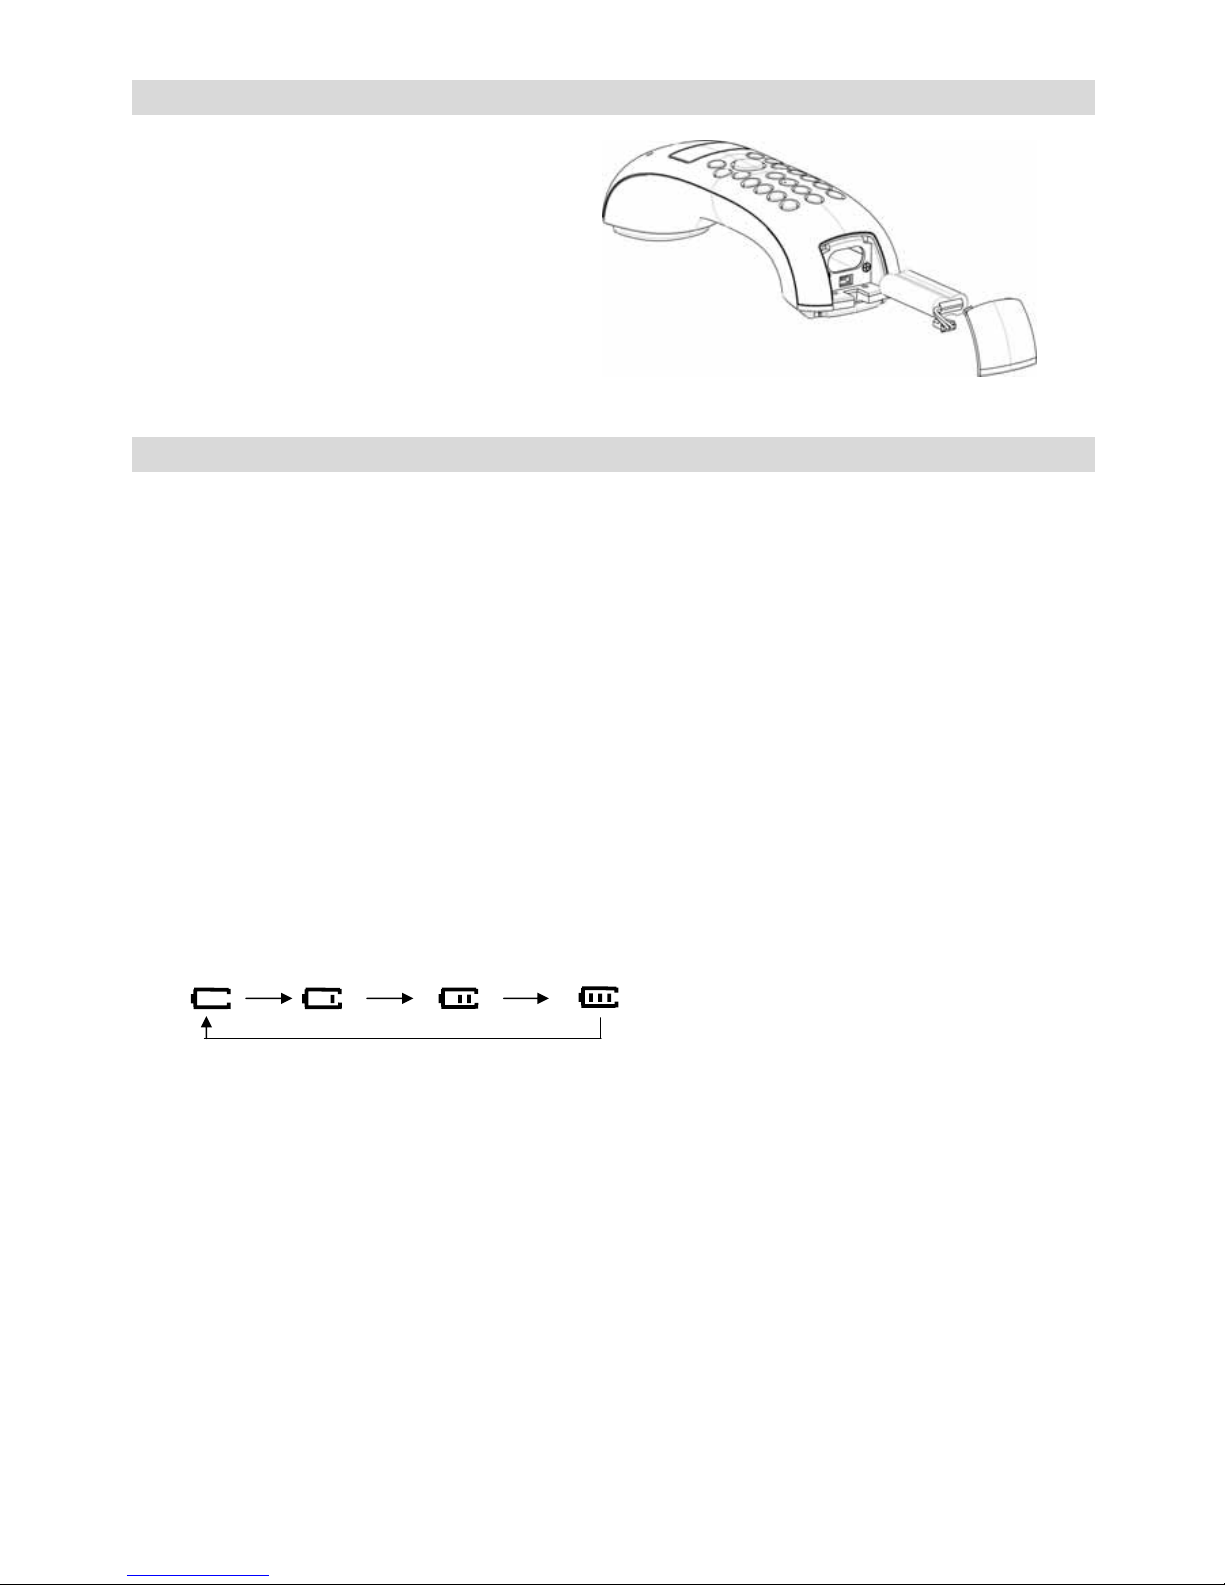
Installing Battery
1. Open the battery compartment by
pushing the battery cover at the bottom
hook.
2. Insert the supplied rechargeable battery
pack in the compartment, ensuring
correct polarity.
3. Place the upper hooks to the handset
first and then push at the battery cover
bottom to lock to close the battery cover.
Battery Charging
IMPORTANT:
Please make sure you have completed the Handset battery pack installation before plugging in
the Base Adaptor.
Place the handset in the base.
•An acoustic acknowledgement is issued and the charging indicator signals the charging
process has started.
•Allow the battery pack to be charged for 12 hours without interruption the first time they are
charged. When possible, only remove the handset from the station when the charging
process has been completed. This ensures optimum operation. If you don’t properly charge
the phone, battery performance will be compromised.
zWhen a handset is initially started up (reloading the batteries or charging up from empty
batteries), the battery will be fast charged in 3 hours.
zDuring a normal usage scenario, when a handset is used and is put on the cradle, the
battery will be fast charged in about 15 minutes.
zIf the battery level reaches 2 bars, the system will charge for 3 hours.
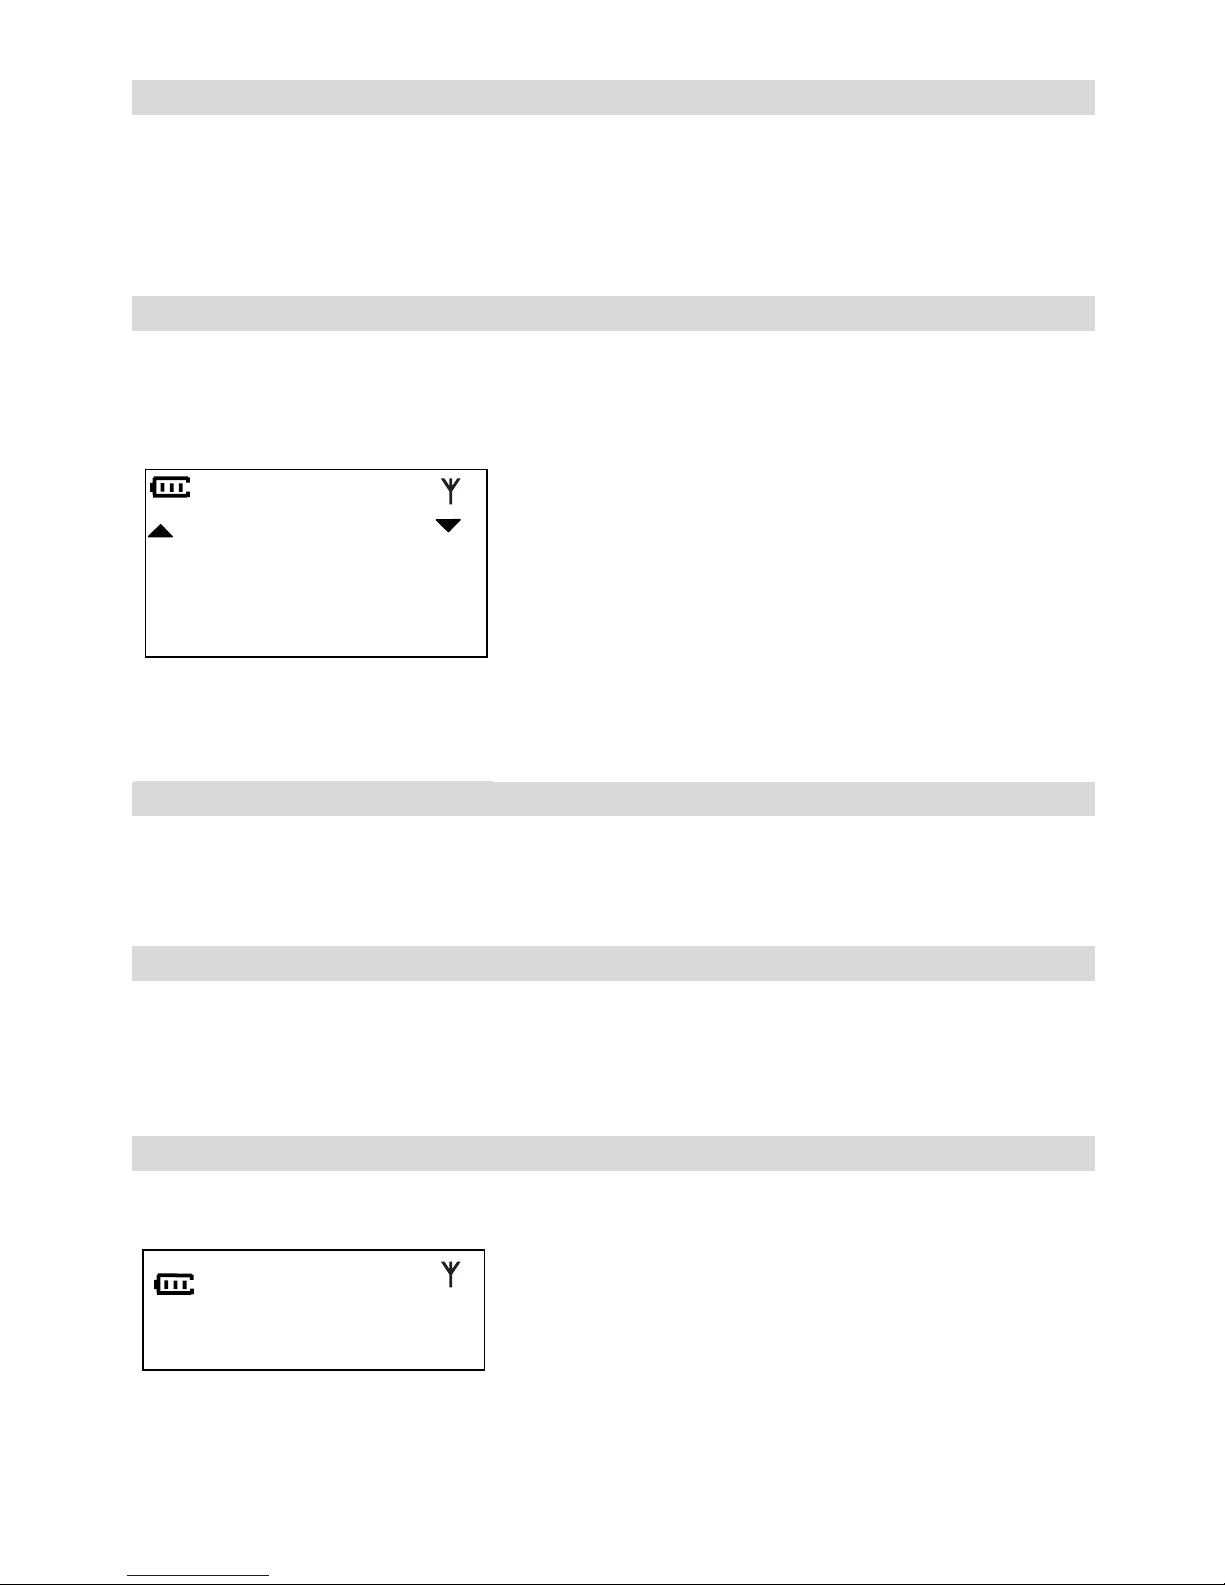
zWhile the battery is being charged, the following animation on the battery icon can be seen.
zAfter the charging period, the software will stop the fast charge cycle and the battery icon
will be shown as full.
zAn empty battery pack has to be charged for about 12 hours in order to reach maximum
capacity.

10
Low Battery Warning
zWhen the battery low condition is detected during standby mode, low-battery warning tone
will sound and the empty battery sign is shown.
L O W B A T T
zIf, however, the low battery condition is detected when a call is active, a low-battery warning
tone will sound every 15 seconds and the empty battery sign is shown. Whereas in idle
mode, the low-battery warning tone will emit every 30 seconds in order to save power.
zIf the low battery warning tone is switched off through the menu, the warning tone will be off.
zThe current call connection will be halted after 3.5 minutes if battery is low.
MENU SETTING
zOnce the handset is powered either by the supplied battery pack or by putting in the cradle,
it will begin to search for a base station that has been registered to that handset. The
‘Aerial’ icon will flash and “RANGE OUT” is shown in the Handset’s LCD during
searching.
zAfter several seconds, the LCD will display “XX NEW CALLS” if there are new calls existing
or the handset number and the handset name.
General Operation
zThe MENU can only be accessed when the handset is in the standby mode.
zAll individual functions are listed in the form of a menu.
1. Press [MENU/ ] to enter the MENU. The first selectable item, CALL LOG, is displayed
as shown.
1 - C A L L L O G
2. The other items such as PHONE BOOK, HANDSET, BASE, REGISTER, LANGUAGE
and their Sub-Menus can be accessed by repeatedly pressing [ /] or [MENU/ ] until
the desired item is shown in the display. You may then press [INT/OK] to confirm or [C] to
abort the selection.
3. The previous selection will always be shown first and can be changed by pressing [ /]
or [MENU/ ].
4. Alternatively, you may also press an index digit to directly select for the desired item. At
any stage of the MENU mode, you may go to one level up by pressing [C] once or press
and hold [C] to exist the MENU.
5. At any stage, you can connect the base immediately by pressing [ ].
6. The Handset will exit from the MENU mode if no key is pressed for 20 seconds.
Note: When entering the CALL LOG or BASE of the MENU, a ‘WAITING’ message will be
shown in the Display indicating that the handset is requesting the base for service and
waiting for it to response.

11
SUMMARY OF THE MENU FUNCTIONS
zFor easy reference, all the selectable items are listed as follows: (Note: At any time, only
one item is shown in the display)
1 - C A L L L O G
1 - U N R E A D
2 - M I S S E D
3 - R E C E I V E D
4 - C L E A R M S G
5 - D E L E T E A L L
2 - P H O N E B O O K
1 - B R O W S E
2 - S T O R E
3 - E D I T
4 - D E L E T E
5 - M E L O D Y
6 - D E L E T E A L L
3 - H A N D S E T
1 - V O L U M E
2 - E X T R I N G
3 - I N T R I N G
4 - H S N A M E
5 - T O N E S
1 - K E Y
2 - C O N F I R M
3 - L O W B A T T
4 - R A N G E
6 - T I M E R
7 - A U T O A N S
8 - D E F A U L T
4 - B A S E
1 - V O L U M E
2 - M E L O D Y
3 - D I A L M O D E
4 - D E R E G H S
5 - F L A S H
6 - D E F A U L T
5 - R E G I S T E R
6 - L A N G U A G E
1 - E N G L I S H
2 - P O R T U G U E S E
3 - S P A N I S H

12
CHANGING HANDSET SETTING
Changing Language
The default display language of the handset is English. Please follow the procedure below to
change the display language if desired.
1. Select ‘LANGUAGE’ from the MENU by pressing [MENU/ ] 6 times and then press
[INT / OK] to confirm selection. You will be prompted to change the display language.
A total of 3 languages can be selected.
E N G L I S H
P O R T U G U E S E
S P A N I S H
2. Press [MENU/ ] or [ /] to select the desired language. Press [INT/OK] to confirm. A
confirm tone will be heard.
Changing Handset Ring Tone
1. To change the handset ringer volume, choose ‘VOLUME’ under ‘HANSET’ by pressing
[MENU/ ] 3 times followed by [INT/OK].
There are 5 selectable volume levels ranging from 0 to 5 levels and the ring tone for
external call can be heard at the same time.
[
□
□
□]
If level 0 is selected, the ‘No Ring’ icon will be shown as well.
2. Press [INT/OK] to confirm the selection. A confirm tone will be heard.
[
]
To change the Handset melody, choose either ‘EXT Ring’ or ‘INT Ring’ for external or internal
incoming call. There are 10 normal ring tone melodies can be selected.
M E L O D Y 1 0
1. To change the ring melody, press [MENU/ ] or [ /].
The selected melody tone can be heard during selection.
2. Press [INT/OK] to confirm the selection. You will hear a confirm tone.
13
Changing Handset Name
1. You can change the Handset’s name displayed during standby mode by choosing sub-menu
‘HS NAME’ under HANDSET from the MENU.
2. If the handset name has been stored, the name will be displayed and can be changed. If no
handset name was stored, if you like just key in your name using the key buttons and press
[INT/OK] to complete. A confirm tone will be heard.
Setting Tones On/Off
There are 4 kinds of tones that can be set to on or off. They are the key tone, confirm tone
(including error tone), low battery tone and range out tone.
1. The key beep tone can be set to on or off by selecting ‘KEY’ from the Sub-Menu ‘TONES’
under HANDSET MENU. The previous setting ‘On/Off’ can be seen.
ON
O F F
2. Choose the desired setting and then press [INT/OK]. A confirm tone will follow.
The other tones can be set as setting the key tone.
Setting Call Timer On/Off
1. The Call Timer display during a call can be set to on or off by selecting ‘TIMER’. Similar to
setting the key beep on/off, the previous on/off setting will be shown after selection.
2. Choose the desired setting and then press [INT/OK].
Setting Auto Answer Mode On/Off
1. The auto answer function can be set to on or off by selecting ‘AUTO ANS’ from the
HANDEST MENU. Similar to setting key beep on/off, the previous on/off setting
will be shown after selection.
2. Choose the desired setting and then press [INT/OK]. A confirm tone will be hard.
Reset Handset Default Setting
1. By choosing ‘DEFAULT’ under ‘HANDSET’, you will be asked to confirm the resetting
procedure.
C O N F I R M ?
Once confirmed, all the handset setting parameters will be reset to the defaulted values.

14
CHANGING BASE SETTING
Changing Base Ring Tone
1. To change the base ringer volume, choose ‘VOLUME’ under ‘BASE’ in the MENU by
pressing [MENU/ ] 4 times followed by [INT/OK].
2. There are 5 selectable volume levels ranging from 0 to 5 levels and the base ring tone can
be heard at the same time.
If level 0 is selected, the base ringer will be turned off.
[
□
□
□]
3. Press [INT/OK] to confirm the selection.
Changing Base Melody
1. To change the melody, press [MENU/ ] or [ /] to choose ‘Melody’ under BASE of the
MENU and press [INT/OK].
M E L O D Y 1
You can select from 9 ring tone melodies.
2. To change the ring melody, press [MENU/ ] or [ /].
The selected melody tone will be heard during selection.
3. Press [INT/OK] to confirm the selection. A confirm tone will be heard.
Changing Tone/Pulse Dialing
PULSE dialing is used if your local telephone system only offers Pulse (rotary dial) service or if
Tone service is available but you do not subscribe to it.
1. The tone or pulse dialing mode can be selected by choosing ‘Dial Mode’ from the BASE
setting menu.
After selecting, the current dial mode is shown;
D T M F
2. Press [ /] or [MENU/ ] to select DTMF or pulse dial mode. Press [INT/OK] to confirm or
press [C] to abort.

15
Changing Flash Time
The flash time can be changed so that the base can be compatible to different PABX system.
1. Choose ‘FLASH’ from the BASE setting menu and the current setting is displayed.
3 0 0
Three different flash times can be selected (100ms, 300ms or 600ms)
2. To select the desired flash time, press [MENU/ ] or [ /].
3. Press [INT/OK] to confirm the selection.
Reset Base Default Setting
zSimilar to the resetting procedure for the Handset, confirmation will be required.
zOnce confirmed, all the base setting parameters will be reset to factory setting.
Storing Number into the Phone Book
1. Choose ‘STORE’ under PHONE BOOK from the MENU to create a new phone book entry.
2. After selection, you will be prompted to enter the name first.
N A M E :
3. After the first pressing, the entering display will appear and the letter will blink once for 1
second, during this 1 second, the character can be entered by pressing a digit ‘1’ to ‘0’ for
different times within 1 seconds.
4. After one second whether no key or another digit key is pressed, the cursor will be advanced
by one step as shown, and blink to indicate the current entering position.
P_
5. Press [C] to delete the current alphabet entry or press [INT/OK] to complete the name
entering procedure.
6. You may enter a name of up to 10 characters. When entering the name, press [C] to clear
the last input character. Press [INT/OK] to confirm the name entered. If no character is
entered but press [INT/OK] to confirm, a warning tone will prompt.
Note: Name and number cannot be empty.

16
7. After entering the name and confirm, number entry will prompt.
N U M B E R :
8. You may enter a number of up to 16 digits. During number entry, press [C] to clear the last
input digit if needed.
1 2 3 _
9. Press [INT/OK] to complete the number entry and also the procedure of storing an entry in
the phone book. A confirm tone will be heard and the storing can be continued one by one.
Setting Distinctive Melody for Phone Book Entry
1. After selecting ‘MELODY’ under PHONE BOOK in the MENU, you can select a melody for
phone book entries. Similar to editing a number from the phone book, you have to choose
an entry to set.
2. Press [INT/OK] and then the melody for that entry will be heard. If no distinctive melody is
set to it, the default melody same as the common one set in Ext Ring will be assigned.
(See the section of Changing handset ring tone)
zThe selected ring tone will be heard if the caller ID matches with the number for the entry
during incoming call.
zPress [R/ ] to view phonebook entries, if the entry is set to a distinctive melody, a ‘#’ will
indicate before the entry name.
□F R A N K

17
CALLER ID OPERATION
IMPORTANT:
This function is operative only when your local telephone system offers Caller ID service and
you have subscribed to it. You should consult with your telephone company if you have any
questions about this service.
PLACING A CALL
NOTE: Before dialing, make sure that TONE or PULSE is chosen for your type of telephone
service.
Normal Dialing
1. Press [ ] and the ‘Phone’ icon will be on.
If the handset is not subscribed or out of range, [ ] key cannot be used and pressing it will
bring on an error tone.
The “EXT’ icon will be on after the PSTN line is connected.
2. Dial the number as required.
2 9 5 1
3. Press [R/ ] to flash the line to perform some PABX function and the LCD will be cleared
waiting for new input. The number dialed after the ‘Flash’ will not be stored in the redial
memory.
If call timer has been set to ON, then after 8 seconds of no further key press, the call timer
counter will display. It starts counting from ‘00: 01’ when off hook.
0 0 : 0 8
4. To terminate the call, press [ ] or return the handset to the cradle. The last call time will
remain in the LCD for 2 seconds.
0 1 : 3 5
EXT
EXT

18
Temp Tone Dialing
You may want to change to Tone dialing temporarily during the call if the call has been setup for
pulse dialing.
This can be done by pressing [*/ ] key for more than 2 seconds during the call is active. A
digit ‘d’ will be shown in the display, indicating the ‘Change to Tone’ command is sent out.
zAdding the digit ‘d’ is also possible in pre-dial buffer.
zTone dialing will resume once you hang up the handset.
Pre-Dialing
1. Enter the number (up to 25 digits) before seizing the line as shown;
9 3 2 1
2. Press [C] to delete the last input digit if necessary. To add a pause digit, press [ /P] and a
letter ‘P’ will be shown. Long Press the [C] key to clear all digits at once if required.
3. After the desired number is entered, press [ ] to seize line and the entered number will be
dialed out.
Redialing
1. During standby mode, press [ /P] once.
One of the 10 last dialed numbers will appear in the Display.
9 6 4 7 8 9 0 4
zIf the number is longer than 12 digits, at first, the first page will be shown aligning right, the
digit number equals to the total number minus 12.
6 7 8 9 0 7 8
•2 seconds later, the second page (the rest 12 digit) will be displayed.
1 2 3 4 5 6 1 2 9 0 8 4
2. Press [ /P] to view another last dialed number in the list. Or press [MENU/ ] or [ /]
to view the former or later number.
3. Press [ ] to seize line and the selected number will be redialed.

19
Dialing Number from the Phone Book Directory
1. To Dial the number stored in the phone book memory during standby mode, press [R/ ]
the name for the first number stored in a sorted listed in the directory will appear in the LCD.
A N G E L A
2. To locate the desired entry either press [MENU/ ] [ /] key or press [8 TUV] to locate the
entry with the name started with ‘T’, press [6 MNO] to locate the name started with ‘M’.
3. When the name of the desired person appears in the LCD, press [INT/OK] once. The
telephone number of the chosen person will be display.
4. Press [ ] to dial out the number immediately.
zIf the phone book is empty, an error tone will be heard following with an error message.
E M P T Y
zThe error message will be displayed for 2 seconds before reverting to standby mode.
Dialing From Displayed Call
1. During standby mode, press [ /] to view unread caller ID or through menu to browse call
log list.
2. To call back to the caller, press [ ] and the viewed number will be dialed out.
Dialing Back On Call Log
1. Use the [ /] or [MENU/ ] button to display the caller ID record you want to dial.
2. During viewing any type of call log, press [0-9] to add digits before CID number. Press [#] to
cancel all additive digits.
3. Press [ ] button, the number dials automatically.
Table of contents
Other Hello Kitty Cordless Telephone manuals


