Hendy Amps Rembrandt User manual
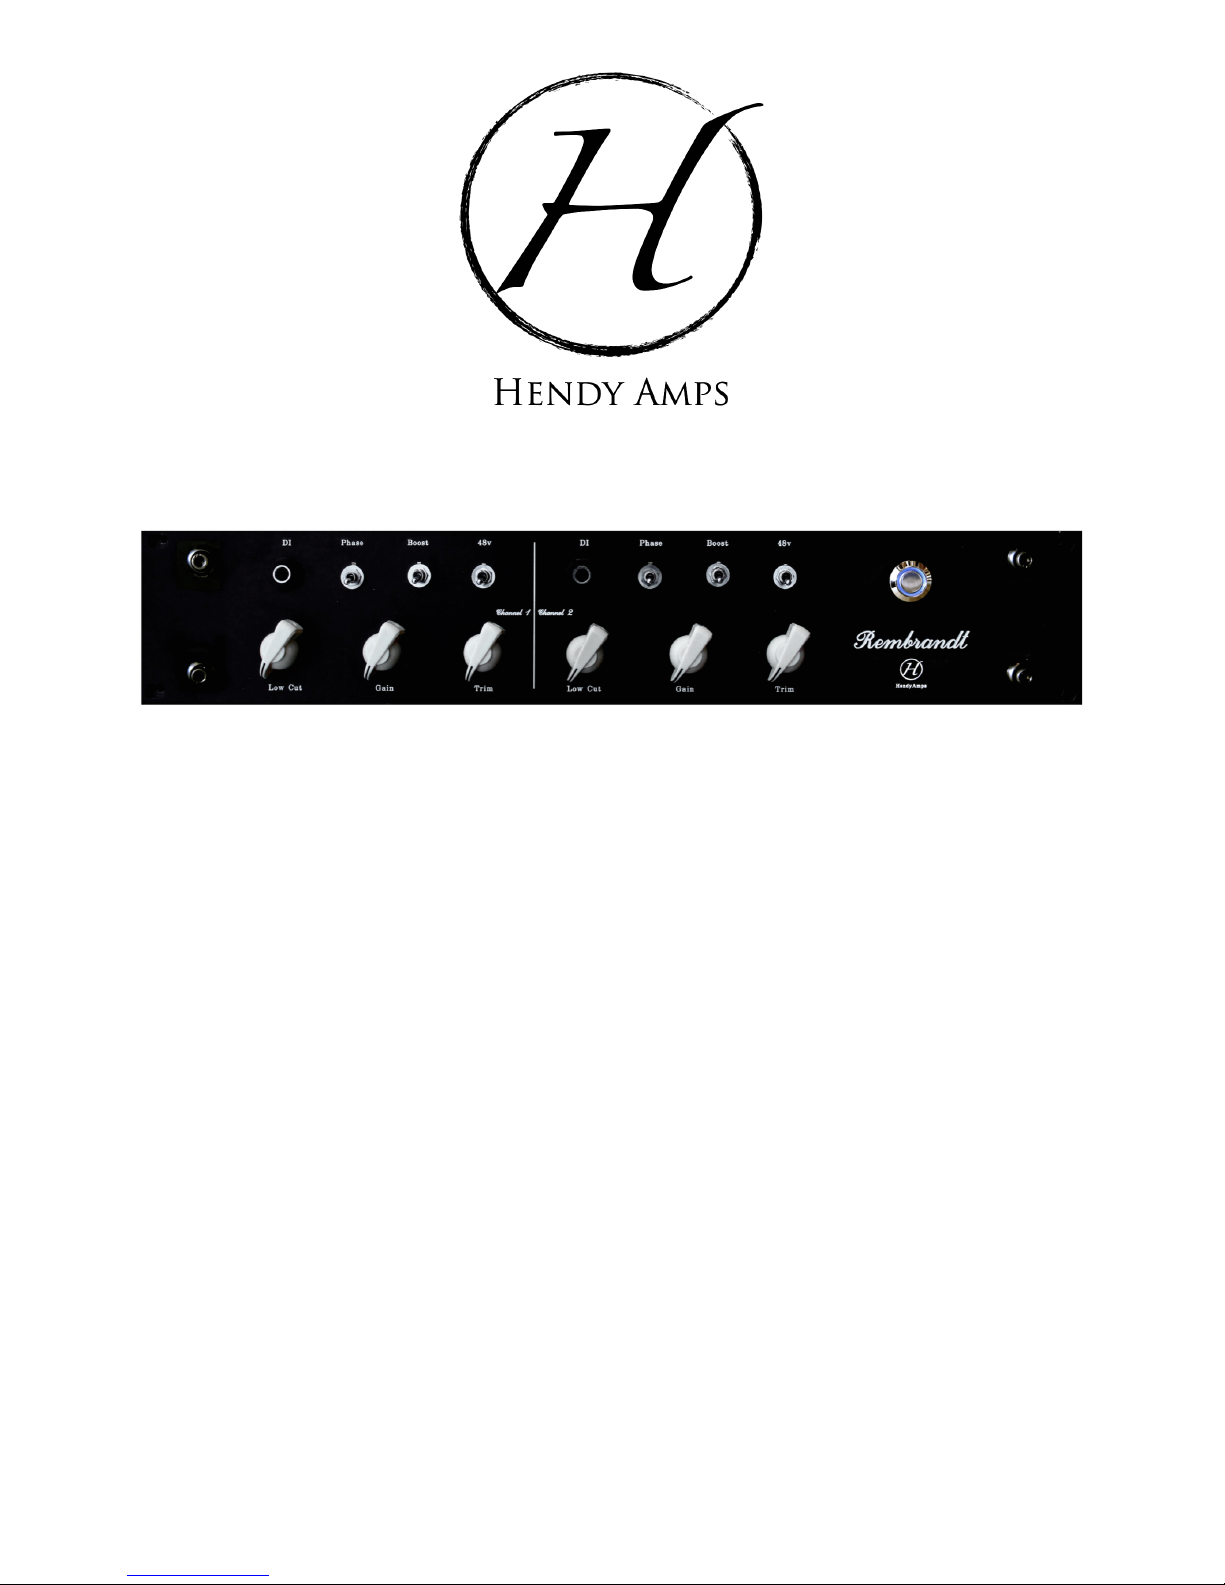
Rembrandt
Two Channel, All Tube Mic Preamplifier
Operating Instructions
Hendyamps - Rembrandt
Page of 110
© 2015 - Hendyamps LLC

Hendyamps - Rembrandt
Page of 210
© 2015 - Hendyamps LLC

Hendyamps is not liable for any technical, editorial error, or omission in this operating instruction manual.
Hendyamps is also not liable for any incidental or consequential damages resulting from the use of this
instructional manual.
Everything in this instructional manual is protected by copyright. That said, if you wish to print a copy of
this manual, go right ahead. Heck, if you want to print a thousand copies and send them to your friends,
by all means…Just don’t expect them to remain friends for long.
Copyright © 2015 - Hendyamps LLC"
Hendyamps - Rembrandt
Page of 310
© 2015 - Hendyamps LLC

Limited 5 Year Warranty
So you purchased a Hendyamps product - Good choice! Well it is going to be covered for five
years in a “bumper to bumper style warranty”, meaning, if there is a defective part, or parts,
Hendyamps will replace it/them for free.*
Just ship it to us and we will have it running again ASAP.
Now, if you, someone else, Mother Nature, or even God, damages the gear, intentionally or not,
Hendyamps will not be bound by this warranty to fix your gear for free.
*Tubes are not covered by this five year warranty. Tubes are fickle things and really can be a
huge pain…its just too bad they sound so good."
Hendyamps - Rembrandt
Page of 410
© 2015 - Hendyamps LLC

Considerations When Mounting
Hendyamps Studio Gear
Hendyamps studio gear is intended to be racked in a standard 19” rack, but please keep in mind
that everything Hendyamps builds contains a varying amount of vacuum tubes, and those things
get hot! It is recommended that 1u of space be placed above each of your Hendyamps studio
gear in order to provide some space for the heat to dissipate. If your situation is such that this
luxury is not allowed, then please make sure there is adequate airflow behind the unit, and even
adding some sort of quiet fan would be best.
Keeping your Hendyamps studio gear nice and cool will prolong the life of your equipment and
probably save you in electricity costs as your AC will possibly be running less. Of course if you
are in the middle of winter then you may be tempted to warm your hands up on your
Hendyamps gear. Please do NOT do this because the tubes are running on voltages well over
300v! Touching anything inside the unit will probably end with you on the news…in a bad way.
Hendyamps - Rembrandt
Page of 510
© 2015 - Hendyamps LLC

The Hendyamps Experience
Hendyamps is simply about one thing - Tone! Now, as it turns out, that includes a whole host of
other things, namely: Quality, ingenuity, creativity, and versatility. Hendyamps was founded as a
reaction to the fact that much of the tube gear on the market today fails to satisfy the needs of
true discerning musicians and recording engineers.
What sets this gear apart from what is currently on the market? The fact that everything is hand-
built from scratch in the USA, point to point wired, no corners are cut , and nearly everything is
customizable. From the beginning, you will be in contact with Chris himself, answering all of
your questions promptly, and even emailing or texting you pictures of your gear as it is being
assembled. After your purchase is complete, you can rest easy, for Hendyamps is committed to
making sure all of its clients are 100% satisfied customers for life. You will not find this level of
service and purchasing experience anywhere else!
“As someone who has grown up around music, playing multiple instruments in various bands,
running live sound, and being a professional recording engineer, I have an ear that is especially
tuned for the needs of a discerning musician as well as the precision needed for the studio.”
- Chris Henderson (Founder and owner of Hendyamps)
Hendyamps - Rembrandt
Page of 610
© 2015 - Hendyamps LLC

The Hendyamps Rembrandt
Housed in a 2U rack unit, the Rembrandt is centered around the EF806 pentode tube, which
provides some of the most sonically pleasing amplification available. The signal first enters the
preamp by passing through an ultra high fidelity Jensen transformer, and from there moves to
the EF806, followed by a 12au7. The signal exits the Rembrandt by passing through another
ultra high fidelity Jensen output transformer. The entire preamp is discrete, single ended, and
Class A in design, causing it to handle transients and the full range of frequencies in a way that
few preamps are able to accomplish.
Regarding the control features, the Rembrandt offers a very unique and extraordinarily versatile
set of tools at the user’s disposal:
- The LOW CUT control allows the user to select six different positions, from zero bass cut to a
max cut for all frequencies below 2k hz. This feature is essential in tweaking the preamp for a
variety of sources and conditions.
- The GAIN control does not technically set the gain of the amplification stage, but instead, sets
the amount of negative feedback used for the channel. The more negative feedback selected,
the quieter the volume is, but also the more linear and neutral the sound becomes. Selecting the
position that allows for the most volume actually bypasses the negative feedback loop and
offers the most pure, harmonically rich amplification the preamp has to offer. A good way to think
about this control is like a “Variable Pad”, though it does more than just pad the signal.
- The BOOST switch, allows the user to increase gain, alter the response of the EF806, and let
the preamp run wild!
- The TRIM control is actually closer to a standard Gain control, but does act as a master
volume in this particular circuit. This control allows you to set the amount of negative feedback
to taste, then control the output volume in order to not overdrive the output signal.
With these controls, the Rembrandt can go from an extremely linear and controlled preamp to
an out of control gain monster. It can be neutral or colored, clean or dirty, and shines in any
application. It is a force to be reckoned with!"
Hendyamps - Rembrandt
Page of 710
© 2015 - Hendyamps LLC
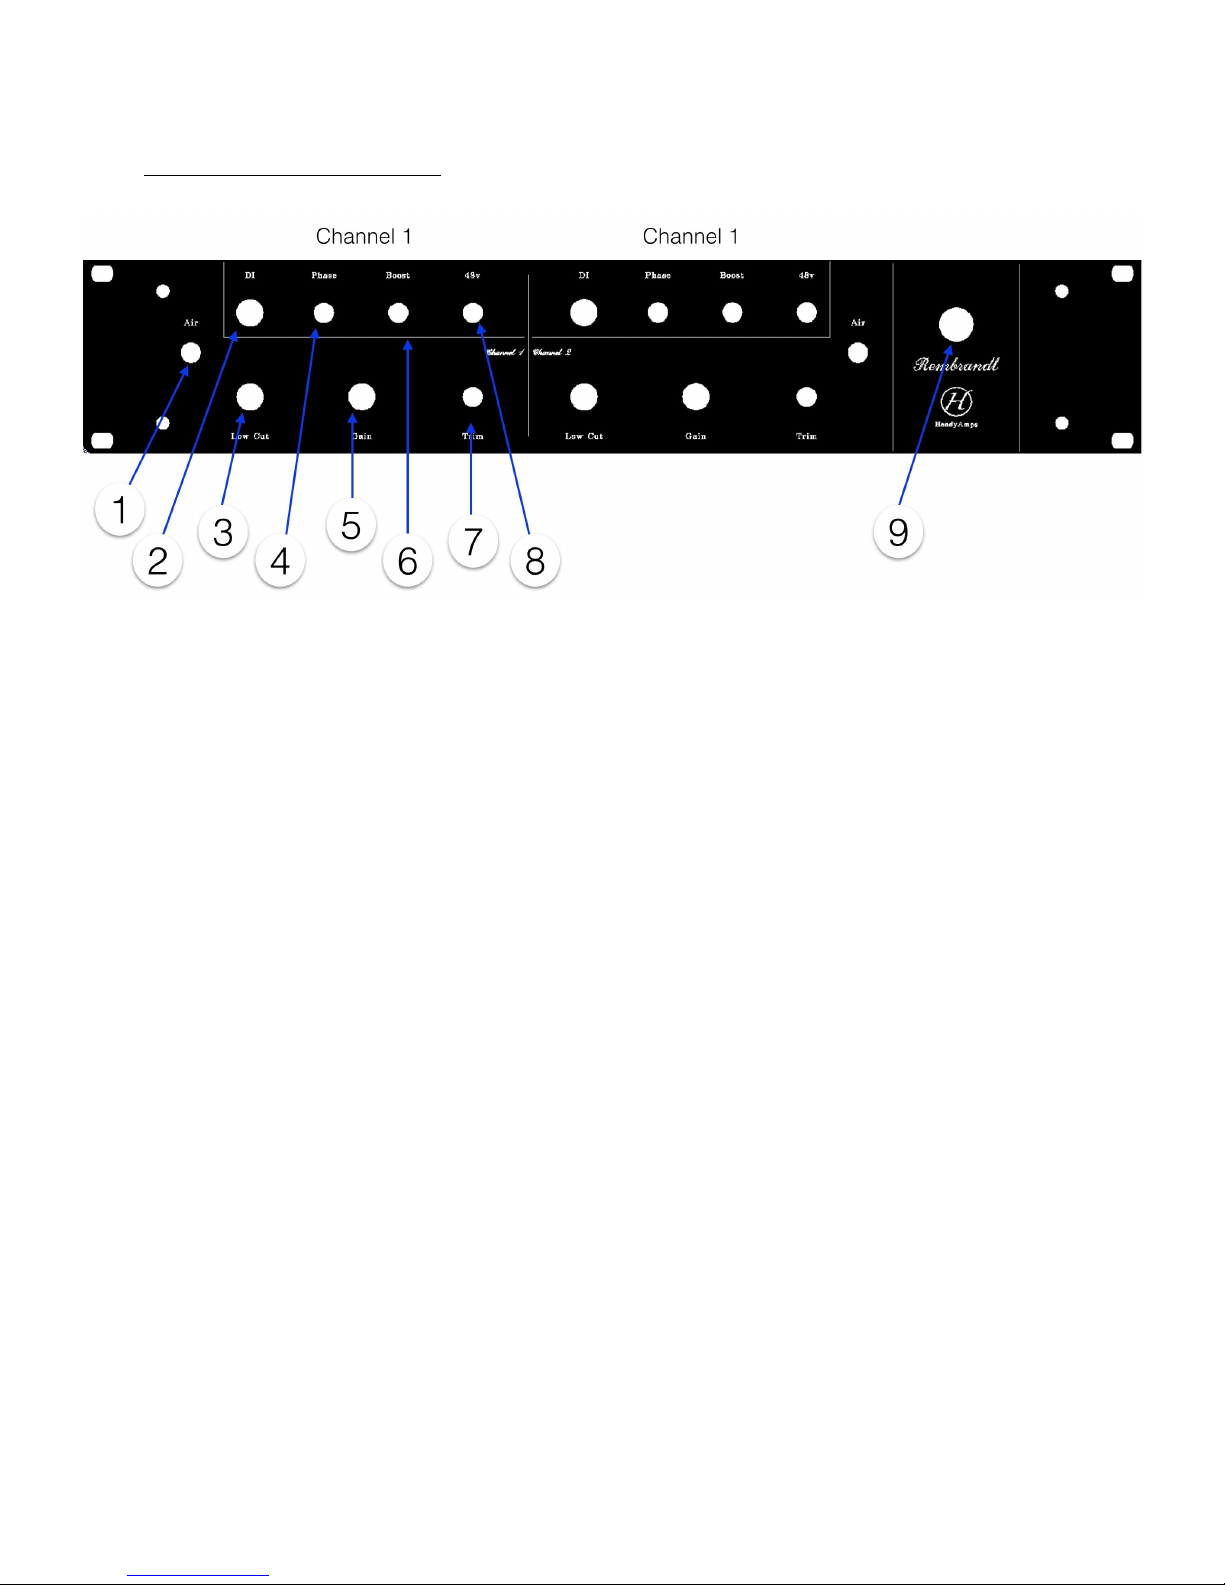
Front Panel Controls
1. The Rembrandt includes an “Air” switch that allows for the boosting of the high frequencies,
often improving the clarity of darker sources, and/or microphones.
2. 1/4”, unbalanced, HiZ input. This is ideal for bass, guitar, or keys.
3. This is the Low Cut control. It has six positions (1 = No low cut), allowing for you to find the
optimal setting for whatever source/mic you are tracking.
4. The Phase switch will reverse the polarity of the signal.
5. The Gain control is a six position control that is better thought of as a variable PAD control in
that it should always be set as high as possible, only pulling it down when desired for tonal
reasons. The lower the Gain is set, the quieter, cleaner, and more linear the signal will be.
The higher the Gain is set, the louder, richer, and punchier the signal will be.
6. When needed, the Boost switch will greatly increase the overall gain of the Rembrandt.
7. Use the Trim control to bring the output volume to the level needed.
8. Rembrandt uses a regulated Phantom Power supply running at a full 48v.
9. To power on or off the Rembrandt just press this button.
*Note*
Both channels are the exact same
Hendyamps - Rembrandt
Page of 810
© 2015 - Hendyamps LLC

Rear Panel Controls
10. This is your AC power inlet. Take note that all Hendyamps units run on 115/120 VAC and
not 220-240 VAC. If you desire to have your Hendyamps built to run on 220-240 VAC
please contact Hendyamps.
11. Here at Hendyamps, the motto is: “If something is worth doing, it is worth overdoing”. Well,
that motto is seen in the power transformer we choose for our units. Our power
transformers are all made in America, paper wound, and able to power up a full vintage
guitar amplifier if desired, meaning this transformer will still be going strong for the next…
well…century.
12. The mains fuse is rated at 1A.
13. Why are we using a rectifier tube in a studio preamp? Seriously? A 5y3? Yes we are using
a rectifier tube. See motto above.
14. Caution!!! The voltages present inside of your unit are as high as 450v! If you open this unit
up and touch the wrong part there is a very strong probability that you will die!!
15. Line level balanced output - XLR (Pin 1 = Ground, Pin 2 = Hot, Pin 3 = Cold)
16. Mic level balanced input - XLR (Pin 1 = Ground, Pin 2 = Hot, Pin 3 = Cold)
Hendyamps - Rembrandt
Page of 910
© 2015 - Hendyamps LLC

Specifications
Circuit Designed By Hendyamps
Class A
Hand-Wired
Two Channels
Tubes: EF806 (x2), 12au7 (x1)
Transformers: Jensen In and Out
PAD: Six Position Rotary Switch (“Gain”)
Low Cut: Six Position Rotary Switch (“Low Cut”)
HiZ Instrument (DI) Input (1/4” Unbalanced)
Input: 150 Ohms
Input Load Impedance: 1.4K Ohms
Output Impedance: low-Z, Transformer Balanced
Maximum Output Level: +23 dBu
Gain: 70db+
Frequency Response: 10hz-20Khz +/- 1dB
Phantom Power: 48v
Power: 115v/120v
Dimensions: 2u
Faceplate - 19” x 3.4375”
Cabinet - 3.25” (H) x 16.625” (W) x 9.625” (D)
www.hendyamps.com
Hendyamps - Rembrandt
Page of 10 10
© 2015 - Hendyamps LLC
Table of contents


