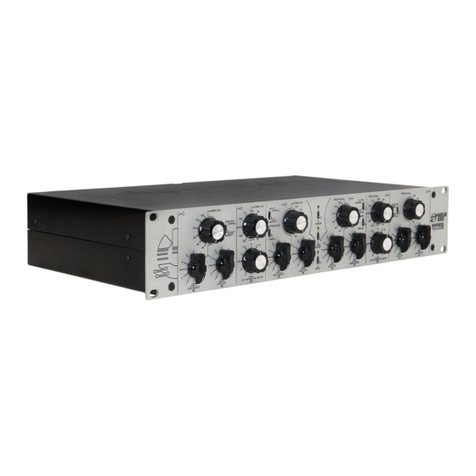
Hendy Amps Michelangelo User manual

Michelangelo
Stereo, All Tube EQ
Operating Instructions
Hendyamps - Michelangelo
Page of 111
© 2015 - Hendyamps LLC

Hendyamps - Michelangelo
Page of 211
© 2015 - Hendyamps LLC

Hendyamps is not liable for any technical, editorial error, or omission in this operating instruction manual.
Hendyamps is also not liable for any incidental or consequential damages resulting from the use of this
instructional manual.
Everything in this instructional manual is protected by copyright. That said, if you wish to print a copy of
this manual, go right ahead. Heck, if you want to print a thousand copies and send them to your friends,
by all means…Just don’t expect them to remain friends for long.
Copyright © 2015 - Hendyamps LLC"
Hendyamps - Michelangelo
Page of 311
© 2015 - Hendyamps LLC

Limited 5 Year Warranty
So you purchased a Hendyamps product - Good choice! Well it is going to be covered for five
years, meaning if there is a defective part, or parts, Hendyamps will replace it/them for free.*
Just ship it to us and we will have it running again ASAP.*
Now, if you, someone else, Mother Nature, or even God, damages the gear, intentionally or not,
Hendyamps will not be bound by this warranty to fix your gear for free.
*Tubes are not covered by this five year warranty.
Tubes are fickle things and really can be a huge pain…its just too bad they sound so good.
*Yeah, you are going to need to cover shipping - Kind of sucks but that is pretty standard these days"
Hendyamps - Michelangelo
Page of 411
© 2015 - Hendyamps LLC

Considerations When Mounting
Hendyamps Studio Gear
Hendyamps studio gear is intended to be racked in a standard 19” rack, but please keep in mind
that everything Hendyamps builds contains a varying amount of vacuum tubes, and those things
get hot! It is recommended that 1u of space be placed above each of your Hendyamps studio
gear in order to provide some space for the heat to dissipate. If your situation is such that this
luxury is not allowed, then please make sure there is adequate airflow behind the unit, and even
adding some sort of quiet fan would be best.
Keeping your Hendyamps studio gear nice and cool will prolong the life of your equipment and
probably save you in electricity costs as your AC will possibly be running less. Of course if you
are in the middle of winter then you may be tempted to warm your hands up on your
Hendyamps gear. Please do NOT do this because the tubes are running on voltages well over
300v! Touching anything inside the unit will probably end with you on the news…in a bad way.
Hendyamps - Michelangelo
Page of 511
© 2015 - Hendyamps LLC

The Hendyamps Experience
Hendyamps is simply about one thing - Tone! Now, as it turns out, that includes a whole host of
other things, namely: Quality, ingenuity, creativity, and versatility. Hendyamps was founded as a
reaction to the fact that much of the tube gear on the market today fails to satisfy the needs of
true discerning musicians and recording engineers.
What sets this gear apart from what is currently on the market? The fact that each piece of gear
is hand-built, individually tested, no corners are cut, and nearly everything is customizable.
From the beginning, you will be in contact with Chris himself, answering all of your questions
promptly, and even emailing or texting you pictures of your gear as it is being assembled. After
your purchase is complete, you can rest easy, for Hendyamps is committed to making sure all of
its clients are 100% satisfied customers for life. You will not find this level of service and
purchasing experience anywhere else!
“As someone who has grown up around music, playing multiple instruments in various bands,
running live sound, and being a professional recording engineer, I have an ear that is especially
tuned for the needs of a discerning musician as well as the precision needed for the studio.”
- Chris Henderson (Founder and owner of Hendyamps)
Hendyamps - Michelangelo
Page of 611
© 2015 - Hendyamps LLC

The Hendyamps Michelangelo
The most common statement from mixing and mastering engineers who use the Michelangelo?
“I literally feel like I’m cheating when I use this thing,
because it should not be this easy to get my mixes sounding good!”
Housed in a 2U rack unit, the Michelangelo is an all tube, stereo EQ that is completely focused
on sonic beauty! This EQ is certainly not aimed at precisely targeting certain frequencies, for it
is intended to be a broad strokes EQ that also acts as a harmonics generator. This one of a
kind EQ is at home during any phase of the music production process (tracking, mixing, or
mastering), for the overall sonic signature it leaves, coupled with its complete ease of use, is
rivaled by none!
The Michelangelo is a discrete, Class A, all tube, full stereo unit, with Jensen transformers in
and out.
FEATURES:
- The BYPASS switches allow the user to completely disengage the Michelangelo at any time in
order to properly A/B a mix (true bypass).
- The TRIM control allows the user to precisely match the volume coming from the Michelangelo
to any desired level, without altering the tone of the unit.
- Left and Right CALIBRATION is used to gain match the Left and Right signals, accounting for
any volume discrepancies encountered. Interestingly enough, these calibration controls can
also be used to alter the tonal response of the Michelangelo if so desired. For example, it is
possible to bring the Calibration volumes up and the Trim down, resulting in the Michelangelo
driving the signal harder than normal, increasing harmonic content.
- The AGGRESSION control alters the drive in the circuit, allowing you to push the tubes for
extra saturation.
- The LOW, MID, and HIGH controls manipulate the three EQ bands, but in a way that adds
more dynamic, harmonic content the higher the EQ is set. Take note that the Mid control covers
a massive amount of territory while the Low and High controls are narrower by comparison.
- The AIR control boosts the ultra high frequencies and is typically a favorite control in this unit.
- MID SHIFT alters the response of the Low and Mid controls, essentially assigning the low
mids to either control.
- The VINTAGE switch toggles between a “modern” mode (think more hifi), and a “vintage”
mode (darker, older sounding).
Hendyamps - Michelangelo
Page of 711
© 2015 - Hendyamps LLC

Front Panel Controls
1. The Bypass switches are true bypass, meaning, they literally remove the Michelangelo from
the signal chain completely.
2. The Calibration controls allow you to fine tune the left and right channels in order to achieve
a proper balance in the stereo image. As well, the Calibration controls function as gain
controls, and as such, can be driven hard for a more aggressive tone.*
3. The Aggression control allows the entire EQ circuit to change its overall feel and sound. At
0% you will hear the Michelangelo at it’s most neutral and 100% is the most aggressive.
4. The Low Shift switch allows you to change the rolloff of the Low shelf control.
5. The Low control is actually a shelf control controlling the low frequencies.
6. The Mid Shift switch alters the response of the Mid control, affecting primarily the low mids
range of the signal.
7. The Mid control covers the range between the Low and High controls.
8. Vintage mode offers a much darker, raw tone that can be very useful when full analog tone
is desired.**
9. The High control is a shelf control controlling the higher frequencies.
10. The Air control is another shelf that controls the ultra-high frequencies, and yes it overlaps
the High control on purpose.***
11. This switch allows you to switch the output impedance of the Michelangelo from high to Low.#
You will notice that switching between LoZ and HiZ will alter the overall sound of the EQ and
will require a recalibration. HiZ has a very large interaction with other gear following the
Michelangelo and thus will sound different in various locations in your signal chain. LoZ will
have lower overall color but will interact much less with other gear following the
Michelangelo.
12. The Trim control allows you to set the output volume coming out of the Michelangelo.
13. If you are having a ground loop issue, flip this switch!
Hendyamps - Michelangelo
Page of 811
© 2015 - Hendyamps LLC

14. Press this button to turn on or off the Michelangelo.
*Take note that the Air control is greatly affected by the Calibration controls in that the harder you drive the
Calibration, the less db swing you will see from the Air control
**Do not be afraid to significantly boost the High and Air controls to compensate for the darkening of the signal.
***Your Michelangelo EQ has been calibrated to give as neutral a tone as possible with your EQ knobs in the noon
(50%) position. You will notice that not all of the knobs run the full range from 0-100% - that is perfectly normal. The
Michelangelo was designed to be sonically rich and harmonically complex, and that ended up meaning that not all of
the EQ controls lined up perfectly. Rather than altering the circuit to accommodate aesthetics, the decision was
made to stick with what sounded best and just calibrate the knobs to be in the correct position.
****Again…DO NOT REMOVE THE KNOBS AND LINE THEM UP UNLESS YOU WANT YOUR MICHELANGELO
TO NO LONGER BE SONICALLY NEUTRAL IN THE 50% POSITION.
Your Michelangelo is calibrated to be sonically neutral with the Aggression control on the 0% position.
Your Michelangelo is calibrated to be sonically neutral with the Trim control on the 100% position.
Your Michelangelo is calibrated to be sonically neutral with the Bass Shift switch in the down position (150hz).
Your Michelangelo is calibrated to be sonically neutral with the Mid Shift switch in the right position (full).
Your Michelangelo is calibrated to be sonically neutral with the Character switch in the left position (Modern).
Your Michelangelo is calibrated to be sonically neutral with the Output Impedance switch in the down position (LoZ).
You will notice that switching between LoZ and HiZ will alter the overall sound of the EQ and will require a
recalibration. HiZ has a very large interaction with other gear following the Michelangelo and thus will sound different
in various locations in your signal chain. LoZ will have lower overall color but will interact much less with other gear
following the Michelangelo.
For calibration of the EQ, the following tones are typically used: Low = 80hz, Mid = 1Khz, High = 5khz, Air = 10Khz.
Do not be overly concerned with making all levels exact for the EQ is very interactive with the source material and
precise levels will be constantly altering. Differences up to .3db between bands is ok.!
Hendyamps - Michelangelo
Page of 911
© 2015 - Hendyamps LLC

Rear Panel Controls
15. This is your AC Mains power inlet.
16. Here at Hendyamps, the motto is: “If something is worth doing, it is worth overdoing”. Well,
that motto is seen in the power transformer we choose for our units. Our power
transformers are all made in America, paper wound, and able to power up a full vintage
guitar amplifier if desired, meaning this transformer will still be going strong for the next…
well…century.
17. This is how you switch the mains voltage from 110v to 220v (or whatever your standard is)
18. The mains fuse is rated at 1A, and yes, it is a circuit breaker
19. Caution!!! The voltages present inside of your unit are as high as 450v! If you open this unit
up and touch the wrong part there is a very strong probability that you will die!!
20. Line level balanced output - XLR (Pin 1 = Ground, Pin 2 = Hot, Pin 3 = Cold)
21. Mic level balanced input - XLR (Pin 1 = Ground, Pin 2 = Hot, Pin 3 = Cold)
Hendyamps - Michelangelo
Page of 10 11
© 2015 - Hendyamps LLC

Specifications
Circuit Designed and built by Hendyamps LLC
Stereo Controls
Tubes: Three 12ax7’s
Transformers: Jensen In and Out
Input Load Impedance: 10K Ohms
Output Impedance: LoZ or HiZ, Transformer Balanced
Maximum Output Level: +23 dBu
Frequency Response: 10hz-20Khz +/- 1dB
Signal to Noise: 85-95db, depending on output impedance setting
Power: 115v/220v
Dimensions: 2u
3.5” (H) x 19” (W) x 10” (D)
www.hendyamps.com
Hendyamps - Michelangelo
Page of 11 11
© 2015 - Hendyamps LLC
Table of contents
Popular Stereo Equalizer manuals by other brands
DiBiQuadro
DiBiQuadro GeminiPTE user manual
Klark Teknik
Klark Teknik DN300 Specifications
Behringer
Behringer FEEDBACK DESTROYER PRO FBQ2496 user manual

Coyote Point Systems
Coyote Point Systems Equalizer GX Series Administration guide
Inter-m
Inter-m MEQ-2000 operating manual
Behringer
Behringer BASS GRAPHIC EQUALIZER BEQ700 manual
