Hensel Turntable 360 User manual
1
Hensel Turntable 360°
QUICK START GUIDE
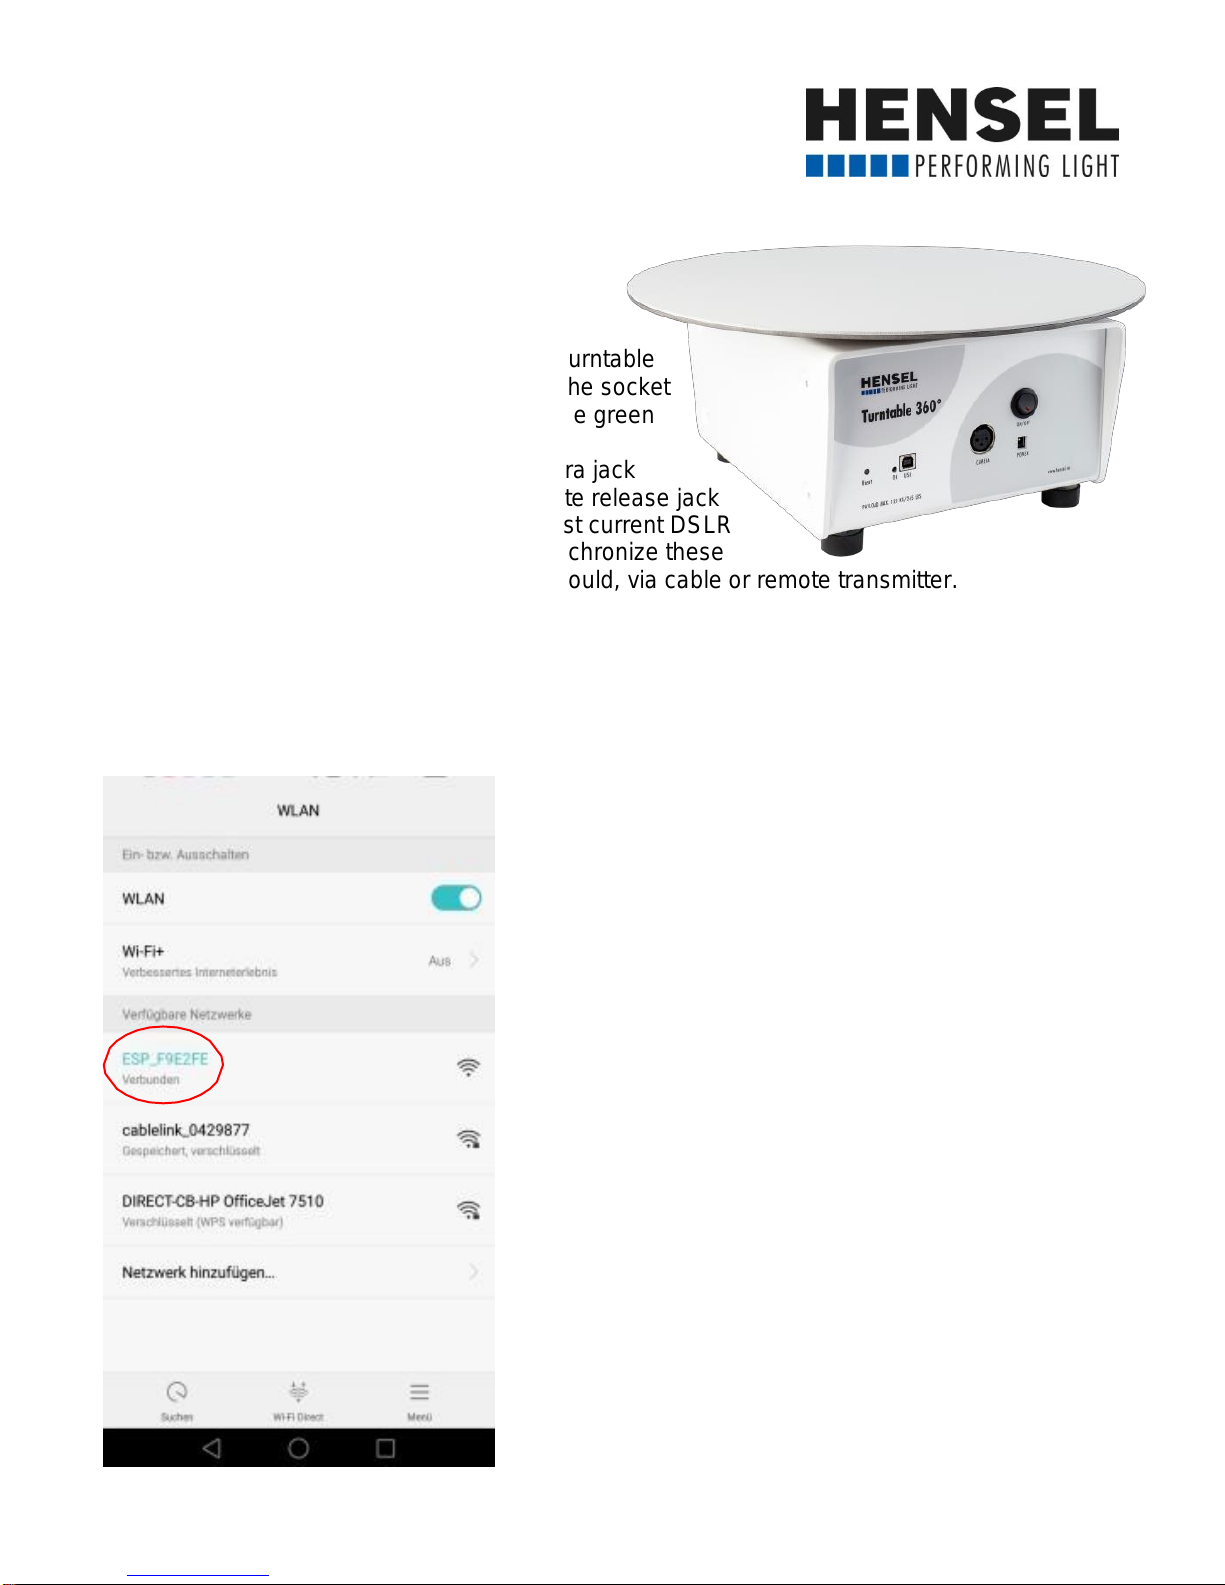
First, connect the included adapter with the turntable
(POWER), then connect the power cord to the socket
and switch the main switch (ON/OFF) until the green
LED (ON) is lit.
Now, connect the release cable to the camera jack
(CAMERA) on the turntable and to the remote release jack
of your camera. Cables are available for most current DSLR
and EVIL cameras. When using flashes, synchronize these
directly with your camera, as you normally would, via cable or remote transmitter.
Connecting with the turntable:
The Hensel Turntable 360° comes with a build-in WLAN module. In order to connect
to it, activate the WLAN of the control device (computer, laptop, tablet, smartphone)
and follow these steps:
Attention: Depending on the operating system /
language version used, the display names in the
app user interface may differ from this manual!
Dial into the integrated WLAN module:
1.
Open the WLAN settings of the device used
for control.
2.
Search for the network name ESP_XXXXXX
(X stands for a series of different letters and
signs - e.g. ESP_F9E338).
3.
Click on the found network name and
confirm dial in as required.
4.
Dial-in can take several seconds and is
confirmed by most devices with “connected”.
2
INITIAL OPERATION
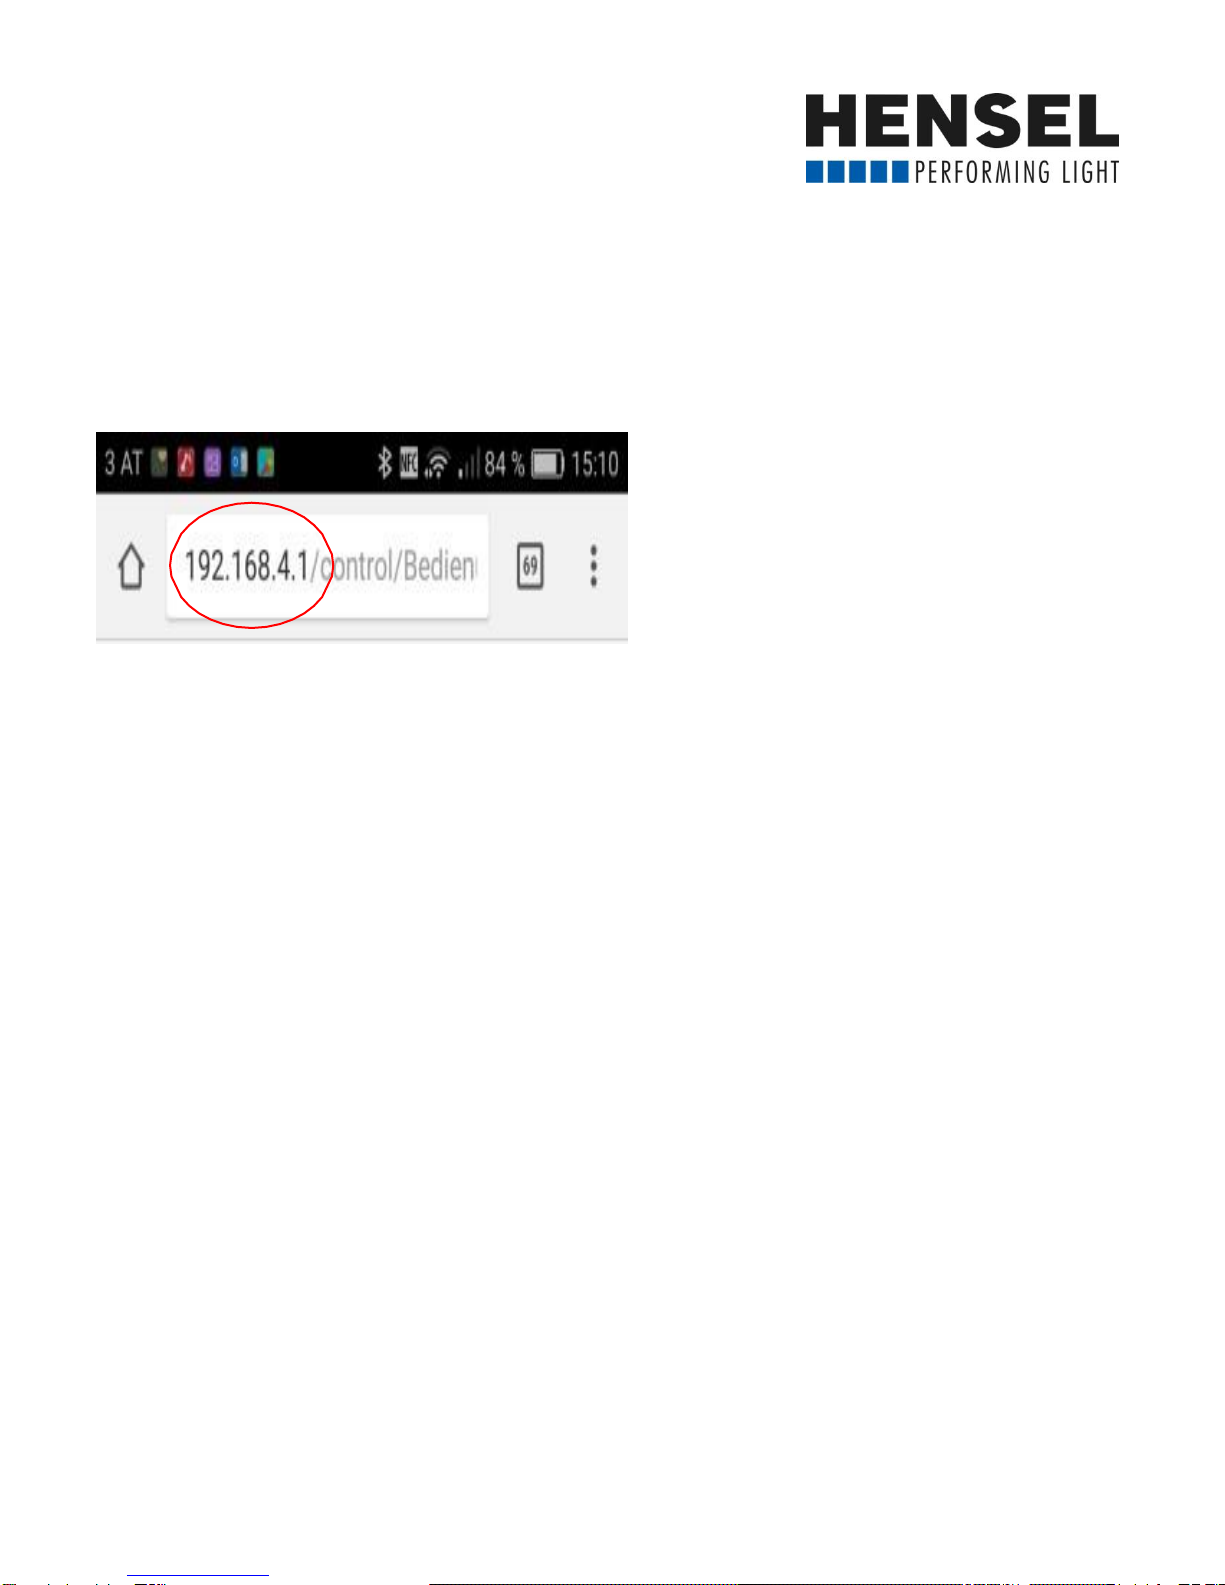
Opening the Operational Environment:
Open the web browser of the device used for control (we recommend using Firefox, other
browsers are also suitable) and enter the following IP address in the address line:
192.168.4.1
Initially, it may take a few seconds until the connection is set up and all buttons are
displayed correctly. The process should be completed after max.10s, otherwise, please
use your browser’s “refresh“ function for a new connection attempt.
This procedure does not install any software on the control device. The turntable is ac-
cessed via a local network and control does not depend on the operating system or
an Internet connection.
In case the connection is not established or the buttons on the user interface do not
function, please follow the instructions starting on page 5 to set up a connection. You must
follow these steps for Apple iPhone®or Apple iPad®.
The turntable is now ready for operation.
On the following page, please find the function instructions of the user
interface.
3
OPERATION
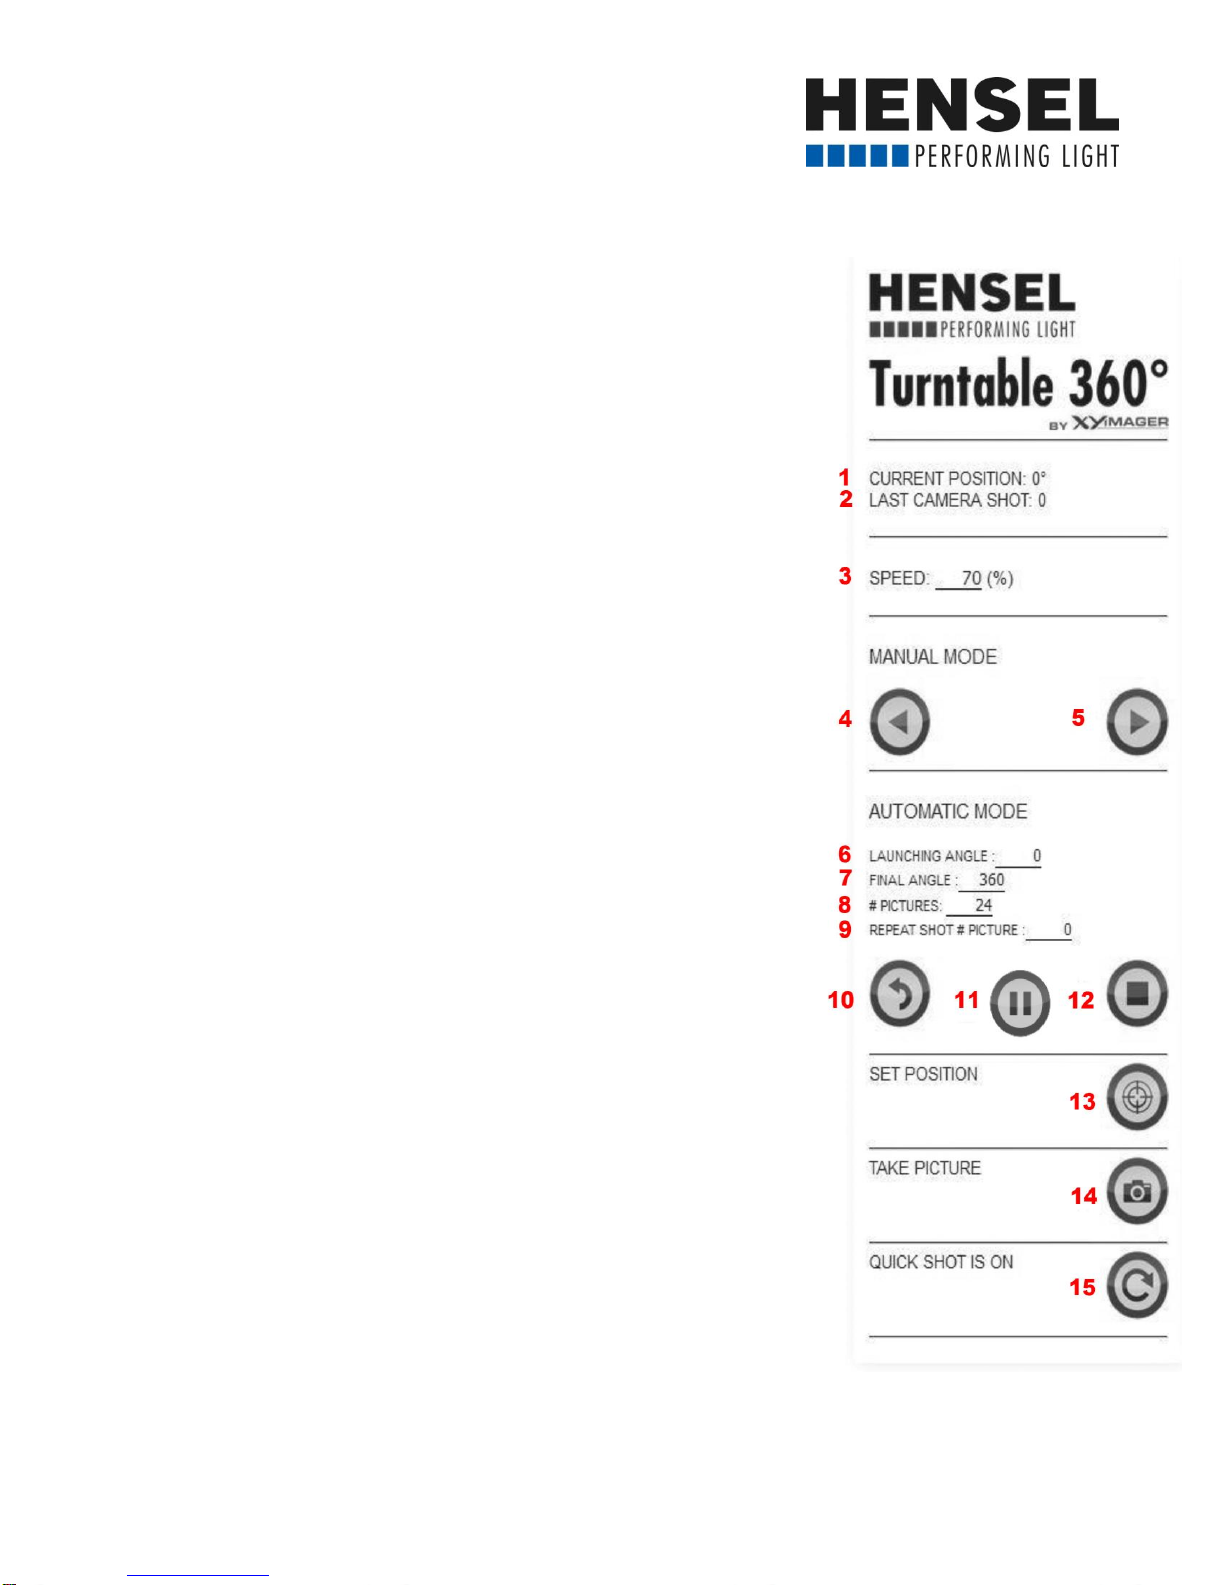
Status Display:
1.
Shows the current position of the turntable (in degrees).
2.
Shows the last exposure of the camera (number of the last
picture).
Rotation Speed:
3.
This setting lets you set the speed of the turntable and, thus, the
time between exposures, e.g. adjusting it to the desired flash recycle time.
Additionally, you can adjust the speed for video recordings. This setting is
active in the manual as well as the automatic mode.
Manual Mode:
4.
The table turns to the left when using this key.
5.
The table turns to the right when using this key.
Automatic Mode:
6.
Select the start angle.
7.
Select the end angle.
8.
Here, you can set the desired number of exposures.
If the start angle 6. is set to “0" and the end 7. is set to “360",
the selected number of exposures 8. is evenly assigned to
one full rotation (360°).
If, for example, the start angle 6. is “0" and the end angle 7. is set to “90",
the first exposure is done at 0° and the last one at 90°. The exposures
inbetween are evenly distributed. If a value is entered here, the selected
exposure is repeated when using the start button
10. Start button for automatic exposure.
11. Here you can pause the automatic exposure. This button is
only active in the setting “QUICK SHOT IS OFF” (15)!
12. Here you can cancel the automatic exposure. The turntable
moves to position 0° when the button is pressed once. If the button is pres-
sed twice, the turntable remains at the current position. Here you can cancel
the automatic exposure. The turntable moves to position 0° when the button
is pressed once. If the button is pressed twice, the turntable remains at the
current position.
13. This button sets the current position of the turntable to 0°.
14. Here, the connected camera can be triggered manually.
15. If “Quick Shot” is activated, the following exposures are triggered
without turntable stops. If “Quick Shot” is off (the button’s arrow line is
hatched), the turntable briefly stops before each exposure.
4
SET-UP OF A FIXED NETWORK
CONNECTION
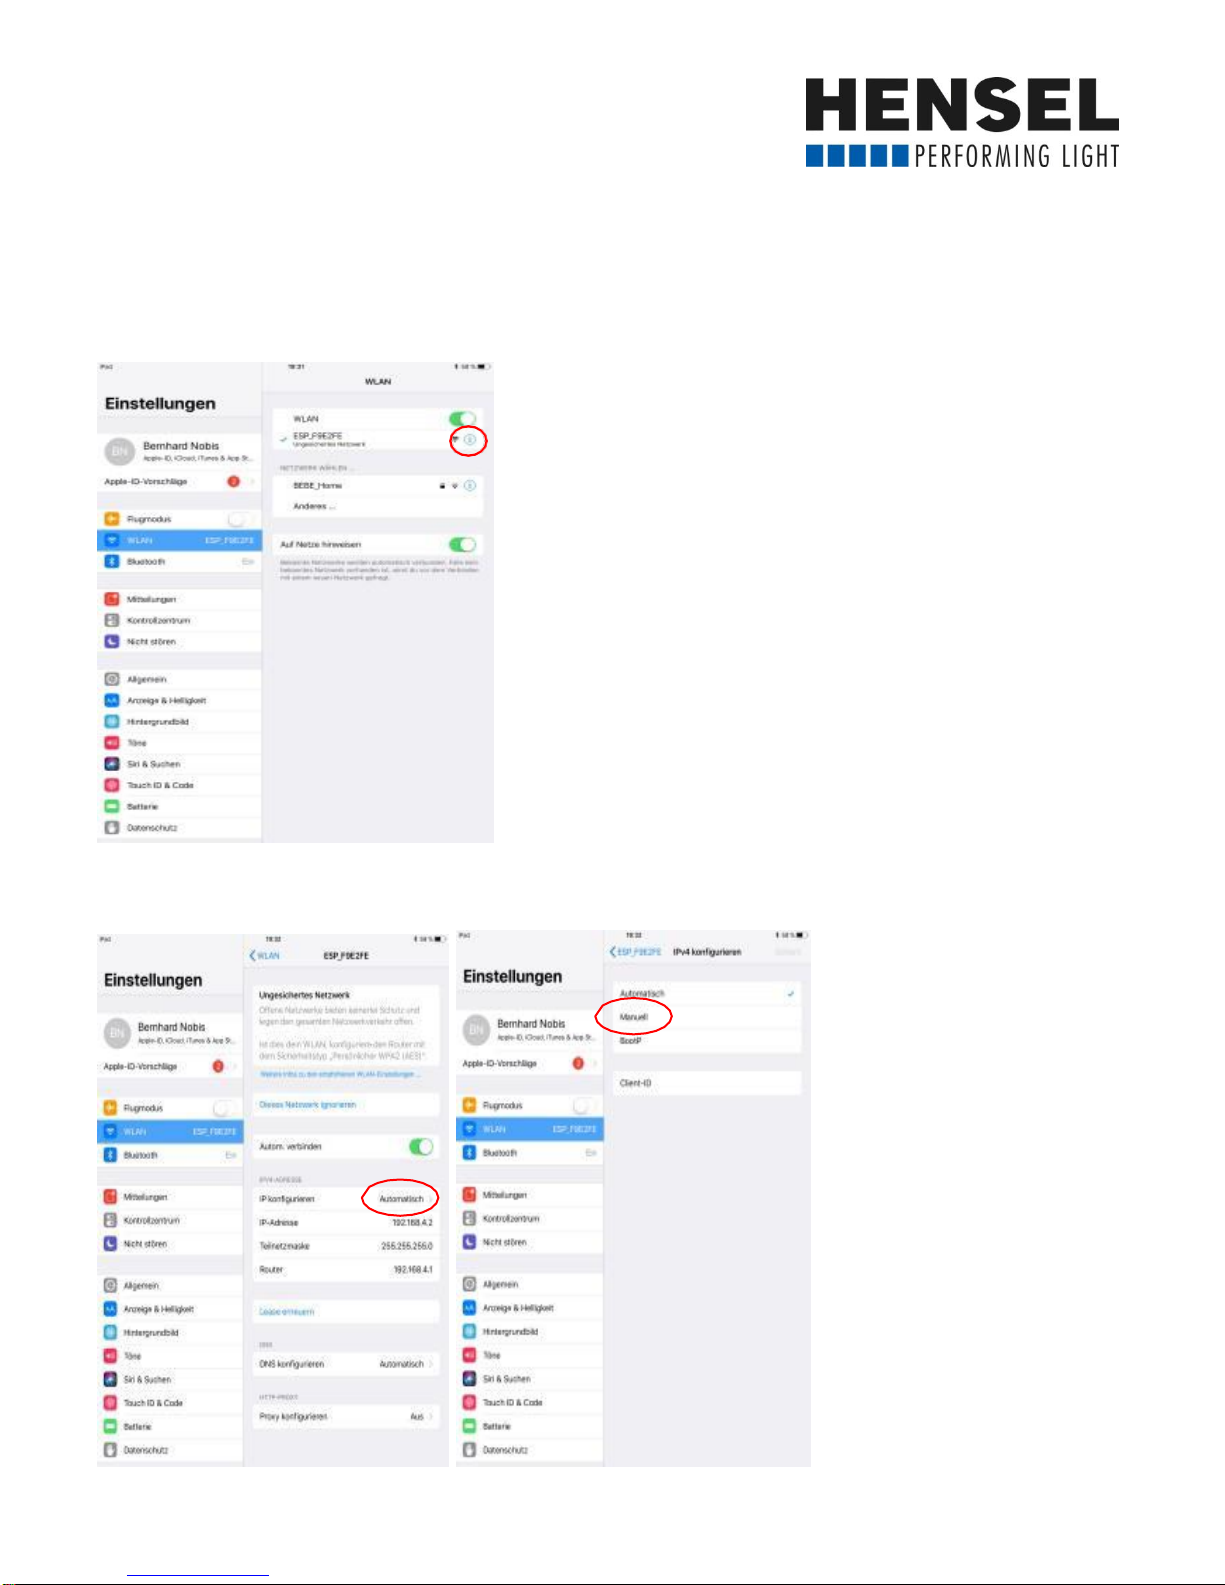
Apple iPhone or iPad (iOS):
1.
Dial into integrated WLAN module as described on page 1.
2.
Click on “i” to open the configuration mode of the network:
3.
Change IP configuration from “automatic” to “manual”:

5
4. Manual configuration:
IP address: 192.168.4.2
Subnet mask: 255.255.255.0
Router: 192.16.4.1
Confirm configuration with “save”.
Now you can continue with the point “Opening the operational environment” on page 2.
6
SET-UP OF A FIXED NETWORK
CONNECTION
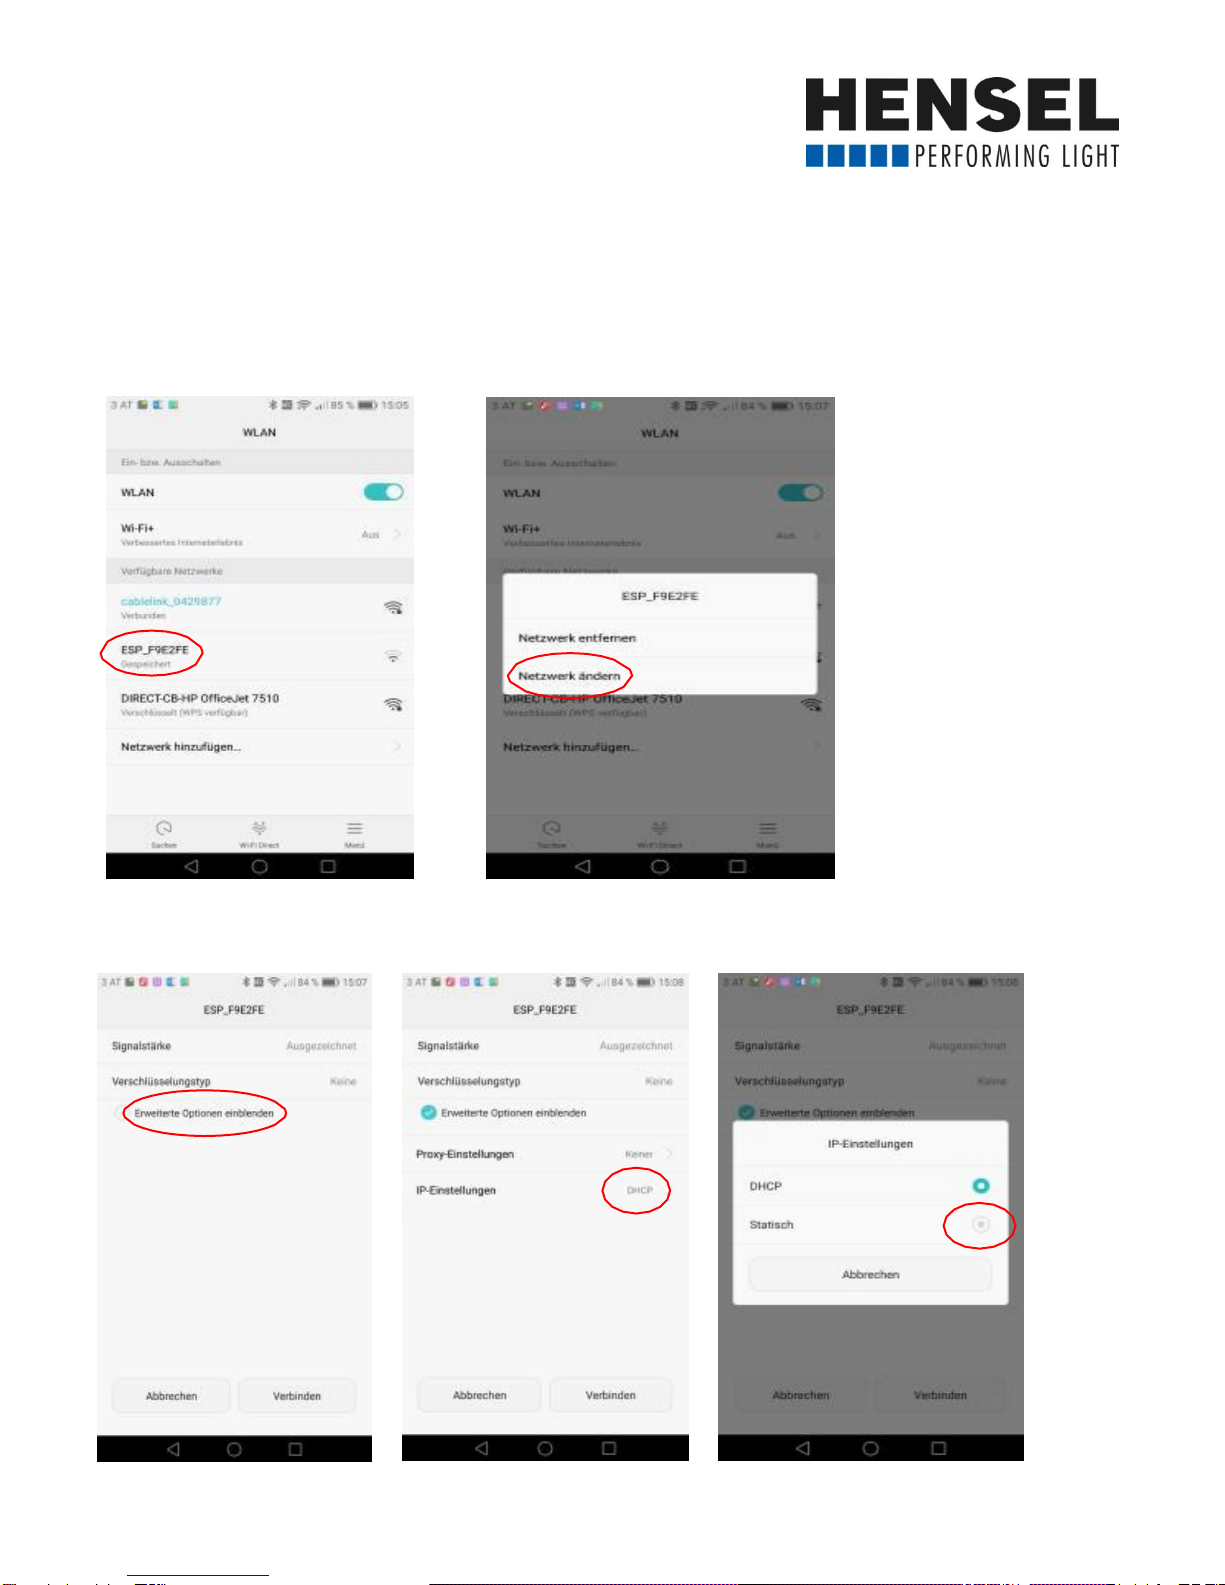
Smartphone or Tablet (Android):
1.
Dial into integrated WLAN module as described on page 1.
2.
Open the configuration mode of the network by pressing (min. 2 sec) on the network
to be adjusted:
3.
Activate “Expanded Options” and change IP settings from „DHCP” to“Fixed”:

7
4.
Manual configuration:
IP Address: 192.168.4.2
Gateway: 192.16.4.1
DNS 1: 192.16.4.1
Confirm configuration with “Connect”.
Now you can continue with the point “Opening the operational environment” on page 2.

8
Hensel Turntable 360°
Technical Data
Code No.: 194940104
Max. Load: 120 kg (10 kg overhead)
Impellent: Step motor with reduction gear
Control: WLAN (USB in the works)
Operating Systems: via web browser, compatible with Windows, OS, Android and iOS
Time for one full rotation: from 20 sec. (max. 16 exposures), 30 sec. (max. 24 exposures),
40 sec. (max. 36 exposures), 160 sec. (max. 100 exposures), etc. –Rotation Speed and
time between exposures can be set
Turning direction: left / right (manual), right (automatic)
Position indicator: yes, in degrees
Shows last exposure: yes
Number of exposures/rotation: max 360
Individual start and end angle: yes
Multiple exposures within pre-selected angles: yes
Special functions: Quick Shot, Repeat Shot, Pause
Camera connector: XLR jack (cable for many EVIL and DSLR cameras available)
Power supply: with 24V DC adapter (included)
Size: 30 x 24 x 15 cm (without plate), 40 x 40 x 17 cm (with plate)
Diameter turntable: 40 cm (changeable)
Weight: 8.5 kg (housing and turntable are metal)
Other: adjustable supporting feet, white housing, USB connector for updates
HENSEL-VISIT GmbH & Co. KG
Robert-Bunsen-Str. 3
97076 Würzburg, Germany
Phone: +49 (0)931/27881-0
Fax: +49 (0)931/27881-50
E-mail: info@hensel.de
www.hensel.eu
Valid from June 2018. All errors and misprints reserved.
Table of contents
Popular Turntable manuals by other brands


Pro-Ject Audio Systems
Pro-Ject Audio Systems Debut RecordMaster II Instructions for use

Pro-Ject Audio Systems
Pro-Ject Audio Systems VC-S2 ALU Instructions for use

Omnitronic
Omnitronic DRT-1000 user manual

Marantz
Marantz TT-42 Specifications

Hanss
Hanss T-60 user manual

LENCO
LENCO Classic Phono TT-120 user manual


