Heru VT 55 User manual

DE
GB
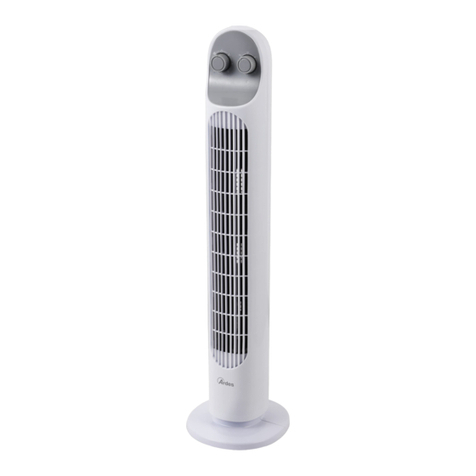
Standventilator
Bedienungsanleitung
Pedestal Fan
Instructions for Use
STA DVE TILATOR
VT 55
HERU International GmbH Lutherstr. 51-55 D-45478 Mülheim an der Ruhr
Service-Hotline +49-(0)208-9 410 410 Fax +49-(0)208-9 410 419
www.heru-international.de
FR Ventilateur sur pied
Mode d’emploi
CZ Větrák se stojanem
ávod K Použiti
RO Ventilator cu picior
Instrucţiuni de utilizare
ES Ventilador de pedestal
Instrucciones de uso

VT 55 WICHTIGE GARA TIEU TERLAGE
BITTE U BEDI GT AUFBEWAHRE !
Liebe Kundin, lieber Kunde,
unsere Produkte unterliegen einer strengen Qualitätsendkontrolle. Sollte dieses Gerät wider Erwarten
nicht einwandfrei funktionieren, kontaktieren Sie bitte zuerst unseren untenstehenden Kundendienst.
Wir weisen darauf hin, dass die Annahme von unfrei eingesandten Geräten verweigert wird.
Die Garantiezeit beträgt 36 Monate und beginnt am Tag des Kaufes. Bitte bewahren Sie den Kassenbon
als achweis für den Kauf auf.
HERU International GmbH
Lutherstraße 51-55
45478 Mülheim/Ruhr
Tel. 0208 / 94104-10
Allgemeine Garantiebedingungen
Garantieansprüche aufgrund von Material- und Fertigungsfehlern werden entsprechend den
nachfolgenden Garantiebestimmungen geregelt:
1. Die Garantie besteht nur für Mängel, die durch Material- und Fertigungsfehler auftreten.
Ausgeschlossen sind Mängel, die durch häufigen Gebrauch, unsachgemäße Anwendung oder
Gewalteinwirkung verursacht worden sind.
2. Innerhalb der Garantiefrist bleibt es dem Hersteller überlassen, die defekten Teile kostenlos zu
ersetzen oder zu reparieren. Weitergehende Ansprüche, insbesondere Schadenersatz sind
ausgeschlossen.
3. Die Garantiezeit wird durch die Gewährleistung nicht verlängert. Das gilt auch für ersetzte und
reparierte Teile.
4. Bei Eingriffen durch nicht von uns autorisierte Personen oder Servicestellen erlischt die Garantie.
5. Von der Garantie ausgeschlossen sind:
Transportschäden
Schäden durch ichtbeachtung der Bedienungsanleitung
Schäden durch unsachgemäßen Gebrauch
Verschleißteile und, falls zutreffend, Leuchtmittel/Glasbruch
Schäden durch ausgelaufene Batterien
6. Eventuell schon beim Kauf vorhandene Schäden und Mängel müssen sofort nach dem Auspacken
gemeldet werden, spätestens aber zwei Tage nach Kaufdatum.
ach Ablauf der Garantiezeit anfallende Reparaturen sind kostenpflichtig.
Ihre gesetzlichen Rechte werden durch diese Garantie nicht eingeschränkt.
Im Garantie- und Servicefall immer mit dem Heru-Kundendienst Kontakt aufnehmen.
GARA TIEKARTE
Bitte den Kaufbeleg und diese Garantiekarte ausgefüllt in Kopie dem Gerät beilegen
Kundendienst HERU International GmbH www.heru-international.de
Zentrale Serviceabteilung Service Hotline: 0208 / 94104-10 (Mo. bis Fr. 8:00 bis 16:00 Uhr)
Lutherstr. 51-55 Service-Fax: 0208 / 94104-19
Ort, Datum Unterschrift des Kunden
Hinweis: Bei Inanspruchnahme der Garantieleistung müssen dem defekten Gerät die Garantiekarte und die Kopie des Kaufbeleges
bzw. Kassenbons unbedingt beigelegt werden sowie nach Möglichkeit eine detaillierte Fehlerbeschreibung. achträglich einge-
sandte Garantiekarten können nicht anerkannt werden.
ame Vorname
Kundendaten Straße/Hausnr. Postleitzahl/Ort
Telefon
Typenbezeichnung VT 55
Fehlerbeschreibung
Kaufdatum
VT55/01/2011

DE
INHA TSVERZEICHNIS SEITE
Sicherheit 2
Allgemeine Sicherheitshinweise 2
Produktbezogene Sicherheitshinweise 3
Beschreibung 4
Aufbauanleitung 4
Bedienung 4
Reinigung 5
Entsorgungshinweis 5
Technische Daten 5
-1-

-2-
STANDVENTI ATOR VT 55
esen Sie vor Inbetriebnahme des Gerä-
tes die folgenden Sicherheitshinweise
sowie die Bedienungsanleitung sorgfältig
durch und bewahren Sie diese Unterlagen
auf. Bei Weitergabe des Gerätes an einen
Dritten geben Sie auch diese Anleitung
weiter.
Sicherheit
Dieses Zeichen warnt vor allge-
meinen Verletzungsgefahren.
Allgemeine Sicherheitshinweise
• Bei nicht bestimmungsgemäßem Ge-
brauch oder falscher Handhabung kann
keine Haftung für evtl. auftretende
Schäden übernommen werden.
• Falsche Bedienung und unsachge-
mäße Behandlung können zu Störun-
gen am Gerät und zu Verletzungen des
Benutzers führen.
• Prüfen Sie vor Inbetriebnahme, ob die
Spannung Ihres Haushaltsstroms der
Spannungsangabe auf dem Gerät ent-
spricht, damit das Gerät bei Gebrauch
nicht überhitzt und beschädigt wird.
•Vorsicht! Lebensgefahr durch
Stromschlag!
• Gerät, Netzkabel und Netzstecker
nicht in Wasser oder andere Flüssig-
keiten tauchen.
• Gerät nicht in der Nähe eines
Wasch- oder Spülbeckens benutzen.
• Gerät nicht mit feuchten Händen be-
nutzen.
• Gerät nicht im Freien benutzen.
•Elektrische Geräte sind kein S iel-
zeug!
• Das Gerät während des Gebrauchs
nie unbeaufsichtigt lassen.
• Dieses Gerät ist nicht dafür bestimmt
durch Personen (einschließlich Kin-
der) mit eingeschränkten physi-
schen, sensorischen oder geistigen
Fähigkeiten oder mangels Erfahrung
und/oder mangels Wissen benutzt
zu werden, es sei denn, sie werden
durch eine für ihre Sicherheit zu-
ständige Person beaufsichtigt oder
erhielten von ihr Anweisungen, wie
das Gerät zu benutzen ist.
• Kinder sollten beaufsichtigt werden,
um sicherzustellen, dass diese nicht
mit dem Gerät spielen.
•Ziehen Sie immer den Netzstecker,
wenn das Gerät nicht in Betrieb ist, vor
dem Auswechseln von Zubehörteilen
und vor dem Reinigen.
• Netzkabel nur am Stecker aus der
Steckdose ziehen.
• Gerät und Netzkabel dürfen nicht mit
heißen Oberflächen in Berührung
kommen, damit es nicht zu Beschä-
digungen am Gerät kommt.
• Das Netzkabel sollte nicht über die
Tischkante/Arbeitsfläche herunter-
hängen, um ein Herunterreißen des
Gerätes zu verhindern. Es darf nicht
an scharfen Gegenständen scheu-
ern.
• Das Netzkabel nicht knicken oder
um das Gerät wickeln.
• Das Gerät nicht verwenden,
• wenn das Netzkabel beschädigt ist
• bei Funktionsstörungen
• wenn das Gerät durch einen Sturz
oder eine andere Ursache mögli-
cherweise Schaden genommen hat
• assen Sie ein defektes Gerät durch
DE

-3-
eine autorisierte Fachwerkstatt über-
prüfen. assen Sie ein defektes Netz-
kabel immer durch eine autorisierte
Fachwerkstatt ersetzen, um Gefähr-
dungen zu vermeiden.
• Nehmen Sie selbst niemals Verände-
rungen oder Reparaturen an dem Gerät
vor.
• Verwenden Sie nur Original-Zubehör-
teile.
• Keinerlei Gegenstände in das Innere
des Gehäuses einführen.
• Niemals selbst versuchen, das Ge-
häuse zu öffnen!
Produktbezogene
Sicherheitshinweise
• Stellen Sie das Gerät auf einer ebenen,
trockenen Arbeitsfläche auf.
Verletzungsgefahr!
• Betreiben Sie den Ventilator niemals
ohne die Schutzgitter.
• Während der Ventilator in Betrieb ist:
• Niemals mit den Fingern durch die
Schutzgitter greifen.
• Keine Gegenstände, wie z. B. einen
Stift, durch das Schutzgitter stecken.
• Niemals versuchen, den Ventilator
mit der Hand anzuhalten.
DE

-4-
Beschreibung
1Frontgitter
2Schraubkappe
3Flügel
4Befestigungsmutter für hinteres
Schutzgitter
5Hinteres Schutzgitter
6Motorwelle
7Motorgehäuse
8Oszillationsschalter
9Einstellschraube für die Neigung
10 Tasten
11 Tastengehäuse
12 Befestigungsschraube
13 Verlängerungsrohr
14 Feststellring Verlängerungsrohr
15 Standrohr
16 Abdeckkappe
17 Sockel
Aufbauanleitung
Achtung! Gerät noch nicht an
das Stromnetz anschließen.
1. Standrohr (15) mit dem kreuzförmigen
Sockel (17) verbinden und mit den 4
beiliegenden Schrauben befestigen.
Abdeckkappe (16) über das Standrohr
(15) schieben.
2. Verlängerungsrohr (13) ausziehen und
den Feststellring (14) über das Verlän-
gerungsrohr (13) auf das Standrohr
(15) schieben und festdrehen.
3. Das Motorgehäuse (7) mit dem Tasten-
gehäuse (11) auf das Verlängerungs-
rohr (13) stecken. Darauf achten, dass
das Tastengehäuse (11) bis zum An-
schlag auf das Rohr geschoben wird,
und mit der Befestigungsschraube (12)
befestigen.
4. Befestigungsmutter (4) für das hintere
Schutzgitter vom Motorgehäuse (7)
lösen.
5. Hinteres Schutzgitter (5) auf die Motor-
welle (6) schieben. Befestigungsmutter
(4) aufsetzen und gut festziehen.
6. Flügel (3) auf die Motorwelle (6) schie-
ben. Mit der Schraubkappe (2) in Ge-
genrichtung fest anziehen.
7. Frontgitter (1) mit fest stehender a-
sche oben am hinteren Schutzgitter (5)
einhängen. Gitter mit den Klemmen
verbinden.
Achtung! Prüfen, ob alle Teile
richtig montiert und gut be-
festigt sind.
Bedienung
1. Gerät an eine geeignete Steckdose an-
schließen.
2. Gerät mit den Tasten (10) einschalten
und die gewünschte Stufe wählen.
0-aus
1-langsam
2-mittel
3-schnell
3. Zum Aktivieren der Oszillationsfunktion,
den Oszillationsschalter (8), der sich
auf dem Motorgehäuse (7) befindet,
nach unten drücken. Um die Oszillation
abzustellen, den Schalter wieder nach
oben ziehen.
4. Um die Neigung zu verstellen, kann die
Motoreinheit auf oder abbewegt wer-
den. Mit der Einstellschraube (9) für die
Neigung fixieren Sie den Ventilator in
DE

-5-
der gewünschten Stellung.
5. Ziehen Sie den Netzstecker, wenn das
Gerät nicht gebraucht wird.
Reinigung
Ziehen Sie vor dem Reinigen
stets den Netzstecker.
• Reinigen Sie die Geräteoberfläche mit
einem weichen, leicht feuchten Tuch.
• Verwenden Sie keine ösungsmittel
oder scharfe Putzmittel.
Entsorgungshinweis
Altgeräte, die mit dem abgebil-
deten Symbol gekennzeichnet
sind, dürfen nicht mit dem
Hausmüll entsorgt werden, son-
dern müssen – gemäß Elektro-
und Elektronikgerätegesetz vom 24. März
2005 – fachgerecht entsorgt werden. Bitte
geben Sie dieses Gerät am Ende seiner
Verwendung zur Entsorgung an den dafür
vorgesehenen öffentlichen Sammelstellen
ab.
Ihr Standventilator VT 55 befindet sich in
einer Verpackung. Verpackungen sind
Wertstoffe und somit wiederverwendungs-
fähig oder können in den Rohstoffkreislauf
zurückgeführt werden.
Technische Daten
Netzspannung 220-240V
~ 50Hz
eistungsaufnahme 50 W
Geschwindigkeitsstufen 3
Technische Änderungen vorbehalten.
Version: VT55/01/2011.
DE

-6-
TAB E OF CONTENTS PAGE
Safety 7
General Safety Instructions 7
Product-Specific Safety Instructions 8
Description 8
Mounting Instructions 8
Operation 9
Cleaning 9
Disposal Instructions 9
Technical Data 9
GB

-7-
PEDESTA FAN VT 55
Before use, please read these instructions
carefully and keep them in a safe place for
future reference. When passing on the ap-
pliance to a third person, make sure to in-
clude these instructions for use.
Safety
This symbol identifies hazards
which may cause injuries.
General Safety Instructions
• Manufacturer takes no responsibility for
any damage caused by incorrect use.
• Incorrect or improper use can damage
the appliance and cause injuries to the
user.
• Before connecting this appliance to the
mains, make sure your local voltage
matches the technical data of the appli-
ance. Otherwise the appliance may
overheat and get damaged.
•Caution! Danger of electric shock!
• Never put the appliance, cord or plug
into water or any other liquid.
• Do not use the appliance near a sink
or wash basin.
• Do not use the appliance with wet
hands.
• Do not use the appliance outdoors.
•An electric a liance is not a toy!
• Never leave the appliance unat-
tended during use.
• This appliance is not intended for
use by persons (including children)
with reduced physical, sensory or
mental capabilities, or lack of experi-
ence and knowledge, unless they
have been given supervision or in-
struction concerning use of the ap-
pliance by a person responsible for
their safety.
• Children should be supervised to en-
sure that they do not play with the
appliance.
•Always un lug your a liance when
it is not in use, before changing acces-
sories and before cleaning.
• Always pull the plug – not the cord.
• Keep the appliance and the cord well
away from any hot surfaces to avoid
any damage to the appliance.
• Make sure the cord may not inad-
vertently be pulled or cause anyone
to trip when in use. Do not allow the
cord to hang over sharp edges.
• Do not bend the cord or wind it round
the appliance.
• Do not use the appliance,
• if the cord is damaged.
• in case of malfunction.
• if the appliance was dropped or is
damaged otherwise.
• Have the defective product checked by
an authorized service centre. If the cord
is damaged have it replaced by an au-
thorized service centre only to avoid
any possible hazards.
• Never attempt to make any modifica-
tions to or repair the appliance yourself.
• Only use accessories evaluated for use
with this appliance.
• Never attempt to drive any objects into
the appliance.
• Never attempt to open the housing
yourself!
GB

GB -8-
Product Specific
Safety Instructions
• Place the appliance on a flat and dry
surface.
Danger of serious injuries!
• Never operate the fan without the
guards installed.
• While the fan is in operation
• Never reach through the grid with
your hands.
• Never put any objects, such as pens,
through the grid.
• Never attempt to stops the blades
with your hands.
Description
1Front guard
2Screw cap
3Blades
4Rear guard mounting nut
5Rear guard
6Motor shaft
7Motor unit
8Oscillation knob
9Tilt adjusting screw
10 Buttons
11 Buttons compartment
12 Mounting screw
13 Extension pole
14 Height adjustment ring
15 Pole
16 Cross base cover
17 Cross base
Mounting Instructions
Attention! Do not connect the
appliance to the mains until
fully mounted.
1. Attach the pole (15) to the hub of the
cross base (17) and firmly tighten with
the screws provided. Slide the cross
base cover (16) over the pole (15).
2. Extend extension pole (13) and insert
the height adjustment ring (14) through
the extension pole (13) onto the lower
pole (15) and tighten.
3. Attach the motor unit (7) with the button
compartment (11) onto the extension
pole (13). Make sure the button com-
partment (11) is fully pushed down onto
the pole and tighten with the mounting
screw (12).
4. oosen rear guard mounting nut (4)
from the motor unit (7).
5. Put rear guard (5) into place onto motor
shaft (6). Secure guard by firmly tight-
ening mounting nut (4).
6. Slide the fan blade (3) onto the motor
shaft (6). Fasten it firmly with spinner
cap (2) by turning counter-clockwise.
7. Attach the front guard (1) to the rear
guard (5) with the position fixer pro-
vided at the rim of the guard. Then fix
both guards with the clips provided.
Attention! Make sure that all
parts are assembled correctly
and firmly tightened.

Operation
1. Connect the appliance to a properly in-
stalled wall socket.
2. Switch on the appliance using the but-
tons (10) and select the desired speed
setting.
0-off
1-slow
2-medium
3-fast
3. For oscillation, press the oscillation
knob (8), which is located on top of the
motor unit (7). To stop oscillation, pull
oscillation knob upwards.
4. The air flow can be adjusted by tilting
the entire motor unit upward or down-
ward until you have reached the de-
sired vertical angle.Fix angle by
tightening with the tilt adjusting screw
(9) below the motor unit.
5. Always unplug the appliance when it is
not used.
Cleaning
Always unplug the appliance
before cleaning.
• Clean the exterior with a soft damp
cloth.
• Do not use any thinners or scouring
agents for cleaning.
Disposal Instructions
Waste electrical devices marked with this
sign must not be disposed of with your
household waste, but – according to the
EU directive on Waste Electric And Elec-
tronic Equipment of 24th March
2005 – are to be collected sep-
arately. Therefore, please re-
turn this device at the end of its
life cycle to special collection
points for disposal.
Your pedestal fan VT 55 is packed in a re-
tail box. Such boxes are recyclable waste,
i.e. they are reusable or recyclable
Technical Data
Voltage 220-240 V ~ 50 Hz
Output 50 W
Speed settings 3
Subject to change without notice.
Version: VT55/01/2011.
-9- GB

TAB E DES MATIÈRES PAGE
Sécurité 11
Instructions générales de sécurité 11
Instructions de sécurité relatives à ce produit 12
Description 12
Assemblage 12
Utilisation 13
Nettoyage 13
Instructions pour le traitement des déchets 13
Données techniques 13
-10-
FR

VENTI ATEUR SUR PIED
VT 55
Veuillez lire attentivement cette notice et
toutes les instructions avant la première
utilisation. Conservez la notice et remet-
tez-la si vous remettez votre appareil.
Sécurité
Ce symbole indique un risque
pouvant entrainer des blessures
corporelles.
Instructions générales de sé-
curité
• a garantie ne couvre pas les dom-
mages occasionnés à défaut d’obser-
ver la notice d’utilisation ou par une
utilisation inadéquate.
• Pour votre sécurité et pour éviter tout
endommagement de l’appareil l’obser-
vation des instructions de cette notice
est de rigueur.
• Vérifiez que la tension d’alimentation de
votre appareil correspond à celle de
votre installation électrique. Autrement
l’appareil pourrait surchauffer et puis
être abîmé durant le fonctionnement.
•Attention ! Danger de mort ar choc
électrique !
• Ne mettez jamais l’appareil, le cor-
don d’alimentation ou la fiche dans
l’eau ou dans d’autres liquides.
• N’utilisez pas l’appareil près d’un
évier ou d’un lavabo.
• N’utilisez pas l’appareil à mains
mouillées.
• N’utilisez pas l’appareil en plein air.
•Un a areil électrique n’est as un
jouet !
• Durant son fonctionnement, ne lais-
sez pas l’appareil sans surveillance.
• es personnes (également les en-
fants) qui ne sont pas à même d’uti-
liser l’appareil de manière sure à
cause de leurs capacités physiques,
sensorielles ou mentales ou à cause
de manque d’expérience ou d’igno-
rance, ne doivent pas utiliser cet ap-
pareil sans surveillance ou sans être
instruites par une personne respon-
sable.
• Pour assurer que les enfants ne
jouent pas avec l’appareil, ils ne le
doivent pas utiliser que sous surveil-
lance.
•Débranchez toujours l’a areil, s’il
n’est pas utilisé, avant de changer d’ac-
cessoires et avant le nettoyage.
• Tirez sur la fiche – jamais sur le cor-
don.
• Posez l’appareil et le cordon d’ali-
mentation à l’écart de surfaces
chaudes pour éviter qu’ils soient en-
dommagés.
• Ne laissez pas pendre le cordon
d’alimentation d’un bord aiguisé ou
d’une table pour éviter que
quelqu’un tire ou trébuche dessus.
• Evitez d’enrouler le cordon autour de
l’appareil et ne le tordez pas.
• N’utilisez pas l’appareil,
• Si le cordon d’alimentation est abîmé
• ors d’une disfonction
• si l’appareil est tombé ou endom-
magé d’une quelconque façon.
• Ne faites contrôler un appareil endom-
magé que par un centre service profes-
sionnel. Ne faites réparer un cordon
d’alimentation endommagé que par un
centre service professionnel pour éviter
tout risque.
-11- FR

• Ne modifiez pas l’appareil.
• N’utilisez que les accessoires d’origine.
• N’introduisez jamais des objets dans
l’appareil.
• N’essayez jamais vous-même d’ouvrir
l’appareil !
Instructions de sécurité
relatives à ce produit
• Placez l’appareil sur un plan stable et
sec.
Danger de blessures !
• N’opérez jamais le ventilateur sans
grilles.
• Durant le fonctionnement :
• N’essayez jamais de toucher l’hélice
à travers la grille de protection.
• N’introduisez jamais des objets,
comme par ex. un stylo, dans la grille
de protection.
• N’essayez jamais d’arrêter l’hélice à
mains.
Description
1Grille de devant
2Capuchon fileté
3Hélice
4Écrou de fixation de la grille arrière
5Grille arrière
6Arbre du moteur
7Boîte du moteur
8Bouton d’oscillation
9Vis de réglage pour l’inclinaison
10 Boutons
11 Boîte des boutons
12 Vis de fixation
13 Tuyau rallonge
14 Bague de fixation du tuyau rallonge
15 Tuyau
16 Manchette
17 Embase
Assemblage
Attention ! Ne branchez pas
encore l’appareil.
1. Placez le tuyau (15) sur l’embase (17)
et fixez-le avec les vis fournies. aissez
glisser la manchette (16) sur le tuyau
(15).
2. Sortez le tuyau rallonge (13) et mettez
la bague (14) sur le tuyau rallonge (13)
jusqu’au tuyau (15). Serrez-la.
3. Mettez la boîte du moteur (7) avec la
boîte des boutons (11) sur le tuyau ral-
longe (13). Veillez à ce que la boîte des
boutons (11) soit poussée contre la
butée du tuyau rallonge et fixez tout à
l’aide de la vis de fixation (12).
-12-
FR

4. Dévissez l’écrou de fixation (4) de la
boîte du moteur (7).
5. Mettez la grille arrière (5) sur l’arbre du
moteur (6). Mettez et serrez l’écrou de
fixation (4).
6. Mettez l’hélice (3) sur l’arbre moteur (6).
Fixez-la en serrant le capuchon fileté
(2) en sens antihoraire.
7. Accrochez la patte de fixation de la
grille de devant (1) à la grille arrière (5).
Puis raccordez le deux grilles avec les
clips fournis.
Attention ! Vérifiez que toutes
les pièces seraient correcte-
ment assemblées et ferme-
ment fixées.
Utilisation
1. Branchez l’appareil sur une prise ap-
propriée.
2. Avec les boutons (10) mettez en
marche l’appareil et sélectionnez la vi-
tesse.
0- arrêt
1- lent
2- moyen
3- vite
3. Pour la fonction oscillation appuyez sur
le bouton d’oscillation (8) qui se trouve
sur la boîte du moteur (7). Pour arrêter
l’oscillation tirez le bouton vers le haut.
4. Pour régler l’inclinaison, basculez le
bloc moteur en bas et en haut jusqu’à
l’inclinaison souhaitée. Fixez l’inclinai-
son avec la vis de réglage (9) en des-
sous de la boîte du moteur.
5. Débranchez l’appareil après l’utilisation.
Nettoyage
Débranchez l’appareil avant
de le nettoyer.
• Nettoyez l’extérieur de l’appareil à l’aide
d’un chiffon doux humide.
• N’utilisez ni de solvants ni de déter-
gents abrasifs.
Instructions pour le
traitement des déchets
es appareils usagés marqués
avec le symbole illustré, ne doi-
vent pas être mis au rebut avec
les déchets domestiques, mais
– selon la directive sur les Dé-
chets d’équipements électriques et élec-
troniques du 24.03.2005 – sont à éliminer
de façon appropriée. Veuillez à la fin de sa
durée de vie renvoyer l’appareil à des dé-
chèteries locales spécialisées.
Votre ventilateur sur pied VT 55 est fourni
dans un emballage. es emballages sont
des matériaux réutilisables ou recyclables.
Données techniques
Tension 220-240 V ~ 50 Hz
Puissance 50 W
Vitesses 3
Sous réserve de modifications
Version : VT55/01/2011.
-13- FR

OBSAH STRANA
Bezpečnost 15
Bezpečnostní instrukce 15
Specifické bezpečnostní instrukce produktu 16
Popis 16
Návod k montáži 16
Provoz 16
Cištení 17
Pokyny k likvidaci 17
Technické specifikace 17
-14-
CZ

VĚTRÁK
SE STOJANEM VT 55
Před použitím si, prosíme, pozorně přečt-
ěte tento návod k použití, poté jej uscho-
vejte na bezpečném místě k pozdějšímu
nahlédnutí. Při předávání tohoto zařízení
další osobě předejte s výrobkem i tento
návod k použití.
Bezpečnost
Tento symbol označuje nebez-
pečí, která mohou způsobit
zranění.
Bezpečnostní instrukce
• Výrobce nepřebírá žádnou odpověd-
nost za škody způsobené nesprávným
použitím.
• Nesprávné nebo nevhodné použití
může přístroj poškodit a způsobit zran-
ění uživateli.
• Před zapojením přístroje do zásuvky se
ujistěte, že napětí odpovídá technickým
údajům přístroje. V opačném případě
by se mohl přístroj přehřát a poškodit.
•Pozor! Nebezpečí úrazu elektrickým
proudem!
• Přístroj, ani jeho kabel nebo zástrčku
nikdy nevkládejte do vody nebo jiné
tekutiny.
• Přístroj nepoužívejte vebo umy-
vadla.
• Přístroj nepoužívejte s mokrýma ru-
kama.
• Přístroj nepoužívejte venku.
•Elektrický přístroj není hračka!
• Během používání nikdy nenechá-
vejte přístroj bez dozoru.
• Tento přístroj není určen pro použí-
vání osobami (včetně dětí) s fyzic-
kým, smyslovým, nebo mentálním
postižením, nebo nedostatkem zku-
šeností a znalostí, pokud nejsou pod
dozorem, nebo nebyly ohledně po-
užití přístroje poučeny osobou od-
povědnou za jejich bezpečnost.
• Děti by měly být pod dozorem, aby
si s přístrojem nehrály.
•Přístroj vždy vypojte ze zásuvky,
když není používán, před výměnou do-
plňků a před čištěním.
• Při vypojování ze zásuvky vždy ta-
hejte za zástrčku, nikoliv za kabel.
• Přístroj i jeho kabel udržujte v dosta-
tečné vzdálenosti od horkých po-
vrchů, aby nedošlo k poškození
přístroje.
• Ujistěte se, že při použití přístroje ne-
může dojít k náhodnému zavadění
nebo zakopnutí o kabel. Ujistěte se,
že kabel neleží na žádných ostrých
hranách.
• Kabel neohýbejte, nebo neobtáčejte
kolem přístroje.
• Přístroj nepoužívejte,
• pokud je kabel poškozen.
•vpřípadě poruchy.
• Pokud přístroj upadl, nebo byl jinak
poškozen.
• Poškozený produkt nechte zkontrolovat
v autorizovaném servisu. Pokud došlo
k poškození kabelu, nechte jej v autori-
zovaném servisu vyměnit, aby nedošlo
k možným zraněním.
• Nikdy se nepokoušejte přístroj sami
upravit nebo opravit.
• Používejte pouze doplňky určené pro
tento přístroj.
• Nikdy se do přístroje nepokoušejte
strkat žádné předměty.
• Nikdy se nepokoušejte otevřít kryt!
-15- CZ

Specifické bezpečnostní
instrukce produktu
• Přístroj umístěte na rovný a suchý po-
vrch.
Nebezpečí vážného poranění!
• Větrák nikdy nepouštějte bez nainstalo-
vaného krytu.
• Když je větrák zapnutý
• nestrkejte ruce skrz mřížku.
• nestrkejte skrz mřížku žádné předm-
ěty, např. tužky.
• nikdy se nepokoušejte rukama za-
stavit vrtule.
Popis
1Čelní kryt
2Krytka hřídele
3Vrtule
4Zajišťovací matka zadního krytu
5Zadní kryt
6Hřídel
7Motor
8Knoflík otáčení
9Šroub pro nastavení náklonu
10 Tlačítka
11 Díl s tlačítky
12 Zajišťovací šroub
13 Vysunovací tyč
14 Kroužek pro nastavení výšky
15 Tyč
16 Krytka křížového stojánku
17 Křížový stojánek
Návod k montáži
Pozor! Nezapojujte spotrebic
do elektrické zásuvky pred-
tím, nežli jej rádne smontu-
jete.
1. Tyč (15) zasaďte do základny ve tvaru
kříže (17) a pevně zajistěte pomocí při-
loženého šroubu. Krytku křížového sto-
jánku (16) navlékněte přes tyč (15).
2. Vysuňte vysunovací tyč (13) a navlékn-
ěte kroužek pro nastavení výšky (15)
přes vysunovací tyč (7) na spodní tyč
(11) a utáhněte.
3. Na vysunovací tyč (7) připevněte motor
(11) s dílem s tlačítky (13). Ujistěte se,
že je díl s tlačítky (11) řádně zasazen
na tyči a utažen zajišťovacím šroubem
(12).
4. Odšroubujte zajišťovací matku zadního
krytu (4) z motoru (7).
5. Nasaďte zadní kryt (5) na své místo na
hřídel (6). Kryt zajistěte řádným utaže-
ním zajišťovací matky zadního krytu
(4).
6. Vrtuli (3) nasaďte na hřídel (6). Zajist-
ěte ji otáčením (2) proti směru hodino-
vých ručiček.
7. Nasaďte čelní kryt (1) do drážek na
rámu zadního krytu (5). Poté oba kryty
zajistěte pomocí sponek.
Pozor! Zkontrolujte, zda jsou
všechny soucásti ventilátoru
správne smontované.
Provoz
1. Zapojte spotrebic do elektrické zá-
suvky.
2. Pomocí tlacítkových spínacu (10) spo-
trebic zapnete a zvolte požadovanou
rychlost.
-16-
CZ

0 - vypnuto
1 - nízká rychlost
2 - strední rychlost
3 - vysoká rychlost
3. Pokud chcete zapnout oscilaci, stisk-
nete prepínac oscilace (8) umístený na
horní strane motorové cásti (7). Pokud
chcete oscilaci vypnout, vytáhnete pre-
pínac oscilace smerem nahoru.
4. Proud vzduchu je možno regulovat na-
kloněním celého motoru nahoru nebo
dolů, aby bylo dosaženo požadova-
ného vertikálního úhlu. Náklon zajistěte
utažením šroubu (9) pro zajištění ná-
klonu pod motorem.
5. Pokud spotrebic nepoužíváte, odpojte
ho ze síte.
Cištení
Predtím, než zacnete spotre-
bic cistit, odpojte ho ze síte.
• Otrete vnejší stranu spotrebice mekkým
navlhceným hadríkem.
• Nepoužívejte žádná rozpouštedla ani
abrazivní cisticí prostredky.
Pokyny k likvidaci
Odpadní elektrické přístroje
označené tímto symbolem
nesmí být vyhozeny do domá-
cího odpadu, ale – v souladu
s nařízením EU o likvidaci
eklektických a elektronických přístrojů
z 24. března 2005 – musí být zvlášť vytří-
zeny. Prosíme, odevzdejte tento přístroj
po skončení jeho životnosti na sběrném
místě, kde bude zlikvidován.
Váš větrák se stojanem VT 55 je balen v
maloobchodním balení. Tyto krabice jsou
recyklovatelné, tj. dají se znovu použít,
nebo recyklovat.
Technické specifikace
Napetí 220-240 V ~ 50 Hz
Výkon 50 W
Rychlostní stupne 3
Údaje se mohou menit bez predchozího upozornení.
Verze VT55/01/2011
-17- CZ

CUPRINS PAGINA
Instrucţiuni de siguranţa 19
Instrucţiuni generale de siguranţa 19
Instrucţiuni de siguranţa specifice produsului 20
Descriere 20
Instructiuni de montaj 20
Utilizare 21
Curăţare 21
Instrucţiuni de evacuare 21
Date tehnice 21
-18-
RO
Table of contents
Languages:
Popular Fan manuals by other brands

Luminance Brands
Luminance Brands kathy ireland HOME CURVA SKY LED INDOOR owner's manual

BLAUBERG Ventilatoren
BLAUBERG Ventilatoren Vento Expert A50-1 Pro user manual
Vornado
Vornado ATOM 2 AE user manual
JetBlack
JetBlack EURUSIII HVLS Install & user manual

Hunter
Hunter Stanley Park 50585 installation manual

aldes
aldes InspirAIR FRESH EK120-HF Installation, operation & maintenance manual
