Hills Portable 170 User manual

Product Manual
PortableTM
Indoor Outdoor Clotheslines
TO SUIT MODELS:
PortableTM 170
PortableTM 120

2
Congratulations
Congratulations on the purchase of your
Portable Clothesline, which will bring
you many years of trouble free and efficient
drying, both indoors and outdoors.
It is important that you read this product
manual thoroughly before assembly and
use. In this way you will benefit from all of
the design features and enjoy safe use
of the product.
Thank you for choosing Hills.
Warning
• Caution: Do not push or pull your portable
clothesline across the floor as this could
lead to breakage of the legs.
• Tomovetheclotheslineliftitcompletely
from the floor (it may require two persons
toavoidinjurytoyourselfordamage
to the product).
• Donotallowchildrenorpetstoswingon
the Portable Clothesline or items of laundry.
• Ensurewhenopeningandclosingyour
Portable Clothesline that your hands are
positionedwheretheywillprovidesupport
andwillnotbecaughtinmovingparts.
• Donotuseforanypurposeotherthanto
hang and dry washing.
• DonotuseyourPortableClotheslineif
parts are worn or damaged.
• Patentsandregistereddesignsapply
to this product.
Introduction
Fastener Descriptions
Part name Qty.
Spreader and hinge assembly 1
Arm assembly 2
Leg assembly - LH 2
Leg assembly - RH 2
Leg brace 2
Hanging bracket 1
Door adaptor 1
Line 2
Accessory pack 1
Carton Contents
Accessory Pack Contents
Part name Qty.
Covercap 4
Covercaptool 1
M6 x 12 low profile screw 4
M6 x 16 countersunk screw 8
M6 x 30 button head screw 4
M6 Nyloc nut 4
Door adaptor screw 1
Hex key – 4mm 1
M6 x 12 low profile screw
M6 x 16 countersunk screw
M6 x 30 button
head screw
M6 nyloc nut
(Always ensure
nyloc nut is
screwed on
as shown)

3
Assembly
The Hills Portable Clothesline is quick and easy to assemble. Just follow the steps below
which are suitable for both the 170 (10 line) and 120 (8 line) models.
NOTE: all diagrams in this manual show the Portable Clothesline 120.
Step 1 – Rotate the Hinges into the open position.
1.1 Place the spreader and hinge assembly on a flat surface.
1.2 Pull the latch out firmly.
1.3 Whilst holding the latch out, rotate the hinge to the ‘open’ position until
the latch ‘clicks’ into place.
1.4 Repeat at other end.
Latch
‘clicks’
into place
Pull out latch
Rotate hinge
Closed Position
Open Position

4
Assembly
Step 2 – Attach the Legs to the Hinge Assemblies.
Fasten the legs as shown in Steps 1–4.
Step 1
Locate the M6 nut on to the moulded leg section of
the hinge moulding.
*Nylon ring of the nut must face outward
Step 4
Repeat for all legs.
Step 2
Fit leg tube (ensuring mount hole is oriented
as shown).
NOTE: Check leg orientation (as per
diagram in Step 4) to ensure the threaded
inserts for securing the leg brace are
facing each other.
Step 3
Insert and fasten securely the M6 x 30 button head
screw using hex key – 4mm.
Mount hole
M6 Nyloc
nut*
Threaded
inserts

5
Step 3 – Attach the Brace to the Legs.
3.1 Using the eight (8) M6 x 16 countersunk screws, attach the leg brace to the four (4)
threaded inserts in the legs using the hex key – 4mm.
3.2 Fasten securely.
3.3 Repeat at other end.
Step 4 – Turn the Portable Clothesline over and stand
on the ground as shown.
Assembly
Leg
Threaded insert
Leg brace
M6 x 16 countersunk screws

6
Assembly
Step 5 – Attach the arms.
5.1 Locate the arms into the recess in each end of the hinge assemblies ensuring the screw
holes and insert fasteners align. Insert the two (2) M6 x 12 low profile screws and fasten
securely using the hex key – 4mm.
Ensure the arms are assembled with the curve up (as shown).
P
U
L
L
T
O
R
E
L
E
A
S
E
Low profile screws
Armscorrectlyassembledcurveup

7
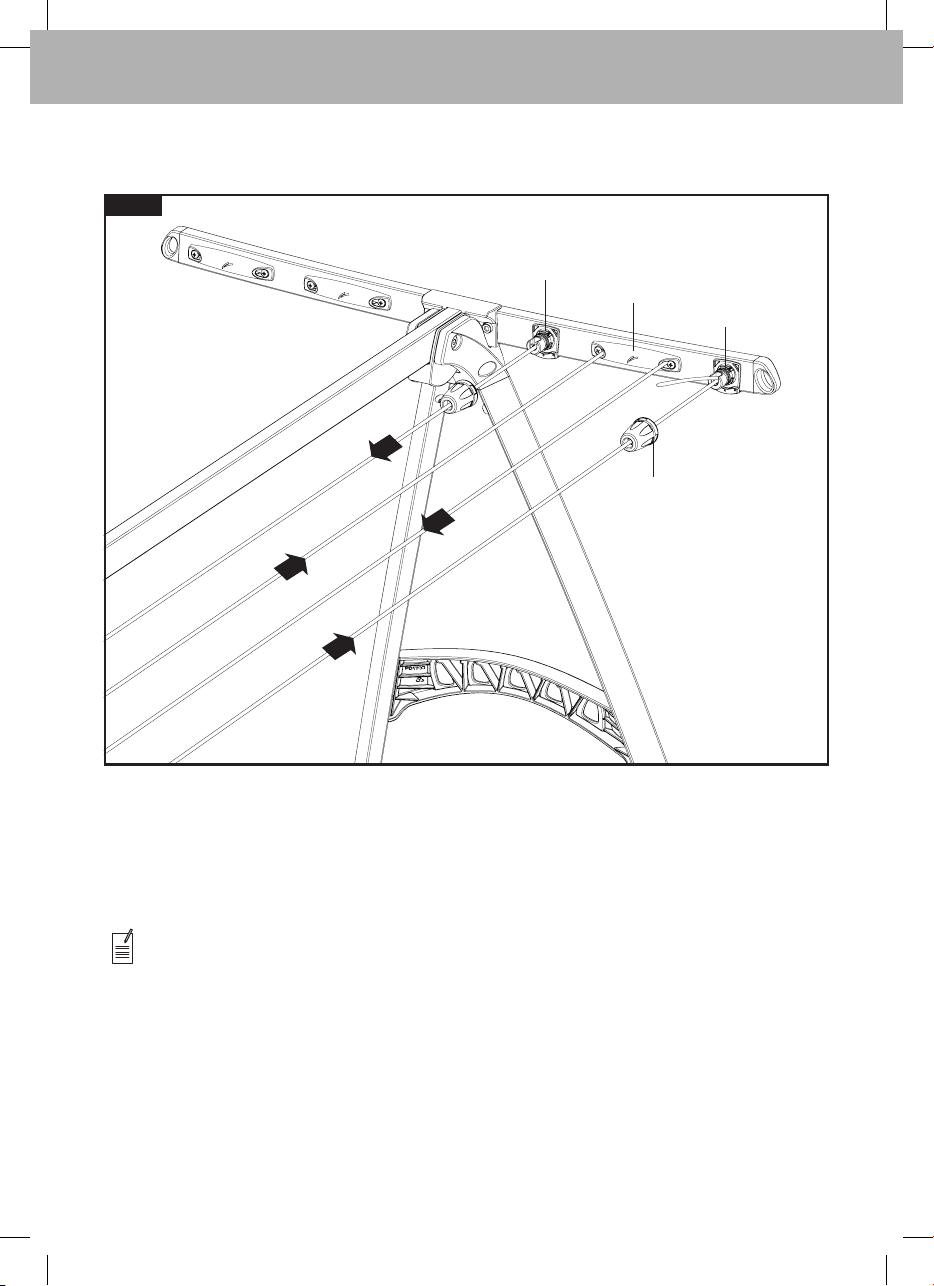
Step 6 – Attach the line.
6.1 Fasten the line to the innermost line tensioner as shown in steps 1–4.
6.2 Feedthelinethroughthelinesleevesasshowninstep5.
Assembly
Step 1
Fitthecovercapontotheendoftheline,(ensure
correct orientation).
Step 4
Feed the line up and back through the front slot of
the tensioner and pull tight.
Step 2
Insert the line down through the front slot of the
tensioner as shown, pull through 100mm (4”) of line.
Step 3
Loopthelinearoundthereargrooveofthetensioner
andpulltighttopreventlineslipping.
Step 5
8
Assembly
6.3 Continuetothreadthelinethrougheachofthelinesleevesensuringalllinesareparallel,
as shown in step 6.
6.4 Tie off line to the outer line tensioner as per steps 1–4 on page 7.
Do not tighten line yet.
6.4 Repeat steps for the other side.
6.5 Tightenlineoneachsidebypullingit‘through’thelinesleevesandrepeatingtie
off procedure with the outer line tensioner.
Do not over tighten the line as you can distort the frame.
Apply approximately the same ‘tension’ to both sides to keep the frame ‘square’
andtoavoidtwisting.
Step 6
Line tensioner inner
Linesleeve
Covercap
Line tensioner outer

9
Line Tensioning
6.6 Fitthecovercapsandtrimthelineasshowninsteps7and8.
Step 7
Feedendofthelinethrougheachcovercapand
tbyrotatingclockwiseusingthecovercaptool
provideduntilaslight‘click’isfelt.
Ashortvideoshowingtheattachmentofline
segmentsisavailableforviewingontheHills
website: www.hillsproducts.com.au
Step 8
Trimoffanyexcesslineushwithendofeachcover
cap as shown.
We recommend trimming excess line after a
fewloadsofwashinghavebeenhungtoallow
‘pre-stretch’ of line to occur.
Your Portable Clothesline is now ready to use.
Step 7 – Line Tensioning
To re-tension lines if required
7.1 Removeeithercovercaponthearm,byrotatinganti-clockwise.
7.2 Untie the existing line.
7.3 Repeat steps as described on pages 8 and 9.
DONOTOVERTENSION,asyoucandistorttheframe.
10
Operation
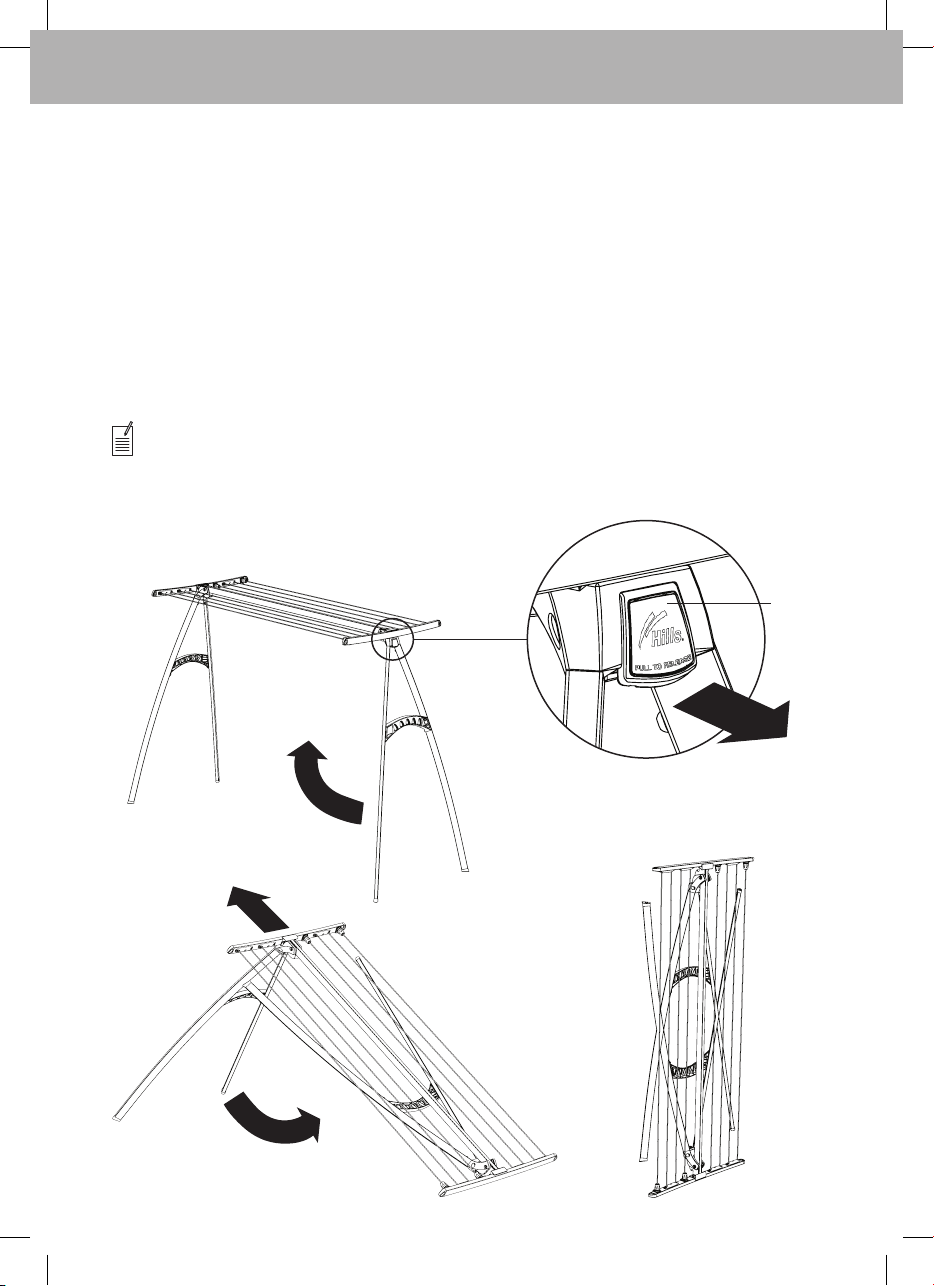
Step 8 – Folding and Unfolding
8.1 To fold away your Portable Clothesline, pull the latch out firmly with one hand, while
supporting and rotating the legs up and around with your other hand. Keep rotating until
the latch ‘clicks’ back into place, locking the legs closed.
8.2 Place the folded end on the ground.
8.3 Release the latch at the other end, and fold the legs while bringing the product
toaverticalposition.
The folded product is now ready to be stored.
To unfold your Portable Clothesline, simply unlatch each leg and rotate around into the
locked open position.
Check the legs are not caught in the lines before trying to unfold.
Always ensure your hands are positioned where they will provide support
and will not be caught in moving parts.
Pull to
release
latch.

11
Accessories
Step 9 – Hanging bracket
TohangyourPortableClotheslineforconvenientstorageahangingbrackethasbeenincluded.
9.1 Thehangingbracketcanbefastenedtoalmostanywallorverticalsurfaceusing
appropriate fasteners (not supplied).
9.2 The hanging bracket and door adaptor can be used over most doors.
Simplyplacethehangingbracketanddooradaptoroveryourdoorasshown.
Place the Portable Clothesline on the hanging bracket ensuring it is centered on the
door and does not make contact with door handles, surrounding furniture and walls,
when the door is opened and closed.
Securethedooradaptortothetopofthedoorwiththesmallscrewprovided.
Check there is clearance between the top edge of the door and door
frame for the door adaptor and screw before fixing.
Check clearance
12
Handy Hints, Care and Maintenance, Clothes Pegs
Hills Handy Hints
Heavyorlargeitemslikethicktowels,
sheets and quilts can be dried on the
Portable Clotheslines. We recommend
placingthemovertheinnerlinesleaving
the outer lines for smaller objects. We also
recommendspreadingtheloadovertwo
lines to allow more air circulation for faster
drying. Sheets can be folded in half and
driedovertwolines.
Quiltscanbedriedbylayingthemoverthe
Portable Clothesline then pegging the
ends/corners together to lift them off the floor.
When placing washing on the Portable
Clothesline ensure the weight is balanced
andwashingisplacedevenlyonbothsides.
The Hills Portable Clothesline can be used
almost anywhere but should not be used
in strong wind conditions unless it is placed
in a protected area and secured.
Hills Portable Clotheslines can be stored
when not in use.
The braces that supports the legs include
holesthatprovideadditionalhangingspace.
Placepegsovertheseamsinyourclothing
toavoidorminimisepegmarksonthefabric.
Care and Maintenance
It is a good idea to occasionally inspect all
components and check for wear and tear
or damage. If there is any damage, parts
should be replaced with original Hills spares
or the Portable Clothesline repaired before
using again.
The Portable Clothesline should be
periodically wiped clean with a damp cloth
and mild detergent.
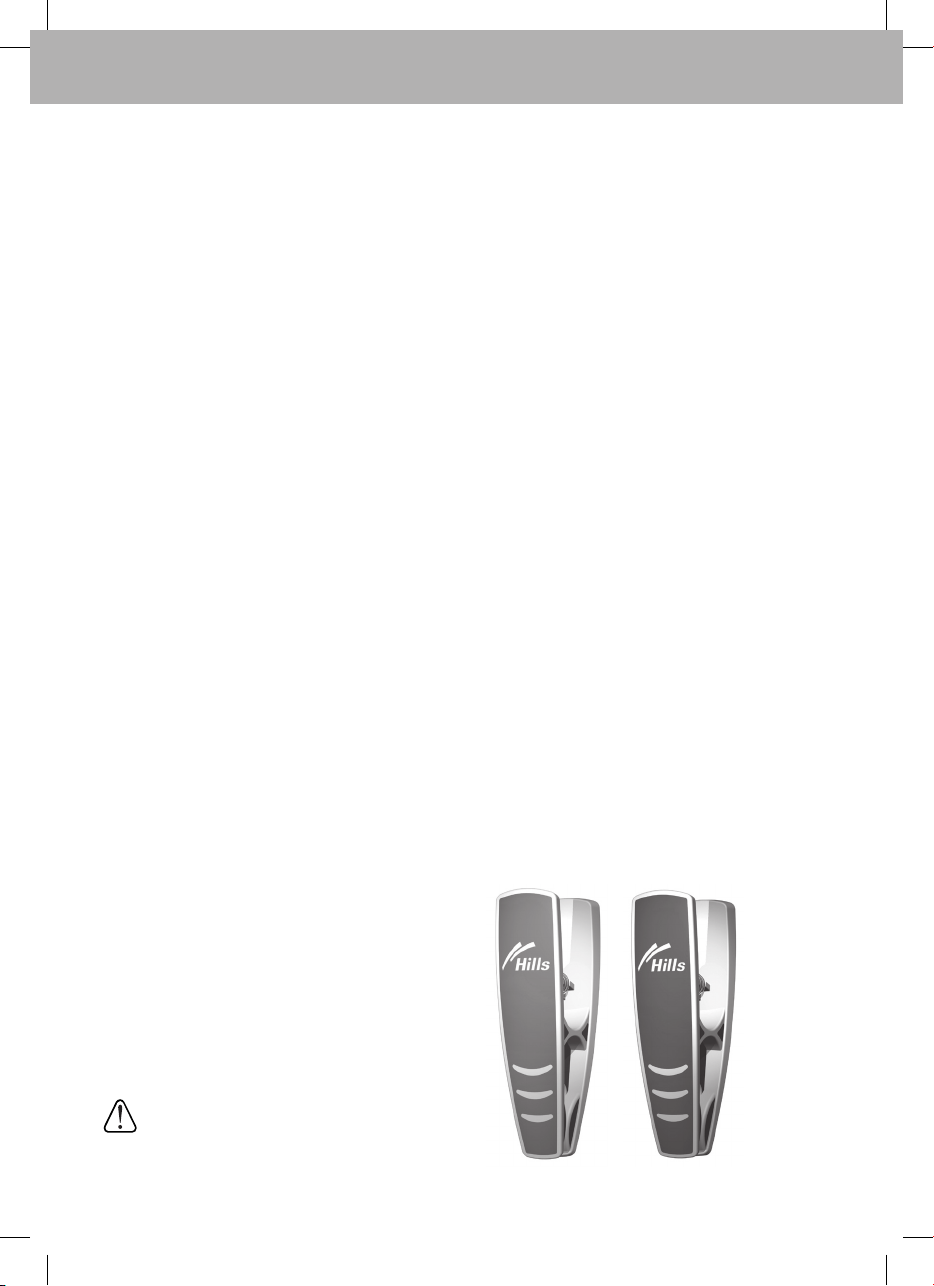
Hills Smart Pegs
Available from leading retailers
•Stylish,contemporaryclothespegs
•Dualmouldedforcomfortandgrip
•UVstabilisedforsunprotection
•Rust-resistantstainlesssteelspring
•Selectionoffashioncolours
WARNING: CHOKING HAZARD!
Small parts. Not for children under 3 yrs.
Not to be used as a toy.

13
Warranty
WARNING: CHOKING HAZARD!
Small parts. Not for children under 3 yrs.
Not to be used as a toy.
Hills Warranty
1.HillsprovidesconsumerswiththefollowingwarrantyinrelationtothisProduct,
inadditiontocomplyingwiththerequirementsofanyrelevantlegislation,including
the Competition and Consumer Act 2010 (Cth) in Australia and the Consumer
Guarantees Act 1993 in New Zealand (the Acts), except where a New Zealand
consumeracquirestherelevantProductforthepurposesofabusiness.
2.Inthiswarranty,wehaveusedthefollowingdenitions:
(a) Hills, our or wemeansHillsHoldingsLimited(ABN35007573417)
of159PortRoadHindmarshSouthAustralia5007;
(b) Products means the following goods manufactured by Hills (including products
manufactured for Hills by its contract manufacturers): Hills Portable Clothesline;
(c) Material means a material or component used by Hills in the manufacture
oftheProducts;
(d) Warranty Periodmeans3yearsfromthedateofpurchaseoftherelevant
Product and, in relation to polycore line, means a period of 1 year from the date of
purchase of the Product. If the Product or part (as the case may be) is repaired or
replaced,therewillbenoextensiontotheoriginalwarrantyperiod;and
(e) Workmanship means the handling, assembly and manufacturing processes
performed by or on behalf of Hills in order to manufacture the Products.
3. Hills warrants that for the duration of the Warranty Period, all Products will be free
of faults arising from defects in Workmanship or Materials, on the terms and conditions
set out in this warranty.
4. Hills undertakes that if during the Warranty Period any Product, or any part
ofaProduct,hasfailedtooperatecorrectlyduetofaultyWorkmanshipordefective
Material, it will repair or replace the Product or part (as the case may be) free of charge
providedthatthefollowingprocedureismet:
(a) The consumer must contact Hills upon becoming aware of any defect to a
Product. The contact details for Hills are set out in this warranty and under
the heading “Hills Contacts”.
(b) Following consultation with Hills, Hills will determine whether there is a defect,
and if so Hills agrees to (at Hills’ option):
i.inthecaseofgoods–repair,replaceorsupplyequivalentgoods,orpay
thecostofanyofthoseremediestotheconsumer;or
ii.inthecaseofservices–supplytheservicesagainorpaythecostofhaving
theservicessuppliedagain.
(c) If Hills requests the return of the applicable Product or part, Hills will be
responsible for the collection and freight costs of returning that Product or part.
The consumer agrees to assist Hills with any reasonable request to enable Hills
to collect such Product or part.
(d)HillsalsoagreestoberesponsibleforthefreightcoststodeliveranynewProduct
or replacement part to the consumer.

14
Warranty
5.Thiswarrantyisinadditiontoanynon-excludablelegalrightsorremediesconferred
on the consumer under any applicable Act and any similar laws. To the extent
permitted by law, Hills' liability for any non-excludable condition or warranty is limited
to rectifying any defect at its option, as set out in paragraph 4(b).
6. Subject to the requirements of any applicable Act or legislation and to the extent
permittedbylaw,noliability(whetherexpressedorimplied)ofanynaturewhatsoever,
is accepted by Hills for any consequential loss, damage or injury arising as a result
of any fault in the Products.
7. This warranty does not extend to damage to Products which occurs during transit
or transportation, or which is caused by any abuse, accident or improper installation,
connection, use, adjustment or repair or use of goods otherwise than in accordance
with instructions issued by Hills.
8.ThewarrantyonProductsiswaivedifanyadditionorattachmenttotheProducts
donothaveHills'specicapprovalorarenotsoldasHillsproducts.TheProducts
are designed to perform specific tasks under established test loads and unauthorised
attachments may produce stresses for which the design is not appropriate.
9.ThefollowingappliestoconsumerswhopurchasedarelevantProductinAustralia:
Our goods come with guarantees that cannot be excluded under the Australian
Consumer Law. You are entitled to a replacement or refund for a major failure
and compensation for any other reasonably foreseeable loss or damage.
Youarealsoentitledtohavethegoodsrepairedorreplacedifthegoodsfail
to be of acceptable quality and the failure does not amount to a major failure.
Hills Contacts
Wearecommittedtoprovidingyouwithcompletecustomersatisfaction.Ifyouhave
anyquestionsorcommentsaboutourproductsorservicespleasecontactyournearest
customerservicecentreduringtheirlocalbusinesshours:
Australia
1300300564
New Zealand
092623052
United States
8775341371(Eastern)
Europe
+44 (0) 118 973 8971 (UK)
enquiries@greenergardensolutions.co.uk
South Africa
0214421540
info@stingray.co.za
Hills Websites
www.hills.com.au
Hills Branded Products
www.hillsholdings.com.au
Hills Holdings Limited

15
Please retain this Product Manual. Record the following
information for future reference.
Product Number (printed on carton): FD
Date of purchase:
Name and location of store:
Made in China
Designed and tested under a
Quality System that meets Hills
demanding quality specifications.
®
Notes

Hills Holdings Limited
A.B.N.35007573417
Issue October 2011
PD2486c
This manual suits for next models
1
Table of contents
Popular Outdoor Furnishing manuals by other brands


Keter
Keter TOSCANA Assembly instructions

Santa & Cole Urbidermis
Santa & Cole Urbidermis NeoRomantico Clasico 1995 Assembly instructions

Orange-Casual
Orange-Casual OC-WK-005 manual

Jet-Line group
Jet-Line group LUXOR instruction manual

Blomus
Blomus BASO Torch Base operating instructions

Sunsitt
Sunsitt Sojeil Jardin SJ-14 manual