HIMS BookSense User manual


- Table of Contents -
1. What’s in the box? .................................................................1
2. Physical description..............................................................2
3. Inserting/removing the battery .............................................3
4. Charging the battery..............................................................5
5. Turning the Power on/off.......................................................5
6. Inserting and removing an SD card......................................6
7. Connecting to a PC................................................................7
8. Basic concept of User Interface ...........................................9
9. Switching among the BookSense programs.....................11
10. Adjusting Volume...............................................................12
11. Play/Pause..........................................................................13
12. Recording...........................................................................13
13. Checking Date & Time.......................................................14
14. Switching storage device..................................................14
15. Using help mode................................................................14
16. Key lock switch..................................................................15
Appendix: BookSense Commands Summary.......................17

Quick Start Guide –BookSense/BookSense XT
1
Thank you for purchasing the BookSense. The BookSense
(available in standard and XT models) is a digital audio player
that is manufactured by HIMS International Corporation, the
creator of the popular SENSE product line. It is a very
convenient, portable device which can play digital books, audio
files, document files, and DAISY content.
Getting started: This Quick Start Guide shows you how to
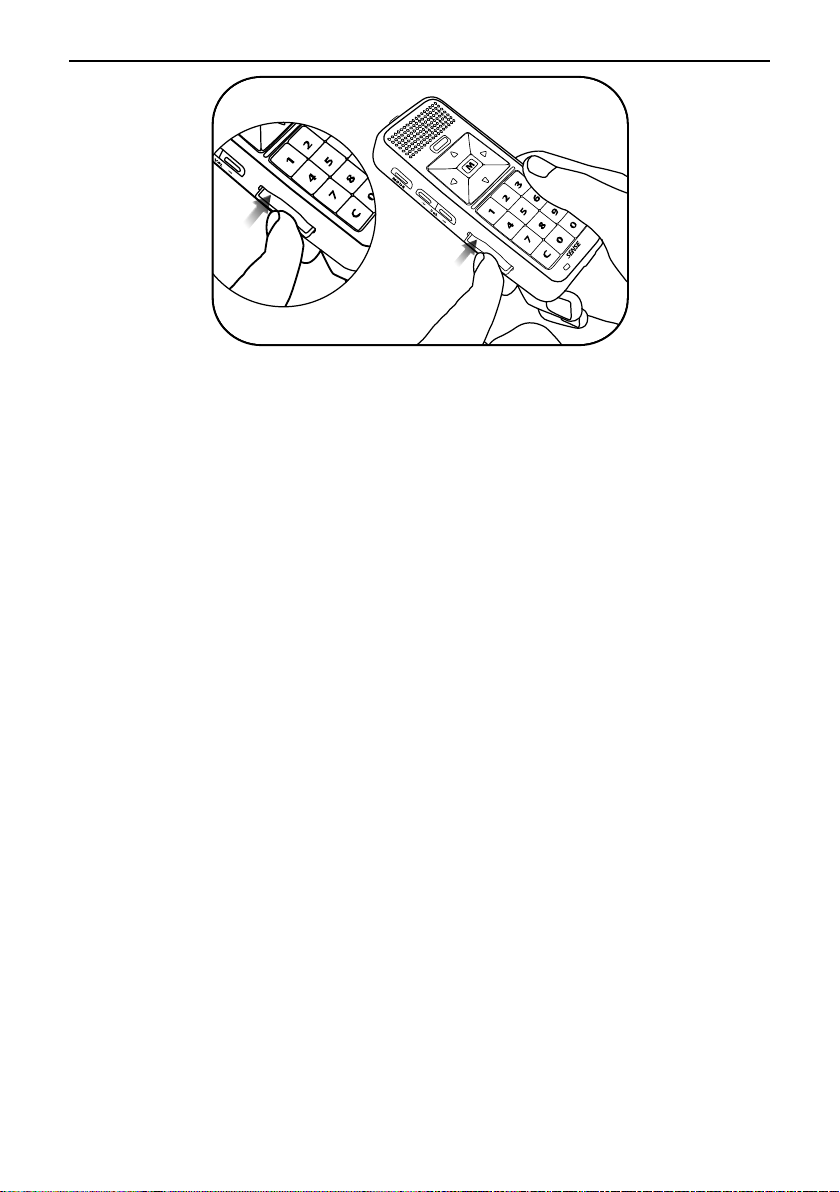
connect and charge the battery, how to turn the BookSense on
and off, how to get help and how to prevent the accidental
pressing of buttons.
For further information, please refer to the User Manual.
1. What’s in the box?
You should find the below items in the BookSense packing box.
1) BookSense or BookSense XT
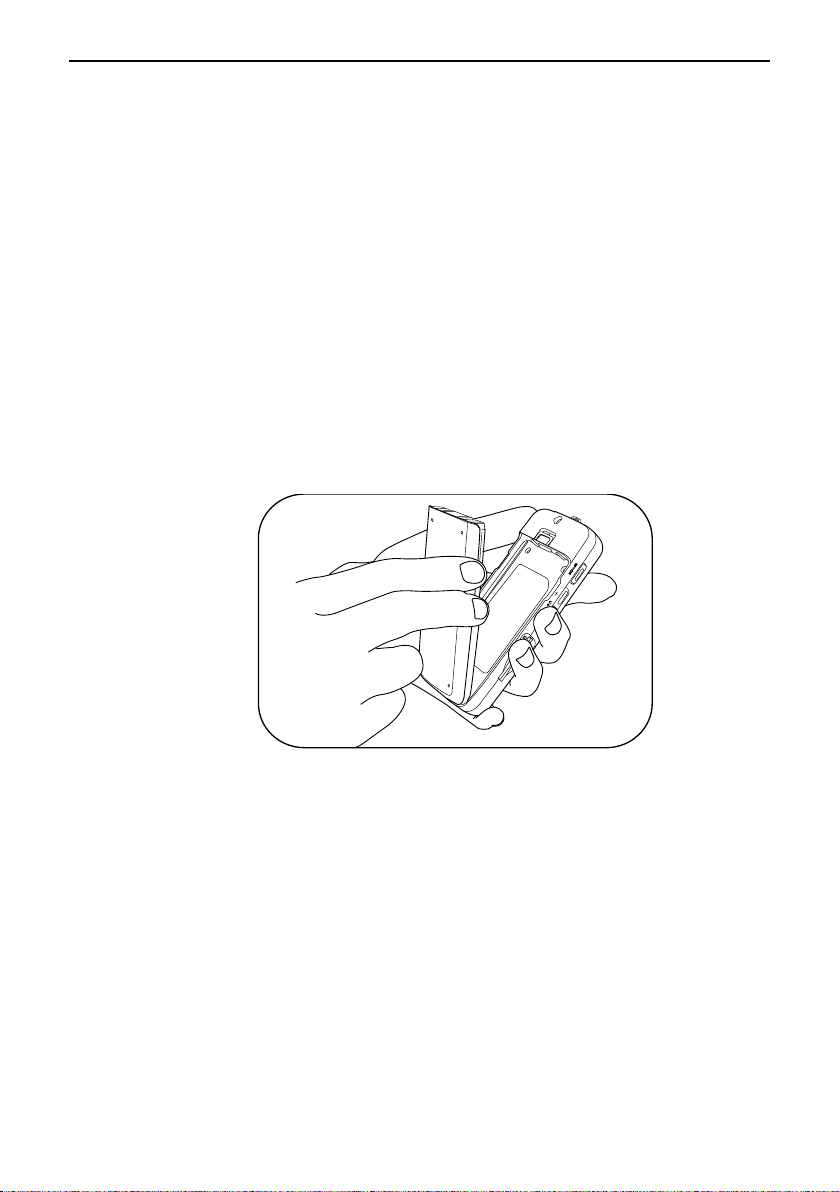
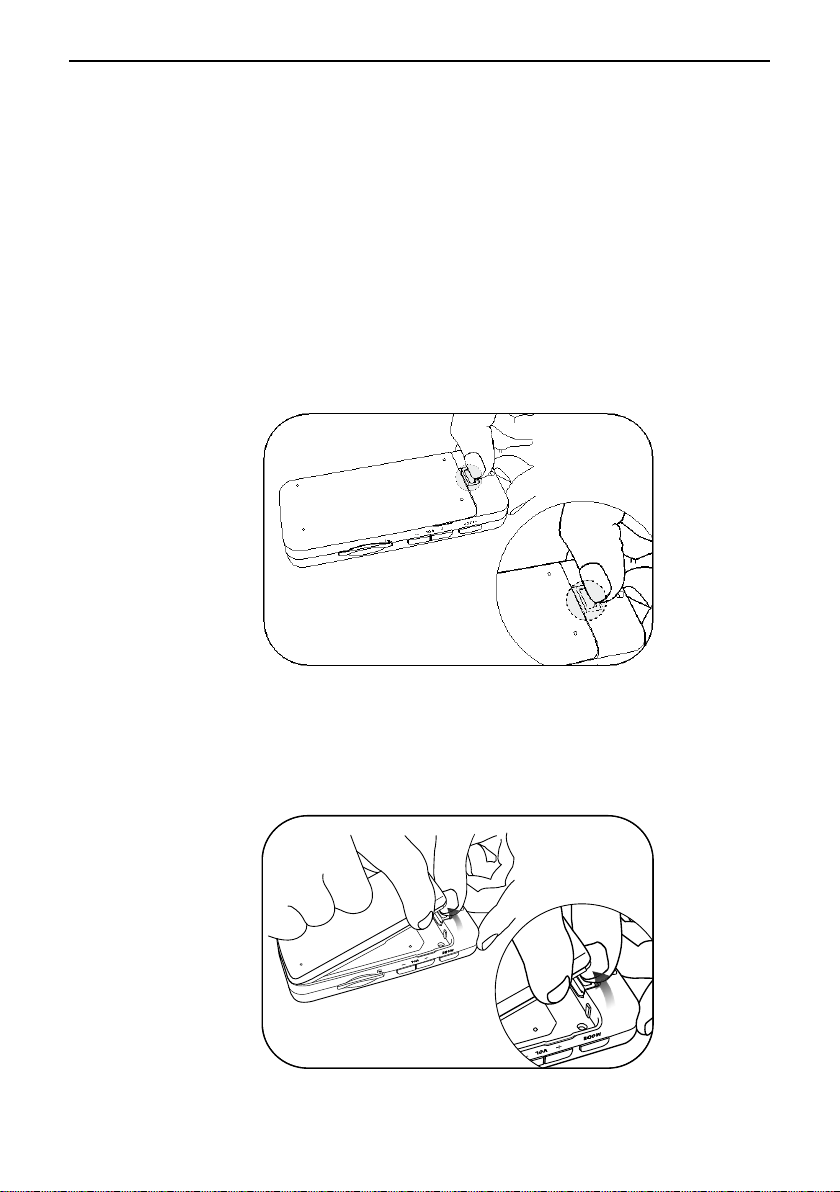
2) Rechargeable battery pack
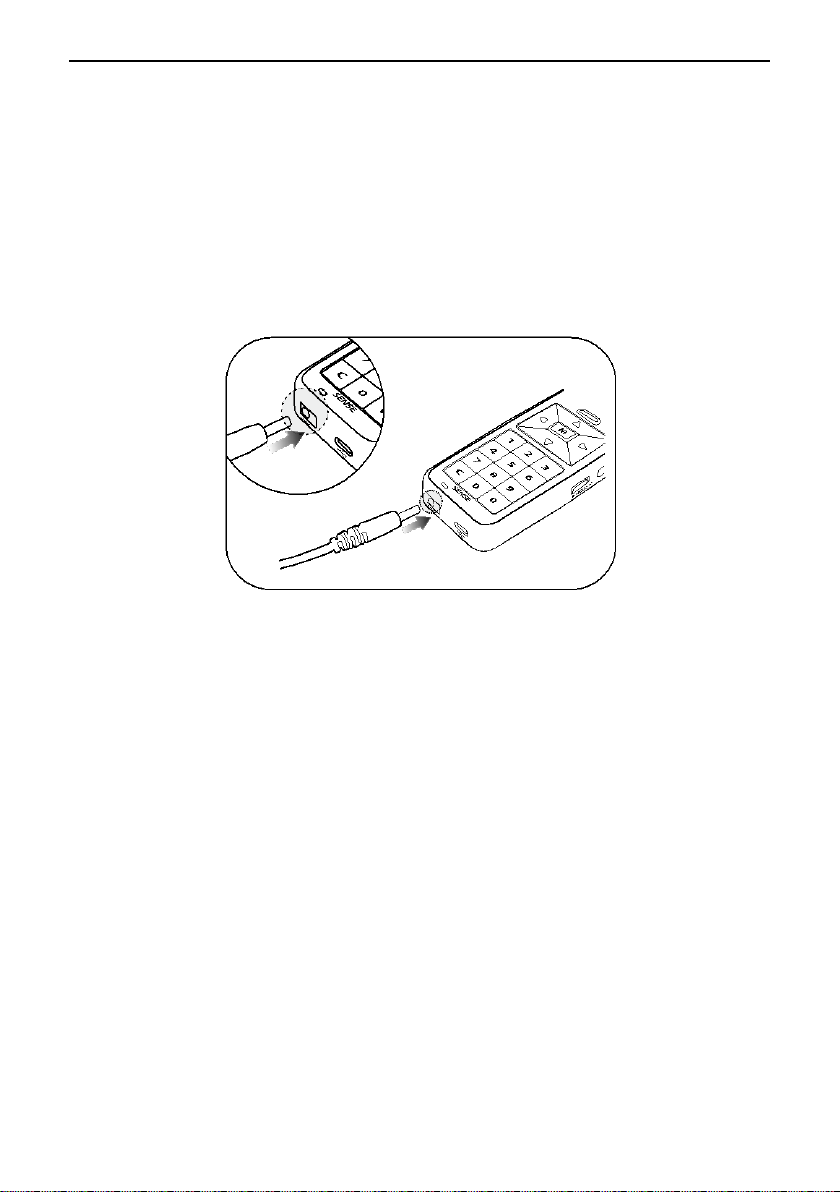
3) AC adaptor
4) Long USB Cable to connect the BookSense to a PC
5) Short USB cable to connect a USB memory stick to the
BookSense
6) Ear buds
7) SD card (including User Manual)
8) Carrying Pouch
9) Lanyard
10) Quick Start Guide (In both print and Braille)

Quick Start Guide –BookSense/BookSense XT
2
2. Physical description
(1) POWER/PLAY button
(2) RECORD button
(3) RIGHT button
(4) Key lock switch
(5) RESET button
(6) OK button
(7) USB OTG port
(8) DC jack
(9) CANCEL button
(10) NUMERIC(0~9) button
(11) DOWN button
(12) LEFT button
(13) MENU button
(14) UP button
(15) DATE & TIME button
(16) Speakers
(17) Earphone jack
(18) Strap Holder
(19) Mic. jack
(20) MODE button
(21) Volume up button
(22) Volume down button
(23) SD slot
(17)
(18)
(19)
(20)
(21)
(22)
(23)
(16)
(1)
(2)
(3)
(4)
(5)
(6)
(9)
(10)
(11)
(14)
(13)
(12)
(8)
(7)
(15)

Quick Start Guide –BookSense/BookSense XT
3
3. Inserting/removing the battery
To insert the battery, follow these steps:
1) The outer surface of the battery is smooth with the
company logo engraved on it. The inner surface is rough
with two recessed sections at the bottom.
2) Hold the BookSense in your hand so that the front face
containing the NUMERIC buttons is facing down. Insert
the bottom of the battery with the recessed sections first,
and then snap the top edge in place. The smooth surface
with the company logo engraved on it should be facing up.
3) Several seconds after inserting the battery in to the
BookSense, you will hear a sound indicating the
BookSense is booting up followed by the announcement,
“Media” to indicate you are now in Media Mode.
Note: The battery is designed to fit only in the correct
orientation. If you feel any resistance it is likely you have
the battery upside down. Make sure that it locks in place.

Quick Start Guide –BookSense/BookSense XT
4
To remove the battery, follow these steps:
1) Place the BookSense in your hand so that the underside
with the company logo is facing up.
2) Rotate the BookSense so that the Strap Holder is facing
you.
3) Find the “Battery lock catch”right above the small screw
hole.
4) Hold down the Battery lock catch.
5) You should find a small groove on each side of the battery.
With your other hand, use these grooves to grip the
battery and pull gently upwards.

Quick Start Guide –BookSense/BookSense XT
5
4. Charging the battery
Location of the DC jack: With the front face containing the
NUMERIC buttons facing you, find the round jack on the left of
the bottom edge of the BookSense.
1) Plug the supplied AC adapter into the DC jack.
2) A full charge takes about 2.5 hours.
Note: Before initial usage of the BookSense, it needs to
be charged for more than 2.5 hours while it is on. You can
use the BookSense while charging it. To check the battery
status, press and hold down the OK button for 2 seconds
while the AC adaptor is disconnected.
5. Turning the Power on/off
Location of the POWER/PLAY button: With the front face
containing the NUMERIC buttons facing you, locate the top
button on the right edge.
1) To turn on the BookSense, press and hold down the
POWER/PLAY button for 2 seconds.

Quick Start Guide –BookSense/BookSense XT
6
2) To turn off the BookSense while it is on, press and hold
down the POWER/PLAY button for 2 seconds.
6. Inserting and removing an SD card.
Location of the SD slot: While the front face containing the
NUMERIC buttons is facing you, find the long rectangular slot
near the bottom of the left edge.
To insert the SD card, follow these steps:
1) One corner of the SD card is cut at a 45 degree angle,
this cut corner should be at the top right when you insert
the card into the SD slot. The surface of the label should
be face down.
2) Gently push the SD card into the slot until it clicks into
place. Do not use excessive force. Only slight pressure is
required to insert the SD card in the slot.

Quick Start Guide –BookSense/BookSense XT
7
3) If the BookSense is turned on, you will hear a ding-dong
sound to confirm that it has been recognized.
To remove the SD card, follow these steps:
1) Gently push the SD card into the card slot until it clicks
and then release it.
2) The SD card will pop out of the slot enough for you to grip
it and pull it out completely.
3) If the BookSense is turned on, you will hear a popping
sound to confirm that the BookSense has detected the
removal of the SD card.
7. Connecting to a PC
Location of the USB OTG port: With the front face containing the
NUMERIC buttons facing you, find the rectangular port on the
right of the bottom edge of the BookSense
To transfer files from your PC to your BookSense, follow these
steps:
1) Turn on the BookSense and connect the small end of the

Quick Start Guide –BookSense/BookSense XT
8
long USB cable to the USB OTG port and the larger end to
your PC’s USB port.
2) Once you connect to your PC, click the “My computer”
icon on the PC. The BookSense should appear as a
removable drive labeled “BOOKSENSE”. If you have an
SD card inserted, another removable disk should appear
as well.
Note: You can see the “BOOKSENSE” drive only for the
BookSense XT.
3) Copy the files from the PC and paste into the specified
folders under the “BOOKSENSE”or the “removable disk”
(only present if an SD card is inserted). For example,
music files should be copied to the MEDIA folder, and NLS
book contents should be copied to the NLS folder which is
a subfolder of the DAISY folder. Please refer to the user
manual for more detailed information.)
Note: While the BookSense is connected, it will not be
operational. If the BookSense is turned off, the PC will not
recognize it. If an SD card is not inserted, you will not be

Quick Start Guide –BookSense/BookSense XT
9
able to access the drive labeled “removable disk”.
8. Basic concept of User Interface
The BookSense has been designed with a consistent and
intuitive interface for the convenience and ease of use of our
users. In this section, we will introduce the basic concepts of the
BookSense interface.
The BookSense consists of 2 main areas: the file browser and
playback area. in all modes except Radio. The file and folder
structure of the BookSense is arranged in a list view. By pressing
the UP and DOWN arrows, you can navigate the file or folder list.
And by pressing the LEFT and RIGHT arrows, you can move
back or forward a level in the directory structure.
You can use numbers 1 through 6 to navigate files or folders very
quickly. Press number 8 to move to a designated indexed file.
When you press the POWER/PLAY button on a file or folder, the
BookSense begins playing the content. Press the CANCEL
button to exit playback of the current content and you are
returned to the file list.
In the playback area, the unit of movement can be changed by
pressing the UP and DOWN arrows either in playing or pause
status. The LEFT and RIGHT arrows are used to move backward
and forward within the currently playing content based on the
specified unit to move by.

Quick Start Guide –BookSense/BookSense XT
10
The numbers 1 through 3 are used in conjunction with marks and
numbers 4 through 6 are used to control the playback speed in
all modes except Radio.
Each program or mode of the BookSense has its own menu
system. To open the menu at any point or from any program,
press the MENU button. Each menu contains several menu items
which you can navigate using the UP and DOWN arrows. If the
menu is a pull down, it means there are sub menu items, and the
BookSense announces “pull down” followed by the menu name.
By pressing the LEFT and RIGHT arrows, you can move back or
forward a level in the menu structure, just like navigating in the
file list. Once you are placed on the menu that you want to
execute, press the MENU or OK button.
Otherwise, press the CANCEL button to return to the place
where you were before entering the menu.
If the menu item is a dialog, it will open a dialog box with at least
1 setting to adjust. The settings to adjust may be combo boxes or
edit boxes.
A combo box can be made up of several items. You can navigate
among items in a dialog by pressing the UP and DOWN arrows.
To change the value of a combo box, you need to press the LEFT
and RIGHT arrows. An edit box allows you to use the numeric
keypad to enter a value. Press the CANCEL button to erase the

Quick Start Guide –BookSense/BookSense XT
11
last number. If the edit box is empty, pressing the CANCEL
button closes the dialog box. Press the OK or MENU button to
save settings that you have changed.
You can create a recording regardless if you are in the Media,
DAISY, or Document Reader. Once the recording is complete,
you can listen to the recording you just made by pressing the OK
or POWER/PLAY button. If you are in Radio mode, the channel
to which you are currently listening will be recorded.
You can query the date and time easily from anywhere using the
DATE &TIME button. This function works even when the
BookSense is turned off, provided the keypad is not locked.
A long press of many of the buttons on the keypad(2 seconds or
more) results in these keys performing additional functions.
For further information, please refer to the appendix of this quick
start guide or to the user manual.
9. Switching among the BookSense programs
Location of the MODE button: With the front face containing the
NUMERIC buttons facing you, find the top button on the left edge.
The BookSense contains 4 different programs.
1) Media 2) DAISY 3) Document Reader 4) Radio
Note: Radio is only available on the BookSense XT.

Quick Start Guide –BookSense/BookSense XT
12
To cycle through the various BookSense programs, press the
MODE button while the BookSense is turned on. By pressing the
MODE button, you can cycle through Media Player, DAISY
Player, and Document Reader in that order. The BookSense XT
also contains the Radio in the rotation order after the Document
Reader.
10. Adjusting Volume
Location of the Volume buttons: With the front face containing the
NUMERIC buttons facing you, locate the second and third
buttons from the top on the left edge of the BookSense.
1) Increase/decrease volume: Volume up/Volume down
buttons.
There are separate volume settings for headphones and the
internal speaker. And both the voice synthesizer and audio
playback volume can be adjusted. For more detailed information,
please refer to the user manual.
When you adjust the volume during content playback, volume is
adjusted without any notification. When it is adjusted to the
default volume, the BookSense notifies the user with the beep
sound. However, while playback is paused or the unit is idle,
the BookSense announces the volume level when it is adjusted.

Quick Start Guide –BookSense/BookSense XT
13
11. Play/Pause
Location of the POWER/PLAY button: With the front face
containing the NUMERIC buttons facing you, find the top button
on the right edge.
Once you have located the file or folder you wish to play, press
the POWER/PLAY button or the OK button to load it and start
playing the contents. Press the POWER/PLAY button to pause
playback and press the POWER/PLAY button again to restart
playing the contents. If you wish to stop playing the current book
or file, press the CANCEL button to exit and return to the file list.
12. Recording
Location of the RECORD button: With the front face containing
the NUMERIC buttons facing you, find the second button from
the top on the right edge of the BookSense.
Below are listed the various ways to create a recording.
1) Start recording: Press and hold the RECORD button for
more than 2 seconds.
2) Pause recording: Press the RECORD button quickly.
3) Re-start recording: Press the RECORD button once more.
4) Stop recording: Press the POWER/PLAY button or OK
button then choose whether or not you want to listen to
the recorded file using the LEFT or RIGHT Arrow.

Quick Start Guide –BookSense/BookSense XT
14
Note: To pause the recording, press the RECORD button
while recording. Press the RECORD button again and
recording resumes.
Note: In radio mode, BookSense records the Radio station
currently being played. In order to create voice or line-in
recordings, record when you are in Media, DAISY or
Document reader.
13. Checking Date & Time
Location of the DATE & TIME button: With the front face
containing the NUMERIC buttons facing you, locate the narrow
horizontal button just above the arrow keys.
To check the date and time quickly, even if the BookSense is
turned off, press the Date/Time button once. Both the date and
time will be spoken.
14. Switching storage device
Press and hold NUMERIC 0 for more than 2 seconds. This
cycles through the available storage devices; The BookSense
(standard) can accommodate an SD card and a USB device. The
BookSense XT contains the additional option of Internal Flash
disk, or rather, the 4GB internal memory.
15. Using help mode
Location of the MENU button: With the front face containing the
NUMERIC buttons facing you, find the rectangular button located

Quick Start Guide –BookSense/BookSense XT
15
in the center of the arrow keys.
Before you start to learn about the main features of the
BookSense, it is useful to know how to get help as you are
learning. No matter what program you are in, The BookSense
provides a built in help mode. As the function of the buttons
varies depending on which mode you are in, so this is a very
useful feature.
To turn on help mode, press and hold down the MENU button for
more than 2 seconds. The BookSense says, "help mode
enabled". Pressing any button results in an announcement of all
the functions of that button pertaining to the mode you are
currently in.
To turn off help mode, press and hold down the MENU button for
2 seconds. The BookSense says, "help mode disabled" and it is
returned to normal operation.
16. Key lock switch
Location of the Key lock switch: With the front face containing the
NUMERIC buttons facing you, find the third button from the top
on the right edge of the BookSense.
At times you may wish to lock the controls of the BookSense to
avoid accidentally pressing buttons. This can be done by using
the Key lock switch.
To lock the BookSense, slide the Key lock switch toward the
bottom of the BookSense. If the BookSense is on, it will say

Quick Start Guide –BookSense/BookSense XT
16
"Locked". If it is off, it will remain silent.
To unlock the BookSense, slide the Key lock switch towards the
top of the BookSense. If the BookSense is on, it will say
"Unlocked". If it is off, it will remain silent.
Note: Locking the BookSense will prevent any button from
performing its function, including the POWER/PLAY button and
the DATE & TIME button. The DATE & TIME button is normally
able to be used even when the BookSense is turned off, while
the Key lock switch is located at the unlocked position.

Quick Start Guide –BookSense/BookSense XT
17
Appendix: BookSense Commands Summary
1. Basic Functions.
Power on/off: Hold the POWER/PLAY button for 2 seconds.
Switch between BookSense programs: Press the MODE button.
Move among items in a menu or list: Press the UP or DOWN
arrow.
Move forward a level in a menu or directory: Press the RIGHT
arrow.
Move back a level in a menu or directory: Press the LEFT arrow.
Play selected item: Press the POWER/PLAY or OK button.
Pause/Resume playback: Press the POWER/PLAY button.
Exit playback: Press the CANCEL button.
Record a memo: Hold the RECORD button for 2 seconds.
Pause/Resume Recording: Press the RECORD button quickly.
Stop recording: Press the POWER/PLAY button.
Check Date and Time: Press the DATE & TIME button just under
speaker.
Check battery status: Hold the OK button for 2 seconds.
Switch storage device: Hold the number 0 for 2 seconds.
Set sleep timer: Hold the number 4 for 2 seconds.
Switch between male/female voices: Hold the number 5 for 2
seconds.
Turn Bluetooth on/off: Hold the number 6 for 2 seconds.
Enable/Disable help mode: Hold the MENU button for 2 seconds.
Lock all buttons: Slide Key lock switch to down position.
Unlock buttons: Slide Key lock switch to up position.
Enter program/menu: Press the MENU button.

Quick Start Guide –BookSense/BookSense XT
18
2. Navigating Menus and Dialogs.
Move among menu items: Press the UP or DOWN arrow.
Open submenu or dialog: Press the RIGHT arrow or OK button.
Change the setting in a combo box: Press the LEFT or RIGHT
arrow.
Change the numbered value in an edit box: Type the value on the
number pad.
Save options: Press the OK button.
Exit without saving: Press the CANCEL button.
3. Navigating folder and file lists.
Move among list items: Press the UP or DOWN arrow.
Move up 5 items in a list: Press the number 1.
Move down 5 items in a list: Press the number 4.
Move up 10 items in a list: Press the number 2.
Move down 10 items in a list: Press the number 5.
Move to the top of the list: Press the number 3.
Move to the bottom of the list: Press the number 6.
Move to specifically numbered file: Press the number 8.
Open subfolder: Press the RIGHT arrow.
Go to parent folder: Press the LEFT arrow.
Play selected item: Press the POWER/PLAY or OK button.
Return to file/folder list: Press the CANCEL button.
Select current item: Press the number 9.
Select all items in list: Press the number 7.
Delete selected: Hold the number 3 for 2 seconds.
Announce size of file/folder: Press the number 0.
4. During Media playback.
Choose element to move by: Press the UP or DOWN arrow.
Move by chosen element: Press the LEFT or RIGHT arrow.
Other manuals for BookSense
1
This manual suits for next models
1
Table of contents
Other HIMS PDA manuals