HIWATT DR 103 User manual
AUTHENTIC BRITISH SOUND
OWNERS MANUAL
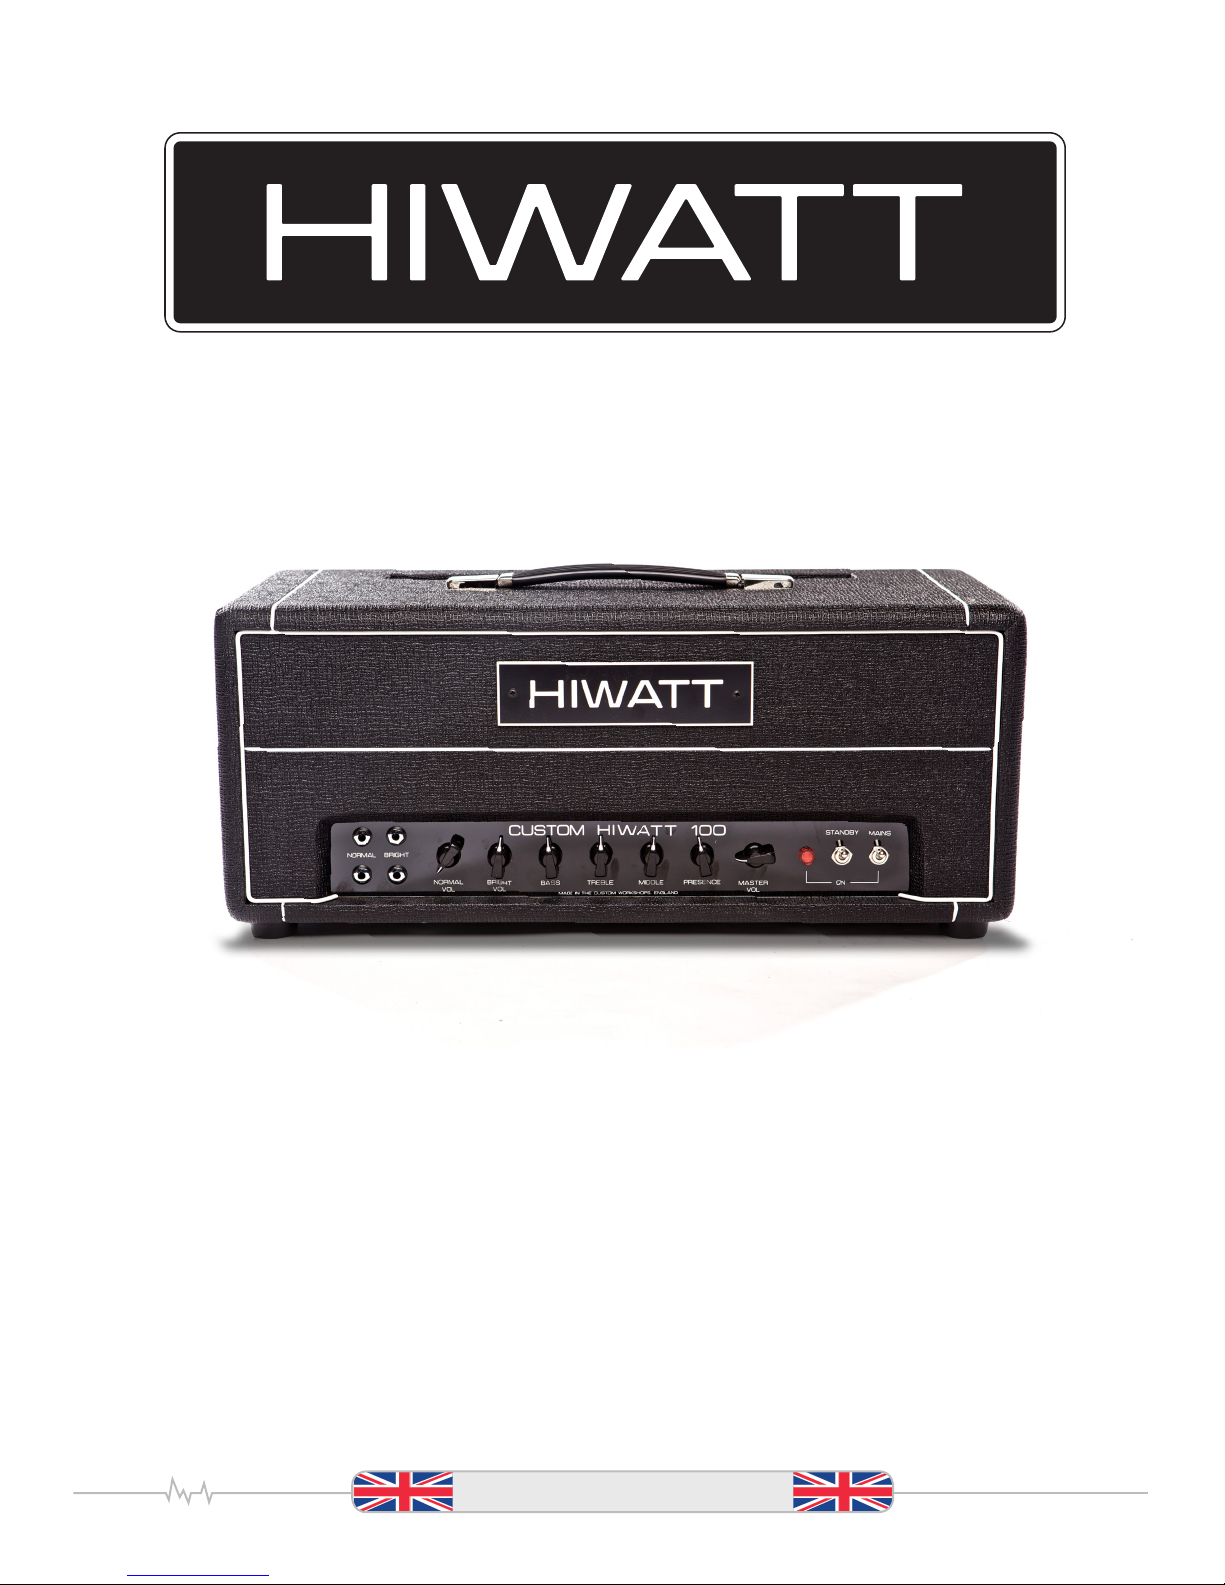
HIWATT
Custom DR 103 Head
Hiwatt.co.uk
WARNING – if used improperly or without proper safeguards this equipment can cause
hearing damage or loss of hearing.
IMPORTANT
Servicing is required when the apparatus has been damaged in any way, such as when the power supply
cord or plug is damaged, liquid has been spilled or objects have fallen into the apparatus, the apparatus has been
exposed to rain or moisture, does not operate normally or has been dropped.
• Always use the supplied mains lead provided
with your amplifier. If a replacement is
needed, please contact your Hiwatt Dealer.
• Never attempt to by-pass fuses or fit ones of
incorrect value.
• Do not attempt to remove the amplifier
chassis, there are no user serviceable parts.
• All servicing should be carried out by a
professionally qualified service technician.
• Never use an amplifier in wet or damp
conditions.
• Always unplug this amplifier during lightning
storms or when unused for prolonged
periods of time.
• Protect the power cord from being walked
on or pinched.
• Do not switch the amplifier on without the
loudspeaker connected. It is important that
the amplifier and speaker are matched at the
correct impedance. Failure to do so can result
in damage to the amplifier or speaker.
• Please ensure that the voltage selector/
indicator matches the supply voltage of the
country in which the amplifier is being used.
• Always ensure free movement of air around
the amplifier to prevent overheating.
• Never modify or make changes to equipment
or use in an unapproved manner
Follow all instructions and warnings
Please keep instructions in a safe place
Register product online: Hiwatt.co.uk
Please read these instructions carefully before
switching your amplifier on.
The exclamation point, within an equilateral triangle, is intended to alert the user to
the presence of important operating and maintenance (servicing) instructions in the
literature accompanying the appliance.
The lightning flash with arrowhead symbol, with an equilateral triangle, is intended to
alert the user to the presence of uninsulated ‘dangerous voltage’ within the product’s
enclosure that may be of sufficient magnitude to constitute a risk to persons.
IMPORTANT SAFETY INSTRUCTIONS
2
Hiwatt.co.uk

HIWATT DR 103 MANUAL
Congratulations - you have purchased one of the most iconic guitar amplifiers ever Designed - the Hiwatt DR 103 Custom
100 Head. This amplifier was hand built in our Custom Shops in England using only top quality parts and original vintage
Hiwatt specification transformers, hand wired in England to our traditional standards.
The DR 103 is the original Hiwatt Circuit that both launched Hiwatt and made Hiwatt the preferred valve amplifier of many
guitarists from the late 1960’s to today. Legendary headroom, clean and clear sounds, uniquely rich in the 3rd and 5th
harmonics, the Hiwatt DR 103 has carved out a place in tonal history. Rugged enough for use on the world’s biggest stages
and immortalized on some of the world’s greatest albums - Custom Hiwatt is truly professional quality Studio/Stage Gear.
Please read this manual in its entirety before using your amplifier to ensure you get the most out of your Hiwatt amplifier
in the safest possible manner. The DR 103 is a professional guitar amplifier and is built to last a lifetime of playing both on and
off the stage if used responsibly and serviced properly.
Please register with us online at Hiwatt.co.uk and keep this manual in a safe place for future reference.
Type: All Purpose Guitar/Bass Amplifier Head
Cabinet: 18mm Baltic Birch Ply head box
Valve Complement:
• 4 x EL34 in the power amp
• 4 x ECC83 / 3 x ECC83 – 1 X ECC81 in the preamp
Voltage: Switchable Voltage (100v, 115v, 230v, 240v)
Impedance: Switchable Impedance (4 Ω, 8 Ω, 16 Ω)
Speaker Outputs:
• 2 x Parallel Speaker output sockets on ¼” Jacks
Power output: 100 Watts
Dimensions: Height 280mm,
Width 631mm,
Depth 280mm
Weight: 23.15kg
SPECIFICATIONS:
3
Hiwatt.co.uk
Back Panel
Front
Made in England by Hiwatt Electronics Ltd.

Front Panel
This amplifier has two channels, Normal Channel and Bright Channel, each with its own Volume control and two inputs. The
top input on each channel is brighter and has more level than the bottom input. The bottom input is typically used for linking
channels (see below) or if you prefer a cleaner and warmer sound. The other controls include Bass, Treble, Middle, Presence
and Master Volume. These controls are shared by both channels. Also included on the front panel are the Standby Switch
and Mains Switch and a Mains Lamp. Let’s go through the functions.
1. Normal Channel: The Normal channel has less high frequencies and more bass when compared to the Bright channel. It is
typically used with brighter guitars including those with single coil pickups. It is also a great pedal platform channel due to
its “flatter” response and fuller sound. If you are using a bright overdrive pedal with this amp, you might consider using this
channel first. Plug into the top input of the Normal channel. Use the Normal Vol to control the sound level.
2. Bright Channel: The Bright channel is more aggressive than the Normal channel. It has more highs, more upper mids and
less bass. This is great for cutting through on stage when playing with a full band. This channel loves humbucking pickups.
Plug into the top input of the Bright channel and use the Bright Vol to control the sound level.
Blending Channels: Many players blend
the channels. This is done by plugging your
guitar into the top input jack of the Normal
channel and then a short cable from the
bottom input jack of the Normal channel
to the top input of the Bright Channel. Now
you can use both Volume controls and blend
the sound from both channels. For example,
set the Bright channel volume to the sound
level you want and then bring up the Normal
volume to fill in the bottom end.
USER GUIDE
This Hiwatt amplifier is a relatively simple to operate. The front and back panels of
this amplifier are laid out in a logical manner so that the controls, switches and jack
connectors are easy to use and understand.
4
NOTE ON THE TWO CHANNELS:
Your Hiwatt amp is one of the best amps for using pedals because of its high headroom and harmonically rich sound.
Since the two channels are voiced differently you have two tonal options to match the sound of your pedals, especially
overdrive and distortion pedals. Try your pedals in both channels to see which one sounds best for your particular pedals.
Then use the tone controls to further shape the sound.
Hiwatt.co.uk
BRIGHTNORMAL
1 2 3 4 5 6 7 8 9 10 11 12
Illust. 1

3. Normal Volume: (Applies to Normal channel.)
Start with knob tuned fully anticlockwise. Increase volume by turning clockwise
4. Bright Volume: (Applies to Brght channel.)
Start with knob tuned fully anticlockwise. Increase volume by turning clockwise
5. Bass: As you would expect, this control is used to set the amount of bass.
Turn the control clockwise for more bass and anticlockwise for less bass. A
Hiwatt amplifier is capable of a very full sound and will remain tight and full
sounding even at high sound levels.
6. Treble: Guess what? Same goes for the Treble control. Turn up (clockwise)
for more treble and down (anticlockwise) for less.
7. Middle: Get the idea yet? Want more Mids? Set this control higher.
8. Presence: The Presence control is used in conjunction with the Treble
control to set the overall amount of high frequencies. Because the Presence
control is in a different part of the circuit (Negative Feedback) it works in
a different manner and control some of the upper mids. Blend these two
controls to set the high-end tone you are looking for.
9. MASTER VOLUME:Once you’ve set the volume level and tone control settings to your liking, use the Master Volume
to control the overall level depending on where you are playing and how loud you want to amp. When the Master is
fully anticlockwise there will be no sound. (You should always have the master volume fully anticlockwise when turning the
amplifier on or off)
Approximate master volume setting: 10:00 for normal play/setup. 2:00 to full-on for onstage play.
Note: This Hiwat amplifier is not a high gain amp and therefore you will not get as much preamp distortion as you
will get with a higher gain amp. Do not expect to get much distortion by setting the Normal or Bright channel Volume
controls high and the Master Volume low. The famed sound of Hiwatt is achieved by setting the Volume controls high
and blasting your neighbors!
Warning! This amplifier can be loud! We do not recommend using the amp at high sound levels especially for
long periods of time. The amp can damage your hearing as well as that of your audience. Hearing protection is
recommended for you and your audience. It is not to be used as a “weapon of aural destruction”!
ARTIST SETTINGS:
Available @ Hiwatt.co.uk a quick
set guide to getting some of the
most famous tone ever created.
Should you be inclined, send
us a video of you playing your
Hiwatt to Hiwatt.co.uk/videos.
It may wind up on our website!
Please include a pic of the way
the amp has been set up!
5
BEFORE TURNING YOUR CUSTOM HIWATT AMPLIFIER ON.
• Please read the Manual in it’s entirety first
• Check that the voltage selector (Back Panel #2) matches the voltage of the country you are playing in.
• Check that the fuses are correct for the voltage selected. see page 6 - (Back Panel #3) -‘fuse plate’ for further info.
• Check that the Speaker Cabinet you are connect to is matching the impedance set on the impedance selector of the
Amplifier (Back Panel #5)
• Always have the master volume turned fully anticlockwise when turning the Amplifier On/Off. Adjust slowly
clockwise after tubes warm up.
10 Mains Lamp 11. Standby Switch 12. Mains Switch:
TO TURN THE AMPLIFIER ON, leave the Standby switch in the up position and switch the Mains switch to the down
position. The amp is now on in the “Standby” mode. The Mains lamp with light up to let you know the amp is on. Wait
a minimum of 60 seconds to let the valves warm up to operating condition, then switch the Standby to the down
position. This will ensure longer valve life.
Hiwatt.co.uk
Back Panel
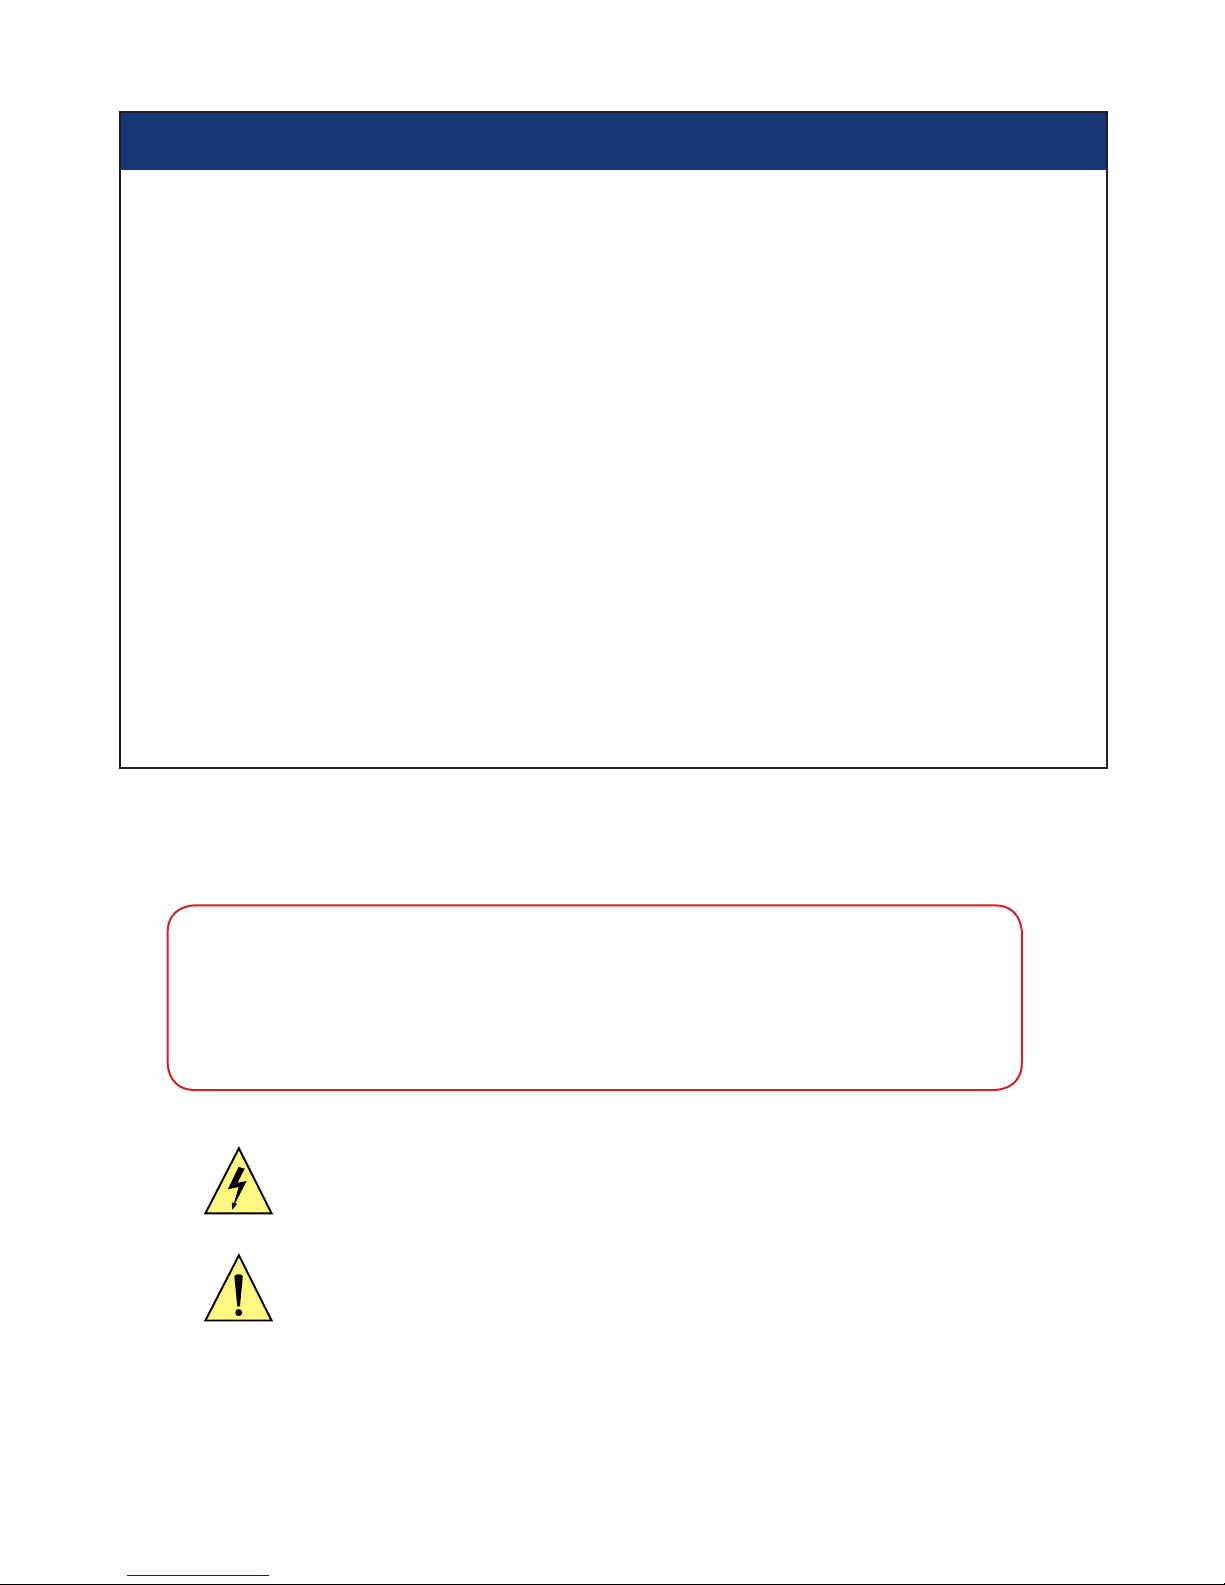
From left to right:
IEC Mains Socket,Mains Voltage Selector,Fuse Plate,Serial Plate,Impedance Selector and Speaker Jacks.
1. IEC Mains Socket: as with all equipment that uses wall voltage to operate, plug your mains lead from this IEC socket to the
mains socket in order to power up the amp.
2. Voltage Selector: As a highly professional amplifier that is commonly used by touring bands who travel, this Custom
Hiwatt includes a voltage selector so it can be used in just about every country around the world. This selector needs to
be set to the proper Mains voltage in your country. SETTING THIS SWITCH INCORRECTLY CAN CAUSE DAMAGE TO THE
AMPLIFIER AND WILL VOID THE WARRANTY!
Note: when changing the voltage on the voltage selector the corresponding fuse must also be changed. See Back Panel
#3- Fuse Plate for more info.
3. Fuse Plate: This amplifier includes two fuses to protect the amplifier. One or both fuses will “blow” if there is something
wrong inside or outside the amplifier. If a fuse blows, please take the amplifier to a qualified amplifier technician
for service. Fuses with proper ratings should always be used. Do not use fuses of high ratings or bypass the fuse by
putting something in the fuse holder that will bypass the fuse. Doing so will potentially cause damage to the amp, can be
dangerous to operate the amplifier and VOID THE WARRANTY! Warning - make sure your mains lead is unplugged from
the wall receptacle or IEC mains socket (back panel #1) while working with fuses.
• Please check the voltage selector is correctly set and adjust the fuses if necessary (see chart below)
• When selecting 230 or 240 volts on Voltage Selector (back panel #2) make sure the fuse in the MAINS Fuse
holder is a ‘time delay (slow-blow) MAINS Fuse rated at 3A or 3.15 A (T 3.15 ) - for 100w Custom
• When selecting 100V or 115V on Voltage Selector (back panel #2) make sure the fuse in the MAINS Fuse
holder is a ‘time delay (slow-blow) Mains Fuse rated at 6Aor 6.3A (T 6.3) - for 100w Custom
• The HT fuse in HT fuse holder is always a FAST BLOW 3A or 3.15A (F 3.15) - for 100w Custom
4. Serial Plate: this is where you will find the model and serial numbers of your amp as well as some technical info.
Please register this amplifier hiwatt.co.uk .
5. Impedance Selector: The impedance selector switch allows you to set the amp to 4, 8 or 16 ohms. Set this switch correctly
depending on your speaker cabinet(s) impedance. Setting this switch incorrectly can cause damage to the amp and VOID
YOUR WARRANTY! There is more information on how to set impedance in the following section.
6. Speaker Jacks: There are two parallel speaker jacks for convenience in setting up your amplifier with your speaker
cabinets. There is more info on how to hook up your speaker cabinets on the next page.
Hiwatt Electronics Limited recommends the use of Ceramic ‘Anti-Surge’ fuses for the MAINS Fuse if available
6
Hiwatt.co.uk
Custom Shop Model
20w Custom
LRD MKII
LRJ MKII
LRP MKII
Studio Stage Custom
50w Custom
100w Custom
200w Custom
400w Custom
100V/115V FUSE RATING GUIDE
Country Supply Voltage
100v / 115v
100v / 115v
100v / 115v
100v / 115v
100v / 115v
100v / 115v
100v / 115v
100v / 115v
100v / 115v
Mains Fuse Rating (amps)
6A or 6.3A time-delay (T)
6A or 6.3A time-delay (T)
6A or 6.3A time-delay (T)
6A or 6.3A time-delay (T)
6A or 6.3A time-delay (T)
6A or 6.3A time-delay (T)
6A or 6.3A time-delay (T)
10A time-delay (T)
10A time-delay (T)
HT Fuse Rating (amps)
1A fast-blow (F)
1A fast-blow (F)
1A fast-blow (F)
1A fast-blow (F)
1A fast-blow (F)
1A fast-blow (F)
3A or 3.15A fast-blow (F)
3A or 3.15A fast-blow (F)
3A or 3.15A fast-blow (F)
Custom Shop Model
20w Custom
LRD MKII
LRJ MKII
LRP MKII
Studio Stage Custom
50w Custom
100w Custom
200w Custom
400w Custom
230V/240V FUSE RATING GUIDE
Country Supply Voltage
230v / 240v
230v / 240v
230v / 240v
230v / 240v
230v / 240v
230v / 240v
230v / 240v
230v / 240v
230v / 240v
Mains Fuse Rating (amps)
3A or 3.15A time-delay (T)
3A or 3.15A time-delay (T)
3A or 3.15A time-delay (T)
3A or 3.15A time-delay (T)
3A or 3.15A time-delay (T)
3A or 3.15A time-delay (T)
3A or 3.15A time-delay (T)
5A time-delay (T)
5A time-delay (T)
HT Fuse Rating (amps)
1A fast-blow (F)
1A fast-blow (F)
1A fast-blow (F)
1A fast-blow (F)
1A fast-blow (F)
1A fast-blow (F)
3A or 3.15A fast-blow (F)
3A or 3.15A fast-blow (F)
3A or 3.15A fast-blow (F)
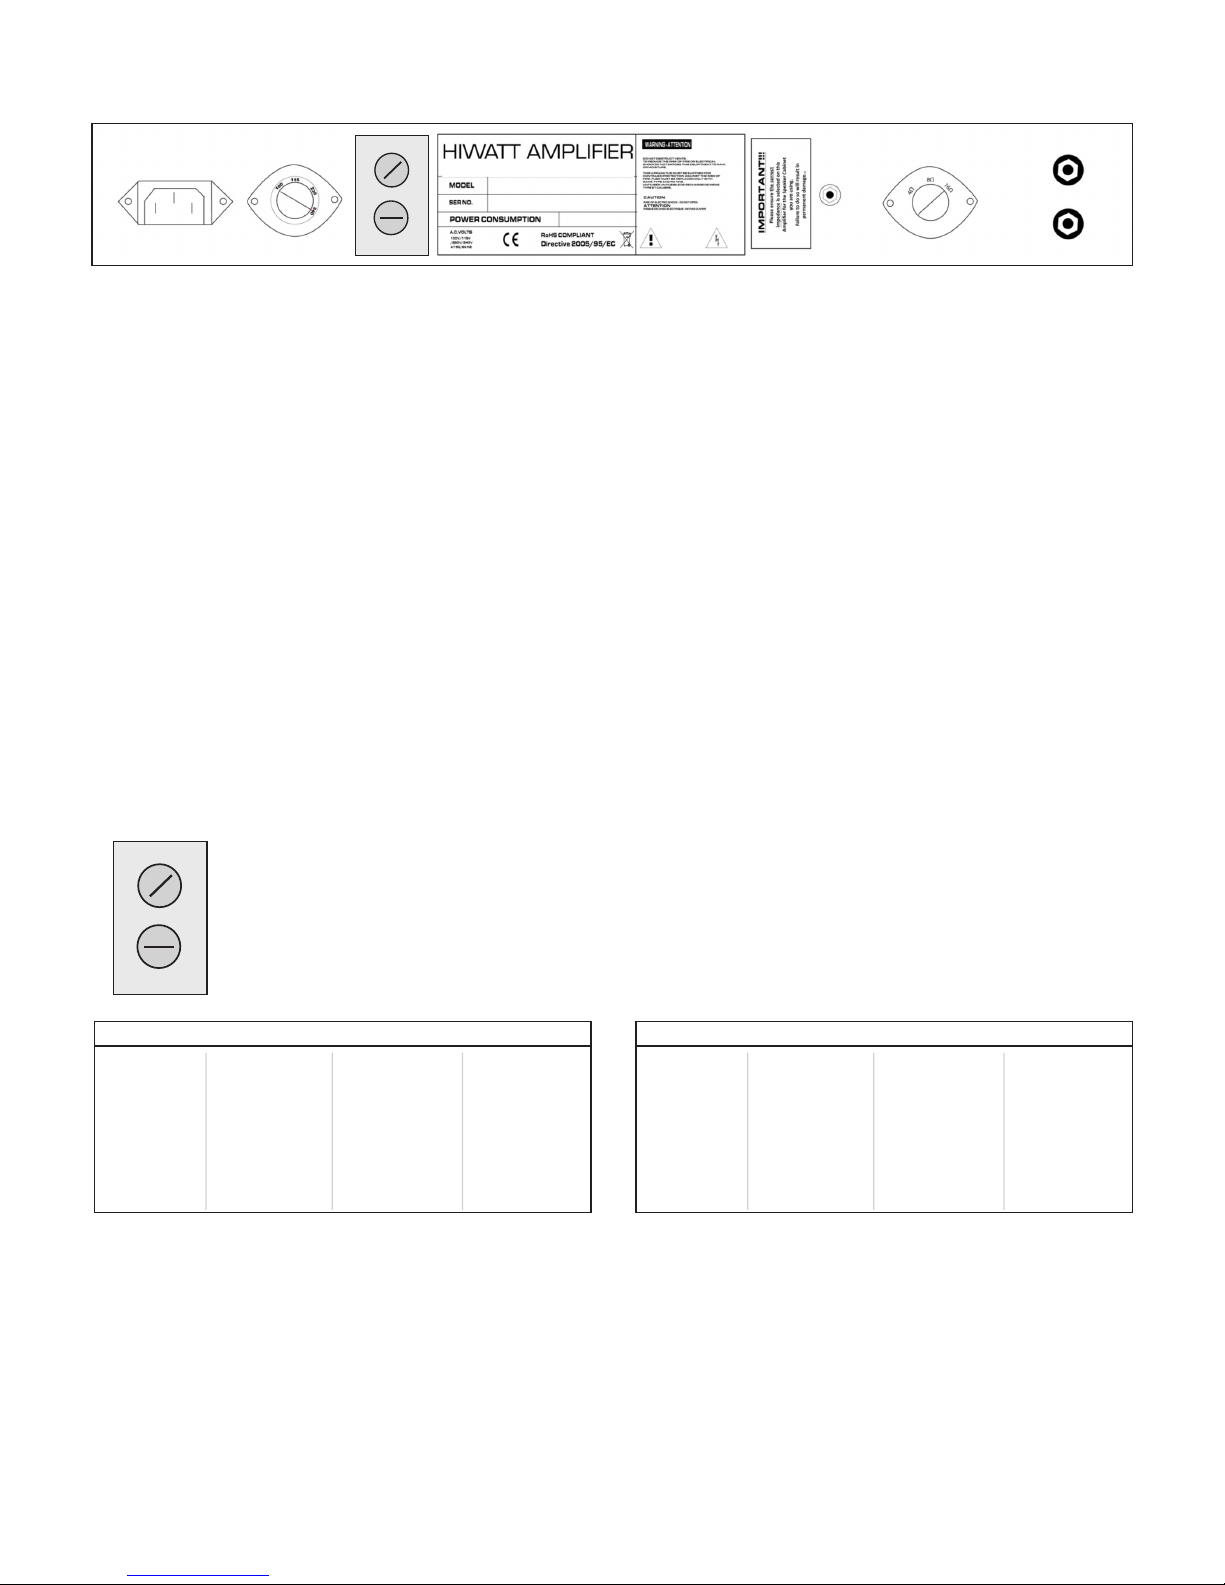
HT 3A
MAINS 3A/230V
Fuse Plate for DR 103 amplifier
1 2 3 4 5 6
Illust. 2
Made in England by Hiwatt Electronics Ltd.
MAINS 3A/230V
HT 3A
IMPORTANT: You should never turn your amplifier on without having it connected to a speaker load that matches the
impedance selected on the rear of the amplifier. If you do, you risk damaging the output transformer and thus voiding your
warranty.
NOTE: It is recommended that all audio cables, except for the speaker lead, used to connect to the amplifier are of a high-
quality screened type. These should not exceed 10 meters in length.
*Always use a non-screened speaker lead when connecting a speaker cabinet to this amplifier.
Impedance Information:
Before you decide to connect your amplifier to your speaker cabinet, you will want to know about impedance first!
Impedance is the electronic load that the speaker puts on the power amplifier and is measured in Ohms. (Ω)
RULE OF IMPEDANCE:
• When two speakers are wired,“parallel” the total impedance is cut in half and when two speakers are wired in“Series”the
total impedance is the sum of the speakers’ individual impedance.
For example: Two 8Ω speakers wired in parallel become 4Ω. Two 8Ω speakers wired in series are 16Ω.
• The actual impedance of your cabinets could be different than the individual speaker’s impedance.
• Make sure that the correct impedance is selected on the back of the amplifier to match the cabinet’s impedance (speaker
configuration) you are using. Be sure to check the manufacturer’s recommended impedance for the cabinets you are using
to avoid any damage to your amplifier and voiding your warranty.
• If you use more than one cabinet, the cabinets must all be of the same impedance.
For example: If you use two cabinets, then if one cabinet is 16 ohms (Ω), the other cabinet must also be 16 ohms (Ω).
If the cabinets are not of the same impedance then you will damage the output transformer and void the warranty.
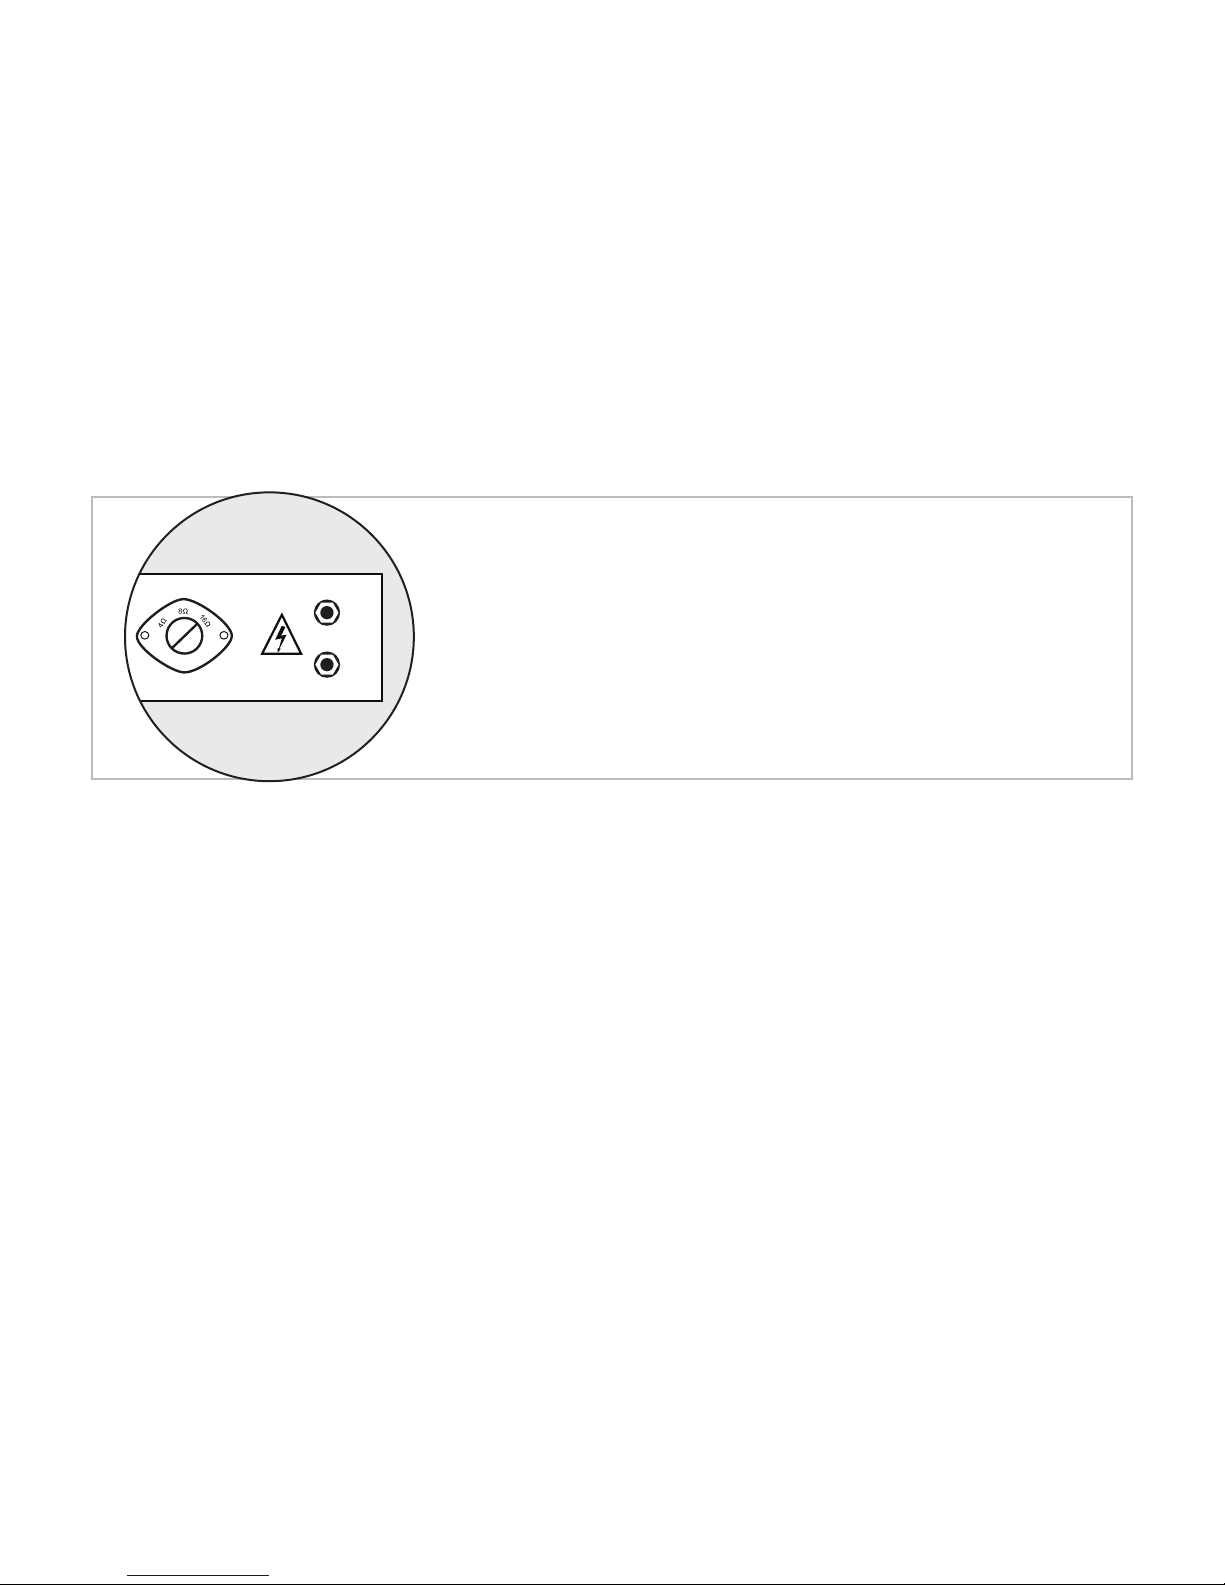
5. Impedance Selector: The impedance selector switch allows you to set the
amp to 4, 8 or 16 ohms. Set this switch correctly depending on your speaker
cabinet(s) impedance. Setting this switch incorrectly can cause damage to
the amp and VOID YOUR WARRANTY! There is more information on how to set
impedance in the following section.
6. Speaker Jacks: There are two parallel speaker jacks for convenience in setting
up your amplifier with your speaker cabinets.
7
OUTPUT
56
Illust. 2
CONNECTING YOUR AMPLIFIER TO A SPEAKER CABINET
Hiwatt.co.uk

Connecting Your Amplifier to
Two Cabinets in Parallel
(if speaker cabinet has parallel extension output)
IMPORTANT : always match the impedance of your amplifier with the
impedance of the speaker cabinet(s).
• Both connections are made with a 1/4” unshielded speaker cable
• Connect one of the amplifier outputs (back of amp) to the correct
input on the speaker cabinet (rear terminal plate)
• Many speaker cabinets come with a convenient parallel extension
output for connecting additional cabinets in parallel. The second
cabinet is connected by running an additional speaker cable from
the parallel output of the first cabinet to the input of the second
cabinet.
Connecting Your Amplifier to
Two Cabinets in Parallel
(if speaker cabinet does not have parallel extension output)
IMPORTANT : always match the impedance of your amplifier with the
impedance of the speaker cabinet(s).
• Both connections are made with a 1/4” unshielded speaker cable
• Connect one of the amplifier outputs (back of amp) to the correct
input on the speaker cabinet (rear terminal plate)
• Connect the second of the amplifier outputs (back of amp) to the
correct input on the second speaker cabinet (rear terminal plate)
Connecting Your Amplifier to a Single Cabinet
IMPORTANT : always match the impedance of your amplifier with the
impedance of the speaker cabinet(s).
• The connections are made with a 1/4” unshielded speaker cable
• Connect one of the amplifier outputs (back of amp) to the correct
input on the speaker cabinet (rear terminal plate)
AMPLIFIER
CABINET 1
CABINET 2
AMPLIFIER
CABINET 1
CABINET 2
AMPLIFIER
OUTPUT
OUTPUT
INPUT
OUTPUT
OUTPUT
INPUT
OUTPUT
INPUT
OUTPUT
INPUT
INPUT
CABINET
2 Cabinets SINGLE 1/4” Connection2 Cabinets in PARALLEL
Single Cabinet
AMPLIFIER
CABINET 1
CABINET 2
AMPLIFIER
CABINET 1
CABINET 2
AMPLIFIER
OUTPUT
OUTPUT
INPUT
OUTPUT
OUTPUT
INPUT
OUTPUT
INPUT
OUTPUT
INPUT
INPUT
CABINET
2 Cabinets SINGLE 1/4” Connection2 Cabinets in PARALLEL
Single Cabinet
AMPLIFIER
CABINET 1
CABINET 2
AMPLIFIER
CABINET 1
CABINET 2
AMPLIFIER
OUTPUT
OUTPUT
INPUT
OUTPUT
OUTPUT
INPUT
OUTPUT
INPUT
OUTPUT
INPUT
INPUT
CABINET
2 Cabinets SINGLE 1/4” Connection2 Cabinets in PARALLEL
Single Cabinet
8
Hiwatt.co.uk
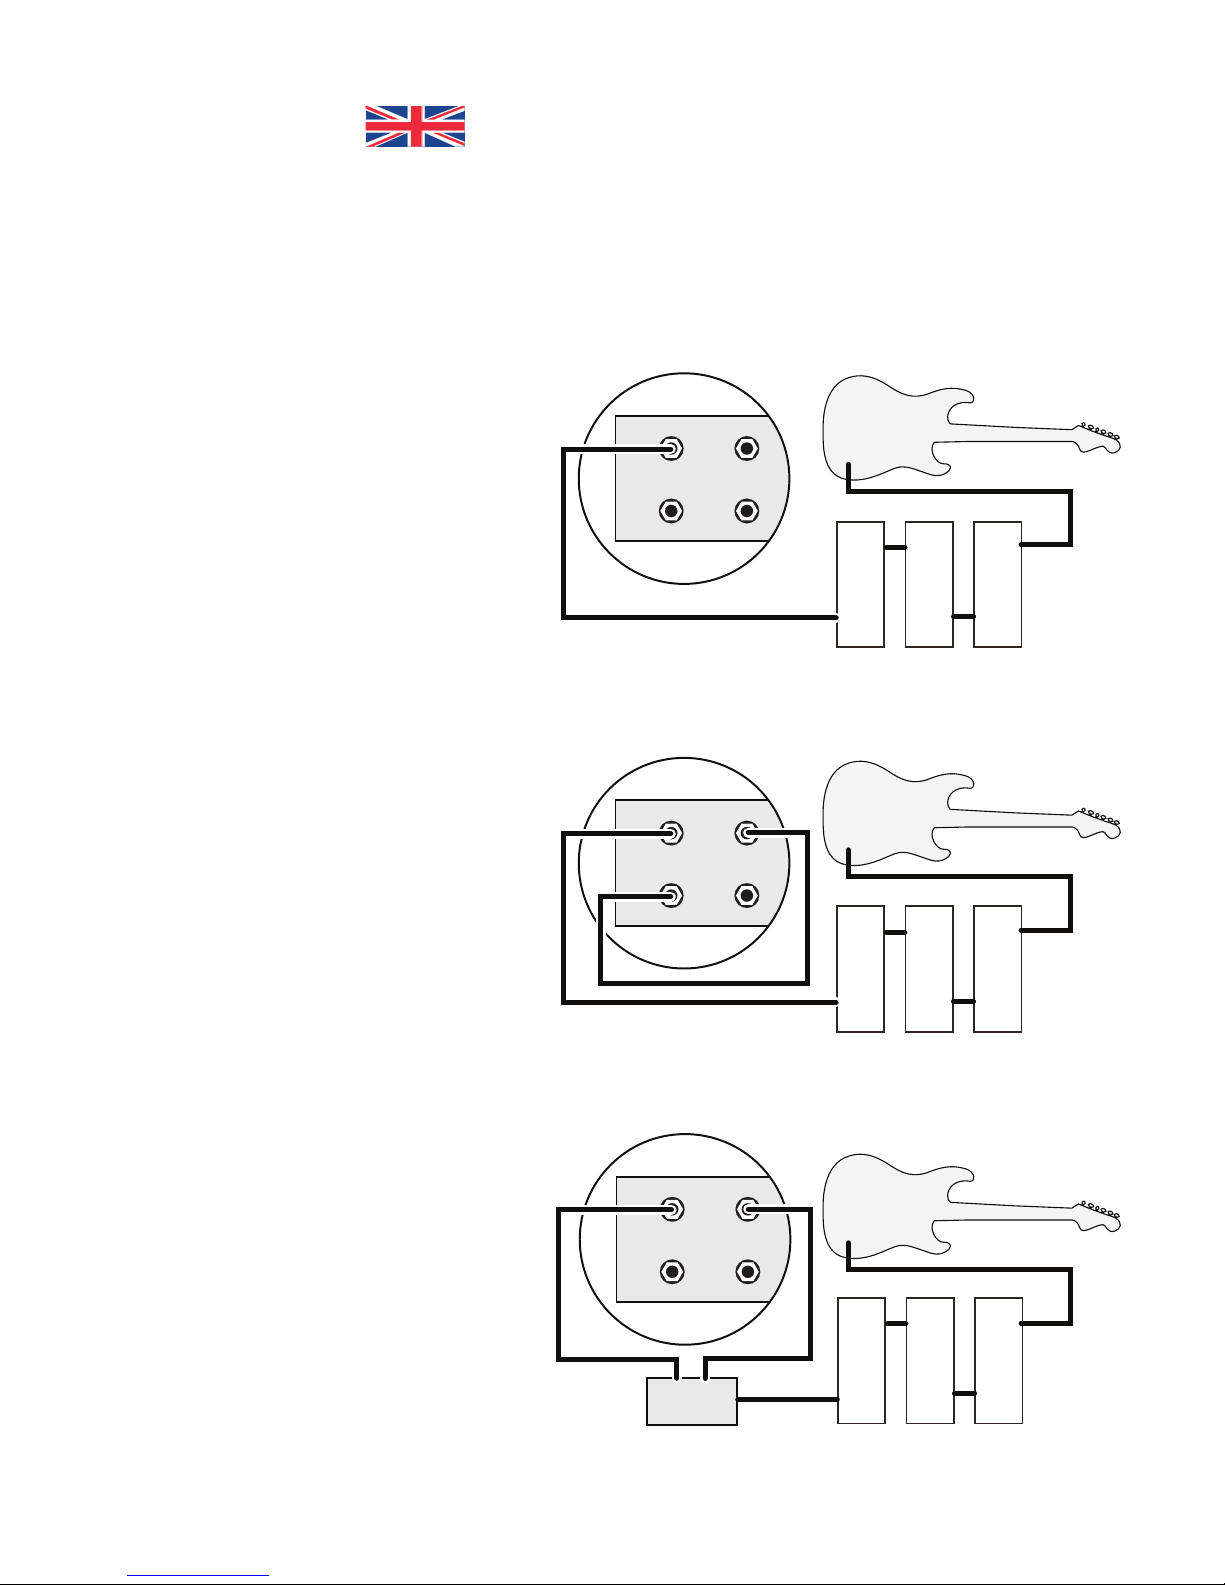
Setting-up a Pedal/Pedal Board
into a Single Channel
• Normal Channel - plug in pedal(s) or pedal
board for effects that sound good with this
channel’s warmer tone like some bright
Overdrive and Distortion Effects.
• Bright Channel - plug in pedal(s) or pedal
board when you need the extra punch to
cut through the rest of the band
Setting-up a Pedal/Pedal Board
into a Linked Channel
• The link allows you to blend the Normal and
Bright Channels
• Experiment with your pedals to obtain your
unique sound
Setting up a Foot-switchable A/B
box so you can Switch Channels
A - Normal channel will be warmer
B - Bright channel will be brighter (for
example, set this up louder than the Normal
channel so you can instantly switch between
two very different sounds and levels)
BRIGHTNORMAL
BRIGHTNORMAL
/
BRIGHTNORMAL
BRIGHTNORMAL
BRIGHTNORMAL
/
BRIGHTNORMAL
BRIGHTNORMAL
BRIGHTNORMAL
/
BRIGHTNORMAL
PEDALS LOVE HIWATT
“ The sound of Hiwatt amps is bold, with plenty of headroom and bottom end.
They are especially great platforms for a pedal based rig.”
- Guitar Aficionado magazine 2015
V3: guitar - pedal(s) - A/B BOX - Normal Channel and Bright Channel
V2: guitar - pedal(s) - input with linked channel
V1: guitar - pedal(s) - input
9
Hiwatt.co.uk

HIWATT Product: Made in the Custom Shops England.
• Tip-Top: Your hand built Hiwatt Amplifier has been thoroughly inspected and rigorously‘soak tested’prior to leaving
our Workshop in Doncaster England. Your Hiwatt product is guaranteed to be performing to it’s desired and correct
specifications. Custom Hiwatt is truly professional Studio/Stage ready gear.
• Hiwatt amplifiers are warranted against defects in materials and workmanship for a period of 3 years. Speakers, speaker
enclosures and reverb tanks for 1 year, tubes/valves for 90 days.
• Note - it is your responsibility to use/operate the equipment safely and properly without modification and with a safe
power supply - failure to do so is dangerous and will result in voiding your warranty - always read, reference and follow the
‘important safety instructions’before turning on or operating your amplifier.
• Note - the Limited Warranty provided is to the original purchaser and is non-transferable. It is an important responsibility of
yours to register your product online with us (Hiwatt.co.uk) and to retain your sales receipt and original packaging.
• Authorisation needs to be obtained by Hiwatt Electronics (Hiwatt.co.uk) before any service work is completed by a
Professionally Qualified Service Technician.
• Shipping costs incurred obtaining warranty service are the responsibility of the purchaser and the purchaser must obtain
permission to ship any/all product before doing so.
• Authorised returns are subject to a restocking and shipping fee.
• Note - Any damages incurred in all shipping matters must be reported to the shipper and Hiwatt Electronics immediately
upon receipt of the product.
Once you have registered your product online at Hiwatt.co.uk,
please record your serial number in the spaces provided below for future reference.
Serial Number:
__________________________________________________________________________________
Date of Purchase:
__________________________________________________________________________________
Store Contact Info:
__________________________________________________________________________________
If the unit purchased develops a fault, you will need to contact the store you purchased the unit from. You will need to
provide your serial number along with your date of purchase. Please retain the original packaging materials and purchase
receipt, as these will be required for any warranty repairs.
Store manual in a safe place for future reference – it contains important information for the safe operation of this equipment.
Visit Hiwatt.co.uk - for more product info and setup instructions
Phone: +44 (0) 1777-717-525
Hiwatt Electronics Limited
@Hiwattofficial @Hiwattuk @HiwattampsUK @HiwattampsUK
Hiwatt.co.uk
10
Table of contents
Other HIWATT Amplifier manuals


