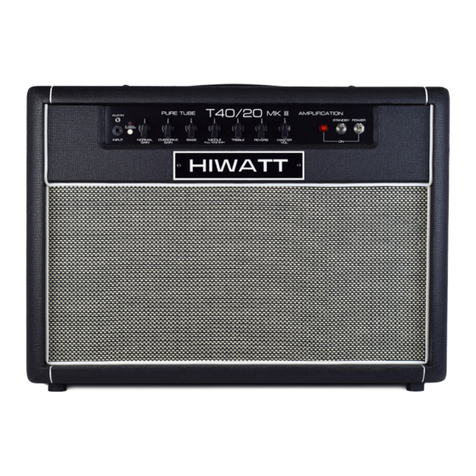
HIWATT Custom Series User manual

Custom 50 SA112 Combo
1x 12

Congratulations on purchasing the:
Custom 50 SA112 Combo
BY HIWATT
We recommend you record your serial
number in the spaces provided below for
future reference:
Serial Number:
____________________________________
Date of Purchase:
Store Purchased from:
Store Telephone Number:
If the unit purchased develops a fault, you will need to
contact the store you purchased the unit from. You will
need to provide your serial number along with your date
of purchase. Please retain the original packaging materials
and purchase receipt, as these will be required for any
warranty repairs.
Do NOT throw this manual away

Not all amplifiers are the same!
Not all amplifier manufacturers are the same either!
We at Hiwatt believe that a goodly proportion of profits
should be channelled into R&D rather than into the
pockets of management companies demanding payments
for endorsements. This way, we keep our standards high
and make our legendary sound available to all musicians
instead of paying for the use of a name that was
instrumental in the design of the equipment in the first
place. If you’re bright enough to buy Hiwatt, you’re bright
enough to work out the influences.
There are tens of thousands of competent guitarists on
the planet, but comparatively few achieve greatness.
These players are the ones who weren’t afraid to break
the mould, dared to be different and set rather than follow
the trends: these guys don’t do “me too” any more than
we do. If you are an individual, and let’s face it, it’s
individuals that make the difference then you won’t be
buying an amp because of the badge that’s on the front.
You’ll be buying an amp because of the way it lets you
sound. And you’ve just found it!

Features:
-2 Input Channels (1 High, 1 Low) With independent
volume controls.
-Master Volume
-Bass, Middle, Treble and Presence EQ controls.
-Mains Switch & Standby Switch
-IEC mains lead input (See Back Panel)
-Variable Impedance Selector (See Back Panel)
-Variable Voltage Selector (See Back Panel)
-2 Parallel ¼” Speaker Jacks (See Back Panel)
-1 Series Speaker-On Jack (See Back Panel)
-Mains & HT Fuses (Accessed on the back panel)

!!!IMPORTANT!!!
Please note: No user serviceable parts inside! Please refer to a
qualified repair Engineer. High Voltages exist within the amplifier.
Do not open the head up to examine!
WARNING! - Important safety instructions
WARNING: This apparatus must be earthed!
A. PLEASE read this instruction manual carefully before
switching on.
B. ALWAYS use the supplied mains lead, if a replacement
is required please contact your authorized HIWATT Dealer.
C. NEVER attempt to by-pass the fuses or fit ones of the
incorrect values.
D. DO NOT attempt to remove the amplifier chassis, there
are no user serviceable parts.
E. Refer all servicing to qualified service personnel.
Servicing is required when the apparatus has been
damaged in any way, such as when the power supply cord
or plug is damaged, liquid has been spilled or objects
have fallen into the apparatus, the apparatus has been
exposed to rain or moisture, does not operate normally or
has been dropped.
F. NEVER use an amplifier in damp or wet conditions. No
objects filled with liquids should be placed on the
apparatus.
G. ALWAYS unplug this apparatus during lightning storms
or if unused for long periods of time.
H. PROTECT the power cord from being walked on or
pinched particularly at plugs, convenience receptacles and
at the point where they exit from the apparatus.

I. Do NOT switch the amplifier on without the
loudspeaker(s) connected.
➲Note: This equipment has been tested and found to
comply with the requirements of the EMC Directive
(Environments E1, E2 and E3 EN 55103-1/2) and the Low
Voltage directive in the E.U.
➲CAUTION: Any changes or modifications not expressly
approved by the party responsible for compliance may
void the users authority to operate the equipment.
➲Note: It is recommended that all audio cables, with the
exception of the speaker lead, used to connect to the
amplifier are of a high quality screened type. These should
not exceed 10 meters in length.
Always use a non-screened speaker lead when connecting
a speaker cabinet to this amplifier.
➲WARNING: Always ensure free movement of air around
the amplifier!

Impedance Information:
Before you decide to connect your SSH to your speaker
cabinet, you will want to know about impedance first!
Impedance is the electronic load that the speaker puts on
the power amplifier and is measured in Ohms. (Ω)
Rule of Impedance:
When two speakers are wired, “parallel” the total
impedance is cut in half and when two speakers are wired
in “Series” the total impedance is the sum of the speakers’
individual impedance. i.e. Two 8Ωspeakers wired in
parallel become 4Ω. Two 8Ωspeakers wired in series are
16Ω.
Make sure that the correct impedance is selected on the
back of the amplifier to match the speaker configuration
you are using. Be sure to check the manufacturer’s
recommended impedance for the cabinets you are using
to avoid any damage to your amplifier and voiding your
warranty.
PLEASE NOTE (Very Important)
You should never turn your amplifier on without having it
connected to a speaker load that matches the impedance
selected on the rear of the amplifier. If you do, you risk
damaging the output transformer and thus voiding your
warranty.
If you use more than one cabinet, the cabinets must all be
of the same impedance. i.e. if you use two cabinets, then
if one cabinet is 16 ohms (Ω), the other cabinet must also
be 16 ohms (Ω). If the cabinets are not of the same
impedance then you will damage the output transformer
and void the warranty.

10 & 11
Two times independent channels
Two for the normal channel,
Two for the bright channel
This amp has a specially designed
linked input system, where the volume
of each channel can be blended/altered
to suit different musical styles. (E.g.
allowing for a brighter sound without
losing lower frequencies etc.)
2.
The standby switch is used when
turning the amp on and off. In
order to heat and also protect the
valves to operate the amplifier
you should leave the standby off
for at least 2 minutes.
4.
The Presence dial is like the Treble
dial but on a higher frequency.
Controlling this dial would enable
you to boost the upper mid-range
frequencies. Refer to the graphs for
more detailed information on
7.
The Bass dial is for enhancing
the bass given out from the amp
And manipulating the lower
frequencies, refer to the graphs
for more detailed information
on frequencies
5.
The Middle dial is for controlling
the middle frequency’s given
sound. Refer to the graphs for
more detailed information on
frequencies
9.
The normal volume dial is to control
the volume given out from the
normal inputs.
3.
The Master Volume controls the
overall volume of the amplifier. If
the master is turned all of the way
down, no sound will come out of
the amplifier. You should always
have the volume on zero when
turning on or off the amplifier.
1.
The Mains Switch is used to turn
the amplifier on/off.
Please note, the mains switch
works in conjunction with the
standby switch and the amplifier
will not work without also using
the standby switch.
1
2
3
5
6
7
8
9
6.
The Treble dial is for increasing
the treble given out from the amp
To manipulate the higher
frequencies, refer to the graphs
for more detailed information on
4
10
11
8.
The bright volume dial is to control
the volume given out from the bright
inputs.

6.
This is the IEC Mains socket
Here you would insert your IEC Mains
Lead, which connects the amplifier to
the mains socket providing power to
the amplifier
2.
The Impedance selector, this is used
to select the appropriate impedance
required by the speakers (Cabinet)
Impedances are 4 Ω 8 Ω &16 Ω
Please read the section “Impedance
Information” for more information
on this.
4.
The Fuse Plate, this houses the HT
and Mains Fuse that act as circuit
protective devices to ensure that,
under fault conditions (such as
electrical surges Etc.)
No damage is done to the internal
circuitry. Correct fuse rating is
essential
T-rates fuses are timed delay fuses
(T1) used in the mains.
F-rated fuses are fast blown fuses
(F3.15) used in the HT
3.
The Serial Plate, this tells you what
make and model your amp is and
provides technical information on
the amplifier including the serial
number.
5.
Voltage Selector, this is for selecting
the correct voltage you need to operate
your amp
Voltages can be set for UK, USA, Europe
and other worldwide destinations
Voltages: 240v, 230v, 115v, 100v
Please check the voltage in the country
you are operating the amplifier in, in
order to set the correct voltage on the
back of the amplifier
1.
Parallel Speaker Outputs,
These are used to link the head to a
speaker.
Read the section “Impedance
Information” for more information
on this.
1
2
3
4
5
6

Appendix
1A

1B

1C

1D

1E

1F

1G

Specifications:
Type:
-All Purpose Guitar/Bass Amplifier Head
Cabinet:
-18mm Baltic Birch Ply head box
Valve Complement:
-2 x EL34’s in the output
-4 x ECC83 – 1 X ECC81 in the preamp
Voltage:
- Switchable Voltage (110v, 115v, 230v, 240v)
Impedance
- Switchable Impedance (4 Ω, 8 Ω, 16 Ω)
Speaker Outputs:
-2 x Parallel Speaker output sockets on ¼” Jacks
Power handling
– 50 Watts
Dimensions
– Height: 570mm
Width: 515mm
Depth: 283mm
Weight:
- 28kg
Manufactured in England by:
HIWATT ELECTRONICS LIMITED
Hiwatt House
Unit 1B Plumtree Farm Industrial Estate
Doncaster, South Yorkshire
DN11 8EW United Kingdom
+44 (0) 1777717525
This manual suits for next models
1
Table of contents
Other HIWATT Amplifier manuals


