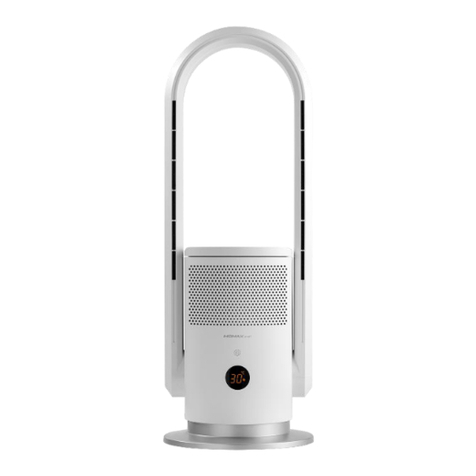
HKBN GWSF12 User manual

1
Gemini Smart Stand Fan
(Model:GWSF12)
HKBN Home User Guide
v.20200602

2
Table of Contents
Product Description................................................................ 3
Download HKBN Home App ................................................... 5
Add Device.............................................................................. 6
Control Device ...................................................................... 10
Scene (Smart Action) ............................................................ 16
Automation (Smart Action) .................................................. 18
Device Information............................................................... 21
Product Specifications .......................................................... 24
Product Maintenance and Warranty.................................... 25

3
Product Description
Name : Gemini Smart Stand Fan
Model : GWSF12
Fan x 1 , User Manual x 1 , Warranty Card x 1, Power Line x 1, Remote Controller x 1
(1)Read Grille
(2)Front Grille
(3)Blade
(4)Back Cover
(5)Extension Tube
(6)Extended Tube Switch
(7)Control Display
(8)Remote Control
Placement
(9)Infrared Receiving
Point
(10)Pedestal
(11)AC Connector
(12)Base Fixed Knob
Bottom View
Package Contents

4
Product Description
This user guide is to introduce the usage of HKBN Home App for Gemini Smart
Stand Fan with smart action examples only. For the following details, please
refer to the instruction in the package:
•Safety Precautions, Caution, Warning;
•Introduction of Control Panel;
•Function Key of Remote Controller;
•Installation;
•Cleaning and Maintenance etc.

5
Download HKBN Home App
OR
Scan the QR code below
Search and download “HKBN Home”
APP in Apple App Store OR Google
Play Store

6
Add Device
1. You must first connect your phone to a 2.4GHz Wi-Fi network when
adding device.
2. Tap “Devices” on the bottom menu. (image 1)
3. Tap “Add Device” button OR “+” icon at top right corner if you already
have paired device. (image 2)
(image 1)
(image 2)

7
Add Device
4. Tap “Gemini Smart Stand Fan” from left menu “Home Appliance”.
(image 1)
5. Connect power, hold the ON/OFF and MODE button at the same time
(image 2) until the Wi-Fi indicator blinks. (image 3)
(image 1)
(image 2)
(image 3)

8
Add Device
6. Select 2.4GHz Wi-Fi network and enter password*,and then tap
“Next”. (image 1)
7. Please wait a moment while your device is in pairing process. (image
2)
⚫Currently all smart devices are compatible to 2.4GHz network only. Please make sure
that your device and mobile are connected with 2.4GHz but not 5GHz Wi-Fi network.
⚫If you have 5GHz network and by using the same network name (SSID) as the 2.4GHz
network, please temporarily turn off the 5GHz network first before adding device.
*Important tips: Wi-Fi requirement
(image 1)
(image 2)

9
Add Device
8. After device added successfully, you can change the device name and
assign it to the located room. (You can also change the device name
and room location later in device setting page and room management
page.) And you can find the Gemini Smart Stand Fan in the “Device”
page.
Device
Name
Room
Selection
Gemini Smart Stand Fan

10
Control Device
•Main Control Panel
On/Off Switch
Wind Speed Control
Device Information
Current On/Off status
Operation
Settings
Current Mode
Mode Selection

11
Control Device
•Switch On/Off
You can press the “Switch”key to turn on/off your fan remotely. (image
1) It will show a “Off” notice on screen after you switched off the Fan.
(image 2)
(image 1)
(image 2)

12
Control Device
•Adjust Wind Speed
By default the fan wind speed is set to level 8 and the wind speed (from
level 1 to 12) can be adjusted by sliding the control bar.

13
Control Device
•Mode Selection
Besides normal mode, there are three different modes (Sleep, Natural
and ECO mode) you can select for your need:
•ECO: Under the ECO mode, the display screen will display the
room temperature. The fan will adjust the wind speed into ideal
fan speed according to the room temperature automatically.
•Natural: Under the Natural mode, the fan will work at the system
setting gear speed.
•Sleep: The fan will be operated quietly in Sleep mode which is soft
wind for sleeping.

14
Control Device
•Swing and Oscillation
You can control ”Up-and-Down Swing” and “Left-and-Right Swing” by
pressing “Settings” and enable the related functions.
Left-and-Right Swing
Up-and-Down Swing

15
Control Device
•Timer Off Setting
You can set the timer to turn off your fan automatically by select
countdown time by default in 4, 3, 2 or 1 hours:
1. Tap “Setting”;
2. Tap “Timer off setting”;
3. Select 4h, 3h, 2h or 1h.
(image 1)
(image 2)
(image 3)

16
Control Device
Scene (Smart Action)
The integration of different smart devices is the beauty of smart home living
which provides convenience and many possibilities of creating your preferred
control settings. By setting SCENE, you can execute different smart devices at
the same time by only one single tap. You can tailor make your unique scene
such as movie time scene, welcome/back home scene, reading scene etc.
User Voice Command to Turn On/Off Fan
Instructions below explain how to create a Scene:
智能家居強調家中不同裝置的聯繫及控制,自設場景令您只需簡單一按,
1. In “Smart Action” under the page of
“Scene”, tap “+”to add new Scene, and
then tap “Add Action”
2. Select Fan and tap “Switch”, and then
select “On”. (If turn off the Fan then
select “Off”)
3. Tap to enable “Show on Dashboard
Widgets”, tap “Save” on the top right
corner to complete

17
How to add Siri Command into Scene:
使用設備
1. In the page of “Scene”, tap “Add to
Siri”
2. In Siri Shortcuts, select the scene you
would like to add Voice command
3. Input the voice command you want
and then tap “Add to Siri” to complete

18
Automation(Smart Action)
AUTOMATION can carry out device actions automatically by pre-conditions like environment
factors or smart device status. You can handover this complex and important daily works to
HKBN Home for a convenient and simple living. Automation included the setting of
Temperature, Humidity, Weather and Schedule as condition to trigger different control in
smart devices. Below is the automation example of Fan and Air-Conditioner (Require infrared
Remote Control):
7:00am turn off air conditioner and then turn on fan
Instructions below explain how to create an Automation:
1. In “Smart Action” under the page of
“Automation”, tap “+”to add new
Automation, and then tap “Add
Condition”
2. Tap “Schedule”
3. Set the time at 7:00am

19
4. Tap “Add Action”
5. Select Air Conditioner, in “Air Condition
Power”select “Off”
6. Select Fan and in “Switch” select “On”

20
7. Tap “All Day” and then set the
effective automation time
8. Select “All Day” to enable 24 hours or
customize the effective period. (If the time
is out of the effective period, the
automation will not be triggered even if
met the conditions
9. Save to complete. In the page of
automation, you can enable or disable
automation
Enable to receive notification
Table of contents
Other HKBN Fan manuals