HoMedics SoundSpa Fusion SS-6510B-AV Instruction Manual

©2007-2009 HoMedics, Inc. et ses sociétés affiliées, tous droits réservés.
HoMedicsMD est une marque de commerce déposée de HoMedics, Inc., et de ses sociétés affiliées.
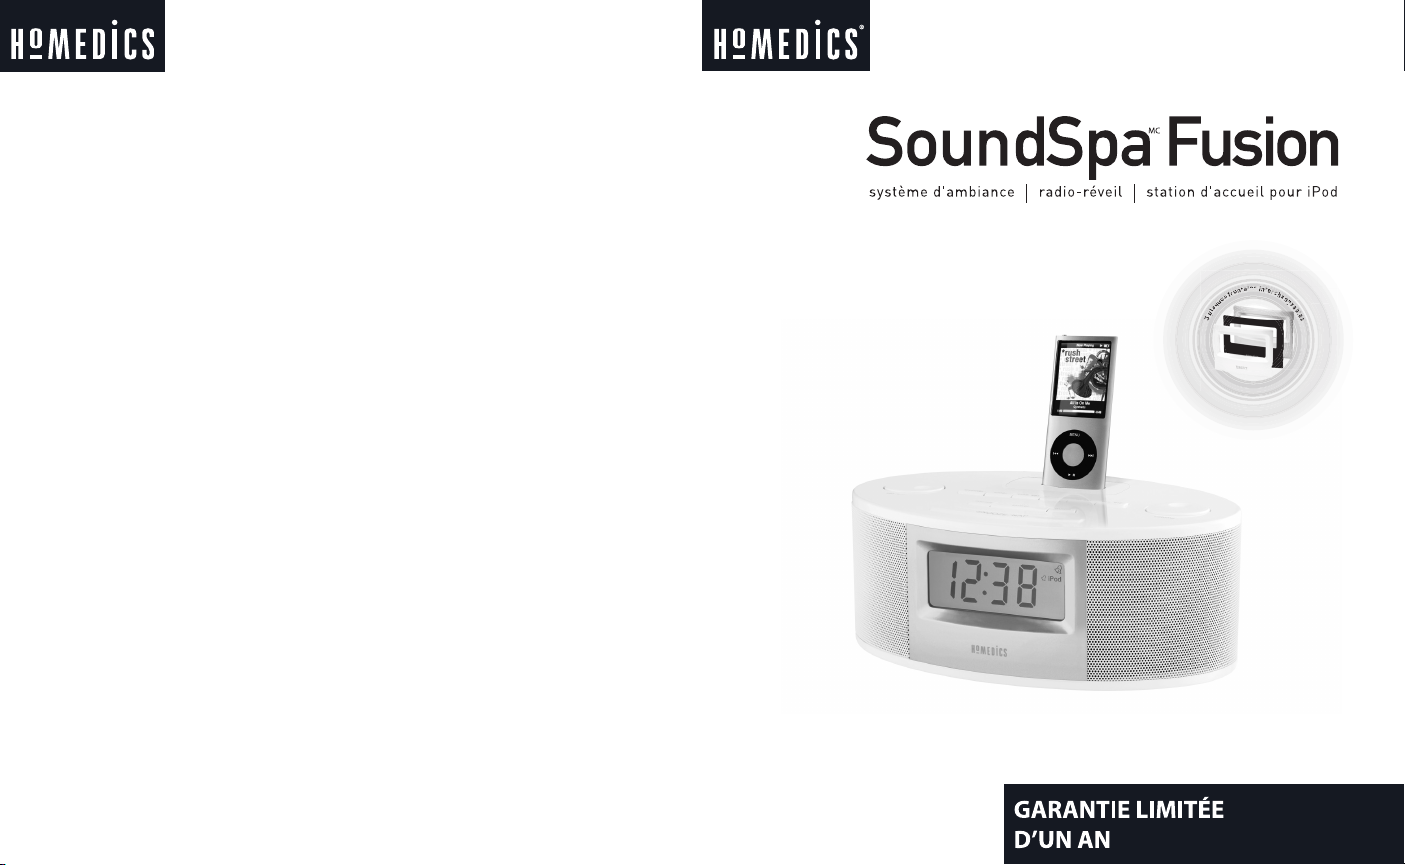
SoundSpaMC est une marque de commerce de HoMedics, Inc., et de ses sociétés affiliées.
Tous droits réservés.
iPodMD, iPod nanoMD, nanoMD et le design iPodMD sont des marques de commerce d’Apple Inc..
IB-SS6510B-AV
GARANTIE LIMITÉE D’UN AN
HoMedics garantit pendant un an à partir de la date d’achat, sauf exceptions mentionnées ci-dessous, que
ses produits vendus ne présentent aucun défaut de fabrication. HoMedics garantit que ses produits seront
exempts de défaut de matière et de fabrication dans des conditions d’utilisation normale. Cette garantie couvre
uniquement les consommateurs et ne s’applique pas aux détaillants.
Pour obtenir le service de la garantie pour le produit HoMedics, poster le produit accompagné du reçu daté
(comme preuve d’achat), port payé, à l’adresse suivante :
HoMedics Consumer Relations
Service Center Dept. 168
3000 Pontiac Trail
Commerce Township, MI 48390
Aucun envoi contre remboursement ne sera accepté.
HoMedics n’autorise aucune personne, y compris, mais sans y être limité, les détaillants, tout acheteur
ultérieur du produit au détaillant ou tout autre, d’obliger HoMedics à garantir au-delà des termes mentionnés
aux présentes. Cette garantie ne couvre pas les dommages causés par un emploi anormal ou abusif; un
accident; un ajout d’accessoire non autorisé; une altération du produit; une installation incorrecte; toute
réparation ou modification non autorisée; un emploi incorrect de l’alimentation électrique; une perte de
courant; une chute; un fonctionnement défectueux ou un dommage d’une pièce résultant d’un entretien
non fait, mais recommandé par le fabricant; les dommages pendant le transport; le vol; la négligence, le
vandalisme; les conditions environnementales, la perte d’utilisation liée à la période au cours de laquelle le
produit est en réparation ou en attente d’une pièce de rechange; ou toute autre condition indépendante de la
volonté d’HoMedics. Cette garantie ne s’applique que dans le pays où le produit a été acheté et est utilisé. Un
produit nécessitant une modification ou une adaptation afin de permettre l’utilisation dans tout pays autre que
celui pour lequel il a été désigné, fabriqué, approuvé et/ou autorisé ou toute réparation du produit endommagé
par ces modifications ne sont pas couverts par la présente garantie.
CETTE GARANTIE DOIT ÊTRE RESPECTÉE COMME ÉTANT LA GARANTIE EXCLUSIVE. IL N’EXISTE AUCUNE
AUTRE GARANTIE EXPRESSE OU IMPLICITE, Y COMPRIS LA GARANTIE D’APTITUDE À LA VENTE OU À UN
BUT PARTICULIER OU AUCUNE AUTRE OBLIGATION DE LA PART DE LA COMPAGNIE EN CE QUI A TRAIT
AUX PRODUITS COUVERTS PAR LA PRÉSENTE GARANTIE. HOMEDICS NE PEUT ÊTRE TENU RESPONSABLE
EN AUCUN CAS POUR DES DOMMAGES ACCESSOIRES, INDIRECTS OU SPÉCIAUX. CETTE GARANTIE
DOIT COUVRIR LA RÉPARATION OU LE REMPLACEMENT DE PIÈCE DÉFECTUEUSE PENDANT LA PÉRIODE
DE GARANTIE SEULEMENT. AUCUN REMBOURSEMENT NE SERA OFFERT. SI LES PIÈCES DE RECHANGE
POUR DES MATÉRIAUX DÉFECTUEUX NE SONT PAS DISPONIBLES, HOMEDICS SE RÉSERVE LE DROIT DE
SUBSTITUER LE PRODUIT AU LIEU DE LE RÉPARER OU DE LE REMPLACER.
Cette garantie ne s’applique pas à l’achat d’un produit ouvert, utilisé, réparé, emballé ou scellé de nouveau, y
compris, mais sans y être limité, à la vente de tels produits sur des sites de ventes aux enchères sur Internet
et/ou à la vente de tels produits par des revendeurs de surplus d’inventaire ou au prix de gros.
Toute garantie doit immédiatement prendre fin et être annulée quant à toute pièce ou à tout produit ayant été
réparé, remplacé, altéré ou modifié, sans l’accord écrit exprès préalable de HoMedics.
Cette garantie vous confère des droits particuliers et vous pouvez également bénéficier d’autres droits qui
varient d’un état à l’autre. En raison de réglementation de chaque pays, certaines des limites énoncées
précédemment peuvent ne pas s’appliquer dans votre cas.
Pour obtenir de plus amples renseignements sur notre gamme de produits offerts aux États-Unis, visiter le site
www.homedics.com
Instruction Manual and
Warranty Information
Le manuel en français
commence à la page 19
3
c
h
a
n
g
e
a
b
l
e
f
a
c
e
p
l
a
t
e
s
3
3
3
3
c
c
c
h
h
h
a
a
a
n
n
n
g
g
g
g
e
e
e
a
a
a
b
b
b
l
l
l
e
e
e
f
f
f
a
a
a
c
c
c
e
e
e
p
p
p
p
l
l
l
a
a
a
t
t
t
e
e
e
s
s
s
SS-6510B-AV
HoMedics Service Center
1.800.466.3342
8:30 – 5:00 p.m. (EST)
Poster à :
HoMedics
Consumer Relations
Service Center Dept. 168
3000 Pontiac Trail
Commerce Township, MI
48390
courriel :
cservice@homedics.com

23
Create your perfect sleep environment.
Thank you for purchasing SoundSpa Fusion, the HoMedics ultimate dock for iPod
and relaxation machine. This, like the entire HoMedics product line, is built with
high-quality craftsmanship to provide you years of dependable service. We hope
you will find it to be the finest product of its kind.
SoundSpa Fusion helps create your perfect sleep environment. Fall asleep to any
of the six calming sounds, then wake to iPod, sounds, radio, or beep tone.
SoundSpa Fusion can also mask distractions to improve your concentration while
you read, work or study.
IMPORTANT SAFETY INSTRUCTIONS:
When using an electrical appliance, basic precautions should always be followed,
including the following:
READ ALL INSTRUCTIONS BEFORE USING
DANGER
- To reduce the risk of electric shock:
• Alwaysunplugtheappliancefromtheelectricaloutletimmediatelyafterusing
and before cleaning.
• Donotreachforanappliancethathasfallenintowater.Unplugitimmediately.
• Donotplaceorstoreappliancewhereitcanfallorbepulledintoatuborsink.
Do not place in or drop into water or other liquid.
WARNING
- To reduce the risk of burns, fire, electric shock or injury to persons:
• Closesupervisionisnecessarywhenthisapplianceisusedbyornearchildren,
invalids or disabled persons.
• Usethisapplianceonlyforitsintendeduseasdescribedinthismanual.Donot
use attachments not recommended by HoMedics; specifically any attachments
not provided with the unit.
• Neveroperatethisapplianceifithasadamagedcord,plug,cableorhousing.
If it is not working properly, if it has been dropped or damaged, return it to
Homedics Service Center for examination and repair.
• Keepcordawayfromheatedsurfaces.
• Neverdroporinsertanyobjectintoanyopening.
• Donotoperatewhereaerosol(spray)productsarebeingusedorwhereoxygen
is being administered.
• Donotcarrythisappliancebypowercordorusecordashandle.
• Todisconnect,removeplugfromoutlet.
• Thisapplianceisdesignedforindooruseonly.Donotuse
outdoors.
• Onlysetondrysurfaces.Donotplaceonsurfacewetfrom
water or cleaning solvents.
SAVE THESE INSTRUCTIONS
Caution – Please read all instructions carefully before operating.
• Neverleavetheapplianceunattended,especiallyifchildren
are present.
• Nevercovertheappliancewhenitisinoperation.
• Thisunitshouldnotbeusedbychildrenwithoutadult
supervision.
• Alwayskeepthecordawayfromhightemperatureandfire.
• Donotlift,carry,hang,orpulltheproductbythepowercord.
• Iftheadaptorsustainsdamage,youmuststopusing
this product immediately and contact the HoMedics Service
Center.(SeethewarrantysectionfortheHoMedicsaddress.)
Caution: All
servicing of
this product
must be
performed by
authorized
HoMedics
Service
Personnel only.

AM
FM
Alarm Icons
5
4
• 6NatureSounds:Night,Ocean,Brook,
Sunrise, Rain and Water Fall
• ChargingdockingstationforiPod
• Premiumqualityspeakers
• AM/FMradiowithdigitaltuner
• DualAlarmwithSnooze
• NapandAutotimeroptions15,30,
45 or 60 minutes
• Fourwakeoptions-iPod,radio,
beep or nature sound
• Easy-to-readclockwith
LCD display
Figure 1
Figure 4
Figure 3
PM Indicator
FM Indicator
Nature Sound Icons
SoundSpa Fusion Features
AM/FM Antennas
Figure 2
AUX Line In Jack
Insert
Locking
Tabs
12
3
12
456
14
11
10
9
8
7
13
15
1 Set+/-
2 Volume
3 DockforiPod
4 Dimmer
5 Timer
6 Time Set
7 AL Mode
8 AL Set
9AL1/AL2
10 Sounds
11 Power
12 Audio
13 Snooze/Nap
14 Aux Connection Cable
15 DC Adapter
16 iPodInserts(4)
17 AM Antenna
18 Interchangeable
Faceplates(3)
Dock
Pin Connector
17
18
AM
FM
DC Jack
AM
FM
AM
FM
Figure 5 Figure 6
A
B
Insert
Removal Slot
16

Insert Label iPod Model
3Gnano iPodnano3rdGeneration
4G nano iPod nano 4th Generation
Classic80G/
Touch
iPodClassic(80GB&120GB),iPodTouch(8GB,16GB&
2NDGen.),5GiPodwithVideo(30GB),U2iPodwithvideo
Classic 160G iPodClassic(160GB),5GiPodwithvideo(60GB,80GB)
3. PresstheTIMESETBUTTONagaintoexittheclocksettingmodeor
after 5 seconds the display will stop flashing to indicate the time is set.
Install/Replace Backup Battery
1. Make sure the DC adaptor is connected. Otherwise the time setting
may be lost during battery replacement.
2. Open the battery compartment cover located on the bottom of the unit.
3. InserttwoAAbatteries,checkingthatthepositivepolaritymatchesthe
picture in the battery housing.
4. Close the compartment cover.
Battery Precautions
1.Useonlythesizeandtypeofbatteriesspecified.
2.Wheninstallingbatteries,observeproper+/–polarities.Incorrect
installation of battery may cause damage to unit.
3.Donotmixdifferenttypesofbatteriestogether(e.g.alkalinewith
carbon-zincoroldbatterieswithnewones).
4. If the unit is not going to be used for a long period of time, remove
batteries to prevent damage due to possible battery leakage.
5. Do not dispose of batteries in fire. Batteries may explode or leak.
Charging your iPod
The SoundSpa Fusion comes with four dock inserts. See chart below to
determinethesizeinsertyoushoulduse.
6 7
Before You Begin
The SoundSpa Fusion uses a backup battery system to provide
continuous alarm and clock settings in the event of a power failure. Two
“AA”batteries(included)mustbeinsertedintothebatterycompartment
if memory backup is desired. When the Backup Battery is installed, in the
event of a power failure or the DC cord is accidentally disconnected, the
LCD display will not remain lit, but the current time and alarm time settings
will be temporarily maintained.
Changing the Colored Faceplates
Attaching Faceplates
1. Choose a faceplate.
2. Slide top lip of faceplate under top lip of SoundSpa Fusion unit
(Fig.5-A).
3.Pressfirmlyonfaceplateuntilitlocksinplace(Fig.5-B).
Removing Faceplates
1. Use thumb to press latch on bottom of SoundSpa Fusion. Press firmly
sofaceplatepopsoffunit(Fig.6).
2. See ATTACHING FACEPLATE for directions on replacing the faceplate.
Getting Started
Setting Clock Time
1. PresstheTIMESETBUTTONlocatedonthetopoftheunit(Fig.1);
hourdigitwillbeginflashing.TurntheSET+/-KNOBuntilthecurrent
hourisdisplayed.RemembertosetthecorrectAMorPM(aniconin
the upper left of the time display is the PM INDICATOR; there is no AM
indicator)(Fig.2).
2. Press the TIME SET BUTTON again; minute digits will begin flashing.
TurntheSET+/-KNOBuntilthecurrentminuteisdisplayed.

WhenyouwanttoconnectadifferentsizeiPod,removetheinsertfrom
theSoundSpaFusionandreplacewiththecorrectsizeinsert.Toremove
dockinsert,placefingernailinslotoninsert(Fig3)andgentlypullup.You
mustalwaysusetheappropriatesizeinsertforyouriPod.Youmaycontact
HoMedicsConsumerRelationsat1-800-466-3342toorderthecorrectinsert
for your iPod.
Note: Make sure you are using the correct insert for your iPod and that it
is properly docked in the SoundSpa Fusion. Failure to do so may damage
your iPod.
WARNING: INSERT AND PIN CONNECTOR ARE DESIGNED FOR
APPLE iPOD MUSIC PLAYERS ONLY. ATTEMPTING TO ATTACH
OR FORCE ANY NON- iPOD MUSIC PLAYER INTO THE ENCLOSED
INSERT OR ONTO THE PIN CONNECTOR WILL DAMAGE AND EVEN
DESTROY YOUR DEVICE.
1. Before you begin, remove your iPod from its case or ‘skin’. Place insert
in dock, being sure that the two plastic tabs face the front of the unit.
Press insert into place, ensuring it is firmly placed in the dock. Carefully
place your iPod into the docking area so
that the pin connector in the dock is fully
connected to the pin socket on the bottom of
youriPod(Fig.7).
2. Your iPod will then begin charging, until fully
charged.
8 9
Figure 7
NOTE: Your iPod will charge even if the POWER button is turned off. The
SoundSpa Fusion only needs to be plugged in for the iPod to charge.
3. Toremove/replaceaninsert,firstremoveyouriPod,thenplacefingernail
inslotoninsert(Fig.3)andgentlypullup.
Listening to Your iPod
1. PressthePOWERBUTTONontheSoundSpaFusion(Fig.1).
2. TogglethroughtheAUDIOBUTTONtoplaytheiPod(Fig.1).
The iPOD ICON will appear on the LCD display on the right side of the
clock, to indicate that the iPod mode has been selected.
Note: When the iPod is docked and in standby mode, it will
automatically begin playing once the iPod mode is selected on the
unit.
3. PressthePLAY/PAUSEbuttononyouriPodtopauseplay;
press play again to resume play.
4. TurntheVOLUMEKNOB(Fig.1)ontheunittoadjustthesystemvolume.
5. Press the or on your iPod to go to the next or previous track.
6. To turn unit off, press the POWER BUTTON. The iPod will
continue charging in the dock.

Listening to a non-docking iPod or other portable
audio devices
If you are using an iPod without a
dockingport,otherMP3player,or
other portable audio device, you can
play it through the SoundSpa Fusion
via the LINE IN located on the back
oftheunit(Fig.9).
1. Plug one end of the Connection
Cable(included)intothe
headphone or line-out jack on your
audio device and the other end of the Connection Cable into
the SoundSpa Fusion LINE IN, located on the back of the unit.
2. PressthePOWERBUTTONontheunittoturniton(Fig.1).
3. TogglethroughtheAUDIOBUTTONontheunituntilyoureachthe
auxiliarymode.TheAUXICON(Fig2)willappearintherightsideof
the clock, to indicate that the auxiliary mode has been selected.
4. Turn on and play external audio device.
5. TurnonVOLUMEKNOB(Fig1)ontheunittoadjustthesystem
volume. Note: You may need to adjust the volume on external
device also.
6. To turn off the unit, press the POWER BUTTON on the top of the unit.
Note: You may need to turn off your external audio device as
well.
Listening to Nature Sounds
1. PressthePOWERBUTTONontheunittoturniton(Fig.1).
2. Select the Sounds button to toggle through the different nature sounds
10
(Fig1).TheywillbeshownonthebottomoftheLCDdisplay,belowthe
time.(Fig.2)
3. TurntheVOLUMEKNOBontheunittoadjustthevolume(Fig.1).
4. To turn off the nature sounds, press the POWER BUTTON to turn the unit
off,orswitchtheaudiomodebypressingtheAUDIOBUTTON(Fig.1).
Note: When the unit is turned on, it will always default to the last
mode used.
Listening to the Radio
FM Antenna
Extend FM wire antenna fully for best FM
reception(donotstrip,alterorattachto
otherantennas).
AM Antenna
Snap the AM loop antenna into the base
provided. Next, plug the AM loop antenna
into the connector located on the back of
theunitforbestAMreception(Fig.10).
1. PressthePOWERBUTTONontheunittoturniton(Fig.1).
2. TogglethroughtheAUDIOBUTTONtoplaytheradio(Fig.1).The
RADIOICONwillappearontherightsideoftheclock(Fig.2).
3. TochoosebetweenFMorAMradio,presstheAUDIOBUTTONagain.
The FM or AM icon will show on the left side of the clock to indicate the
bandthatisselected(Fig.2).
4. TurntheSET+/-knobontheunittotuneinthedesiredstation(Fig.1).
5. TurntheVOLUMEKNOBontheunittoadjustthesystemvolume(Fig.1).
6. To turn off the unit, press the POWER BUTTON.
11
Figure 10
Figure 9

Using Auto-Timer
While listening to your iPod, the nature sounds, or the radio, you may set a
timer so the unit will turn off automatically after so many minutes.
1. TogglethroughtheTIMERBUTTONuntilthetimeofyourchoice,15,30,45,
or 60 minutes, is shown on the LCD.
2. To cancel the timer, toggle through the TIMER BUTTON until OFF is
shown on the LCD.
Setting And Using The Alarms
Setting Alarm1 or Alarm2 (Individually)
1. PresstheAL1/AL2button(Fig.1).TheAL1orAL2ICONwillappearin
the upper right corner of the LCD display to indicate which alarm is
activated.
2. PresstheALSETBUTTONtwice(Fig.1);hourdigitswillbeginflashing.
TurntheSET+/-KNOBuntilthedesiredhourisdisplayed.Rememberto
setthecorrecttimeofday,AMorPM(anicontotheleftofthetime
displayisthePMINDICATOR;thereisnoAMindicator)(Fig.2).
3. PresstheALSETBUTTONagain;minutedigitswillbeginflashing.Turn
theSET+/-KNOBuntilthedesiredminuteisdisplayed.
4. Press the AL SET BUTTON again to exit the alarm setting mode or after
5 seconds the display will stop flashing to indicate the alarm is set.
Note: You can press the AL SET BUTTON at any time to review the
alarm setting.
5. Toggle through the AL MODE BUTTON until the corresponding icon
lights on the LCD screen for the wake mode of your choice: iPod,
sound,radio,orbeep(Fig.2).
Note: To wake to iPod, your iPod must be properly docked in the
unit, or alarm will default to beep wake mode.
Note: When using the sound mode, the unit will set to the last
sound you listened to. If you wish to change it, first, press the
POWER button to turn the unit on, then press the SOUND button
and toggle through until the sound of your choice is shown on the
LCD display, then press the POWER button to turn the unit off.
6. When the alarm is sounding, press the POWER BUTTON on the unit to
turn the alarm OFF. The alarm will come on again at the same time on
the next day.
7. Tostopthealarmfromcomingonthenextday,presstheAL1/AL2
BUTTON until the AL1 or AL2 icon disappears on the LCD display. If the
icon disappears, this indicates the alarm is disarmed.
Note: If the alarm sounds for 30 minutes continuously it will
automatically turn off and reset for the next day.
Setting Alarm1 and Alarm2 (Together)
1. PresstheAL1/AL2button(Fig.1)untilbothAL1andAL2iconsappear
in the upper right hand corner of the LCD display to indicate that both
alarmsareactivated(Fig.2).
Note: You cannot change the alarm time when BOTH alarms are
selected. If you need to change the alarm time for either alarm,
follow step 1 under Setting Alarm 1 or Alarm 2 (Individually).
2. Toggle through the AL MODE BUTTON until the corresponding icon lights
on the LCD screen for the wake mode of your choice: iPod, sound, radio,
orbeep(Fig.2).BothAL1&AL2mustwaketothesamemode.
Note: To wake to iPod, your iPod must be properly docked in the
unit, or it will default to beep wake mode.
12 13

Note: When using the sound mode, the unit will set to the last
sound listened to. If you wish to change it, first press the
POWER button to turn the unit on, then press the SOUND button
and toggle through until the sound of your choice is shown on the
LCD display, then press the POWER button to turn the unit off.
3. Whenthealarmissounding,pressthePOWERBUTTON(Fig.1)onthe
unit to turn the alarm OFF. The alarm will come on again at the same
time on the next day.
Note: If the alarm sounds for 30 minutes continuously it will
automatically turn off and reset for the next day.
4. Tostopthealarmfromcomingonthenextday,presstheAL1/AL2
button until the AL1 or AL2 icon disappears on the LCD display. If the
icon disappears, this indicates the alarm is disarmed.
Note: If one of the alarm users still needs their alarm set, you will
need to toggle through the AL1/AL2 button until the alarm that
corresponds to their wake time is shown on the LCD display.
Snooze Operation
1. PresstheSNOOZE/NAPBUTTON(Fig.1)ontheunitwhilethealarmis
sounding. The alarm will go off for 9 minutes and then sound again. You
may use this feature until you turn the alarm OFF.
Note: After you have pressed the SNOOZE/NAP button once, you
may turn off the snooze function prior to the alarm activating again
by pressing the POWER button twice. The alarm will come on again
the next day at the same time.
Nap Operation
TheNAPTIMERFUNCTIONwillwakeyouafteranapof15,30,45,or60
minutes without the need to change your regular Alarm 1 or Alarm 2 settings.
1. If the system is playing audio, press the POWER BUTTON to OFF.
2. TogglethroughtheSNOOZE/NAPBUTTONuntilthecorresponding
timeofyourchoice,15,30,45,or60minutes,showsontheLCD
display.
3. TogglethroughtheALMODEBUTTONuntilthecorrespondingicon
lights on the LCD display for the wake mode of your choice: iPod,
naturesound,radio,orbeep(Fig.2).
Note: To wake to iPod, your iPod must be properly docked in the
unit, or unit will default to beep wake mode.
Note: When using the sound mode, the unit will wake to the
last sound listened to. If you wish to change it, first press the
POWER button to turn the unit on, the press the SOUND button
and toggle through until the sound of your choice is shown on the
LCD
display, then press the POWER button to turn the unit off.
4. The alarm will sound to wake you up after the selected amount of
minutes have passed.
5. TocanceltheNAPTIMER,presstheSNOOZE/NAPBUTTON,untilOFF
shows on the LCD display, which indicates the NAP function is disarmed.
14 15

Dimmer Control
1. PresstheDIMMERBUTTON(Fig.1)toadjustthebacklightintensityof
the LCD display.
Maintenance
To Store
You may leave the unit on display, or you can store it in its box in a cool,
dry place.
To Clean
Use only a soft dry cloth to clean the enclosure of the unit.
NEVER use liquids or abrasive cleaner to clean.
Modificationsnotauthorizedbythemanufacturermayvoidusersauthority
to operate this device.
Note: This equipment has been tested and found to comply with the limits
for a Class B digital device, pursuant to Part 15 of the FCC Rules. These
limits are designed to provide reasonable protection against harmful
interference in a residential installation. This equipment generates, uses
and can radiate radio frequency energy and, if not installed and used in
accordance with the instructions, may cause harmful interference to radio
communications. However, there is no guarantee that interference will not
occur in a particular installation. If this equipment does cause harmful
interference to radio or television reception, which can be determined by
turning the equipment off and on, the user is encouraged to try to correct
the interference by one or more of the following measures:
• Reorientorrelocatethereceivingantenna.
• Increasetheseparationbetweentheequipmentandreceiver.
• Connecttheequipmentintoanoutletonacircuitdifferentfromthatto
which the receiver is connected.
• Consultthedealeroranexperiencedradio/TVtechnicianforhelp
Note: The manufacturer is not responsible for any radio or TV interference
causedbyunauthorizedmodificationstothisequipment.Such
modifications could void the user authority to operate the equipment.
16 17

©2007-2009 HoMedics, Inc. and its affiliated companies, all rights reserved.
HoMedics® is a registered trademark of HoMedics, Inc. and its affiliated companies.
SoundSpa™ is a trademark of HoMedics, Inc. and its affiliated companies.
All rights reserved.
iPod®, iPod nano®, nano® and the iPod® design are trademarks of Apple Inc.
IB-SS6510B-AV
LIMITED ONE YEAR WARRANTY
HoMedics sells its products with the intent that they are free of defects in manufacture and workman-
ship for a period of one year from the date of original purchase, except as noted below. HoMedics
warrants that its products will be free of defects in material and workmanship under normal use and
service. This warranty extends only to consumers and does not extend to Retailers.
To obtain warranty service on your HoMedics product, mail the product and your dated sales receipt
(as proof of purchase), postpaid, to the following address:
HoMedics Consumer Relations
Service Center Dept. 168
3000 Pontiac Trail
Commerce Township, MI 48390
No COD’s will be accepted.
HoMedics does not authorize anyone, including, but not limited to, Retailers, the subsequent consumer
purchaser of the product from a Retailer or remote purchasers, to obligate HoMedics in any way
beyond the terms set forth herein. This warranty does not cover damage caused by misuse or abuse;
accident; the attachment of any unauthorized accessory; alteration to the product; improper installation;
unauthorized repairs or modifications; improper use of electrical/power supply; loss of power; dropped
product; malfunction or damage of an operating part from failure to provide manufacturer’s recom-
mended maintenance; transportation damage; theft; neglect; vandalism; or environmental conditions;
loss of use during the period the product is at a repair facility or otherwise awaiting parts or repair; or
any other conditions whatsoever that are beyond the control of HoMedics.
This warranty is effective only if the product is purchased and operated in the country in which the
product is purchased. A product that requires modifications or adoption to enable it to operate in any
other country than the country for which it was designed, manufactured, approved and/or authorized, or
repair of products damaged by these modifications is not covered under this warranty.
THE WARRANTY PROVIDED HEREIN SHALL BE THE SOLE AND EXCLUSIVE WARRANTY. THERE
SHALL BE NO OTHER WARRANTIES EXPRESS OR IMPLIED INCLUDING ANY IMPLIED WARRANTY OF
MERCHANTABILITY OR FITNESS OR ANY OTHER OBLIGATION ON THE PART OF THE COMPANY WITH
RESPECT TO PRODUCTS COVERED BY THIS WARRANTY. HOMEDICS SHALL HAVE NO LIABILITY FOR
ANY INCIDENTAL, CONSEQUENTIAL OR SPECIAL DAMAGES. IN NO EVENT SHALL THIS WARRANTY
REQUIRE MORE THAN THE REPAIR OR REPLACEMENT OF ANY PART OR PARTS WHICH ARE FOUND
TO BE DEFECTIVE WITHIN THE EFFECTIVE PERIOD OF THE WARRANTY. NO REFUNDS WILL BE
GIVEN. IF REPLACEMENT PARTS FOR DEFECTIVE MATERIALS ARE NOT AVAILABLE, HOMEDICS
RESERVES THE RIGHT TO MAKE PRODUCT SUBSTITUTIONS IN LIEU OF REPAIR OR REPLACEMENT.
This warranty does not extend to the purchase of opened, used, repaired, repackaged and/or resealed
products, including but not limited to sale of such products on Internet auction sites and/or sales of
such products by surplus or bulk resellers. Any and all warranties or guarantees shall immediately
cease and terminate as to any products or parts thereof which are repaired, replaced, altered, or modi-
fied, without the prior express and written consent of HoMedics.
This warranty provides you with specific legal rights. You may have additional rights which may vary
from country to country. Because of individual country regulations, some of the above limitations and
exclusions may not apply to you.
For more information regarding our product line in the USA, please visit: www.homedics.com
HoMedics Service Center
1.800.466.3342
8:30 – 5:00 p.m. (EST)
M – F
Mail To:
HoMedics
Consumer Relations
Service Center Dept. 168
3000 Pontiac Trail
Commerce Township, MI
48390
e-mail:
cservice@homedics.com
Mode d’emploi et information
sur la garantie SS-6510B-AV
SoundSpa Fusion
système d'ambiance
|
radio-réveil
|
station d'accueil pour iPod
MC
out-
lined
3
p
l
a
q
u
e
s
f
r
o
n
t
a
l
e
s
i
n
t
e
r
c
h
a
n
g
e
a
b
l
e
s
3
3
3
3
3
p
p
p
p
l
l
l
l
a
a
q
q
q
q
u
u
e
e
s
s
f
f
f
f
r
r
o
o
n
n
t
t
t
t
a
a
l
l
l
l
e
e
s
s
i
i
i
i
n
n
t
t
t
t
e
e
r
r
c
c
h
h
h
h
a
a
n
n
n
n
g
g
g
g
g
e
e
e
e
a
a
a
a
b
b
b
b
b
l
l
l
l
l
e
e
e
e
s
s
s
s
3
3
s
s
s
s

21
Créez un environnement favorisant le sommeil.
Merci d’avoir acheté le SoundSpa Fusion, qui combine une station d’accueil pour
iPod et un appareil de relaxation par excellence, signé HoMedics. La conception
de haute qualité de cet appareil, tout comme la gamme complète de produits
HoMedics, vous procurera des années de service fiable. Nous espérons que vous
trouverezqu’ils’agitdumeilleurappareilensongenresurlemarché.
SoundSpa Fusion vous aide à créer un environnement idéal pour votre sommeil.
Endormez-voussurl’undessixsonsapaisants,puisréveillez-vousgrâceàvotre
musique sur iPod, aux sons apaisants, à la radio ou encore à la tonalité. SoundSpa
Fusion vous permet également de masquer les distractions afin d’améliorer votre
concentration au moment de lire, de travailler ou d’étudier.
INSTRUCTIONS IMPORTANTES CONCERNANT LA SÉCURITÉ :
Au moment d’utiliser un appareil électrique, des précautions élémentaires devraient
toujours être observées, dont :
LIRE TOUTES LES INSTRUCTIONS AVANT L’EMPLOI
DANGER - Afin de minimiser les risques de chocs électriques :
• Débranchertoujoursl’appareildelaprisedecourantimmédiatementaprès
l’avoir utilisé ou avant de le nettoyer.
• Nepastenterderetirerunappareilquiesttombédansl’eau.Ledébrancher
immédiatement.
• Nepasplacernirangerl’appareildansunendroitoùilrisquedetomberou
d’être entraîné dans une baignoire ou un évier. Ne pas placer l’appareil dans
l’eau ni dans aucun autre liquide.
AVERTISSEMENT - Afin de réduire le risque de brûlure, d’incendie, de choc
électrique ou de blessure :
• Exercerunesurveillanceétroitelorsquel’appareilestutiliséàproximitéd’un
enfant ou d’une personne handicapée ou si l’appareil est utilisé par eux.
• Utilisercetappareilseulementselonl’usageprescritdansleprésentmanuel.Ne
pas utiliser d’accessoires non recommandés par HoMedics, et particulièrement
des accessoires non compris avec l’appareil.
• Nejamaisfairefonctionnerl’appareilsilecordon,lafiche,lecâbleouleboîtier
est endommagé. Si l’appareil ne fonctionne pas correctement,
s’il a été échappé ou s’il est abîmé, le retourner à un centre de
service Homedics afin qu’il soit inspecté et réparé.
• Garderlecordonàl’écartdessurfaceschaudes.
• Nejamaiséchapperniinsérerd’objetdansaucuneouverture.
• Nepasutiliserl’appareildansdesendroitsoùdesproduitsen
aérosol(vapo)sontutilisésoudel’oxygèneestadministré.
• Nepastransportercetappareilparsoncordond’alimentation
ou utiliser son cordon comme poignée.
• Pourdébrancherl’appareil,enleverlafichedelaprisede
courant.
• Cetappareilestconçupourl’intérieurseulement.Nepas
utiliser à l’extérieur.
• Déposercetappareilseulementsurdessurfacessèches.Ne
pas le déposer sur une surface mouillée avec de l’eau ou des
solvants détachants.
CONSERVER CES INSTRUCTIONS
Miseengarde–Liretouteslesinstructionsattentivementavant
l’emploi.
• Nejamaislaisserl’appareilsanssurveillance,surtouten
présence d’enfants.
• Nejamaisrecouvrirl’appareilpendantqu’ilfonctionne.
• Cetappareilnedoitpasêtreutilisépardesenfantssansla
surveillance d’un adulte.
• Gardertoujourslecordonàl’écartdestempératures
élevées et du feu.
• Nepassoulever,transporter,suspendrenitirerleproduit
par le cordon d’alimentation.
• Sil’adaptateurestendommagé,cesserimmédiatement
l’emploi de l’appareil et communiquer avec le centre de
serviceHoMedics.(Voirlasectionsurlagarantiepour
l’adresseHoMedics.)
Mise en garde :
Tout entretien
de cet appareil
doit être
effectué
par du
personnel
qualifié
HoMedics
autorisé
seulement.
20

23
22
• 6sonsdelanature:Night(nuit),Ocean
(océan),Brook(ruisseau),Sunrise(lever
dusoleil),Rain(pluie),etWaterFall(cas-
cade)
• Stationd’accueilpourrechargerl’iPod
• Haut-parleursdequalitésupérieure
• RadioAM/FMavecsyntoniseurnuméri-
que
• Alarmedoubleavecrappeld’alarme
• Optionssiesteetminuterieauto15,30,
45 ou 60 minutes
• Quatreoptionsréveil-iPod,radio,tonalité
ou son de la nature
• HorlogefacileàlireavecécranACL
Figure 1
Figure 4
Figure 3
Figure 2
AM
FM
12
3
12
456
14
11
10
9
8
7
13
15 17
18
1 Réglage+/-
2 Volume
3 Stationd’accueilpouriPod
4 Gradateur
5 Minuterie
6 Réglage de l’heure
7 Mode AL
8 Réglage AL
9 AL1/AL2
10 Sons
11 Alimentation
12 Audio
13 Rappeld’alarme/Sieste
14CâbledeconnexionAux
15 Adaptateur CC
16AdaptateursiPod(4)
17 Antenne AM
18Plaquesfrontalesinterchangeables(3)
AM
FM
AM
FM
Figure 5 Figure 6
A
B
Caractéristiques SoundSpa Fusion
Icônes alarmes
Indicateur PM
Indicateur FM
Icônes sons de la nature
Adaptateur
Languettes
de verrouil-
lage
Connecteur à broche
Antennes AM/FM Prise entrée auxiliaire
Prise CC
Station d’accueil
Fente de
démontage
16
AM
FM

Configuration initiale
Réglage de l’heure
1.AppuyersurlatoucheTIMESET(RÉGLAGEDEL’HEURE)situéesurle
dessusdel’appareil(Fig.1);l’heureclignotera.TournerleboutonSET
+/-(RÉGLAGE+/-)jusqu’àl’obtentiondel’heureencours.S’assurerde
préciserAMouPM(uneicônedanslecoinsupérieurgauchedel’heure
s’afficheracommeindicateurPM;iln’yaaucunindicateurAM)(Fig.2).
2. Appuyer de nouveau sur la touche TIME SET; les minutes clignoteront.
TournerleboutonSET+/-jusqu’àl’obtentiondesminutesencours.
3.AppuyerdenouveausurlatoucheTIMESETpourquitterlemode
de réglage de l’horloge ou après 5 secondes; l’affichage arrêtera de
clignoter indiquant que l’heure est réglée.
Insertion/remplacement des piles de sauvegarde
1. S’assurer de brancher l’adaptateur CC. Sinon, le réglage de l’heure
peut être perdu pendant le remplacement des piles.
2. Ouvrir le couvercle du compartiment à piles situé sous l’appareil.
3.InsérerdeuxpilesAA,enrespectantlediagrammedespolaritésà
l’intérieur du compartiment à piles.
4. Fermer le couvercle du compartiment à piles.
Mises en garde concernant les piles
1. Utiliser seulement les piles de format et de type spécifiés.
2. Au moment d’insérer les piles, respecter le diagramme des polarités
+/–,cardespilesinséréesincorrectementpourraientendommager
l’appareil.
24 25
Avant l’emploi
Le SoundSpa Fusion est doté d’un système de piles qui assure la
sauvegarde des réglages de l’alarme et de l’heure en cas de panne
decourant.Pourprofiterdecettefonction,deuxpilesAA(incluses)
doivent être insérées dans le compartiment à piles. Une fois les piles
de sauvegarde installées, si une panne de courant survient ou si le
cordon CC est débranché accidentellement, l’écran ACL ne restera pas
allumé, mais les réglages de l’heure et de l’alarme seront sauvegardés
temporairement.
Comment remplacer les plaques frontales
de couleur
Pose d’une plaque frontale
1. Choisir une plaque frontale
2. Glisser la lèvre supérieure de la plaque frontale sous la lèvre supérieure
duSoundSpaFusion(Fig.5-A).
3.Presserfermementsurlaplaquefrontalejusqu’àcequ’elles’enclenche
enplace(Fig.5-B).
Retrait d’une plaque frontale
1. À l’aide du pouce, pousser sur le verrou situé sous le SoundSpa
Fusion. Pousser fermement de manière à enlever la plaque de
l’appareil(Fig.6).
2.VoirlasectionPOSED’UNEPLAQUEFRONTALEpourlamarcheà
suivre pour remplacer une plaque.

3.Nepasmélangerdifférentstypesdepilesensemble(p.ex.piles
alcalinesetcarbones-zincoupilesneuvesetusagées).
4. Si l’appareil n’est pas utilisé pendant une période de temps prolongée,
enlever les piles pour éviter qu’elles ne coulent.
5. Ne pas jeter les piles au feu. Les piles pourraient exploser ou couler.
Chargement du iPod
Le SoundSpa Fusion est vendu avec quatre adaptateurs de station
d’accueil. Se reporter au tableau ci-dessous pour déterminer le format de
l’adaptateur à utiliser selon le modèle.
Pour brancher un iPod de modèle différent, il suffit d’enlever l’adaptateur
du SoundSpa Fusion et de le remplacer par un adaptateur correspondant
au modèle du iPod désiré. Pour enlever l’adaptateur de la station
d’accueil,glisserunongledanslafentedel’adaptateur(Fig.3)etle
soulever doucement. Il est indispensable de toujours utiliser l’adaptateur
correspondant au modèle du iPod utilisé. Il est possible de communiquer
avecleserviceàlaclientèle(enanglais)HoMedicsau1-800-466-3342pour
commander l’adaptateur correspondant au iPod.
Remarque : S’assurer d’utiliser l’adaptateur correspondant au modèle du
iPod et de l’insérer correctement dans la station d’accueil du SoundSpa
Fusion pour éviter d’endommager l’iPod.
AVERTISSEMENT : L’ADAPTATEUR ET LE CONNECTEUR À BROCHE
SONT CONÇUS POUR LES LECTEURS DE MUSIQUE iPOD APPLE
Étiquette de l’adaptateur Modèle iPod
3Gnano iPodnano3egénération
4G nano iPod nano 4egénération
Classic80G/Touch iPodClassic(80Goet120Go),iPodTouch(8Go,16Goet2e
génération.),5GiPodavecvidéo(30Go),U2iPodavecvidéo
Classic 160G iPodClassic(160Go),5GiPodavecvidéo(60Go,80Go)
26 27
SEULEMENT. LE FAIT D’ESSAYER DE BRANCHER OU DE
FORCER UN LECTEUR DE MUSIQUE AUTRE QU’UN iPOD
DANS L’ADAPTATEUR OU SUR LE CONNECTEUR À BROCHE
INCLUS ENDOMMAGERA, VOIRE MÊME DÉTRUIRA, LE
DISPOSITIF.
1. Avant de commencer, retirer l’iPod de son étui. Insérer
l’adaptateur dans la station d’accueil, en veillant à ce que les
deux languettes de plastique soient à l’avant de l’appareil.
Appuyer sur l’adaptateur et s’assurer qu’il soit solidement
en place dans le logement de la station d’accueil. Insérer
doucement l’iPod dans la station de manière à ce que les
connecteurs de la station d’accueil et de l’iPod s’enclenchent
complètement(Fig.7).
Figure 7

28 29
2. L’iPod commencera alors à se charger et s’arrêtera une fois la charge
complète atteinte.
REMARQUE:L’iPodcontinueraàsechargermêmesilatouche
POWER(ALIMENTATION)estfermée.LeSoundSpaFusionn’aqu’à
être branché pour charger l’iPod.
3. Pourenleverouremplacerunadaptateur,retirertoutd’abordl’iPod,
puisglisserunongledanslafentedel’adaptateur(Fig.2)etlesoulever
doucement.
Écoute du iPod
1.AppuyersurlatouchePOWERsurleSoundSpaFusion(Fig.1).
2. Appuyer sur la touche AUDIO et faire défiler le menu pour écouter
l’iPod(Fig.1).L’icôneIPODs’afficheraàl’écranACLsurlecôtédroitde
l’horloge, indiquant que le mode iPod a été sélectionné.
Remarque : Lorsque l’iPod est dans la station d’accueil et qu’il est
en mode veille, il commencera automatiquement à jouer une fois le
mode iPod mode sélectionné sur l’appareil.
3.AppuyersurlatouchePLAY/PAUSE(ÉCOUTE/PAUSE)surl’iPodpour
faire une pause; appuyer de nouveau pour continuer à écouter.
4.TournerleboutonduVOLUME(Fig.1)surl’appareilpourréglerle
volume.
5. Appuyer sur ou sur l’iPod pour passer à la piste précédente ou
suivante.
6. Pour fermer l’appareil, appuyer sur la touche POWER. L’iPod continuera
à se charger sur la station d’accueil.
Écoute d’un iPod ou d’autres lecteurs audio
portables sans adaptateur
PourécouteruniPodsansportdeconnexion,unlecteurMP3deformat
différent, ou tout autre dispositif audio portable, il est possible de le faire
avecleSoundSpaFusionparlebiaisdelapriseLINEIN(ENTRÉE)située
àl’arrièredel’appareil(Fig.9).
1. Brancherl’unedesextrémitésducâbledeconnexion(inclus)dansles
écouteurs ou dans la prise sortie du dispositif audio, et l’autre extrémité
ducâbledeconnexiondanslapriseLINEINduSoundSpaFusion,
située à l’arrière de l’appareil.
2. AppuyersurlatouchePOWERdel’appareilpourl’allumer(Fig.1).
Figure 9

3. AppuyersurlatoucheAUDIOdel’appareiletfairedéfilerlemenu
jusqu’àl’obtentiondumodeauxiliaire.L’icôneAUX(Fig.2)s’affichera
sur le coin supérieur droit de l’horloge, indiquant que le mode
auxiliaire a été sélectionné.
4. Allumer et faire jouer le dispositif externe.
5. TournerleboutonduVOLUME(Fig.1)surl’appareilpourrégler
le volume. Remarque : Il est possible qu’il soit également
nécessaire de régler le volume du dispositif externe.
6. Pour fermer l’appareil, appuyer sur la touche POWER sur le dessus
de l’appareil.
Remarque : Il est possible qu’il soit également nécessaire de
fermer le dispositif externe.
Écoute des sons de la Nature
1.AppuyersurlatouchePOWERpourallumerl’appareil(Fig.1).
2.SeservirdelatoucheSOUNDS(SONS)pourfairedéfilerlesdifférents
sonsdelanature(Fig1).Ilss’afficherontaubasdel’écranACL,sous
l’heure(Fig.2).
3.TournerleboutonduVOLUME(Fig.1)surl’appareilpourréglerle
volume.
4. Pour fermer les sons de la nature, appuyer sur la touche POWER
pour éteindre l’appareil ou passer au mode audio en appuyant sur la
toucheAUDIO(Fig.1).
Remarque : Lorsque l’appareil est allumé, il retourne toujours par
défaut au dernier mode utilisé.
Écoute de la radio
Antenne FM
Sortir complètement l’antenne FM pour obtenir la meilleure réception
FMpossible(nepasdémonter,altérerniattacherl’antenneàd’autres
antennes).
Antenne AM
Fixer l’antenne cadre AM dans la base fournie. Brancher ensuite l’antenne
cadre AM dans le connecteur situé à l’arrière de l’appareil pour obtenir la
meilleureréceptionAM(Fig.10).
30 31
Figure 10

1.AppuyersurlatouchePOWERsurl’appareilpourl’allumer(Fig.1).
2. Appuyer sur la touche AUDIO et faire défiler le menu jusqu’à l’obtention
delaradio(Fig.1).L’icônedelaRADIOs’afficherasurlecôtédroitde
l’horloge(Fig.2).
3.PourchoisirentrelaradioFMouAM,appuyerdenouveausurlatouche
AUDIO.L’icôneFMouAMs’afficherasurlecôtégauchedel’horloge
indiquantlabandesélectionnée(Fig.2).
4.TournerleboutonSET+/-surl’appareilpourobtenirlastationdésirée
(Fig.1).
5.TournerleboutonVOLUMEsurl’appareilpourréglerlevolume(Fig.1).
6. Pour fermer l’appareil, appuyer sur la touche POWER.
Emploi de la minuterie
Tout en écoutant l’iPod, les sons de la nature ou la radio, il est possible de
régler une minuterie afin que l’appareil s’éteigne automatiquement après
une période de temps établie.
1. AppuyersurlatoucheTIMER(MINUTERIE)jusqu’àl’obtentiondela
périodedetempsdésirée:15,30,45ou60minutess’afficheraà
l’écran ACL.
2. Pour annuler la minuterie, appuyer sur la touche TIMER et faire défiler le
menujusqu’àcequelamentionOFF(FERMÉ)s’afficheàl’écran.
Réglage et emploi des alarmes
Régler Alarm1 ou Alarm2 (individuellement)
1.AppuyersurlatoucheAL1/AL2(Fig.1).L’icôneAL1ouAL2s’affichera
sur le coin supérieur droit de l’écran ACL, indiquant que l’alarme est
activée.
2.AppuyerdeuxfoissurlatoucheALSET(RÉGLAGEALARME)(Fig.1);
l’heureclignotera.TournerleboutonSET+/-jusqu’àl’obtentionde
l’heuredésirée.S’assurerdepréciserAMouPM(uneicônedansle
coin supérieur gauche de l’heure s’affichera comme indicateur PM; il
n’yaaucunindicateurAM)(Fig.2).
3.AppuyerdenouveausurlatoucheALSET;lesminutesclignoteront.
TournerleboutonSET+/-jusqu’àl’obtentiondesminutesdésirées.
4. Appuyer de nouveau sur la touche AL SET pour quitter le mode de
réglage de l’alarme ou après 5 secondes, l’affichage arrêtera de
clignoter, indiquant que l’alarme est réglée.
Remarque : Il est possible de vérifier en tout temps le réglage de
l’alarme en appuyant sur la touche AL SET.
5.AppuyersurleboutonALMODE(MODEALARME)etfairedéfilerle
menujusqu’àcequel’icônecorrespondants’afficheàl’écranACL
selonlemodederéveildésiré:iPod,son,radiooutonalité(Fig.2).
Remarque : Pour se réveiller au son du iPod, il doit être
correctement inséré dans la station d’accueil. Sinon, l’alarme de
réveil par défaut sera la tonalité.
32 33

Remarque : Au moment d’utiliser le mode son, l’appareil garde
en mémoire le dernier son écouté. Pour le changer, appuyer tout
d’abord sur la touche POWER pour allumer l’appareil, puis appuyer
sur la touche SOUNDS et faire défiler le menu à l’écran ACL
jusqu’à l’obtention du son désiré. Appuyer ensuite sur la touche
POWER pour éteindre l’appareil.
6. Lorsque l’alarme sonne, appuyer sur la touche POWER de l’appareil pour
la fermer. L’alarme sonnera de nouveau à la même heure le lendemain.
7. Pour annuler la sonnerie de l’alarme du lendemain, appuyer sur la touche
AL1/AL2jusqu’àcequel’icôneAL1ouAL2disparaisseàl’écranACL.
Lorsquel’icônen’apparaîtplusàl’écran,celasignifiequel’alarmeest
désactivée.
Remarque : Si l’alarme sonne sans interruption pendant 30
minutes, elle s’éteindra automatiquement et se réactivera pour la
même heure le lendemain.
Régler Alarm1 ou Alarm2 (ensemble)
1.AppuyersurlatoucheAL1/AL2(Fig.1)jusqu’àcequelesdeux
icônesAL1etAL2s’affichentsurlecoinsupérieurdroitdel’écranACL
indiquantquelesdeuxalarmessontactivées(Fig.2).
Remarque : Il est impossible de changer l’heure de l’alarme
lorsque les DEUX alarmes sont sélectionnées. Pour changer l’heure
de l’une ou l’autre des alarmes, suivre l’étape 1 de la section
«Régler Alarm1 ou Alarm2 (individuellement)».
2.AppuyersurleboutonALMODE(MODEALARME)jusqu’àcequel’icône
correspondant s’allume à l’écran ACL selon le mode de réveil désiré :
iPod,son,radiooutonalité(Fig.2).Lemodederéveildesdeuxalarmes
AL1 et AL2 doit être le même.
Remarque : Pour se réveiller au son du iPod, il doit être
correctement inséré dans la station d’accueil. Sinon, l’alarme de
réveil par défaut sera la tonalité.
Remarque : Au moment d’utiliser le mode son, l’appareil garde
en mémoire le dernier son écouté. Pour le changer, appuyer tout
d’abord sur la touche POWER pour allumer l’appareil, puis appuyer
sur la touche SOUNDS et faire défiler le menu à l’écran ACL
jusqu’à l’obtention du son désiré. Appuyer ensuite sur la touche
POWER pour éteindre l’appareil.
3.Lorsquel’alarmesonne,appuyersurlatouchePOWER(Fig.1)de
l’appareil pour la fermer. L’alarme sonnera de nouveau à la même
heure le lendemain.
Remarque : Si l’alarme sonne sans interruption pendant 30
minutes, elle s’éteindra automatiquement et se réactivera pour la
même heure le lendemain.
4. Pour annuler la sonnerie de l’alarme du lendemain, appuyer sur la touche
AL1/AL2jusqu’àcequel’icôneAL1ouAL2disparaisseàl’écranACL.
Lorsquel’icônen’apparaîtplusàl’écran,celasignifiequel’alarmeest
désactivée.
34 35

Remarque : Si l’une des deux alarmes est requise par l’utilisateur,
appuyer sur la touche AL1/AL2 jusqu’à ce que l’alarme désirée
apparaisse à l’écran ACL.
Fonction rappel d’alarme
1. AppuyersurlatoucheSNOOZE/NAP(RAPPELD’ALARME/SIESTE)
(Fig.1)surl’appareilpendantquel’alarmesonne.L’alarmes’arrêtera
pendant 9 minutes, puis sonnera de nouveau. Il est possible d’utiliser
cette fonction jusqu’au moment d’éteindre l’alarme.
Remarque : Après avoir appuyé une fois sur la touche SNOOZE/
NAP, il est possible d’éteindre la fonction du rappel d’alarme
avant que l’alarme ne sonne de nouveau en appuyant deux fois
sur la touche POWER. L’alarme sonnera de nouveau à la même
heure le lendemain.
Fonction sieste
Cettefonctionpermetdeseréveilleraprèsunesiestede15,30,45ou60
minutes sans avoir à modifier les préréglages de l’alarme 1 et de l’alarme 2.
1. Si l’appareil est en mode audio, appuyer sur la touche POWER pour
l’éteindre.
2.AppuyersurlatoucheSNOOZE/NAPjusqu’àl’obtentiondelapériode
detempsdésirée:15,30,45ou60minutess’afficheraàl’écranACL.
3.AppuyersurleboutonALMODEjusqu’àcequel’icônecorrespondant
s’affiche à l’écran ACL selon le mode de réveil désiré : iPod, son, radio
outonalité(Fig.2).
Remarque : Pour se réveiller au son du iPod, il doit être
correctement inséré dans la station d’accueil. Sinon, l’alarme de
réveil par défaut sera la tonalité.
Remarque : Au moment d’utiliser le mode son, l’appareil garde
en mémoire le dernier son écouté. Pour le changer, appuyer
tout d’abord sur la touche POWER pour allumer l’appareil, puis
appuyer sur la touche SOUNDS et faire défiler le menu à l’écran
ACL jusqu’à l’obtention du son désiré. Appuyer ensuite sur la
touche POWER pour éteindre l’appareil.
4. L’alarme sonnera une fois la période de temps écoulée.
5. Pour annuler la fonction de minuterie de la sieste, appuyer sur la
toucheSNOOZE/NAPjusqu’àcequelamentionOFFapparaisseà
l’écran ACL, indiquant que la fonction sieste a été désactivée.
Gradateur de lumière
1.AppuyersurleboutonDIMMER(GRADATEUR)(Fig.1)pourrégler
l’intensité du rétroéclairage de l’écran ACL.
36 37

Entretien
Rangement
Il est possible de laisser l’appareil en montre ou de le ranger dans sa boîte,
dans un endroit frais et sec.
Nettoyage
Utiliser seulement un linge doux et sec pour nettoyer l’extérieur de l’appareil.
Ne JAMAIS utiliser de nettoyant abrasif ni de liquide.
Les modifications non autorisées par le fabricant peuvent annuler le droit des
utilisateurs de faire fonctionner cet appareil.
Remarque : Cet équipement a été testé et reconnu conforme aux limites des appareils
numériques de classe B, en vertu de la partie 15 des normes de la FCC. Ces limites
ont été mises en place afin de fournir une protection raisonnable contre le brouillage
nuisible dans une installation résidentielle. Cet équipement génère, utilise et peut émettre
de l’énergie à fréquence radio et, s’il n’est pas installé ou utilisé conformément aux
instructions, peut provoquer du brouillage nuisible aux radiocommunications. Toutefois,
il n’existe aucune garantie spécifiant que ce brouillage ne se produira pas dans une
installation particulière. Si cet équipement provoque du brouillage nuisible à la réception
radio ou télévision, ce qui peut être déterminé en mettant l’équipement sous tension puis
hors tension, l’utilisateur est prié d’essayer de corriger ce brouillage en utilisant une ou
plusieurs des mesures suivantes:
• Réorienterourepositionnerl’antennederéception.
• Augmenterladistanceséparantl’équipementdurécepteur.
• Brancherl’équipementàuneprisesuruncircuitdifférentdeceluiauquellerécepteur
est relié.
• Consulterunvendeurouuntechnicienradiotélévisionpourobtenirdel’aide.
Remarque : Le fabricant n’est pas responsable de toute interférence avec la radio ou
la télévision résultant de modifications non autorisées de cet équipement. De telles
modifications pourraient rendre nul le droit de l’utilisateur de faire fonctionner cet
équipement.
38 39
Table of contents
Languages:
Other HoMedics Docking Speakers manuals