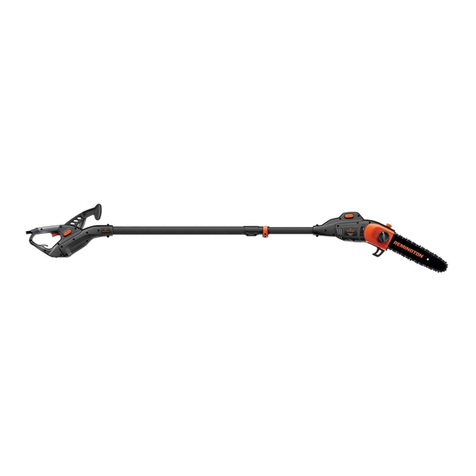
Homelite UT34020 User manual

18.0v
U
L
C
L
N
O
K
OPERATOR'S MANUAL
18 Volt Cordless Pole Pruner
Model No. UT34020
Your new pole pruner has been engineered and manufactured to Homelite’s high standard for dependability, ease of
operation,andoperatorsafety.Properly cared for, itwillgiveyouyearsofrugged, trouble-freeperformance.
Pay close attentionto the Rulesfor SafeOperation,Warnings,andCautions.Ifyouuseyourpoleprunerproperly and
only for what it is intended, you will enjoy years of safe, reliable service.
Thankyouforbuyinga Homelite polepruner.
SAVETHIS MANUAL FOR FUTURE REFERENCE
WARNING: To reduce the risk of injury, the user must read and understand the operator’s manual
before using this product.

2
INTRODUCTION
■■
■■
■Introduction ...................................................................................................................................................... 2
■■
■■
■Important Safety Instructions ...................................................................................................................... 3 - 5
■■
■■
■Symbols ...................................................................................................................................................... 6 - 7
■■
■■
■Specifications................................................................................................................................................... 7
■■
■■
■Unpacking ........................................................................................................................................................ 7
■■
■■
■Applications...................................................................................................................................................... 8
■■
■■
■Features ........................................................................................................................................................... 8
■■
■■
■Assembly ......................................................................................................................................................... 9
■■
■■
■Adjustments ....................................................................................................................................................10
■■
■■
■Operation..................................................................................................................................................11 - 14
■■
■■
■Maintenance ....................................................................................................................................................15
■■
■■
■Warranty ..........................................................................................................................................................16
■■
■■
■PartsOrdering /Service ..................................................................................................................................18
Limbing and pruning can be accomplished fast, safe, and easy with the 18V Cordless Pole Pruner.The long reach of
the pole pruner allows the operator to cut high branches comfortably.Safety, performance, and dependability have
been given top priority in the design of this pole pruner making it easy to maintain and operate.
Look for this symbol to point out important safety
precautions. It means attention!!! Your safety is involved.
TABLE OF CONTENTS

3
READ ALL INSTRUCTIONS
BASIC SAFETY PRECAUTIONS
■Donot allow children or untrainedindividuals to use
this unit.
■To protect from chips or falling branches, wear eye
protection which is marked to comply with ANSI
Z87.1aswellashearingandheadprotection when
operatingthis unit.
■Wearheavy longpants, non-slipsafety footwear,
gloves, and a hard hat.
■Neveroperateunitwhilebarefootorwearingopen
shoes.
■Do not wear loose clothing, or jewelry that might get
entangled in this unit.
■Keep all bystanders, children, and pets at least 50
feet(15m) away. Rememberthattheoperator or
user is responsible for accidents occurring to
bystanders, their property, as well as themselves.
■Maintain the unit with care. Keep the cutting edge
sharpandclean for bestperformanceand to reduce
the risk of injury. Follow instructions for lubricating
and changing accessories. Inspect the battery
chargercord periodically,and ifdamaged, have it
replacedorrepairedbyanauthorizedservice center.
Keep handles dry, clean, and free from oil and
grease.
■Check for damaged parts. Before further use of the
appliance, any part that is damaged should be
carefully checked to determine that it will operate
properlyand perform itsintended function. Checkfor
alignment of moving parts, binding of moving parts,
breakageofparts, mounting, and anyothercondi-
tions that may affect its operation. A guard or other
partthatisdamagedshouldbeproperly repairedor
replacedbyanauthorizedservicecenter.Following
this rule will reduce the risk of shock, fire, or serious
injury.
IMPORTANT SAFETY INSTRUCTIONS
WARNING:
Do not attempt to operate this unit until you have
readthoroughlyandunderstandcompletelyall
instructions, safety information, etc. contained in
this manual. Failure to comply can result in
accidents involving fire, electric shock, or serious
personalinjury.
■Do not force the pole pruner. Use the correct tool for
your application. The correct tool will do the job
better and safer at the rate for which it is designed.
■Donotoverreach.Keepproperfootingandbalance
at all times. Proper footing and balance enables
bettercontrolof the pole prunerinunexpectedsitua-
tion. Do not use on a ladder or unstable support.
■Secure long hair so it can not become entangled in
moving parts or air intake.
■Do not operate this unit when you are tired, ill, or
under the influence of alcohol, drugs, or medication.
■Stay alert and pay attention to what you are doing.
Use common sense when using this unit.
■Donotoperateinpoorlighting.
■Do not expose the pole pruner to wet or damp
conditions.
■Always store the pole pruner indoors in a dry
location that is inaccessible to children.
■Never let anyone use your unit who has not received
adequate instructions in the unit's proper use. This
applies to rentals as well as private owned units.
■Keep the handles dry and clean.
■Before you start the unit, make sure the blade is not
contacting any object.
■Stop the unit, remove the battery pack, and make
sure the blade has stopped before setting the unit
down.
■To avoid accidental starting, never carry the unit
withyour fingeron thetrigger.
■To protect yourself from electrocution, do not
operatewithin50feet(15m)ofoverheadelectrical
lines.
■To protect yourself from falling branches, do not
stand directly under the branch or limb being cut.
This unit should not be held at an angle over 60°
fromgroundlevel.
■Useonlythemanufacturer'sreplacementparts.
Failure to do so may cause poor performance,
possible injury and may void your warranty.

4
■To reduce the risk of explosion and possible injury,
Do not place battery units or their batteries near fire
orheat.
■Do not open or mutilate the battery pack. Released
electrolyte is corrosive and may cause damage to
the eyes or skin. It may be toxic if swallowed.
■A damaged battery pack is subject to explosion. To
avoid serious personal injury, properly dispose of a
damagedbatterypack.
■Batteries vent hydrogen gas and can explode in the
presence of a source of ignition, such as a pilot
light. To reduce the risk of serious personal injury,
never use any cordless product in the presence of
open flame. An exploded battery pack can propel
debris and chemicals. If exposed, flush with water
immediately.
■Do not charge unit in a damp or wet location.
Following this rule will reduce the risk of electric
shock.
■For best results, your battery unit should be charged
ina locationwhere thetemperature is more than
50°F(10°C) butless than 100°F(38°C). Do not
store outside or in vehicles.
■Underextremeusageortemperatureconditions,
battery pack leakage may occur. If liquid comes in
contact with your skin, wash immediately with soap
andwater, then neutralize with lemonjuice or
vinegar. If liquid gets into your eyes, flush them with
clean water for at least 10 minutes, then seek
immediatemedicalattention.
IMPORTANT SAFETY INSTRUCTIONS
PRECAUTIONS AGAINST KICKBACK
Kickback is a dangerous reaction that can lead to
seriousinjury.
■Keep a good firm grip on the unit with both hands
when operating the unit. Place your right hand on the
rear handle and the left hand on the front handle. A
firm grip will help you reduce kickback and maintain
control of the unit.
■Make sure that the area in which you are cutting is
free from obstructions. Do not let the blade come in
contact with any obstruction while operating the unit.
■Always cut with the unit at full speed. Fully squeeze
the trigger and maintain a steady cutting speed.
■Use only the replacement blade specified for your
unit.
BATTERY SAFETY
■Battery operated units do not have to be plugged
into an electrical outlet; therefore, they are always in
operatingcondition.Beawareofpossiblehazards
even when unit is not operating.
■Remove the battery pack before making any adjust-
ments, cleaning, storing, or removing material from
the unit, or when not in use.
■A battery pack must be recharged only with the
specified charger for the battery pack. A charger
that may be suitable for one type of battery pack
may create a risk of fire when used with another
battery pack. Use the battery pack only with the
chargerlisted.
BATTERYPACK: Item#1323701
CHARGER: Item#1425701

5
b. Thatextension cord is properly wiredand ingood
electricalcondition;and
c. That wire size is large enough for AC ampere
ratingof chargeras specifiedbelow:
CordLength(Feet) 25' 50' 100'
CordSize(AWG) 16 16 16
NOTE: AWG=American Wire Gage
■Donotoperatechargerwithadamagedcord or plug.
If damaged, have replaced immediately by a
qualifiedserviceman.
■Do not operate charger if it has received a sharp
blow,beendropped,orotherwisedamagedinany
way; take it to a qualified serviceman.
■Do not disassemble charger; take it to a qualified
servicemanwhenserviceorrepair is required.
Incorrect reassembly may result in a risk of electric
shock or fire.
■To reduce risk of electric shock, unplug the charger
fromoutletbefore attempting any maintenanceor
cleaning. Turning off controls will not reduce this
risk.
■Disconnectchargerfrom power supplywhennotin
use.
■Risk of electric shock. Do not touch uninsulated
portionofoutputconnectororuninsulatedbattery
terminal.
■Save these instructions. Refer to them frequently
and use them to instruct others who may use this
unit. If you loan someone this unit, loan them these
instructions also.
■Do not dispose of batteries in a fire. The cell may
explode. Batteries should be recycled, consult your
localwasteauthorityforinformationregarding
availablerecyclingand/ordisposaloptions.
■When battery pack is not in use, keep it away from
other metal objects like: paper clips, coins, keys,
nails, screws, or other small metal objects that can
make a connection from one terminal to another.
Shorting the battery pack terminals together may
cause sparks, burns, or a fire.
CHARGER SAFETY
■Save these instructions. This manual contains
importantRulesforSafeOperationandoperating
instructionsforcharger.
■Beforeusing battery charger, read allinstructions
and cautionary markings in this manual, on battery
charger,andproductusingbatterycharger.
■To reduce risk of injury, charge only nickel-cadmium
typerechargeable batteries. Othertypes of batteries
mayburst, causing personalinjuryand damage.
■Do not expose charger to wet or damp conditions.
■Use of an attachment not recommended or sold by
the battery charger manufacturer may result in a risk
of fire, electric shock, or injury to persons.
■To reduce risk of damage to charger body and cord,
pullbychargerplugratherthan cord when discon-
nectingcharger.
■Make sure cord is located so that it will not be
steppedon, tripped over, or otherwisesubjected to
damageor stress.
■An extension cord should not be used unless
absolutelynecessary. Useof improperextension
cord could result in a risk of fire and electric shock.
If extension cord must be used, make sure:
a. That pins on plug of extension cord are the same
number, size and shape as those of plug on
charger.
IMPORTANT SAFETY INSTRUCTIONS

6
Important:Someofthefollowingsymbolsmaybeusedonyourtool.Pleasestudythemandlearntheirmeaning.
Proper interpretation of these symbols will allow you to operate the tool better and safer.
SYMBOL NAME EXPLANATION
SYMBOLS
V Volts Voltage
A Amperes Current
Hz Hertz Frequency(cycles per second)
W Watt Power
min Minutes Time
AlternatingCurrent Type or a characteristic of current
DirectCurrent Type or a characteristic of current
n0NoLoadSpeed Rotational speed, at no load
Class II Construction DesignatesDoubleInsulatedConstructiontools
.../min RevolutionsorReciprocationPerMinute Revolutions, strokes, surface speed, orbits
etc. per minute
Safety Alert Symbol Indicates danger, warning or caution. It means
attention!!! Your safety is involved.
Wet Conditions Alert Do not expose to rain or use in damp
locations.
Read Your Operator’s Manual Your manual contains special messages to
bring attention to potential safety concerns,
machine damage as well as helpful operating
and servicing information. Please read all the
information carefully to avoid injury and ma-
chine damage.
WearEye,Hearing,andHeadProtection Weareyeprotectionwhichismarkedtocomply
with ANSI Z87.1 as well as hearing and head
protectionwhenoperatingthisequipment.
WearSafetyFootwear Wear non-slip safety footwearwhenusingthis
equipment.
WearGloves Wear non-slip, heavy-duty protective gloves
whenhandlingthepruner.
Moving Parts Keep hands away from moving parts.
KeepChildrenand Pets Away Danger-Keepchildrenandpetsaway.
Risk of Electrocution DANGER! Risk of electrocution! Keep all
bystanders at least 50' (15 m) away.
SAVE THESE INSTRUCTIONS
50'
15m

7
The purpose of safety symbols is to attract your attention to possible dangers. The safety symbols, and the
explanations with them, deserve your careful attention and understanding. The safety warnings do not by
themselves eliminate any danger. The instructions or warnings they give are not substitutes for proper accident
prevention measures.
DANGER:Indicates an imminently hazardous situation which, if not avoided, will result in death
orserious injury.
WARNING: Indicates a potentially hazardous situation which, if not avoided, could result in
seriousinjury.
CAUTION: Indicates a potentially hazardous situation which, if not avoided, may result in minor
or moderate injury. It may also be used to alert against unsafe practices that may cause property
damage.
NOTE: Advises you of information or instructions vital to the operation or maintenance of the equipment.
SYMBOL MEANING
NOTE: Save these instructions.Refer to them frequently and use them to instruct others who may use this unit.If
you loan someone this unit, loan them these instructions also.
SYMBOLS
WARNING:
The operation of any power tool can result in foreign objects being thrown into your eyes,
whichcan result insevere eye damage.Beforebeginning tool operation,always wear
safety goggles or safety glasses with side shields and a full face shield when needed. We
recommend Wide Vision Safety Mask for use over eyeglasses or standard safety glasses
with side shields. Always wear eye protection which is marked to comply with ANSI Z87.1.
SPECIFICATIONS
Motor 18 Volt, DC
Blade Length 5 in.(127 mm)
CuttingCapacity Max 4 in.(10.25cm)
ReplacementBladePartNumber 6968001
NetWeight 7.37lbs(3.35kg)
ChargerReplacementPartNumber 1425701
BatteryReplacementPartNumber 1323701
ChargerRating 120V, 60 Hz, AC Only
ChargerVoltage 18Volt
ChargerRate 1Hour
PRODUCT SPECIFICATIONS:
UNPACKING
Thepoleprunerhasbeenshippedcompletelyassembledexceptforthebladeandbatterypack. Afterremovingitfrom
thebox,inspectitcarefullytomakesurenobreakageordamagehasoccurredduringshipping.Ifanypartsaredamaged
ormissing,contactyournearestHomeliteAuthorizedServiceCentertoobtainreplacementpartsbeforeattemptingto
operate the pole pruner. The blade, allen wrench, battery pack, battery charger, and this operator’s manual are also
included.
SAVE THESE INSTRUCTIONS

8
FEATURES
KNOW YOUR POLE PRUNER
See Figure 3.
Before attempting to use the pole pruner, familiarize
yourself withall operatingfeatures andsafety require-
ments.
WARNING:
Do not allow familiarity with your pole pruner to
make you careless. Remember that a careless
fraction of a second is sufficient to inflict severe
injury.
Fig. 3
WARNING:
If any parts are missing, do not operate your pole
pruner until the missing parts are replaced. Failure
to do so could result in possible serious personal
injury.
APPLICATIONS
Use the pole pruner for limbing and pruning small branches and limbs up to 4 in.(10.25 cm) in diameter.The long
length of the pole pruner allows the operator to prune branches or limbs that are normally out of reach.
18.0v
U
L
C
L
N
O
K
BATTERY
PACK
TRIGGER
TRIGGER LOCK BUTTON
REAR HANDLE
BLADE
CUTTING GUIDE
MOTORHOUSING
SHAFT
ADJUSTMENT
COLLAR
FRONT
HANDLE
ANCHOR SCREW
BLADE WRENCH
AND STORAGE
AREA

9
ASSEMBLY
TO INSTALL AND REMOVE BLADE
INSTALLING THE BLADE
See Figures 4 and 5.
1Remove the battery pack from the pole pruner.
2Removethebladewrenchfromthestoragearea.
SeeFigure 4
.
3Place the blade wrench in access hole and loosen
theblade retaining screw.
SeeFigure 5.
4Install blade into the mounting clamp.
NOTE: Make sure the mounting clamp pin is
positioned correctly in the positioning pin hole of the
blade. If not positioned correctly the mounting clamp
will not hold the blade securely.
5Tightentheblade retaining screwsecurelywith
bladewrench.
6Returnbladewrenchtostoragearea.
REMOVING THE BLADE
See Figures 4 and 5.
1Remove the battery pack from the pole pruner.
2Removethebladewrenchfromthestoragearea.
SeeFigure 4
.
3Place the blade wrench in access hole and remove
theblade retaining screw.
SeeFigure 5
.
4Remove the blade from the unit, making sure the
blade clears the mounting clamp pin. See
Figure 5
.
TO INSTALL BATTERY PACK
SeeFigure 6
.
1Place the battery pack in your pole pruner. Align
raised rib on battery pack with groove in pole
pruner’sbatteryport.
2Make sure the latches on each side of the battery
pack snap in place and that battery pack is secured
inpoleprunerbeforebeginningoperation.
TO REMOVE BATTERY PACK
SeeFigure 6
.
Locate latches on side of battery pack and depress
both sides to release the battery pack from the pole
pruner.
WARNING:
Failure to remove the battery pack from the pole
pruner could result in accidental starting which
could possibly cause serious personal injury.
POSITIONING
PINHOLE
MOUNTING
CLAMP PIN
MOUNTING CLAMP
Fig. 4
Fig. 5
Fig. 6
18.0V
BATTERY PACK
LATCHES
BATTERY
PORT

10
U
L
C
L
N
O
K
ADJUSTMENTS
ADJUSTING THE SHAFT
See Figures 7, 8 and 9.
1Rotate the lower portion of the shaft adjustment
collar to the “Unlock” position.
See Figure 7
.
2Lower shaft should now be free to slide down from
inside the upper shaft. Make sure the shaft is pulled
out to the desired position.
See Figure 8
.
3Rotate shaft adjustment collar to the “Lock” position
and tighten securely.
See Figure 9
.
Fig. 7
Fig. 8
Fig. 9
SHAFT
ADJUSTMENT
COLLAR
LOWERPORTION
OF SHAFT
ADJUSTMENT
COLLAR
TO UNLOCK
COLLAR
TO LOCK
COLLAR
LOWERPORTION
OF SHAFT
ADJUSTMENT
COLLAR
SHAFT
ADJUSTMENT
COLLAR
SLIDE OUT TO
DESIREDPOSITION
U
L
C
L
N
O
K
U
L
C
L
N
O
K

11
OPERATION
BATTERY PACK AND CHARGER
LED FUNCTION OF CHARGER
SeeFigure10.
LEDWILL BE ONTO INDICATE STATUS OF
CHARGERANDBATTERY PACK:
■Red LED on = Fast charging mode.
■Green LED on = Fully charged battery pack.
■Yellow and GreenLEDs on =Control charge or
defective battery pack.
■No LED on = Defective charge or battery pack.
CHARGING YOUR POLE PRUNER
Thebattery pack for your polepruner has beenshipped
ina low chargecondition to preventpossible problems.
Therefore, you should charge it prior to use.
NOTE: Batteries will not reach full charge the first time
theyare charged. Allowseveral cycles(pruningfol-
lowed by recharging) for them to fully charge.
TOCHARGE
■Chargebattery pack onlywith the chargerprovided.
■Make sure power supply is normal household
voltage, 120 volts, 60 Hz, AC only.
■Connectcharger to power supply.
■Place battery pack in charger.
See Figure 10
. Align
raised rib on battery pack with groove in charger.
■Press down on battery pack to be sure contacts on
battery pack engage properly with contacts in
charger.Whenproperly connected,redlight will turn
on.
■Normally, the yellow and green lights on the charger
will come on.This indicates charger is in control
charge mode and should switch to fast charge mode
within 5 minutes.When charger is in fast charge
mode the red light will come on. If after a period of
15 minutes the yellow and green lights remain on,
remove the battery pack, wait 1 minute and reinsert
battery pack in charger.If the yellow and green
lights continue to remain on an additional 15 min-
utes, the battery pack is damaged and will not
acceptcharge.
■When your battery pack becomes fully charged, the
red light will turn off and the green light will turn on.
■After normal usage, 1 hour of charge time is re-
quired to be fully charged. A minimum charge time
of 1 to 1-1/2 hours is required to recharge a com-
pletelydischarged tool.
Fig.10
BATTERY
CHARGER
BATTERY
PACK
GREEN
LIGHT
YELLOW
LIGHT
RED LIGHT
■RED LIGHT “ON” INDICATES FAST CHARGING MODE
■YELLOWAND GREEN LIGHTS “ON” INDICATES
CONTROL CHARGE OR POSSIBLE FAULTY
BATTERY
■GREEN LIGHT “ON” INDICATES FULLY CHARGED
■The battery pack will become slightly warm to the
touch while charging.This is normal and does not
indicatea problem.
■DO NOT place charger in an area of extreme heat or
cold. It will work best at temperatures above 50°F
andbelow100°F.
IMPORTANT INFORMATION FOR RECHARGING
HOT BATTERIES
Whenusing yourpole prunercontinuously,thebatteries
in your battery pack will become hot.You should let a
hot battery pack cool down for approximately 30
minutesbeforeattempting to recharge.
NOTE:This situationonly occurs whencontinuous use
of your pole pruner causes the batteries to become hot.
It does not occur under normal circumstances. Refer to
“ChargingYour PolePruner”earlierinthis manual, for
normalrechargingof batteries. Ifthecharger/charging
assembly does not charge your battery pack under
normal circumstances, return both the battery pack and
charger/chargingassembly to yournearestHomelite
Authorized Service Center forelectrical check.

12
OPERATION
STARTING AND STOPPING THE POLE
PRUNER
SeeFigure11.
STARTING THE POLE PRUNER
1Holdthe pole pruneras shownand ensure thatyou
are well away from anything that may contact the
blade.
SeeFigure12.
2Press and hold the trigger lock button.This makes
thetriggeroperational.
3Press and hold the trigger, release the trigger lock
button and continue to squeeze the trigger for
continuedoperation.
STOPPING THE POLE PRUNER
1Releasethe trigger tostop thepole pruner.
2Upon release of the trigger, the trigger lock button
will be automatically reset to the lock position.
PREPARATION FOR CUTTING
PROPER GRIP ON HANDLES
SeeFigure12.
Refer to “Important Safety Instructions”earlier in this
manual,forappropriate safety equipment.
■Wearnon-slipglovesformaximumgripandprotection.
■Maintainapropergrip on the unitwheninoperation.
Use your right hand to firmly grip the rear handle
while your left hand has a firm grip on the front
handle.
■Never stand directly under the limb you are cutting.
BASIC CUTTING PROCEDURE
SeeFigures 13and 14.
■Accelerate the unit to full speed just before entering
the cut by squeezing the trigger.
■Do not use a back and forth sawing type motion for
cutting.
■The following steps should be followed to prevent
damage to tree or shrub bark.
See Figure 13
.
1The first cut should be a shallow cut (1/4 of the
limb diameter) on underside of limb or trunk.
2The second cut should be made from the top side
of the limb outboard from first cut.
3Make the final cut close to the trunk and from the
top of the branch.
CAUTION:
When placing battery pack in your pole pruner, be
sure raised rib on battery pack aligns with groove
in pole pruner's battery port and latches snap in
place properly. Improper assembly of battery
pack can cause damage to internal components.
Fig.11
18.0v
1
8
0
v
TRIGGER
TRIGGER LOCK
BUTTON
Fig. 12
60° MAXIMUM
FINAL CUT
SECOND CUT
FIRST CUT
1/4 DIAMETER
LOAD
Fig. 13

13
WARNING:
To prevent possible serious injury to yourself or
to others, read, understand, and follow all
instructions in this operator's manual.
OPERATION
■Keep the unit at full speed the entire time you are
cutting.
■For second and final cuts (from top of limb or
branch), hold the front cutting guide against the limb
being cut. This will help steady the limb and make it
easier to cut.
See Figure 14.
■Allow the blade to cut for you; exert only light
downward pressure. If you force the cut, damage to
the blade or unit can result.
■Release the trigger as soon as the cut is completed,
allowing the unit to stop.
WORK AREA PRECAUTIONS
■Cutonly woodor materialsmade from wood; no
sheet metal, no plastics, no masonry, no non-wood
buildingmaterials.
■Neverallowchildrentooperateyourpolepruner.
Allow no person to use this pole pruner who has not
readthisOperator'sManualandreceivedadequate
instructions for the safe and proper use of this pole
pruner.
■Keepeveryone-helpers,bystanders,children,and
animals a safe distance, of at least 50 ft. (15 m),
from the cutting area.
■Always cut with both feet on solid ground to prevent
beingpulledoffbalance.
■Cut only when visibility and light are adequate for
you to see clearly.
LIMBING AND PRUNING
SeeFigures 15and 16.
This unit is designed for trimming small branches and
limbs up to 4 in.(10.25cm) in diameter.
■Plan the cut carefully. Be aware of the direction in
which the branch will fall.
■Branches may fall in unexpected directions. Do not
stand directly under the branch being cut.
■The most typical cutting application is to position the
unit at an angle of 60° or less, depending on the
specific situation.
See Figure 15.
CUTTING GUIDE
Fig. 14
Fig. 15
60° MAXIMUM

14
■As the angle of the pole pruner boom to ground
increases, the difficulty of making the first cut (from
the underside of limb) increases. Failure to follow
thisprocedure can result in the blade binding and
becoming pinched or trapped in the limb. If this
shouldhappen:
1Stop the unit and remove the battery pack.
2Remove the blade retaining screw, with the allen
wrench supplied, then remove the unit from the
trappedblade.
3Lift the limb while holding the blade. This should
releasethe“pinch”andfreethe blade.
4If the blade or pole pruner is still trapped, call a
professional for assistance.
■The long reach of the unit allows the operator to
prune branches or limbs that are normally out of
reach.
■Longbranchesshouldberemovedin several
stages.
■Cutting lower branches first will allow the top
branches more room to fall.
■Workslowly, keeping bothhandson the polepruner
with a firm grip. Maintain secure footing and bal-
ance.
■Keepthe tree between youand the blade while
limbing. Cut from the side of the tree opposite the
branchyou arecutting.
■Do not cut from a ladder, this is extremely danger-
ous. Leave this operation for professionals.
■Do not use for felling or bucking.
■Whenpruningtreesitisimportantnottomaketheflush
cutnexttothe main limb ortrunkuntilyouhave cut off
thelimbfurtherouttoreducetheweight.Thisprevents
stripping the bark from the main member. Underbuck
the branch 1/4 way through for your first cut, your
secondcutshouldoverbucktodropthebranchoff.Now
make your final cut smoothly and neatly against the
main member so the bark will grow back to seal the
wound.
OPERATION
WARNING:
Never climb into a tree to limb or prune. Do not
stand on ladders, platforms, a log or in any
position which can cause you to lose your
balance or control of the unit.
WARNING:
To prevent electrocution, do not operate within 50
feet (15m) of overhead electrical lines.
See Figure
16.
WARNING:
Keep all bystanders at least 50 ft. (15 m) away.
SeeFigure16.
50'
15m
Fig. 16

15
MAINTENANCE
BATTERIES
The battery pack for your pole pruner is equipped with
nickel-cadmiumrechargeablebatteries.Length of
service from each charging will depend on the type of
workyouare doing.
The batteries in this tool have been designed to provide
maximum trouble free life.However, like all batteries,
they will eventually wear out. Do not disassemble
battery pack and attempt to replace the batteries.
Handlingof these batteries,especiallywhen wearing
rings and jewelry, could result in a serious burn.
To obtain the longest possible battery life, we suggest
thefollowing:
■Storeand charge yourbatteries in alocation where
the temperature is above 50°F but less than 100°F.
■Neverstore batteries ina discharged condition.
Rechargethem immediatelyafter they aredis-
charged.
■Allbatteriesgraduallylosetheir charge.Thehigher
the temperature the quicker they lose their charge. If
you store your pole pruner for long periods of time
without using it, recharge it every month or two.This
practice will prolong battery life.
DISPOSAL OF THE EXHAUSTED BATTERY
To preserve natural resources, please
recycle or dispose of properly. This
productcontainsanickel-cadmiumbat-
tery. Must be disposed of properly.
Local, state, or federal laws may pro-
hibit disposal of Nickel-Cadmium bat-
teries in ordinary trash.
Consultyourlocalwasteauthorityforinformationregard-
ingavailablerecyclingand/ordisposaloptions.Formore
informationonbatteryrecyclingcall1-800-8BATTERY.
BATTERY PACK PREPARATION FOR RECYCLING
Avoid using solvents when cleaning plastic parts.Most
plastics are susceptible to damage from various types
of commercial solvents and may be damaged by their
use.Use clean cloths to remove dirt, dust, oil, grease,
etc.
WARNING:
Do not at any time let brake fluids, gasoline,
petroleum-basedproducts,penetratingoils,etc.
come in contact with plastic parts. They contain
chemicals that can damage, weaken or destroy
plastic.
WARNING:
Upon removal, cover the battery pack’s terminals
with heavy duty adhesive tape. Do not attempt to
destroy or disassemble battery pack or remove
any of its components. Also, never touch both
terminals with metal objects and/or body parts as
short circuit may result. Keep away from children.
Failure to comply with these warnings could result
in fire and/or serious injury.
WARNING:
When servicing use only identical Homelite
replacement parts. Use of any other parts may
create a hazard or cause product damage.
WARNING:
Do not attempt to modify this tool or create
accessories not recommended for use with this
tool. Any such alteration or modification is misuse
and could result in a hazardous condition leading
to possible serious personal injury.
WARNING:
Anyrepairs requiringdisassembly shouldonly be
performedbyaHomeliteAuthorizedServiceCenter.
Fortherepaircenternearestyou, call1-800-242-
4672.
TRANSPORTING AND STORING
■Always place the blade cover on the blade before
storingortransportingthepolepruner.Usecaution
to avoid the sharp teeth of the blade.
■Cleanthepoleprunerthoroughlybeforestoring.
Store the pole pruner indoors, in a dry place that is
inaccessible to children. Keep away from corrosive
agents such as garden chemicals and de-icing
salts.
R
E
C
Y
C
L
E
1
.
8
0
0
.
8
2
2
.
8
8
3
7
RBRC
Ni Cd™

16
LIMITED WARRANTY STATEMENT
HomeliteConsumerProduct,Inc.warrantstotheoriginal
retailpurchaser thatthisHOMELITE productisfree from
defectinmaterialandworkmanshipandagreestorepairor
replace,atHomeliteConsumerProducts,Inc.’sdiscretion,any
defectiveproductfreeofchargewithinthesetimeperiodsfrom
thedateofpurchase.
■■
■■
■Oneyearforthefollowingunits:UT08110,UT20760,
UT10901;
■■
■■
■Twoyears forallother Homeliteproducts,iftheproduct is
usedforpersonal,familyorhouseholduse;
■■
■■
■90 days, if any of the above products are used for product
usedforany otherpurpose, suchas commercialorrental.
Thiswarrantyextendstotheoriginalretailpurchaseronlyand
commencesonthedateoftheoriginalretialpurchase.
AnypartoftheHOMELITEproductmanufacturedorsupplied
byHOMELITEandfoundinthereasonablejudgmentof
HOMELITEtobedefectiveinmaterialorworkmanshipwillbe
repairedorreplacedbyanauthorized HOMELITEservice
dealerwithoutchargeforpartsandlabor.
TheHOMELITEproductincludinganydefectivepartmustbe
returnedtoanauthorizedservicedealerwithinthewarranty
period.TheexpenseofdeliveringtheHOMELITEproductto
thedealer forwarrantywork andtheexpense ofreturningit
backtotheowner afterrepairorreplacementwill bepaidforby
theowner.HOMELITE’Sresponsibilityinrespecttoclaimsis
limitedtomakingtherequiredrepairsorreplacementsandno
claimofbreach ofwarrantyshallbe causeforcancellationor
rescission of the contract of sale ofany HOMELITE product.
Proofofpurchasewillberequiredbythedealertosubstantiate
anywarranty claim.All warrantywork mustbeperformedby
anauthorizedHOMELITEservicedealer.
Thiswarranty islimited toninety (90)daysfromthedate of
originalretailpurchaseforanyHOMELITEproductthatisused
forrentalorcommercial purposes,or anyotherincome-
producingpurpose.
Thiswarrantydoesnotcover anyHOMELITE productthat has
beensubjecttomisuse,neglect,negligence,oraccident,or
thathasbeenoperated inanywaycontrarytotheoperating
instructionsasspecifiedintheHOMELITEoperator’smanual.
Thiswarranty doesnotapply toanydamage totheHOMELITE
productthatistheresult ofimproper maintenanceortoany
HOMELITEproductthathasbeenalteredormodifiedsoasto
adverselyaffecttheproductsoperation,performanceor
durabilityorthathasbeenalteredormodifiedsoastochange
itsintended use.Thewarranty doesnotextendtorepairs
made necessary by
normal wear or by the use of parts or accessories which are
eitherINCOMPATIBLEWITHTHEHOMELITEproductor
adverselyaffectitsoperation,performanceordurability.In
addition,thiswarrantydoesnotcover:
A.Tune-ups–SparkPlugs,CarburetorAdjustments,Filters
B.Wearitems–BumpKnobs,OuterSpools,CuttingLines,
Inner
Reels,StarterPulley,StarterRopes,DriveBelts
HOMELITEreserves therighttochange orimprovethedesign
ofanyHOMELITEproductwithoutassuminganyobligationto
modifyanyproductpreviouslymanufactured.
ALLIMPLIEDWARRANTIESARELIMITEDINDURATIONTO
THESTATEDWARRANTYPERIOD.ACCORDINGLY,ANY
SUCHIMPLIEDWARRANTIESINCLUDING
MERCHANTABILITY,FITNESSFORAPARTICULAR
PURPOSE,OROTHERWISE,AREDISCLAIMEDINTHEIR
ENTIRETYAFTERTHEEXPIRATIONOFTHE
APPROPRIATETWO-YEAR,ONE-YEAR,ORNINETYDAY
WARRANTYPERIOD.HOMELITE’SOBLIGATIONUNDER
THISWARRANTYISSTRICTLYANDEXCLUSIVELYLIMITED
TOTHEREPAIRORREPLACEMENTOFDEFECTIVE
PARTSANDHOMELITEDOESNOTASSUMEOR
AUTHORIZEANYONETOASSUMEFORTHEMANYOTHER
OBLIGATION.SOMESTATESDONOTALLOW
LIMITATIONSONHOWLONGANIMPLIEDWARRANTY
LASTS,SOTHEABOVELIMITATIONMAYNOTAPPLYTO
YOU.HOMELITEASSUMESNORESPONSIBILITYFOR
INCIDENTAL,CONSEQUENTIALOROTHERDAMAGES
INCLUDING,BUTNOLIMITEDTOEXPENSEOF
RETURNINGTHEHOMELITEPRODUCTTOAN
AUTHORIZEDSERVICEDEALERANDEXPENSEOF
DELIVERINGITBACKTOTHEOWNER,MECHANIC’S
TRAVELTIME,TELEPHONEORTELEGRAMCHARGES,
RENTALOFALIKEPRODUCTDURINGTHETIME
WARRANTYSERVICEISBEINGPERFORMED,TRAVEL,
LOSSORDAMAGETOPERSONALPROPERLY,LOSSOF
REVENUE,LOSSOFUSEOFTHEPRODUCT,LOSSOF
TIME,ORINCONVENIENCE,SOMESTATESDONOT
ALLOWTHEEXCLUSIONORLIMITATIONOFINCIDENTAL
ORCONSEQUENTIALDAMAGES,SOTHEABOVE
LIMITATIONOREXCLUSIONMAYNOTAPPLYTOYOU.
Thiswarranty givesyouspecificlegalrights, anyyou mayalso
have other rights which vary from state to state.
ThiswarrantyappliestoallHOMELITEproductsmanufactured
byHOMELITEandsoldintheUnitedStatesandCanada.
Tolocateyournearestservicedealer,dial1-800-242-4672or
logontoourwebsiteatwww.homelite.com.
WARRANTY

17
NOTES

SERVICE
Now that you have purchased your unit, should a need ever exist for repair parts or service, simply contact your
nearest Homelite Authorized Service Center. Be sure to provide all pertinent facts when you call or visit. Please
call1-800-chainsaw(1-800-242-4672)foryournearestHomeliteAuthorizedServiceCenter.Youcanalsocheck
our web site at www.homelite.com for a complete list of Authorized Service Centers.
MODEL NO. AND SERIAL NO.
The model and serial number of this unit will be found on a label attached to the motor housing.
Please record the serial number in the space provided below.
HOW TO ORDER REPAIR PARTS
WHENORDERINGREPAIRPARTS,
ALWAYSGIVETHEFOLLOWINGINFORMATION:
• MODEL NUMBER
• SERIAL NUMBER
983000-114
2-03
UT34020
HOMELITE CONSUMER PRODUCTS, INC.
1428PearmanDairyRoadAnderson,SC29625
Post Office Box 1207, Anderson, SC 29622
Phone1-800-chainsaw(1-800-242-4672)
www.homelite.com
OPERATOR'S MANUAL
18 Volt Cordless Pole Pruner
Model No. UT34020
Table of contents
Other Homelite Pole Saw manuals