Basiclnstructions:
When
you
unboxtheHotRodPL
you'll
findtherearethreeseparately
wrapped
parts.
1)Takethe
PL
mount
adapter
[Part
HRPLA]andattachitto
your
rnicro4/3camerabodv,
just
as
you
wouldth€standard
lensincludedwith
your
camera.
2)AttachthePL
mountadaptertotheCentralSupport
[Part
HRCS]viathe1/4'threaded
knobonthe
CentralSupport
(see
fig1- l(nobA).Attachthiscaptured
green
knobtightly
(finger
tight
isfine,
just
makesureitistlghtenedcompete
y)
tothePLmount.
WhenthePLmountlsattachedcorrect
y
tothe
CentralSupportand
your
camera
bodviscorrectlyattachedtothePLmountadapter,thecamera
body
doesNOTneedtobeattachedtothecamerarnounting
knob
(See
fig2
-
KnobB)ontheCentral
Support.
lfchoosingtoattach
thecameramountingscrewintheCentraSupporttothecamerabody,thescrew
needonlybesnLrggedintothecamerabodyeno!gh
tosafetythecamera.ThereisNObenefltto
making
this
connection
morethansnugtightwhilethePLadapterisinoperation.
ThePLadapteris
takingaLl
theweightofthelens.Donotover-tightenthecameramountingscrew
whenusingthePL
mount,
lf
you
areusingnonPLmountlenseswith
your
camera,removethePLadapter
fromtheCentralSupport
andcamerabody,ihen
backdownthePLmountknob
(Knob
A)sothatitnoonger
movesfree
yinslde
the
CentraSupport.Next,tightenthecamerabodysecLrrelytotheCentralSupport
withthecamera
mounting<nob
(l(nob
B).
3)Slide15mmirisrodslntotheCentraSupportandadjusttheheightof
therodsbyusingthe
Sreen
verticalVofientedknurledknob
(See
Fig
1
- l(nobC)onthefrontoftheCentraSupport.
lf
for
some
reasonfinger
tightisnotsufficient,ahexkeycanbeusedtotightenthe
verticalyorientedknurledknob
a ittlefurther.Oncethe15rnmlrisrodsarelnthedesired
position,
tightenthe
(2x)
green
irisrodlevers
tosecure
the
rods
ln
place.
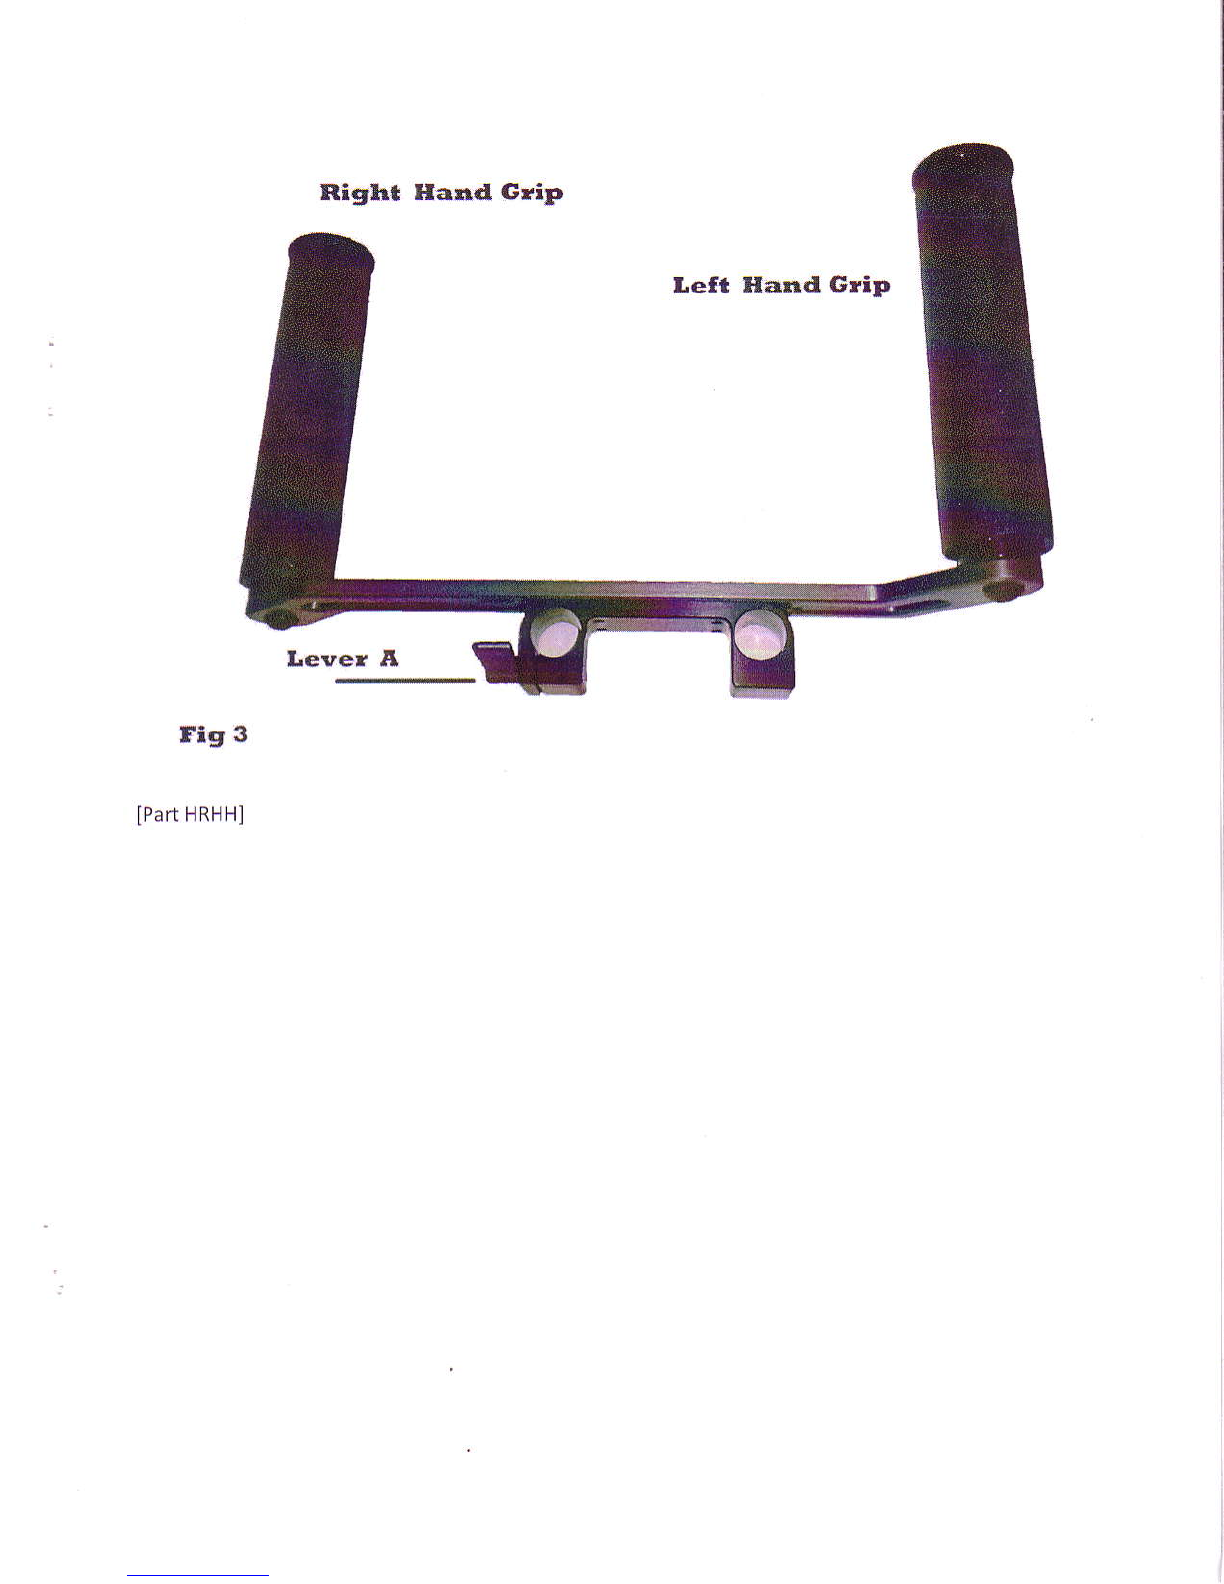
4)lfapplicableto
you
shootingsituation,attachtheHandHeld
Grip
IPart
HRHH]tothe15mmrods.The
Hand
HeldGriplockinglevershouldbe
just
beow
your
righthand
grip. fchoosingtoattachthehand
heldsupport"inside"theC-shapedcavltyoftheCentralSupport,
makesurethatirisrod
heightis
adl!sted
onthevertical
y
orientedknuredknob
(See
Fig1- KnobC)
toallowthehandhedkitclearance
ofthebase
plate
ofthe
CentraSupport.
5)Ascautionedintheintroduction-there'sonlyone
lockingleverfortheHandHeld
Srip
onthe
camera
rightside
(See
Fig3
- LeverA). Makesurethatthislever
istightenedsecurelywhenoperating
handheld
ormovlngthecamerabythehandle.
6)
MakesurethatthePLringisadjustedtothecorrectopen
position
beforeinsertingaPLmountLens.
lfitistooclosed,
you
maynotbeairleto
properly
mountorlockalens.When
facingtheHotRodPLit's-
"righty
tighty","eftyloosey."Alwayssecurelensestight,but
withoutovertightening.lt's
just
likea