manuals.online logo
Brands
  1. Home
  2. •
  3. Brands
  4. •
  5. Hotpoint
  6. •
  7. Refrigerator
  8. •
  9. Hotpoint CTF14 Installation instructions

Hotpoint CTF14 Installation instructions

Other manuals for CTF14

5

This manual suits for next models

1

Other Hotpoint Refrigerator manuals

Hotpoint FF7190TX User manual

Hotpoint

Hotpoint FF7190TX User manual

Hotpoint HSZ3021VL User manual

Hotpoint

Hotpoint HSZ3021VL User manual

Hotpoint MSZ802DF Operating and installation instructions

Hotpoint

Hotpoint MSZ802DF Operating and installation instructions

Hotpoint HTM18IBPLRSA and Operating instructions

Hotpoint

Hotpoint HTM18IBPLRSA and Operating instructions

Hotpoint HDR190I User manual

Hotpoint

Hotpoint HDR190I User manual

Hotpoint KHM325FF.1 User manual

Hotpoint

Hotpoint KHM325FF.1 User manual

Hotpoint MISTRAL PLUS 8496 User manual

Hotpoint

Hotpoint MISTRAL PLUS 8496 User manual

Hotpoint HT303 User manual

Hotpoint

Hotpoint HT303 User manual

Hotpoint HS16 Series User manual

Hotpoint

Hotpoint HS16 Series User manual

Hotpoint MISTRAL FF61 User manual

Hotpoint

Hotpoint MISTRAL FF61 User manual

Hotpoint ECOFL series User manual

Hotpoint

Hotpoint ECOFL series User manual

Hotpoint HTH16BBXL User manual

Hotpoint

Hotpoint HTH16BBXL User manual

Hotpoint HTM18GCSSA Manual

Hotpoint

Hotpoint HTM18GCSSA Manual

Hotpoint CSX27H User manual

Hotpoint

Hotpoint CSX27H User manual

Hotpoint MSZ 906 DF (UK) User manual

Hotpoint

Hotpoint MSZ 906 DF (UK) User manual

Hotpoint RLA80 User manual

Hotpoint

Hotpoint RLA80 User manual

Hotpoint FF4DK(UK) User manual

Hotpoint

Hotpoint FF4DK(UK) User manual

Hotpoint BS 16 Series User manual

Hotpoint

Hotpoint BS 16 Series User manual

Hotpoint MBT 1911 FI/HA User manual

Hotpoint

Hotpoint MBT 1911 FI/HA User manual

Hotpoint CSX20 Specification sheet

Hotpoint

Hotpoint CSX20 Specification sheet

Hotpoint CTF-17 User manual

Hotpoint

Hotpoint CTF-17 User manual

Hotpoint HTS18BCM User instructions

Hotpoint

Hotpoint HTS18BCM User instructions

Hotpoint 22 Series Operating instructions

Hotpoint

Hotpoint 22 Series Operating instructions

Hotpoint HTR15BBM User instructions

Hotpoint

Hotpoint HTR15BBM User instructions

Popular Refrigerator manuals by other brands

Frigidaire FRS26TS7DW2 Use & care manual

Frigidaire

Frigidaire FRS26TS7DW2 Use & care manual

Fisher Scientific 10ECEEFSA manual

Fisher Scientific

Fisher Scientific 10ECEEFSA manual

Summit FF22BDRSS user manual

Summit

Summit FF22BDRSS user manual

Frigidaire FFRU17B2QWE use & care

Frigidaire

Frigidaire FFRU17B2QWE use & care

Hitachi R-SG28KPH instruction manual

Hitachi

Hitachi R-SG28KPH instruction manual

Dometic RMH 7390 L operating instructions

Dometic

Dometic RMH 7390 L operating instructions

AEG S71700TSW0 user manual

AEG

AEG S71700TSW0 user manual

Electrolux ENB3669 Instruction book

Electrolux

Electrolux ENB3669 Instruction book

Electrolux ERN 2930 Instruction book

Electrolux

Electrolux ERN 2930 Instruction book

Beko GNE 60520 X user manual

Beko

Beko GNE 60520 X user manual

Jenn-Air JUR248LBES00 Use & care guide

Jenn-Air

Jenn-Air JUR248LBES00 Use & care guide

Dometic RGE 4000 Installation and operating manual

Dometic

Dometic RGE 4000 Installation and operating manual

Dometic L-0191B Brochure & specs

Dometic

Dometic L-0191B Brochure & specs

LG LRBP1031W - 10 Cu. Ft. Cabinet Depth Bottom Freezer... owner's guide

LG

LG LRBP1031W - 10 Cu. Ft. Cabinet Depth Bottom Freezer... owner's guide

Daewoo RN-33 Series user manual

Daewoo

Daewoo RN-33 Series user manual

Haier RF-8888-174 Service manual

Haier

Haier RF-8888-174 Service manual

Blaupunkt 5CK2 Series user manual

Blaupunkt

Blaupunkt 5CK2 Series user manual

Beko B5RCNE366HG user manual

Beko

Beko B5RCNE366HG user manual

manuals.online logo
manuals.online logoBrands
  • About & Mission
  • Contact us
  • Privacy Policy
  • Terms and Conditions

Copyright 2025 Manuals.Online. All Rights Reserved.

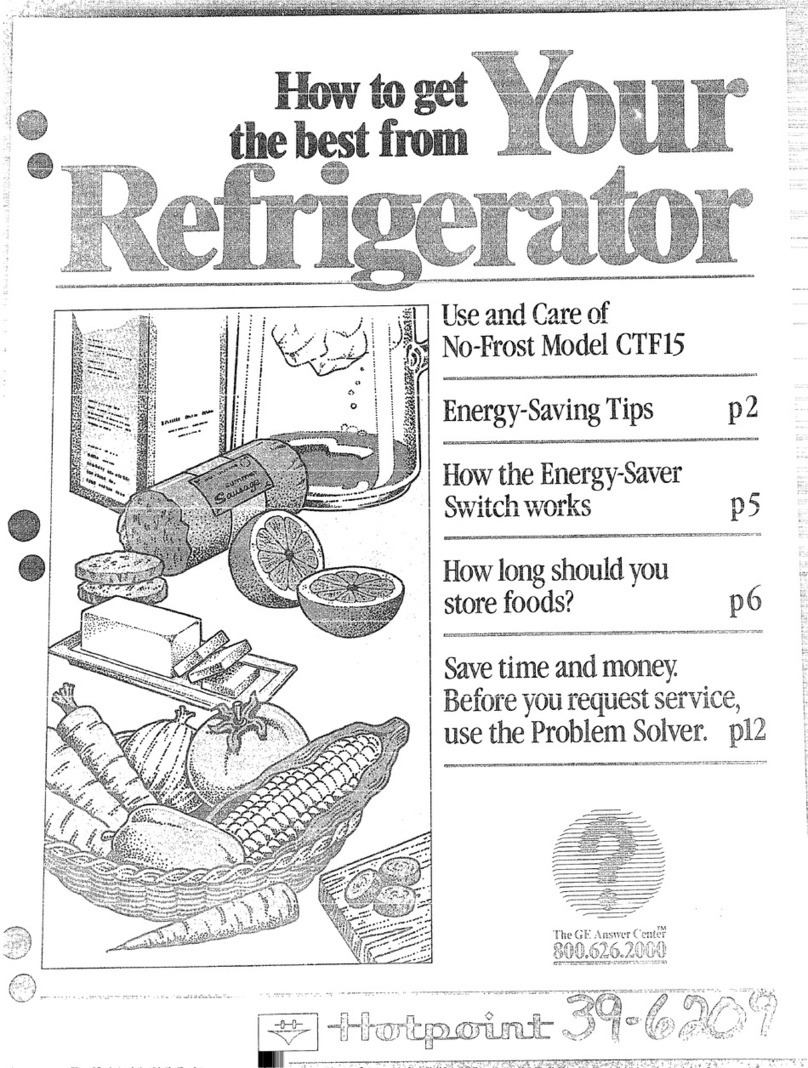
toget
the stfmm
useandcared’No-Frost
Models CTF14&CTF16
Energy-savingTips p2
How
theEnergy-saver
Witchworks p!$
Savetimeandmoney
Beforeyou.requestservice,
usetheProblemSolver.pli?!
Fssr-=- ..—---———=——
_A=qr=rm
~q...-m
-m! ‘GEAwm”er GAY
l--__-.-..-J
LJ
page
Energy-SavingTips. . . . . . . , . ..2
Important Safety Instructions. ,,3
How to connect Electricity. ..394
InWdkNkmRequirements, . , ..4
How to Adjust Rollers. ,,.....4
How to AdjustLevelingLegs. ...4
How to Set Temperature
Controls .......5...........5
How to Use Energy-Saver
~~,~~~j~.,,, ,,. .c, .,, ,,. ,., ,~
Food Storage Suggestions. .....6
ShelfPositions. . . . . . . . . . . . ..’7
Storage Drawers. ..........’798
Ice Service . . . . . . . . . . . . ..9q10
Accessories . . . . . . . . . . . . . . ..lfl
User Maintenance
Instructkxrs. . . . . . . . . . . . . . ..ll
l?robkrn Sokx. . . . . . . . . . .1.3M
ConsumerServices. . . . . . . ...15
Wmmty..,.......Ekdkfcmm’
It is intenckxlto help you operate
and maintain your new refrigerator
properly.
Keep it handy for answers to your
questions.
If you don’t understand something
or need more help...
Call, toll-free:
‘me GE Answer Centel’m
8m.626.2m
consumer information service
or write (include your phone
number)
Consumer Affairs
FkXpoint
Appliance Park
Louisville,KY 40225
writedown themodeland
said Em.mkmse
You’Hfind them on alabel at the
bottom, just inside the fresh food
compartment door.
These numbers are also on the
Consumer Product @nership
Registration card that came with
your refrigerator. Before sending
i]~this cardj please wrke these
numbers here:
Mode{ Number
&?rkd Number
Use these numbers in any
correspondence or service calls
concerning your refrigerator.
Nyou received admaged
rdrigemtoq immediately contact
the dealer (or builder) that sold
you the refrigerator.
SW%?
timead money.
Ban%?ymi!frequmwSWvka)
check the Problem Solveron pages
12through 14.It listsminor causes
of operating problems that you can
correct yourself.
ToobtainHispanicversionof
thisbook, call
The GE AnswerCenter’M
800.626.2000
consumer informationservice.
Toll-free.
Para obtener laversidn en
espafiolde &te manual,
Hamegratis a
TheGEAnswer Center,
servicio de informacibn
para el consumidor,
tel~fono800.626.2000.
eJ&cation of your refrigerator is
4hmportzmt.Avoidlocating it next to
your range, aheating vent or where
.! sun WNshine directly c3n it.
@Be sure the doors are ckxed
tightly. Before leaving the house or
retiring for the night, check.to be
sure doors haven’t been left open
accidentally.
~,St.oreordy those foods requiring
refrigeralicm in ym.wre.kigerat.ora
@Keep all foods covered to reduce
moisture build-up inside -therefrig-
erator.
*If you turnCormds tocoldest
position for quick chilling or freez-
ing, be sure to W33them back to
regular settings.
@Mm yourl%!fz’igerdtmisk
operation,do !niOttm.Rdl?the (X3’M
!3Wfkesqparticulmiywhimkinds
me damp or wet. Skin may adhere
to these extremely cold surfaces.
. ...... . >---
‘. , , -------------
@If ymm’ FefTig@T%tQrIhmsml
automaiiaieemakerqdo not‘#m
fingersml”kinds ‘am $BM3au$o~mi$tic
faemaldngineebdsm WMWEthe
FetigeratoFisplwggedin.“nliswill
prevent contact withthemoving
pazts of the ejector mechanism,
or with the heating element that
releases the cubes.
@Don’t !J%3fE’@X3zehozemfoods Wbieb
have thawed comp~etely.
The United Mates Department of
Agriculture in Home and Garden
IMetin No. 69says:
‘f..You may safely refreeze frozen
foods that have thawed if they stiH
contain ice crystals or if they are
still cold—below 40°F.
‘t..Thawed ground meats, pOUltIY,
or fish that have any off-odor or
off-color should not berefrozen and
should not be eaten. Thawed ice
cream should be discarded. If the
odor or color of any food is poor
or questionable, get rid of it. The
food may be dangerous to eat. ‘
“Even partial thawing and refreez-
ing reduce the eating quality Of
foods, particularly fruits, vegeta-
bles,and prepared foods.The eating
quality of red meats isaffected less
than that of many other foods. Use
refrozen foods as soon as possible
A. Before making any repairs.
Note: We stronglyrecommend
that any servicingbe performed
by aqualified indivithxd.
RBefore cleaning.
C. Before repfacing aburned-out
light bulb, the refrigerator should
be unplugged in order to avoid
contact with alivewire filament.
(A burned-out lightbulb may
break when being replaced.)
Note: Turning control to (N?F
position does not remove power
to the light circuit.
The power cord of this appliance
PREFERRED
ME-MID
. . . ...-..
I
. .
‘>
I:!
Where astandard two-prongwall ;,-,
;“”.
outlet isencountered, it isyour per- ,‘-- ~
,.
sonal responsibility and obligation I:.
to have it replaced with aproperly ;“. ‘- -
g-roundedthree-prong wa~~oudet. ~‘
,“
))
‘i --i
INSUREPROPER Do IWIT, IJlwYn? ANY CXRCXJNI” :
IGROUNDEXISTS
Fig. 1BEFOREUSE STANCW$9 CUT’ OR Riwwowz
Tm. ‘IwlHwil [GROLJND) !WLON-G ‘
Have the wall outlet and circuit FROMTmifkwnmCFOND.
!,
Part NO, 467736!%3
Ekcause ofpohmtia6 safety
hazardsumkrcertain con~itions,
we stmrwlvrecommend againstuse
u
of an ad:l”p;erplug. However,ifyou
stillelect to usean adapter, where
localcodes permit, a‘1’EMPORARY
cnm~cmxi1332ijfbemade to a
properlygrounded two-prongwall
outlet by useof aLJLlistedadapter
(Fig. 2) available at most local
hardware stores.
The Iqer slot in the adapter
must be aligned with the larger slot
in the wall outlet to provide proper
pohity in the connection of the
power cord.
CAUTION: Attaching adapter
ground termin:l] to wall outiet
cover screw does not ground the
appliance unless cover screw is
metal, and not insulated, and wall
outlet isgrounded through house
wiring. Youshould have the circuit
checked by aqualified electrician
to make sure the outlet isproperly
grounded.
whamdkmmxting thepm%x
cod from‘theadapter,al ways hoki
the adapter with one hand. If this
is not done, the adapter ground
terminaI isvery likely to break wi[h
repeateci use.
Because of potential safety
hazards under certain conditions,
we strongjy recommend against the
use of an extensioncord. However,
ifw3ustillelect to use an extension
cob. it is absd utelynecessary that
i[[~e a[.JL lis[ed 3--wire grounding
:ype :Ippliance extensioi~cord hav-
inga:rounding typepluguncloutlet
and that the electrical rating of the
cord be 15amperes (minimum)and
120volts.Such extensioncords
are obtainable through your local
service organization,
The refrigerator Sllouid
dwtrys be plugged imto its OWxl
inditidRRal ehxh%d outkt-
(115volt, 60 Hertz, or 100volt,
50Hertz, singlephase AC). This is
recommended forbestperformance
and to prevent overloadinghouse
wiring circuits, which could cause
apossiblefire hazard from over-
heating wires.
I?efrigerator Installation
ILocatiol%
Do ml’$install refrigerator where
temperature willgo below 60°R
because itwilInot run often enough
to maintain proper temperatures.
DOinstall it on afloor strong
enmgh $0 support afullykxded
refrigerator.
Also see Energy-SavingTips
regarding location=
~l@J~y~a~@~
Mow the following &%WMMXsfor
ease of installation and pq’ler lain’
Ciredation :
sides.. _______5/8°
Top--_--. -__---l”
Ba&__---___o”-o”
Tf~,/
~{\ :fi~,~v%~fyRJllr ~Q ~~~~~]f~g
.- .2Utiik yJ
(on modek so quipped)
You willneed to connect your
icemaker to acold water line. A
water supply kit containing copper
tubing, shut-off valve, fittings and
instructions is avaiIabIe at extra
cost from your dealer. There
should be sufficient tubing for
the icemaker from the cold water
supply to allow you to move the
refrigerator out from the wall
several feet (approximately 3coils
of U4-iRc13copper tubing that
measure at least 10inchesin
dM.Oeter),
L;
for cle:u~ing;other ~%delshave
adj~~ttib!e]e?di~~~
k&b Rdk!%
or legs, locakxi behind the base
grill,should be set so the refriger-
ator is firmlypositioned on the
floor and the front is raised ~ust
enough that the doors closeeasily
when opened about halfway,
Toadjuastden% or k!vdinglegs,
remove base grille by grasping it
at bottom and pulling it out.
ROLLER
Turn roller adjusting screws or
leveling Iegsckdcwise to raise
refrigerator, eolmtercloektise $0
lower it. Use adjustable wrench or
pliers on the roller adjusting screw’s
3/8” hex head bolt.
When adjusting rollers or leveling
legsfor proper door closure, bottom.
fr~nt edge ~f cabinet should be
approximately 5/8” from floor.
,
FREEZER
cINITIAL SETT!NG
~IS COLDEST ALLOW’ 24 HOURS
BETWEEN ADJUSTMENTS
FRESH FcmD
SINITIAL SETTING
9IS COLDEST
() IS OFF
~Iltlwt\lm
7g3~4sl A
TEMPERATURE
CONTROLS
..you may want to turn the lettered
control one step colder, asfrom “C”
to “D.”Cooler temperatures in the
house lmaycause the compressor to
operate less frequently, thus allow-
ing the freezer compartment to
warm somewhat. To protect your
frozen food supply,leave your
lettered setting at this colder setting
for the entire winter or for whatever
period of time you are turning down
your thermostat. This ise.specialiy
important when the thermostat is
turned down for an extended period.
This change should have no effect
on your fresh food compartment.
However, if freezing occurs, turn
the numbered control one step
warmer, as from “5” to “4:’
When you stop turning the ther-
mostat down, turn temperature
controls back to their regular
settings.
The Energy Saver Switch islocated
on the upper left side of the fresh
food compartment.
TOE’duw mermmowltdekdl’icity
M%-@i’edt-oGqpemte ymrwFeh$igewl-
t’twy push SW&h tothe~o-m~
pmitimoThis turns off heaters in
your refrigerator that prewnt rfiok-
tme from ;c3rmimg cm the outside.
[,JseoftheEnergy saver Switchcan
save you money.Estimated yearly
savings,depending on your local
electric rates, are as follows;
L
Model
CTF14
CTF16 -=4
Est~mat6dYeadYSaVing~ Fne[gy
.—..
ElectricRate(PerKwII) Savings
ZmG_mEOxb .11 (A~prox’)
$8.00 I$13.00I$18.001 13% ]
With the heaters turned off, there
is achance that moisture may form
on the outside of your refrigerator,
especially when the weather is
humid. The humidity ismost likely
to be high in the summer, in the
early morning hours, and in homes
which are not air conditioned.
Over an extended period of time,
moisture that forms on the outside
may cause deterioration ofthe paint
finish. Itwillbe important to protect
the finishby using appliance polish
wax as described on page 11.
menthe Energy saw’ stitch is
pushed to the right, electricity flows
through the low wattage heaters
which warm the outside of the cabi-
net and, under most conditions,
prevent the forming of moisture
or water droplets.
Nodefrosting
It is not necessary to defrost
the freezer or fresh food compart-
ments. Your refrigerator isdesigned
and equipped to defrost itself
automatically.
5I%rt !40. 4(NXWTX3
... ...
Eatingquaiiiy dwps REFRIGERATOR FR\\ZER
.
?Jier’lime shmwn 35Q &40”F.
DAYS
2oasis (Beef&Lamb). 3t05
Roasts(Pork&Veal). 3to 5
Steaks(Beef) ........... 3t05
Chops(Lamb) . . . . . . . . . . . 3t05
Chops(Pork) ........... 3t05
Ground &Stew Meats. . . . . lto2
VarietyMeads........... lto2
Sausage(Pork) .......... lto.2
Processed Meats
Bacon................7
Frankfurters ............ 7
Ham(Whole) . . . . . . . . ...7
Fiam(Half) . . . . . . . . . . . ..3to5
Ham(Slices) . . . . . . . . . . . . 3
Luncheon Meats......... 3t05
Sausage(Smoked). . . . . . 7
Sausage(Dry&Semi-Dry). 14to 21
cooked Meats
CookedMeatsand
MeatDishes .......... 3t04
Gravy&Meat Broth . . .. . . . lto2
FreshPoultry
Chicken&Turkey (Whole). 1to 2
Chicken(Pieces). Ito 2
Turkey(Pieces) . . . . . . . . . . lto2
Duck &Goose (Whole). 1to 2
Giblets................ lto2
cookedPoultry
?ieces (Covered with Broth) 1to 2
Pieces(Not Covered). . . 3to 4
CookedPoultry Dishes. . . . . 3to 4
Fried Chicken . . . . . . . . . . . 3t04
OOF.
NlONTIN
6to 12
4t08
6to 12
6t09
3t04
3t04
3t04
lto2
1
x
1102
lto2
lto2
Freezing
not recom-
mended.
2t03
2t03
12
9
:
3
6
1
4t06
4
(~~~~~i~afifO~~~~tS ~~tXl~@) FREEZER
)Jost frui[s and vegetables. . . . . . ...8-12 months
Lean fish . . . . . . . . . . . . . . . . . . . .6-8 months
Fatty fish, rolls and breads,
soups, stew, casseroles. ...2-3 months
Cakes,pies, sandwiches,
Ieft-overs (cooked),
Ice cream (original carton). ......1 month max
Newtechniquesareconstantlybeingdeveloped.
ConsulttheCollegeorCountyExtensionServiceor
yourlocalUtilityCompanyfor thelatestinformation
crifreezingandstoringfoods.
z[[ S.DepuiIIwmoj’Agriculture
>itwts, fish and poultry purchased
from the store vary in quality and
:iqe:consequently, safe storage time
in your refrigerator will vary.
TOSQD4%3Wrlkmi?nmt?m, fish and
pwlhtry:
@
Alwaysremove store wrappings.
@Rewrap in foil, filmor wax paper
and refrigerate immediately.
To store Cheesegwrap wellwith wax
paper or aluminum foil,or put in a
plastic bag.
@Carefully wrap to expel air and
help prevent mold.
~Store pre-packaged cheese in its
own wrapping if you wish.
TOstore veg&Mes9 use the
vegetable drawers—they’vebeen
designed to preserve the natural
moisture and freshnessof produce.
~Covering vegetables with amoist
towel helps maintain crispness.
@As afurther aid to freshness,
pre-packaged vegetables can be
stored in their original wrapping.
To store ice meam-l?ine-quality
ice cream, with high cream
content, willnormaIly require
slightlylower temperatures than
more “airy” already-packaged
brands with low cream content.
~It willbe necessary to experiment
to determine the freezer compart-
ment location and temperature con-
trol setting to keep your ice cream
at the right serving temperature.
0The rear of the freezer compart-
ment isslightlycolder than the front.
r~:e..+
-&g>[9@~&=}’{JQMQJJ
;:k~:)sc~Jjl.4 ~- .d
Th~re are three essential require-
ments for efficient home freezing.
1. initial ~Rdit~e Freezeonly
top-quality foods. Freezing retains
quality and flavor; itcannot improve
quality.
2. Speed. The quicker fruits and
vegetables are frozen after picking,
the better the frozen product will
be. You’llsave time, too –less
culiing and sorting willbe needed.
3. I%wwr padkagh,go Use food
wraps ‘designed especially for
freezing.
6
“1%k’e.ze meat, fishad poultry,
wrap wel~in freezer-weightfoil(or
other heavy-dutywrappingmaterial)
forming itcarefully to the shape of
the contents. This expels air.Fold
and crimp ends of the package to
provide agood, lastingseal.
Don’t refreeze meat that has com-
pletely thawed; meat, whether raw
or cooked, can be frozen success-
fullyonly once.
Limit freezing of fresh (unfrozen)
meats or seafoods to number of
pounds at atime as follows:
CTF14. . . . . . . . . . . ..12 pounds
CT’F16..............14 pounds
For eomvemienee **6’
~Store alllike things together. This
not onlysavestime, but electricity—
because you can find foods faster.
~Place the oldest items up front so
they can be used up promptly.
~Use shelves on the door for most
often used sauces and condiments.
@Use the meat drawer, if your
model has one, for meats you do
not freeze.
To save KRok%eyilllK%@Wgy
~@
~~~fi&QQd~~~f~ ..Q
~Place most perishable items such
as milk, cream or cottage cheese
toward the rear ofthe top fresh food
shelf where they willstay coldest.
~Cover moist foods with tight lids,
plastic film or foil.
*Leaf vegetables and fruits placed
in storage drawers wi!llast longer
when stored in closed plastic con-
tainers or wrapped in plastic film.
QDo not overload your fresh food
or freezer compartment with alot
of warm food at one time.
~Open the door the fewest times
possible to saveelectrical energy.
~When going away for several days,
leave as few perishables as possible
in the refrigerator. Set icenmker, if [~:~;
1
your model has one, to the “OFF”
‘-’--+-
position and shut off water to the -“~~
refrigerator. (~;j
-!, ;-f@$yp&.~~)
~;~;’;,.;.:-- :(<;:.,::) :,;,
.-
Sornemodels have adjustable
shelvesin the fresh food compart-
ment, enabling you rearrange the
shelvesto fit your family’sfood
storage needs.
(
I
Toremove shelves: Tilt shelfup
at front, then lift it up and out of
tracks on rear waHof refrigerator.
❑Engage
top lug
❑Lower to
lock into place
To ~ep#we SkSKWS:Select desired
shelf height. With shelf front raised
slightly,engage top lugs in tracks
at rear of cabinet. Then lower front
of shelf until it locks into position.
Tempered glassshelves (on.models
so equipped) are adjmtab~e in the
~anle~anner.
,,-,-,,’,,,:.”:; .,-.!
... . .. ,.:. L.
Drawers at bo~tomof fresh fooci
compartment willstop before
coming ail the way out of riifrig-
erator to help prevent contents
from spilIingonto fioor.Drawers
can easily be removed by tilting
up slightlyand pullingpast “stop”
location.
To rwmow?drawers whenthe fnwb
foodeompar~ent door cannot be
openedmy, bhw the pmmxhre
that appliesto your model.
1. Remove food from drawers and
drawer covers and shelfabove thein,
and take shelfout.
2. Grip drawer and cover farthest
from the door simultaneously with
both hands, lift them off the front
supports, and pull them out.
3. G@ remaining drawer and
cover simultaneously with both
hands, lift them off the front sup-
ports, and pull forward just enough
to detach. from rear supports.
\
4‘Tiltdrawer and cover sideways.
5. Turn drawer and cover and take
them out.
TOM@aee: reverse procedure,
making sure covers engage sup-
ports at rear and rest on supports
at front of refrigerator.
-.,
)
i
,.
Part P!o.46R36P03
2ePull drawer out afewinches.Grip
drawer cover with both hands, lift
frontoff supports and pull forward
just enough to detach cover from
rear support brackets.
3Up-end drawer and cover with
front side up.
I
t
The slide-out meat drawer can be
4. Turn drawer and cover to lgftand
remove fromrefrigerator, (Withleft-
hand door, turn drawer and cover
to .-
right.)
To repiace: reverse procedure,
making sure holes in rear of cover
hook onto supports at rear of
refrigerator and front of cover rests
on supports at front of refrigerator.
removed and taken to the sink or
food preparation area. Youmay also
relocate it within the fresh food
compartment to suit your storage
needs.
onfdl-%dth shelf models, just
slide drawer out, remove drawer
cover from shelf above, relocate
cover in the position you desire it
and slide drawer back into place.
(hi half-tidth shelf models,the
drawer and the shelf to which it
attaches can be relocated at any
level.
‘,
,, ......... . .. . .
,. -,. -.,$;
p’? %.,- . . . . . ... . . . ,...,~ 7+..
t>
1, ~.- ,
--.--” .,! ;:. ~. +.:. ~.:. l~i.$.
.. . ,. -.2?> ‘,’.’[
.~.s
,.. ..,,..:_-
Q&pbw icemdw winpmk.fm eight
dies per fcyde —approximately
lUOcubes in a24-how-period,
dependingon freezer compartment
temperature, room temperature,
number of door openingsand other-
use conditions.
If.yore’Fehigemtor isoperated
before waler Wmmdkm ismade
@the kemaker9keep the icemaker
feeler arm in’the OFF (up) position
as shown below.
Feeler Arm in
Ice Storage BirI
when ?refrigemm’has been
connectedtowaterSupplytmove
the feeler arm to the ON (down)
position.
Feeler Arm in
ON position
Icc cube mold willautomatically
fi~lwith water after cooling to
freezing temperature, and first
cubes norrnaliyfreeze after several
hours. When cubes are solidly
frozen, they willbe ejected from
the mold into the ice storage bin by
means of asweeper arm. hmnaking
willcontinue until the feeler arm
senses asufficientaccumulation of
ice cubes in the storage bin and
halts the operation temporarily.
For maximum ice storage, level
the stored cubes with your hand
occasionally. Be sure nothing
interferes with the swingof the
feeler arm.
The icemaker ejects cubes in
groups of eight and it is normal
for several cubes to bejoined
together.
once your imm.tker is in oper-
ation Mm’ mvaythe first few
batches of ice cubes. This will
flush away any impurities in the
water line. Do the same thing
after vacations or extended
periods when ice isn’tused.
caution:
Under certain rare circums-
tances, ice cubes may be
discolored, usually appearing
with agreen-bIuish hue. The
cause of this unusual discolor-
ation is appmently due to a
combination of factors such as
certain characteristics of local
waters, household plumbing
and the accumulation of copper
salts in an inactive water supply
line which feeds the icernaker.
Continued consumption of such
discolored ice cubes may be
injurious -tohealth. If such dis-
colomtion is observed, discard
the ice cubes and contact your
C&meld Electric Factory service
Center or an authorized Customer
.~;@@&J@J~\Ti~~~+
*home water supply isto be off for
several hours.
@ice storage bin is to be removed
for aperiod of time.
sgoing aw:~yon vacation, at which
time you shoukl also turn off the
valve in the water supply line to
your refrigerator.
If iceisused iBIfreqUentlyq old cubes
willbecome cloudy and taste stale.
Empty ice storage bin periodically
and wash it in lukewarm water.
when akwgesupply of icetill
be needed, make an extra supply
ahead of time. Empty bin, put cubes
in plastic bags or contaii~ersand
store in the freezer compartment
until the bin refills.
Mthis is your first icemaker, you’ll
hear occasional sounds that may be
unfamiliar. They are normal ice-
making sounds and are not cause
for concern.
f
-.-.,
,, ~
‘. —‘,
—..
PartNo.4EY73Wiii ‘“
.
‘lbEQdwww icemhes+ invert tray,
hold it Overstorage bucket (cm
modelsso equipped) or bowl, and.
twist tray at both encks. \
For Ody $MRem$3-’wice a.ks~
leave the tray right-side up, twist
both ends slightlyand remove
desired number of cubes. ,
/’/---
W.h trays and storage bucket in
Jukewarrn water only. Do not put
them in an automatic dishwasher.
<. ,.
.,, -.,,,, .! t,
.,f~
_l,..-.:.,. .. i‘
;~r,,,<::.,..;.:‘,,. .
.-- . . . -
7..7,
[:,, ,:, =;:e:$; :;<: ::~?) vi!:.i”
.. ..-.
a
, ,,
1~.:$.ii :U!:i;”::!.’4),;!)
{[)$>>j$},+.
The optiol]al automatic icemaker
willrepklce the ice you use...auto-
matically.It can keep you supplied
with abinf~~of ~ubes—icefor
everything, everybody—without
fussor muss.
If your refrigerator did not come
ah-eadyequipped with an auto-
matic icemaker, you may add one-
contact your local I-Iotpointdealer;
specify UK-KIT-Ior UK-KIT-2.A
water supply kit containing copper
tubing, shut-off valve, fittingsand
instructions needed to connect the
icemaker to your cold water line
is also available at extra cost.
Your ike cubes can only
be as fresh-tasting as the
water that produces them,
That’swhy it’sagooclidea
to purify your water with
aQuadra Ween Water
Filter.
Its activated charcoal
removes musty,stale odors
and unpleasant medicinal,
metallic tastes. Aporous
fiber cartridge catches
dirt, rust particles, sand
and silt while special
crystals reduce deposits
of hard scale.
The water filter is available from
your I+Iotpointdealer. Specify
JVR97X214.It has complete instal-
lation instructions and installsin
minutes on 1/4”0.D. copper
water line.