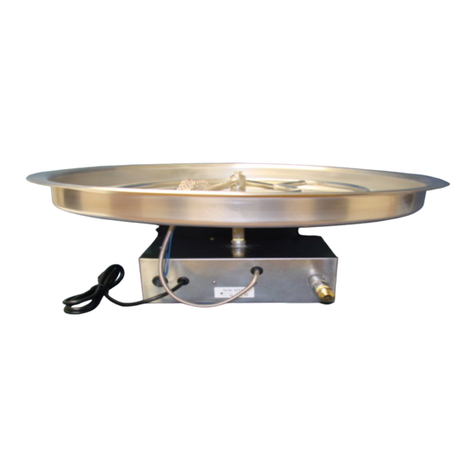
HPC Electronic Ignition Flame Control System User guide

1
8/17/2016 850-EI
Service We suggest that our products
be serviced by a professional
certified in the US by the
National Fireplace Institute
(NFI) as NFI Gas Specialists.
Electronic Ignition Flame Control
System Safety Manual
Available in “Hi/Lo” and “On/Off” Models
Installation & Operation Instructions
Commercial and Residential Use
WARNING: FOR OUTDOOR USE ONLY
WARNING
•Improper installation, adjustment, alteration, service or maintenance can cause injury or property
damage. Read the installation, operating and maintenance instructions thoroughly before installing or
servicing this equipment.
WARNING
•Do not store or use gasoline or other flammable vapors and liquids in vicinity of this or any other
appliance.
•An LP cylinder not connected for use shall not be stored in the vicinity of this or any other appliance.
DANGER
If you smell gas:
1) Shut off gas to appliance.
2) Extinguish any open flame.
3) If odor continues, keep away from appliance and immediately call gas supplier or fire
department.
Select Models
Certified to
ANSI Z21.97-2014
CSA 2.41-2014
Installation
We suggest that our products be
installed by professionals that are
locally licensed by the authority having
jurisdiction in gas piping.
INSTALLER: Leave this
manual with the appliance.
CONSUMER: Retain this
manual for future reference.
Record and keep for your records: You may
remove the label from the package and tape here.
Model #:
Serial #:
BTU: Voltage:
Attention:
Hi/Lo Only
For the App, the default
security code is 2345.

2
8/17/2016 850-EI
Index:
General Information
1) General Information
2) Selecting the Location
3) Construction of Enclosure
4) Installation of Fire Pit
5) Media
1) General Information
Instructions are also available at hpcfire.com
Please carefully follow the instructions in this manual to prevent personal injury or property loss. Instructions are
updated as needed. It is the installer’s responsibility to periodically review instructions for applicable updates.
The steps listed as:
WARNINGS: Contains information critical to the safe installation and operation of the fire pit.
WARRANTY REQUIREMENT: Must be strictly followed to qualify for product warranty.
Warranty will be void if not followed.
IMPORTANT: Notes and insights to help ensure product satisfaction and serviceability.
-------------------------------------------------------------------------------------------------------------------------------------------------
WARNING: It is the installer’s responsibility to ensure a safe installation and to educate the end user as to proper
operation. Leave this manual with the end user.
WARNING: Never alter product or configuration in any way.
WARNING: FOR REMOTE CONTROL / SHUTDOWN TIMER USE: Including but not limited to wall switches,
hand held devices such as (cellphones, key fobs, remote controllers, timer controller, etc.), business and whole house
automated control systems. It is the user’s responsibility to comply with the following guidelines:
1) Visual inspection
a. Visually ensure all covers are removed
b. Visually ensure that the product is clear of people and any foreign debris prior to start-up
c. Visually ensure that the product is safe to start
2) Ensure product is monitored by a responsible adult during use
3) When not in use, ensure power is off to the product to avoid accidental start-up of the product
4) Product is for use with electrical remote/timer control. Do not use with gas remote/timer controls
WARNING: Not for use with any kind of automatic start-up timer.
WARNING: We suggest that our products be installed by professionals that are locally licensed by the authority having
jurisdiction in gas piping. We suggest that our products be serviced annually by a professional certified in the US by the
National Fireplace Institute (NFI) as NFI Gas Specialists or in Canada by WETT (Wood Energy Technical Training).
Installer must follow all instructions carefully to ensure proper performance and safety. Hearth Products Controls
Company is not responsible for your actions.
WARNING:Product is not intended to be a starter for wood or any other combustibles.
WARNING:Product is not for use with small LP Tanks and must utilize permanent fixed piping for fuel supply.
WARNING: It is the responsibility of the installer to follow:
oThe National Fuel Gas Code, ANSI Z223.1/NFPA 54 or International Fuel Gas Code.
oThe National Electrical Code, ANSI/NFPA 70.
oLocal Codes
WARNING: Only use gas/fuel type specified for this fire pit see label on the fire pit control box. Verify correct
gas/fuel type and pressure. Never use an alternative fuel to include bio-fuel, ethanol, lighter fluid or any other fuel.
2 Gas pressure and type should be checked prior to use and installation.
● Natural Gas:
Operating Supply Pressure: Minimum: 6.0” W.C.; Maximum: 7.0” W.C.
● LP Gas:
Operating Supply Pressure: Minimum: 10.0” W.C.; Maximum: 11.0” W.C.
Product Specific Information
6) Parts List
7) Installation of Flame Control System
8) Fire Pit Operation
9) Maintenance
10)Troubleshooting
11)Replacement Parts
12)Warranty

3
8/17/2016 850-EI
IMPORTANT: Fuel Supply for “Hi/Lo” Systems –It is necessary to supply your (Hi/Lo) fire feature with 1.5 times
the maximum rated BTU. This will ensure there is enough pressure for your high/low function to work properly. This
requirement does not increase the amount of fuel your appliance will consume during normal operation. (Example: A
200k BTU fire pit should be supplied with 300 k BTU fuel capacity).
IMPORTANT: Do not exceed maximum input pressures; low pressure will impact HI/LO model’s flame control.
IMPORTANT: Ensure any flex line that may be used from the permanent main fuel supply to the product is rated to
the stated max BTU of the product and certified to ANSI Z21.75*CSA 6.27.
2) Selecting the Location
WARNING: All fire pits, match lit kits, spark ignition, safety pilot and electronic ignition systems are designed and intended for
outdoor use only. Fire pits are not to be installed within 36”-48” of any structure depending on the size. See drawing in instructions.
WARNING: For electronic ignition models there must be an electrical shut off (wall switch or breaker) on the exterior of the fire
pit or on adjacent wall to allow for emergency shutdown and maintenance.
WARNING:All fire pits must have a gas shutoff on the outside of the exterior of the fire pit to allow for emergency shut off and
maintenance. The gas shutoff should not be used to adjust flame height.
WARNING: Select a location where the fire pit can be attended during operation. Never leave an operating fire pit unattended or
by someone not familiar with its operation or emergency shut off locations.
WARNING: Both children and adults should be alerted to the hazards of high surface temperatures and should stay away to avoid
burns and clothing ignition.
WARNING: Young children should be carefully supervised when they are in the area of fire pit.
WARNING: Clothing or other flammable materials should not be placed on or near fire pit.
WARNING: Fire pits create very high temperatures - Combustibles must be located far enough away that there is no risk of
ignition.
IMPORTANT: It is recommended that material such as granite, marble or other dense stone be kept away from heat and
especially flame due to risk of cracking. Manufacturer is not responsible for damage.
Fire Pit Clearances –See figures 1 and 2 on last pages
Up to 200k BTU
201k ~ 400k BTU
Under valve box when applicable for drainage
2”
2”
Sides surrounding fire pit from structure or combustibles
36”
48”
Overhead clearance above product
84”
Noncombustible screen only
Select a location above ground with good drainage and allows easy access for installation and maintenance of the fire
pit.
Pick a location that allows sufficient horizontal room to enjoy the fire pit while allowing a safe distance from the heat
and flame.
3) Construction of the Enclosure
WARNING: For electronic ignition models there must be an electrical shut off (wall switch and breaker) on the exterior of the fire
pit or on adjacent wall to allow for emergency shutdown and maintenance. Verify correct 110VAC, 1 amp or 24VAC 4 amp supply.
All electronic applications should utilize a GFCI protected circuit.
WARNING: For 24V systems a Class II, 24VAC, 4 amps (14 gauge wires) must be supplied to the fire pit and able to be
switched on and off from a remote location to allow for easy access or emergency.
WARNING:All fire pits must have a gas shutoff on the outside of the exterior of the fire pit to allow for emergency shut off and
maintenance. The gas shutoff should not be used to adjust flame height. Refer to your local codes.
WARNING: Use noncombustible materials and construction for gas supply, power and enclosure. A metal outlet box should be
used inside the enclosure for electronic ignition models.
WARNING: We prefer the enclosure incorporate 4 vents total (minimum 18 sq. inches each side) to reduce the risk of thermal
shutdown on the EI Series- some enclosures may require more ventilation based on material, size and extended use. The minimum
requirement is the enclosure incorporate 1 vent on at least 2 sides (2 vents total) at a minimum size of 18 sq. inches of total free area
each (Example: 3”x 6” or larger) to ensure that heat and residual gas can escape. Installation of the vents in the mid to lower area of
the enclosure is recommended. Failure to properly vent enclosure may result in the fire pit overheating or explosion. Continuous
overheating could lead to heat damage to internal components. The vent may work as a drain as well when installed at bottom
sidewall to prevent water build up.
WARNING: The interior void space of the enclosure surrounding the valve box cannot be filled with any material (gravel, crushed
rock, concrete, etc.) - It is a requirement to have a minimum of 2” under the valve box for proper ventilation and drainage.
WARNING: The fire pit assembly should be recessed a minimum of 2.25” from the top of the enclosure to protect flame from
being blown out. Some areas may require more in the range of 4 to 6”.
WARRANTY REQUIREMENT: Do not daisy chain wiring for multiple fire pit installations. Each fire pit must have dedicated
wiring.

4
8/17/2016 850-EI
WARRANTY REQUIREMENT: The enclosure must be constructed on a stable surface. The weight of the fire pit must be
supported by the pan and not by any control/valve box. For electronic ignition models the control/valve box must be above grade
with adequate drainage to prevent water damage to the controls inside the box.
Make sure that the structure is level. We recommend the use of the installation collar (optional) that may be mortared
into the surround.
HPC recommends that the pan lip is recessed on trough (linear), and large round products as illustrated below. HPC
cannot guarantee the lip on all of our products will be perfectly flat and will not warp due to heat.
IMPORTANT: Product must be accessible for service.
4) Installation of a Fire Pit
WARNING: We suggest that our products be installed by professionals that are locally licensed by the authority having jurisdiction
in gas piping.
WARNING: Confirm this appliance is built for gas used –natural gas or LP. Do not use natural gas appliance with LP or LP
appliance with natural gas. Refer to the label on the appliance.
WARNING: To prevent damage, unhook fire pit from gas supply for pressure leak tests.
WARNING: Burn testing - It is the responsibility of the qualified installer to test for gas leaks at all connections.
WARNING: When filling the pan with lava rock and/or decorative glass, the instructions in Section 5 must be followed.
WARNING: Gas Plumbing Connections: Use only joint compound or tape that is resistant to all gases. Apply joint compound to all
male pipe fittings only- DO NOT use on FLARED fittings. Be sure to tighten every joint securely.
WARNING: For systems with an extended or detached valve box: the area in which the valve box is installed must conform to all
installation requirements to include but not limited to location, construction, venting and local codes. Failure to do so may result in
personal injury property damage or explosion.
IMPORTANT: Fuel line sizing is the responsibility of the installer and must be able to supply 1.5 times the stated maximum BTU
for the product.
IMPORTANT: Ensure any flex line that may be used from the permanent main fuel supply to the product is rated to the stated max
BTU of the product and certified to ANSI Z21.75*CSA 6.27.
WARRANTY REQUIREMENT: Electronic Ignition fire pits come with a sheet of insulation between pan and valve box to protect
internal components from heat damage. This may need to be trimmed on smaller enclosures for proper fit. Please use insulation at all
times.
Antenna position for “Hi/Lo”models –For best results the antenna should be pointed down as much as possible depending on the
configuration and the onsite conditions. Be careful not to damage the antenna during installation or service.
Installation
We suggest that our products be installed by professionals
that are locally licensed by the authority having
jurisdiction in gas piping.
Side Mount –
Round, Square,
Rectangular Units
Vertical Mount - Linear Unit
Mount
Antenna extension cable is available for
installations that have poor reception.

5
8/17/2016 850-EI
1. Refer to cut sheets on our website for important dimensional information for your fire pit.
2. Plan your project well in advance to comply with all instruction and codes and allow for access and serviceability of the
product.
3. Purge gas lines of air.
4. Perform all leak tests with leak detector or leak reactant.
5. Verify correct gas type and pressure.
6. Perform leak test on main gas supply. Repair leaks as necessary.
7. Shut off gas supply and power to fire pit.
8. Connect fire pit to main gas supply. If using flex line avoid sharp bends with flex line to prevent whistling.
9. Turn on gas supply and perform leak test on all inlet connections. Repair as needed.
10. For electronic ignition models hook up proper 110VAC or 24VAC electrical power following all local codes.
11. Position fire pit safely with access to all gas connections for testing.
12. Light fire pit. It may take several cycles to purge air from the lines.
13. Once fire pit is lit perform leak test on all gas connections. Repair as needed.
14. Turn off fire pit and allow cooling.
15. Apply media as described in Section 5.
16. Turn on fire pit again and perform leak test with media correctly installed. If gas leak is detected verify
correct media application and repair as needed.
17. If trimmer valve is installed adjust flame to desired height. (Never alter the product configuration).
18. Set fire pit in properly constructed enclosure (Section 3).
19. Verify correct operation and lighting.
20. Review safety manual with end user and instruct not to change/ modify fire pit or media.
21. Leave manual with end user.
IMPORTANT: On electronic ignition models please apply the Start Up and Shutdown decal next to control switch in an obvious
position.
5) Media
WARNING: FOR GLASS MEDIA USAGE WITH LP GAS - WHEN USING APPROVED DECORATIVE GLASS TO
COVER BURNER, APPLY ONLY ENOUGH TO HIDE BURNER. APPLYING OVER 1/2” MAY CREATE BACK
PRESSURE AND GAS LEAKAGE FROM AIR MIXER RESULTING IN LP POOLING UNDER FIRE PIT.
WARNING: FOR GLASS MEDIA USAGE WITH LP GAS - THE UNIT MUST BE TESTED WITH MEDIA OVER
BURNER FOR CONFIRMATION OF NO BACK PRESSURE CREATING GAS TO LEAK OUT OF AIR MIXER
VENTURI HOLES. THIS MAY HAVE TO BE DONE PRIOR TO PLACING IN ENCLOSURE IF NO ACCESS DOOR.
WARNING: The fire pit is designed to use approved media correctly installed over the burner to achieve proper combustion.
WARRANTY REQUIREMENT: Never install a mesh or screen under the media.
IMPORTANT: Media affects flame pattern greatly. It is possible to create an unusual flame pattern that could damage your
enclosure. Enclosure damage from an open flame fire feature is not covered under any warranty.
IMPORTANT: Lava rock/glass coverage should be at a minimum to prevent smothering of the flame and for correct operation –
See “Lave Rock & Glass Application” instructions before applying.
IMPORTANT: The use of concrete logs is not recommended.

6
8/17/2016 850-EI
Lava Rock & Glass Application
Please follow the instructions below to add the
finishing touch to your fire pit. Particular attention needs to
be on the pilot assembly area. Incorrect media installation
will cause the pilot flame to suffocate and turn off pit or
delay main burner ignition.
Lava Rock Application- Standard size, 1”~3” pcs.
(part #657)
1) Install your fire pit per
instructions.
2) Apply standard lava rock only deep enough to cover ring
and pan- less than 2” above fire ring.
Lava Rock Application- Large size, 4”+ pcs.
3) Apply base coat of standard size lava rock as in Step 2, then
place large size lava rock loosely on top.
For Electronic Ignition
4) Blowout Box: Do not cover blowout box vents or opening
with lava rock or glass. Incorrect media installation will
cause the pilot flame to suffocate and turn off pit or delay
main burner ignition.
Decorative Glass Application
1) Install your fire pit per instructions.
2) Fill Pan with glass. Cover burner with 1/8 to ¼” of
glass. Do not over fill with glass. All LP installations
must be checked for back pressure with media installed.
Failure to do so may result in personal injury or
property damage.
For Electronic Ignition
3) Blowout Box: Do not cover blowout box vents or
opening with lava rock or glass. Incorrect media
installation will cause the pilot flame to suffocate and
turn off pit or delay main burner ignition.
DO NOT COVER VENTS! DO NOT COVER PILOT
OPENING!
6) Parts Lists
1) Electronic Ignition Flame Control System
2) Remote Control on “Hi/Lo”Models
3) Instructions
4) 120-HWI Bracket (Optional)
5) EI Manifold (Optional)

7
8/17/2016 850-EI
7) Installation of Flame Control System
Gas Out to Main Burner
Gas In
WARNING: Hard Pipe the valve box to the burner.
WARNING: Perform leak test on all fittings and back pressure checks for LP with media installed.
LP Installations:
WARNING: For LP air-mixers confirm “Gas In” is towards control valve or shutoff valve. Installing backwards will result in
severe gas leak and risk of explosion. If your air-mixer has an adjustment nut adjust to desired flame condition.
WARNING: A pan must be used on LP systems and configured in way to minimize fuel settling below the pan. Failure to do so
may result in personal injury or explosion.
WARNING: For LP Installations the air-mixer should be positioned near the burner with one
coupler between the burner and the air-mixer. Do not attach Air Mixer directly to burner. This may
increase back pressure.
WARNING: If the Flame Control System will be extended away from the burner the air-mixer
should be positioned on the burner side of the extended pipe or flex line.
WARNING: Always do thorough leak and back pressure checks on all fittings and air-mixers with
media in place. This may need to be done with the fire pit outside of the enclosure.
WARNING: Never alter the unit.
WARNING: Do not put an elbow immediately after an air-mixer. This may increase the chance of
back pressure.
WARNING: Never add anything after an air-mixer that would act to impeded gas flow. This may
increase the risk of back pressure.
WARNING: Ensure the burner selected has sufficient flow capacity as to not create back pressure.
WARNING: Ensure correct air mixer size as described below.
40K (Standard 127LC - for use with HPC 6” Round, 36” T and smaller)
90K (Standard 127 - for use with HPC 12” Round, 12” square, 48” T and larger)
150K (Properly Sized 127 - for use with HPC 18” Round, 72” T and larger)
300K (Properly Sized 127 or 127HC with HPC 30” Round and larger)
Sizing recommendations is based on HPC burners only. Installer is responsible for correct sizing based on the application and must
follow all instructions and local codes to include but not limited to back pressure checks with media.
Pilot Assembly Mounting:
WARNING: The Pilot assembly must be directly beside burner with center of pilot flame window lined up above a burner hole to
ensure main burner ignition. Misalignment will cause delayed ignition of main burner.
WARNING: A pan must be used on LP systems and configured in way to minimize fuel settling below the pan. Failure to do so
may result in personal injury or explosion.
WARNING: For systems with an extended valve box the area in which the valve box is installed must conform with all installation
requirements and local codes. Failure to do so may result in personal/property injury or explosion.
WARRANTY REQUIREMENT: Do not touch the igniter to any metal material while energized- will blow internal fuse.
WARRANTY REQUIREMENT: If no pan is used (on natural gas systems only) accommodations must be made to protect igniter
wires and thermocouple tube from flame.
IMPORTANT: For proper operation, it is required for the pilot assembly to receive fresh air from underneath.
IMPORTANT: Do not block pilot assembly blow out box underside with media (lava rock or glass.) Area must remain open.
Installation
We suggest that our products be
installed by professionals that are
locally licensed by the authority
having jurisdiction in gas piping.

8
8/17/2016 850-EI
Igniter- Hot surface
Pilot hood
Thermocouple- flame sensing
Pilot Assembly Pilot Assembly Components
Pan Mounting:
WARNING: Pilot assembly should be directly beside burner with center of pilot flame window lined up above a burner hole to
ensure main burner ignition. Misalignment will cause delayed ignition of main burner.
Pilot Window
lined up with burner hole.
Pilot Window: Above burner.
Burner
1) Cut rectangular hole (2.8” x 1.75”) in pan for pilot assembly mounting (see drawing below).
2) Drill two (2) 5/32” bolt holes for mounting of pilot assembly.
Rectangular
Hole
Bolt Holes (2)
Bottom View Pilot Assembly Footprint Top View- note next to burner
IMPORTANT: Do not reduce rectangular hole size- must be large to prevent suffocation of pilot flame.
Burner Mounting:
The pilot assembly can also be mounted directly to the burner using our 120-HWI bracket (optional).
The center portion of the T-pilot hood should be aligned with a burner hole as shown above. Care must
be taken to prevent flame from being blown under the pilot assembly and damaging wire or
connections.
Water in Valve Prevention: HPC does not cover water in the valve under warranty.
WARRANTY REQUIREMENT: Fire Ring Drainage- If the unit will or may be exposed to rain,
snow or moisture the installer must account for how water will drain out of the fire ring. If adequate ring drainage is not
accomplished, water will accumulate in the valve. Below is a suggestion how to provide weep holes in the ring. Drill ring and pan
accordingly.
WARRANTY REQUIREMENT: Seal Center Hub–If your fire ring has a threaded center plug it is advised to seal this with a high
temp sealer rated at 2000 degrees Fahrenheit or greater.
WARRANTY REQUIREMENT: Weep holes in pan–If not an HPC pan installer must ensure sufficient weep holes in pan to drain
heavy rains positioned in a way that does not drain directly onto the valve box.
Fire Ring and Pan Weep Hole Example
(Weep hole estimate for every10 sq. feet of pan = 10 each - 1/4” functioning weep holes)
Pilot window
With flame

9
8/17/2016 850-EI
8) Fire Pit Operation
WARNING: Before use, be sure to test all gas connections for leaks. Do not use fire pit if there is any evidence of leaking gas. If
leaking gas suspected, turn off the main gas supply and repair immediately.
WARNING: Do not use the enclosure as a seating area. Wind and gusty conditions will affect the flame in an unpredictable
manner. If conditions exist that are not safe for patrons turn the fire pit off.
WARNING: Do not use fire pit if any part has been submerged under water. Immediately call a qualified service technician to
inspect the fire pit.
WARNING: For electronic ignition models power to fire pit must be turned off via wall switch or breaker when not in operation.
WARNING: Never use any material that is nonporous and holds moisture such as gravel, pebbles, river rock, etc. This material,
when heated will cause the trapped moisture to boil and fracture unexpectedly. This material is not sufficiently porous to allow
heated steam to readily escape which can break and cause personal injury or damage.
WARNING: Solid fuels shall not be burned in the fire pit. Leaves, sticks, wood, paper, clothing, food material, should be kept away
from the fire pit. Fire pit is not for cooking. Make sure that there is no vegetation or other objects over the top or sides of the fire pit
that could interfere with safe operation. See clearances in Section 2 selecting the location.
WARNING: If lava rock is wet, allow fire pit to burn for 45 minutes prior to coming within 15 feet of the fire pit.
WARNING: When fire pit is not in operation turn off gas valve.
WARRANTY REQUIREMENT: When not in use the fire pit must be covered at all times.
Electronic Ignition Fire Pit Start Up:
Initial Start-up: Several “on/off” cycles may be necessary to purge air in gas lines after system installation. Fire pit will
lockout after 15 attempts to light pilot: Please power OFF then ON to restart.
Sequence of Operation:
1. The igniter will be powered (glow red) for 5 seconds before pilot valve opens.
2. The igniter will only be powered the initial 15 seconds of the 30 second pilot cycle. This sequence will repeat up to 15 times
(~15 minutes) before going into lockout. To reset, turn “OFF” power then back “ON” again.
3. Pilot flame will ignite and warm thermocouple- it may take 30 seconds at times for thermocouple to get hot. If thermocouple
is not hot in 60 seconds, system will shutdown then go back to Step 1.
4. Once thermocouple is hot, main valve will open allowing main burner to ignite.
5. If pilot flame is blown out at anytime, system will shutdown, then automatically restart (Step 1).
For “On/Off” Models refer to “FIRE PIT START UP” and FIRE PIT SHUTDOWN” sections below.
For “Hi/Lo” Models with “Hi/Lo” Remote
1. Remote Sync –The remote should arrive already sync’d to the fire pit.
a. To sync the remote to a fire pit:
1. Depress the low and off button simultaneously and hold, until the remote flashes rapidly (8 to 10 seconds)
2. Release the low and off buttons
3. Apply power to the fire pit within 10 seconds –Fire pit will accept a new remote for the first 2 minutes it is on.
4. Allow the remote to finish flashing which could take up to 30 seconds
5. Your remote should operate the fire pit
2. Normal Remote Operation
a. Power On/Off –2 Flash
b. Low –3 Flash ▼
c. High –4 Flash ▲
d. Poor Communication - 10 Flash (Move closer or change positions.)
e. Remote Response Time –When not in use for more than 30 seconds the remote will go into a sleep mode to save
battery life. If remote is in sleep mode it may take a few extra seconds for a command to be executed.
3. Remote Range –The remote should operate within a 20 foot distance from your fire pit reliably. Further distances may be
achieved depending on your particular application. Antenna extension cable is available when needed.
a. Metal objects negatively affect communication between the remote device and your fire pit. Things such as metal
enclosures, metal grates and metal mesh for stone veneer or in some cases metal furniture may interfere with
communication between your remote device and the fire pit.
4. For lost remote –If the remote is misplaced the fire-pit may still be turned on by the following method.
All times +/- 1 second.
a. Apply power for 5 seconds; turn off for at least 5 seconds.
b. Apply power for 5 seconds; turn off for at least 5 seconds.
c. Apply power for 5 seconds; turn off for at least 5 seconds.
d. Next time unit is powered up it will turn. Fire pit can still be turned off with the remote. Once power is removed start
over with Step a.

10
8/17/2016 850-EI
EI FIRE PIT START UP
1. STOP! Read the safety information on “What to Do If Smell Gas” (Pg. 1).
2. Confirm there is no debris in the fire pit (as mentioned in warnings) including water.
3. Turn “ON” electrical power and gas to fire pit.
4. Using wall switch, remote or app, turn “ON” fire pit - this may take several cycles to purge any air.
5. To reset after lockout, power unit down, wait 5 minutes, then restart.
6. Once the fire pit has ignited, DO NOT leave unattended.
This product is not for use with small tanks. It is intended to be connected to fixed piping systems only.
EI FIRE PIT SHUTDOWN
1. Turn “OFF” fire pit using remote, wall switch, or app.
IMPORTANT: FOR REMOTE CONTROL USE: YOU MUST ALSO TURN OFF POWER TO
ELECTRICAL OUTLET OR GAS TO FIRE PIT TO PREVENT ACCIDENTAL START.
2. Once fire pit is cooled, use appropriate cover to protect fire pit.
Service We suggest that our products
be serviced by a professional
certified in the US by the
National Fireplace Institute
(NFI) as NFI Gas Specialists.
For “Hi/Lo” Models with Smart Phone App, refer to section 12 of this manual.
IMPORTANT: For Hi/Lo models: Orient the antenna to align with the enclosure vents for best Bluetooth reception. Some
enclosures may require an antenna extension cable. HPC part number AEK-60 Hi/Lo.
IMPORTANT: If power to the fire pit is turned “Off” then immediately turned back “On” the system will go into lockout mode.
To reset, turn off, wait 5 minutes, then turn on.
To reset after lockout, power unit down, wait 5 minutes, then restart.
Once fire pit has ignited, DO NOT leave unattended.
WARNING: - OVERHEATING: The fire pit will automatically close gas valve if temperature exceeds 190º F inside valve box to
prevent component damage. Turn main power to the fire pit off and on to reset. To correct overheating, ensure enclosure has
adequate ventilation - see “Construction of Enclosure”.
9) Maintenance
WARNING: Any guard or protective device removed for servicing must be replaced
prior to operating the fire pit.
WARNING: We suggest that our products be serviced annually by a professional
certified in the US by the National Fireplace Institute (NFI) as NFI Gas Specialists.
WARNING:Ensure gas and power (if applicable) are shut off and fire pit is cool before servicing.
Keep fire pit covered at all times when not in use.
Keep any debris out of fire pit - clean as needed.
In some areas of the country spiders or insects have been known to
build nest and or lay eggs in the venture holes of the air-mixer for LP
units. This can cause fuel to fill the fire feature cavity and result in
personal injury or property damage. Periodical inspection by a
qualified service technician of the air intake is required to ensure your
fire feature performs properly.
Ring Cleaning: (1 x YR) If flames exhibit any abnormal shapes or behavior or if burner fails to ignite properly, then the
burner holes may require cleaning. The appliance can be cleaned by carefully removing the media to allow access to
burner. Use a brush to carefully remove dust, spider webs, and loose particles from base, logs and fire ring itself. If
evidence of damage, fire ring must be replaced with fire ring specified by manufacturer.
Thermocouple Cleaning of Soot: (1 x 6 mos. or as needed) remove lava rock & glass around pilot, then the blowout
box lid. Clean thermocouple of any soot using soft brush. Be careful not to damage igniter element. Place lava rock or
glass back as explained in Section 5.
Visually inspect the pilot - The pilot flame should cover 3/8” to 1/2” of the thermocouple as shown below. Cleaning of
orifice may be required by removing the pilot tube and removing orifice as shown below. Perform leak test on pilot
tube after reassembly.
Orifice

11
8/17/2016 850-EI
10) Troubleshooting
Below are some potential causes and counter measures to the symptoms indicated in bold. Please contact your retailer or
certified technician for service and repair.
WARRANTY REQUIREMENT:
Fire Pit Won’t light
1. No power to unit. Confirm breaker, wall switch, and remote are on.
2. Remote not synced to fire pit Resync remote
3. Remote batteries weak Change batteries
4. Hi Limit Temp. Switch Tripping Inadequate venting - see proper venting in “Construction of Enclosure”
5. Igniter element damaged Change igniter element
6. Damaged wires Inspect wires to igniter - confirm insulation is in good condition and connections are
tight
No Pilot Flame (Igniter Glows)
1. Air in gas line If new install, may take several attempts to purge air
2. Debris in gas line Confirm gas line is clear (insulation, dirt, plastic etc.)
3. Gas Pressure Improper Confirm proper gas pressure (Section 1)
4. Pilot Orifice Dirty Remove pilot head and clean (Section 8)
No Main Burner (Pilot Lights)
1. Gas Pressure Improper Confirm proper gas pressure. (Section 1)
2. Small Pilot Flame Remove pilot head and clean orifice (Section 8)
3. Dirty Thermocouple Clean using soft brush (Section 8)
4. Fire Ring Obstructed Confirm no debris or water in ring. Always cover fire pit!
5. Improperly applied Media See Section 5
Main Burner Turning Off/On Frequently
1. Small Pilot Flame Remove pilot head and clean orifice (Section 8)
2. Improperly applied Media See (Section 5)
3. Gas Pressure Improper Gas pressure too low (Section 1)
4. Thermocouple Defective Change thermocouple
Error Codes for “Hi/Lo” Models Displayed on “Hi/Lo” Remote:
Customers with a smart phone app will have information displayed on their smart phone.
Number of Flashes
on the Remote
1
Ignition Failure
2
Over temperature detected - More venting is required.
3
Thermocouple Error –Call for service.
4
Hardware fault pilot/main valve –Call for service.
5
Flame at start up –Call for Service
6
HSI igniter is open –Fire pit pilot can still be lit with a lighter and fire pit will turn on.
Use appropriate caution when using this method.
7
Connection lost between ignition board and wireless transceiver –Call for Service
8
Remote is not sync’d to fire pit – Attempt to resync.
10
No Communication –Move closer or change position to improve signal

12
8/17/2016 850-EI
Limited Warranty
Hearth Products Controls Company (HPC) warranties EI fire pits against manufacturing defects that prevent safe and correct function
as follows:
Electronics, gas valve: Commercial-1yr; Residential- 3 yr.
Pilot assembly: Commercial-1 yr.; Residential-2 yr.
Stainless steel pan, fire ring and valve box: Commercial-1yr.; Residential 5yrs.
This commences from the date of original sale / shipment from HPC FOB Dayton, Ohio.
This warranty is for parts and in-house (HPC) labor. The defective product must be sent back to HPC with a Return
Merchandise Authorization (RMA) issued by HPC for that specific product and any other additional information for the
nature of the defect or warranty claim.
The warranty does not cover items that have been damaged by overheating, modification, abuse or improper storage.
Also any labor involving installation or maintenance with the unit is not covered.
This warranty excludes claims for consequential, indirect - collateral expenses arising from product defects or
warranty recovery.
11) Replacement Parts
Please contact your dealer for parts - if unsure please contact HPC and we will be happy to help you.
12) Warranty

13
8/17/2016 850-EI

14
8/17/2016 850-EI

15
8/17/2016 850-EI
Hearth Products Controls Co.
EI App Instructions
App Setup and Usage
Note:
The content of the app or the design is
subject to change. Support for apps
may be discontinued without notice,
depending on the content provider’s
policy.
Adult use only.
Attention:
When pairing a device with the fire pit,
only one Bluetooth connection can be
used. Turn Bluetooth “OFF” to allow
other devices to connect to the fire pit.
Setting up the App:
1. Download the HPC
Fire App from the
Apple store or Google
Play.
2. Ensure that there is power supplied to the
fire pit.
Note:
If power is already applied, disconnect
and reconnect power.
3. Open the HPC Fire App, see Fig.1.
4. From the setup screen, enter 6
characters.
5. Enter a password and confirm the
password.
6. Select your language, and press
“Continue”.
7. Enable the Bluetooth.
8. Select search for devices, see Fig.2.
9. Select the Remote Igniter.
10.Enter the default security code 2345 and
press “Connect”, see Fig.3. Repeat until
App is connected to the fire pit.
Fig.1
Fig.2
Fig.3

16
8/17/2016 850-EI
Using the App:
Status
Dashboard
Power ON/OFF: Answer 2 safety questions when
powering on unit.
Flame –HIGH/LOW
Timer –amount of time left before shut-off.
Troubleshoot Guide –tap the “link to online help.”
Setup –
1. Timer ON/OFF and set the timer.
2. Customize the fire pit’s name.
3. Customize the security code.
Igniter Indicator
Temperature Indicator
Timer –amount of time left before shutoff.
Website link to HPCFire.com

17
8/17/2016 850-EI

18
8/17/2016 850-EI

19
8/17/2016 850-EI
Table of contents
Other HPC Outdoor Fireplace manuals
Popular Outdoor Fireplace manuals by other brands

AZ Patio Heaters
AZ Patio Heaters F-1108-FPT owner's guide

Sunnydaze Decor
Sunnydaze Decor NB-CF24 Owner's manual and instructions

Fiap
Fiap premiumdesign FireTower manual

Heininger
Heininger FMPPC2 owner's manual

Regency
Regency PTO28CIT - NG Owners & installation manual

Firegear
Firegear FPB-29DBS22MT-N Installation and operating instructions