HTD HD-IWS10 User manual

HD-IWS10 Inwall Subwoofer
and
Digital Amplifier
Owner’s Manual
Home Theater Direct, Inc.
www.htd.com
Expert Support:
866-HTD-AUDIO (483-2834)
© Copyright Home Theater Direct, Inc.V.03.22.2016

2
Safety Instructions for the SDA-120 Digital Amplier
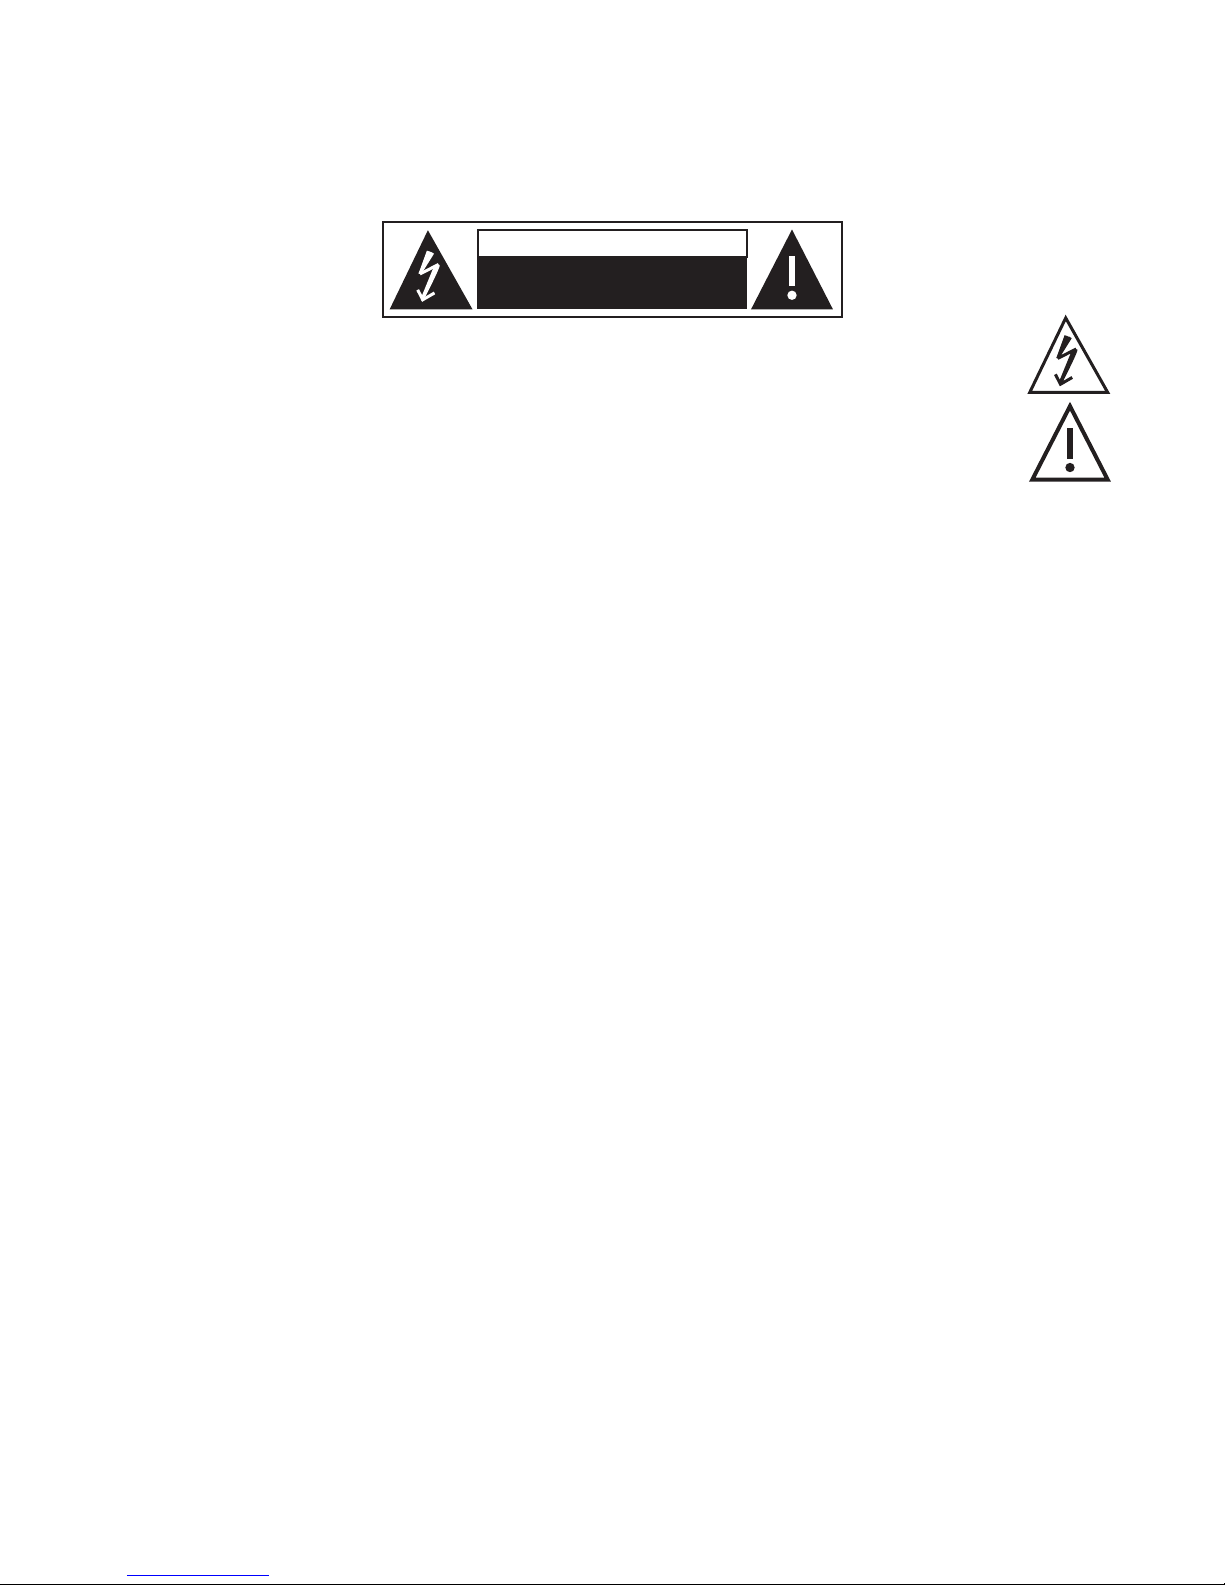
CAUTION
RISK OF ELECTRIC SHOCK
DO NOT OPEN
The lightning ash with arrowhead symbol, within an equilateral triangle, is intended to alert the
user to the presence to un-insulated dangerous voltage within the product’s enclosure that may be of
sufcient magnitude to constitute a risk of electrical shock to persons.
The exclamation point within an equilateral triangle is intended to alert the user to the presence
of important operating and maintenance (servicing) instructions in the literature accompanying this
appliance.
Read Instructions
All safety and operating instructions should be read before the
appliance is operated.
Retain Instructions
The safety and operating instructions should be adhered to.
Heed Warnings
All warnings on the appliance and in the operating instructions
should be adhered to.
Follow Instructions
All operating and use instructions should be followed.
Water and Moisture
The appliance should not be used near water. For example,
near a bathtub, washbowl, kitchen sink, laundry tub, in a wet
basement, or near a swimming pool, etc.
Ventilation
The appliance should be situated so that its location or position
does not interfere with its proper ventilation. For example, the
appliance should not be situated on a bed, sofa, rug, or similar
surface that may block the ventilation openings: or placed in
a built-in situation, such as a bookcase or cabinet that may
impede the ow of air through the ventilation openings.
Heat
The appliance should be situated away from heat sources such
as radiators, heat registers, stoves, or other appliances (includ-
ing ampliers) that produce heat.
Power Sources
The appliance should be connected to a power supply only of
the type described in the operating instructions or as marked on
the appliance.
Grounding or Polarization
Precautions should be taken so that the grounding or polariza-
tion means of an appliance is not defeated.
Power Cord Protection
Power supply cords should be routed so that they are not likely
to be walked on or pinched by items placed on or against them,
paying particular attention to cords at plugs, convenience re-
ceptacles, and the point where they exit from the appliance.
Cleaning
The appliance should be cleaned only as recommended by the
manufacturer.
Power Lines
An outdoor antenna should be located away from power lines.
Non-Use Periods
The power cord of the appliance should be unplugged from the
outlet when left unused for long periods of time.
Object and Liquid Entry
Care should be taken so that objects do not fall and liquids are
not spilled into the enclosure through openings.
Damage Requiring Service
The appliance should be serviced by qualied personnel when:
a) the power supply cord or the plug has been damaged: b)
objects have fallen, or liquid spilled into the appliance: c) the
appliance has been exposed to rain: d) the appliance does
not appear to operate normally or exhibits a marked change
in performance or e) the appliance has been dropped, or the
enclosure damaged.
Servicing
The user should not attempt to service the appliance beyond
that described in the operating instructions. All other servicing
should be referred to qualied service personnel.
Product Servicing
If your system fails to operate properly, please contact HTD
directly for further assistance, at 1-866-483-2834.
Additional information, including detailed specications for each
model, can be found on our website, www.htd.com. Thanks
again for choosing Home Theater Direct!
If you have any questions, we can be reached at...
Warning - To reduce the risk of re or shock, do not expose this appliance to rain or moisture.
Caution - To reduce the risk of re or shock, do not remove the cover or back. No user serviceable parts inside.
Refer servicing to qualied service personnel.
Caution - To prevent electric shock, match wide blade of plug to wide slot, fully insert.

3
Thank you for giving Home Theater Direct the chance to win your business! We are condent you will
nd that HTD offers an outstanding combination of performance and value in everything we make. To
ensure you get the most out of your new subwoofer and amplier, please take a moment to read this
manual before you get started. Should you lose this manual, you can always download or print a copy
from www.htd.com.
HTD In-Wall / In-Ceiling Speakers are designed to accurately reproduce soundtracks from both music
and video sources, including today’s demanding digital signals. Mounted ush to the wall or ceiling, in-
wall / in-ceiling speakers are ideal for many applications where traditional speakers would be impractical
or impossible. They are especially suited for distributing sound throughout a home and can also be
used to enhance surround sound systems.
Inwall Subwoofer Owner’s Manual
Tips Before You Begin
Subwoofer Placement
Once installed, the Inwall subwoofer is not easily moved or repositioned. Take a little extra time to carefully consider a good location
before you begin the installation.
Ideally, you should try to locate your In-wall Subwoofer so that it is on the front wall, facing toward the seating position. If this is not
practical, you can alternately locate it on a side wall, close to the front of the room. A 3rd choice would be on a side wall, further
back in the room. A 4th choice would be to locate it on a back wall, facing toward the front.
In all cases, make sure the location will not be blocked by furniture or other objects.
Since the Subwoofer will be installed in a wall, some of the low frequency sounds will be transmitted to the room on the other
side of the installation wall. Insertion of berglass insulation blankets/batts in the wall, above and below the Subwoofer is
recommended to minimize such sound transfer and to enhance the overall performance of the Subwoofer.
Connecting the Wires
The terminals will accommodate up to 14-gauge speaker wire, which should be used for longer connections (greater than 50 feet of
wire). For shorter distances, 16-gauge wire will sufce, although we still recommend 14-gauge for best performance. For behind-the-wall
installations such as this, we recommend using UL Class 3 approved cable (marked “CL3”) for compliance with local building codes.
Consider using HTD cable for all of your home theater and whole-house audio installations. HTD cable offers exceptional performance,
and of course, is priced signicantly lower than retail.
Leave about two feet of extra wire at the speaker end to make installation and positioning of the speaker easier. Do not use staples, nails
or other metal objects to secure the speaker wire. The resulting short could affect your system’s performance, and could also damage
components in your system, especially the amplier. You will get the best sound quality and least amount of hum by keeping the speaker
wires at least 18 inches away from other electrical wires and cables. Always cross speaker wires with other cable at a 90-degree angle.
When connecting the subwoofer, it is very important to retain the correct wiring polarity. To do this, be sure that the wire attached to the
+, red, or positive terminal on the speaker connects to the +, red, or positive terminal on the subwoofer amplier. Similarly, the -, black, or
negative terminal on the speaker must connect to the respective -, black, or negative terminal on the subwoofer amplier.
Mounting the Speaker (if you are unsure, consult a professional contractor)
Yes, you will be cutting a hole in the wall. With the right tools and a little extra care and preparation, installing the Inwall subwoofer can
be both quick and easy. Follow the instructions beginning on page 6 for best installation practices.

Product Features
Power Selection Switch, Power Button, and Power Indicator Light
The Power Selection Switch is found on the back of the amplier. It includes two settings that will affect
how the amplier is turned on and off.
• AUTO - the amplier will turn ON when an input signal is sensed by the source that is selected
and will go into STAND-BY/OFF after several minutes of no signal. The Power Button should be
in the IN position. If the Power Button is in the OUT position, the amplier will not turn on.
• ON - allows the user to manually turn the amplier ON and OFF by pushing the power button IN
or OUT on the front panel.
The Power Indicator Light will be amber when the amplier is in stand-by mode and bright blue when
the amplier is active. The Power Indicator Light will not be lit when the Power Button is in the OUT
position.
Amplier Protection Light
The Amplier Protection Light will only light when a problem exists that triggers the built-in protection
mode. The amplier will shut down until the problem is resolved.
Phase Switch
The phase switch allows setting the output to be out of phase with another subwoofer (if used) to mini-
mize “dead spots” in the room caused by speaker wave interaction and cancellation.
LEFT
INPUT
INPUT OUTPUT
OUTPUT
RIGHT
SPEAKER
Subwoofer Digital Amplifier SDA-120
Min Max
120Hz
80Hz
40Hz
CROSSOVER LEVEL
POWER
ON AUTO
LFE IN LFE IN
XO-BYPASSEDXO-ACTIVE
LEFT RIGHT
4Ω
AC 120V~60Hz
Power Consumption: 150W
To Speakers To Amplifier/Receiver
4
Level Knob
LFE Inputs
(XO-Active/XO-Bypassed)
5-way Binding Posts
Snap-In Speaker Cable Connec-
tions (Connectors Included)
Power CordPower Selection Switch
Amplier Protection Light
Phase Switch
Crossover Control Knob
Power Indicator Light
Power Button
SDA-120 Features

5
Banana Plug Connection
Make sure binding posts are tight-
ened then push in banana plug.
Be sure to maintain polarity (Subwoofer + to Amplier + , Subwoofer - to Amplier -)
Bare Wire Connection
Rotate binding post counter-clock-
wise to reveal “eye”. Strip back 3/8”
insulation from cable. Tightly twist
copper wire and insert into “eye”.
Rotate binding post clock-wise to
tighten.
Product Features (Cont.)
10” Reinforced Long-throw Alumi-
num Driver
Gold-plated Compression Terminals Sturdy Wooden Mounting Braces (included).
Braces attach to existing studs. Fits easily
through hole cut for subwoofer.
Crossover Control Knob
TheCrossover control knob allows control of the frequencies which your subwoofer will produce.
Level Knob
This knob is used to adjust input level to blend subwoofer volume with the other speakers in the room.
The level is usually set just once.
LFE Inputs (LFE = Low Frequency Effects)
Inputs for line level subwoofer signal from the LFE or Subwoofer output connector on your surround
sound receiver.
• XO-Active - Use this input if you would like to use the built-in crossover on the front of the
amplier.
• XO-Bypassed - Use this input if you would rather use the crossover frequency set by your
receiver.
Snap-In Speaker Cable Input and Output Connectors
Used to obtain the audio signal from existing speaker cable in the instance that an LFE Signal is not available from
your receiver.
In the event your receiver does not have a dedicated line-level LFE or Subwoofer output connector, you can get the
needed signal by connecting speaker cables from your receiver’s Left & Right Front output connectors to the SDA-
120’s rear INPUT connectors and then connecting speaker cables from the SDA-120’s rear OUTPUT connectors to
your Left & Right Front speakers.
Note: This connection would not be needed if your receiver has a dedicated LFE or Subwoofer output connector.
5-way Binding Posts
These posts are used for connecting standard speaker cable from the amplier to the subwoofer.
HD-IWS10 Features

6
Quick Steps: Install HTD In-Wall Powered Subwoofer
Step 1
Step 2
Step 3
You will need the following tools:
Pencil Drywall Saw
Drill
(with phillips
head bit and
1/8” drill bit)
After checking for stud locations and conrming
there are no obstructions hidden behind the wall,
position the cardboard template and trace along
the inside edge.
TIP: Check for obstructions before you cut the hole. Drill a
small hole in the center of the area you plan to mount the
speaker. Cut a piece of coathanger wire and bend it with a
90 degree angle. Insert the wire into the small hole and sh
around to make sure that no pipes, studs, or other objects
will get in the way. If you do nd something, you can easily
patch the small hole you drilled. Otherwise, cut the big hole
with condence!
Cut along the traced line using a drywall saw or
rotary drill. A utility knife will also work but is more
difcult to control for beginners.
TIP: Use a drywall saw to cut the hole. A utility knife will
make the cleanest cuts in drywall, but a utility knife can
be difcult to control by a non-expert. Electric rotary saws
make cutting drywall physically easy, but they too can be
difcult to control. A simple, inexpensive drywall saw (about
$10 at your local hardware store) is the best bet for begin-
ners. The speaker’s frame will cover up any rough edges.
Insert wood mounting bracket through the hole,
with the curved portion facing toward the center
of the hole. The wood bracket should sit against
the back side of the drywall and against the stud.
Center the bracket up/down so it is centered ver-
tically in the side of the hole. Screw the two pre-
threaded screws into the stud. This will hold the
bracket securely in place. (Repeat process for
second bracket on opposite side of the hole.)
Optional: 1/2” foam tape

7
Step 4
Step 5
Removing the grille from the in-wall powered sub-
woofer is easy if you know a couple of tricks....
Here they are:
With the gold-plated spring-loaded speaker cable
connectors positioned at the TOP of the subwoof-
er, insert the Subwoofer into the hole in the wall.
Push the Subwoofer up against the drywall and
hold hold it there with your hand (always hold the
subwoofer by the frame - Never by the cone).
Insert your pencil or a long nail through each of
the four holes in the front corners of the Sub-
woofer to mark each hole location on the wood
bracket that is now directly behind each hole.
Remove subwoofer from the hole cut in the dry
wall and set it aside.
Brand new (un-installed) subwoofer:
* Awl Method - Using an awl, insert the hook end of
the awl into a hole of the grille (along the edge, not in the
center). Pull rmly to raise the grille from the seat. Repeat
at multiple positions around the edge of the grille until it
pops off.
* Reverse Mounting Hole Method - Turn subwoofer fac-
ing away from you. Find the four mounting holes located on
the back. (These holes will be used to mount the subwoofer
to the wooden mounting brackets later.) Insert a straight,
thin, sturdy object (such as a nail, or thin screw driver) into
one of the four holes and apply slight pressure. This will
in turn apply pressure to the back of the grille dislodging
it from the subwoofer frame. (Repeat in each of the four
mounting screw holes if necessary)
* Paper Clip Method - Bend a paperclip into the shape
of a “J” and then inserting the “J” through the small holes in
the grille, along the edges. Pull on the paperclip “J” and the
grille will lift out of the subwoofer.
Already-installed subwoofer:
* Use either the Awl Method or the Paper Clip Method
above.
Note: The grille is intentionally very tight inside the frame. A loose
grille would buzz or rattle during loud or bass-heavy operation.
This “press-t” design is used by most of today’s manufacturers.

8
Step 6
Step 7
Step 8 - Optional
Using a 1/8” drill bit, drill pilot holes into the wood
brackets at the four previously marked locations.
This prevents the wood from splitting when the
screws are driven in.
If you have not already done so, run the 2-con-
ductor speaker cable from the location of the
SDA-120 Amplier, to this wall-space where the
Subwoofer will go. Allow some extra cable length
at the end for ease of connection. Strip about 3/8”
of insulation off of the ends of the two wires in the
speaker cable. But do not connect subwoofer at
this time.
Cut two 12”- 24” pieces of berglass batt insu-
lation. Completely insert one piece into the wall
cavity above and below the subwoofer location.
Optional: If you wish you can purchase foam tape
from a home improvement store. Peel the back-
ing off of the foam tape to expose the adhesive.
Attach the foam tape around the BACK surface
of the Subwoofer’s outer plastic frame (about
1⁄2” in from the outer edge.) The non-sticky side
of the foam tape should be facing out. The foam
tape will be out of sight when the Subwoofer is in-
stalled, and it will seal the gap between the Sub-
woofer’s frame and the wall to prevent vibration
and rattling.
Note: The powder coated aluminum grille, as well as the plastic
frame, can be painted to match any decor. If you choose to paint
them, plan to do so before installation of the subwoofer. This
would be the best time to paint the grille and frame, if you have
not done so already.

9
Step 9
Step 10
Step 11
Pick up the Subwoofer and hold it near the hole
in the wall. Connect the speaker wires to the
Subwoofer by pressing down on the gold-plated
spring-loaded cable connectors on the back,
top of the Subwoofer, and inserting one of the
stripped ends into each one. Be sure to connect
the speaker wires to the correct Red (+) and
Black (-) connectors
Insert the Subwoofer into the wall opening with
the speaker connectors at the top. Using the four
black Phillips-head screws (included), insert one
through each of the four holes in the corners of
the front of the subwoofer and screw them into
the wood bracket. This will compress the foam
tape and pull the Subwoofer snugly against the
wall. Tighten the screws just enough to pull the
Subwoofer snug, but do not over-tighten them
enough to warp the outer frame.
Place the included acoustically transparent fab-
ric on the back-side of the grille if you have not
already done so. This material prevents seeing
through the holes in the grille and enhances vi-
sual appearance.

10
Step 12
Insert the grille into the grooves around the front
of the Subwoofer, pushing it in around the edges
until it is ush with the outer frame.
Your In-wall Powered Subwoofer installation is
now complete. Enjoy!
Installation Idea #1
LEFT
INPUT
INPUT OUTPUT
OUTPUT
RIGHT
SPEAKER
POWER
ON AUTO
LFE IN LFE IN
XO-BYPASSED
LFE OUT
XO-ACTIVE
LEFT RIGHT
4Ω
AC 120V~60Hz
Power Consumption: 150W
Home Theater Receiver SDA-100 Subwoofer Amplifier In-wall Subwoofer (backside)
SDA-100
Receiver
LEFT
INPUT
INPUT OUTPUT
OUTPUT
RIGHT
SPEAKER
POWER
ON AUTO
LFE IN LFE IN
L
R
XO-BYPASSED
LFE OUT
XO-ACTIVE LEFT RIGHT
4Ω
AC 120V~60Hz
Power Consumption: 150W
Home Theater Receiver SDA-120 Subwoofer Amplifier In-wall Subwoofer (backside)
SDA-100
Receiver
The diagram to the left shows
that the SDA-120 Amplier can
be located near the surround
sound receiver (recommended)
and connected to the In-Wall
Subwoofer unit using 2-conduc-
tor, in-wall speaker cable.
The connection of the inwall subwoofer in this example is performed as such: the SDA-120 ampli-
er is connected to a receiver’s LFE or Subwoofer Out connector using a shielded subwoofer cable
(available from HTD), and the SDA-120 and In-Wall Subwoofer are connected using standard
2-conductor 14-gauge speaker cable.

11
Installation Idea #2
Controller
Amplifier
SDA-100
LEFT
INPUT
INPUT OUTPUT
OUTPUT
RIGHT
SPEAKER
POWER
ON AUTO
LFE IN LFE IN
XO-BYPASSED
Source Output
XO-ACTIVE
LEFT RIGHT
4Ω
AC 120V~60Hz
Power Consumption: 150W
Whole-House Audio Controller SDA-100 Subwoofer Amplifier In-wall Subwoofer (backside)
LR
Line Input
Whole-House Amplifier
LR
Controller
Amplifier
SDA-100
LEFT
INPUT
INPUT OUTPUT
OUTPUT
RIGHT
SPEAKER
POWER
ON AUTO
LFE IN
L
R
LFE IN
XO-BYPASSED
Source Output
XO-ACTIVE LEFT RIGHT
4Ω
AC 120V~60Hz
Power Consumption: 150W
Whole-House Audio Controller SDA-120 Subwoofer Amplifier In-wall Subwoofer (backside)
LR
Line Input
Whole-House Amplifier
LR
The diagram illustrates how the inwall
subwoofer can be installed in another
area/room. In this case the SDA-120
Amplier is located near a multi-room
audio controller and connected to the
In-Wall Subwoofer which is in an-
other area using 2-conductor, in-wall
speaker cable.
This setup is ideal in the situation where
one would like to add a subwoofer to a
specic zone within a multi-room audio
scenario.
A separate run of 2-conductor speaker cable connects from the SDA-120 Amplier, to the In-
Wall Subwoofer. The other two speakers are connected to the multi-room setup as usual.
This image above shows specically how to connect
the SDA-120 Amplier to an HTD Whole-House Con-
troller in order to use the In-wall Subwoofer in one
Zone. The left side of this diagram shows use of RCA
Y adapters to “split” the line-level signal coming from
the whole-house Controller, so that it can be con-
nected to both the whole-house Amplier AND the
SDA-120 Amplier. The stereo signal is then com-
bined into a “merged stereo or “mono” signal using
another RCA-Y adapter, for connection to the LFE
input on the back of the SDA-120 Amplier

12
Home Theater Direct, Inc.
www.htd.com
Expert Support:
Toll free: 866-HTD-AUDIO (483-2834)
Warranty
All HTD electronics carry a two-year parts and labor warranty. Details can be found at www.htd.com/info/warranty.
Warranty registration occurred automatically at the time your order was placed. There is no need to complete or
mail in additional paperwork.
If you have any questions, we can be reached at...
Specications:
10” aluminum cone with butyl rubber surround for long life
Power handling: 120 watts RMS, 150 watts program
Frequency response: 34 Hz - 200 Hz
Flush-mount grille and frame provides clean, professional appearance
Reinforced resonant-absorbing ABS polymer frame
Moisture-resistant design includes powder-coated aluminum grille that will not rust
Grille and frame can be painted to match any decor
Impedance: 4 ohms
Sensitivity: 88dB
Dimensions: 13” x 13”
Hole Cutout: 11.5” x 11.5” template included with speakers
Special wood braces included and required; will work with wood studs spaced 15” to 18” on center
(note: most walls are built with studs spaced at 16” on center)
Minimum install depth: 3.75”
Weight (without amp or braces): 15 lbs
Includes 120 Watt RMS High Efciency Digital Amplier with:
LFE (subwoofer) RCA-type Input
Hi Level (speaker level) inputs and outputs
Level Control
Phase Switch
Auto-on capability with dual color LED indicator (amber:stand-by; blue:on)
Also Note that the amplier that is
packaged with this subwoofer complies
with Part 15 of the FCC Rules. Operation
is subject to the following two conditions:
(1) this device may not cause harmful
interference, and (2) this device must
accept any interference received,
including interference that may cause
undesired operation.
Other manuals for HD-IWS10
1
Table of contents
Popular Subwoofer manuals by other brands

AudioBahn
AudioBahn ATB10AT operating instructions

Focal
Focal Access 1 25 A1 user manual

CABASSE
CABASSE SANTORIN 21 operating instructions

Pioneer
Pioneer SW841D - Premier Car Subwoofer Driver instruction manual

Teufel
Teufel T 1108/1 SW manual

Blaupunkt
Blaupunkt GTr 100 A Operating and installation instructions