Hubble Optics Ultra Light UL 16 User manual

Hubble Optics Ultra Light UL 16
Dobsonian instruction manual
REV: 1.1.5 02-12-2013
Please read these instructions thoroughly before beginning assembly
and subsequent use of the telescope.
1.Unpacking .................................................................................................................. 2
2. Assembly ................................................................................................................... 7
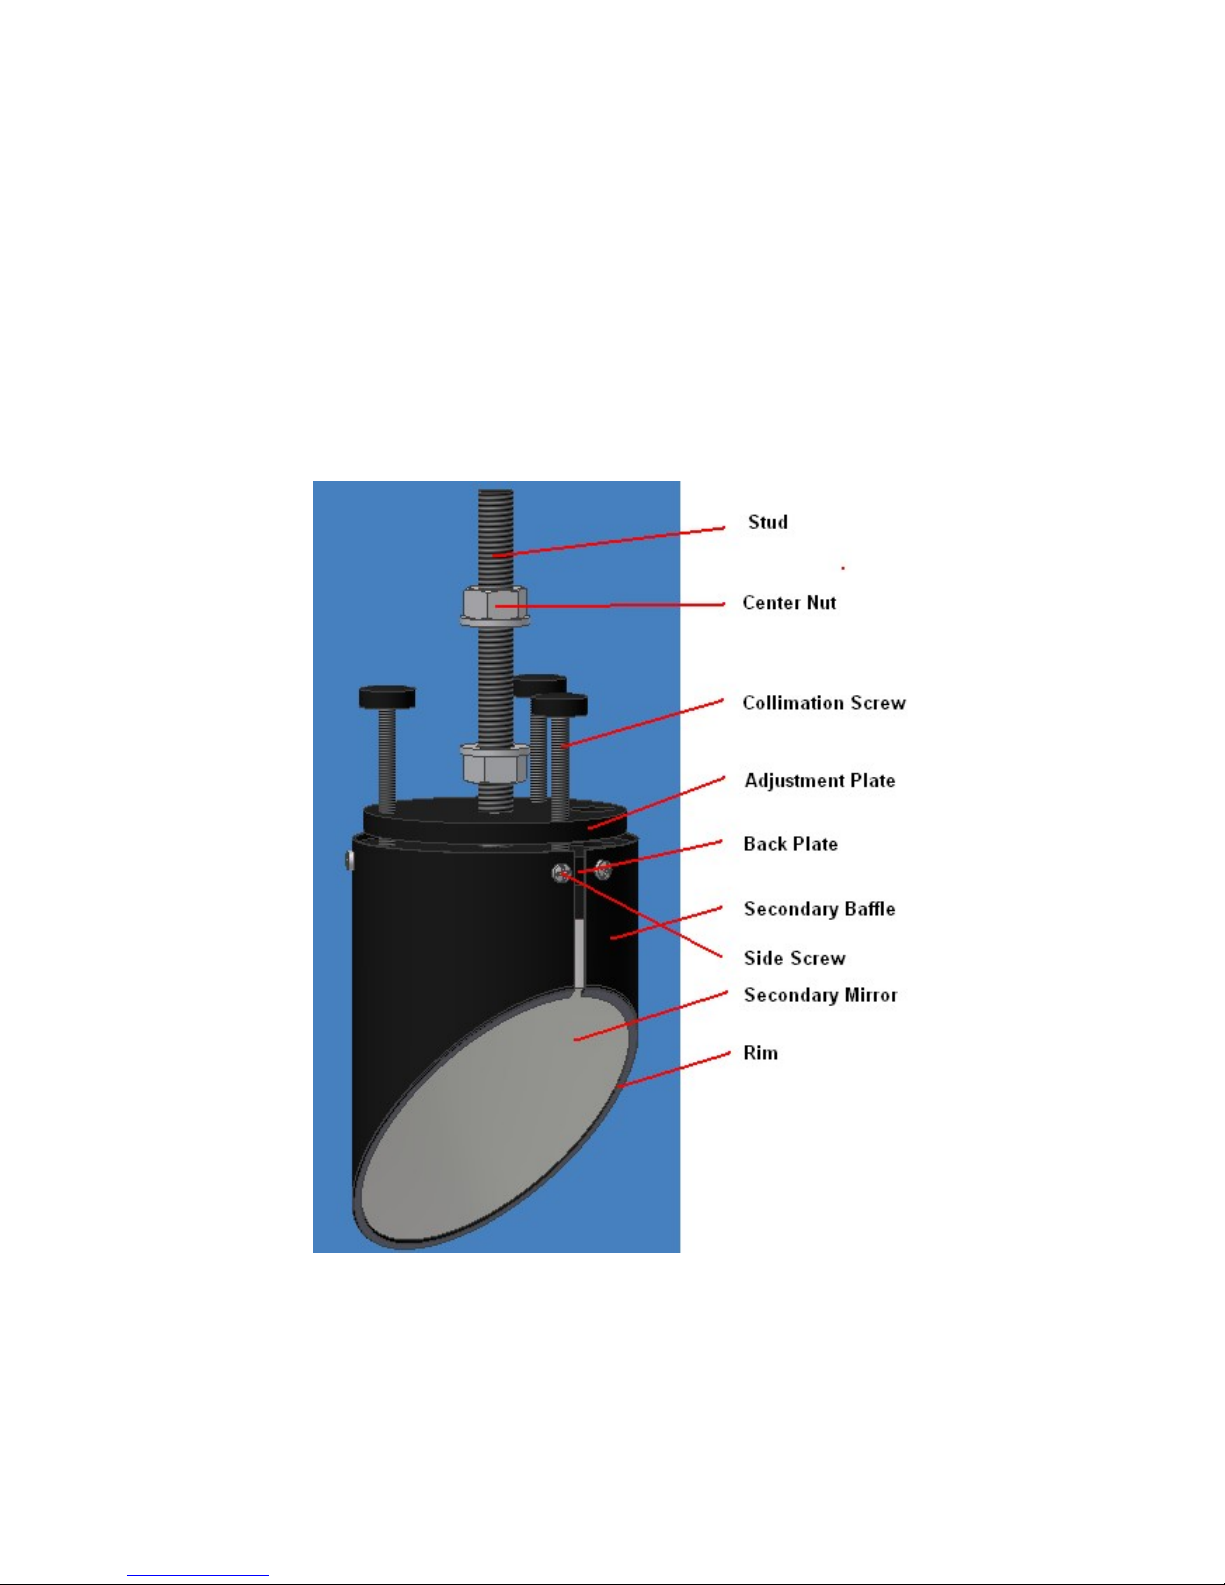
2.1 Install the Secondary Mirror ................................................................................ 8
2.1.1 Install the Secondary to the diagonal holder ................................................. 8
2.1.2 Install the Secondary Mirror Cage ................................................................
2.2 Assembly of the Dobsonian Rocker ................................................................... 14
2.3 Assembly of the Mirror Box .............................................................................. 14
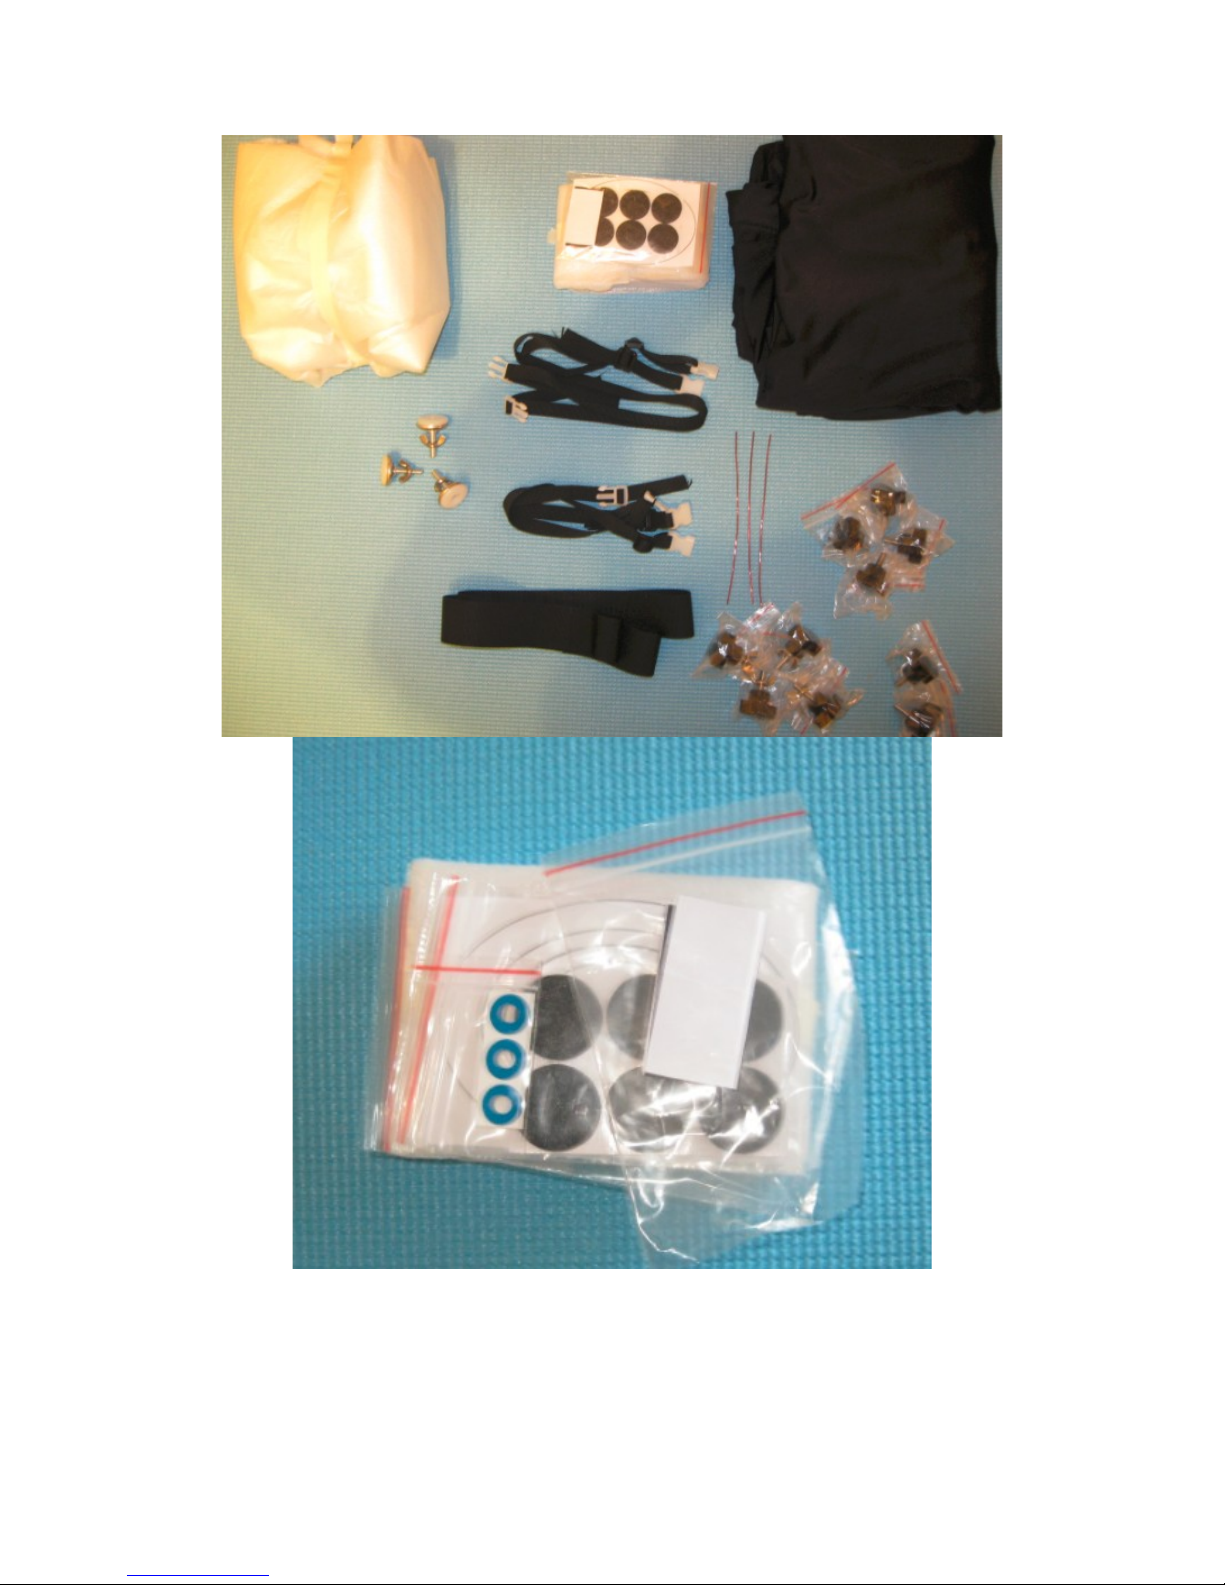
2.3.1 Installation of the Pads and Brass Wires .................................................... 15
2.3.2. Installation of the Lower ALT Bearing Sections ...................................... 16
2.4 Install The Truss Tubes and Secondary Cage .................................................... 22
2.4.1 Installation of the Truss Tubes .................................................................... 22
2.4.2 Installation of the Secondary Mirror Cage .................................................. 24
2.4.3 Installation of the Optional Finder Scope .................................................... 26
2.5 Adjust the Sling .................................................................................................. 27
3. ollimate the Optics. .............................................................................................. 28
4. are and Maintenance ........................................................................................... 31
4.1 Mirror Storage .................................................................................................... 31
4.2 Mirror Cleaning .................................................................................................. 32
5. Specifications .......................................................................................................... 33
6. Limited Warranty .................................................................................................. 34
7. Technical Support .................................................................................................. 34
WARNING: Never look at the sun with your telescope without a
professionally made solar filter. Permanent eye damage or blindness
could result. Eye damage is often painless, so there is no warning until
it is too late. Children should not be allowed to handle the telescope.
Avoid using the type of solar filter that screws into an eyepiece. They
are susceptible to cracking under the intense heat that builds up near
the focus point, and could cause severe retinal damage. se only the
type of solar filter that covers the front of the telescope. Also, be sure to
leave the cover caps on the finder scope when solar observing. Better
yet, remove the finder scope altogether when viewing the sun.
1

1.Unpacking
The telescope is packed in three shipping boxes, as described below. We recommend
keeping the original packaging for the future usage.
Make sure all the parts in the Parts List are present. Be sure to check all boxes
carefully, as some parts are very small. If anything appears to be missing or broken,
immediately email Hubble Optics for assistance.
Box #1, The UL16 main structure
Quantity Description
1 Mirror Box/Rocker/Ground board
1 Upper ring
3 Spider Vanes
1 Secondary spider hub and the diagonal secondary mirror holder
1 Mirror Box, Rocker, and “Ground Board”
1 Focuser L bracket (with 2 M5 x 16 screws)
1 Secondary mirror
1 2" 10:1 dual speed focuser
3 Plastic feet with wing nuts
4 M6 knob screws (20mm long) with wingnuts for the truss tube and upper
ring connection
8 M6 knob screws for the truss tube and mirror box connection
2 M6 knob screws for the ALT bearing assembly
1 Magic nylon tape to hold the sling
3 Brass wire to evenly separate cell support bars
1 Nylon sling belt
3 Center spot ring (spare)
6 Mirror Cell Support Pad
1 8 x 50 finder scope and bracket (option)
1 Shroud (option)
1 Truss Tube Carry Bag (option)
1 5-star artificial star (option)
2

Figure 1: Mirror Box
Figure 2:Upper Ring
3

Figure 3: Spider Vanes
4

Figure 4: Secondary Spider Hub/ Diagonal Support
Figure 5: Focuser L Bracket
Figure 6: 14 Knob Screws
5

Box #2: The primary mirror
Qty. Description
1 Primary Mirror
6

Box #3: Truss Tubes
Qty. Description
8 Truss Tubes
2. Assembly
Now that you have unpacked the boxes and familiarized yourself with all of the parts
in front of you, it’s time to begin assembly. You’ll need a regular screwdriver, a
Phillips screwdriver, a set of metric hex keys (1.5,2,2.5,3, 4, and 5mm), two 6-inch
(150mm or smaller) adjustable crescent wrenches, and a scissor.
Figure 7: Tools Required (Not provided)
7

2.1 Install the Secondary Mirror
2.1.1 Install the Secondary to the diagonal holder
The Secondary baffle is made of the thin aluminum, please handle the mirror and the
baffle with care! First, remove the 5 small side screws holding the secondary baffle.
Open the baffle slightly, and carefully slide the secondary mirror into the baffle from
the back; let the mirror lightly held by the baffle's rim. Then place the fiber fill behind
the secondary mirror to support the mirror. You should place enough fiber packing
behind the secondary to hold it snugly in place but don't over-pack it; otherwise it cause
distortion of the secondary mirror. Then re-install the 5 small screws to secure the baffle
and the secondary mirror to the back plate.
8

2.1.2 Install the Secondary Mirror Cage
Please note that most screws needed for the installation are already installed on the
parts for easy identification.
You do not need to have the scope completely set up to carry out this step of
assembly.
•Attach the three spider wings to the spider holder
•Attach the three spider wings to the upper ring
•Attach the focuser L bracket to the upper ring and tighten the screws
•Attach the focuser to the L bracket and tighten the screws
•Attach the secondary holder to the spider
•Roughly adjust the center bolt and the orientation of the secondary holder until the
secondary mirror is centered by being viewed from the focuser draw tube
•Adjust and tighten the three collimation screws.
When installing the holder into the spider, you should orient the 3 collimation screws
evenly between the vanes.
Then make sure that the secondary mirror is roughly oriented towards to the focuser.
This can be done by loosening all the collimating screws a small amount and rotating the
mirror, the secondary baffle and back plate relative to the adjustment plate and mounting
stud. The tighten the collimation screw after the adjustment.
Then make sure the secondary is roughly at the right height by adjusting two center nuts
on the Stud. Tighten the center nuts after the adjustment.
No precision adjustment is need at this stage.

Figure 8:Attach the three spider wings to the spider hub
Figure 9: Attach the three spider wings to the upper ring
10

Figure 10: Attach the focuser L bracket to the upper ring
Figure 11: Attach the focuser to the L bracket
11

Figure 12: 3 collimation screws evenly between the vanes
Figure 13: Attach the secondary holder with the secondary mirror
12

Figure 14: enter the secondary in the focuser drawtube
13

2.2 Assembly of the Dobsonian Rocker
The UL16 base is shipped assembled. The only thing you need to do is to install the
three plastic feet. Make sure to use the wing nuts to lock the three feets.
2.3 Assembly of the Mirror Box
14

The primary mirror is shipped in its own box to prevent possible damage. Once the
primary mirror is installed in the mirror box, there will be no need to remove it until
cleaning is necessary. However, for shipping and long-term storage, the primary
mirror should be packed tightly in its original packing.
The mirror box is mostly assembled already, but you do need to place the primary
mirror into the mirror box.
2.3.1 Installation of the Pads and Brass Wires
Before installing the primary mirror, you need to perform the following tasks:
•Attach the 6 adhesive scratch protectors to the three support bars
•Attach the three brass wires to regulate the support bars
First bend the three brass wires into the following shape, with the center portion about
4 mm (a bit longer is OK, but all three should be the same length, as much as
possible).
15

Insert the brass wires into the small holes on the support bars, and then bend the head
portions to lock the brass wires in the position.
Push the brass wires outward into a slight curve to keep the support bars in position.
2.3.2. Installation of the Lower ALT Bearing Sections
16

First make sure that 3 collimation knobs and 3 locking screws are installed, then
rest the Mirror Box on its side:
Place the two spacers around the ALT bearing installation holes. (Please note that the
spacers are already installed).
17

Then turn around the mirror box to rest it on another side to install another lower ALT
bearing section.
2.3.3. Installation of The Upper Lower ALT Bearing Section
Place the mirror box onto the Rocker box.
Then install and bolt the ALT upper bearings sections one at time to the lower section.
Then bolt the two cross tubes to the upper bearing sections.
18

Figure 15: Tighten the knob screw and pivot screw
The mirror box can be stored and transported folded in the following way:
2.3.4 Installation of the Primary Mirror
Rotate the two eccentric side pins to make room for the primary mirror. Loosen the
locknuts on the top of the mirror clips and turn them aside.
1

Use a flat head screwdriver to open the split bolts, and insert the sling into the slot.
Also loosen the nuts on the two split bolts that hold the sling. Stretch the sling loosely
around the two lower side pins.
Figure 16: Open the slot
Figure 17:Insert the sling
20
Table of contents
Other Hubble Optics Telescope manuals
Popular Telescope manuals by other brands

UNIPRODO
UNIPRODO UNI TELESCOPE 08 user manual

Zhumell
Zhumell ZHUN003-1 owner's manual

Eschenbach
Eschenbach 1621 Fitting instructions

Meade
Meade Coronado SolarMax II Series instructions

Harbor Freight Tools
Harbor Freight Tools 90750 Assembly and operating instructions

Meade
Meade LX200-ACF instruction manual

Astroscan
Astroscan 7000000 user guide

ORION TELESCOPES & BINOCULARS
ORION TELESCOPES & BINOCULARS StarSeeker IV GoTo quick start guide

Taurus
Taurus T300 instruction manual

GeoSafari
GeoSafari Vega 360 manual

William Optics
William Optics Ferrari ZenithStar Racing brochure

SurgiTel
SurgiTel SurgiCam HD quick start guide