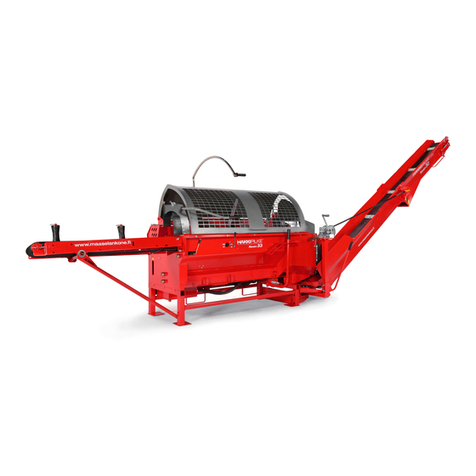
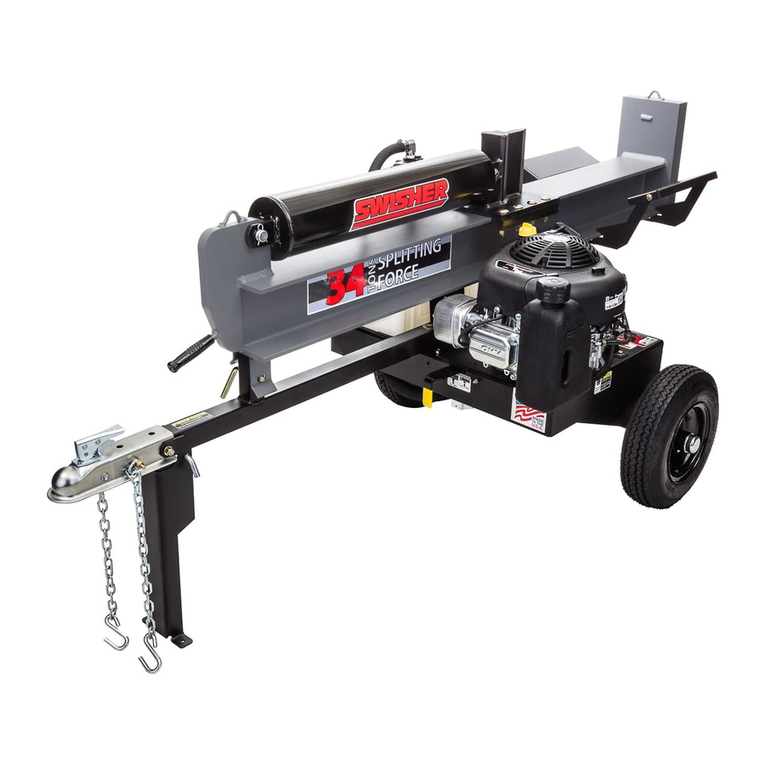
Hudson HDH-1 User manual

HUD-SON WOODSPLITTER
OPERATOR’S MANUAL
8201 STATE ROUTE 12 • PO BOX 345 • BARNEVELD NEW YORK 13304
WWW.HUD-SON.COM • 800.765.SAWS

A NOTE FROM HUD-SON
Thank you for your purchase of a woodsplitter from Hud-Son Forest Equipment. We are
pleased that you chose us as your supplier of your forestry equipment.
Hud-Son Forest Equipment has been in the forestry business since 1965 and prides itself
on developing new and innovative products for the forestry business.
Our product line is always transforming so please check us out on the web at www.hud-
son.com for the up and coming developments we are making.
Should you have any questions with the setup of your mill or have any technical questions
please feel free to contact our onsite technician Monday - Friday, 8 to 4:30 and Saturdays
from 8 to noon eastern time at 1-800-765-7297. We are always available to our customers
for any questions or concerns they may have about their equipment.
CONTENTS
Introduction . . . . . . . . . . . . . . . . . . . . . . . . . . . . . . .3
Safety . . . . . . . . . . . . . . . . . . . . . . . . . . . . . . . . . . .4
Maintenance . . . . . . . . . . . . . . . . . . . . . . . . . . . . . . .8
Start Up . . . . . . . . . . . . . . . . . . . . . . . . . . . . . . . .10
Operation . . . . . . . . . . . . . . . . . . . . . . . . . . . . . . . .11
Inspection and Maintenace . . . . . . . . . . . . . . . . . . . .15
Mechanical Specifications . . . . . . . . . . . . . . . . . . . . .17
2

3
• Read all operating, and safety instructions.
• Complete and return the warranty card .
• Write the serial number and date-of-purchase in this manual.
• Make sure the oil filter is properly installed. (See "Assembly Procedure" sec-
tion.)
• Fill the hydraulic tank with the recommended type and quantity of oil. (See
"Start-Up Procedure" section.)
• Fill the engine crankcase with the manufacturer's recommended type and quan-
tity of oil. (See "Start-Up Procedure" section.)
• Fill the engine fuel tank with fresh, clean, lead-free gasoline. (Do not mix oil
with gasoline.)
• Make sure the trailer hitch of the towing vehicle is equipped with a 2 inch ball.
INTRODUCTION
Purchaser Agreement
By accepting the delivery of your woodsplitter by Hud-Son Forest
Equipment you agree that you will not modify your mill from it’s original
assembly. This will VOID any warranty from Hud-Son Forest Equipment.
Dealer: ________________________________________
Phone Number: _________________________
Address: ___________________________________________
___________________________________________________
Purchase Date: ______________________
Model: ___________________________________________
Serial Number: _________________________________________________
This manual is filled with the latest information and specifications at the time of publica-
tion. We have the right to make changes as they are needed. Any of the changes in our
product may cause a variation between the illustrations and explanations in the manual
and the item that you have purchased.
Please fill out the information for quick reference:

Safety Guidelines
The reason for the safety section is to inform the operators and maintenance personnel,
the precautions that should be taken while operating or servicing the Hud-Son Mills.
Please use good judgement and keep safety in mind when operating Hud-Son machinery.
Please read and follow ALL the instructions in this manual before operating the Hud-Son
Mill safely at all times. These instructions were produced for your benefit. Your ability
to understand and follow the instructions is essential for the safe operation of this prod-
uct. Always call your servicing dealer if you are in doubt before operation of any kind.
General Safety Procedures
1- Always wear safety glasses, ear protection, and gloves while operating or servicing the
machine.
2 - Keep all body parts and foreign objects away from all moving parts. Do not reach
into the machine while it is still operating. (Be Sure The Machine Is OFF.)
3 - Do not attempt to override any safety features on the machine.
4 - Inspect the machine before every use for wear, damage, and that it’s functioning
correctly. If the machine has been damaged or is not running correctly, DO NOT
attempt to operate the machine. Repair or replace all parts when necessary.
5 - Do not wear loose clothing or jewelry while operating or servicing the machine.
6 - All replacement parts should be of the same specifications as the original parts on
your Hud-Son machine.
7 - All guards and covers must be in place before operating the machine.
8 - Before starting the machine be sure that it is set up properly.
9 - DO NOT operate or service any machinery while under the influence of drugs or
alcohol, while tired or if you are unable to control your movements.
10 -All worn or damaged decals should be replaced.
11 -Any modifications to the machine requires written approval from Hud-Son
Forest Equipment.
12 -The sawmill should only be used when it is on level stable ground.

5
The safety rules are made for the benefit of the persons operating and servicing
the machine, to prevent injury to oneself or others. Please review all setup and
operating procedures before attempting to run the machine, whether covered in
this manual or not, to ensure the safest operation of this product.
Hud-Son Forest Equipment is not liable for damage to property or personal injury due to
the failure of any person and/or operator to follow the instructions and recommendations
set forth in this manual or any other instructions or recommendations contained in other
literature issued by other vendor manuals in the owner's kit.
Product Safety Decals
The decals below are used on the Hud-Son Saw Mills to identify warnings and prohibit-
ed actions. It is very important that you understand the meaning of the decals for your
safety and the safety of others. Decals are to be replaced if worn or illegible.

6
CAUTION - Be EXTRA careful around these
areas, unsafe practices may cause personnel
injury or damage.
DANGER - Be careful around any rotating
parts, they may cause personnel injury or dam-
age.
DANGER - Be sure to be very cautious and
alert, these areas may cause personnel injury or
damage.
CAUTION - Operating equipment without
guards may cause personnel injury or damage.
BLADE LUBE TANK - be sure to use the
correct lubrication, if incorrect lube is used it
may cause personnel injury or damage.
NOTICE - Please remember to send in war-
ranty card and information.
CAUTION - All debris needs to be removed
from machine before transporting, failure to so
may cause personnel injury or damage.
CAUTION FIRE HAZARD - Keep all saw-
dust away from motor.

7
•DO NOT allow any person to operate the log splitter until they have read and under
stood the safe operating instructions contained in this manual.
•DO NOT under any circumstances, alter your log splitter. This equipment was
designed and engineered to be used in accordance with the operating instructions.
Altering the equipment, or using the equipment in such a way as to circumvent its
design capabilities and capacities, could result in serious or fatal injury and
WlLL VOID THE WARRANTY.
•NEVER operate, or allow anyone else to operate, this equipment while under the
influence of medication, drugs, or alcohol.
•NEVER wear loose clothing or jewelry that may get caught or become entangled in
the log splitter.
•NEVER place hands or feet between log and splitting wedge or between log and ram
during the forward or reverse stroke.
•DO NOT STRADDLE OR REACH ACROSS THE SPLITTINGAREA WHEN
OPERATING THE LOG SPLITTER.
•DO NOT step over your log splitter when the engine is running, because you may trip
or accidentally engage the ram.
•NEVER attempt to load your log splitter while the ram is in motion.
Only use your hand to operate the control lever. NEVER use your foot, knee, a rope,
or any other extension device.
Operating Safety
ALLOW ONLY ONE (1) PERSON TO LOAD AND OPERATE
THE LOGSPLITTER.
•ALLOW ONLY ADULTS to operate the log splitter. No one under the age of 18
should be allowed to operate the log splitter.
•ALWAYS keep bystanders, including children and pets, at least twenty-five (25) feet
away from the work area. Only the operator should stand near the equipment and only
within the safe operating area prescribed in this manual.
•When the ram of the log splitter is in the return mode, keep your hands off the
machine - the log splitter is designed to automatically stop when the cylinder is fully
retracted.
8
•ALWAYS inspect your log splitter before each use. Make sure all nuts, bolts, screws,
hydraulic fittings, hose clamps, etc. are securely tightened.
•ALWAYS check the oil level in the hydraulic oil tank and engine reservoir.
• NEVER operate your log splitter when it is in need of repair or is in poor
mechanical condition.
•NEVER tamper with the engine to run it at excessive speeds. The maximum
engine speed is preset and is within safety limits.
•NEVER make alterations to your log splitter in any manner. Such alterations
may cause the log splitter to become unsafe and WILL VOID THE WARRANTY.
•NEVER attach a rope or extension to the control lever or add width or height to the
splitting wedge. Such ALTERATIONS may cause the log splitter to become
UNSAFE and WILL VOID THE WARRANTY.
•ALWAYS clean the unit after each use. If possible, store the unit inside or cover
Towing
•ALWAYS check before towing to make certain your log splitter is correctly and
securely attached to the towing vehicle. Be sure that the ball hitch you are using is the
proper size for the hitch coupler on the log splitter . Be sure the safety chains are
properly hooked to the vehicle leaving enough slack for turning.
Log Splitting Safety
•ALWAYS keep your fingers away from any cracks that open in the log during the
splitting operation.
•ALWAYS make sure that both ends of the log you are splitting are cut as square as
possible. This will prevent the log from sliding out of position while under pressure.
Logs should be 24 inches or shorter in length.
•NEVER try to split two logs on top of each other.
•NEVER pile logs to be split in a manner that will cause you to reach across the log
splitter. Maintenance and Repair
• Follow ALL safety rules, because most accidents involving the operation,
maintenance, or repair of products occur because the assembler/owner/operator failed
to observe basic safety rules or operating instructions.

9
•ALWAYS allow for added length of the log splitter when turning, parking, crossing
intersections, and in all driving situations.
•ALWAYS be careful when backing up. You could jackknife your log splitter if care is
not taken.
• ALWAYS disconnect your log splitter from your towing vehicle before attempting
to use it.
• NEVER exceed 35 m.p.h. when towing your log splitter. Obey all state and local
regulations when towing on state and local roads and highways. Adjust your speed
for terrain and conditions, as needed. Be extra cautious when towing over rough
terrain, especially over a railroad crossing.
• NEVER tow your log splitter when there is fuel in the engine's tank.
• NEVER allow anyone to sit or ride on your log splitter.
•NEVER carry any cargo or wood on your log splitter.
Connecting Splitter To Hitch To Receiver
1. Ensure splitter coupler ball size is the same as the ball size receiver
2. Position the hitch coupler of the log splitter over or onto the tow vehicle's tow ball. In
some cases, the hitch coupler may not totally engage with the tow ball without raising
the jack leg assembly. Pull the latch assembly on the hitch coupler up and into the
open position.
3. Release the latch assembly on the hitch coupler and lock the hitch coupler onto the
tow ball. Attach the towing safety chains to the tow vehicle.
4. Raise the front leg to the towing position by pulling the spring pin. If not already
secure, make sure the hitch coupler is properly and securely attached to the tow ball.
5. Place a customer supplied lock or lock pin into the latch assembly of the hitch cou-
pler
WARNING: Making sure the log splitter is securely attached to the vehicle is the
responsibility of the owner/operator. Failure to securely attach the log splitter can cause
loss of control of the vehicle or the log splitter being separated from the towing vehicle,
resulting in serious injury or death.

10
First Time Start-Up Procedure
IMPORTANT NOTICE:
Do not start the engine. Follow all of the instructions in the "Start-up Procedure" before
operating the log splitter. Failure to follow this recommendation will result in engine
Refueling
•ONLY refuel the log splitter outdoors in a clear area void of gas fumes or spilled
gasoline.
•ALWAYS use an approved fuel container to carry gasoline.
• ALWAYS replace the log splitter gas cap and the fuel container cap securely.
•If gasoline is spilled, move the machine away from the area of the spill and avoid
creating any source of ignition until the spilled gasoline has completely evaporated.
•Take a class B fire extinguisher with you when operating the log splitter in dry areas
as a precautionary measure against possible flying sparks.
•Always store gasoline in an approved, tightly sealed container. Store the container
in a cool, dry place. Do not store the container in a house or near any heating
appliance.
•Do not smoke or have open flames when refueling the engine. Do not spill fuel. If fuel
should spill, quickly wipe up the spill and allow the excess to evaporate before
continuing. Make sure gasoline soaked rags are properly disposed of.
•DO NOT fill the gas tank while the engine is hot or running. Allow time for the
engine to cool down before refueling.
Preventing Fires
•NEVER operate the log splitter near a flame or spark. Oil and gasoline are flammable
and can explode.
•NEVER smoke while operating or refueling the log splitter. Gasoline, oil, and even
gas fumes can explode. Important Notice
The log splitter is equipped with an internal combustion engine and should not be used
on or near any unimproved forest-covered, brush-covered, or grasscovered land unless
the engine's exhaust system is equipped with a spark arrester meeting local or state laws
(if any). If a spark arrester is used, it should be maintained in effective working order by
the owner and/or operator.

11
and hydraulic pump damage. If this log splitter is purchased without an engine, the cus-
tomer assumes all liabilities that might arise from an engine that is incompatible with
the design of the log splitter. Also, any unauthorized changes or modifications to the log
splitter will void all warranties.
IMPORTANT: The hydraulic system oil for your log splitter NEEDS TO BE
CHECKED FOR PROPER LEVEL BEFORE STARTING ENGINE. Make sure the
filter is installed before attempting to fill the hydraulic tank or start the
engine.Instructions are printed on the side of the filter.
IMPORTANT: Before starting the engine, read the engine manufacturer's operating and
maintenance instruction manual. If an engine manual was not supplied with the log
splitter, it is your responsibility to obtain a manual. Start by contacting the store where
you purchased the log splitter. If they cannot help you, contact the engine manufacturer.
Check the hydraulic tank fluid level. The tank is full when the oil level is approximate-
ly one inch from the top of the tank. Tighten the fill cap. Be careful not to spill fuel
when filling the engine. If fuel should spill, quickly wipe off and allow the excess fuel
to evaporate before continuing. Fuel and fuel vapors are highly flammable and can
cause personal injury or even death when ignited. Your log splitter is equipped with a
factory installed engine, do not mix oil with the gasoline. Using mixed oil/gasoline in a
four cycle engine can cause engine damage.
1. Fill the engine's fuel tank with fresh, clean, lead-free automotive gasoline.
2. Check engine oil level, be sure oil level is full.
3. Turn ful shit off on. Start the engine per the manufacturer's instructions.
4. Cycle the log splitter several times, shut engine off.
5. Again, check the fluid level in the hydraulic tank and add oil as needed.
Replace and tighten the fill cap.
6. Your log splitter is now ready to operate
Operation
Do not attempt to operate the log splitter without fully understanding all our instruc-
tions, safety precautions, and/or warnings. If any doubt or question arises about the cor-
rect or safe method of performing anything found in this manuals, contact HUD-SON
FOREST EQUIPMENT 800-765-7297 Proper care is your responsibility.
When operating the log splitter, make sure you are standing in a safe operating area

12
You must stay in the safe operating area at all times when the splitting wedge is in
motion (whether extending or retracting). Never place any part of your body into a posi-
tion that causes an unsafe operating condition.
1. Set your log splitter on flat, dry ground. Make sure you read all the
recommendations from the "Safety" section before using the log splitter.
2. Start the engine using the instructions from the engine manual. If the log splitter has
not been running (cold engine), warm up the engine and hydraulic system by running
the engine at half throttle for 3 to 4 minutes, then advance the engine throttle control
to maximum speed.
3. Make sure both ends of the log you are splitting are cut as square as possible.
This will prevent the log from sliding out of position while under pressure. All logs
should be 24 inches long or shorter.
Never attempt to split wood across the grain. The log splitter was not designed for
cross-grain splitting. Doing so will damage the log splitter and may cause personal
injury.
4. Only using your hand, push the control lever forward (towards the log). If the
log moves, before it is contacted by the splitting wedge, release the control lever and
then reposition the log. Operate the log splitter only when standing in a safe operating
area.
Make sure you stand clear from the engine's exhaust. Hot exhaust is intense and
can cause serious injury.
If you find you must hold the log until the wedge touches it and holds it in place, be
very careful not to put your hand between the log and the end plate or the log and the
wedge. If you must, hold the log on top and in the middle. Remove your hand
immediately when the splitting wedge engages the log.
Never use your hip or any extension device to operate the valve control handle.
Do not operate the log splitter by reaching across the rail. This is a very UNSAFE
method which could cause personal injury or even death.
Do not reach or step across the rail while the log splitter is running. This is a very
UNSAFE method which could cause personal injury or even death.

13
Operation - Horizontal Position
Before loading and operating the log splitter, always wear protective gear, such as safety
goggles, face shield, hearing protection, tight-fitting gloves without draw strings or
loose cuffs, and steel-toed shoes.
a. Place the log on the log splitter. Grasp the log on the sides near the middle of the
block. Center the log, side-to-side, on the rail of the log splitter, making sure that the
sawed end is against the large plate (base plate) at the opposite end of the hydraulic
control valve control lever.
Do not place your hands on the ends of the log when loading the log splitter. This is a
very UNSAFE method and could result in injury to your hands.
CAUTION - WARNING
c. Hold the control lever, extending the splitting wedge, until the log is split or the
cylinder rod stops at its maximum travel position. Stop the log splitter (forward
movement), at any point in the splitting process, if you feel an unsafe log splitting
condition is occurring. As the log is being split, DO NOT reach forward and attempt
to catch the split wood - let it fall to the ground.
d. Once the wedge reaches its full forward travel, pull back on the control lever to the
full retract position. The ram of the cylinder will automatically retract into the
cylinder. It is not necessary to hold the control lever as the cylinder retracts. Stop the
wedge if the log sticks (see caution below). When the cylinder is fully retracted, the
control valve will automatically shift to a neutral position.
e. DO NOT load another log or remove split pieces until the wedge has completely
stopped and the control handle automatically returns to the neutral position.
Depending on the type of wood being split, a log may not always break into two
pieces and fall to the ground. If a log sticks to the wedge, place the valve handle in
the neutral position (stop the wedge from retracting) and carefully remove the log
from the wedge.
Allowing the log to remain attached to the wedge when it is fully retracted could lead
to possible injury and/or damage to the log splitter.

14
6. Never split a log using an incorrect or unsafe method.
a. To operate the log splitter in a vertical position, pull the spring-loaded locking
lever and twist the locking lever either direction to lock it in the "unlocked"
position.
b. Block the wheels and stand the rail assembly up into a vertical position.
c. Turn the spring-loaded locking lever knob until the pin slides into the slot. This
allows the plunger to snap into place, securing the rail assembly in a vertical
position.
d. Move the log under the splitting wedge keeping your hands on the sides of the log
near the middle of the block. Center the log making sure that the sawed end is
sitting on the large plate (baseplate).
CAUTION
Make sure you stand clear from the engine's exhaust. Hot exhaust is intense and can
cause serious injury.
Do not place your hands on top of the log when loading the log splitter. This is a very
UNSAFE method and could result in injury to your hands.
If you find you must hold the log until the wedge touches it and holds it in place, be
very careful not to put your hand on top of the log. If you must, hold the log in the mid-
dle of the block. Remove your hand immediately when the wedge engages the log.
Never use your hip or any extension device to operate the valve control handle.
e. Only using your hand, push the control lever down (towards the log). If the log
moves, before it is contacted by the splitting wedge, release the control lever and
then reposition the log Operate the log splitter only when standing in the safe
operating area.
f. Hold the control lever, extending the splitting wedge, until the log is split or the
cylinder rod stops at its maximum travel position. Stop the log splitter (forward
movement), at any point in the splitting process, if you feel an unsafe log splitting
condition is occurring. As the log is being split, DO NOT reach forward and
attempt to catch the split wood - let it fall to the ground.
Operation - HDHV - Horizontal - Vertical Splitter
WARNING
Before loading and operating the log splitter, always wear protective gear, such as safety
goggles, face shield, hearing protection, tight-fitting gloves without draw strings or
loose cuffs, and steel-toed shoes.

15
HYDRAULIC OIL CHANGE
HUD-SON FOREST EQUIPMENT recommends an oil and filter change every 100
hours of operation.
IMPORTANT NOTICE
Never run the log splitter unless the hydraulic oil tank is full.
1. Drain the head end of the cylinder.
a. Remove the spark plug wire and spark plug to help reduce the back pressure on the
engine and to prevent it from starting.
b. Disconnect return hose (1) from the oil filter housing and place it in a waste oil
container. (Please properly dispose of the waste oil per local regulations.)
Daily maintenance of this machine includes checking engine oil, hydraulic fluid,
cable, safety equipment and the splitter trough needs to be cleaned out in front
and behind the push plate. Neglecting to do this will result in splitter damage
which will NOT be covered under warranty.
PROCESSOR FILTERS SHOULD BE CHANGED AFTER
10 HOURS OF INITIAL USE AND EVERY100 HOURS THEREAFTER.
g. Once the wedge reaches its full forward travel, pull back on the control lever to the
full retract position. The ram of the cylinder will automatically retract into the
cylinder. It is not necessary to hold the control lever as the cylinder retracts. Stop
the wedge if the log sticks (see caution below). When the cylinder is fully
retracted, the control valve will automatically shift to a neutral position.
h. DO NOT load another log or remove split pieces until the wedge has completely
stopped and the control handle automatically returns to the neutral position.
INSPECTION and MAINTENANCE
CAUTION
Depending on the type of wood being split, a log may not always break into two pieces
and fall to the ground. If a log sticks to the wedge, place the valve handle in the neutral
position (stop the wedge from retracting) and carefully remove the log from the wedge.
Allowing the log to remain attached to the wedge when it is fully retracted could lead
to possible injury and/or damage to the log splitter.

16
c. Extend the cylinder by holding the valve handle forward and pulling on the
engine's pull start cord until oil from the return line stops flowing. This step drains
the head end of the cylinder.
2. Drain the hydraulic tank.
a. Place a waste oil container under inlet hose (2).
b. Remove the inlet hose from the pump.
c. Slightly lower the front of the log splitter to completely drain the tank.
3. Remove and replace the oil filter.
a. Remove the existing oil filter and properly dispose of it.
b. Apply a thin coat of oil to the rubber seal of the new oil filter.
c. Screw the filter onto the filter head. Once the filter makes contact with the
filter head, turn it an additional 3/4 turn. Hand-tighten only.
4. Refill hydraulic oil.
a. reconnect all hose, clamps, and caps.
b. Fill hydraulic oil tank
c. reconnect spark plug wire and start engine
d. cycle the value to fill cylinder with oil.
e. Once cylinder moves smoothly, turn engine off, check level of hydraulic tank.
General Maintenance Check (before operating)
The hydraulic system (hoses, cylinder, and pump) should be carefully inspected before
each use. Also, inspect the mechanical parts at the same time. Make sure all clamps,
nuts, bolts, fittings, etc. are properly installed and tightened.
Do not check for leaks with your hand. Leaks can be located by passing a piece of card-
board or wood around the suspected leak and looking for discoloration. High-pressure
fluid escaping from a very small hole can be almost invisible. Escaping fluid under
pressure can have sufficient force to penetrate skin, causing serious injury or even death.
If fluid is injected into your skin, it must be treated immediately by a doctor familiar
with this type of injury.
Always replace frayed, kinked, or cracked hoses and/or other damaged hydraulic com-
ponents with HUD-SON FOREST EQUIPMENT authorized parts and components.
HUD-SON FOREST EQUIPMENT - PARTS DEPARTMENT 1-800- 765-7297

17
WARNING
Do not remove the cap from the hydraulic tank or reservoir while the log splitter is run-
ning. Hot oil, under pressure, could be expelled resulting in serious injury.
Should it become necessary to loosen or remove any hydraulic fitting or line, be sure to
relieve all hydraulic pressure by shutting off the engine, removing spark plug wire, and
moving the valve control handle back and forth several times until no cylinder move-
ment is visible.
ENGINE SERVICE
Refer to the engine manufacturers' manual for engine maintenance and repair.
Storage : refer to engine manufacturer manual
INSPECTION AND MAINTENANCE
4. Refill the hydraulic tank.
a. Reconnect inlet hose (2) to the pump.
b. Remove the hydraulic tank fill cap and fill the tank with the recommended type
and quantity of oil. Replace the cap.
5. Drain and refill the piston end of the cylinder.
a. Hold the valve handle in the retract position and pull the engine pull start cord
until the rod is fully retracted. This step removes the old oil from the piston end of
the cylinder.
b. Reconnect return hose (1) to the oil filter.
c. Extend the cylinder by holding the valve handle forward and pulling on the
engine's pull start cord until the cylinder is completely extended. This step refills
the piston end of the cylinder.
6. Start the engine and cycle the cylinder.
a. Replace the spark plug and spark plug wire.
b. Start the engine and cycle the cylinder several times.
c. Retract the cylinder and shut off the engine.
d. Recheck the hydraulic tank to make sure oil is filled within approximately one
inch from the top of the tank

Mechanical Specifications (HUD-SON Model HDH-1, Manual start )
Frame . . . . . . . . . . . . . . . . . . . . . . . . .Heavy Duty Reinforced Bridge Frame , standard
Wedge . . . . . . . . . . . . . . . . . . . . . . . . . . . . . . . . . . . . . . . . . . . . .4-WAY-HD, standard
Hydraulic Pump . . . . . . . . . . . . . . . . . . . . . . . . . . . . . . . . . . . . . . . . . . . . . . . . .13 GPM
Tank Capacity . . . . . . . . . . . . . . . . . . . . . . . . . . . . . . . . . . . . . . . . . . . . . . . . . .5 US Gal
Cycle Time . . . . . . . . . . . . . . . . . . . . . . . . . . . . . . . . . . . . . . . . . . 12 seconds (approx.)
Cylinder Stroke . . . . . . . . . . . . . . . . . . . . . . . . . . . . . . . . . . . . . . . . . . . . . . . .24 inches
Operating Positions . . . . . . . . . . . . . . . . . . . . . . . . . . . . . . . . . . . . . . . . . . .Horizontal
Wheels & Tires . . . . . . . . . . . . . . . . . . . . . . . . . . . . . . . . . . . . . . 12" highway (Bolt-on)
Safety Chains . . . . . . . . . . . . . . . . . . . . . . . . . . . . . . . . . . . . . . . . . . . . . . . . . .Standard
Hitch Coupler . . . . . . . . . . . . . . . . . . . . . . . . . . . . . . . . . . . .2" locking ball (Standard)
Hour Meter & RPM meter . . . . . . . . . . . . . . . . . . . . . . . . . . . . . . . . . . . . . . . .standard
Engine . . . . . . . . . . . . . . . . . . . . . . . . . . . . . . . . . . . . . . . . . . . . .9 HP Robbins Subaru
Mechanical Specifications (HUD-SON Model HDH-2, Manual Start)
Frame . . . . . . . . . . . . . . . . . . . . . . . . . .Heavy Duty reinforced Bridge Frame, standard
Wedge . . . . . . . . . . . . . . . . . . . . . . . . . . . . . . . . . . . . . . . . . . . . . . .4- Way,HD, standard
Hydraulic Pump . . . . . . . . . . . . . . . . . . . . . . . . . . . . . . . . . . . . . . . . . . . . . . . . .16 GPM
Tank Capacity . . . . . . . . . . . . . . . . . . . . . . . . . . . . . . . . . . . . . . . . . . . . . . . . .15 US Gal
Cylinder Stroke . . . . . . . . . . . . . . . . . . . . . . . . . . . . . . . . . . . . . . . . . . . . . . . . .24 inches
Cycle Time . . . . . . . . . . . . . . . . . . . . . . . . . . . . . . . . . . . . . . . . . . . .9 seconds (approx.)
Operating Positions . . . . . . . . . . . . . . . . . . . . . . . . . . . . . . . . . . . . . . . . . . . . .Horizontal
Wheels & Tires . . . . . . . . . . . . . . . . . . . . . . . . . . . . . . . . . . . . . . .12"highway (Bolt-on)
Safety Chains . . . . . . . . . . . . . . . . . . . . . . . . . . . . . . . . . . . . . . . . . . . . . . . . . . .Standard
Hitch Coupler . . . . . . . . . . . . . . . . . . . . . . . . . . . . . . . . . . . . .2" locking ball (Standard)
Hour Meter & RPM meter . . . . . . . . . . . . . . . . . . . . . . . . . . . . . . . . . . . . . . . . .standard
Engine . . . . . . . . . . . . . . . . . . . . . . . . . . . . . . . . . . . . . .10HP Briggs & Stratton engine
Mechanical Specifications (HUD-SON Model HDH-3, Electric Start)
Frame . . . . . . . . . . . . . . . . . . . . . . . . .Heavy Duty Reinforced Bridge Frame, Standard
Wedge . . . . . . . . . . . . . . . . . . . . . . . . . . . . . . . . . . . . . . . . . . . . . . 4- Way-HD, standard
Hydraulic Pump . . . . . . . . . . . . . . . . . . . . . . . . . . . . . . . . . . . . . . . . . . . . . . . . .22 GPM
18

19
Tank Capacity . . . . . . . . . . . . . . . . . . . . . . . . . . . . . . . . . . . . . . . . . . . . . . . . .5 US Gal.
Cylinder Stroke . . . . . . . . . . . . . . . . . . . . . . . . . . . . . . . . . . . . . . . . . . . . . . . . .24 inches
Cycle Time . . . . . . . . . . . . . . . . . . . . . . . . . . . . . . . . . . . . . . . . . . .12 seconds (approx.)
Operating Positions . . . . . . . . . . . . . . . . . . . . . . . . . . . . . . . . . . . . . . . . . . .Horizontal
Wheels & Tires . . . . . . . . . . . . . . . . . . . . . . . . . . . . . . . . . . . . .Highway 12" (Bolt-on)
Safety Chains . . . . . . . . . . . . . . . . . . . . . . . . . . . . . . . . . . . . . . . . . . . . . . . . . . Standard
Hitch Coupler . . . . . . . . . . . . . . . . . . . . . . . . . . . . . . . . . . . .2" locking ball (Standard)
Hour Meter & RPM meter . . . . . . . . . . . . . . . . . . . . . . . . . . . . . . . . . . . . . . . . .standard
Engine . . . . . . . . . . . . . . . . . . . . . . . . . . . . . . . . .14HP single cylinder Robbins Subaru
Mechanical Specifications (HUD-SON Model LJVH Vertical/Horizontal)
Frame . . . . . . . . . . . . . . . . . . . . . . . . . . . . . . . . . .Heavy Duty Steel Beam Construction
Wedge . . . . . . . . . . . . . . . . . . . . . . . . . . . . . . . . . . . . . . . . . . . . . . . . . . . . . . .2-WAY-HD
Cylinder Stroke . . . . . . . . . . . . . . . . . . . . . . . . . . . . . . . . . . . . . . . . . . . . . . . . . . .24 inch
Cycle Time . . . . . . . . . . . . . . . . . . . . . . . . . . . . . . . . . . . . . . . . . . . . . . . . . . . .10 second
Operating Positions . . . . . . . . . . . . . . . . . . . . . . . . . . . . . . . . . . . .Vertical or Horizontal
Wheels & Tires . . . . . . . . . . . . . . . . . . . . . . . . . . . . . . . . . . . . . . .Highway 12"(bolt on)
Safety Chains . . . . . . . . . . . . . . . . . . . . . . . . . . . . . . . . . . . . . . . . . . . . . . . . . . .Standard
Hitch Coupler . . . . . . . . . . . . . . . . . . . . . . . . . . . . . . . . . . . . .2" locking ball (Standard)
Engine . . . . . . . . . . . . . . . . . . . . . . . . . . . . . . . .6.5 HP- Manual Start Briggs & Stratton
Hydraulic Tank . . . . . . . . . . . . . . . . . . . . . . . . . . . . . . . . . . . . . . . . . . . . . . . . .5 US gal.
Hydraulic Pump . . . . . . . . . . . . . . . . . . . . . . . . . . . . . . . . . . . . . . . . . . . . . . . . .13 GPM

20
Optional Attachments:
HDH-LOG LOADER, 37" X 16" W/2' PLATFORM AVAILABLE
FOR EACH HDH-MODEL. Call Hud-Son 1-800-765-7297
This manual suits for next models
3
Table of contents
Other Hudson Log Splitter manuals