STEP 1 Prepare pipe end by de-scaling if required. Clean the pipe as required with
water. Make sure that the pipe is clean from debris and defects that interfere
with HYMAX GRIP's proper seal.
NOTE: Except steel, PVC, and PE pipes, all rough-surfaced pipes must be lubricated
with a water-based gasket lubricant in order to achieve a proper seal.
STEP 2 Measure the pipe’s Outer Diameter and make sure the coupling’s size fits properly.
NOTE: Each coupling’s size range is shown on the product’s label. Make sure that
the pipe is not out of round! The pipe should be free of scratches, dents, flats or
other defects which may interfere with the HYMAX GRIP Flange Adaptor's proper
seal. The GRIP Flange Adaptor may not fit well or function properly on a pipe which
is damaged or is out of round.
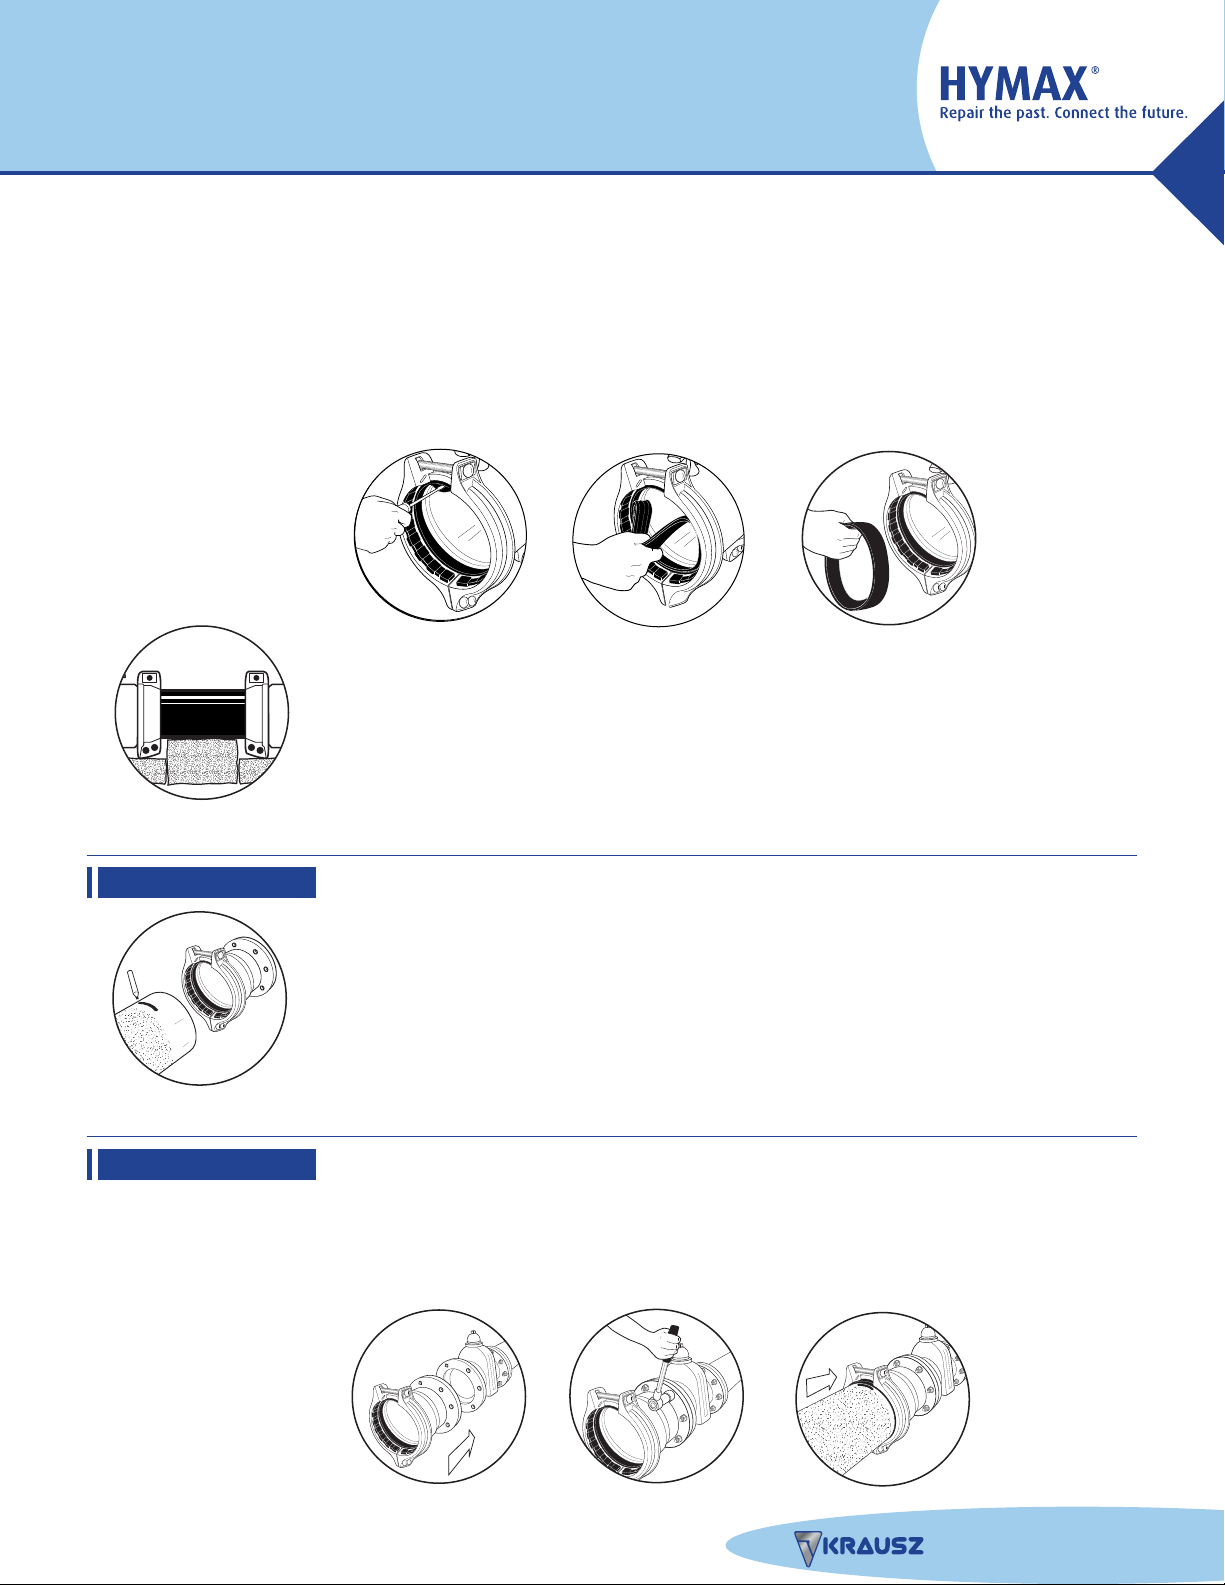
STEP 3 Unpack the HYMAX GRIP Flange Adaptor carefully. Inspect the product and end ring
for shipping damage and assure all parts are present.
Inspect the end ring. If it is not centered on the HYMAX GRIP Flange Adaptor - DO
NOT USE! Contact your distributor for return and replacement.
NOTE: HYMAX GRIP Flange Adaptor is a stab-on type product. Do not loosen or
remove the end ring bolts.
NOTE: Make sure that the product fits the flange standard of the flanged product
you need to connect it to. The Flanged standard types appear in the submittal
drawings.
GENERAL INSTRUCTIONS:
THE HYMAX GRIP FLANGE ADAPTOR IS A STAB-ON TYPE RESTRAINT THAT IS APPROVED FOR USE WITH METAL
AND PLASTIC PIPES.
WARNING: DO NOT ATTEMPT TO USE THE HYMAX GRIP ON AC OR FRP PIPE!
PRECAUTIONS FOR HDPE PIPE:
FOR OTHER MATERIALS, PLEASE CONTACT KRAUSZ USA OR YOUR KRAUSZ DEALER.
DO NOT DISASSEMBLE THE COUPLING. DO NOT LUBRICATE THE BOLTS.
HYMAX GRIP FLANGE ADAPTOR
3”-12”
STEP 1: Clean the pipe as required
with water. Make sure that the pipe is
clean from debris and defects that
interfere with HYMAX Grip’s proper seal.
STEP 2: Measure the pipe's Outer
Diameter and make sure the coupling's
size fits properly.
STEP 4: Mark pipe end to a minimum
required stab depth of 3.5”. These marks
indicate the required stab depth of the
pipe on the Flange Adaptor.
STEP 6a: Connect the GRIP Flange Adaptor
to the existing flange....
STEP 6b: .... and tighten bolts
to maximum.
STEP 6c: .... Bring in the pipe.
Stab the pipe onto the Flange
Adaptor so it covers the
mark on the pipe drawn
in step #4 above.
STEP 7: Tighten the end ring
using a torque wrench, to the
correct torque shown on the
product's label. By tightening
bolts the Flange Adaptor is steadily
stabbed on the pipe.
HYMAX GRIP FLANGE ADAPTOR 3”-12”
STEP 8: Make sure that the pipes
are not touching each other inside
the body of the HYMAX GRIP.
There must be space between the
pipes in order for “Continuous
Dynamic Deflection” (CDD) to
take place.
THE USE OF FULL CIRCLE STIFFENERS IS REQUIRED
WHEN USING THE HYMAX GRIP FLANGE ADAPTOR ON HDPE PIPE.
1
(1.5”-12”)
HYMAX
®
GRIP
FLANGE ADAPTOR
INSTALLATION INSTRUCTIONS
is the creator of HYMAX