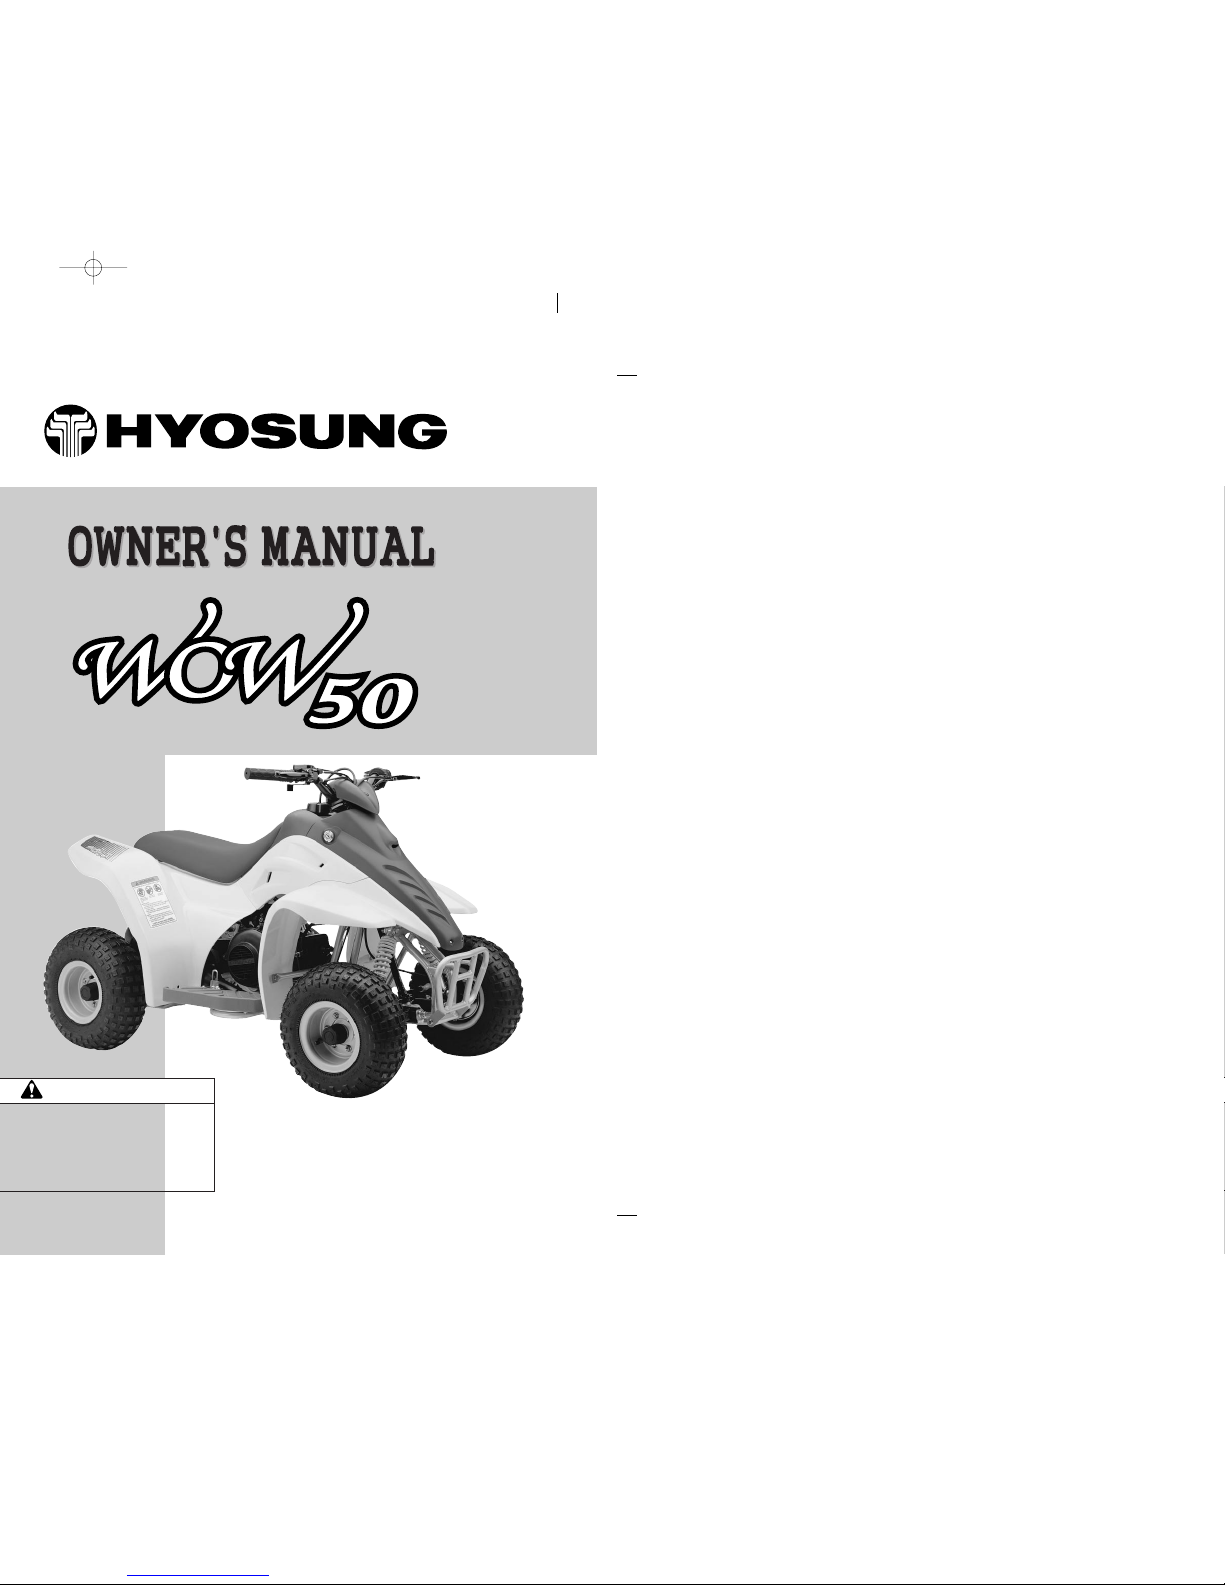
HYOSUNG TE 50 User manual

Part No. 99011HK3100
FEB. 2001.
Printed in KOREA
HYOSUNG MOTORS & MACHINERY INC.
1st Ed.
This owner’s manual con ains
impor an safe y informa ion.
Please read i carefully.
Never allow anyone under 6 years
old o ride his ATV.
CAUTION

NOTE: This provides special infor-
mation to make maintenance
easier or important instruc-
tions clearer.
1
This manual should be considered a permanent part of the vehicle and should
remain with the vehicle when resold or otherwise transferred to a new owner or
operator. The manual contains important safety information and instructions
which should be read carefully before operating the vehicle.
IMPORTANT
ARNING/CAUTION/NOTE
Please read this manual and follow its instruc-
tions carefully. To emphasize special informa-
tion the words
ARNING,
CAUTION
and
NOTEhave special meanings.
Information following these signal words
should be carefully reviewed.
HYOSUNG MOTORS & MACHINERY INC.
Overseas Technical Department
COPYRIGHT HYOSUNG MOTOR & MACHINERY INC.
FORE ORD
This manual is an essential part of your
vehicle. Please read it carefully. It con-
tains important information on safety,
operation and maintenance. It is espe-
cially important that this manual remain
with the vehicle at the time of resale. The
next owner will need this information
also.
Your HYOSUNG
AATTVVis built for use
by children, but this owner s manual is
written for the adults who will be super-
vising the children. HYOSUNG strongly
recommends, therefore, that you review
this entire manual with your child and
carefully explain the instructions, require-
ments, and warnings it contains so that
your child can understand them.
ARNING
The personal safety of the rider or
bystanders may be involved.
Disregarding this information could
result in personal injury.
These instructions point out special
service procedures or precautions
that must be followed to avoid dam-
aging the machine.
CAUTION
COPYRIGHTED

IMPORTANT NOTICE TO
PARENTS
ARNING
Even though the
AATTVVhas four
wheels, it can tip over in any direc-
tion. Improper turning techniques,
traversing hills, accelerating on
hills, and turning on hills can all
lead to vehicle tip over.
Learn proper riding techniques and
avoid riding situations which can
lead to tip over accidents.
The
AATTVVand other all-terrain
vehicles (ATVs) have unique han-
dling characteristics. ATVs handle
differently than motercycles.
Although ATVs have four(or three)
wheels, they handle differently
than automobiles, too.
ATVs require special riding tech-
niques suited to their handling
characteristics, so be sure that all
riders of the
AATTVVpractice and
master the riding techniques
described in this owner’s manual
(Starting on page 15)
ARNING
You must take special precautions
to reduce the chance of accidents
and injuries resulting from operation
of this vehicle. Some of the impor-
tant safety precautions you should
take are :
Supervise operation of the
AATTVV
AT ALL TIMES. Constant supervi-
sion is necessary so you can
observe that the operator is riding
safely.
Never permit children under age 6
to operate the
AATTVV
. These chil-
dren, as well as some children age
6 and older, may not be able to
operate this vehicle safely due to
physical or mental limitations.
Parents should carefully observe
their child’s first use of the vehi-
cle. Further use should be permit-
ted only if the parent can deter-
mine that the child has the physi-
cal and mental capabilities neces-
sary to operate the vehicle safely.
Before first use of the
AATTVV
, read
this owner’s manual carefully to
become familiar with the
AATTVV
’s
features, and safety and mainte-
nance requirements. Review all
instructions, requirements and
warnings with the riders. Keep the
owner’s manual in the owner’s
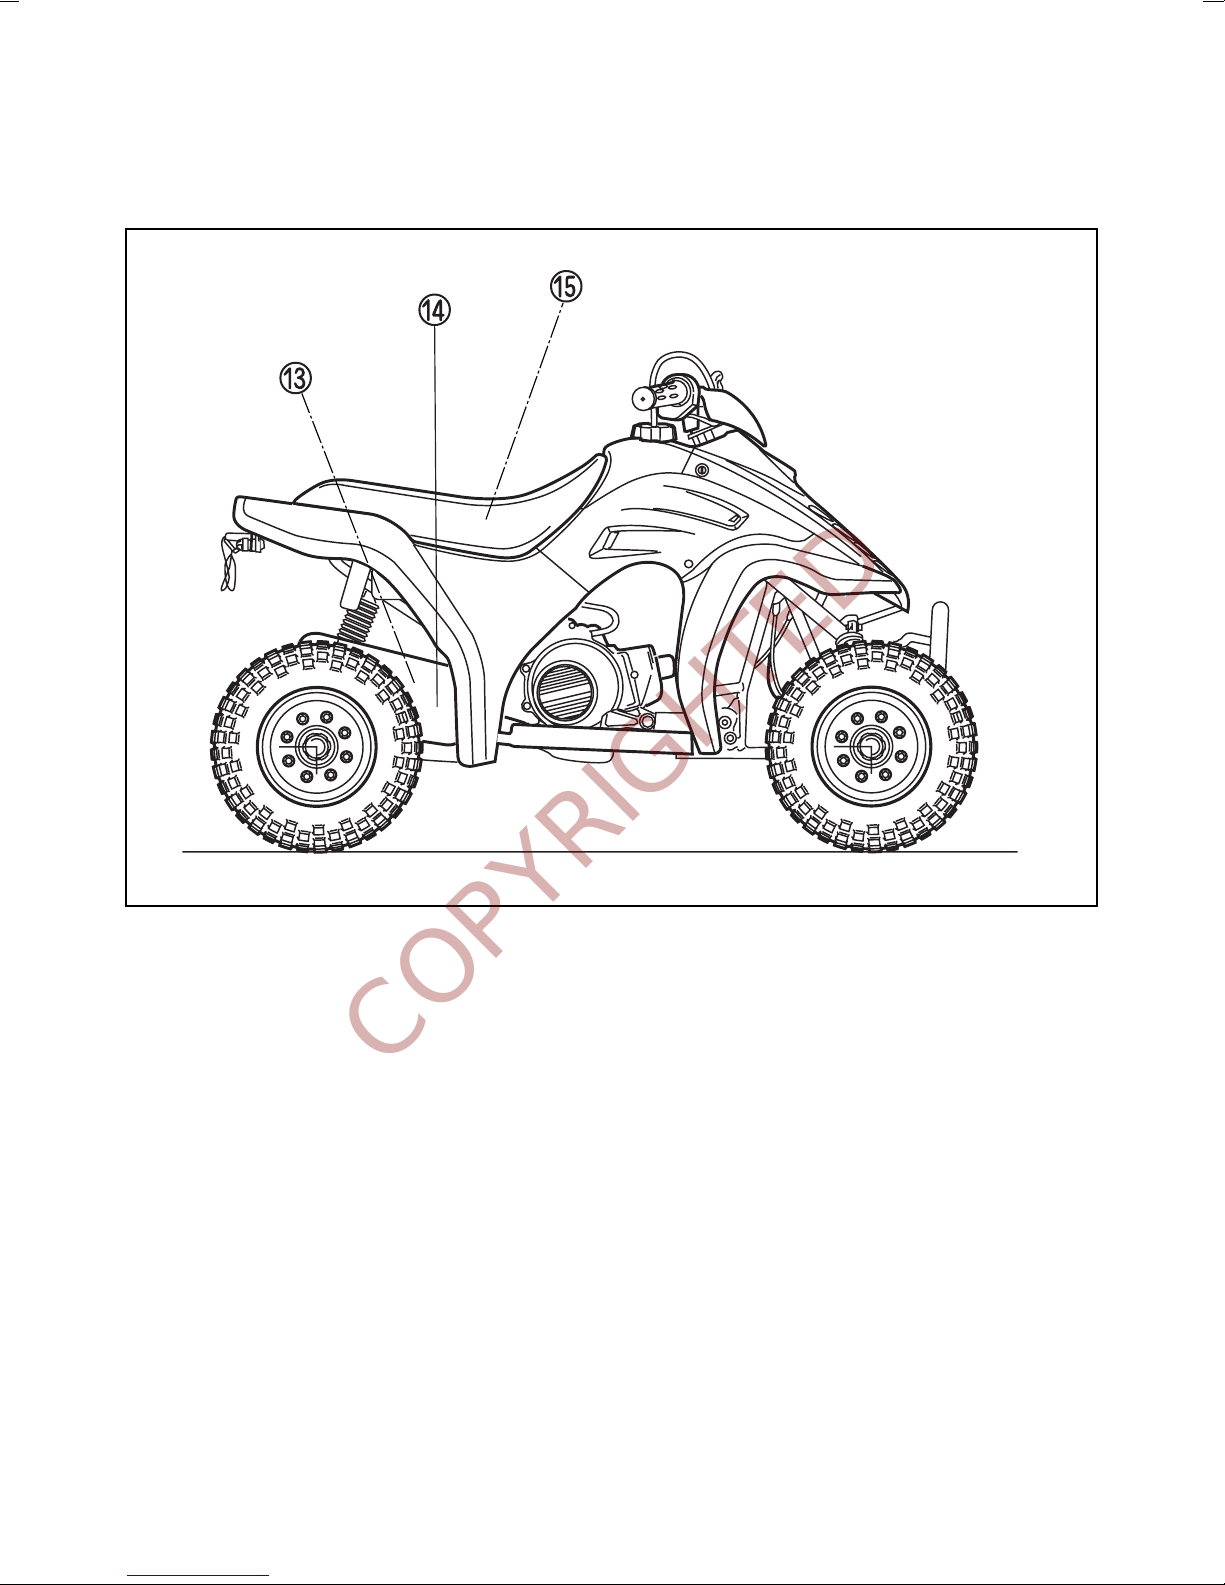
manual storage compartment
located under the seat.
Before the rider’s first use of the
AATTVV
, make sure that he/she is
familiar with the location and
operation of all controls, and has
been instructed in the proper oper-
ation of the vehicle.
For first use of the
AATTVV
, find a
level, open area for the rider to
use to become familiar with the
operation of controls and the oper-
ating and handling characteristics
of the
AATTVV
.
ARNING
Proper parental supervision and
instruction are necessary for safe and
proper operation of this
AATTVVby
young riders.
It is important that both you and your child
understand and observe the restrictions listed
on the fender label of the
AATTVV
.
Read this owner s manual carefully and review
its contents fully with your child. It is YOUR
RESPONSIBILITY to make sure that your
AATTVVis properly and safely ridden and
maintained.
2
COPYRIGHTED

3
Before each use, perform daily
inspections with the rider. Specific
items to check are listed in the
INSPECTION BEFORE RIDING sec-
tion on page 15 of this owner’s
manual.
Make sure the rider wears a hel-
met, eye protection, and protec-
tive clothing (gloves, leather or
heavy cloth pants, long sleeved
shirt or jacket, boots).
Beware of hazardous situations.
Instruct the rider to do Iikewise.
Do not permit the
AATTVVto be
used on public roads AT ANY
TIME.
This vehicle is designed and manu-
factured for use ONLY off public
roads. It is not subject to Federal
Motor Vehicle Safety Standards as
it is not equipped or approved for
operation on public streets, roads,
or highways at any time.
Do not permit the
AATTVVto be
operated on any paved surfaces.
The vehicle can be more difficult
to control when it is operated on
pavement.
Permit use only by a single rider.
This vehicle is designed for use
only by a single rider. Extra seat
space is provided so the rider can
change his/her body position to
maneuver the vehicle. This space
should never be used to carry a
passenger.
Do not permit anyone to operate
the
AATTVVwhile under the influ-
ence of alcohol or other drugs.
Make sure the combined weight of
the rider, protective gear and any
accessories or cargo does not
exceed the 35kg(77lbs)
weight limit. Exceeding this
weight limit may result in injury
caused by damage to the vehicle
or altered handling characteris-
tics.
Observe periodic maintenance
requirements-your authorized
HYOSUNG dealer is trained and
equipped to perform this service.
Never permit vehicle refueling by
anyone other than an adult.
Drain gasoline from the fuel tank
and carburetor prior to transport-
ing the
AATTVV
.
Caution the rider and others near
the
AATTVVnot to get close to or
touch any moving parts or any
heated areas such as the engine
and exhaust system.
Do not make any modifications to
the
AATTVV
.Modifications may
make the vehicle unsafe or illegal
unsafe or illegal in your state.
Do not allow the
AATTVVto be rid-
den at night. This vehicle is not
equipped with a headlight. Unseen
obstacles could cause an accident
resulting in injury to the rider.
COPYRIGHTED

TABLE OF CONTENTS
1. SERIAL NUMBER LOCATION 5
2. FUEL AND OIL RECOMMENDATIONS 5
FUEL
ENGINE OIL
TRANSMISSION OIL
3. LOCATION OF PARTS 6
4. CONTROLS 10
LEFT HANDLEBAR
RIGHT HANDLEBAR
FUEL COCK
5. EQUIPMENT AND ADJUSTMENTS 12
FUEL TANK CAP
REMOTE ENGINE STOP S ITCH
6. BREAK-IN (RUNNING-IN) 14
7. INSPECTION BEFORE RIDING 15
8. RIDING TIPS 15
9. INSTRUCTING THE YOUNG RIDER 21
10. INSPECTION AND MAINTENANCE 24
MAINTENANCE SCHEDULE
PERIODIC MAINTENANCE CHART
SEAT REMOVAL
TOOLS
AIR CLEANER
SPARK PLUGS
IDLE SPEED ADJUSTMENT
THROTTLE CABLE ADJUSTMENT
FUEL HOSE
TRANSMISSION OIL
ENGINE OIL LEVEL
BRAKE
TIRES
DRIVE CHAIN
FOOTREST HEIGHT ADJUSTMENT
FRONT AND REAR HEEL REMOVAL
GENERAL LUBRICATION
11. TROUBLESHOOTING 39
12. TRANSPORTING 40
13. CLEANING PROCEDURE 41
14. STORAGE PROCEDURE 43
15. LOCATION OF LABELS 44
16. SPECIFICATIONS 46
4
COPYRIGHTED

The frame and/or engine serial numbers are used to
title the vehicle. They are also used to assist your
dealer when ordering parts or referring to special
service information.
Gasoline used should be graded 85 ~ 95 octane or
higher. An unleaded type gasoline is recommended.
If engine pinging is experienced, substitute another
brand as there are differences between brands.
The frame number is stamped on the front frame
member as shown in the illustration.
The engine serial number is stamped on the left
side of the crankcase assembly.
Please write down the serial numbers here for your
future reference.
Frame No.:
Engine No.:
FUEL
Use HYOSUNG HYPOL OIL HS.
If they are not available, use a good quality TWO-
STROKE engine oil.
Use a good quality SAE 10W/40 multi-grade motor
oil.
ENGINE OIL
TRANSMISSION OIL
SERIAL NUMBER LOCATION FUEL AND OIL
RECOMMENDATIONS
5
COPYRIGHTED

Rear brake lever (Parking brake Iever)
Parking brake knob
Front brake lever
Throttle lever
Fuel tank cap
Starter switch
Engine stop switch
LOCATION OF PARTS
6
COPYRIGHTED

7
Remote engine stop switch
COPYRIGHTED

8
Fuel cock
Air cleaner
Battery & fuse
Tools
COPYRIGHTED

9
Drive chain
Muffler
Engine oil tank
COPYRIGHTED

LEFT HANDLEBAR
CONTROLS
hen the starter motor doesn’t
rotate within 5 seconds after push-
ing the switch, try again after 10
seconds to prevent damage to the
battery.
CAUTION
10
NOTE : If the front or rear brake lever
is not squeezed, the starter
motor will not rotate.
①Rear Brake Lever
Apply the rear brake by squeezing the rear
brake lever towards the grip.
②Parking Brake Knob
This knob is used to set the parking brake,
which is used to prevent thefrom
moving when it is parked, being started, or at
idle. Set the parking brake by squeezing the
rear brake lever and pushing this knob to
lock the lever in the squeezed position.
③Starter Switch
Push in the electric starter switch to rotate
the starting motor.
Engine Stop Switch
RIGHT HANDLEBAR
②Throttle Lever
①Front Brake Lever
Apply the front brake by squeezing the front
brake lever towards the grip.
Engine speed is controlled by the position of the
throttle lever. Push it forward to increase engine
speed. Release it to decrease engine speed.
This lever is operated by the rider s thumb.
③Throttle Limiter
◉“ ”Position :
The ignition circuit is off.
The engine cannot start or run.
◉“ ”Position :
The ignition circuit is on
and the engine can run.
COPYRIGHTED

FUEL COCK
11
This vehicle is equipped with the throttle limiter
to restrict maximum engine power by limiting
throttle lever travel. The supervising adult should
adjust this limiter to limit maximum vehicle
speed according to the rider s skill and experi-
ence.
To adjust the throttle limiter :
1. Loosen the lock nut .
2. Turn the throttle limiter screw clockwise
to restrict maximum engine power or coun-
terclockwise to increase maximum engine
power.
3. Tighten the lock nut .
This vehicle is equipped with a manually operat-
ed fuel cock.
There are three position : ON , OFF and
RES
◉“ ON”
Position
The normal operating position for the fuel cock
lever is in the
ON
position.
◉“ OFF”
Position
Turn the lever to the
OFFposition whenever
stopping the engine for more than a few min-
utes.
◉“ RES”
(RESERVE) Position
If the fuel level in the tank is too low, turn the
lever to the
RESposition to use the 1of
reserve fuel supply.
After switching the fuel cock lever
to the “RES” position, it is advisable
that the tank be refilled at the clos-
est gas station.
After refueling be sure to move the
fuel cock to the “ON” position.
CAUTION
COPYRIGHTED

Do not overfill the fuel tank. Stop
adding fuel when the fuel level
reaches the bottom of the filler neck
as shown the illustration. If you fill
the tank beyond this level, fuel may
overflow when it expands due to
engine heat or heating by the sun.
ARNING
Gasoline is extremely flammable
and toxic. Always observe the fol-
lowing precautions when refueling
your
AATTVV
.
●
Never permit vehicle refueling by
anyone other than an adult.
●
Refuel in a well ventilated area.
●
Make sure the engine is off and
avoid spilling fuel on a hot engine.
●
Do not smoke, and make sure
there are no open flames or sparks
in the area.
●
Avoid prolonged contact with skin
and breathing of gasoline vapors.
●
Keep children and pets away dur-
ing refueling.
ARNING
To open the fuel tank cap, remove the end of
the vent tube from the hole in the vehicle body
and turn the fuel tank cap counterclockwise. To
close the fuel tank cap, turn it clockwise and
tighten it securely. Be sure that the end of the
vent tube is reinstalled in the hole in the vehicle
body and routed properly as shown.
The
AATTVVcomes equipped with a remote
engine stop switch which may be operated by
pulling the leash-like lanyard attached to the
remote engine stop switch cap. An adult super-
vising operation of the vehicle can use the lan-
yard to stop the engine from a short distance.
The adult who trains the young rider should
always use this lanyard until the rider develops
sufficient skills for safe operation of the vehicle.
12
FUEL TANK CAP
REMOTE ENGINE STOP S ITCH
EQUIPMENT AND
ADJUSTMENTS
Switch body
Rubber cap
Remote engine stop switch lanyard
COPYRIGHTED

The switch consists of a rubber cap fitted over a
plastic body. When the rubber cap is in place, the
engine can operate. When the rubber cap is
removed from the switch body, the engine cannot
be started. If the engine is running and the rubber
cap is removed by pulling the lanyard attached to
the cap, the engine will stop running.
To use the remote engine stop switch :
1. Fit the rubber cap on the engine of the lan-
yard over the remote engine stop switch
body located on the rear end of the vehicle
as shown.
2. Put your fingers through the loop at the
other end of the lanyard.
3. With the lanyard fastened to the vehicle and
to your hand, follow after the moving vehi-
cle. If you notice any driving hazard or
unsafe situation, pull the lanyard forcefully
so that the rubber cap comes off.
This will activated the remote engine stop
switch, stopping the vehicle s engine.
13
hen the remote engine stop switch
cap is pulled off, the engine will stop
running.
The vehicle will continue to roll for
some distance, however. Remember
this when judging when to operate
the remote engine stop switch.
ARNING
If you do not put your fingers through
the loop in the lanyard, it may slip from
your grasp unexpectedly. This could
make it impossible for you to stop the
engine in an unsafe situation.
ARNING
The throttle limiter should always be set
to the low power position(as described
on page 10) when the remote engine
stop lanyard is used. Only children with
enough skill for safe operation of the
AATTVVwithout parental use of the lan-
yard should be permitted to operate
AATTVV
with the throttle limiter set to the
maximum power position. In addition, an
adult trying to follow a moving
AATTVV
with the throttle limiter set to the maxi-
mum power position may run into the
rider if he stops, or may trip and fall
down trying to keep up with the vehicle.
ARNING
Instruction For Remote engine stop
switch Lanyard Storage
The lanyard may be stowed on the
AATTVV
when, in the judgement of the parents, the rider
has developed sufficient skills to be able to safe-
ly operate the vehicle without parental use of the
lanyard.
For storage of the lanyard, follow the instruc-
tions below :
COPYRIGHTED

★MAXIMUM THROTTLE OPENING
RECOMMENDATION
During the first 10 hours of vehicle operation,
the maximum thottle opening you should use is
1/2 throtttle.
★VARY THE ENGINE SPEED
The engine speed should be varied during the
break-in period. Although it is essential that
some stress be placed on the engine compo-
nents during break-in, you must be careful not to
excessively load the engine.
★AVOID CONSTANT LO SPEED
Operating the engine at constant low speed
(light load) can cause parts to glaze and not
seat properly. Allow the engine to accelerate
freely through the gears, without exceeding the
maximum recommnded throttle opening.
★OBSERVE YOUR INITIAL AND
MOST CRITICAL SERVICE
The initial service (break-in maintenance) is the
most important service your vehicle will receive.
During break-in operation, all of the engine com-
ponents will have mated together and seated.
Maintenance required as part of the initial servie
includes correction of all adjustments, tightening
of all fasteners and replacement of dirty oil.
Timely performance of this service will ensure
optimum service life and performance from the
engine.
The first month is the most important in the life
of your vehicle. Proper operation during this
break-in period will help ensure maximum life
and performance from your new vehicle.
The following guidelines explain proper break-in
procedures.
The initial service (after 1 month of
vehicle operation) should be per-
formed as outlined in the INSPEC-
TION AND MAINTENANCE section of
this Owner’s Manual. Pay particular
attention to the information con-
tained in the CAUTION and ARN-
ING section when performing this
maintenance.
ARNING
14
Avoid leaving any part of the lanyard
visible outside the bag as it can be
caught and damaged by moving
parts.
ARNING
To prevent unauthorized starting or
unsupervised operation of the
AATTVV
, remove the remote engine
stop switch cap and lanyard after
each use and store them in a safe
place, out of the reach of children.
ARNING
2. Hook the bag on the frame as shown and fit
the rubber cap snugly over the remote
engine stop switch body.
NOTE : ith the rubber cap off the
switch, the engine can not be
started because the ignition
circuit is not completed.
BREAK-IN (RUNNING-IN)
1. Place the lanyard in the vinyl bag provided
with the vehicle, with the rubber cap visible
at the bag opening.
COPYRIGHTED

★DO NOT START THE
AATTVV
OR
ALLO YOUR CHILD TO RIDE YET
Finish reading the Riding Tips section and then
the instructing the Young Rider section before
starting the
AATTVV
or beginning riding instruc-
tions. The Riding Tips section contains impor-
tant operating information you will need to know
before you go to the Instructing the Young
Rider section. The Instructing the Young Rider
section will guide you in teaching young riders
how to operate and ride the
AATTVV
, using the
information you learn in this owner s manual.
All of the items above should be
checked with the engine off, except
the functional check of the remote
engine stop switch. Make sure your
child doesn’t get too close when you
check the fuel level and drive chain,
or he/she might be injured.
ARNING
★STARTING THE ENGINE
Before attempting to start the engine, make sure:
1. The parking brake is engaged.
2.
The engine stop switch is in the position.
3. Verify that the remote engine stop switch cap
is in place.
4. The fuel cock is in the ON position.
15
RIDING TIPS
Failure to perform an inspection
before riding may result in an acci-
dent or serious damage to the vehi-
cle. Check these items before each
ride. Be sure your
AATTVVis in good
condition for the personal safety of
the rider and protection of the vehi-
cle.
ARNING
INSPECTION BEFORE
RIDING
Steering No rattle or looseness
Proper lever play
Parking brake
effectiveness
Proper pressure
Enough tread depth
No cracks, rips, or other
damage
Enough fuel for the
intended run
Fuel hose connected
securely
No damage to fuel tank
or cap
Tank cap closed
securely
Proper cable play
Smooth response
Quick return to idle
position
Bolts and nuts are tight
No rattle from any part
of the machine with the
engine running
No visible evidence of
damage
Proper operation
No damage to
rubber cap
Secure attachment of
lanyard to cap
Brakes
Tires
Fuel
Engine stop
switch
Engine oil
Transmission oil
Throttle
Drive chain
General
condition
Remote
engine stop
switch
(if used)
HAT TO
CHECK CHECK FOR :
Proper operation
Proper level
Proper level
Adequate lubrication
COPYRIGHTED

★STARTING OFF
After the engine has warmed up, disengage the
parking brake. To release the parking brake,
simply squeeze the brake lever until the lock
knob disengages.
★BRAKING
To stop the
AATTVV
, release the throttle lever
and apply the brake.
Open the throttle gradually to move forward.
16
Do not run the engine indoors or
where there is little or no ventila-
tion. Exhaust gases contain car-
bon monoxide, a potentially lethal
gas that is colorless and odorless.
Never leave the vehicle running
while unattended, even for a short
time.
ARNING
Keep both hands on the handgrips at
all times when riding. Removing your
hands from the handgrips reduces
your ability to control the vehicle,
and could result in an accident.
ARNING
Always open the throttle gradually
to prevent front wheel lifting. Failure
to observe this precaution may
result in loss of control and an acci-
dent.
ARNING
Avoid braking during turns. Use of
the brake when turning could
cause the
AATTVVto slide or roll
over. Use the brake to slow down
before entering turns.
Apply the brake lightly and with
great care on slippery surfaces to
avoid skidding.
ARNING
Never operate the parking brake
lock when the
AATTVVis moving. The
rear wheels will lock, and an acci-
dent could result.
ARNING
Before releasing the parking brake,
make sure:
The throttle is fully closed.
The rider is completely ready to
ride.
If you do not observe these precau-
tions, the vehicle can move forward
unexpectedly when the parking
brake is released. This may result in
an accident and injury.
ARNING
hile operating the
AATTVV
, the rider
should keep both feet on the
footrests at all times, or injuries
resulting from accidents such as the
rear wheels running over the rider’s
feet could occur. There is no need
for the rider to move his/her feet
from the footrests during operation
or maneuvering of the vehicle.
Moving the rider’s feet from the
footrests reduces the rider’s ability
to control the vehicle, and could
lead to an accident.
ARNING
COPYRIGHTED

★TURNING
To turn the
AATTVV
the rider must learn a spe-
cial technique. Because this vehicle has a solid
rear axle, both rear wheels always turn at the
same speed. This means that if the rear wheels
are getting equal traction, the vehicle will move
straight ahead, because the rear wheels will
travel the same distance.
For the vehicle to turn, the outside rear wheel
must travel a greater distance than the inside
rear wheel. To make this happen, the rider must
learn how to create less traction for the inside
wheel, so that it can travel a shorter distance
than the outside wheel, even though both
wheels are still turning at the same speed.
To turn the
AATTVV
, the rider should use the fol-
lowing technique :
Turn the handlebars in the direction of the
turn.
Shift body weight slightly forward and support
your weight on the outer footrest. This will
reduce the load on the inside rear wheel,
reducing its traction.
Lean upper body into the turn.
■
At higher speeds :
Use the same technique that you use for turning
at low speeds, but lean farther into the turn.
Since natural turning forces(which tend to push
the vehicle to the outside of the turn) increase
as speed increases, you must lean your upper
body farther into the turn as you go faster, to
prevent the vehicle from tipping over to the out-
side of the turn. Remember, though, to keep
your weight supported on the outer footrest.
★SKIDDING OR SLIDING
If the rider experiences inadvertent skidding or
sliding when not braking, he/she may be able to
overcome it by using the appropriate technique
listed below.
■Front wheel:
If front wheel skidding occurs, try to gain front
wheel traction by reducing the throttle opening
and leaning your body weight slightly forward.
■Rear wheel
If rear wheel skidding occurs, steer in the direc-
tion of the skid (if space permits), shift body
weight away from the skid slightly, and avoid
using the throttle or brakes until you regain
directional control of the vehicle.
17
If the rider does not use the proper
technique to turn the
AATTVV
, it may
plow straight ahead even though the
front wheels are turned. The rider
should practice the above technique
at low speeds in a wide open area
until he/she has mastered it.
ARNING
Skidding or sliding can result in
accidents caused by loss of rider
control. To avoid inadvertent skid-
ding or sliding, the rider should slow
down and be very cautious when rid-
ing on slippery or loose surfaces.
ARNING
COPYRIGHTED

18
★OPERATION ON HILLS
Riders who have become experienced at oper-
ating the
AATTVV
on level surfaces may wish to
try riding on a wider variety of terrains. The
AATTVVmay be operated on small hills with
even surfaces, but extreme care should be
taken.
■Climbing a Hill
To climb a small hill with the
AATTVV
, the rider
should:
Speed up and maintain a steady speed
before reaching the bottom of the hill.
Shift body weight forward by sliding forward
on the seat. Lean slightly forward.
Maintain a steady speed while climbing the
hill.
Slow down when reaching the top of the hill.
hen the
AATTVV
is operated on hills,
it can roll over more easily than
when it is operated on level ground,
under certain conditions. Only chil-
dren who are capable of safe opera-
tion of the
AATTVVon level ground
should be permitted to operate the
vehicle on hills.
ARNING
Only permit your child to climb small
hills. Do not let him/her attempt to
climb a hill unless you are sure that
he/she can easily ride to the top of
the hill without stopping. It can be
dangerous to stop the
AATTVVwhile
climbing a hill, because the vehicle
may begin to roll backwards and
then roll over.
ARNING
The rider should never open the
throttle suddenly when climbing a
hill. The vehicle could flip over back-
wards.
ARNING
The rider should never go over the
top of the hill at high speed. Once
over the top of the hill, he/she could
lose control and crash or could col-
lide with an unseen object.
ARNING
If your child is climbing a hill and loses forward
momentum, he/she should :
Lean farther forward, uphill.
Apply the front and rear brake and stop the
vehicle before it starts to roll backwards.
Set the parking brake and dismount to the
right while still leaning uphill.
Use one of the following procedures to turn
the vehicle around :
COPYRIGHTED

19
1. Ask the adult who is supervising to help drag
the rear end of the
AATTVVaround until the
vehicle is angled downhill. Stay on the uphill
side of the vehicle while dragging it around.
2. Turn the handlebars fully to the right. While
standing on the uphill side of the vehicle,
release the parking brake and pump the
hand brake to let the
AATTVVroll slowly
backwards. This will turn the vehicle side-
ways to the hill. Reset the parking brake.
Turn the handlebars to the left. Staying on
the uphill side, release the parking brake and
pump the hand brake to let the ATV roll until
it is angled downhill. Reset the parking
brake.
Romount the vehicle, release the parking
brake and ride down the hill as instructed in
the DESCENDING A HILL section.
The rider should never allow the
AATTVVto roll backwards on a hill. If
the vehicle does begin to roll back-
wards, the rider should move his/her
body weight forward and try to slow
the vehicle to a stop using the
FRONT BRAKE ONLY. If the front
brake does not slow the vehicle, the
rider should dismount to the side
immediately. The rear brake should
never be used when rolling back-
wards on a hill. Use of the rear
brake can cause the vehicle to flip
over.
ARNING
Traversing a slope is very tricky and
should be avoided when possible.
Improper riding techniques while
traversing a slope could cause the
AATTVVto tip over. Do not permit
your child to traverse a slope unless
you are sure he/she can perform this
maneuver safely.
ARNING
■Descending a Hill
To ride down a small hill with the
AATTVV
, the
rider should:
Point the
AATTVV
straight downhill.
Transfer body weight to the rear by sliding
back on the seat.
Ride down the hill with the throttle closed.
Apply the brake to control downhill speed.
■Traversing a Slope
To traverse a slope, the rider should:
Lean his/her body uphill.
Steer slightly uphill, if necessary, to maintain
a straight course.
COPYRIGHTED
This manual suits for next models
2
Table of contents
Other HYOSUNG Offroad Vehicle manuals