Hyundai HYTab Pro 8WB1 User manual

USER MANUAL


HYTAB
User Manual

Limited Warranty does NOT cover:
Any costs associated with the repair or replacement of the Product including
labor, installation or other costs incurred by you, and in particular, any costs
relating to the removal or replacement of any Product that is soldered or
otherwise permanently affixed to any printed circuit board; OR
Damage to the Product due to external causes, including accident, problems
with electrical power, abnormal electrical, mechanical or environmental
conditions, usage not in accordance with product instructions, misuse,
neglect, alteration, repair, improper installation, or improper testing; OR
Any Product which has been modified or operated outside of specifications
or where the original identification markings (trademark or serial number) has
been removed, altered or obliterated from the Product, or where the label or
screw on the exterior of the Product is removed or broken.
WARRANTY NOTICE

Undo
Check your product box for the following items.
Assembling
Tablet
User manuals
Adapter and USB Cable
Warranty Card
You can purchase additional accessories from your local retailer.
Charge the Battery
Before using the device for the first time, you must charge the battery.
You can charge the device with a travel adapter or by connecting the
device to a PC with a USB cable.
Battery full icon is shown when finished if your device is off.
1.
2.
Warning: Use only original batteries and chargers. Unapproved chargers or cables can
cause batteries to explode or damage your device.
Install the Memory Card
To store additional multimedia files, you need insert a memory card.
Insert a memory card with the gold contacts facing downwards.
Push the memory card into the slot.
1.
2.
Notice: Our company uses approved industry standards for memory cards, but some
brands may not be fully compatible with your device.

Turn your device on ,reboot and off
To turn on your device, press and hold the power key.
To reboot your device, press and hold the power key, select “reboot” .
To turn off your device, press and hold the power key, select “power off”.
Getting Started
Home Screen
The home screen has multiple panels. Scroll left or right to the panels
on the home screen, you can view indicator icons, widgets, shortcuts to
applications, and other items.
Task Bar
The task bar is shown at the top of the screen. It displays commonly used
option buttons, battery level indicator, current time and other indicator
icons.
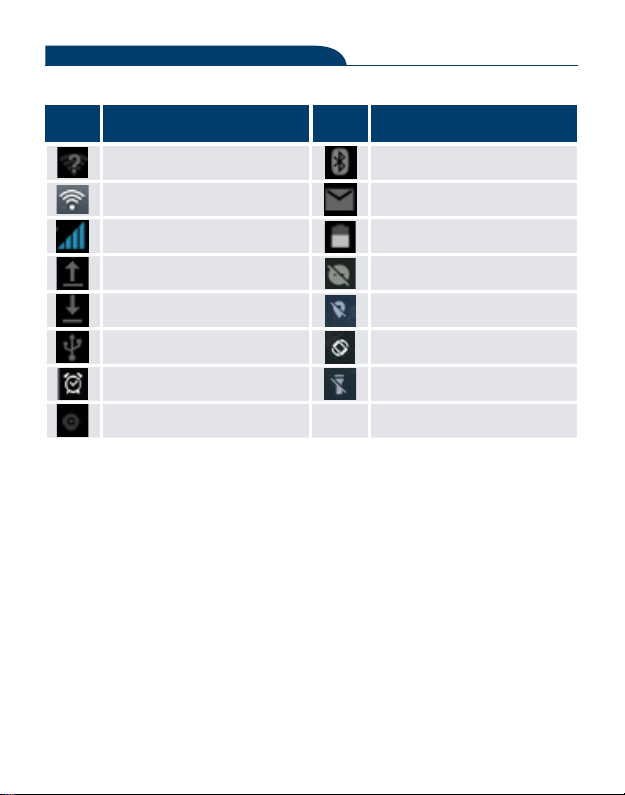
Open WiFi available
Definition
WiFi connected New email
Signal strength
BT connected
Uploading data
Downloading data
Connected to PC
Alarm activated
Battery power level
Music being played
Don't disturb
Auto-rotate
Location
Flashlight
DefinitionIcon Icon
Notification Panel
Pull down to open the top of the notification bar to show the 6 users commonly used
shortcut switch, support click on the switch, and long press to enter the corresponding
settings. If you continue to pull down the notification bar to display all the quick switch,
fast switch in the lower right corner of page will display a "Edit" button, click to add /
delete custom shortcut switch, or drag the sort.
Tap icon to activate or deactivate wireless connection features and other settings.
Indicator Icons

Activate or deactivate the Wi-Fi connection.Wi-Fi:
Bluetooth: Activate or deactivate the Bluetooth connection.
Activate or deactivate the notification feature.Notifications:
Flashlight: Activate or deactivate the Flashlight.
Activate or deactivate the auto rotation feature.Auto-rotate
screen:
Battery Saver: Activate or deactivate the Battery Saver.
Adjust the basic brightness level of the display to lighter or darker.Brightness:
Settings: Access Settings application.
Auto rotation
If you rotate the device while using some features, the interface will automatically
rotate as well. To prevent the interface from rotating, open the notifications panel and
select Auto-rotate screen, then tap it to Off.
Lock & Unlock the Screen
Slide to unlock the screen.
To lock the screen manually, press Power key.
Customize your Device
To customize your device according to your preferences, tap Settings from application
list or notification panel.

You can purchase additional accessories from your local retailer.
Charge the Battery
To manage the applications installed on your device, tap Settings -Apps &
Notifications.
To uninstall an application, select an item and tap UNINSTALL, tap
OK to confirm.
To stop or change the settings of an application, select an item and
tap the option you need.
1.
2.
Security
You can protect your device and data by setting screen lock or encrypting your mobile
phone.
Set a Screen Lock
Security
To set a screen lock, tap Settings - Security - Screen lock from application list.
None: Deactivate the screen lock.
Swipe: Slide to unlock the screen.
Pattern: Draw a pattern to unlock. Follow the instructions to draw
your lock pattern. When prompted, draw the pattern to unlock the
screen.

Screen Time-Out
Select Settings - Display - Advanced - Screen timeoutfrom application list, you can
set the time before the screen times out and goes into lock mode. ( you have not
entered any characters or made other selections).
Attention: In addition to using fingerprint unlock their devices, you can also set the
equipment before startup requires the user to unlock pattern, to further protect the
equipment.Equipment starts, to answer the phone, receiving a message or notice
(including alarm clock).This can be in to protect the data on the equipment after the
device is lost or stolen.
Display Size
You can set it Settings - Display -Advanced - Display size1.
You can switch applications by simply double clicking the "Recents" button1.
Quick Switch
PIN: Enter a numeric PIN to unlock. When prompted, enter the PIN to unlock
the screen.
Password: Enter a passcode to unlock. When prompted, enter the passcode
to unlock the screen.

Reset Tablet
You can reset system and desktop settings to their original values by the following
steps:
Select Settings -System -Advanced -Reset options from application list.
TapErase all data (factory reset).
TapErase all data (factory reset).
TapErase all data (factory reset).
1.
2.
3.
4.
The device resets to the factory default settings automatically.
Warning: Factory data reset will erase all data from your device, including your
Google™ account, system and application data and settings, and dowloaded
applications.

Email
To receive and send mail, you must have a remote mailbox service. This service may
be offered by a service provider. Your device is compliant with applicable internet
standards for POP3/IMAP/Exchange.
Before you can send or receive mail on your device, you need to set up an email
account and define the email settings correctly. You can define more than 1 mailbox.
Click Email from application list.
You can use mailbox guide to set up your mailbox, tap Next until it’s done.
If you need to add another email account, tap the option button at the upper
left
- Settings - Add account, then set up the email account with the mailbox
guide.
1.
2.
3.
Set up Your Email
When you are finished setting up the email account, the email messages are
downloaded to your device. If you have created more than two accounts, you can
switch between email accounts. Select an account name at the top left of the screen
and select the one you want to retrieve messages from.
Delete your Email Account
Click Settings from application list - Users & accounts - Click on the email address -
Click the "REMOVE ACCOUNT"button

Open Email application.
Clickthe write button.
In To field, enter the recipient’s email addresses manually and separate them
with a comma. Add more recipients by tapping Cc/Bcc.
Click to choose attachments that you want to insert.
Enter the subject and the text.
ClickSENDbutton to send the email.
1.
2.
3.
Create and Send Email
4.
5.
6.
Set Homepage
Tap the option button at the upper right.
Select Settings - General - Set homepage.
Enter the web address of the desired webpage.
1.
2.
3.
Add Bookmarks
While navigating a website, click -select “Save to bookmarks”to Save bookmarks
and easily access it later.
View Bookmarks and History
Tap the option button at the upper right ⮑ select “Bookmarks/History”to open
the bookmark list and the recent history. click a bookmark or any entry to display the
webpage.
Customize Browser
To make adjustments in your browser settings, click the option button at the upper
right, and then select Settings.
Web
Browser
Tap Browser from application list to access to the web.
Browser Webpages
Select Browser to launch a specified homepage.1.
To access a specific webpage, select the URL input field, enter the web ad-
dress of the webpage, and select Go.
2.
Entertainment
Camera
With the camera function, you can capture photos and take videos.
Capture a Photo
Open the application list and select Camera.
Before taking a picture, you need to know some settings.
1.
2.
Place two fingers on the screen and spread them apart or move fingers closer together
to zoom in or zoom out.
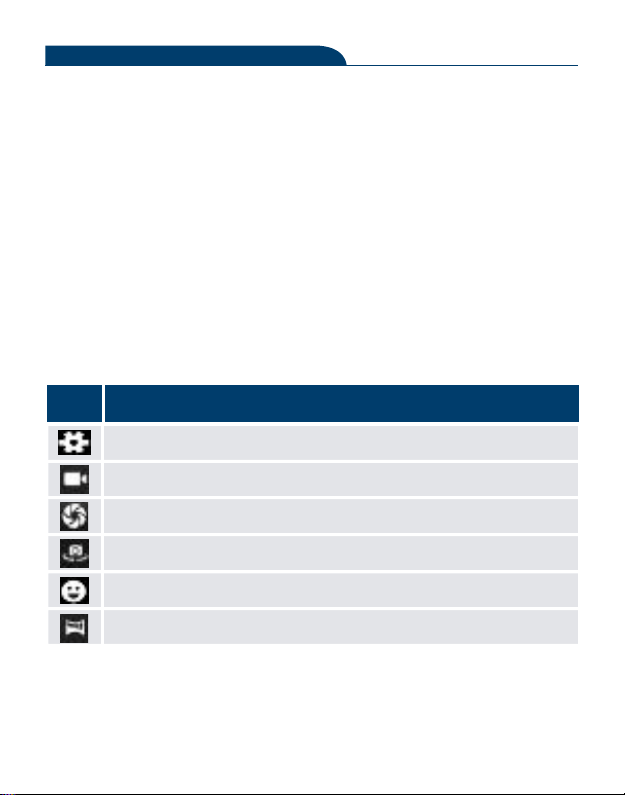
Definition
Icon
Settings
Change to Video Mode
Take Photos
Tap to switch between the front and rear camera lenses
Smile Mode
Change to panorama mode to take a landscape photo.
Aim the lens at the subject and tap to take a photo. The photo is saved
automatically to the folder DCIM.
Select the image viewer icon at the lower right to view the pictures.
3.
4.
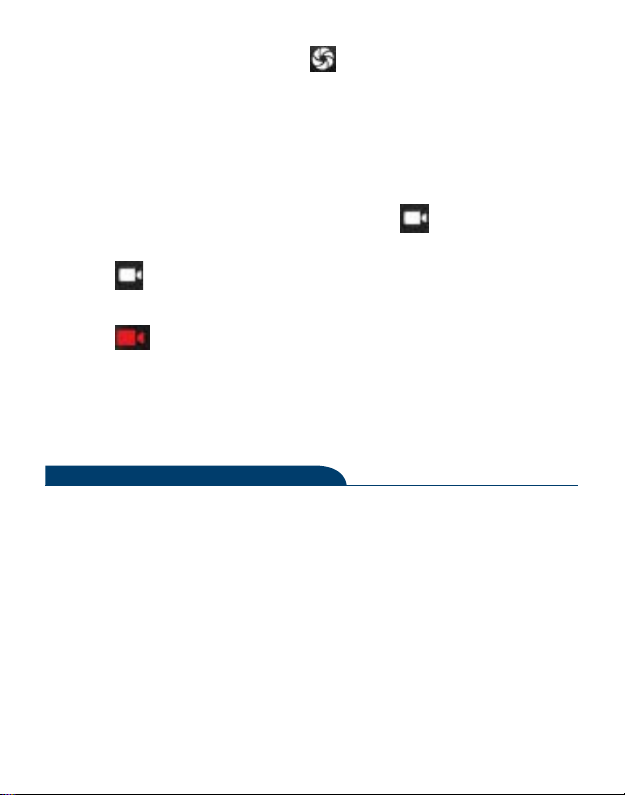
Record a Video
Open the application list and select Camera. Tap to change to video
mode.
Tap to start recording. The length of the video recording is restricted by
the available space on your storage.
Tap to stop recording. The video is saved automatically to the folder
DCIM.
After recording videos, select the image viewer icon at the lower right to view
the recorded videos.
1.
2.
3.
4.
Tools
Calendar
With the Calendar feature, you can consult the calendar by day, week, or month, create
events, and set an alarm to act as a reminder, if necessary.
To access the calendar, tap Calendar from application list.
To create an event, tapthe option button at the upper right and then select
New event.
1.
Fill in the fields, and set category, date, time & an alarm.
After you finish, select DONE.
You can view calendar in different views, Day, Week, Month and All.
To delete an entry, tap the event to open it - tapthe option button at the
upper right and then select Delete -select OK.
2.
3.
Alarm
From application list, tap Clock, and then select .
Tap to add alarm.1.
Tap the numeric pad to set alarm time, and then select AM or PM,
when you are finished, tap OK.
Tap the time to change alarm time.
Set repeat cycle, alarm ringtone, Vibrate ,and edit Label message, tap OK
after finished.
Tap“DISMISS” to shut down the alarm, and tap”SNOOZE”, then the alarm
will stop ringing for a few minutes.
Tap the Arrow of one alarm and click to Delete this alarm.
2.
3.
4.
File Manager
Many features of the device, such as images, videos, documents, received attachments
and downloaded files or applications, use memory to store data. With File manager,
you can store and browse files and folders in your device, or edit, move, copy files; you
can send files to compatible devices as well.
Note:
Some files formats are not supported depending on the software of the
device.
Some files may not play properly depending on how they are encoded.
1.
2.
Sound Recorder
With Recorder, you can record a voice memo. From application list, tap Sound
Recorder.
To record a voice memo, tap .
To stop the recording, tap .
To listen to a voice recording that you just recorded, tap .
1.
2.
2.
Calculator
With this feature, you can use the device as a calculator. The calculator provides the
basic arithmetic functions. Tap the virtual numeric and calculation keys to perform a
calculation.

USB Connection
You can connect your device to a PC and use it as a removable disk, which allows you
access thefile directory.
Connectivity
If you want to transfer files from or to device, insert a memory card into the
device.
With a USB cable, connect your device to a PC.
Open the notification panel, Use USB to select Transfer files.
Open the folder to view files.
Copy files from the PC to the device memory or memory card.
1.
2.
3.
4.
5.
Wi-Fi
With Wi-Fi, you can connect to the internet or other network devices anywhere an
access point or wireless hotspot is available.
Activate the Wi-Fi Feature
From application list, tap Settings -Network & internet, turn on the Wi-Fi
feature.
1.

Find and Connect to Wi-Fi
Once the Wi-Fi feature is activated, the device automatically search for availa-
ble Wi-Fi connection.
Select a network.
Enter a password for the network (if necessary).
Select Connect.
1.
2.
3.
4.
Bluetooth
With bluetooth, you can sharemusic, pictures, video, contacts with another phone. You
can use bluetooth headset phone or listening to music.
Activate the Bluetooth Feature
From application list, tap Settings -Connected devices -Pair new device.1.
Scan and Connect to other Bluetooth Devices
The device automatically search for other Bluetooth devices.
Select a device and pair.
1.
2.
This manual suits for next models
3
Table of contents
Other Hyundai Tablet manuals


