©Copyright Lotronic 2014 Manual LC192DMX 3
GB – USER MANUAL
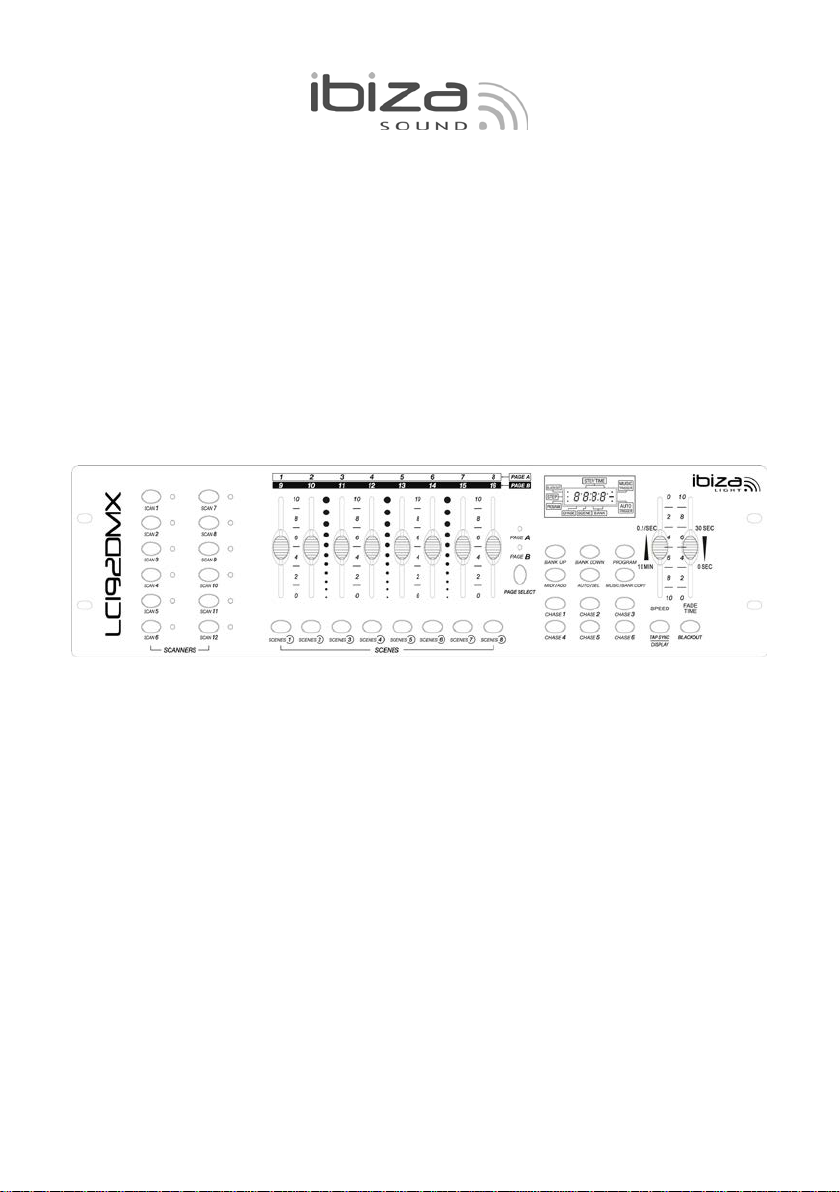
LC192DMX
1. SAFETY RECOMMENDATIONS
* Please keep this User Guide for future consultation. If you sell the unit to another
user, be sure that they also receive this instruction booklet.
* Always make sure that you are connecting to the proper voltage and that the line
voltage you are connecting to is not higher than that stated on decal or rear panel of
the fixture.
* This product is intended for indoor use only!
* To prevent risk of fire or shock, do not expose fixture to rain or moisture. Make sure
there are no flammable materials close to the unit while operating.
* The unit must be installed in a location with adequate ventilation, at least 50cm
from adjacent surfaces. Be sure that no ventilation slots are blocked.
* Always disconnect from power source before maintenance, repairs or fuse
replacement.
* In the event of serious operating problem, stop using the unit immediately. Never
try to repair the unit by yourself. Repairs carried out by unskilled people can lead to
damage or malfunction. Please contact the nearest authorized technical assistance
center. Always use the same type spare parts.
* Don t connect the device to a dimmer pack.
* Make sure power cord is never crimped or damaged.
* Never disconnect power cord by pulling or tugging on the cord.
* Do not operate this device under 113 F ambient temperature conditions
2. DESCRIPTION
* DMX512/1990 Standard
* Controls 12 intelligent lights of up to 16 channels, totally 192 channels
* 23 banks, each with 8 scenes; 6x chase, each with up to 184 scenes
* Record up to 6 chases with fade time and speeds
* MIDI control over banks, chases and blackout
* Built-in microphone for music mode
* Auto mode program controlled by fade time sliders
* DMX in/out via 3-pin XRL lead
* Plastic end housing
* Auto-save last running program when switch off or power off and continue play last
running program while switch ON or power ON again.