iClick Pro 5X User manual

Contents
Camera Precautions 2
FCC/CE Compliance Information 3
iClick Product Warranty 4
Technical Specifications 5
Computer System Requirements 6
Camera Diagram 7
Status LCD Diagram 8
Battery Installation 9
Power the Camera On/Off 10
Using Expanded Memory 11,12
Taking Pictures 13
Self-Timer 14
Image Resolution and Picture Mode 15
Movie Mode 16
Deleting Images 17
Set Mode 18
Flash Mode 19
Quality Mode 20
PC Mode 21
Lighting AC Power Frequency 22,23
Installing the Driver 24
Installing the Application Software 25
Downloading Images—MSDC Mode 26
Downloading Images Using Mr. Photo 3.6 27
PC/ Web Cam 28
1

C
amera Precautions
Please note the following when using the camera:
Do not place the camera in a damp or dusty location. This may cause fire or
electric shock.
Do not leave the camera in places subject to extremely high temperatures, such as
in direct sunlight. This may affect the camera case and internal components.
Try to avoid bumping or hitting the camera while it is being activated. This may cause
the camera to malfunction.
Choose a flat, still surface to set the camera on.
When the lens or the viewfinder is dirty, please clean them with a lens brush or soft
cloth.
Under the following circumstances, have the camera repaired by qualified personnel.
The cable or plug is damaged or worn.
The device has been dropped and/or the casing has been damaged.
Liquid has entered the camera.
! W
ARNING !
Before installing any software on your computer it is very important that you disable
your anti-virus program. Anti-virus programs have the ability to corrupt files before
they are finished being created, rendering them in-operable.
To disable your anti-virus program, locate and right-click on the anti-virus icon in the
lower, right-hand corner of your screen (near the time display) and disable the
program. Disabling your anti-virus program in this manner is temporary, and your
anti-virus program will reactivate when you reboot your computer.
2

FCC Notice
This equipment has been tested and found to comply with the limits for a Class B
digital device, pursuant to Part 15 of the FCC Rules. These limits are designed to
provide reasonable protection against harmful interference in a residential l
installation. This equipment generates, uses and can radiate radio frequency
energy. If not installed and used in accordance with the instruction, it may cause
harmful interference to radio communication. However, there is no guarantee
that interference will not occur in a particular installation. If this equipment does
cause harmful interference to radio or television reception, which can be
determined by turning the equipment on and off, the user is encouraged to try to
correct the interference by one or more of the following suggestions.
• Reorient or relocate the receiving antenna.
• Increase the distance between the equipment and the receiver.
• Connect the equipment to a different power outlet other than the one where
the receiver is connected.
• Consult an experienced television or radio technician for help.
CAUTION
To comply with the limits for a Class B digital device, pursuant to Part 15 of the
FCC Rules, this device must only be installed on computer equipment certified to
comply with the Class B limits.
3

iClick Product Warranty
All iClick products are guaranteed to function properly for a period of 1-year from the
date of manufacture. If a product is deemed defective by iClick personnel a
replacement product will be sent to the end-user. Replacement products are sent
free of charge. iClick technical support can be contacted per the following:
Refer to the iClick web site at www.iClickCamera.com.
To post questions to iClick Technical Support professionals or to download software
files, refer to:
- iClick online support: www.iclickcamera.com/customersupport.php
- iClick product downloads: www.iclickcamera.com/downloads/index.htm
- Email address: service@iclickcamera.com
4

Technical Specifications
Resolution CMOS, 640 X 480 pixels
Memory 8 SDRAM
Image Storage, 640 X 480 60 Images
Expandable Memory Type 1 SD/MMC memory card (128 MB max)
Status LCD 3-digit B/W on back for functions
AudibleAlert / LED Yes / Yes
White Balance Auto
Exposure Auto
View Finder Optical
Focusing Fixed range from 1 m ~ infinity
Focal Length 6.0 mm
Aperture F=2.8
Flash Strobe Auto / Off
Self Timer 10 Seconds
File Format Still - JPEG / Movie - AVI
Interface USB 1.1
Delete Image All / Last one
Movie Clip 6 sec per section @ 10 fps-QVGA
Dimensions 3.4 X 2.1 X 1.2 in
Video Teleconference PC Camera / NetMeeting 10 fps-QVGA
Auto Power Off 30 sec
Battery 2 X AA Alkaline Battery
Weight 81g (w/o Batteries)
OS Win 98/ME/2000/XP
5

Computer System Requirements
Personal computer with Win98SE, 2000, ME, XP or Mac
Minimum Pentium II 450 MHz CPU
At least 12 x CD-ROM drive to install software
Available USB ports
Color monitor with a minimum resolution of 800 x 600 24-bit true color (1024 x
768 is recommended)
Minimum 256 MB or above RAM for WIN98SE, 2000, ME, XP, and Mac.
Graphic Card: 8 MB memory or above
500MB of available hard disk space to transfer 32MB SD card data
750MB of available hard disk space to transfer 64MB SD card data
1.3G of available hard disk space to transfer 128MB SD card data
6

Camera Diagram
Front Side---Fig. 1
1. Lens
2. Shutter Release Button
3. Flash
4. Viewfinder
5. USB Port
6. Battery Compartment Door
7. SD Card Slot
Back Side---Fig. 2
8. Power On/Off
9. Mode Button
10. Hand Strap Attachment Lug
11. Viewfinder
12. Status Green LED
13. Status LCD
14. Tripod Socket
7
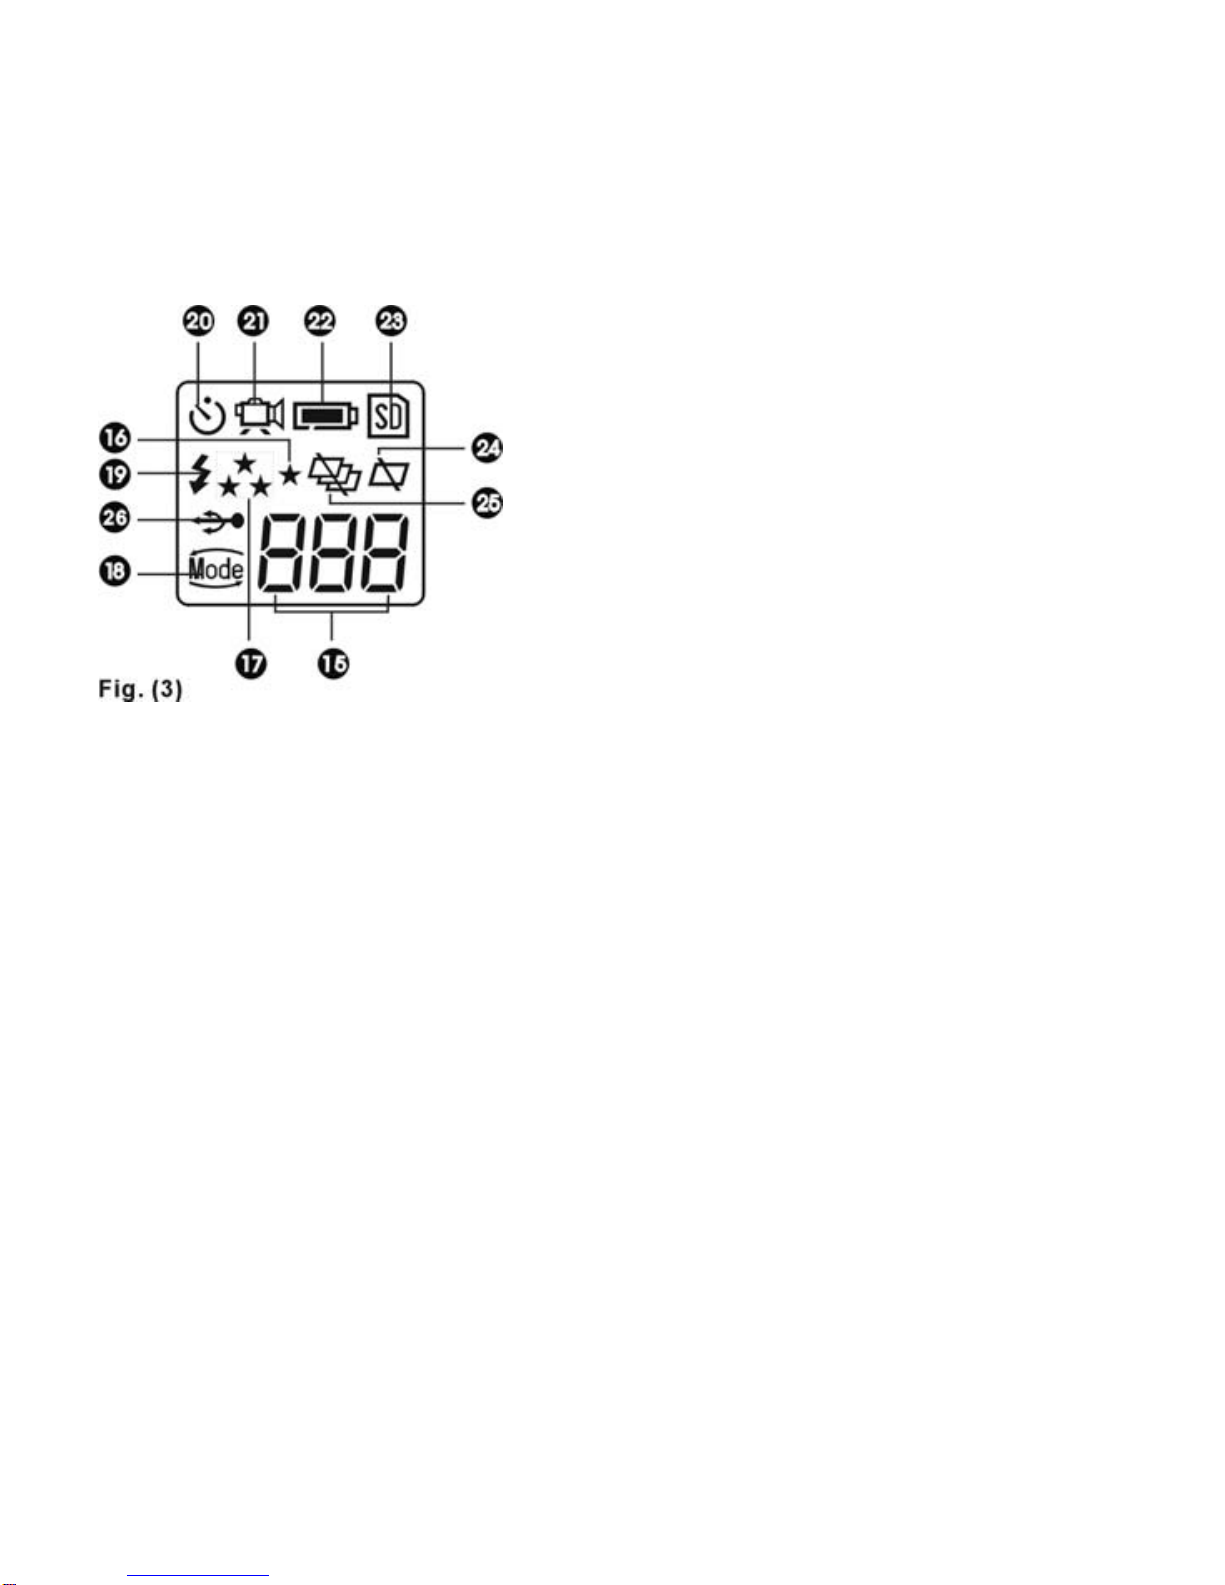
Status LCD Diagram
Status LCD Icons---Fig. 3
15. Frame Counter
16. Low Resolution
17. High Resolution
18. Mode Switch
19. Flash On
20. Self Timer Mode
21. Video Mode
22. Battery Status
23. SD Card Status
24. Delete Last Image
25. Delete All Images
26. USB Connection
8

Battery Installation
Open the BATTERY DOOR--Fig. 4.
Insert two AA alkaline batteries
into the battery compartment with
the polarity aligned--Fig. 5.
Close the BATTERY DOOR--Fig. 6.
Please Note the Following:
When the batteries are low, you will see the
light on STATUS LCD continuously blinking.
Always download photos to a computer
prior to replacing the batteries to avoid
memory loss.
Do not use both old and new batteries
together. Replace all the batteries at the
same time.
It is recommended that you remove the
batteries if the camera is not going to be
used for some time. This will save the battery
life.
9
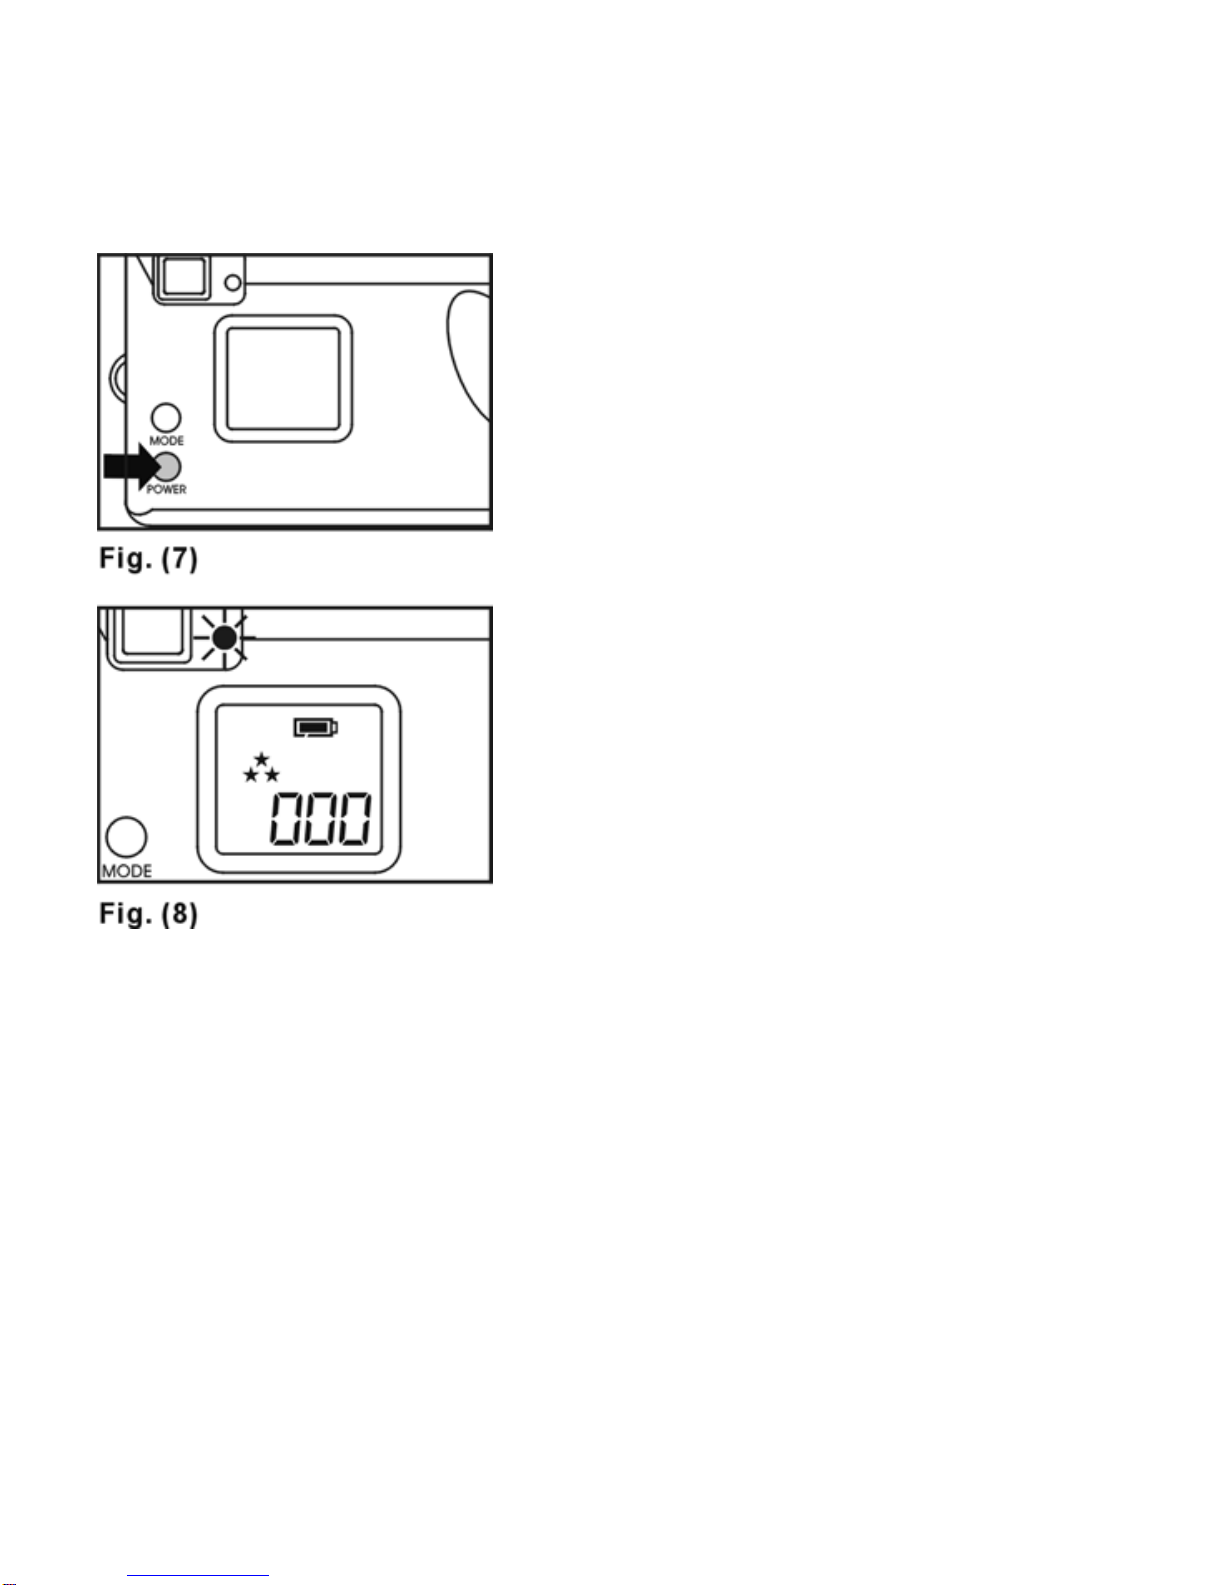
Power the Camera On/Off
Power On
Press the POWER BUTTON--Fig 7.
The camera will beep once to indicate
that the power is on.
The green LED will light up and the STATUS
LCD will be activated--Fig 8.
The camera is now ready to use.
Power Off
Press the POWER BUTTON to turn the
camera off.
The camera also shuts off automatically if it
has not been used within 30 seconds and will
“beep” twice when it powers off.
10
This manual suits for next models
1
Table of contents
Other iClick Digital Camera manuals


