iGenix IG7161 User manual
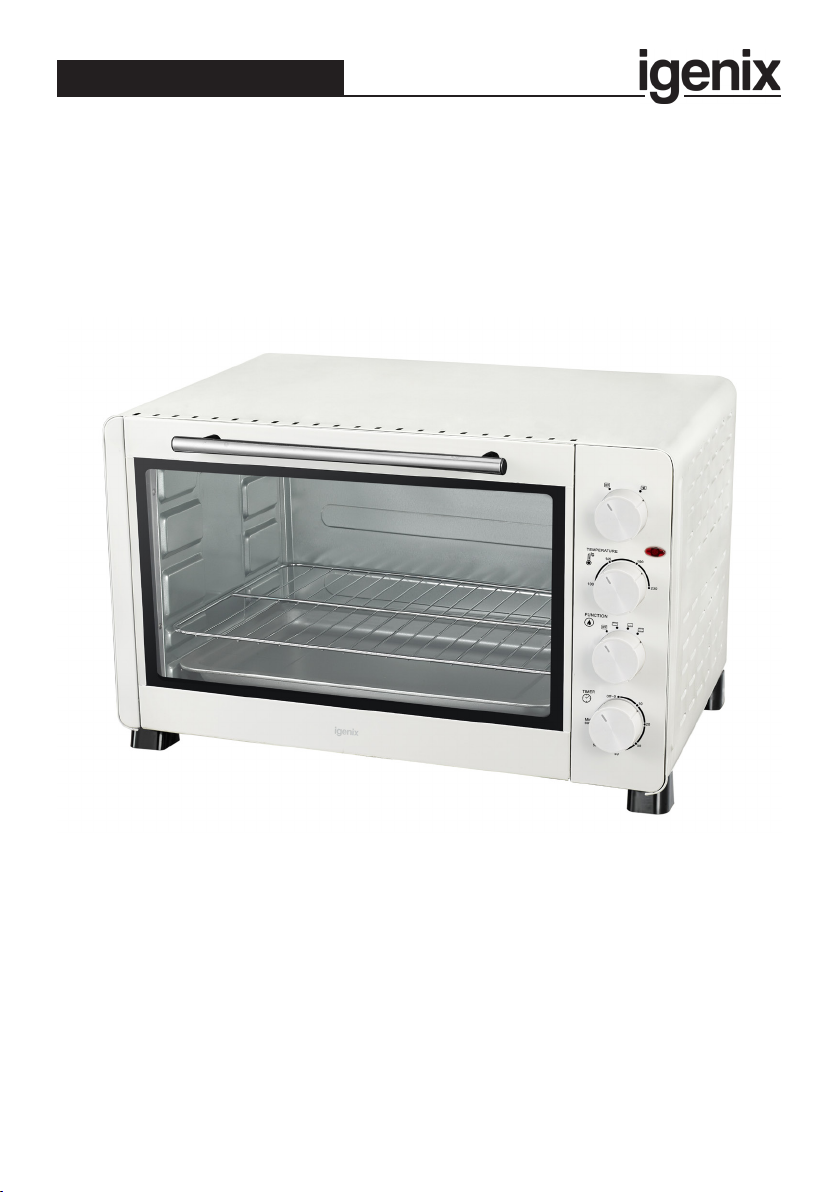
IG7161
60 Litre Electric Mini Oven White
USER MANUAL
PO Number:
Please read these instructions carefully before use and retain for future reference
Before switching on your appliance,
always check for any damage which may have been caused in transit

CONTENTS
Important Safety Instructions...............................................2-4
Specications................................................................................5
Appliance Overview...................................................................5
Operating Instructions........................................................ 6 - 8
Cleaning & Maintenance ............................................................8
Plug Fuse Replacement ..............................................................9
Disposal Information..................................................................9
Igenix Warranty Information .........................................10 - 11
IMPORTANT SAFETY INSTRUCTIONS
Important: Read all instructions before using the appliance.
1. Do not touch hot surfaces, only use handles or knobs.
2. To protect against electric shock, do not immerse cord, plug or
any parts of the oven in water or any other liquids.
3. Do not let the cord hang over the edge of a table or counter, or
touch hot surfaces.
4. Do not operate the appliance with a damaged cord or plug or
after the appliance malfunctions or has been damaged in any
manner. Return the appliance to the nearest authorized service
facility for examination, repair or adjustment.
5. The use of accessory attachments is not recommended by the
appliance manufacturer and may cause hazard or injury.
6. Do not place on or near a hot gas or electric burner.
7. Unplug from the outlet when not in use and before cleaning.
Allow to cool before putting on or taking off parts and before
cleaning.
8. To disconnect, turn the timer to OFF, then remove the plug.
Always hold the plug and never pull the cord.
9. Do not cover the crumb tray or any part of the oven with metal
foil.This may cause the oven to overheat.
10. Use extreme caution when removing the tray, racks or disposing
of hot grease or other hot liquids.
2

3
11. Do not clean the inside of the oven with metal scouring pads,
pieces can break off the pad and touch electrical parts creating a
risk of electric shock.
12. Oversized foods or metal utensils must not be inserted in an
electric oven as they may create a re or risk of electric risk.
13. A re may occur if the oven is covered or touching ammable
material, including curtains, draperies, walls etc. when in
operation. Do not store any item on top of the appliance when
in operation.
14. Extreme caution should be exercised when using cooking or
baking containers constructed of anything other than metal or
ovenproof glass.
15. Be sure that nothing touches the top or bottom elements of the
oven.
16. Do not place any of the following materials in the oven:
cardboard, plastic, paper, or anything similar.
17. Do not store any materials other than the manufacturer’s
recommended accessories in this oven when not in use.
18. Always wear protective, insulated oven gloves or use a special
handle when inserting or removing items from the hot oven
19. This appliance has a tempered safety glass door.The glass is
stronger than ordinary glass and more resistant to breakage.
Tempered glass can still break around the edges.Avoid scratching
the door surface or nicking edges.
20. Do not use outdoors.
21. Do not use the appliance for anything other than the intended
use.
22. The appliance can be used by children aged from 8 years and
above and persons with reduced physical sensory or mental
capabilities or lack of experience and knowledge if they have
been given supervision or instruction concerning use of the
appliance in a safe way and understand the hazards involved.
23. Children shall not play with the appliance.

4
24. Cleaning and user maintenance shall not be made by children
unless they are older than 8 and supervised.
25. Keep the appliance and its cord out of reach of children less than
8 years old.
26. If the supply cord is damaged, it must be replaced by the
manufacturer, its service agent or similarly qualied persons in
order to avoid a hazard.
27. This appliance is not intended for use by persons (including
children) with reduced physical sensory or mental capabilities, or
lack of experience and knowledge, unless they have been given
supervision or instruction concerning use of the appliance by a
person responsible for their safety.
28. Children should be supervised to ensure that they do not play
with the appliance.
29. The temperature of accessible surfaces may be high when the
appliance is operating.
30. The appliances are not intended to be operated by means of an
external timer or separate remote-control system.
31. The rear surface of appliances which, according to the
instructions, shall be placed against a wall, and are not accessible
with test probe 41 of EN610
5
Supply Voltage: 220-240V, 50-60Hz
Max Output: 2500W
Oven Capacity: 60 Litres
SPECIFICATIONS
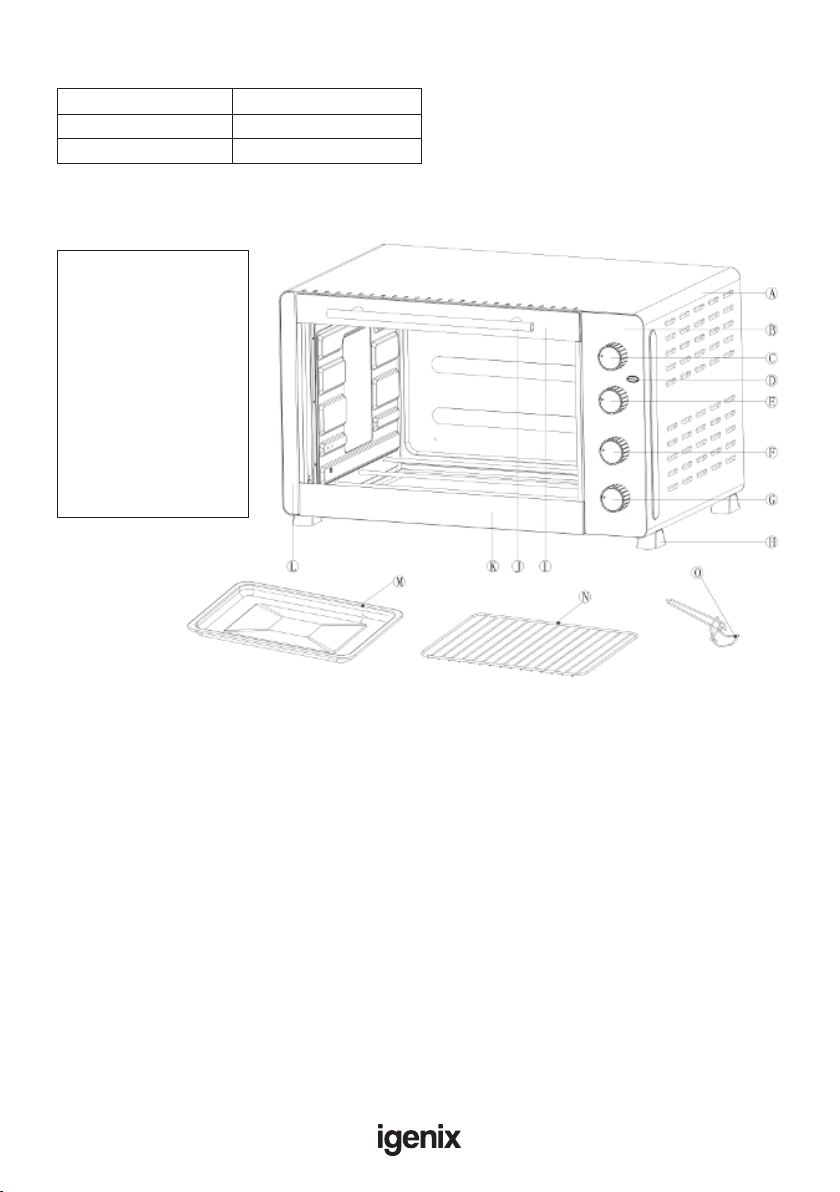
A: housing
B: control panel
C: convection control knob
D: power indicator light
E: temperature knob
F: function knob
G: timer knob
H: oven foot
I: upper door frame
J: door handle
K: lower door frame
L: left frame
M: bake tray
N: wire rack
O: tray handle
APPLIANCE OVERVIEW
6
OPERATING INSTRUCTIONS
Before Using Your Oven
Before using your mini oven for the rst time, be sure to:
1. Read all of the instructions included in this manual.
2. Make sure that the oven is unplugged and the Timer Knob is in the “OFF” position.
3. Wash all the accessories in hot, soapy water or in the dishwasher.
4. Thoroughly dry all accessories and re-assemble in the oven, plug the oven into an appropriate outlet
and it is ready to use.
5. After re–assembling your oven, we recommend that you run it at the highest temperature (230°C)
on the Roast Function ( ) for approximately 15 minutes to eliminate any packing residue that
may remain after shipping.This will also remove any traces of odor initially present.
Note: Initial start-up operation may result in minimal smell and smoke (for about 15 minutes).This is
normal and harmless. It is due to burning of the protective substance applied to the heating elements in
the factory.
Please familiarize yourself with the following oven functions and accessories prior to rst use:
• Temperature Control: choose the desired temperature from 100°C to 230°C for cooking.
• Function Control: There are 3 functions to choose from and 3 rack positions inside the oven for
a variety of cooking needs:
Grill ( ): Only the upper heating elements work, suitable for broiling sh, steak, poultry, pork
chops, etc.
Bake ( ): Only the lower heating elements work, suitable for baking cakes, pies, cookies etc. foods
that don’t need browning or a crispy surface, or stewing food in a pot.
Roast ( ): Both the upper and lower heating elements work together, suitable for toasting bread,
mufns, frozen wafes, pizza ,etc.
Convection Control: Choose to have the convection fan on by turning the rst knob to ( )
position. It will work with the grill, bake, or roast function separately.
• Timer Control: You can choose up to 60 minutes according to your cooking needs, and the time
can be adjusted during the cooking procedure.A bell will ring at the end of the programmed time.
• Power “ON” indicator light: Illuminated whenever the timer is turned on.
• Oven Lamp: Illuminated when the timer is turned on, convenient for observing the cooking
procedure.
• Bake Tray: For use in grilling and roasting meat, poultry, sh and various other foods. Also to be
used as a drip pan to catch oil drippings.
• Wire Rack: For roasting, baking, and general cooking in casserole dishes and standard pans.
• Tray Handle: Allows you to pick up the wire rack and bake tray when they are hot.
WARNING: TO AVOID RISK OF INJURY OR BURNS, DO NOT TOUCH HOT
SURFACES WHEN OVEN IS IN USE. ALWAYS USE OVEN MITTS.
CAUTION: Always use extreme care when removing bake tray, wire rack or any hot container from a
hot oven. Always use the tray handle, or an oven mitt when removing hot items from the oven.

7
HOW TO USE GRILL
For best results it is recommended that you preheat the oven for 15 minutes on 230°C.
Operation:
• Place food on the wire rack and slide into the top rack position. Food should be placed as close as
possible to the top heating element without touching it.
• Put bake tray at the lowest rack position to catch possible dripping.
• To prevent re hazards, it is suggested that food is wrapped with aluminum foil
• Set temperature knob to the appropriate temperature.
• Brush food with sauces or oil as desired.
• Set function knob to Grill Function. ( )
• Turn the time knob to your desired cooking time.
• Turn the food over midway through the chosen cooking time.
• When broiling is complete turn the function knob to “OFF” position.
HOW TO USE BAKE
Please note that the BAKE function uses only the bottom heating elements. For best results it is
recommended that you preheat the oven for 15 minutes on 230°C.
Operation :
• Place food on the wire rack or bake tray and slide into the lowest rack position.
• To prevent re hazards it is suggested that food is wrapped with aluminum foil
• Set the temperature knob to the appropriate temperature.
• Brush food with sauces or oil as desired.
• Set the function knob to Bake Function. ( )
• Turn the time knob to your desired cooking time.
• Turn food over midway through the appropriate cooking time.
• When BAKE is complete turn the function knob to “OFF” position.
Positioning of the Wire Racks
Cookies – Use bottom and middle Support Guides.
Layer Cakes – Use bottom Support Guide only (bake one at a time).
Pies – Use bottom and middle Support Guides.
HOW TO USE ROAST
Please note that the ROAST function uses all the heating elements. Large capacity oven allows for
toasting 4 to 6 slices of bread, 6 mufns, frozen wafes or frozen pancakes. When toasting only 1or 2
items, place food on the bake rack in the center of the oven.
Operation:
• Place food on the wire rack and slide into the middle rack position.
• Set the temperature knob to the appropriate temperature.
• Set the function knob to Roast Function. ( )
• Turn the time knob to your desired cooking time.
• When roast is completed a bell will ring to signal the end of the roast cycle.
• Turn the function knob to “OFF” position.
Note: Wire Rack should be positioned in the middle of the oven with the indentations pointing down.

8
HOW TO USE CONVECTION
Convection cooking combines hot air movement by means of a fan blowing with the regular features
(grill, bake or roast). Convection cooking provides faster cooking times than regular radiant type electric
oven in most cases.The fan gently sends hot air to every area of the food, quickly browning, crisping
and sealing in moisture and avor. It produces a more even temperature all around the food by hot air
movement so that food cooks/bakes/broils evenly versus the normal oven’s hot and cold spots.The
convection feature allows cooking/baking at lower temperatures, which saves energy and helps keep
the kitchen cooler. Convection air is superheated and it circulates around the food so it cooks food
signicantly faster than conventional ovens.
The convection fan works when you turn the top knob to the ( ) position, and can work with the
grill, bake or roast function separately.
CLEANING & MAINTENANCE
Clean the appliance after every use.
1. Remove the plug from the wall socket and allow the appliance to cool down completely.
2. Use warm water with a small amount of washing-up liquid to clean the baking tray, the grille and the
removal tool. Rinse the items with plenty of water and dry them thoroughly.
3. Use a damp cloth to clean the interior and exterior of the oven and the door. Dry them thoroughly.
4. Place all the items back in the oven and store the oven
• Make sure the plug has been removed from the plug socket before cleaning the appliance.
• Never use corrosive or scouring cleaning agents or sharp objects (such as knives or hard brushes)
to clean the appliance.
• Never immerse the appliance, the power cord or the plug in water or any other uid.
9
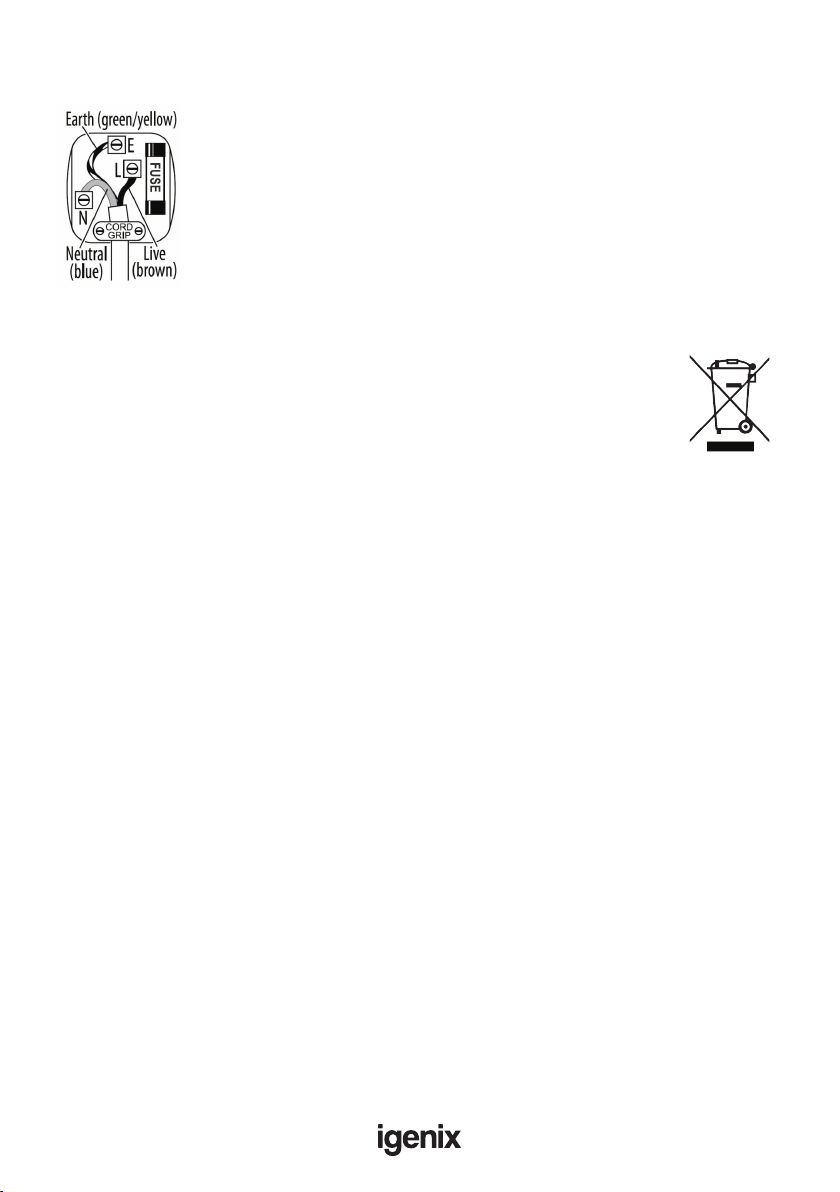
Fuse Replacement (Class I)
This appliance must be earthed. Remove the central screw on the plug and
open the shell.Take out the fuse and replace with a new fuse of the same Amp.
Install the shell again and tighten the screws.
MAINS PLUG FUSE REPLACEMENT
DISPOSAL INFORMATION
The European Directive 2012/19/EU on Waste Electrical and
Electronic Equipment (WEEE), requires that old household
electrical appliances must not be disposed of in normal unsorted
municipal waste.
Old appliances must be collected separately in order to optimise
the recovery and recycling of the materials they contain and reduce the impact
on human health and the environment.
The crossed out “wheeled bin” symbol on the product reminds you of your
obligation, that when you dispose of the appliance it must be separately collected.
Consumers should contact their local authority or retailer for information
concerning the correct disposal of their old appliance.

10
lgenix Warranty Terms & Conditions
This product is guaranteed for a period of 12 months as standard from the date of purchase
against mechanical and electrical defects.You can extend your warranty for a further 12 months by
registering your product.
Upon registration we will cover your product for a period of 24 months from the original purchase
date against any mechanical or electrical defects.
To qualify for the guarantee, the product must be used for domestic household use only and in
accordance with the instructions in the user manual.Any misuse of the product will result in the
warranty being void.
The guarantee does not cover accidental damage, misuse, neglect, tampering or incorrect
adjustment or installation.
The guarantee will be rendered invalid if the product is resold, has had its serial number removed
(or has an invalid serial number), or if an unauthorised person has carried out any repairs or
alterations.
The warranty does not cover accessories or consumable parts that require replacement under
normal use. This includes shelving, dials, lters, belts and trays etc.
In the unlikely event of a breakdown please refer to the Troubleshooting guide in your user manual
and check all plugs, fuses and the electricity supply.
If you still require assistance please contact our Customer Service department on
01473 271 272 or write to us at the following address:
Customer Service Department
38 Bluestem Road, Ransomes Europark
Ipswich, IP3 9RR
Please quote the Product Code which begins ‘IG’ or ‘DF’ and the PO Number on the front of the
instruction manual and give details of the exact fault.We will then decide whether to repair or
replace the item.
Before we arrange the repair or replacement you will be required to return a copy of your proof
of purchase. Please retain your original.
If an item is replaced within the agreed guarantee period, the guarantee for the replacement item
will be calculated from the purchase date of the original.
In the event that the product is inspected and no fault is found or the product is not within the
guarantee period you will be charged for the repair and any carriage costs.

11
Thank you for choosing lgenix
As a valued customer we would like to offer you a FREE 2 year warranty to cover your product
against any electrical or mechanical defects.
This means that in the unlikely event you develop a fault or problem with your product we will
happily repair or replace the item free of charge.
To qualify for the 2 year warranty you must register your product within 30 days of purchase.
The full Terms & Conditions of our warranty policy are shown on the opposite page.They are
also available on our website. www.igenix.co.uk

38 Bluestem Road, Ransomes Europark, Ipswich, IP3 9RR
Tel. 01473 271 272
Disclaimer: Igenix operate a policy of continual improvement and development.
We therefore reserve the right to change/alter the specication and appearance of our appliances without prior notice.
All diagrams and images shown in this manual are for illustration purposes only.
Table of contents
Other iGenix Oven manuals


Popular Oven manuals by other brands


AEG
AEG DC7013001M user manual

CORBERO
CORBERO CC4060WB instruction manual

Miele
Miele DGC 735 Series Operating and installation instructions

VERDER
VERDER CARBOLITE GERO LHT 6/60 Installation, operation and maintenance instructions

NEFF
NEFF U15M42 0GB Series instruction manual

Eurofred
Eurofred EF 411/999/00113 Use and instruction manual


