Ignis Pixel User manual

1
Manual for LED digital poi Ignis Pixel
Dear Customer! Thank you for purchasing our digital poi. To maximize the life of props, as well as to
maintain the warranty please read this manual to the end and follow our advices.
Controls
Three control buttons are located at handle of digital poi:
To switch poi on/off press and hold central button
Up and down buttons change selected timeline or picture to next or previous.
BLUE cursor means that you select one of 10 timeline modes. Number of blue LED means
number of mode (cells T1-T10 in left column in software). On picture below selected timeline
is #3:
RED cursor means that you select one of 80 single pictures. Number of red LED the same way
means number of single picture (cells 1-80 in left column in software). On picture below
selected picture is #21:
If you move cursor up or down it will run 10 timeline modes (blue) and then 80 single pictures (red)
and then timelines again etc.
To run/stop selected timeline or picture short press central button
If no button is pressed within 10 minutes in select mode poi automatically turns off.
2
Using locked “Performance” mode and start synchronous with music
If you need to lock all the buttons and start timeline program at exact moment of music do following:
1. Run timeline you need
2. Press and hold down button for 2 seconds. You’ll see last led shines dark white:
3. Now poi are in “Trigger” state. It means that any press of any button will start timeline from
beginning. To be exact, poi starts to run at release of any button. So you need to press and
release any button at start moment of music.
If no button is pressed within 1 hour poi automatically turns off.
4. After poi starts all buttons are locked from accidental clicks.
To unlock buttons press and hold central button for 2 seconds.
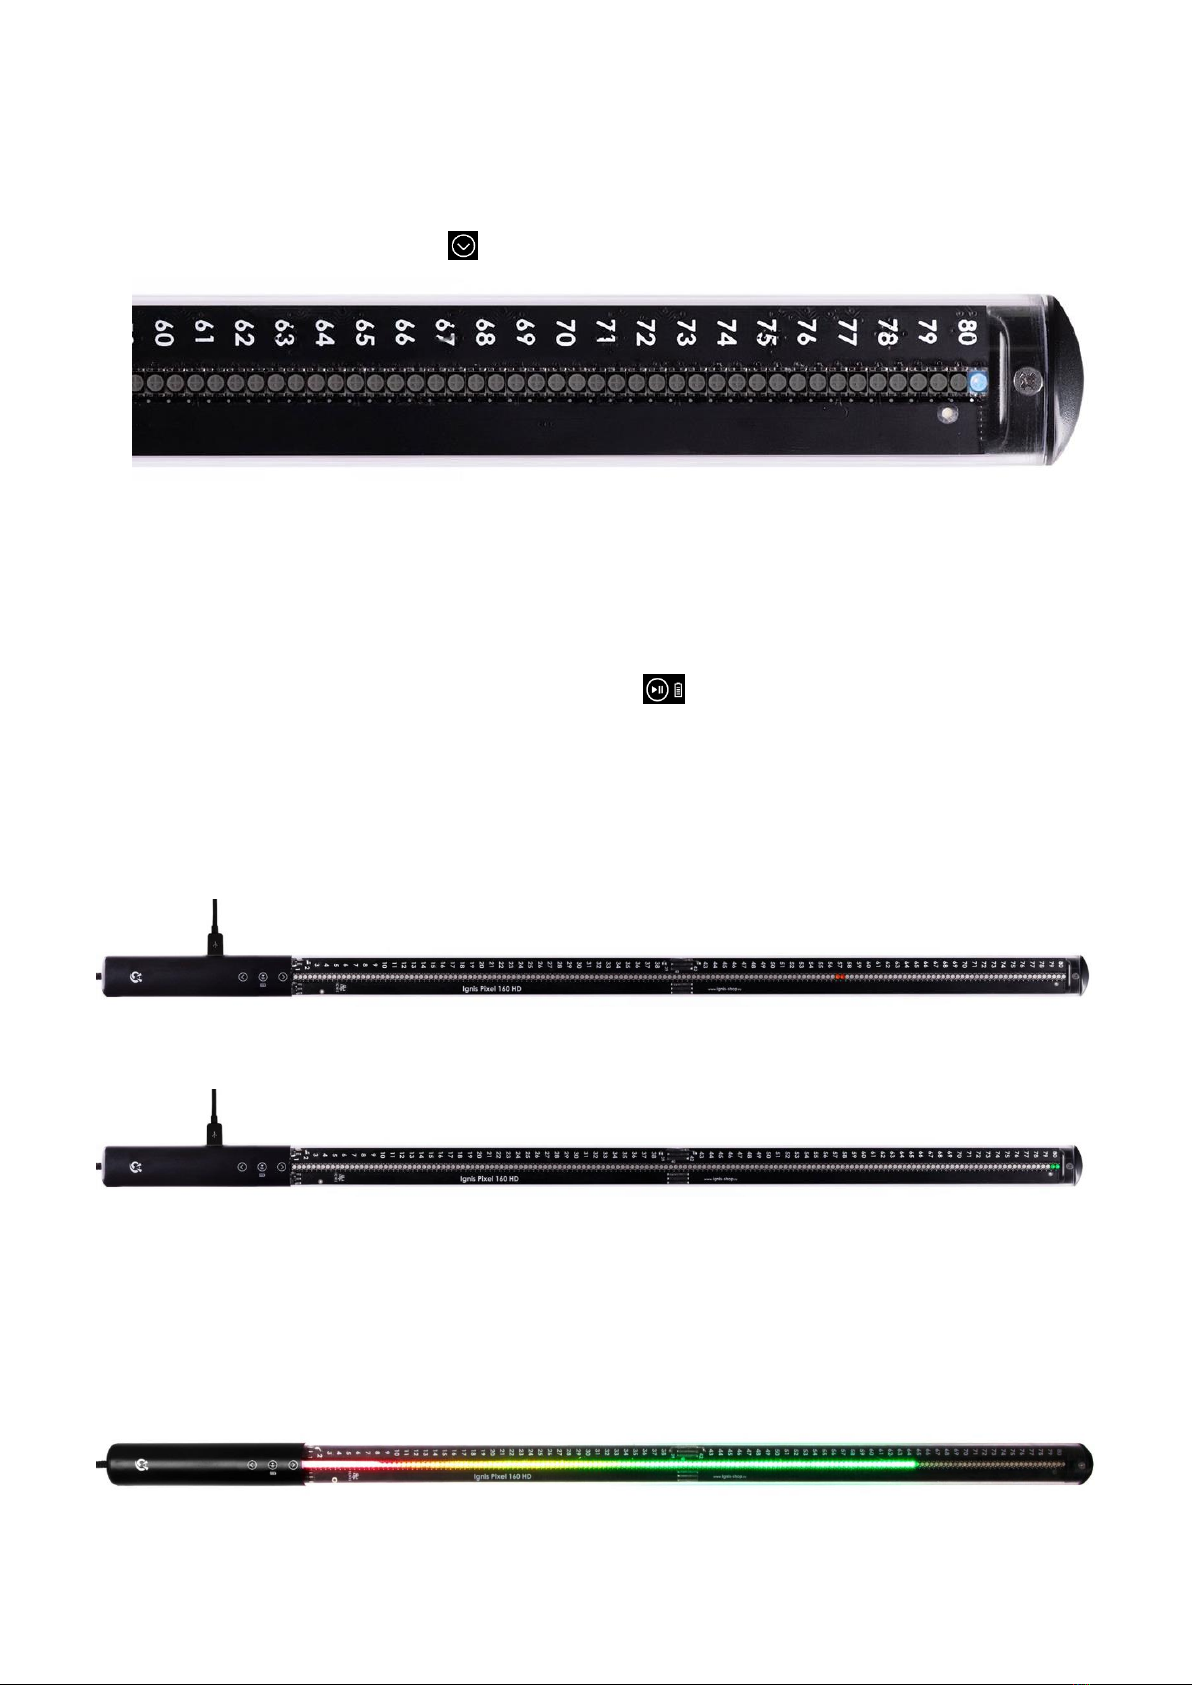
Charging
For charging poi just connect it to the charger or computer USB –you’ll see one red light. Its
position shows current charging level. On picture below red light is #57. It means that current
charging level is approximately 57/80 ≈ 70%.
Light will gradually moving towards to the maximum number of LED. At full charge the last LED
light turns to green:
If poi is switched off and connected to the charger poi also charges automatically.
Lithium batteries have no memory effect, so it is recommended to charge your poi without
waiting for a complete discharge. Charge after each use of poi will prolong battery life.
To see remain battery level return to select mode and press central button for 1 second. Right
before running light you see current battery level. Full scale means 100% charge, half –50%
etc.
Avoid deep discharge of your digital poi! Failure to do so may result in loss of battery capacity
and reduction of operating time.

3
Installing Ignis Pixel software
1. Download installation file from the page of Ignis Pixel on our website
http://www.ignis-shop.ru/page/downloads-ignis-pixel?lang=en.
2. Run the file and proceed to the end of installation.
3. Start Ignis Pixel Utility using the shortcut on your desktop.
4. Turn on your poi and connect it to your computer.
5. Click "Settings" button in the lower left corner.
6. Select REAL device: «iPixel… (COM …)»(NOT «Virtual Poi»).
If you doesn’t see « iPixel… (COM …)» in list of devices then:
1. Close settings.
2. Make sure that your poi is ON and connected.
3. Open settings again and find device in list «iPixel… (COM …)».
4. If it doesn’t help try to do these methods –one of them should help:
a. Change USB port.
b. Change USB cord.
c. Reboot your computer.
d. Re-Install Ignis Pixel Utility.
Set of basic pictures is available here http://www.ignis-shop.ru/page/downloads-ignis-pixel?lang=en.
Uploading Firmware of Ignis Pixel
Important! Don’t upload Firmware on poi if you use Ignis Pixel Utility version 1.3.1 or lower!
Otherwise poi stop working!
Your poi have up to date firmware. Uploading firmware is system function that you don’t need in
normal work. If firmware is damaged and need to be uploaded contact us first and we will send you
special instructions for this procedure.
Programming timeline modes (time-programmed sequence of pictures).
You can set duration for each uploaded picture and thus create a sequence of them, synchronized
with the music. There are 10 timeline sequences T1-T10.
To configure the timeline:
1. Start Ignis Pixel Utility, switch on you digital poi and connect it to your computer.
2. Open single pictures from files to any cells from 1 to 80 in the left column. You can drag and
drop files from Explorer to these cells.
3. Select any "Timeline Mode" and drag pictures from left cells to the right part of the window.
Sequence of pictures in right part of window can be changed by dragging.
4. Set the duration in seconds for each picture. Fractional values of time can be set through the
point such as 7.426 seconds with precision of 0.001 second.

4
5. Click the "Upload all" - the process can take up to several minutes depending on the height-
width ratios of the pictures.
6. When you change only duration or order of pictures in timeline mode to save time just click
orange button "Upload" –process will only take 1-2 seconds.
Saving your project
The software allows you to save the project, and you can, for example, send your project by e-mail or
USB flash to another computer. You do not need to send the original pictures of your project. They
are contained within the project file.
Temperature recommendations
Warning! Do not use white images at maximum brightness continuously more than 3-4
minutes! Especially if ambient temperature above 30°C (86°F). Poi become very hot and
battery also heat up too much. This considerably shorten lifetime and health of battery. Full
white on maximum brightness result in maximum power and intended to use in short times.
Mixed-color pictures considerably reduce power and heating –you may use them as you want.
Temperature of storage and operation of pixel props is from -20°C to +50°C. (-4°F to 122°F) At
low temperatures operating time can be reduced due to decreased capacity of battery. After
returning to room temperature and battery charge all parameters will return to normal level.
However if there is a need to perform in the cold conditions, keep your poi in a warm place
and get them just before the performance. Then the batteries would not have time to cool and
operation time would not reduce.
Self-heating on bright modes can also be used for performance in the cold conditions - it will
not allow the battery to freeze during the performance.
Warranty
We give 2-year warranty for pixel props. If a defect is detected we repair your props or replace the
defective item for free. All delivery charges are on buyer.
Pixel props is strong enough for impacts and bumps at regular speed of twirling. However you should
understand that it not undestructible. And warranty can’t cover damages that can be caused by very
strong impacts and drops.
Expected lifetime of pixel props is 5-10 years and limited only by battery lifetime (like cell phones). If
battery becomes bad contact us and we replace it into new or tell you how to replace it by yourself.
If something happened with your props contact us first and tell what happened. In many cases
problem can be solved remotely without sending poi to our service center in Moscow and you save
enough time and money on 2-way shipping.
It is very important to know the weak points of our props, so we can make it
more durable. Thank you for helping us in this way to develop the props!
You can contact us, ask questions and check for new products on our
website: ignispixel.com
E-mail: [email protected]
Best wishes, Ignis Team
Table of contents
Other Ignis Dj Equipment manuals


