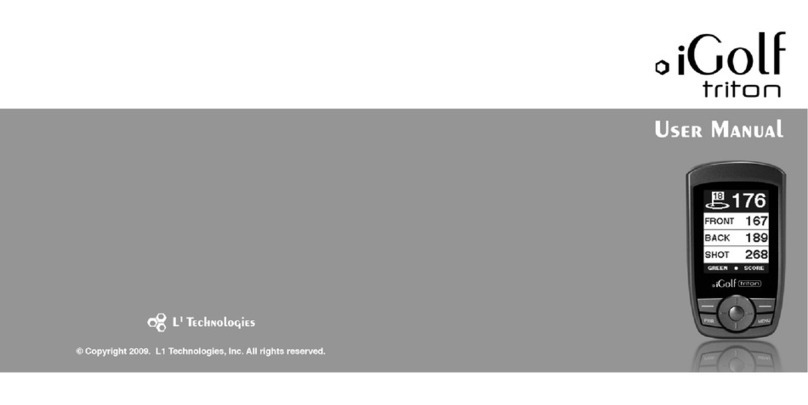
iGolf GPS Caddie User manual

iGolf GPS Caddie
User Manual
Table of Contents
Section 1: Introduction................................................................................................................................................2
Welcome .............................................................................................................................................................................. 2
Important Information ......................................................................................................................................................... 3
iGolf.com ............................................................................................................................................................................. 4
Package Details.................................................................................................................................................................... 5
GPS Caddie Features........................................................................................................................................................... 6
Battery Installation............................................................................................................................................................... 7
Keypad Function.................................................................................................................................................................. 8
Start-up................................................................................................................................................................................. 9
Section 2: iGolf GPS Caddie ......................................................................................................................................10
Main Menu........................................................................................................................................................................... 10
Play Golf.............................................................................................................................................................................. 11
Map Course.......................................................................................................................................................................... 17
Delete Course....................................................................................................................................................................... 21
Satellites............................................................................................................................................................................... 22
Battery Level........................................................................................................................................................................ 23
Sync Handheld..................................................................................................................................................................... 24
Settings Menu ...................................................................................................................................................................... 25
About iGolf.......................................................................................................................................................................... 29
Section 3: iGolf Transfer Software.............................................................................................................................30
Overview.............................................................................................................................................................................. 30
Installation ........................................................................................................................................................................... 31
Launch Software.................................................................................................................................................................. 32
Send Course Files ................................................................................................................................................................ 33
Backup Course Files............................................................................................................................................................ 34
Create Golf Course .............................................................................................................................................................. 35
Edit Golf Course.................................................................................................................................................................. 36
Computer Settings ............................................................................................................................................................... 37
Section 4: Appendices..................................................................................................................................................39
1

2
Introduction
Welcome
Dear Valued Consumer:
We would like to thank you for purchasing the iGolf GPS Caddie. We sincerely hope you will find your
GPS Caddie both easy and enjoyable to use. Knowing the exact distance for each shot will help you
lower your score and enhance your overall golfing experience.
This User Manual was created for you to get the most out of your new GPS Caddie. It only takes a few
minutes to read, after which you can immediately begin using your new GPS Caddie and enjoy all its
features.
Also, please visit www.iGolf.com to explore the benefits of becoming an iGolf Member. As a member,
your product warranty can be extended from 90 days from date of purchase to 12 months from date of
manufacture. Plus, you can begin downloading GPS course files and using your GPS Caddie right away!
Sincerely,
L1 Technologies
Introduction
Important Information
Legal Disclaimer
L1 Technologies, Inc. will not be legally
responsible for any injury or damage to any
person or property caused by the user’s improper
operation and/or poor judgment while using this
product.
Additional Information
The Global Positioning System (GPS), a network
of 24 satellites orbiting Earth, is operated and
maintained by the U.S. government. This GPS
device requires at least 3 satellites to be locked
on to accurately determine your position. Any
change made to the system by the government
could affect the accuracy and performance of this
product.
3

Introduction
Package Details
Package Contents
1 - iGolf GPS Caddie w/ belt clip
1 - Software CD
1 - USB Sync Cable
1 - User Manual
Please contact vendor if your package is incomplete.
Additional Requirements
Two 1.5V AA batteries (alkaline or rechargeable)
PC with Windows 98/2000/XP*
PC with CD-ROM to load software*
PC with USB port to sync files*
*Required to transfer files from computer
5
Introduction
iGolf.com
iGolf.com
iGolf.com is an online resource for all golfers, but serves as a community for iGolf members to access GPS golf
course files to use with their iGolf products. Membership is not required for much of the content; however, access
to GPS course files and the ability to download data files requires a membership. Membership to iGolf.com is
$29.99 per year and you get to keep all the files you download!
Download Course Files
1. Go to www.iGolf.com, become an iGolf Member and log in using your email address and password.
2. Search for and select your golf course to obtain detailed information.
3. If available, download golf course information directly to your computer.
4. If unavailable, submit a request to have iGolf map your course for you.
5. Use iGolf Transfer (see pp. 30-38) to transfer golf course file to your GPS Caddie.
Visit www.iGolf.com today to become a member!
Member Features
• Unlimited scorecard downloads
• Fifty (50) GPS downloads
• One (1) mapping credit for a golf course of your choosing
• Twelve (12) month warranty from date of manufacture
• Special offers on related products and accessories
• Free software updates during membership period
• All non-member features
4
Non-Member Features
• Free golf course search
• Free industry news
• Free sporting news
• Free local and national news
• Free market reports
• Free local weather reports
• Free online games

Introduction
Battery Installation
Battery Installation
Battery life varies due to a variety of factors, including temperature and back-light usage.
While changing batteries, an internal lithium battery will retain saved data.
1. Access battery compartment by turning the battery-cover screw counterclockwise.
2. Lift up on the cover by using fingernail to break airtight seal.
3. Observing correct polarity (+) and (-), insert two (2) 1.5V AA alkaline or rechargeable batteries.
4. Replace cover.
5. Turn battery-cover screw clockwise until tight (do not over-tighten).
For optimal performance, we recommend using high capacity alkaline batteries as recommended for digital cameras and
portable CD players. If using rechargeable batteries, we recommend Ni-MH rechargeable batteries with a power rating
of 1700mA or higher. Lithium batteries are recommended for use in cold temperatures.
WARNING:
• DO NOT MIX alkaline and rechargeable batteries
• REMOVE batteries from GPS Caddie when connected to data/power cord
• REMOVE batteries from GPS Caddie during extended periods of non-use
• DAMAGE to person or property caused by improper use of batteries is not covered under warranty
(Manufacturer is not liable for any injuries caused while using this product)
• CHECK with battery manufacturer regarding specific warranty and proper disposal
information
7
Introduction
GPS Caddie Features
6
Large display
Secure battery
compartment
USB synchronization
3-button operation
Easy-grip sides
Removable belt clip
Water-resistant
construction

Introduction
Start-up
Start-up
Power On
• Press and hold Power button until the welcome screen appears
Power Off
• Press and hold Power button until the screen goes blank (about 3 seconds)
Back-light On/Off
• From any screen, press Power button to turn back-light on
• Press Power button again to turn back-light off
9
Introduction
Keypad Function
Keypad Function
Escape
• Switches between screens
• Cancels current operation
• Backs up to previous step or screen
Toggle
• Scroll up, down, left and right
• Highlights menu options and enters data
• Press down to Enter
Power
• Turns the GPS Caddie on and off
• Turns the back-light on and off
8

iGolf GPS Caddie
Main Menu
Main Menu
The Main Menu displays all the features available to the user. Main Menu features are
explained in detail in subsequent sections of this manual. To access Main Menu features
and begin using the GPS Caddie:
• Scroll to highlight any icon on the Main Menu and press Enter.
Feature Descriptions
Play Golf ............Allows user to play golf using GPS data
Map Course ........Allows user to create and customize GPS golf course files
Delete Course.....Allows user to delete files from the GPS Caddie
Satellites .............Displays satellite position and signal strength
Battery Level......Displays remaining battery power
Sync Handheld ...Allows user to Sync with computer
Settings...............Provides user with additional features to setup the GPS Caddie
About iGolf.........Provides user with version and company information
10
Play Golf
Play Golf
Play Golf is a feature which allows the user to play a golf course with GPS distance
information available. To begin using Play Golf feature:
1. Scroll to highlight Play Golf on the Main Menu and press Enter.
2. To exit and return to the previous screen, press ESC.
Select Course
This feature lists all the golf courses available to play using entered, acquired or downloaded
data.
Note: To download course files, you will need to join iGolf.com (see page 4)
and install iGolf Transfer on your computer (see pp. 30-38).
To select course:
1. Scroll to highlight golf course name and press Enter.
2. To exit and return to the previous screen, press ESC.
Tee Box
This feature lists the available tee box positions for the selected golf course.
To select tee box:
1. Scroll to highlight tee box position and press Enter.
2. To exit and return to the previous screen, press ESC.
iGolf GPS Caddie
11

iGolf GPS Caddie
Play Golf
Primary Screen
This screen displays the GPS distance measurement to the front, center and back of
the green, as well as satellite status and scorecard information for each hole.
Screen Information
Front..........................Front of green
Center........................Center of green
Back...........................Back of green
SAT ...........................No fix/Weak/Good/Strong
...................................Hole number
YDS...........................Yards or Meters
PAR...........................Par value for hole
HCP...........................Handicap value for hole
GPS Caddie Controls
Right/Left toggle .......Move between holes
Up/Down toggle........Move between screens
Press toggle................Activate Shot Distance (see page 14)
Press ESC..................Go to Play Menu (see pp. 15-16)
12
iGolf GPS Caddie
Play Golf
Custom Points Screen
This screen displays preset or user defined abbreviations representing custom points,
which are determined using the Map Course feature (see pp. 17-20).
Screen Information
Abbreviations............ Displays chosen custom point abbreviations
Distance..................... Displays distance to each custom point
GPS Caddie Controls
Right/Left toggle....... Move between holes
Up/Down toggle........ Move between screens
Press toggle............... Activate Shot Distance (see page 14)
Press ESC.................. Go to Play Menu (see pp. 15-16)
13

iGolf GPS Caddie
Play Golf
Shot Distance
This feature can be accessed from the Play Golf screens and allows the user to
measure the distance between any two points. This feature is useful for measuring
driver and iron distance to gauge consistency and improve scoring.
To measure the distance between points:
1. Press Enter from any Play Golf screen.
2. Stand at the exact Start Point you wish to measure from and press Enter.
3. Go to the exact End Point you wish to measure.
4. Scroll to highlight End Point and press Enter.
5. Look at Distance for the result.
6. Repeat steps 2-5 above to measure additional distances.
7. To exit and return to the previous screen, press ESC.
To measure the distance to additional locations using the existing Start Point:
1. Go to the exact End Point you wish to measure.
2. Scroll to highlight End Point and press Enter.
3. Look at Distance for the result.
4. To exit and return to the previous screen, press ESC.
14
Play Golf
iGolf GPS Caddie
Play Menu-Satellites
Satellite signal strength is displayed using different column heights to
show signal strength for all satellites being tracked. The ID number of
each satellite is given below each column (see page 22).
To view satellite information:
1. Scroll to highlight Satellites on the Play Menu and press Enter.
2. To exit and return to the previous screen, press ESC.
Play Menu-Battery Level
Battery level is displayed using a horizontal bar representing the power
remaining in the batteries. The percentage of battery life remaining is
given numerically at the right of the graphic.
To view remaining battery level:
1. Scroll to highlight Battery Level on the Play Menu and press Enter.
2. To exit and return to the previous screen, press ESC.
15
03 15 18 09
03
15 18
09

Play Golf
iGolf GPS Caddie
Play Menu-Tee Box
To select a tee box without exiting the current game:
1. Scroll to highlight Tee Box and press Enter.
2. Scroll to highlight tee box position and press Enter.
Play Menu-Yard or Meter
To select if yards or meters are used to measure distance:
1. Scroll to highlight Yard or Meter and press Enter.
2. Toggle up/down to highlight Yard or Meter and press Enter.
Play Menu-Return Game
To return to playing golf:
• Scroll to highlight Return Game and press Enter.
Play Menu-Exit
To return to the Main Menu:
• Scroll to highlight Exit and press Enter.
16
Map Course
The Map Course feature is used to manually input or customize golf course
information and map GPS data points for desired locations. Alternatively, golf
course information can be inputted using iGolf Transfer software (see pp. 30-38)
and GPS course files can be downloaded from www.iGolf.com (see page 4).
Scroll to highlight Map Course on the Main Menu and press Enter to begin
mapping a course manually.
Select Course
Scroll to highlight golf course name and press Enter to select a new or existing golf
course to input or map.
Course Name
To enter/edit the golf course name:
1. Scroll to highlight Course Name and press Enter.
2. Edit the default golf course name to identify the golf course you are mapping.
• Course name is limited to 12 characters (abbreviate if necessary) and
should be distinguishable from other golf courses entered.
• Delete characters by scrolling to BKSPC and pressing Enter.
• Enter characters by scrolling to highlight the letter, number or symbol and
pressing Enter.
3. Scroll to highlight SAVE and press Enter.
Map Course
iGolf GPS Caddie
17

Map Course
iGolf GPS Caddie
Course Data
To add golf course data, such as par, handicap (HCP) and distance:
1. Scroll to highlight Course Data and press Enter.
2. Scroll to highlight the tee box you wish to enter data for and press Enter.
3. Toggle up/down to select the hole you wish to enter data for and press Enter.
4. Toggle up/down to select Par for the hole, toggle right to enter Handicap.
5. Toggle up/down to select the first digit, toggle right for second digit.
6. Toggle up/down to select the second digit, toggle right to enter distance.
7. Toggle up/down to select the first digit, toggle right for second digit.
8. Toggle up/down to select the second digit, toggle right for third digit.
9. Toggle up/down to select the third digit, toggle right to save.
10. To save and return to Select Hole, scroll to highlight SAVE and press Enter.
11. Repeat steps 2-10 for each hole on the golf course.
12. To exit and return to the previous screen, press ESC.
18
Map Course
iGolf GPS Caddie
Map GPS Point
To map GPS points on a golf course:
1. Scroll to highlight Map GPS Point and press Enter.
2. Toggle up/down to select the hole you wish to enter.
3. Press Enter.
4. Scroll to highlight the point you wish to map.
• If a Custom Point, choose desired abbreviation.
5. Press Enter.
6. Go to point to register, verify point name and satellite strength.
7. Scroll down to Register and press Enter.
8. Follow on-screen instructions. Do not move until point is registered.
9. Repeat steps 2-9 for each point and for each hole on the golf course.
10. To exit and save GPS points, scroll to Save and press Enter.
19

Map Course
iGolf GPS Caddie
Custom Points
This feature allows the user to select from a list of provided abbreviations,
create their own abbreviation or use the default abbreviation.
To use one of the supplied abbreviations:
1. Scroll to highlight Abbreviated and press Enter.
2. Scroll to highlight desired point and press Enter.
3. Scroll to Register and press Enter.
To use a user defined abbreviation (limited to 5 characters):
1. Scroll to highlight User Defined and press Enter.
2. Scroll to BKSPC and press Enter to delete characters.
3. Scroll to the letter, number or symbol and press Enter to enter characters.
4. Scroll to Register and press Enter.
To use the default abbreviation:
1. Scroll to highlight Register and press Enter.
2. Scroll to Register and press Enter.
20
21
Delete Course
iGolf GPS Caddie
Delete Course
The Delete Course feature allows the user to permanently remove a golf course file
from the GPS Caddie.
To access the Delete Course feature:
1. Scroll to highlight Delete Course on the Main Menu.
2. Press Enter.
3. To exit and return to the previous screen, press ESC.
To delete a golf course file:
1. Scroll to highlight the golf course to delete.
2. Press Enter.
3. Scroll to highlight Yes to confirm deletion or No to cancel.
4. When finished, scroll to highlight Exit.
5. Press Enter.
6. To exit and return to the previous screen, press ESC.

23
Battery Level
Battery information is displayed using a horizontal bar representing the amount of
power remaining in the batteries. The percentage of battery life
remaining is given numerically to the right of the graphic.
To access battery information:
1. Scroll to highlight Battery Level on the Main Menu.
2. Press Enter.
3. To exit and return to the previous screen, press ESC.
If using rechargeable batteries, it is essential to change the setting in Settings (see
page 30).
Battery Level
iGolf GPS Caddie
22
iGolf GPS Caddie
Satellites
Satellites
Satellite activity is displayed using black and clear circles with ID numbers to
represent acquired satellites (black) and other satellites in view (clear). Typically, at
least three (3) satellites are required to be acquired (black) to process data.
Satellite signal strength is displayed using different column heights to show signal
strength for all satellites being tracked. The ID number of each satellite is given
below each column.
To access Satellite features:
1. Scroll to highlight Satellites on the Main Menu.
2. Press Enter.
3. To exit and return to the previous screen, press ESC.
03 15 18 09
03
15 18
09

24
Sync Handheld
iGolf GPS Caddie
Sync Handheld
This feature is the setting on the GPS Caddie which allows the transfer of course files
between the unit and your computer when used in conjunction with iGolf Transfer. If
the USB sync cable is not connected to both the GPS Caddie and your computer, the
connection status will remain “Waiting”. Once the USB cable is properly connected and
iGolf Transfer is open, the status on the GPS Caddie will show “Active” and iGolf
Transfer “Connected”. Files can only be transferred when the status is “Connected”.
For more information on transferring files, please see the iGolf Transfer sections
(pp. 30-38).
25
Settings Menu
iGolf GPS Caddie
Settings Menu
The Settings Menu provides several features for the user to configure the
GPS Caddie. These features are Contrast, Distance, WAAS, Stabilizer, Time, Datum
and Battery. If you would like to change the default setting for any of these features,
please read the following instructions.
To access the Settings Menu:
1. Scroll to highlight Settings on the Main Menu.
2. Press Enter.
3. To exit and return to the previous screen, press ESC.
To access Settings Menu features:
1. Scroll to highlight desired feature.
2. Press Enter.
3. To exit and return to the previous screen, press ESC.

Settings Menu
iGolf GPS Caddie
Screen Contrast
To adjust the contrast of the screen to aid viewing in various light conditions:
1. Scroll to highlight Screen Contrast on the Settings Menu.
2. Press Enter.
3. Toggle right/left to adjust the contract of the screen.
4. To exit and return to previous screen, press ESC.
Yard or Meter
To select if yards or meters are used to measure distance:
1. Scroll to highlight Yard or Meter on the Settings Menu .
2. Press Enter.
3. Toggle up/down to highlight Yard or Meter.
4. Press Enter.
5. To exit and return to previous screen, press ESC.
26
27
iGolf GPS Caddie
Settings Menu
WAAS
Wide Area Augmentation System (WAAS) is a system of satellites and ground
stations that provide GPS signal corrections in the United States. The use of WAAS
in the U.S. provides more accurate position data, and thus more accurate distance
measurements. However, in some parts of the country WAAS can actually cause
less accurate position readings.
If you are in the U.S. and experience inconsistent or inaccurate position readings, or
you are outside the U.S., you can deactivate WAAS by selecting “WAAS Off”. The
factory setting on the GPS Caddie is “WAAS On.”
Stabilizer
The GPS Caddie is equipped with an option to stabilize (or lock) the distance
displayed on the screen. This feature is provided for GPS Caddie customers who
experience fluctuating distance readings, even though they remain in the same
place for extended periods of time.
If you experience this, you can activate the stabilizer feature by selecting
“Stabilizer On” to eliminate the fluctuating distance. The factory setting on the
GPS Caddie is “Stabilizer Off.”

About iGolf
iGolf GPS Caddie
About iGolf
To display the version of software loaded on the GPS Caddie:
1. Scroll to highlight About iGolf on the Main Menu.
2. Press Enter.
3. To exit and return to the previous screen, press ESC.
29
Settings Menu
iGolf GPS Caddie
Battery Type
To select alkaline or rechargeable batteries:
1. Scroll to highlight Battery Type and press Enter.
2. Scroll to highlight the battery type you are using and press Enter.
3. To exit and return to the previous screen, press ESC.
GPS Power Mode
To select power usage:
1. Scroll to highlight GPS Power Mode and press Enter.
2. Scroll to highlight Normal or Trickle Power and press Enter.
3. To exit and return to the previous screen, press ESC.
Default Setting
To reset the unit to factory settings:
1. Scroll to highlight Battery Settings and press Enter.
2. Scroll to highlight Default Setting and press Enter.
3. Scroll to highlight Yes to confirm reset or No to cancel and press Enter.
4. To exit and return to the previous screen, press ESC.
28

Overview
iGolf Transfer
iGolf Transfer
Included with the GPS Caddie is iGolf Transfer software and a USB cable to allow the user to connect the GPS
Caddie with a Windows 98/2000/XP computer. iGolf Transfer allows the user to:
Send Golf Courses.......................... Transfer data between the GPS Caddie and a computer
Backup Golf Courses...................... Backup golf course files on the GPS Caddie to a computer
Create Golf Course......................... Enter scorecard data on a computer rather than using the GPS Caddie
Edit Golf Course............................. Modify scorecard data on a computer rather than using the GPS Caddie
Change Computer Settings............. Select USB port, change file storage and backup location
iGolf Transfer is not required to use the GPS Caddie. Golf course information can be entered, edited and deleted
using various features on the GPS Caddie; however, this software simplifies the creation and modification of
course files, as well as manages the storage and security of those files. GPS data is obtained manually using the
GPS Caddie or downloaded using iGolf.com (see page 4). iGolf Transfer is the only way to transfer this data to a
computer for safe keeping.
30
iGolf Transfer
Installation
USB SYNC CABLE MUST BE DISCONNECTED FROM COMPUTER AND SWITCH MUST BE SET
TO “DATA” PRIOR TO INSTALLING SOFTWARE!!
Installation
To install iGolf Transfer on a Windows 98/2000/XP computer:
1. Confirm USB cable is not attached to computer. If attached, unplug before proceeding.
2. Insert iGolf Transfer software CD into your computer’s CD-ROM or download latest version from iGolf.com.
3. Open drive folder on computer to view CD contents.
4. Open Setup file to launch Windows Installer Wizard.
5. Follow on-screen instructions to install USB driver and iGolf Transfer.
31

Launch Software
iGolf Transfer
Launch iGolf Transfer from Windows
During installation, an iGolf Transfer icon was added to your desktop along
with an iGolf folder. iGolf Transfer is the application you will use to syn-
chronize your computer with the GPS Caddie. iGolf folder is the default
folder used to store and backup golf course files.
To launch iGolf Transfer from your desktop:
1. Locate iGolf Transfer icon on desktop.
2. Open iGolf Transfer application.
3. Click on tab displaying desired function.
4. Click Exit at any time to exit iGolf Transfer.
32
iGolf Transfer
Send Course Files
Send Golf Courses
Connect GPS Caddie
1. Remove belt clip by squeezing tab on top of clip
together and sliding up to expose connection terminal.
2. Connect the USB cable to your computer and to the GPS Caddie by
sliding connector down to cover terminal (as shown in picture).
3. Turn the GPS Caddie on by pressing Power button.
4. GPS Caddie status must show Connected to continue.
5. Click Exit at any time to exit iGolf Transfer.
Select Golf Course File
1. Click Browse and select the golf course file(s) to send.
2. Click Open (files to transfer will be listed in the box).
3. To remove files from the list, highlight file name and click
Remove.
4. Click Exit at any time to exit iGolf Transfer.
Send Golf Course File
1. On the GPS Caddie, scroll to highlight Handheld Sync on the
Main Menu and press Enter.
2. On the computer, go to iGolf Transfer and click Send to begin
transferring files.
*Transfer may take up to 2 minutes per golf course.
3. Click Stop to terminate the transfer.
4. Click Exit at any time to exit iGolf Transfer. 33
Insert cable as shown
on the left.
Insert cable as shown
on the left.

iGolf Transfer
Backup Course Files
Backup Golf Courses
Connect GPS Caddie
1. Remove belt clip by squeezing tab on top of clip
together and sliding up to expose connection terminal.
2. Connect the USB cable to your computer and to the GPS Caddie by
sliding connector down to cover terminal (as shown in picture).
3. Turn the GPS Caddie on by pressing Power button.
4. GPS Caddie status must show Connected to continue.
5. Click Exit at any time to exit iGolf Transfer.
Backup GPS Caddie
1. On GPS Caddie Main Menu, scroll to highlight Handheld Sync and press
Enter.
2. On the computer, go to iGolf Transfer and click Backup to begin
transferring files.
*Transfer may take up to 2 minutes per golf course.
3. Click Stop to terminate the transfer.
4. Click Exit at any time to exit iGolf Transfer.
Backed-Up Files
This area lists all the files currently saved to the iGolf folder on your
computer.
To permanently remove any file:
1. Highlight file name and click Delete.
2. Click Exit at any time to exit iGolf Transfer.
Insert cable as shown
on the left.
34
Create Golf Course
iGolf Transfer
Create Golf Course
To enter golf course scorecard information using a computer:
1. Gather golf course scorecard information.
2. Enter Golf Course Name in white box.
3. Select up to five (5) Tee Boxes to enter.
4. Select the Number of Holes for the golf course (if two or more 9-hole courses, enter each course separately).
5. Click Create Holes.
6. Enter distance for each Tee Box selected for the hole.
7. Enter Par and HCP information for Men and/or Women for the hole.
8. Click Next to enter next hole, Back for previous hole, or Cancel to start over.
9. Repeat steps 5-7 for remaining holes.
10. Click Finish to save golf course file.
11. Send the new golf course file to the GPS Caddie using iGolf Transfer (see page 33).
12. On the GPS Caddie, go to Map Course (see pp. 17-20) and map GPS points.
13. Click Exit at any time to exit iGolf Transfer.
35

iGolf Transfer
Edit Golf Course
Edit Golf Course
To edit a previously saved golf course file using iGolf Transfer:
1. Gather golf course scorecard information.
2. Click Browse.
3. Select previously saved golf course file.
4. Click Open.
5. Edit Golf Course Name, distance, par and HCP (as necessary).
6. Click Next or Back to edit each hole.
7. Click Save or Cancel when finished.
8. Transfer the revised golf course file to the GPS Caddie using iGolf Transfer (see page 33).
• To avoid duplication, delete the original file from the GPS Caddie using Delete Course from the Main Menu (see page 21).
9. On the GPS Caddie, go to Map Course (see pp. 17-20) and map GPS points.
10. Click Exit at any time to exit iGolf Transfer.
Note: To edit a file using the GPS Caddie, refer to Map Course section on pp. 17-20.
36
iGolf Transfer
Computer Settings
Computer Settings
Computer Settings
This setting specifies the COM assigned to a computer’s USB port, which is
required to synchronize the GPS Caddie.
1. If you know the specific COM port assigned to your USB port on your
computer, select it from the drop-down menu and click Apply.
2. To find the COM assigned to the USB port on your computer:
• Plug in the USB cable to your computer.
• Go to Start, select Settings, select Control Panel, select System, select
Hardware and then Device Manager.
• Locate the Ports topic, open and find the COM assigned to
Prolific USB-to-Serial COM Port.
3. If you cannot determine the specific COM port assigned to USB on your
computer, select AUTO from the drop-down menu (default) and
click Apply.
37

Problem Solution
The GPS Caddie will not turn on
1. Confirm batteries are installed and are installed correctly.
2. Replace batteries with new or fully-charged batteries.
3. Press and hold power button for at least three (3) seconds.
4. Refer to Introduction: Start-up for more information.
I cannot turn the backlight on 1. Turn GPS Caddie on, press Escape to skip Satellite screen and press Power button quickly.
2. Refer to Introduction: Start-up for more information.
The GPS Caddie will not turn off 1. Press and hold power button for at least three (3) seconds.
2. If software freezes, remove batteries to turn off GPS Caddie.
3. Refer to Introduction: Start-up for more information.
The GPS Caddie turned off automatically 1. Replace batteries with new or fully-charged batteries (Some rechargeable batteries not compatible with the GPS Caddie).
2. If problems persist with rechargeable batteries, change setting on GPS Caddie to “Alkaline” and use alkaline batteries.
3. Refer to Introduction: Battery Installation for more information.
There are no golf course files in Play
Section. 1. Add a golf course to the list by mapping a course or transferring a file using the included software.
2. Refer to GPS Caddie: Map Course or iGolf Transfer in this manual for more information.
The handheld does not have any GPS data
for my golf course on it.
NOTE: No golf course files are preloaded on the handheld.
1. Map the course yourself or join iGolf.com to access GPS data on your handheld.
2. Refer to GPS Caddie: Map Course or iGolf.com in this manual for more information.
There are no custom points available for
my golf course.
NOTE: No custom points are preloaded on the handheld.
1. Map the course yourself to acquire custom points for your golf course.
2. Refer to GPS Caddie: Map Course in this manual for more information.
iGolf Transfer
Computer Settings
Find Golf Course
This setting specifies where golf course files are stored on a computer. The default
location is C:\IGOLF. To change to a different location:
• Click Browse and choose a new location or create a
new folder and click OK.
Backup GPS Caddie Files
The Handheld Overrides Computer setting specifies
which files are replaced during backup.
1. If Yes is selected, files on the GPS Caddie will
replace the files with the same name on your
computer (default).
2. If No is selected, files on your computer will not be
replaced by the files with the same name on the
GPS Caddie.
The Location setting specifies where golf course files
are backed up and saved. The default location is
C:\IGOLF\Backup.
To change to a different location:
• Click Browse and choose a new location or create a new folder and click OK.
38
Appendix A
Troubleshooting
39
Table of contents
Other iGolf GPS manuals
