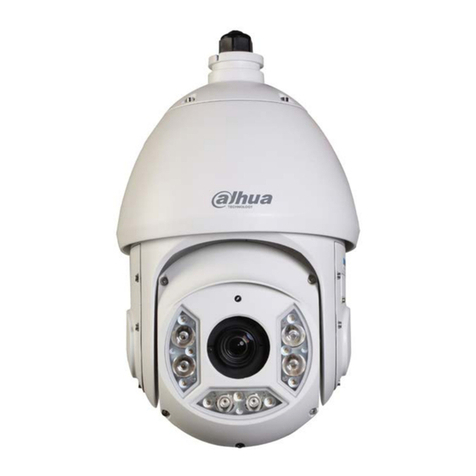
Ildvr Digital Technology USA SC series User manual

Intelligence Speed Ddome SC&SE Series User Manual
1
Thank you for using ILDVR®product, this manual will guide you install and operate SC/SE
Series speed dome camera, please read it thoroughly and carefully.
1. Precautions:
1.1 This manual provides information on features, installation, configuration and applications.
Please read this manual carefully and use the product correctly. Also please refer to the detail
information if you have any inquiries.
1.2 Either DC15V/1A or AC24v power supply. Before using, to confirm power Supply.
1.3 This product should be protected against extremes of pressure, vibration or dampness
during transportation. It should be shipped in parts as original packing. Damage caused by not
obeying said above is not in the warranty.
1.4 Do not attempt to disassemble the camera. In order to prevent electric shock, do not remove
screws or covers. There are no user serviceable parts inside and only qualified personnel are to
service the unit.
1.5 Do not install this product to outdoor environment alone and do not put the camera to shoot
the sun directly.
1.6 Do not use strong or abrasive detergents when cleaning the camera body. Do use a dry cloth
to clean the camera when dirty. In case the dirt is hard to remove, use mild detergent and wipe
gently.
1.7 If necessary, use a professional lens’cleaning paper to clear the lens’glass.
1.8 Never mount the unit on a ceiling that cannot support its weight.

Intelligence Speed Ddome SC&SE Series User Manual
2
2. Function
2.1 The multi-protocol interface transfer inside.
a. The multi-protocol cable can integrate 16 kinds of protocol, the baud rate can be adjusted,
by setting the 1~10 bits of the DIP Switch. The dome is compatible with the most of systems.
b. RS485 COM control; dome address 1~511
2.2 Speed pan/tilt
a. Tilt rotation range 0º~90º with auto flip gives full 180º correctly orientated continuous
vision.
b. 360º pan rotation without dead spots.
c. Extremely smooth low speed pan operation is achieved without picture vibration
2.3. High level of intelligence
a. 64 preset positions, dome stores current horizontal angle and the tilt angle of pan/tilt/zoom
and position parameters into the memorizer even if lose power.
b. Set left and right of the desired view area beforehand and make the dome scan between the
two positions.
c. The preset positions can be programmed to be recalled in a set of sequence. This sequence
can be set to automatically cycle from one position to the next at a setting time .The dome can
remember 6 tracks even if lose power these tracks will not be lost.
2.4 New function
a. Updatable English Character function, display dome address and the presets.
b. Shiftable speed rotation (pan 0º~240º/s tilt 0º~60º/s). In manual control applications,
the high lead it is very difficult to view images when the lens is zoomed to longer focal lengths. To
improve the ergonomics of control the dome has a zoom-pan speed interaction function this will
automatically make control the operating speed of the pan function dependant on the focal length
of the zoom lens. This feature automatically product very good image control under manual pan
operation.
2.5 The range of optical power zoom lens
Optical Power Zoom Lens Focus range Lux
22x F4~f88mm 0.2 Lux(F1.6 1/3s)
23x F3.6~f82.8mm 1Lux(normal)/0.01Lux(D/N)
30x
F3.4~102.0mm
1Lux(normal)/0.01Lux(D/N)
35x
F3.4~119.0mm
1Lux(normal)/0.01Lux(D/N)
2.6 Camera function
□ If you use SONY camera and the on screen display is opened.
(1) Focus: user can adjust focus near or far, when the focus is near state the screen display the
symbol , when the focus is the nearest state the screen display , when the focus is far
state the screen display .
(2) Backlight: In a weak light background, user can turn on the backlight function the screen
will display the symbol .
(3) White Balance: camera can adjust white balance according to the alteration of background
lightness to give a true image. There are 6 modes of white balance can be chosen:
①indoor
②outdoor
③one-push
④ATW ATW
⑤manual WB-MAN
⑥auto
(4) Zoom: User can adjust zoom wide or tele by controller and get desired image .The screen
display
(5) Camera Power: ON

Intelligence Speed Ddome SC&SE Series User Manual
3
(6) Shutter: When turn on the camera the shutter default is 1/50sec,this time the screen display
50, user can turn on the manual shutter function the adjust range :1/3sec~1/10000sec.
(7) Set the Image Effect: User can set the image effect by personal fancy. There are 8 kinds of
image effect can be chosen.
①Pastel
②Neg. Art
③Sepia
④B&W
⑤SOLARIZE
⑥Mosaic
⑦SLIM
⑧Stretch
(8) AE Mode: Setting the parameter of shutter, iris, gain, light, etc.
①Full Auto:automatic exposure mode(FCB-IX48/480:1/60sec. FCB-IX48P/480P:
1/50sec.)
②Shutter Priority:Shutter Priority automatic exposure mode
③Iris Priority:Iris Priority automatic exposure mode (F1.4 to Close, 18 steps)
④Gain Priority:Gain Priority automatic exposure mode (-3 dB to 18 dB, 18 steps),
⑤manual:Manual control mode.
⑥Bright:Bright mode(Manual control Closed to F1.6, 17 steps at 0 dB: F1.4, 7
steps form 0 to 18 dB)
⑦Iris auto:Automatic iris mode
⑧Shutter auto:Automatic shutter mode
⑨Gain auto:Automatic gain mode
(9) ICR shot: The camera can change from color to mono. The picture is clear even if the
illumination is as low as 1 Lux.
(10) Reverse: mirror image.
(11) Freeze: still image.
□If you use Hitachi Camera
(1) Focus: user can adjust focus near or far.
(2) Backlight: In a weak light background, user can turn on the backlight function.
(3) Shutter: When turn on the camera the shutter default is 1/50sec,this time the screen display
50, user can turn on the manual shutter function the adjust range :1/3sec~1/10000sec.
(4) White Balance: camera can adjust white balance according to the alteration of background
lightness to give a true image.
⑸Zoom: User can adjust zoom wide or tele by controller and get desired image.
(6) Camera Power: ON
(7) AE Mode: Setting the parameter of shutter, iris, gain, light, etc. Can choose auto or
manual.
(8) Iris is auto mode cannot adjust.
(9) Reverse (some cameras have not this function): mirror image.
□If you use Honeywell Camera
(1) Zoom, focus, iris can be adjusted by manual.
(2) The other functions can be set by menu.

Intelligence Speed Ddome SC&SE Series User Manual
4
Attention: these symbol only displays when turn on the On Screen Display function. Turn Off it
the screen would only display the image.
3. Dome Setting
3.1 Factory default setting
Factory default protocol is Pelco-D, Baud Rate is 2400, Address is 1.
3.2 Connection:
Before install the dome please confirm the protocol, baud rate of the control system, then
setting the SW2 to fit for the controller.
SW2 Setting Baud Rate (DIP5, 6)
Table 1
DIP
Baud Rate
1 2 3 4 5 6
2400bps
OFF
OFF
4800bps
ON
OFF
9600bps
OFF
ON
19200bps
ON
ON

Intelligence Speed Ddome SC&SE Series User Manual
5
SW1 Setting Dome Address:
Table2
Note:
1. The dome address is binary digit, ON equal “1” OFF equal “0”.
2. The range of ID from 1 to 511.
3. The 10 bit of SW1 is a switch to a resistance on the connection line for the last camera to
the daisy chain.
Protocol type:
DIP
Protocol
Protocol Type Baud Rate Integrate
d Protocol
1th
2th
3th
4th
5th
6th
*Santach OFF ON OFF OFF OFF ON ●
*PELCO-D ON ON OFF OFF OFF OFF ●
*PELCO-P/4800 OFF OFF ON OFF ON OFF ●
*PELCO-P/9600 OFF ON
PANASONIC ON OFF ON OFF OFF ON ○
Longcomity OFF ON ON OFF OFF ON ●
HUNDA600 ON ON ON OFF OFF ON ●
TAIYO OFF OFF OFF ON ON OFF ○
DI
P
Address
1 2 3 4 5 6 7 8 9
1 ON OFF OFF OFF OFF OFF OFF OFF OFF
2 OFF ON OFF OFF OFF OFF OFF OFF OFF
3 ON ON OFF OFF OFF OFF OFF OFF OFF
4 OFF OFF ON OFF OFF OFF OFF OFF OFF
5 ON OFF ON OFF OFF OFF OFF OFF OFF
6 OFF ON ON OFF OFF OFF OFF OFF OFF
7 ON ON ON OFF OFF OFF OFF OFF OFF
8 OFF OFF OFF ON OFF OFF OFF OFF OFF
9 ON OFF OFF ON OFF OFF OFF OFF OFF
10 OFF ON OFF ON OFF OFF OFF OFF OFF
11 ON ON OFF ON OFF OFF OFF OFF OFF
12 OFF OFF ON ON OFF OFF OFF OFF OFF
13 ON OFF ON ON OFF OFF OFF OFF OFF
14 OFF ON ON ON OFF OFF OFF OFF OFF
15 ON ON ON ON OFF OFF OFF OFF OFF
16 OFF OFF OFF OFF ON OFF OFF OFF OFF
17 ON OFF OFF OFF ON OFF OFF OFF OFF
18 OFF ON OFF OFF ON OFF OFF OFF OFF
19 ON ON OFF OFF ON OFF OFF OFF OFF
20 OFF OFF ON OFF ON OFF OFF OFF OFF
... ...
511 ON ON ON ON ON ON ON ON ON

Intelligence Speed Ddome SC&SE Series User Manual
6
VICON ON OFF OFF ON OFF ON ○
Molynx OFF ON OFF ON OFF ON ○
KALATE ON ON OFF ON OFF ON ○
VCL OFF OFF ON ON OFF ON ○
DAIWA ON OFF ON ON OFF ON ○
ALIC OFF ON ON ON OFF ON ●
Ultrak ON ON ON ON OFF ON ●
Table3
Note:
1. Setting Dome Protocol (bit1~bit4 of SW2) and Baud Rate (bit6~bit7 of SW2). If the default
protocol or baud rate is not fit for the given system please set the protocol and baud rate to consist
with the matrix. (● means this protocol has integrated)
2. The above table have listed the kinds of protocol for dome, the normal control are same as
the foreign system. But some special protocol such as “Santach”,”PELCO-D” and “PELCO-P”
without the command of control some especial functions, in order to use the special functions of
dome, so we changed the command of calling/setting NO.51 preset to NO.64 preset to control
them.
Refer to the table 4:
N Object of control
Keyboard control
Call the N position
Preset the N position
51
Auto scan
Auto scan
(
low speed
)
Auto cruise
52 Auto scan(middle speed)Set the start point of scan
53
Auto scan
(
high speed
)
Set the end point of scan
54
Camera power
Power on
Power off
55 Back light * On Off
56
ICR shot
On
Off
57
OSD (On Screen Display) *
On
Off
58
Digital Zoom *
On
Off
59
FOCUS
Auto
Manual
60
IRIS
Auto
Manual
61
White Balance Mode *
Auto
Manual
62 Indoor Outdoor
63
ATW
One Push WB
64 Character control
Set the title of the current
position
Table 4
Note:
1. The object marked “*” can be remembered by dome even if lose power.
2. Some cameras have it’s own menu, to open/close the menu by the command “turn on the
OSD”, and use the command “turn off the OSD” to open/close the OSD.
3. Some cameras have not the function “ICR shot” or this function is automatic, so user
cannot control it by command.
Auto Cruise:
(1) The sequence is automatic cycle from the 1 to the 16 preset, if there are some presets
have not setAuto Cruise would skip them.
(2) The dwelling time is 4 seconds on per position.
(3) To turn on auto cruise us the command of setting the 51 preset.
4. Auto Scan:
(1) The dome scans between two positions which can be set.
(2) There are 3 classes of scan speed can be chosen use the command of calling the
51/52/53 preset.
(3) The dwelling time at the start point and end point is 3 seconds.
5. Because preset/call the 51 to 64 positions has changed to assistant function, so there are
total 50 presets.

Intelligence Speed Ddome SC&SE Series User Manual
7
6. If the dome being provided with Updatable English Character function, we can modify the
caption by next step: First, open the OSD (if OSD OFF). Second, call the present position which
you want to modify the caption by using call preset positions command. Third, set the 64 positions
present by using setting preset number command. Forth, when the cursor winking, you can modify
the caption by using rocker. In the end, you can quit the state by setting the 64 positions present.
4. Structure and installing
4.1 Structure
1. ID-code
2. out-line socket
3. bottom board
4. barrel body
5. lens hood
6. camera
1. Please read this manual carefully.
2. Please set the protocol and baud rate before installation.
3. Connecting power supply, RS485 and video signal correctly. Attention, the dome power
supply is DC15V 1A, please use the supplementary switch power supply.
If use the 15V/1A power supply the dome has one line alarm signal input. If there is alarm
signal input the dome will call the 32 preset (refer to the function intro). If use the AC24V power
supply the dome has not this function.
4. Socket Intro:
There are 2 ways to connect the dome
a: socket mode.(default)
1ALARM _COM
2 ALARM _IN
3 DC15V
4 GND
5 RS485+
6 RS485-
7 VIDEO-
8 VIDEO+
1 AC24V
2 AC24V
3 RS485+
4 RS485-
5 VIDEO-
6 VIDEO+
1 DC15V
2 GND
3 RS485+
4 RS485-
5 VIDEO-
6 VIDEO+
OR
(Before using, please checkpower supply.)

Intelligence Speed Ddome SC&SE Series User Manual
8
b: out-line mode.(According to the customer Request)
NO.
1
15V DC +
2 GND
3
RS 485 +
4
RS 485 -
5
VIDEO -
6
VIDEO +
Socket mode (default)
5. Set speed dome address:
a. Remove the clip
b.The dome address is 9 bits binary digit, the range is from 1 to 511, refer to the table 2.
c. Recover the clip.
4.2 Installation
(Referenced equipment must to be chosen and bought.)
1. Drop ceiling mount (Fig 1):
Fig 1
2. Hanging ceiling mount (Fig 2):
The follow is installed on ceiling under the dome unit base
3. Embedded dome cover mount (Fig 3):
4. Outdoor mount (Fig 4)
Fig 2 Fig 3

Intelligence Speed Ddome SC&SE Series User Manual
9
Fig 4
5. Reference of installation:
Take off the bottom board; put the connection line through the center hole on the bottom
board. Refer to the following fig 5, use 3 bolts to fix the bottom board on the ceiling, and then
connect the dome with the external connection line. Finally install the dome to the bottom board,
circumgyrate rightward until the shrapnel bounding.
Fig 5
5. Technical data table
Specification
Image inductor 1/4″color CCD
Pixels 752H×582V(440000pixels)PAL
In-phase system In-phase inside
Video out 1.0Vp-p/75Ω
White balance Auto/manual
Power supply DC15V±10% 1.0A
Power consumption 10VA
Weight 2Kg
Installation Drop ceiling mount, Surface mount, etc.
Opposite temp 10-75%

Intelligence Speed Ddome SC&SE Series User Manual
10
Environment temp 0℃~ 40℃
Camera
function
Scan system 15.625KHz(H) 50Hz(V)
Horizontal 480 horizontal
Signal-to-Noise > 48db
Shutter 1/3~1/10000sec
Sensitivity 0.01~1Lux(F1.6)
Lens parameter Zoom rate 16x, 18x, 22x, 23x, 27x optical 8x digital
Iris Auto / manual
Focus Auto / manual
Dome
Function
Pan speed 0~240°/s
Tilt speed 0~60°/s
Preset 64 presets
Auto cruise At best 6 cruises
6. Troubleshooting table
Problem
Probable cause
Solution
On power no action Power supply fault Replace
Bad connection of the power
Make correction
Transformer damaged
Replace
On power cannot self-check
have image but have motor
noise
Mechanical failure
Repair
Camera incline
Reinstall
Power supply not enough
Replace
Self-check ok, but have no
image
Video signal fault
Reinstall
Bad connection of the video Press to full connect
Camera damaged
Replace
Self-check ok but cannot
control
RS485 Bus bad connection
Check the RS485 connection
Dome id setting is wrong
Reselect
Protocol setting is wrong
Reset and on power again
Vague image
Bad connection of the video
Press to full connect
Power supply not enough
Replace
On power cannot control
Self check error
On power again
Bad connection of control
Press to full connect
Bad control of matrix
On power again
There are some reason cause to the familiar problem, and it's resolve method, it is just list to be
consulted. If you have different requirements or problems, please contact us directly to ask the
technical support.
Copyright Reserved
Manufacturer: ILDVR Digital Technology USA Inc
Website: www.ildvr.com
Tech-support: supprot@ildvr.com
This manual suits for next models
1
Table of contents
Popular Security Camera manuals by other brands
Novus
Novus NVIP-8H-6202M quick start guide
Dahua
Dahua IPC-HDB3200CP(N) Series user manual
Motorola
Motorola Avigilon H4 Series installation guide
Atlantis Land
Atlantis Land NetCamera A02-IPCAM-W54 user manual
D-Link
D-Link DCS-3110 - SECURICAM Fixed Network Camera Quick installation guide
ACTi
ACTi ACM-3001 Hardware user manual
