IMG STAGE LINE CD-112RDS/BT User manual
CD-112RDS/BT Bestellnummer 21.2950
BEDIENUNGSANLEITUNG • INSTRUCTION MANUAL • MODE D’EMPLOI
ISTRUZIONI PER L’USO • GEBRUIKSAANWIJZING • MANUAL DE INSTRUCCIONES • INSTRUKCJA OBSŁUGI
SIKKERHEDSOPLYSNINGER • SÄKERHETSFÖRESKRIFTER • TURVALLISUUDESTA
CD/MP3-SPIELER MIT FM-RDS-TUNER
CD/MP3 PLAYER WITH FM RDS TUNER
LECTEUR CD/MP3 AVEC TUNER FM/RDS
LETTORE CD/MP3 CON TUNER FM RDS

2
wwwwww..iimmggssttaaggeelliinnee..ccoomm
Bevor Sie einschalten …
Wir wünschen Ihnen viel Spaß mit Ihrem neuen Gerät
von „img Stage Line“. Bitte lesen Sie diese Bedienungs-
anleitung vor dem Betrieb gründlich durch. Nur so lernen
Sie alle Funktionsmöglichkeiten kennen, vermeiden
Fehlbedienungen und schützen sich und Ihr Gerät vor
eventuellen Schäden durch unsachgemäßen Gebrauch.
Heben Sie die Anleitung für ein späteres Nachlesen auf.
Der deutsche Text beginnt auf der Seite 4.
Before switching on …
We wish you much pleasure with your new “img Stage
Line” unit. Please read these operating instructions care-
fully prior to operating the unit. Thus, you will get to know
all functions of the unit, operating errors will be pre-
vented, and yourself and the unit will be protected
against any damage caused by improper use. Please
keep the operating instructions for later use.
The English text starts on page 9.
Avant toute installation …
Nous vous souhaitons beaucoup de plaisir à utiliser cet
appareil “img Stage Line”. Lisez ce mode dʼemploi entiè-
rement avant toute utilisation. Uniquement ainsi, vous
pourrez apprendre lʼensemble des possibilités de fonc-
tionnement de lʼappareil, éviter toute manipulation erronée
et vous protéger, ainsi que lʼappareil, de dommages éven-
tuels engendrés par une utilisation inadaptée. Conser-
vez la notice pour pouvoir vous y reporter ultérieurement.
La version française se trouve page 14.
Prima di accendere …
Vi auguriamo buon divertimento con il vostro nuovo
apparecchio di “img Stage Line”. Leggete attentamente
le istruzioni prima di mettere in funzione lʼapparecchio.
Solo così potete conoscere tutte le funzionalità, evitare
comandi sbagliati e proteggere voi stessi e lʼapparecchio
da eventuali danni in seguito ad un uso improprio. Con-
servate le istruzioni per poterle consultare anche in
futuro.
Il testo italiano inizia a pagina 19.
D
A
CH
GB
Antes de la utilización …
Le deseamos una buena utilización para su nuevo apa-
rato “img Stage Line”. Por favor, lea estas instrucciones
de uso atentamente antes de hacer funcionar el aparato.
De esta manera conocerá todas las funciones de la uni-
dad, se prevendrán errores de operación, usted y el apa-
rato estarán protegidos en contra de todo daño causado
por un uso inadecuado. Por favor, guarde las instruccio-
nes para una futura utilización.
La versión española comienza en la página 29.
Voor u inschakelt …
Wij wensen u veel plezier met uw nieuwe apparaat van
“img Stage Line”. Lees deze gebruikershandleiding gron-
dig door, alvorens het apparaat in gebruik te nemen.
Alleen zo leert u alle functies kennen, vermijdt u foutieve
bediening en behoedt u zichzelf en het apparaat voor
eventuele schade door ondeskundig gebruik. Bewaar de
handleiding voor latere raadpleging.
De Nederlandstalige tekst vindt u op pagina 24.
Przed uruchomieniem …
Życzymy zadowolenia z nowego produktu “img Stage
Line”. Dzięki tej instrukcji obsługi będą państwo w stanie
poznać wszystkie funkcje tego urządzenia. Stosując się
do instrukcji unikną państwo błędów i ewentualnego
uszkodzenia urządzenia na skutek nieprawidłowego
użytkowania. Prosimy zachować instrukcję.
Tekst polski zaczyna się na stronie 34.
Før du tænder …
Tillykke med dit nye “img Stage Line” produkt. Læs sik-
kerhedsanvisningerne nøje før ibrugtagning, for at
beskytte Dem og enheden mod skader, der skyldes for-
kert brug. Gem venligst denne betjeningsvejledning til
senere brug.
Sikkerhedsanvisningerne findes på side 40.
Innan du slår på enheten …
Vi önskar dig mycket glädje med din nya “img Stage
Line” produkt. Läs igenom säkerhetsföreskrifterna innan
enheten tas i bruk för att undvika skador till följd av
felaktig hantering. Behåll instruktionerna för framtida
bruk.
Säkerhetsföreskrifterna återfinns på sidan 40.
Ennen kytkemistä …
Toivomme Sinulle paljon miellyttäviä hetkiä uuden “img
Stage Line” laitteen kanssa. Ennen laitteen käyttöä pyy-
dämme Sinua huolellisesti tutustumaan turvallisuusoh-
jeisiin. Näin vältyt vahingoilta, joita virheellinen laitteen
käyttö saattaa aiheuttaa. Ole hyvä ja säilytä käyttöohjeet
myöhempää tarvetta varten.
Turvallisuusohjeet löytyvät sivulta 41.
F
B
CH
I
ENL
PL DK
SFIN
B

2 31
5 64
8 97
10/ 0
STOP
PROG MEM
FIND ASM
ESP MO /ST
PLAY
PAUSE
REV
FUNC
DISPLAYREPEAT
MUTE
FOLDER
DIRECT +10
CD/ TUNER
SLEEP
DOWN UP
M-DOWN M-UP
RDS
S IP CUE
3
CD
PROG
REPEAT FIND MUTE FUNC
SKIPREV CUE STOP PLAY/ PAUSE
FOLDER
SD / MMC
CARD
CD
TR 02 00:53 ESP
4 5 6 7 8 9 10 11
12 13 14 15 16 17 18
+5
12345
DOWN UP
TUNER
IR
MEMORY ASM
PAIR
DOWN UP
BT POWER
PAIR
CD-
112RDS/BT
CD / MP3 PLAYER FM RDS TUNER
STEREO
FM 88.30MHZ CH04
19 20 21 22 23 24 25
26 27 28 29 30 31
POWER
CD
PROG
REPEAT FIND MUTE FUNC
SKIPREV CUE STOP PLAY/ PAUSE
FOLDER
SD / MMC
CARD
+5
12345
DOWN UP
TUNER
IR
MEMORY ASM
PAIR
DOWN UP
BT POWER
PAIR
CD-
112RDS/BT
CD / MP3 PLAYER FM RDS TUNER
STEREO
FM 88.30MHZ CH04
CD
TR 02 00:53 ESP
12 3
6789
12345
CD PLAYER OUT LR
REMOTE CONTROL PRIORITY OUT LR
ANTENNA
BT OUT
TUNER
OUT
L
R
L
R
230 V~ /
50 Hz
USE ONLY WITH A 250V FUSE
32 33 34 35 36 37 38 39
17
7/29
45
44
15/30
6/28
8
9
13
43
14/42
41
40
46
4716
AUTO PLAY
MANUAL PLAY
48

4
D
A
CH
Auf der ausklappbaren Seite 3 finden Sie
alle beschriebenen Bedienelemente und An-
schlüsse.
1 Übersicht der Bedienelemente
und Anschlüsse
1.1 Frontseite
1Ein-/Ausschalter POWER
2Bedienfeld für den CD/MP3-Spieler
(Details siehe Abb. 2)
3Bedienfeld für den Tuner
(Details siehe Abb. 3)
1.2 CD/MP3-Spieler
4USB-Schnittstelle zum Einstecken eines USB-
Sticks oder zum Anschluss einer Festplatte
5CD-Einzugschlitz
Die CD soweit in den Schlitz schieben, bis sie
automatisch eingezogen wird.
6Taste PROG, um zum Zusammenstellen
einer eigenen Titelfolge in den Programmier-
modus zu schalten (Kap. 6.2.7)
7Tasten REV – SKIP – CUE für die Titelanwahl
sowie den schnellen Vor- und Rücklauf
Titelanwahl
Mit jedem Drücken der Taste CUE wird
einen Titel vorgesprungen; durch Drücken
der Taste REV wird an den Titelanfang ge-
sprungen und mit jedem weiteren Drücken
einen Titel zurück.
schneller Vor-/Rücklauf
Für den Vorlauf die Taste CUE gedrückt
halten, für den Rücklauf die Taste REV.
8Taste STOP zum Beenden des Abspielens
9Taste PLAY/PAUSE zum Umschalten zwi-
schen Wiedergabe und Pause
10 Anzeige CD: leuchtet, wenn der CD/MP3-
Spieler mit der Fernbedienung gesteuert wer-
den kann; siehe auch Position 46 Taste CD/
TUNER
11 Taste EJECT zum Auswerfen der CD
12 Display des CD/MP3-Spielers
13 Taste REPEAT zum Anwählen der Wieder-
holfunktionen und der Zufallswiedergabe
Grundeinstellung (PLAY ALL)
alle Titel des Tonträgers oder einer pro-
grammierten Titelfolge werden einmal ab-
gespielt
erster Tastendruck (PLAY ALL RANDOM)
einmalige Wiedergabe der Titel in zufälli-
ger Reihenfolge
nächster Tastendruck (REPEAT TRACK)
ständige Wiederholung des angewählten
Titels
nächster Tastendruck (REPEAT FOLDER)
ständige Wiederholung aller Titel im ange-
wählten Ordner
(Funktion nur bei MP3-Dateien vorhanden)
nächster Tastendruck (REPEAT ALL)
ständige Wiederholung aller Titel
nächster Tastendruck (RANDOM REPEAT)
ständiges Abspielen der Titel in zufälliger
Reihenfolge
nächster Tastendruck (PLAY ALL)
Zurückschalten auf die Grundeinstellung
14 Tasten FOLDER bei MP3-Dateien zur Ord-
neranwahl:
Zum Anwählen des nächsten Ordners die
Taste drücken. Zum Zurückspringen auf
den vorherigen Ordner die Taste betäti-
gen. Dabei wird immer auf den ersten Titel
des angewählten Ordners gesprungen.
15 Taste FIND zur Suche von MP3-Titeln und
Ordnern (Kap. 6.2.2 C und D)
16 Taste MUTE zum Stummschalten des CD/
MP3-Spielers
17 Taste FUNC zum Wählen des Tonträgers
(CD, USB-Speicher, Speicherkarte)
18 Schlitz zum Einstecken einer Speicherkarte
1.3 Tuner
19 Infrarotsensor für die Fernbedienungssignale
20 Anzeige TUNER: leuchtet, wenn der Tuner mit
der Fernbedienung gesteuert werden kann;
siehe auch Position 46 Taste CD/TUNER
21 Stationstasten 1 – 5 zum Wählen der auf die-
sen Tasten gespeicherten Sender
22 Taste PAIR zum Koppeln mit einer Bluetooth-
Signalquelle (Kap. 6.3)
23 Anzeige PAIR:
Blinkt bei eingeschaltetem Bluetooth-Emp-
fänger.
Leuchtet konstant bei erfolgter Kopplung mit
einer Bluetooth-Signalquelle.
24 Antenne des Bluetooth-Empfängers
25 Taste BT POWER/ zum Ein- und Aus-
schalten des Bluetooth-Empfängers (Taste
länger gedrückt halten) und um die Wieder-
gabe bei Bluetooth-Betrieb zu unterbrechen
oder fortzufahren (Taste kurz drücken)
26 Display des Tuners
27 Taste +5 zum Wählen von Sendern der Spei-
cherplätze 6 – 30: Nach dem Drücken einer
Stationstaste (21) die Taste +5 entsprechend
oft drücken.
28 Taste MEMORY (MEM)* zum Speichern von
Sendern: Nach dem Einstellen eines Senders
mit den Tasten DOWN / UP (29) die Taste
MEMORY drücken, dann den Speicherplatz
mit den Stationstasten 1 – 5 (21) und +5 (27)
wählen. Abschließend die Taste MEMORY
erneut drücken.
29 Tasten DOWN / UP zur Sendereinstellung:
Ein kurzer Tastendruck erhöht bzw. verringert
die Empfangsfrequenz; wird eine der Tasten
länger als 0,5 Sek. gedrückt, startet der Sen-
dersuchlauf (vor- oder rückwärts laufend).
30 Taste ASM zum automatischen Suchen und
Speichern der Sender
Zum Aktivieren der Funktion die Taste kurz
gedrückt halten.
31 Tasten DOWN/ und UP/ für die Titel-
anwahl sowie den schnellen Vor- und Rück-
lauf bei Bluetooth-Betrieb
*Beschriftung auf der Fernbedienung
1.4 Rückseite
32 RS-232-Schnittstelle zur Fernsteuerung des
Gerätes über einen Computer
33 Anschluss ANTENNA für eine UKW-Antenne
Eine einfache UKW-Antenne liegt dem Gerät
bei.
34 XLR-Anschluss PRIORITY OUT
Hier liegt das Signal des Bluetooth-Empfän-
gers an (1. Priorität) oder des CD/MP3-Spie-
lers (2. Priorität) oder des Tuners.
35 Cinch-Buchsen BT OUT für den Audioaus-
gang des Bluetooth-Empfängers
36 Cinch-Buchsen TUNER OUT für den Audio-
ausgang des Tuners
37 XLR-Anschluss CD PLAYER OUT für den
Audioausgang des CD/MP3-Spielers
38
Netzbuchse zum Anschluss an eine Steckdose
(230 V~/50 Hz) über das beiliegende Netzkabel
39 Halterung für die Netzsicherung
Eine geschmolzene Sicherung nur durch
eine gleichen Typs ersetzen.
1.5 Fernbedienung
Die Tasten der Fernbedienung bis einschließlich
der Position 30 sind auch am Gerät vorhanden
und in den Kapiteln 1.2 und 1.3 beschrieben. Die
Tasten mit zwei Positionsnummern haben ver-
schiedene Funktionen bei der Steuerung des
CD/MP3-Spielers (linke Nummer) und des
Tuners (rechte Nummer). Das Umschalten der
Steuerung zwischen dem CD/MP3-Spieler [An-
zeige CD (10) leuchtet] und dem Tuner [Anzeige
TUNER (20) leuchtet] erfolgt mit der Taste CD/
TUNER (46). Die folgenden Tasten sind nur auf
der Fernbedienung vorhanden:
40 Zifferntasten 1 – 10/0
–für den CD/MP3-Spieler zur Direktwahl
eines Titels, Beispiele:
Titelnr. Tasten
4 4, PLAY/PAUSE
10 1, 10/0, PLAY/PAUSE
135 1, 3, 5, PLAY/PAUSE
–für den Tuner zum Anwählen der gespei-
cherten Sender 1 – 10; zum Anwählen der
Sender 11 – 30 anschließend die Taste
+10 (45) entsprechend oft drücken
41 Taste DIRECT für den Tuner zur Direktwahl
einer Empfangsfrequenz:
1. Taste DIRECT drücken
2. Frequenz mit den Zifferntasten (40) eintip-
pen
3. Taste DIRECT drücken
42 Tasten M-DOWN / M-UP zum schrittweisen
Anwählen der gespeicherten Sender (vor-
oder rückwärts)
43 Taste DISPLAY für den CD/MP3-Spieler
zum Umschalten der Informationen in der
unteren Displayzeile während der Wieder-
gabe von MP3-Dateien
Die obere Displayzeile zeigt bei MP3-Dateien
immer durchlaufend den Namen des Titels,
des Interpreten (Artist) und des Albums an.
Grundeinstellung
In der unteren Zeile wird die Titelnummer
(TR) und die gespielte Zeit des Titels ange-
zeigt
1. Tastendruck
Der Ordnername wird angezeigt
2. Tastendruck
Der Dateiname wird angezeigt
3. Tastendruck
Die Anzahl der Ordner und der Titel wer-
den angezeigt
4. Tastendruck
Zurückschalten auf die Grundeinstellung
44 Taste ESP MO/ST
–für den CD/MP3-Spieler zum Aus- und
Wiedereinschalten des Anti-Schock-Spei-
chers (nicht bei MP3-Betrieb möglich)
–für den Tuner zum Umschalten zwischen
Stereo- und Mono-Empfang
45 Taste +10 für den Tuner zum Anwählen der
gespeicherten Sender 11 – 30: Nach dem
Drücken einer Zifferntaste (40) die Taste +10
entsprechend oft drücken.
46 Taste CD/TUNER zum Umschalten der Fern-
bedienung, um den CD/MP3-Spieler zu steu-
ern [Anzeige CD (10) leuchtet] oder den
Tuner [Anzeige TUNER (20) leuchtet]
47 Taste SLEEP zum automatischen Ausschal-
ten des Tuners nach einer eingestellten Zeit
(90 – 10 Minuten); mit jedem Drücken der
Taste verringert sich die Zeit um 10 Minuten.
Zum Wiedereinschalten des Tuners die Taste
SLEEP drücken (Kap. 6.4.4).
48 Taste RDS zum Umschalten zwischen ver-
schiedenen Zusatzinformationen bei RDS-
Empfang

2 Hinweise für den
sicheren Gebrauch
Das Gerät entspricht allen relevanten Richtlinien
der EU und ist deshalb mit gekennzeichnet.
Beachten Sie auch unbedingt folgende Punkte:
Das Gerät ist nur zur Verwendung im Innen-
bereich geeignet. Schützen Sie es vor Tropf-
und Spritzwasser, hoher Luftfeuchtigkeit und
Hitze (zulässiger Einsatztemperaturbereich
0 – 40 °C).
Stellen Sie keine mit Flüssigkeit gefüllten Ge-
fäße, z. B. Trinkgläser, auf das Gerät.
Nehmen Sie das Gerät nicht in Betrieb und
ziehen Sie sofort den Netzstecker aus der
Steckdose,
1. wenn sichtbare Schäden am Gerät oder am
Netzkabel vorhanden sind,
2. wenn nach einem Sturz oder Ähnlichem der
Verdacht auf einen Defekt besteht,
3. wenn Funktionsstörungen auftreten.
Geben Sie das Gerät in jedem Fall zur Repa-
ratur in eine Fachwerkstatt.
Ziehen Sie den Netzstecker nie am Kabel aus
der Steckdose, fassen Sie immer am Stecker
an.
Verwenden Sie für die Reinigung nur ein tro-
ckenes, weiches Tuch, niemals Wasser oder
Chemikalien.
Wird das Gerät zweckentfremdet, nicht richtig
angeschlossen, falsch bedient oder nicht fach-
gerecht repariert, kann keine Haftung für
daraus resultierende Sach- oder Personen-
schäden und keine Garantie für das Gerät
übernommen werden.
3 Einsatzmöglichkeiten
Das Gerät CD-112RDS/BT ist eine Kombination
aus CD/MP3-Spieler, FM-RDS-Tuner und Blue-
tooth-Empfänger und eignet sich für vielfältige
Beschallungsaufgaben, z. B. im Theater, in Gast-
stätten, in Warteräumen. Der CD/MP3-Spieler
bietet dazu spezielle Funktionen wie z. B. End-
loswiedergabe, Zufallswiedergabe, MP3-Wieder-
gabe von USB-Speichermedien und SD/SDHC-
Speicherkarten (max. 32 GB).
Mit dem Gerät können Audio-CDs, selbst
gebrannte Audio-CDs (Audio CD-R) sowie CDs
mit Titeln im MP3-Format abgespielt werden.
Bei wiederbeschreibbaren CDs (CD-RW) kann
es jedoch je nach CD-Typ, verwendetem CD-
Brenner und Brennprogramm beim Abspielen zu
Problemen kommen.
4 Auto-Start-Funktion
ausschalten
Der CD/MP3-Spieler ist mit einer Auto-Start-
Funktion ausgestattet: Nach dem Einschalten
des Gerätes und dem Einlesen eines Tonträgers
(CD, USB-Speicher oder Speicherkarte) startet
automatisch die Wiedergabe des ersten Titels.
Wenn das automatische Starten nicht ge-
wünscht wird [Start der Wiedergabe erst durch
Drücken der Taste PLAY/PAUSE (9)], lässt sich
die Auto-Start-Funktion ausschalten.
Vor dem Öffnen des Gerätes unbedingt den
Netzstecker aus der Steckdose ziehen!
Auf der Leiterplatte mit dem Netzteil und den
Audio-Ausgangsbuchsen befindet sich eine
Steckbrücke (siehe Pfeil in der Abb. 6). Die Auto-
Start-Funktion ist eingeschaltet, wenn sich die
Brücke in der Position AUTO PLAY befindet. Zum
Ausschalten der Funktion die Brücke in die Posi-
tion MANUAL PLAY stecken.
5 Gerät aufstellen und
anschließen
Das Gerät ist für die Montage in ein Rack
(482 mm/19″) vorgesehen, kann aber auch als
frei stehendes Tischgerät verwendet werden.
Für den Einbau in ein Rack wird 1 HE benötigt
(HE = Höheneinheit = 44,45 mm).
Vor dem Anschluss bzw. vor dem Verändern
von Anschlüssen den CD-112RDS/BT und die
anzuschließenden Geräte ausschalten.
1) Um die Audiosignale an das nachfolgende
Gerät (z. B. Mischpult oder Verstärker) wei-
terzuleiten, sind vier Line-Pegel-Ausgänge
vorhanden:
PRIORITY OUT (34)
1. Für das Signal des Bluetooth-Empfängers;
das Signal hat Vorrang vor den Signalen
des CD/MP3-Spielers und des Tuners.
2. Wird kein Bluetooth-Signal empfangen
oder ist die Wiedergabe auf Pause ge-
schaltet, liegt hier das Signal des CD/
MP3-Spielers an.
3. Ist der CD/MP3-Spieler auf Pause oder
Stopp geschaltet, liegt hier das Signal des
Tuners an.
BT OUT (35)
für das Signal des Bluetooth-Empfängers
TUNER OUT (36)
für das Signal des Tuners
CD PLAYER OUT (37)
für das Signal des CD/MP3-Spielers
2) Eine UKW-Antenne an die Buchse AN-
TENNA (33) anschließen. Eine einfache
UKW-Antenne liegt dem Gerät bei.
3) Zum Schluss das beiliegende Netzkabel
zuerst in die Netzbuchse (38) und dann in
eine Steckdose (230 V~/50 Hz) stecken.
6 Bedienung
Das Gerät mit dem Netzschalter POWER (1)
einschalten. Auf dem Display (12) des CD/MP3-
Spielers erscheint die Anzeige Welcome. Das
Display (26) des Tuners zeigt den zuletzt ge-
wählten Sender an.
6.1 Fernbedienung
1) Zum Einsetzen der Batterien (2 × 1,5 V, Größe
AAA = Micro) auf der Rückseite der Fernbe-
dienung den Batteriefachdeckel abnehmen.
Die Batterien, wie im Batteriefach angege-
ben, einsetzen. Das Fach mit dem Deckel
wieder schließen.
Bei längerem Nichtgebrauch die Batterien
herausnehmen, damit die Fernbedienung bei
einem eventuellen Auslaufen der Batterien
nicht beschädigt wird.
2) Die Fernbedienung beim Drücken einer Taste
immer in Richtung des Sensors IR (19) hal-
ten. Dabei muss Sichtverbindung zwischen
der Fernbedienung und dem Sensor beste-
hen.
3) Am Gerät zeigen die LEDs CD (10) und
TUNER (20) an, ob der CD/MP3-Spieler oder
der Tuner mit der Fernbedienung gesteuert
werden kann. Zum Umschalten der Steue-
rung die Taste CD/TUNER (46) drücken. Die
rote Beschriftung auf der Fernbedienung
kennzeichnet die Funktionen für den Tuner.
4) Lässt die Reichweite der Fernbedienung
nach, sind die Batterien verbraucht und müs-
sen ausgewechselt werden.
6.2 CD/MP3-Spieler
Nach dem Einschalten liest der CD/MP3-Spieler
zuerst die CD ein. Ist keine CD eingeschoben,
wird der USB-Speicher eingelesen. Ist kein USB-
Speicher angeschlossen, wird die Speicherkarte
eingelesen. Ist auch keine Speicherkarte einge-
steckt, zeigt das Display (12) NO DISC an.
6.2.1 Musiktitel abspielen
1) Eine CD, mit der Beschriftung nach oben zei-
gend, in den Einzugschlitz (5) schieben, bis
sie automatisch eingezogen wird
und/oder
einen USB-Stick in den USB-Anschluss (4)
stecken oder eine Festplatte (ggf. mit eigener
Stromversorgung) mit dem USB-Anschluss
verbinden
und/oder
eine Speicherkarte in den Schlitz SD/MMC
CARD (18) stecken. Dabei muss die abge-
schrägte Ecke der Karte nach oben zeigen.
Soll die Karte wieder entnommen werden, sie
etwas hineindrücken, sodass sie ausrastet.
2) Den Tonträger (CD, USB-Speicher, Spei-
cherkarte) ggf. mit der Taste FUNC (17) an-
wählen.
3) Nach dem Einlesevorgang startet automa-
tisch die Wiedergabe des ersten Titels.
Wurde jedoch die Auto-Start-Funktion aus-
geschaltet (Kap. 4), mit der Taste PLAY/
PAUSE (9) die Wiedergabe des ersten Titels
starten. Zum Anwählen anderer Titel siehe
Kapitel 6.2.2.
4) Während des Abspielens ist in der oberen
Displayzeile rechts das Wiedergabesymbol
eingeblendet. Die untere Zeile zeigt die Num-
mer (TR …) des laufenden Titels und die
bereits verstrichene Abspielzeit (Min. : Sek.)
des Titels an. Ganz rechts wird MP3 bei Titeln
im MP3-Format angezeigt oder ESP bei
Standard-Audio-CDs.
5) Bei MP3-Dateien erscheint zusätzlich durch-
laufend in der oberen Zeile:
File – … = Dateiname
Title – … = Titelname
Artist – … = Name des Künstlers
Album – … = Name des Albums
Hinweise: Der Dateiname wird nur nach dem Star-
ten der Wiedergabe angezeigt. Fehlt eine Angabe,
zeigt das Display anstelle des Namens NONE an.
6) Durch Drücken der Taste DISPLAY (43) auf
der Fernbedienung können bei MP3-Dateien
Verbrauchte Batterien dürfen nicht in
den Hausmüll geworfen werden. Ge-
ben Sie sie zur umweltgerechten Ent-
sorgung nur in den Sondermüll (z. B.
Sammelbehälter im Einzelhandel).
WARNUNG Weil das Gerät für die Änderung
geöffnet werden muss, darf dies
nur durch eine ausgebildete Fach-
kraft erfolgen. Durch unsachge-
mäßes Vorgehen besteht die Ge-
fahr eines elektrischen Schlages!
WARNUNG Das Gerät wird mit lebensge-
fährlicher Netzspannung versorgt.
Nehmen Sie deshalb nie selbst
Eingriffe am Gerät vor. Durch un-
sachgemäßes Vorgehen besteht
die Gefahr eines elektrischen
Schlages.
Soll das Gerät endgültig aus dem Be-
trieb genommen werden, übergeben
Sie es zur umweltgerechten Entsorgung
einem örtlichen Recyclingbetrieb.
D
A
CH
5

in der unteren Displayzeile verschiedene
Informationen angezeigt werden:
Grundeinstellung
In der unteren Zeile wird die Titelnummer
und die gespielte Zeit des Titels angezeigt
1. Tastendruck
Der Ordnername wird angezeigt
2. Tastendruck
Der Dateiname wird angezeigt
3. Tastendruck
Die Anzahl der Ordner und der Titel wer-
den angezeigt
4. Tastendruck
Zurückschalten auf die Grundeinstellung
7) Mit der Taste PLAY/PAUSE kann zwischen
Wiedergabe und Pause gewechselt werden.
Im Pausenmodus ist das Pausensymbol
eingeblendet und die Zeitangabe blinkt.
8) Wenn die Wiedergabe beendet werden soll,
die Taste STOP (8) drücken. Das Display
zeigt dann in der zweiten Zeile:
bei Standard-Audio-CDs
– die Anzahl der Titel (TR …)
– die Gesamtspielzeit (Min. : Sek.)
bei Tonträgern mit MP3-Dateien
– die Anzahl der Ordner
– die Anzahl der Titel
9) Zum Auswerfen der CD die Taste EJECT
(11) drücken. Das Display zeigt EJECT, die
CD wird herausgefahren und kann entnom-
men werden. Wird die CD nicht aus dem Ein-
zugschlitz genommen, zieht das Gerät sie
nach ca. 10 s wieder automatisch ein.
6.2.2 Titelanwahl
A – Direktwahl der Titelnummer
Mit den Zifferntasten (40) lässt sich ein Titel
durch Eingabe seiner Nummer direkt anwählen.
Zum Starten des Titels anschließend die Taste
PLAY/PAUSE (9) drücken. Beispiele:
Titelnr. Tasten
4 4, PLAY/PAUSE
10 1, 10/0, PLAY/PAUSE
135 1, 3, 5, PLAY/PAUSE
Hinweis: MP3-Titel werden vom Gerät wie folgt durch-
nummeriert:
1. alle Titel ohne Ordner im Hauptverzeichnis ROOT
2. alle Titel in Ordnern im Hauptverzeichnis
3. alle Titel in Unterordnern usw.
Die Nummerierung der Titel und Ordner erfolgt nicht in
alphabetischer Reihenfolge, lässt sich jedoch mit der
Suchfunktion leicht feststellen (Kap. C und D).
B – Titel vor- oder zurückspringen
Um einen oder mehrere Titel vor- oder zurück-
zuspringen, die Taste CUE bzw. REV (7) kurz
(mehrfach) drücken.
Taste CUE: Zum nächsten Titel springen
Taste REV: An den Anfang des gerade laufen-
den Titels springen. Durch weiteres Drücken der
Taste REV wird immer einen Titel weiter zurück-
gesprungen.
Hinweis: Die Tasten REV und CUE nur kurz drücken,
sonst erfolgt ein schneller Rück- bzw. Vorlauf.
C – Alphabetische Suche von MP3-Titeln
1) Die Taste FIND (15) drücken. Ein Lupensym-
bol erscheint blinkend unten links im Display.
Rechts daneben wird der Buchstabe Aange-
zeigt und in der oberen Displayzeile der
Name der ersten Datei, die mit dem Buchsta-
ben A beginnt.
2) Mit der Taste CUE [vorwärts laufend] oder
REV (7) [rückwärts laufend] den Buchstaben
wählen, mit dem der gesuchte Dateiname
beginnt. Hierbei können auch die Ziffern 0 – 9
gewählt werden. Bei Buchstaben und Ziffern,
mit denen kein Dateiname beginnt, wird
None angezeigt.
3) Wenn mehrere Dateinamen mit dem gleichen
Anfangsbuchstaben vorkommen, nach dem
Wählen des Suchbuchstabens die Taste REV
oder CUE gedrückt halten, bis der Buchstabe
neben dem Lupensymbol blinkt. Alle Dateina-
men mit dem angezeigten Anfangsbuchsta-
ben können nun mit der Taste REV oder CUE
nacheinander angewählt werden.
4) Bei der Suche zeigt das Display stets die
Nummer des Ordners und des Titels unten
rechts an. Ist der gewünschte Titel gefunden,
die Wiedergabe mit der Taste PLAY/PAUSE
(9) starten.
D – Ordneranwahl und Ordnersuche
Bei MP3-Dateien in mehreren Ordnern (Datei-
verzeichnissen) kann während der Wiedergabe
mit den Tasten FOLDER (14) auf den ersten
Titel des nächsten Ordners (Taste ) und auf
den ersten Titel des vorherigen Ordners (Taste
) gesprungen werden.
Wird zuerst die Wiedergabe mit der Taste
STOP (8) beendet und dann die Taste FOLDER
oder gedrückt, zeigt die obere Display-
zeile den Ordnernamen an und die untere Zeile
hinter dem Symbol die Ordnernummer.
Mit der Suchfunktion lässt sich ein Ordner
mit einem bestimmten Namen auch während der
Wiedergabe eines Titels finden:
1) Die Taste FIND (15) zweimal drücken, sodass
im Display das Lupensymbol blinkend er-
scheint und rechts daneben Dir für Direc-
tory (Ordner) angezeigt wird.
2) Mit den Tasten REV – SKIP – CUE (7) den
gewünschten Ordner suchen. Die obere Dis-
playzeile zeigt dabei den Ordnernamen an
und die untere Zeile die Ordnernummer.
3) Ist der Ordner gefunden, zum Starten des
ersten Titels aus dem Ordner die Taste
PLAY/PAUSE (9) drücken oder zum Starten
eines anderen Titels aus dem Ordner zuerst
die Taste REV oder CUE gedrückt halten, bis
neben dem Lupensymbol File (Datei) ange-
zeigt wird. Mit den Tasten REV – SKIP – CUE
lassen sich jetzt die Titel aus dem Ordner
nacheinander anwählen. Zum Starten des
gewählten Titels die Taste PLAY/PAUSE
drücken.
6.2.3 Schneller Vor-/Rücklauf
Für den schnellen Vorlauf die Taste CUE (7) ge-
drückt halten, für den schnellen Rücklauf die
Taste REV. Bei MP3-Dateien kann ein Vor- oder
Rücklauf nur innerhalb eines Titels erfolgen und
nicht akustisch, sondern nur anhand der Zeitan-
zeige des Displays verfolgt werden.
6.2.4 Wiederholfunktionen und
Zufallswiedergabe
Mit der Taste REPEAT (13) lässt sich eine der
Wiederholfunktionen und die Wiedergabe der
Titel in zufälliger Reihenfolge einschalten:
Grundeinstellung (PLAY ALL)
Alle Titel des Tonträgers oder einer program-
mierten Titelfolge werden einmal abgespielt,
dann endet die Wiedergabe.
erster Tastendruck (PLAY ALL RANDOM)
einmalige Wiedergabe der Titel in zufälliger
Reihenfolge
nächster Tastendruck (REPEAT TRACK)
ständige Wiederholung des angewählten
Titels
nächster Tastendruck (REPEAT FOLDER)
ständige Wiederholung aller Titel im ange-
wählten Ordner
(Funktion nur bei MP3-Dateien vorhanden)
nächster Tastendruck (REPEAT ALL)
ständige Wiederholung aller Titel
nächster Tastendruck (RANDOM REPEAT)
ständiges Abspielen der Titel in zufälliger
Reihenfolge
nächster Tastendruck (PLAY ALL)
Zurückschalten auf die Grundeinstellung
6.2.5 Ton stumm schalten
Um während der Wiedergabe eines Titels den
Ton stumm zu schalten, die Taste MUTE (16)
drücken. Zum Wiedereinschalten des Tons die
Taste MUTE erneut drücken.
6.2.6 Anti-Schock-Speicher
Der CD/MP3-Spieler ist mit einem Anti-Schock-
Speicher ausgestattet, der beim Abspielen einer
CD durch Stöße und Vibrationen verursachte
Störungen ausgleichen kann (max. 40 s). Zum
Testen lässt sich der Anti-Schock-Speicher mit
der Taste ESP (44) auf der Fernbedienung aus-
schalten (nicht bei MP3-Betrieb). Das Display
(12) signalisiert kurz ESP OFF. Zum Wiederein-
schalten die Taste ESP erneut drücken. Das
Display zeigt kurz ESP ON.
6.2.7 Eigene Titelfolge zusammenstellen
Soll eine Auswahl von Titeln in einer bestimmten
Reihenfolge abgespielt werden, lässt sich eine
Folge von bis zu 64 Titeln programmieren. Dazu
sollte bei MP3-Dateien die Nummerierung der
Ordner bekannt sein (Kap. 6.2.2 – D), denn
für jeden zu programmierenden Titel muss die
zugehörige Nummer des Ordner eingegeben
werden.
1) Das Gerät muss auf Stopp geschaltet sein;
ggf. die Taste STOP (8) drücken.
2) Mit der Taste PROG (6) den Programmier-
modus einschalten. Alle weiteren Tasten je-
weils innerhalb von 15 Sekunden drücken,
sonst wird der Programmiermodus verlas-
sen. In diesem Fall die Taste PROG erneut
betätigen. Das Display zeigt:
—bei einer CD ohne MP3-Dateien
PROGRAM
CD P-01 00
—bei MP3-Dateien
PROGRAM
P-01 000 0000
3) Bei CDs ohne MP3-Dateien diesen Bedien-
schritt überspringen und direkt mit dem
Schritt 4 fortfahren.
Bei MP3-Dateien muss zuerst die Num-
mer des Ordners gewählt werden, in dem
sich der erste gewünschte Titel der Titelfolge
befindet. Dieses ist auch erforderlich, wenn
sich alle Titel im Hauptverzeichnis ROOT
ohne Ordner befinden. In diesem Fall die 1
als Ordnernummer eingeben.
Die Ordnernummer mit den Tasten REV –
SKIP – CUE (7) wählen oder mit den Ziffern-
tasten (40) eingeben. Zum Speichern dann
die Taste PROG drücken. Die vier Nullen
blinken als Aufforderung, die Titelnummer
einzugeben.
4) Die Nummer des ersten Titels für die Titel-
folge mit den Tasten REV – SKIP – CUE (7)
wählen oder mit den Zifferntasten (40) einge-
ben. Bei MP3-Dateien in Ordnern beachten,
dass jetzt nicht alle Dateien durchnummeriert
sind, sondern dass jeweils die erste Datei in
einem Ordner mit der Nummer 1 bezeichnet
wird.
5) Zum Speichern die Taste PROG drücken.
Das Display zeigt die nächste Speicherplatz-
nummer, z. B. P-02.
D
A
CH
6

D
A
CH
7
6) Die Bedienschritte (3), 4 und 5 für alle weite-
ren gewünschten Titel wiederholen, bis die
gesamte Titelfolge programmiert ist.
7) Zum Starten der Titelfolge die Taste PLAY/
PAUSE (9) drücken. Die obere Displayzeile
zeigt links MEM für Memory an und die Titel-
folge wird abgespielt.
8) Mit den Tasten REV – SKIP – CUE kann jeder
Titel der Titelfolge angewählt oder durch
Gedrückthalten der jeweiligen Taste der
schnelle Vor-/Rücklauf innerhalb eines Titels
aktiviert werden.
9) Nach dem Abspielen der Titelfolge oder beim
Drücken der Taste STOP wird die Wieder-
gabe beendet. Soll die Titelfolge erneut ge-
startet werden, zuerst die Taste PROG und
dann die Taste PLAY/PAUSE drücken.
Hinweis: Eine programmierte Titelfolge wird beim
Wechseln des Tonträgers, beim Drücken der Taste
FUNC (17), beim Drücken der Taste STOP im Pro-
grammiermodus und beim Ausschalten des Gerätes
gelöscht.
6.3 Bedienung
des Bluetooth-Empfängers
Mit dem Bluetooth-Empfänger kann eine Funk-
verbindung zu einer Bluetooth-Signalquelle
(z. B. Notebook, Smartphone, Tablet-PC) herge-
stellt werden, um die dort gespeicherten Audio-
Dateien über den CD-112RDS/BT abzuspielen.
Hinweis: Die Bluetooth-Signalquelle muss nach dem
A2DP-Protokol arbeiten (Advanced Audio Distribution
Profile). Anderenfalls ist keine Funkverbindung möglich.
1) Die Bluetooth-Funktion am Notebook, Smart-
phone oder Tablet-PC einschalten (siehe ggf.
Anleitung des Gerätes).
2) Um den Bluetooth-Empfänger des CD-
112RDS/BT einzuschalten, die Taste BT
POWER (25) kurz gedrückt halten, bis die
Anzeige PAIR (23) blinkt.
3) Um den CD-112RDS/BT mit der Bluetooth-
Signalquelle zu koppeln, die Taste PAIR (22)
kurz gedrückt halten, bis die Anzeige PAIR
langsamer blinkt. Sobald die Funkverbindung
hergestellt ist, leuchtet die Anzeige PAIR
konstant.
Hinweis: Der CD-112RDS/BT wird auf dem Dis-
play der Bluetooth-Signalquelle mit „Audio Blue-
tooth“ angezeigt.
4) Die Wiedergabe eines Titels an der Blue-
tooth-Signalquelle starten.
5) Mit der Taste (25) lässt sich die Wieder-
gabe unterbrechen und wieder fortfahren.
Hinweis: Solange die Wiedergabe unterbrochen
ist, liegt am Ausgang PRIORITY (34) das Signal
des CD/MP3-Spielers oder des Tuners an.
6) Mit den Tasten DOWN/ und UP/ (31)
kann auf den vorherigen oder den nächsten
Titel gesprungen werden (Taste kurz drü-
cken) sowie ein schneller Rück- oder Vorlauf
erfolgen (Taste gedrückt halten).
7) Soll der Bluetooth-Empfänger ausgeschaltet
werden, die Taste BT POWER so lange ge-
drückt halten, bis die Anzeige PAIR erlischt.
6.4 Bedienung des Tuners
6.4.1 Sender speichern
Zum Speichern von Sendern stehen 30 Stati-
onsnummern zur Verfügung.
A – Automatische Sendersuche und -speicherung
Durch die Automatikfunktion kann das Suchen
und Speichern von Sendern schnell und einfach
erfolgen. Der Tuner durchläuft den Empfangsbe-
reich und speichert die empfangenen Sender
automatisch nacheinander:
Die Taste ASM (30) gedrückt halten, bis die Zah-
len der Frequenzanzeige durchlaufen. Alle Sen-
der sind automatisch gespeichert, wenn der
Tuner auf den Sender der Stationsnummer 1
geschaltet hat. Zum Aufrufen anderer Sender
siehe Kapitel 6.4.2.
B – Sender manuell speichern
1) Ist die Frequenz des gewünschten Senders
bekannt, kann sie mit der Fernbedienung ein-
getippt werden. Ist sie nicht bekannt, mit dem
Bedienschritt 2 fortfahren.
Zur Eingabe der Empfangsfrequenz die Taste
DIRECT (41) drücken und dann mit den Zif-
ferntasten (40) die Frequenz eingeben. Zum
Abschluss die Taste DIRECT erneut drücken.
Beispiele:
Hinweis: Wird eine Frequenz eingegeben, die nicht
im Empfangsbereich liegt, zeigt das Display kurz
ERROR (Fehler) an.
Nach der Frequenzeingabe mit dem Bedien-
schritt 3 fortfahren.
2) Ein bestimmter Sender kann auch mit dem
Sendersuchlauf gefunden werden. Zum Star-
ten des Suchlaufs die Taste DOWN oder UP
(29) gedrückt halten, bis die Zahlen der Fre-
quenzanzeige durchlaufen.
Die Taste DOWN startet den Sendersuchlauf
rückwärtslaufend.
Die Taste UP startet den Sendersuchlauf vor-
wärtslaufend.
Beim nächsten Sender hält der Suchlauf an.
Den Suchlauf so oft erneut starten, bis der
gewünschte Sender empfangen wird.
3) Zur Feineinstellung kann durch kurzes Drü-
cken der Taste DOWN oder UP (29) die
Empfangsfrequenz schrittweise verringert
oder erhöht werden.
4) Zum Speichern des Senders alle weiteren
Tasten jeweils innerhalb von 5 Sekunden drü-
cken, sonst müssen die folgenden Schritte
wiederholt werden:
a) Am Gerät die Taste MEMORY (28) drü-
cken oder auf der Fernbedienung die
Taste MEM (28). Im Display blinkt rechts
unten die Stationsnummer.
b) Die Stationsnummer für den eingestellten
Sender wählen:
Entweder schrittweise mit der Taste
M-DOWN oder M-UP (42) auf der Fernbe-
dienung oder
durch Direktwahl der Stationsnummer am
Gerät mit den Tasten 1 – 5 (21) und +5 (27)
oder auf der Fernbedienung mit den Tas-
ten 1 – 10/0 (40) und +10 (45). Beispiele:
c) Mit der Taste MEMORY bzw. MEM den
Speichervorgang abschließen.
5) Zum Speichern weiterer Sender die Bedien-
schritte 1 bis 4 wiederholen.
6.4.2 Gespeicherte Sender aufrufen
1) Die Stationsnummer, unter der der Sender
gespeichert wurde, am Gerät mit den Tasten
1 – 5 (21) und +5 (27) oder auf der Fernbe-
dienung mit den Tasten 1 – 10/0 (40) und
+10 (45) eintippen. Beispiele siehe vorherige
Tabelle.
2) Alternativ können die Sender auch mit den
Tasten M-DOWN und M-UP (42) auf der
Fernbedienung aufgerufen werden. Mit der
Taste M-DOWN wird auf die vorherige Stati-
onsnummer geschaltet und mit der Taste
M-UP auf die nächste Stationsnummer.
3) Wird eine Sendung in Stereo ausgestrahlt,
erscheint im Display die Anzeige STEREO.
Mit der Taste MO/ST (44) auf der Fernbedie-
nung kann dann zwischen Stereo- und Mono-
Empfang umgeschaltet werden.
Hinweis: Wird von Mono- auf Stereo-Empfang ge-
schaltet, wechselt im Display die Anzeige von MONO
auf STEREO etwas verzögert.
6.4.3 Zusätzliche Informationen
bei RDS-Empfang
Strahlt der gewählte Sender RDS-Informationen
(Radio Data System) aus, wird im Display der
Sendername anstelle der Frequenz und der Sta-
tionsnummer angezeigt. Mit der Taste RDS (48)
auf der Fernbedienung können zusätzliche Infor-
mationen im Display angezeigt werden:
1. Tastendruck Anzeige des Programmtyps
Wird vom Sender kein Programmtyp angege-
ben, zeigt das Display PTY NONE.
2. Tastendruck Informationen zum laufenden
Titel (Titelname, Interpret) oder der Sendung
Werden keine Informationen angegeben,
zeigt das Display RT NONE.
3. Tastendruck Anzeige der Uhrzeit
Wird keine Uhrzeit gesendet, zeigt das Dis-
play CT NONE. Weil die Uhrzeit nicht konti-
nuierlich gesendet wird, kann es nach dem
Aufrufen des Senders einige Minuten dauern,
bis die Uhrzeit verfügbar ist.
4. Tastendruck kurz die Empfangsfrequenz
und die Stationsnummer, dann der Name des
Senders (Grundeinstellung)
6.4.4 Automatisches Ausschalten des Tuners
Mit der Taste SLEEP (47) kann eine Zeit zwi-
schen 90 und 10 Minuten eingestellt werden,
nach der sich der Tuner ausschaltet.
1) Die Taste SLEEP so oft drücken, bis die ge-
wünschte Zeit zum Ausschalten des Tuners
im Display (26) angezeigt wird. Mit jedem Tas-
tendruck verringert sich die Zeit um 10 Minu-
ten. Nach dem Ablauf der eingestellten Zeit
schaltet sich der Tuner aus.
2) Zum Wiedereinschalten die Taste SLEEP
drücken. Das Display zeigt SLEEP-90 MIN
an. Jetzt die Taste SLEEP noch einmal drü-
cken, sodass die Anzeige SLEEP-90 MIN
ausgeblendet wird. Anderenfalls ist die Aus-
schaltfunktion wieder aktiviert.
Alternativ kann aber auch das komplette
Gerät mit dem Netzschalter POWER (1) aus-
und wiedereingeschaltet werden.
Hinweis: Um die Ausschaltfunktion vor dem Ablauf
der eingestellten Zeit zu deaktivieren, die Taste SLEEP
drücken, sodass die Anzeige SLEEP-.. MIN ausge-
blendet wird.
Nr. Tasten am Gerät Tasten auf der
Fernbedienung
4 4 4
10 5, +5, +5 10/0
18 3, +5, +5, +5, +5 8, +10
22 2, +5, +5, +5, +5, +5 2, +10, +10
Frequenz Tasten
90,50 MHz DIRECT, 9, 10/0, 5, 10/0, DIRECT
98,75 MHz DIRECT, 9, 8, 7, 5, DIRECT
104,25 MHz DIRECT, 1, 10/0, 4, 2, 5, DIRECT
D
A
CH
8
Diese Bedienungsanleitung ist urheberrechtlich für MONACOR ®INTERNATIONAL GmbH & Co. KG
geschützt. Eine Reproduktion für eigene kommerzielle Zwecke – auch auszugsweise – ist untersagt.
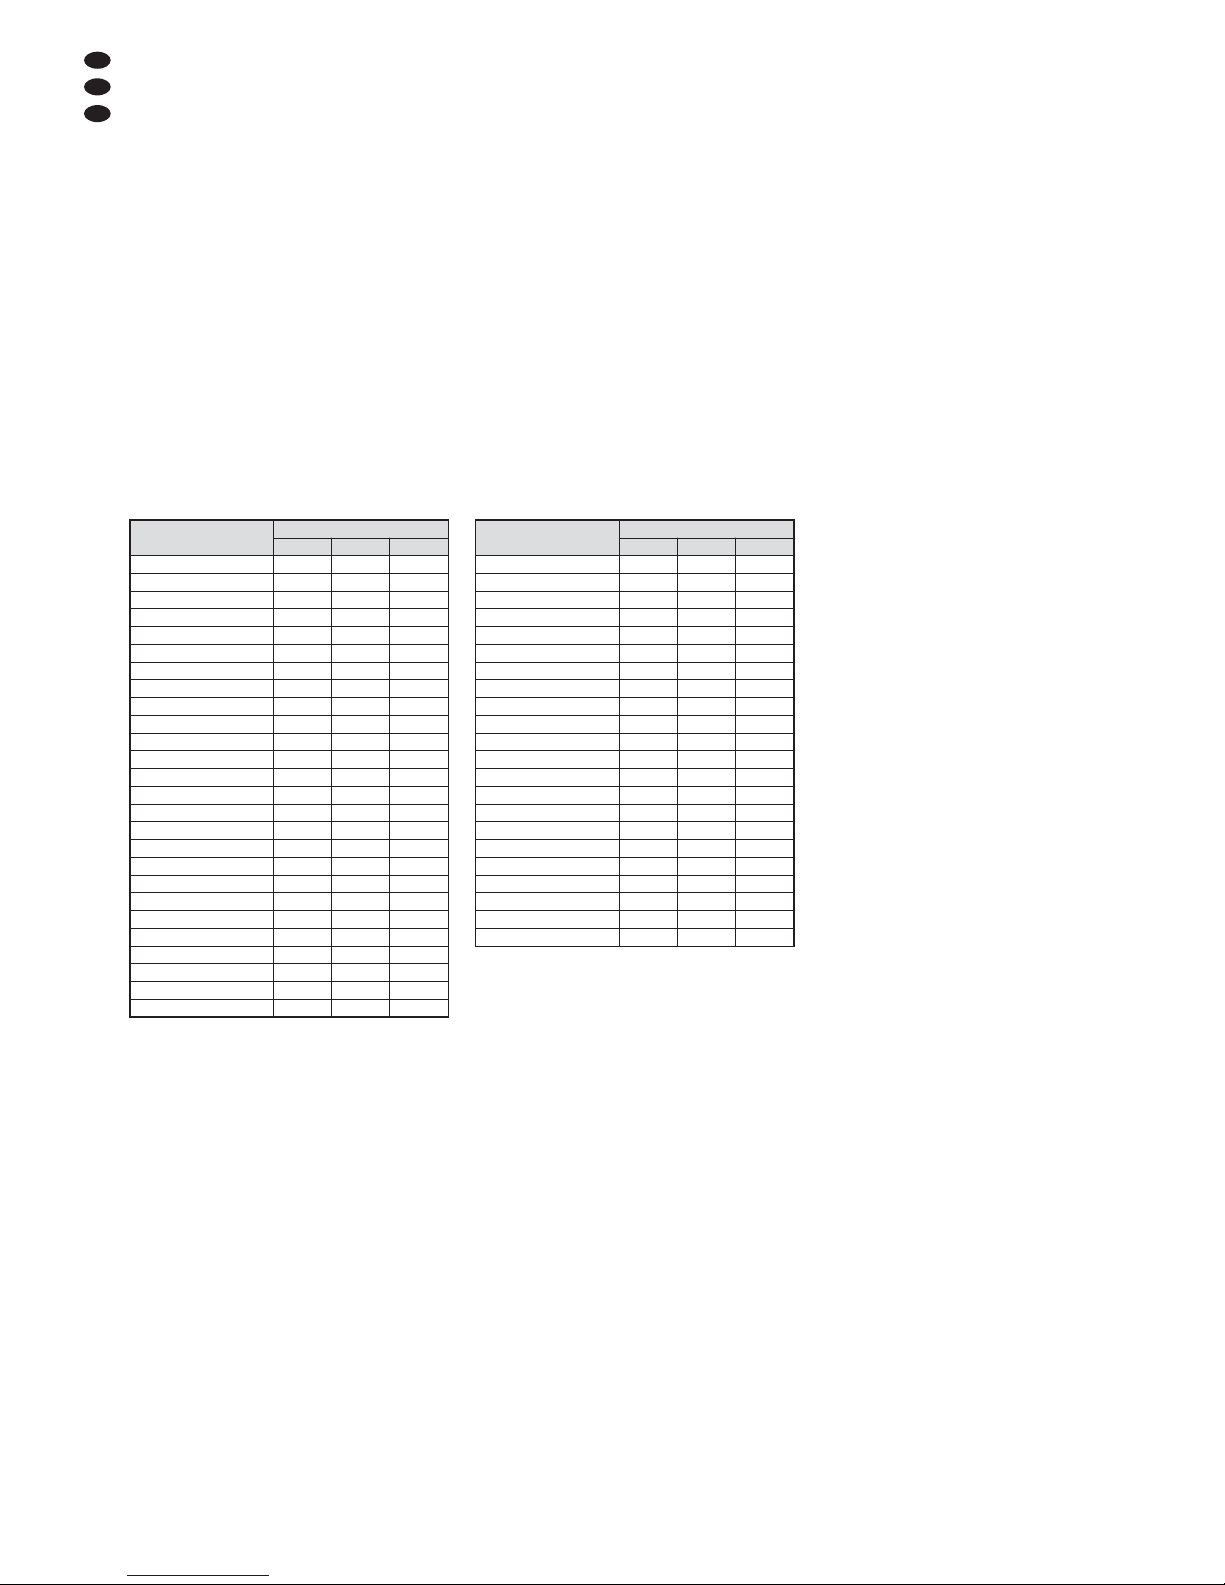
Funktionen des CD/MP3-Spielers Funktionen des Tuners
Funktion Steuerbefehl
Byte 1 Byte 2 Byte 3
1 E C A
2 E C B
3 E C C
4 E C D
5 E C E
6 E C F
7 E C G
8 E C H
9 E C I
10/0 E C J
+10 E C K
DIRECT E C L
(TUNING) DOWN E C M
(TUNING) UP E C N
(STATION) M-UP E C 0
(STATION) M-DOWN E C 1
MEMORY (MEM) E C 2
ASM E C 3
MO/ST E C 4
SLEEP E C 5
Sendersuchlauf E C 7
Sendersuchlauf E C 8
Funktion Steuerbefehl
Byte 1 Byte 2 Byte 3
FOLDER E A A
FOLDER E A B
SKIP REV E A C
SKIP CUE E A D
STOP E A E
PLAY/PAUSE E A F
EJECT E A G
PROG E A H
ESP E A I
FIND E A J
MUTE E A K
REPEAT E A L
FUNC E A M
DISPLAY E A N
EJECT sperren E A P
EJECT freigeben E A Q
0 E A 0
1 E A 1
2 E A 2
3 E A 3
4 E A 4
5 E A 5
6 E A 6
7 E A 7
8 E A 8
9 E A 9
8 Pflege
Das Gerät vor Staub, Vibrationen, Feuchtigkeit
und Hitze schützen (zulässiger Einsatztempera-
turbereich 0 – 40 °C). Für die Reinigung nur ein
weiches, trockenes Tuch verwenden, auf keinen
Fall Wasser oder Chemikalien.
Hinweis zu Tonaussetzern und Lesefehlern
Zigarettenrauch und Staub dringen leicht durch
alle Öffnungen des Gerätes und setzen sich
auch auf der Optik der Laser-Abtastsysteme ab.
Sollte dieser Belag zu Lesefehlern und Ton-
aussetzern führen, muss das Gerät in einer
Fachwerkstatt gereinigt werden. Diese Reini-
gung ist kostenpflichtig, auch während der
Garantiezeit!
9 Technische Daten
CD/MP3-Spieler
Frequenzgang: . . . . . . . . 20 – 20 000 Hz
Klirrfaktor: . . . . . . . . . . . . < 0,1 %
Kanaltrennung: . . . . . . . . > 60 dB
Dynamikumfang: . . . . . . . > 96 dB
Störabstand: . . . . . . . . . . > 70 dB
Audioausgang: . . . . . . . . . 1,2 V
Tuner
Empfangsfrequenz: . . . . . 87,5 – 108 MHz
Allgemeine Daten
Stromversorgung: . . . . . . 230 V~/50 Hz
Leistungsaufnahme: . . . . max. 50 VA
Einsatztemperatur: . . . . . 0 – 40 °C
Abmessungen (B×H×T): 482 × 44 × 265 mm,
1 HE (Höheneinheit)
Gewicht: . . . . . . . . . . . . . . 4,1 kg
Änderungen vorbehalten.
Nach dem Ausführen eines Befehles meldet der
CD-112RDS/BT an den PC im ASCII-Code zu-
rück:
+ O K „Carriage Return“ „Line Feed“
Bei einer Fehleingabe meldet das Gerät:
+ E R „Carriage Return“ „Line Feed“
Hinweis: Zwischen zwei Befehlen muss eine Pause
von mindestens 300 ms liegen. Nach einem Sender-
suchlauf-Befehl ist eine Pause von min. 800 ms erfor-
derlich.
7 PC-Steuerung des Gerätes über die RS-232-Schnittstelle
Der CD-112RDS/BT kann mit einem entspre-
chenden Terminalprogramm von einem PC aus
gesteuert werden. Die Buchse REMOTE CON-
TROL (32) mit der RS-232-Schnittstelle des
Computers verbinden. Folgende Parameter im
Terminalprogramm einstellen:
Symbolrate: . . . . . . . . . 9600 baud
Anzahl der Datenbits: . 8
Anzahl der Stoppbits: . . 1
Parität: . . . . . . . . . . . . . keine
Flusskontrolle: . . . . . . . keine
Die Steuerbefehle für sämtliche Funktionen des
CD-112RDS/BT sind in den folgenden Tabellen
aufgeführt und werden vom Terminalprogramm
im ASCII-Code gesendet. Als 4. und 5. Byte
müssen abschließend die Befehle „Carriage
Return“ (0D hexadezimal) und „Line Feed“ (0A
hexadezimal) an den CD-112RDS/BT gesendet
werden. Einige Terminalprogramme führen
diese automatisch aus oder können entspre-
chend eingestellt werden.

All operating elements and connections de-
scribed can be found on the fold-out page 3.
1 Operating Elements and
Connections
1.1 Front panel
1POWER switch
2Control section of the CD/MP3 player
(for details see fig. 2)
3Control section of the tuner
(for details see fig. 3)
1.2 CD/MP3 player
4USB interface to connect a USB flash drive or
a hard disk
5CD slot
Insert the CD into the slot until it is pulled in
automatically.
6Button PROG to switch to the programming
mode to compile an individual title sequence
(chapter 6.2.7)
7Buttons REV – SKIP – CUE for title selection
and for fast forward/reverse
Title selection
Each time you press the button CUE, the
player will go to the next title; when you
press the button REV, the player will return
to the beginning of the current title and
each time you press it again, it will go back
one title at a time.
Fast forward/reverse
For fast forward, keep the button CUE
pressed; for fast reverse, keep the button
REV pressed.
8Button STOP to stop the replay
9Button PLAY/PAUSE to switch between
replay and pause
10 LED CD: will light up when it is possible to
control the CD/MP3 player with the remote
control; also see item 46, button CD/TUNER
11 Button EJECT to eject the CD
12 Display of the CD/MP3 player
13 Button REPEAT to select the repeat func-
tions and random replay
basic setting (PLAY ALL)
all titles of the sound carrier or of a pro-
grammed title sequence will be replayed
once
first actuation of button (PLAY ALL RANDOM)
the titles will be replayed once in random
order
next actuation of button (REPEAT TRACK)
the title selected will be repeated continu-
ously
next actuation of button (REPEAT FOLDER)
all titles in the folder selected will be re-
peated continuously
(function available for MP3 files only)
next actuation of button (REPEAT ALL)
all titles will be repeated continuously
next actuation of button (RANDOM REPEAT)
all titles will be replayed continuously in
random order
next actuation of button (PLAY ALL)
return to basic setting
14 Buttons FOLDER for folder selection of MP3
files:
To select the next folder, press the button .
To return to the previous folder, press the
button . The player always goes to the
first title of the folder selected.
15 Button FIND to search for MP3 titles and fold-
ers (chapters 6.2.2 C and D)
16 Button MUTE to mute the CD/MP3 player
17 Button FUNC to select the sound carrier
(CD, USB flash drive, memory card)
18 Slot to insert a memory card
1.3 Tuner
19 IR sensor for the remote control signals
20 LED TUNER: will light up when it is possible
to control the tuner with the remote control;
also see item 46, button CD/TUNER
21 Station buttons 1 – 5 to select the stations
stored on these buttons
22 Button PAIR to link the unit to a Bluetooth sig-
nal source (chapter 6.3)
23 LED PAIR
Keeps flashing when the Bluetooth receiver
has been switched on.
Lights permanently after the unit has been
linked to a Bluetooth signal source.
24 Antenna of the Bluetooth receiver
25 Button BT POWER/ to switch on/off the
Bluetooth receiver (keep the button pressed
for a longer period) and to pause/continue
the replay in Bluetooth mode (press the but-
ton briefly)
26 Display of the tuner
27 Button +5 to select stations of the storage
locations 6 – 30: After pressing a station but-
ton (21), press the button +5 as often as nec-
essary.
28 Button MEMORY (MEM)* to store stations:
After station tuning with the buttons DOWN /
UP (29), press the button MEMORY, then
select the storage location with the station
buttons 1 – 5 (21) and +5 (27). Finally press
the button MEMORY once again.
29 Buttons DOWN / UP for station tuning: Briefly
press the button to increase or decrease the
received frequency; if you press one of the
buttons for more than 0.5 seconds, the sta-
tion scanning will start (upwards or down-
wards).
30 Button ASM for automatic search for stations
and storage of stations
To activate the function, briefly keep the but-
ton pressed.
31 Button DOWN/ and UP/ for title selec-
tion and for fast forward/reverse in Bluetooth
mode
*lettering on remote control
1.4 Rear panel
32 RS-232 interface for remote control of the
unit via a computer
33 Terminal ANTENNA for an FM antenna
A basic FM antenna is supplied with the unit.
34 XLR connection PRIORITY OUT
The signal of the Bluetooth receiver (first pri-
ority) or of the CD/MP3 player (second prior-
ity) or of the tuner is present at this output.
35 RCA jacks BT OUT for the audio output of the
Bluetooth receiver
36 RCA jacks TUNER OUT for the audio output
of the tuner
37 XLR connection CD PLAYER OUT for the
audio output of the CD/MP3 player
38 Mains jack for connection to a socket (230 V~/
50 Hz) via the mains cable provided
39 Support for the mains fuse
Always replace a blown fuse by one of the
same type.
1.5 Remote control
The buttons of the remote control up to and
including item 30 are also available on the unit
and are described in chapters 1.2 and 1.3. The
buttons with two item numbers have different
functions for control of the CD/MP3 player (num-
ber on the left) and of the tuner (number on the
right). Press the button CD/TUNER (46) to
switch the remote control between control of the
CD/MP3 player [LED CD (10) will light up] and
control of the tuner [LED TUNER (20) will light
up]. The following buttons are available on the
remote control only:
40 Numerical keys 1 – 10/0
–CD/MP3 player: for direct selection of a
title, examples:
Title number Keys
4 4, PLAY/PAUSE
10 1, 10/0, PLAY/PAUSE
135 1, 3, 5, PLAY/PAUSE
–tuner: to select the stored stations 1 – 10;
to select the stations 11 – 30, press the but-
ton +10 (45) as often as necessary
41 Button DIRECT for the tuner for direct selec-
tion of a received frequency:
1. Press the button DIRECT.
2. Enter the frequency with the numerical
keys (40).
3. Press the button DIRECT.
42 Buttons M-DOWN / M-UP for stepwise selec-
tion of stored stations (upwards or down-
wards)
43 Button DISPLAY for the CD/MP3 player to
change the information in the lower line of the
display during replay of MP3 files
For MP3 files, the name of the title, the name
of the artist and the name of the album will
scroll in the upper line of the display.
basic setting
The lower line will show the title number
(TR) and the time already played of the
title.
first actuation of button
The folder name will be displayed.
second actuation of button
The file name will be displayed.
third actuation of button
The number of folders and the number of
titles will be displayed.
fourth actuation of button
return to basic setting
44 Button ESP MO/ST
–CD/MP3 player: to deactivate and reacti-
vate the anti-shock memory (not in MP3
mode)
–tuner: to switch between stereo reception
and mono reception
45 Button +10 for the tuner to select the stored
stations 11 – 30. After pressing a numerical
key (40), press the button +10 as often as
necessary.
46 Button CD/TUNER to switch the remote con-
trol to control of the CD/MP3 player [LED CD
(10) will light up] or to control of the tuner
[LED TUNER (20) will light up]
47 Button SLEEP for the automatic switch-off
function of the tuner after a preset time
(90 – 10 minutes); each time you press the
button, the time will decrease by 10 minutes
To switch the tuner on again, press the button
SLEEP (chapter 6.4.4).
48 Button RDS to indicate additional information
during RDS reception
9
GB
2 Safety Notes
This unit corresponds to all relevant directives of
the EU and is therefore marked with .
Please observe the following items in any case:
The unit is suitable for indoor use only. Protect
it against dripping water and splash water,
high air humidity and heat (admissible ambi-
ent temperature range 0 – 40 °C).
Do not place any vessel filled with liquid on the
unit, e. g. a drinking glass.
Do not operate the unit and immediately dis-
connect the mains plug from the socket
1. if the unit or the mains cable is visibly dam-
aged,
2. if a defect might have occurred after the unit
was dropped or suffered a similar accident,
3. if malfunctions occur.
In any case the unit must be repaired by
skilled personnel.
Never pull the mains cable to disconnect the
mains plug from the socket, always seize the
plug.
For cleaning only use a dry, soft cloth; never
use water or chemicals.
No guarantee claims for the unit and no liabil-
ity for any resulting personal damage or mate-
rial damage will be accepted if the unit is used
for other purposes than originally intended, if it
is not correctly connected or operated, or if it
is not repaired in an expert way.
3 Applications
The CD-112RDS/BT is a combination of CD/
MP3 player, FM RDS tuner and Bluetooth re-
ceiver: It is suited for versatile PA applications
(e. g. in theatres, pubs or waiting rooms) and
offers special features for this purpose, e. g. con-
tinuous repeat, random replay, MP3 replay of
USB storage media and SD/SDHC memory
cards (32 GB max.).
It is able to play audio CDs, audio CDs you
have burnt yourself (audio CD-R) and CDs with
titles in MP3 format. However, problems may
occur when replaying rewriteable CDs (CD-RW)
depending on the type of CD, the CD burner and
the burning programme used.
4 Deactivating the Automatic
Start Function
The CD player is provided with an automatic
start function: After switching on the unit and
reading in a sound carrier (CD, USB flash drive
or memory card) the replay of the first title will
start automatically. If you do not wish the unit to
start automatically [replay will not start before the
button PLAY/PAUSE (9) is pressed], deactivate
the automatic start function.
Always disconnect the mains plug from the
socket before opening the unit!
On the PCB with the power supply unit and the
audio output jacks there is a jumper (see arrow
in fig. 6). The automatic start function is activated
when the jumper is in the position AUTO PLAY.
To deactivate the function, rearrange the jumper
to the position MANUAL PLAY.
5 Setting Up and
Connecting the Unit
The unit is designed for installation into a rack
(482 mm/19″); however, it can also be used as a
tabletop unit. For installation into a rack, 1 rack
space (RS = 44.45 mm) is required.
Prior to making or changing any connec-
tions, switch off the CD-112RDS/BT and the
units to be connected.
1) Four line level outputs are available to route
the audio signals to the subsequent unit (e. g.
mixer or amplifier):
PRIORITY OUT (34)
1. For the signal of the Bluetooth receiver;
the signal will take priority over the signals
of the CD/MP3 player and of the tuner.
2. When no Bluetooth signal is received or
when the replay has been set to pause,
the signal of the CD/MP3 player is present
at this output.
3. When the CD/MP3 player has been set to
pause or stop, the signal of the tuner is
present at this output.
BT OUT (35)
for the signal of the Bluetooth receiver
TUNER OUT (36)
for the signal of the tuner
CD PLAYER OUT (37)
for the signal of the CD/MP3 player
2) Connect an FM antenna to the jack ANTEN-
NA (33). A basic FM antenna is supplied with
the unit.
3) Finally connect the mains cable provided to
the mains jack (38) first and then to a mains
socket (230 V~/50 Hz).
6 Operation
Switch on the player with the POWER switch (1).
The display (12) of the CD/MP3 player shows
Welcome. The display (26) of the tuner shows
the station most recently selected.
6.1 Remote control
1) To insert the batteries (2 x 1.5 V, size AAA),
remove the battery compartment cover on
the rear side of the remote control. Insert the
batteries as indicated in the battery compart-
ment. Close the compartment with the cover.
If the remote control is not in use for a
longer period of time, remove the batteries to
prevent any damage due to battery leakage.
2) When you press a button on the remote con-
trol, always direct the remote control towards
the sensor IR (19). There must be no obsta-
cles between the remote control and the sen-
sor.
3) On the unit, the LEDs CD (10) and TUNER
(20) will indicate if it is possible to control the
CD/MP3 player or the tuner with the remote
control. To change the control, press the but-
ton CD/TUNER (46). The red lettering on the
remote control shows the functions for the
tuner.
4) If the range of the remote control decreases,
the batteries are exhausted and must be
replaced.
6.2 CD/MP3 player
After switching on, the CD/MP3 player will read
the CD first. If no CD has been inserted, the
player will read the USB flash drive. If no USB
flash drive has been connected, the player will
read the memory card. If no memory card
has been inserted, the display (12) will show
NO DISC.
6.2.1 Replaying music titles
1) Insert a CD with the lettering facing up into
the slot (5) until it is pulled in automatically
and/or
connect a USB flash drive to the USB port (4)
or connect a hard disk (with individual power
supply, if required) to the USB port
and/or
insert a memory card into the slot SD/MMC
CARD (18), the notched corner of the card
facing up. To remove the card, slightly push it
in to eject the card from the slot.
2) Select the sound carrier (CD, USB flash drive,
memory card) with the button FUNC (17), if
necessary.
3) After loading the sound carrier, the first title
will start automatically. However, if the auto-
matic start function has been deactivated
(chapter 4), press the button PLAY/PAUSE
(9) to start the first title. To select other titles
see chapter 6.2.2.
4) While replaying, the upper line of the display
will show the replay symbol on the right.
The lower line will show the number (TR …)
of the current title and the time already played
of the title (min. : sec.). On the far right, MP3
is shown for titles in MP3 format or ESP for
standard audio CDs.
5) For MP3 files, the following additional infor-
mation will scroll in the upper line:
File – …
Title – …
Artist – …
Album – …
Note: The file name will only be displayed after
starting the replay. If an information is not available,
the display will show NONE instead of a name.
6) When you press the button DISPLAY (43) on
the remote control, various information for
MP3 files will be displayed in the lower line of
the display:
basic setting
The lower line will show the title number
and the time already played of the title.
first actuation of button
The folder name will be displayed.
second actuation of button
The file name will be displayed.
third actuation of button
The number of folders and the number of
titles will be displayed.
fourth actuation of button
return to basic setting
7) Press the button PLAY/PAUSE to switch be-
tween replay and pause. In the pause mode,
the pause symbol will be inserted and the
time indication will flash.
WARNING The unit uses dangerous mains
voltage. Leave servicing to skilled
personnel only. Inexpert handling
or modification of the unit may
result in electric shock.
WARNING To make this modification, the unit
must be opened by skilled person-
nel only. Inexpert handling may
result in electric shock!
Used batteries must not be placed in
the household waste; always take
them to a special waste disposal, e. g.
collection container at your retailer.
If the unit is to be put out of operation
definitively, take it to a local recycling
plant for a disposal which will not be
harmful to the environment
10
GB

8) To stop the replay, press the button STOP (8).
The second line of the display will show:
for standard audio CDs
– the number of titles (TR …)
– the total playing time (min.: sec.)
for audio carriers with MP3 files:
– the number of folders
– the number of titles
9) To eject the CD, press the button EJECT
(11). The display will show EJECT, the CD
will be ejected and can be removed. If the CD
is not removed from the slot, the CD player
will pull it in again automatically after approx.
10 seconds.
6.2.2 Title selection
A – Direct selection of the title number
For direct selection of a title, enter its number
with the numerical keys (40). To start the title,
press the button PLAY/PAUSE (9). Examples:
Title number Keys
4 4, PLAY/PAUSE
10 1, 10/0, PLAY/PAUSE
135 1, 3, 5, PLAY/PAUSE
Note: The player will arrange MP3 titles as follows:
1. all titles without folder in the ROOT directory
2. all titles in folders in the ROOT directory
3. all titles in subfolders, etc.
The titles and folders will not be arranged in alphabeti-
cal order, but can be easily found with the search func-
tion (chapters C and D).
B – Skipping titles in forward / reverse direction
To skip one title or several titles in forward or
reverse direction, briefly press the button CUE or
REV (7) [repeatedly].
Button CUE: to skip to the next title
Button REV: to return to the beginning of the title
currently playing. Each time the button REV is
pressed again, the unit will go back one title at a
time.
Note: Only press the buttons REV and CUE briefly,
longer actuation will result in fast forward or reverse.
C – Alphabetical search for MP3 titles
1) Press the button FIND (15). A magnifying
glass symbol will flash on the left at the bot-
tom of the display. On the right of it, the letter
Awill appear and in the upper line of the dis-
play the name of the first file beginning with
the letter A.
2) Press the button CUE [forward direction] or
REV (7) [reverse direction] to select the first
letter of the desired file name. The numerals
0 – 9 are also available. If there are no file
names beginning with certain letters or num-
bers, these letters or numbers are marked
None.
3) If there are several file names beginning with
the same letter, select the desired letter and
keep the button REV or CUE pressed until
the letter starts flashing next to the magnify-
ing glass symbol. All file names beginning
with the letter will now be available to be
selected one after the other with the button
REV or CUE.
4) When searching, the display will always show
the number of the folder and of the title on the
right at the bottom. When you have found the
desired title, start the replay with the button
PLAY/PAUSE (9).
D – Selection of folders and search for folders
With MP3 files in several folders (file directories),
press the buttons FOLDER (14) during the
replay to go to the first title of the next folder (but-
ton ) or to the first tile of the previous folder
(button ).
If you stop the replay with the button STOP
(8) first and then press the button FOLDER
or , the upper line of the display will show the
folder name and the lower line will show the
folder number behind the symbol .
The search function even allows you to find
a folder with a certain name during the replay of
a title:
1) Press the button FIND (15) twice so that the
magnifying glass symbol will flash on the dis-
play and Dir (directory) will appear on the
right of it.
2) Search for the desired folder with the buttons
REV – SKIP – CUE (7). The upper line of the
display will show the folder name and the
lower line will show the folder number.
3) When you have found the folder, press the
button PLAY/PAUSE (9) to start the first title
or keep the button REV or CUE pressed to
start another title from the folder until File
appears next to the magnifying glass symbol.
Press the buttons REV – SKIP – CUE to
select the titles from the folder one after
another. To start the title selected, press the
button PLAY/PAUSE.
6.2.3 Fast forward/reverse
For fast forward, keep the button CUE (7)
pressed; for fast reverse, keep the button REV
pressed. With MP3 files, fast forward/reverse
will only be possible within a title. You will not be
able to trace it acoustically, only by means of the
time indication on the display.
6.2.4 Repeat functions and
random replay
Press the button REPEAT (13) to activate one of
the repeat functions and the replay of the titles in
random order:
basic setting (PLAY ALL)
all titles of the sound carrier or of a pro-
grammed title sequence will be replayed
once, then the replay will stop
first actuation of button (PLAY ALL RANDOM)
the titles will be replayed once in random
order
next actuation of button (REPEAT TRACK)
the title selected will be repeated continu-
ously
next actuation of button (REPEAT FOLDER)
all titles in the folder selected will be repeated
continuously
(function available for MP3 files only)
next actuation of button (REPEAT ALL)
all titles will be repeated continuously
next actuation of button (RANDOM REPEAT)
all titles will be replayed continuously in ran-
dom order
next actuation of button (PLAY ALL)
return to basic setting
6.2.5 Muting the sound
To mute the sound of a title during replay, press
the button MUTE (16). To reactivate the sound,
press the button MUTE once again.
6.2.6 Anti-shock memory
The CD/MP3 player is equipped with an anti-
shock memory which is able to compensate inter-
ruptions (40 seconds max.) caused by shocks or
vibrations when replaying a CD. For testing,
press the button ESP (44) on the remote control
to deactivate the anti-shock memory (not in MP3
mode). The display (12) will briefly show ESP
OFF. To reactivate, press the button ESP once
again. The display will briefly show ESP ON.
6.2.7 Compiling an individual
title sequence
For replaying a selection of titles in a certain
order, a sequence of up to 64 titles can be pro-
grammed. For this purpose, in case MP3 files,
the arrangement of the folders should be known
to you (chapter 6.2.2 – D) as it will be neces-
sary to enter the corresponding number of each
title to be programmed.
1) Set the CD player to the stop mode; press the
button STOP (8), if required.
2) Activate the programming mode with the but-
ton PROG (6). Press all other buttons within
15 seconds otherwise you will exit the pro-
gramming mode. In this case, press the but-
ton PROG once again. The display will show:
—for a CD without MP3 files
PROGRAM
CD P-01 00
—for MP3 files
PROGRAM
P-01 000 0000
3) For CDs without MP3 files, skip this step and
directly proceed with step 4.
For MP3 files, first select the number of the
folder containing the first title desired for the
title sequence. This is also necessary when
all the files are in the ROOT directory without
folder. In this case, enter 1 as the folder num-
ber.
Select the folder number with the buttons
REV – SKIP – CUE (7) or with the numerical
keys (40). To memorize, press the button
PROG. The four zeroes will flash as a prompt
to enter the title number.
4) Select the number of the first title of the title
sequence with the buttons REV – SKIP – CUE
(7) or enter it with the numerical keys (40).
For MP3 files in folders, please note that
these files are not arranged consecutively but
that the first file in each folder is always num-
ber 1.
5) To memorize press the button PROG. The
display will show the next memory location
number, e. g. P-02.
6) Repeat steps (3), 4 and 5 for all further titles
desired until the entire title sequence has
been programmed.
7) To start the title sequence, press the button
PLAY/PAUSE (9). The upper line of the dis-
play will show MEM (memory) and the title
sequence will be replayed.
8) Press the buttons REV – SKIP – CUE to
select any title of the title sequence or keep
the corresponding button pressed to activate
the fast forward/reverse function within a title.
9) The replay will stop after the title sequence
has been replayed or when you press the
button STOP. To restart the title sequence,
first press the button PROG, then the button
PLAY/PAUSE.
Note: A programmed title sequence will be deleted
when you change the sound carrier, when you press the
button FUNC (17), when you press the button STOP in
the programming mode and when you switch off the
player.
11
GB

12
GB 6.3 Operation of the Bluetooth receiver
The Bluetooth receiver is used for radio commu-
nication with a Bluetooth signal source (e. g.
notebook, smartphone, tablet PC). Thus, the
CD-112RDS/BT will be able to replay the audio
files that have been stored on this source.
Note: The Bluetooth signal source must be compatible
with the A2DP protocol (Advanced Audio Distribution
Profile); otherwise radio communication will not be pos-
sible.
1) Enable the Bluetooth function on the note-
book, smartphone or tablet PC (see manual
of the unit, if necessary).
2) To switch on the Bluetooth receiver of the CD-
112RDS/BT, keep the button BT POWER
(25) pressed briefly until the LED PAIR (23)
starts flashing.
3) To link the CD-112RDS/BT to the Bluetooth
signal source, keep the button PAIR (22)
pressed briefly until the LED PAIR keeps
flashing more slowly. As soon as the radio
communication has been established, the
LED PAIR will light permanently.
Note: On the display of the Bluetooth signal source,
the CD-112RDS/BT is indicated as “Audio Blue-
tooth”.
4) Start a title at the Bluetooth signal source.
5) To pause or continue the title, press the but-
ton (25).
Note: As long as the replay is interrupted, the signal
of the CD/MP3 player or of the tuner will be present
at the output PRIORITY (34).
6) Use the buttons DOWN/ and UP/ (31)
to go to the previous or next title (press the
button briefly) or for fast forward/reverse
(keep the button pressed).
7) To switch off the Bluetooth receiver, keep the
button BT POWER pressed until the LED
PAIR is extinguished.
6.4 Operation of the tuner
6.4.1 Storing stations
For storing stations, 30 station numbers are
available.
A – Automatic station scanning and storage
Due to the automatic function, station scanning
and storage is quick and easy. The tuner will
scan the reception range and will automatically
store the stations received one after the other:
Keep the button ASM (30) pressed until figures
start appearing on the frequency indication. Once
the tuner has switched to the station on station
number 1, all stations will be stored automati-
cally. To recall other stations see chapter 6.4.2.
B – Manual storage of stations
1) If you know the frequency of the desired sta-
tion, enter it with the remote control. If you do
not know it, proceed with step 2.
To enter the received frequency, press the
button DIRECT (41), then enter the fre-
quency with the numerical keys (40). Finally
press the button DIRECT once again.
Examples:
Note: If you enter a frequency outside the reception
range, the display will briefly show ERROR.
After entering the frequency, proceed with
step 3.
2) To find a certain station, use the station scan-
ning. To start scanning, keep the button
DOWN or UP (29) pressed until figures start
appearing on the frequency indication.
Press the button DOWN to start scanning
downwards.
Press the button UP to start the scanning
upwards.
Scanning will stop at the next station. Restart
scanning as often as necessary to find the
desired station.
3) For fine tuning, briefly press the button
DOWN or UP (29) for stepwise increase or
decrease of the frequency.
4) To store the station, always press any further
button within 5 seconds, otherwise the fol-
lowing steps must be repeated:
a) Press the button MEMORY (28) on the
unit or MEM (28) on the remote control.
The station number keeps flashing on the
right at the bottom of the display.
b) Select the station number for the station
adjusted:
Either stepwise with the button M-DOWN
or M-UP (42) on the remote control or
directly select the station number with the
buttons 1 – 5 (21) and +5 (27) on the unit
or with the buttons 1 – 10/0 (40) and +10
(45) on the remote control.
Examples:
c) Press the button MEMORY or MEM to
complete the storing procedure.
5) To store further stations, repeat steps 1 to 4.
6.4.2 Recalling stored stations
1) Enter the number under which the station has
been stored: With the buttons 1 – 5 (21) and
+5 (27) on the unit or with the buttons 1 – 10/0
(40) and +10 (45) on the remote control.
Examples can be found in the previous table.
2) Alternatively, recall the stations with the but-
tons M-DOWN and M-UP (42) on the remote
control. Press the button M-DOWN to select
the previous station number or press the but-
ton M-UP to select the next station number.
3) With a broadcast in stereo, the display will
indicate STEREO. To switch between stereo
reception and mono reception, press the but-
ton MO/ST (44) on the remote control.
Note: If you switch from mono to stereo reception,
there will be a short delay before the indication on
the display changes from MONO to STEREO.
6.4.3 Additional information
for RDS reception
If the station selected broadcasts RDS informa-
tion (radio data system), the display will show the
station name instead of the frequency and the
station number. To show additional information
on the display, press the button RDS (48) on the
remote control:
1st actuation of button ©indication of pro-
gramme type
If the station does not provide an indication of
the programme type, the display will show
PTY NONE.
2ndactuation of button ©information about the
current title (title name, artist) or the broad-
cast programme
If no information is provided, the display will
show RT NONE.
3rd actuation of button ©indication of time
If no time is broadcast, the display will show
CT NONE. The time is not broadcast continu-
ously; therefore, after calling up the station, it
may take a few minutes before the time is
available.
4th actuation of button ©brief indication of the
receiving frequency and the station number,
then the name of the station (basic setting)
6.4.4 Automatic switch-off of the tuner
Press the button SLEEP (47) to set a time
between 90 and 10 minutes after which the tuner
will switch off.
1) Press the button SLEEP repeatedly until the
desired time for switching off the tuner
appears on the display (26). Each time you
press the button, the time will decrease by
10 minutes. After the set time, the tuner will
switch off.
2) To switch on again, press the button SLEEP.
The display shows SLEEP-90 MIN. Then
press the button SLEEP again so that the
indication SLEEP-90 MIN will disappear. If
you fail to do so, the automatic switch-off will
be activated again.
Alternatively, use the POWER switch (1)
to switch off the complete unit and then
switch it on again.
Note: To deactivate the automatic switch-off before
the time adjusted, press the button SLEEP so that
the indication SLEEP-.. MIN will disappear.
No. Buttons on unit Buttons on
remote control
4 4 4
10 5, +5, +5 10/0
18 3, +5, +5, +5, +5 8, +10
22 2, +5, +5, +5, +5, +5 2, +10, +10
Frequency Keys
90.50 MHz DIRECT, 9, 10/0, 5, 10/0, DIRECT
98.75 MHz DIRECT, 9, 8, 7, 5, DIRECT
104.25 MHz DIRECT, 1, 10/0, 4, 2, 5, DIRECT
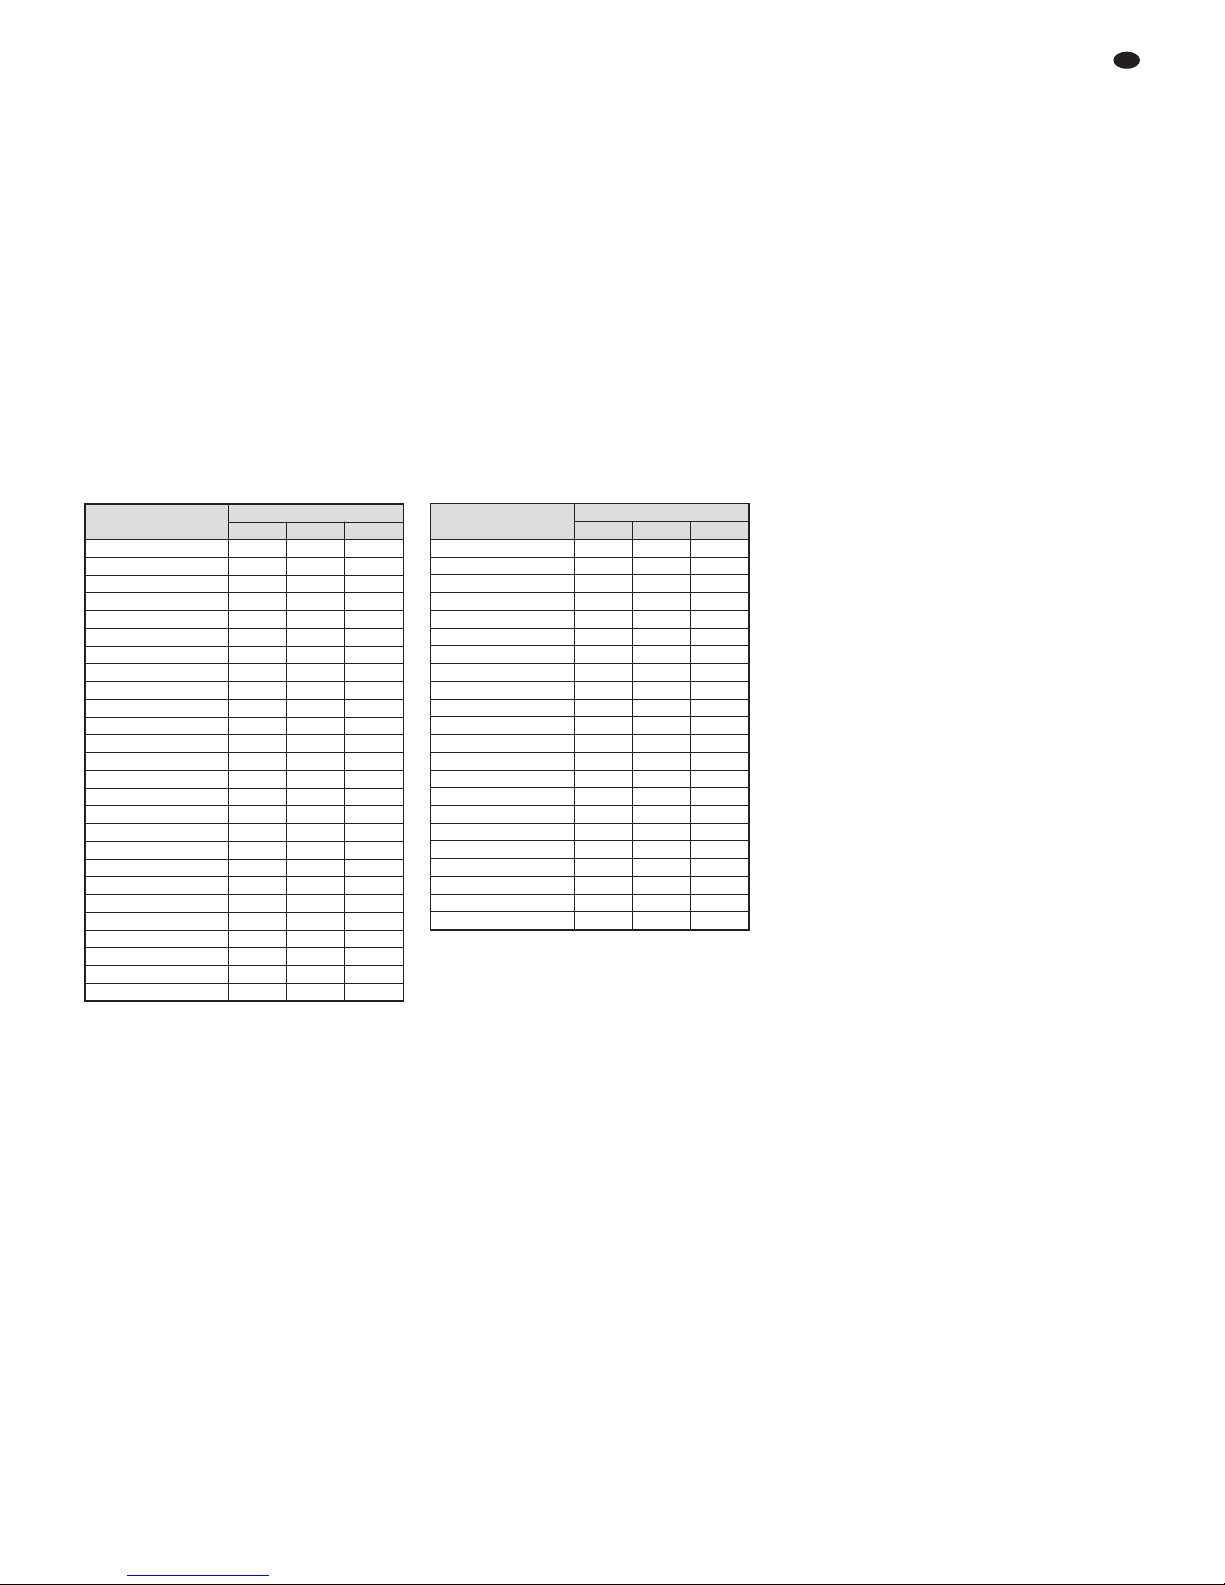
13
GB
All rights reserved by MONACOR ®INTERNATIONAL GmbH & Co. KG. No part of this instruction
manual may be reproduced in any form or by any means for any commercial use.
It is possible to control the CD-112RDS/BT from
a PC via a suitable terminal program. Connect
the jack REMOTE CONTROL (32) to the RS-232
interface of the computer. Set the following
parameters in the terminal program:
Symbol rate . . . . . . . . . 9600 bauds
Number of data bits: . . 8
Number of stop bits: . . . 1
Parity: . . . . . . . . . . . . . . none
Flow control: . . . . . . . . none
The control commands for all functions of the
CD-112RDS/BT are listed in the tables below.
The terminal program will send them in ASCII
code. Finally, the commands “Carriage Return”
(0D hexadecimal) and “Line Feed” (0A hexadec-
imal) must be sent to the CD-112RDS/BT as
bytes 4 and 5. Some terminal programs will exe-
cute them automatically or can be adjusted
accordingly.
Functions of the CD/MP3 player Functions of the tuner
Function Control command
Byte 1 Byte 2 Byte 3
1 E C A
2 E C B
3 E C C
4 E C D
5 E C E
6 E C F
7 E C G
8 E C H
9 E C I
10/0 E C J
+10 E C K
DIRECT E C L
(TUNING) DOWN E C M
(TUNING) UP E C N
(STATION) M-UP E C 0
(STATION) M-DOWN E C 1
MEMORY (MEM) E C 2
ASM E C 3
MO/ST E C 4
SLEEP E C 5
Station scanning E C 7
Station scanning E C 8
Function Control command
Byte 1 Byte 2 Byte 3
FOLDER E A A
FOLDER E A B
SKIP REV E A C
SKIP CUE E A D
STOP E A E
PLAY/PAUSE E A F
EJECT E A G
PROG E A H
ESP E A I
FIND E A J
MUTE E A K
REPEAT E A L
FUNC E A M
DISPLAY E A N
disable EJECT E A P
enable EJECT E A Q
0 E A 0
1 E A 1
2 E A 2
3 E A 3
4 E A 4
5 E A 5
6 E A 6
7 E A 7
8 E A 8
9 E A 9
8 Maintenance
Protect the unit from dust, vibrations, humidity
and heat (admissible ambient temperature
range 0 – 40 °C). For cleaning only use a dry,
soft cloth; never use water or chemicals.
Note concerning sound interruptions and
reading errors
Cigarette smoke and dust will easily penetrate
through all openings of the unit and will also set-
tle on the optics of the laser sampling systems. If
this deposit should cause reading errors and
sound interruptions, the unit must be cleaned by
skilled personnel. Please note that there will be
a charge on cleaning, even during the warranty
period!
9 Specifications
CD/MP3 player
Frequency range: . . . . . . 20 – 20 000 Hz
THD: . . . . . . . . . . . . . . . . < 0.1 %
Channel separation: . . . . > 60 dB
Dynamic range: . . . . . . . . > 96 dB
S/N ratio: . . . . . . . . . . . . . > 70 dB
Audio output: . . . . . . . . . . 1.2 V
Tuner
Received frequency: . . . . 87.5 – 108 MHz
General information
Power supply: . . . . . . . . . 230 V~/50 Hz
Power consumption: . . . . 50 VA max.
Ambient temperature: . . . 0 – 40 °C
Dimensions (W×H×D): . 482 × 44 × 265 mm,
1 rack space
Weight: . . . . . . . . . . . . . . 4.1 kg
Subject to technical modification.
After a command has been executed, the CD-
112RDS/BT will send the following message in
ASCII code to the PC:
+ O K “Carriage Return” “Line Feed”
In case of an input error, it will send the mes-
sage:
+ E R “Carriage Return” “Line Feed”
Note: Between two commands, there must be an inter-
val of at least 300 ms. After a command for station scan-
ning, an interval of at least 800 ms is required.
7 PC Control of the Unit via RS-232 Interface

Vous trouverez sur la page 3, dépliable, les
éléments et branchements décrits.
1 Eléments et branchements
1.1 Face avant
1Interrupteur Marche/Arrêt POWER
2Zone de commande pour le lecteur CD/MP3
(voir schéma 2 pour le détail)
3Zone de commande pour le tuner
(voir schéma 3 pour le détail)
1.2 Lecteur CD/MP3
4Interface USB pour mettre une clé USB ou
brancher un disque dur
5Fente dʼinsertion du CD
Poussez le CD dans la fente jusquʼà ce quʼil
entre automatiquement.
6Touche PROG pour commuter en mode pro-
grammation pour créer votre propre suite de
titres (chapitre 6.2.7)
7Touches REV – SKIP – CUE pour la sélection
de titres et lʼavance et retour rapides
sélection de titres :
A chaque pression sur la touche CUE, on
avance dʼun titre ; en appuyant sur la touche
REV, on saute au début du titre et à chaque
autre pression, on recule dʼun titre.
avance et retour rapides :
Pour lʼavance rapide, maintenez la touche
CUE enfoncée, pour le retour rapide, main-
tenez la touche REV enfoncée.
8Touche STOP pour arrêter la lecture
9Touche PLAY/PAUSE pour commuter entre
lecture et pause
10 Affichage CD : brille lorsque le lecteur CD/
MP3 peut être géré avec la télécommande ;
voir également point 46, touche CD/TUNER
11 Touche EJECT pour éjecter le CD
12 Affichage du lecteur CD/MP3
13 Touche REPEAT pour sélectionner les fonc-
tions répétition et la lecture aléatoire
réglage de base (PLAY ALL)
Tous les titres du support audio ou dʼune
suite programmée sont lus une fois.
première pression (PLAY ALL RANDOM)
une seule lecture de tous les titres dans un
ordre aléatoire
pression suivante (REPEAT TRACK)
répétition continue du titre sélectionné
pression suivante (REPEAT FOLDER)
répétition continue de tous les titres dans
le dossier sélectionné (fonction unique-
ment pour des fichiers MP3)
pression suivante (REPEAT ALL)
répétition continue de tous les titres
pression suivante (RANDOM REPEAT)
lecture continue des titres dans un ordre
aléatoire
pression suivante (PLAY ALL)
retour au réglage de base
14 Touches FOLDER pour sélectionner les dos-
siers de fichiers MP3 :
Pour sélectionner le dossier suivant, appuyez
sur la touche . Pour revenir au dossier pré-
cédent, activez la touche . Vous revenez
toujours au premier titre du dossier sélectionné.
15 Touche FIND pour une recherche de titres
MP3 et dossiers (chapitre 6.2.2 C et D)
16 Touche MUTE pour couper le son du lecteur
CD/MP3
17 Touche FUNC pour sélectionner le support
audio (CD, support USB, carte mémoire)
18 Fente pour insérer une carte mémoire
1.3 Tuner
19 Capteur infrarouge pour les signaux de la
télécommande
20 LED TUNER : brille lorsque le tuner peut être
géré avec la télécommande ; voir également
point 46, touche CD/TUNER
21 Touches de stations 1 à 5 pour sélectionner
les stations mémorisées sur ces touches
22 Touche PAIR pour coupler lʼappareil à une
source de signal Bluetooth (chapitre 6.3)
23 LED PAIR:
Clignote lorsque le récepteur Bluetooth est
allumé
Brille en continu lorsque lʼappareil a été cou-
plé à une source de signal Bluetooth
24 Antenne du récepteur Bluetooth
25 Touche BT POWER/ pour éteindre et allu-
mer le récepteur Bluetooth (maintenez la
touche enfoncée) et pour interrompre ou
poursuivre la lecture en mode Bluetooth
(enfoncez brièvement la touche)
26 Affichage du tuner
27 Touche +5 pour sélectionner les stations des
emplacements de mémoire 6 à 30 : après
avoir appuyé sur une touche de station (21),
appuyez sur la touche +5 aussi souvent que
nécessaire
28 Touche MEMORY (MEM)* pour mémoriser
des stations : une fois le réglage de station
effectué avec les touches DOWN / UP (29),
appuyez sur la touche MEMORY, puis sélec-
tionnez lʼemplacement de mémoire avec les
touches de station 1 à 5 (21) et +5 (27).
Appuyez ensuite sur la touche MEMORY une
nouvelle fois.
29 Touches DOWN / UP pour le réglage de sta-
tions : une brève pression sur la touche aug-
mente ou diminue la fréquence de réception ;
si une des touches est enfoncée plus de
0,5 secondes, la recherche de stations dé-
marre (défilement vers lʼavant ou vers lʼarrière)
30 Touche ASM pour une recherche et mémori-
sation automatique des stations
Pour activer la fonction, maintenez la touche
brièvement enfoncée.
31 Touches DOWN/ et UP/ pour la sélec-
tion de titres et lʼavance et retour rapide en
mode Bluetooth
*repère sur la télécommande
1.4 Face arrière
32 Interface RS-232 pour gérer lʼappareil via un
ordinateur
33 Branchement ANTENNA pour une an-
tenne FM
Une antenne FM simple est livrée avec lʼap-
pareil.
34 Connexion XLR PRIORITY OUT
Le signal du récepteur Bluetooth (première
priorité) ou du lecteur CD/MP3 (seconde
priorité) ou du tuner est présent ici.
35 Prises RCA femelles BT OUT pour la sortie
audio du récepteur Bluetooth
36 Prises RCA femelles TUNER OUT pour la
sortie audio du tuner
37 Connexion XLR CD PLAYER OUT pour la
sortie audio du lecteur CD/MP3
38 Prise secteur à relier à une prise 230 V~/
50 Hz via le cordon secteur livré
39 Porte fusible
tout fusible fondu doit être remplacé par un
fusible de même type.
1.5 Télécommande
Les touches de la télécommande jusquʼau point
30 existent également sur lʼappareil et sont
décrites dans les chapitres 1.2 et 1.3. Les
touches avec deux numéros de position ont dif-
férentes fonctions pour gérer le lecteur CD/MP3
(numéro de gauche) et gérer le tuner (numéro de
droite). Appuyez sur la touche CD/TUNER (46)
pour commuter la télécommande entre la ges-
tion du lecteur CD/MP3 [la LED CD (10) brille] et
la gestion du tuner [la LED TUNER (20) brille].
Les touches suivantes nʼexistent que sur la télé-
commande :
40 Touches numériques 1 – 10/0
–pour le lecteur CD/MP3 pour la sélection
directe dʼun titre, exemples :
node titre touches
4 4, PLAY/PAUSE
10 1, 10/0, PLAY/PAUSE
135 1, 3, 5, PLAY/PAUSE
–pour le tuner, pour sélectionner les stations
mémorisées 1 à 10 ; pour sélectionner les
stations 11 à 30, appuyez ensuite sur la
touche +10 (45) aussi souvent que néces-
saire.
41 Touche DIRECT pour le tuner pour la sélec-
tion directe dʼune fréquence de réception
1. Appuyez sur la touche DIRECT.
2. Tapez la fréquence avec les touches nu-
mériques (40).
3. Appuyez sur la touche DIRECT.
42 Touches M-DOWN / M-UP pour une sélec-
tion par palier des stations mémorisées (vers
lʼavant ou vers lʼarrière)
43 Touche DISPLAY pour le lecteur CD/MP3
pour commuter les informations dans la ligne
inférieure de lʼaffichage pendant la lecture de
fichiers MP3
Pour des fichiers MP3, le nom du titre, de lʼin-
terprète (Artist) et de lʼalbum défilent dans la
ligne supérieure de lʼaffichage.
réglage de base :
dans la ligne inférieure, le numéro du titre
(TR) et la durée déjà lue du titre sʼaffichent
1re pression
le nom du dossier sʼaffiche
2ème pression
le nom du fichier sʼaffiche
3ème pression
le nombre de dossiers et de titres sʼaffi-
chent
4ème pression
retour au réglage de base
44 Touche ESP MO/ST
–pour le lecteur CD/MP3, pour désactiver et
activer la mémoire anti-chocs
(pas en mode MP3)
–pour le tuner, pour commuter entre la ré-
ception mono et la réception stéréo
45 Touche +10 pour le tuner pour sélectionner
les stations mémorisées 11 à 30 : après avoir
appuyé sur une touche numérique (40), ap-
puyez sur la touche +10 aussi souvent que
nécessaire.
46 Touche CD/TUNER pour commuter la télé-
commande pour gérer le lecteur CD/MP3 [la
LED CD (10) brille] ou le tuner [la LED
TUNER (20) brille]
47 Touche SLEEP pour un arrêt automatique du
tuner une fois la durée réglée écoulée
(90 – 10 minutes) ; à chaque pression sur la
touche, la durée diminue de 10 minutes.
Appuyez sur la touche SLEEP pour rallumer
le tuner (chapitre 6.4.4)
48 Touche RDS pour commuter entre différentes
informations supplémentaires en mode ré-
ception RDS
14
F
B
CH
2 Conseils dʼutilisation
et de sécurité
Cet appareil répond à toutes les directives
nécessaires de lʼUnion Européenne et porte
donc le symbole .
Respectez scrupuleusement les points suivants :
Lʼappareil nʼest conçu que pour une utilisation
en intérieur. Protégez-le de tout type de pro-
jections dʼeau, des éclaboussures, dʼune
humidité élevée de lʼair et de la chaleur (plage
de température de fonctionnement autorisée :
0 – 40 °C).
En aucun cas, vous ne devez poser dʼobjet
contenant du liquide ou un verre sur lʼappareil.
Ne le faites jamais fonctionner et débranchez-
le immédiatement lorsque :
1. des dommages visibles apparaissent sur
lʼappareil et sur le cordon secteur
2. après une chute ou accident similaire...,
vous avez un doute au sujet de lʼétat de
lʼappareil.
3. des dysfonctionnements apparaissent.
Dans tous les cas, les dommages doivent être
réparés par un technicien spécialisé.
Ne débranchez jamais lʼappareil en tirant sur
le cordon secteur, tenez-le toujours par la
fiche.
Pour le nettoyage utilisez uniquement un chif-
fon doux et sec, en aucun cas de produits chi-
miques ou dʼeau.
Nous déclinons toute responsabilité en cas de
dommages matériels ou corporels résultants
si lʼappareil est utilisé dans un but autre que
celui pour lequel il a été conçu, sʼil nʼest pas
correctement branché ou utilisé ou sʼil nʼest
pas réparé par une personne habilitée, en
outre, la garantie deviendrait caduque.
3 Possibilités dʼutilisation
Lʼappareil CD-112RDS/BT est une combinaison
dʼun lecteur CD/MP3, dʼun tuner FM RDS et dʼun
récepteur Bluetooth ; il est adapté pour des ap-
plications de sonorisation multiples, par exemple
théâtres, restaurants, salles dʼattente. Le lecteur
CD/MP3 propose de nombreuses fonctions
telles que répétition continue, lecture aléatoire,
lecture MP3 de supports de stockage USB et
cartes SD/SDHC (32 GO max.).
On peut lire des CDs audio, des CD-R (CDs
audio gravés) et des CDs avec titres au format
MP3. Pour des CD-RW (CDs réinscriptibles), on
peut rencontrer des problèmes lors de la lecture
selon le type de CD, le graveur et le programme
de gravure utilisés.
4 Désactiver la fonction
Auto Start
Le lecteur CD/MP3 est doté dʼune fonction
Démarrage automatique : une fois lʼappareil al-
lumé et le support (CD, support USB, carte de
mémoire) reconnu, la lecture du premier titre
démarre automatiquement. Si vous ne voulez
pas la fonction de démarrage automatique
[démarrage de la lecture uniquement en ap-
puyant sur la touche PLAY/PAUSE (9)], vous
pouvez désactiver la fonction démarrage auto-
matique.
Avant dʼouvrir lʼappareil, débranchez impéra-
tivement la fiche du secteur.
Il y a un cavalier sur la platine avec le bloc sec-
teur et les prises de sortie audio (voir la flèche
sur le schéma 6). La fonction démarrage auto-
matique est activée lorsque le cavalier est sur la
position AUTO PLAY. Pour désactiver la fonc-
tion, mettez le cavalier sur la position MANUAL
PLAY.
5 Positionnement et
branchement de lʼappareil
Lʼappareil est prévu pour un montage dans un
rack 482 mm/19″, il peut également être posé
directement sur une table. Pour le montage dans
un rack, 1 unité (= 44,45 mm) est nécessaire.
Avant dʼeffectuer les branchements ou de
modifier les branchements existants, éteignez le
CD-112RDS/BT et les appareils à relier.
1) Pour diriger les signaux audio vers lʼappareil
suivant (par exemple table de mixage ou
amplificateur), quatre sorties niveau ligne
sont prévues :
PRIORITY OUT (34)
1. Pour le signal du récepteur Bluetooth ; le
signal a la priorité sur les signaux du lec-
teur CD/MP3 et du tuner.
2. Si aucun signal Bluetooth nʼest reçu ou si
la lecture est sur Pause, le signal du lec-
teur CD/MP3 est présent ici.
3. Si le lecteur CD/MP3 est sur Pause ou
Arrêt, le signal du tuner est présent ici.
BT OUT (35)
pour le signal du récepteur Bluetooth
TUNER OUT (36)
pour le signal du tuner
CD PLAYER OUT (37)
pour le signal du lecteur CD/MP3
2) Reliez une antenne FM à la prise ANTENNA
(33). Une antenne FM simple est livrée avec
lʼappareil.
3) Pour finir, reliez le cordon secteur livré à la
prise secteur (38) et à une prise 230 V~/
50 Hz.
6 Utilisation
Allumez lʼappareil avec lʼinterrupteur secteur
POWER (1). Le message Welcome est visible
sur lʼaffichage (12) du lecteur CD/MP3. Lʼaffi-
chage (26) du tuner indique la dernière station
sélectionnée.
6.1 Télécommande
1) Pour insérer les batteries (2 × 1,5V, type R03),
retirez le couvercle du compartiment batterie
sur la face arrière de la télécommande. Insé-
rez les batteries comme indiqué dans le com-
partiment, refermez le compartiment avec le
couvercle.
En cas de non utilisation prolongée de la
télécommande, retirez les batteries, elles
pourraient couler et endommager la télécom-
mande.
2) Maintenez toujours la télécommande dans la
direction du capteur IR (19) lorsque vous acti-
vez une touche. Il ne faut aucun obstacle
entre la télécommande et le capteur.
3) Sur lʼappareil, les LEDs CD (10) et TUNER
(20) indiquent si le lecteur CD/MP3 ou le
tuner peut être géré avec la télécommande.
Pour commuter la gestion, appuyez sur la
touche CD/TUNER (46). Le repère rouge sur
la télécommande indique les fonctions pour
le tuner.
4) Si la portée de la télécommande diminue, les
batteries sont épuisées et doivent être rem-
placés.
6.2 Lecteur CD/MP3
Une fois allumé, le lecteur CD/MP3 lit tout
dʼabord le CD. Si aucun CD nʼest inséré, le sup-
port USB est lu. Si aucun support USB nʼest
relié, la carte mémoire est lue. Si aucune carte
mémoire nʼest placée, lʼaffichage indique (12)
NO DISC.
6.2.1 Lecture de titres de musique
1) Insérez un CD, inscription vers le haut, dans
la fente (5) jusquʼà ce quʼil soit automatique-
ment inséré
et/ou
mettez une clé USB dans le port USB (4) ou
branchez un disque dur (le cas échéant avec
alimentation propre) au port USB
et/ou
mettez une carte mémoire dans la fente SD/
MMC CARD (18). Le coin en diagonale de la
carte doit être dirigé vers le haut. Pour retirer
la carte, enfoncez-la légèrement pour quʼelle
se désenclenche.
2) Sélectionnez le support audio (CD, support
USB, carte mémoire) le cas échéant avec la
touche FUNC (17).
3) La lecture du premier titre démarre automati-
quement une fois le processus de reconnais-
sance du support terminé. Si la fonction
démarrage automatique a été désactivée
(chapitre 4), démarrez la lecture du premier
titre avec la touche PLAY/PAUSE (9). Voir
chapitre 6.2.2 pour sélectionner dʼautres
titres.
4) Pendant la lecture, le symbole de lecture
est affiché dans la ligne supérieure à droite
de lʼaffichage. La ligne inférieure indique le
numéro (TR …) du titre en cours et la durée
déjà écoulée (min, sec) du titre. Pour des
titres au format MP3, MP3 sʼaffiche tout à
droite, pour des CDs audio standards, ESP
sʼaffiche.
5) Pour des fichiers MP3, sʼaffiche en plus dans
la ligne supérieure :
File – … = nom du fichier
Title – … = nom du titre
AVERTISSEMNT Comme lʼappareil doit être
ouvert pour effectuer des modi-
fications, seul un personnel
qualifié peut le faire. En cas de
mauvaise manipulation, il y a
risque de décharge électrique.
AVERTISSEMENT Cet appareil est alimenté par
une tension dangereuse. Ne
touchez jamais lʼintérieur de
lʼappareil car, en cas de mau-
vaise manipulation, vous
pourriez subir une décharge
électrique.
Lorsque lʼappareil est définitivement retiré
du service, vous devez le déposer dans
une usine de recyclage adaptée pour
contribuer à son élimination non polluante.
Ne jetez pas les batteries usagées
dans la poubelle domestique, dépo-
sez-les dans un container spécifique
ou ramenez-les chez votre reven-
deur.
15
F
B
CH

Artist – … = nom de lʼartiste
Album – … = nom de lʼalbum
Remarques : Le nom du fichier ne sʼaffiche quʼaprès
le démarrage de la lecture. Sʼil manque une don-
née, lʼaffichage indique à la place NONE.
6) En appuyant sur la touche DISPLAY (43) sur
la télécommande, des informations diverses
peuvent sʼafficher dans la ligne inférieure
pour des fichiers MP3 :
réglage de base
dans la ligne inférieure, le numéro du titre
et la durée déjà lue du titre sʼaffichent.
1re pression
le nom du dossier sʼaffiche
2ème pression
le nom du fichier sʼaffiche
3ème pression
le nombre de dossiers et de titres sʼaffi-
chent
4ème Pression
retour au réglage de base
7) Avec la touche PLAY/PAUSE, on peut com-
muter entre lecture et pause. En mode
pause, le symbole pause sʼaffiche, lʼindica-
tion de temps clignote.
8) Pour arrêter la lecture, appuyez sur la
touche STOP (8). Lʼaffichage indique dans la
deuxième ligne :
pour des CDs audio standard :
– le nombre de titres (TR …)
– la durée totale (min, sec)
pour des supports audio avec fichiers MP3 :
– nombre de dossiers
– nombre de titres
9) Pour éjecter le CD, appuyez sur la touche
EJECT (11). Lʼaffichage indique EJECT, le
CD est éjecté et peut être retiré. Si le CD
nʼest pas retiré de la fente, lʼappareil le fait
rentrer automatiquement après 10 secondes
environ.
6.2.2 Sélection de titres
A – Sélection directe du numéro de titre
Sélectionnez directement le titre voulu avec les
touches numériques (40) en tapant son numéro.
Pour démarrer le titre, appuyez ensuite sur la
touche PLAY/PAUSE (9). Exemples :
numéro titre touches
4 4, PLAY/PAUSE
10 1, 10/0, PLAY/PAUSE
135 1, 3, 5, PLAY/PAUSE
Remarque : Les titres MP3 sont numérotés par lʼappa-
reil comme suit :
1. tous les titres sans dossier dans le répertoire princi-
pal ROOT
2. tous les titres dans des dossiers dans le répertoire
principal
3. tous les titres dans les sous-dossiers etc.
La numérotation des titres et dossiers ne sʼeffectue pas
par ordre alphabétique, mais on peut les trouver facile-
ment avec la fonction recherche (chapitre
C et D
).
B – Avance et retour de titres
Pour avancer ou reculer dʼun ou plusieurs titres,
appuyez brièvement (plusieurs fois) sur la touche
CUE ou REV (7).
touche CUE : saut au titre suivant
touche REV : saut au début du titre en cours. Par
une autre pression sur la touche REV, on recule
toujours dʼun titre.
Conseil : Nʼappuyez que brièvement sur les touches
REV et CUE sinon on a une avance/ un retour rapide.
C – Recherche alphabétique des titres MP3
1) Appuyez sur la touche FIND (15). Un sym-
bole de loupe sʼaffiche en clignotant à bas à
gauche sur lʼaffichage. A sa droite sʼaffiche la
lettre Aet dans la ligne supérieure le nom du
premier fichier commençant par la lettre A.
2) Avec la touche CUE [avance], ou REV (7)
[retour], sélectionnez la première lettre du
nom du fichier voulu. Les chiffres 0 à 9 peu-
vent également être sélectionnés. Les lettres
et chiffres qui ne débutent aucun titre sur le
CD sont toujours repérés par None.
3) Si plusieurs noms de fichiers ont la même let-
tre initiale, sélectionnez la lettre clé puis
maintenez la touche REV ou CUE enfoncée
jusquʼà ce que la lettre à côté du symbole
loupe clignote. Tous les noms de fichiers
commençant par la lettre clé peuvent être
sélectionnés avec la touche REV ou CUE les
uns après les autres.
4) Lors de la recherche, lʼaffichage indique tou-
jours le numéro du dossier et du titre en bas
à droite. Lorsque le titre voulu est trouvé,
démarrez la lecture avec la touche PLAY/
PAUSE (9).
D – Sélection et recherche de dossiers
Pour des fichiers MP3 dans plusieurs dossiers
(répertoires de fichiers), on peut sauter pendant la
lecture au premier titre du dossier suivant (touche
) et au premier titre du dossier précédent
(touche ) avec les touches FOLDER (14).
Si la lecture est arrêtée avec la touche
STOP (8) et la touche FOLDER ou est
enfoncée, la ligne supérieure de lʼaffichage in-
dique le nom du dossier et la ligne inférieure le
numéro du dossier derrière le symbole .
Avec la fonction recherche, on peut trouver
un dossier avec un nom donné, même pendant
la lecture dʼun titre :
1) Appuyez deux fois sur la touche FIND (15)
pour que le symbole loupe clignote sur lʼaffi-
chage et que Dir pour Directory (dossier)
soit affiché à côté à droite.
2) Avec les touches REV – SKIP – CUE (7),
recherchez le dossier souhaité. La ligne supé-
rieure de lʼaffichage indique le nom du dossier
et la ligne inférieure le numéro du dossier.
3) Lorsque vous avez trouvé le dossier,
appuyez sur la touche PLAY/PAUSE (9) pour
démarrer le premier titre du dossier ou pour
démarrer un autre titre du dossier, maintenez
tout dʼabord la touche REV ou CUE enfoncée
jusquʼà ce que File (fichier) soit affiché à
côté du symbole loupe. Avec les touches
REV – SKIP – CUE, vous pouvez sélection-
ner les titres dans le dossier les uns après les
autres. Pour démarrer la lecture du titre
sélectionné, appuyez sur la touche PLAY/
PAUSE.
6.2.3 Avance et retour rapides
Pour lʼavance rapide, maintenez la touche CUE
(7) enfoncée, pour un retour rapide, la touche
REV. Pour des fichiers MP3, une avance ou un
retour rapide ne peut se faire quʼau sein dʼun
titre ; elle ne peut être suivie acoustiquement
mais uniquement selon les indications de durée
sur lʼaffichage.
6.2.4 Fonctions répétition et lecture aléatoire
Avec la touche REPEAT (13), on peut activer
une des fonctions répétition et la lecture de tous
les titres en ordre aléatoire :
réglage de base (PLAY ALL)
Tous les titres du support audio ou dʼune
suite programmée sont lus une fois puis la
lecture sʼarrête.
première pression (PLAY ALL RANDOM)
une seule lecture de tous les titres dans un
ordre aléatoire
pression suivante (REPEAT TRACK)
répétition continue du titre sélectionné
pression suivante (REPEAT FOLDER)
répétition continue de tous les titres dans le
dossier sélectionné
(fonction uniquement pour des fichiers MP3)
pression suivante (REPEAT ALL)
répétition continue de tous les titres
pression suivante (RANDOM REPEAT)
lecture continue des titres dans un ordre
aléatoire
pression suivante (PLAY ALL)
retour au réglage de base
6.2.5 Coupure du son
Pour couper le son pendant la lecture dʼun titre,
appuyez sur la touche MUTE (16). Pour rallumer
le son, appuyez une nouvelle fois sur la touche
MUTE.
6.2.6 Mémoire anti-chocs
Le lecteur CD/MP3 est doté dʼune mémoire anti-
chocs qui peut compenser les dysfonctionne-
ments causés par des chocs ou vibrations
(jusquʼà 40 secondes) lors de la lecture du CD.
Pour tester, la mémoire anti-chocs peut être dés-
activée avec la touche ESP (44) sur la télécom-
mande (pas en mode MP3). Lʼaffichage (12)
indique brièvement ESP OFF. Pour réactiver,
appuyez une nouvelle fois sur la touche ESP,
lʼaffichage indique brièvement ESP ON.
6.2.7 Composition personnelle
dʼune suite de titres
Si une sélection de titres doit être lue dans un
ordre donné, on peut programmer une suite de
64 titres au plus. Pour des fichiers MP3, il faut
connaître la numérotation des dossiers (cha-
pitre 6.2.2 – D) ; de même, il faut entrer le numéro
correspondant de chaque titre à programmer.
1) Le lecteur CD doit être en mode Stop ; si
besoin, appuyez sur la touche STOP (8).
2) Avec la touche PROG (6), activez le mode
de programmation ; toutes les autres touches
doivent être enfoncées en lʼespace de 15 se-
condes sinon on quitte le mode de program-
mation. Dans ce cas, appuyez une nouvelle
fois sur la touche PROG. Lʼaffichage indique :
—pour un CD sans fichiers MP3
PROGRAM
CD P-01 00
—pour fichiers MP3
PROGRAM
P-01 000 0000
3) Pour des CDs sans fichiers MP3, sautez cet
étape et allez directement au point 4).
Pour des fichiers MP3, il faut tout dʼabord
sélectionner le numéro du dossier dans
lequel se trouve le premier titre souhaité pour
la suite. Cʼest également nécessaire lorsque
tous les fichiers sont dans le répertoire prin-
cipal ROOT sans dossier. Dans ce cas, sai-
sissez 1 comme numéro de dossier.
Sélectionnez le numéro de dossier avec
les touches REV – SKIP – CUE (7) ou tapez-
le avec les touches numériques (40). Pour
mémoriser, appuyez ensuite sur la touche
PROG. Les 4 zéros clignotent incitant à taper
le numéro du titre.
4) Sélectionnez le numéro du premier titre pour
la suite avec les touches REV – SKIP – CUE
(7) ou tapez-le avec les touches numériques
(40). Pour des fichiers MP3 dans des dos-
siers, nʼoubliez pas que les fichiers ne sont
16
F
B
CH
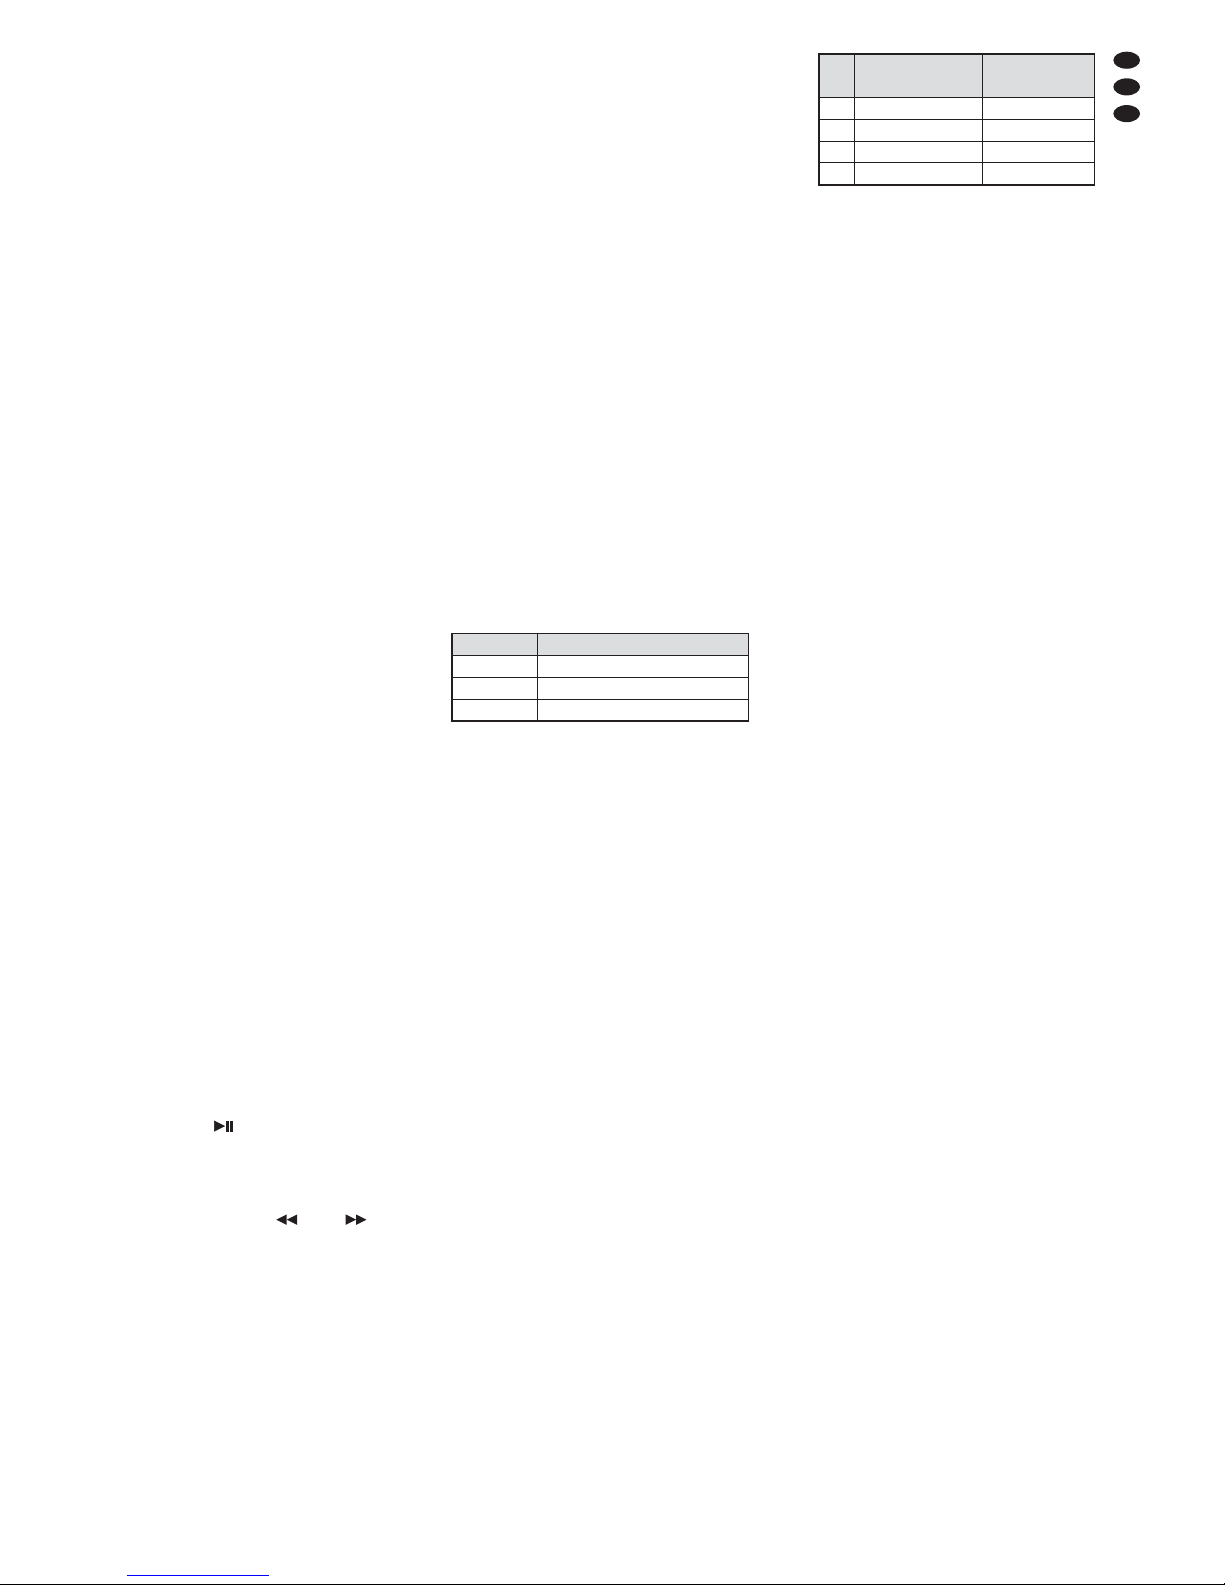
pas numérotés les uns à la suite des autres
mais que le premier fichier dans chaque dos-
sier est repéré par numéro 1.
5) Appuyez sur la touche PROG pour mémori-
ser. Lʼaffichage indique le prochain numéro
de lʼemplacement de mémoire, par exemple
P-02.
6) Répétez les étapes (3), 4 et 5 pour les autres
titres souhaités jusquʼà complète program-
mation de la suite de titres.
7) Pour démarrer la lecture de la suite, appuyez
sur la touche PLAY/PAUSE (9). La ligne
supérieure de lʼaffichage indique MEM pour
Memory (mémoire) et la suite de titres est
lue.
8) Avec les touches REV – SKIP – CUE, on peut
sélectionner chaque titre de la suite ou acti-
ver la fonction avance/retour rapides au sein
dʼun titre en maintenant la touche correspon-
dante enfoncée.
9) Une fois la suite lue ou si vous appuyez sur la
touche STOP, la lecture sʼarrête. Pour redé-
marrer la suite, enfoncez tout dʼabord la
touche PROG puis la touche PLAY/PAUSE.
Conseil : Une suite programmée de titres est effacée
lorsquʼon change de supports de données, lorsquʼon
appuie sur la touche FUNC (17) ou appuie sur la touche
STOP en mode programmation, ou si on arrête lʼappareil.
6.3 Utilisation du récepteur Bluetooth
Avec le récepteur Bluetooth, on peut établir une
liaison radio vers une source de signal Bluetooth
(par exemple ordinateur portable, Smartphone,
tablette PC) pour lire, via le CD-112RDS/BT, les
données audio qui y sont mémorisées.
Conseil : La source de signal Bluetooth doit fonction-
ner selon le protocole A2DP (Advanced Audio Distribu-
tion Profile). Sinon aucune liaison radio nʼest possible.
1) Allumez la fonction Bluetooth sur lʼordinateur
portable, Smartphone ou tablette PC (voir si
besoin la notice de cet appareil).
2) Pour allumez le récepteur Bluetooth du CD-
112RDS/BT maintenez la touche BT POWER
(25) brièvement enfoncée jusquʼà ce que la
LED PAIR (23) clignote.
3) Pour coupler le CD-112RDS/BT à la source
de signal Bluetooth, maintenez la touche
PAIR (22) brièvement enfoncée jusquʼà ce
que la LED PAIR clignote lentement. Dès que
la liaison radio est établie, la LED PAIR brille
en continu.
Conseil : Le CD-112RDS/BT est indiqué sur lʼaffi-
chage de la source de signal Bluetooth par “Audio
Bluetooth”.
4) Démarrez la lecture dʼun titre sur la source de
signal Bluetooth.
5) Avec la touche (25), vous pouvez inter-
rompre puis reprendre la lecture.
Conseil : Tant que la lecture est interrompue, le
signal du lecteur CD/MP3 ou du tuner est présent à
la sortie PRIORITY (34).
6) Avec les touches DOWN/ et UP/ (31),
vous pouvez aller au titre précédent ou au
titre suivant (enfoncez la touche brièvement)
ou faire un retour/avance rapide (maintenez
la touche enfoncée).
7) Pour éteindre le récepteur Bluetooth, mainte-
nez la touche BT POWER enfoncée jusquʼà
ce que la LED PAIR sʼéteigne.
6.4 Utilisation du tuner
6.4.1 Mémoriser les stations
Pour mémoriser les stations, 30 numéros de sta-
tions sont disponibles.
A – recherche et mémorisation
automatique de stations
Grâce à la fonction automatique, la recherche et
la mémorisation de stations sʼeffectuent simple-
ment et rapidement. Le tuner fait défiler la plage
de réception et mémorise automatiquement les
stations reçues les unes après les autres :
Maintenez la touche ASM (30) enfoncée jusquʼà
ce que les chiffres de lʼaffichage de fréquence
défilent. Tous les stations sont automatiquement
mémorisées lorsque le tuner est commuté sur la
station à lʼemplacement de la station numéro 1.
Voir chapitre 6.4.2 pour appeler les autres sta-
tions.
B – mémorisation manuelle des stations
1) Si la fréquence de la station voulue est
connue, vous pouvez la saisir avec la télé-
commande. Si ce nʼest pas le cas, poursuivez
avec les indications figurant dans le point 2.
Pour saisir la fréquence de réception, ap-
puyez sur la touche DIRECT (41) et saisissez
la fréquence avec les touches numériques
(40). Pour finir, appuyez une nouvelle fois sur
la touche DIRECT. Exemples :
Remarque : Si une fréquence est saisie en dehors
de la plage de réception, lʼaffichage indique briève-
ment ERROR (erreur).
Une fois la fréquence saisie, poursuivez avec
les indications du point 3.
2)
On peut rechercher également un station
don-
née avec la recherche de stations. Pour
démarrer la recherche, maintenez la touche
DOWN ou UP (29) enfoncée jusquʼà ce que
les chiffres de lʼaffichage de fréquence défi-
lent.
La touche DOWN démarre la recherche de
stations vers lʼarrière.
La touche UP démarre la recherche de sta-
tions vers lʼavant.
La recherche sʼinterrompt à la station sui-
vante. Redémarrez la recherche autant de
fois que nécessaire jusquʼà ce que la station
voulue soit reçue.
3) Pour un réglage précis, on peut diminuer ou
augmenter par palier la fréquence de récep-
tion par de brèves pressions sur la touche
DOWN ou UP (29).
4) Pour mémoriser la station, appuyez sur toute
autre touche en lʼespace de 5 secondes
sinon il faut répéter les points suivants :
a) Sur lʼappareil appuyez sur la touche
MEMORY (28) ou sur la télécommande,
sur la touche MEM (29). Le numéro de la
station clignote sur lʼaffichage en bas à
droite.
b) Sélectionnez le numéro de la station pour
la station réglée :
Soit par palier avec la touche M-DOWN
ou M-UP (42) sur la télécommande soit
en sélectionnant directement le numéro
de station sur lʼappareil avec les touches
1 à 5 (21) et +5 (27) ou sur la télécom-
mande avec les touches 1 à 10/0 (40) et
+10 (45). Exemples :
c) Enfoncez la touche MEMORY ou MEM
pour terminer la mémorisation.
5) Pour mémoriser dʼautres stations, répétez les
points 1 à 4.
6.4.2 Appeler des stations mémorisées
1) Tapez le numéro sous lequel la station est
mémorisée, sur lʼappareil avec les touches 1
à 5 (21) et +5 (27) ou sur la télécommande
avec les touches 1 – 10/0 (40) et +10 (45).
Voir exemples dans le tableau précédent.
2) On peut également appeler les stations avec
les touches M-DOWN et M-UP (42) sur la
télécommande. Avec la touche M-DOWN,
vous commutez sur le numéro de station pré-
cédent et avec la touche M-UP sur le numéro
de station suivant.
3) Si une station diffuse en stéréo, STEREO est
visible sur lʼaffichage. Avec la touche MO/ST
(44) sur la télécommande, vous pouvez com-
muter sur réception en mode mono ou en
mode stéréo.
Conseil : Si vous commutez de la réception mono
sur la réception stéréo, lʼindication sur lʼaffichage
passe de MONO sur STEREO avec un peu de délai.
6.4.3 Informations supplémentaires
pour réception RDS
Si la station sélectionnée émet des informations
RDS (Radio Data System), le nom de la station
est indiquée sur lʼaffichage à la place de la fré-
quence et du numéro de la station. Avec la
touche RDS (48) sur la télécommande, on peut
afficher des informations supplémentaires :
1. pression affichage du type de programme.
Si la station ne donne aucun type de pro-
gramme, lʼaffichage indique PTY NONE.
2. deuxième pression informations sur le titre
en cours (nom du titre, interprète) ou de
lʼémission. Sʼil nʼy a pas dʼinformations, lʼaffi-
chage indique RT NONE.
3. pression affichage de lʼheure
Si aucune heure nʼest émise, lʼaffichage
indique CT NONE. Parce que lʼheure nʼest
pas émise en continu, cela peut prendre
quelques minutes après lʼappel de la station
jusquʼà ce que lʼheure soit disponible.
4. pression brièvement la fréquence de ré-
ception et le numéro de la station, ensuite le
nom de la station (réglage de base).
6.4.4 Déconnexion automatique du tuner
Avec la touche SLEEP (47), vous pouvez régler
une durée entre 90 et 10 minutes après laquelle
le tuner sʼéteint.
1) Appuyez sur la touche SLEEP jusquʼà ce que
la durée voulue pour éteindre le tuner soit visi-
ble sur lʼaffichage (26). A chaque pression sur
la touche, la durée diminue de 10 minutes.
Une fois la durée écoulée, le tuner sʼéteint.
2) Pour rallumer, appuyez sur la touche SLEEP.
Lʼaffichage indique SLEEP-90 MIN. Ap-
puyez une nouvelle fois sur la touche SLEEP
jusquʼà ce que lʼaffichage SLEEP-90 MIN
ne sʼaffiche plus. Sinon, la fonction dʼarrêt est
à nouveau activée.
A la place, on peut également éteindre
complètement lʼappareil avec lʼinterrupteur
secteur POWER (1) puis le rallumer.
Conseil : Pour désactiver la fonction dʼarrêt avant la fin
de la durée réglée, appuyez sur la touche SLEEP jusquʼà
ce que l'affichage SLEEP-.. MIN ne sʼaffiche plus.
Notouches sur
lʼappareil
touches sur la
télécommande
4 4 4
10 5, +5, +5 10/0
18 3, +5, +5, +5, +5 8, +10
22 2, +5, +5, +5, +5, +5 2, +10, +10
Fréquence Touches
90,50 MHz DIRECT, 9, 10/0, 5, 10/0, DIRECT
98,75 MHz DIRECT, 9, 8, 7, 5, DIRECT
104,25 MHz DIRECT, 1, 10/0, 4, 2, 5, DIRECT
17
F
B
CH
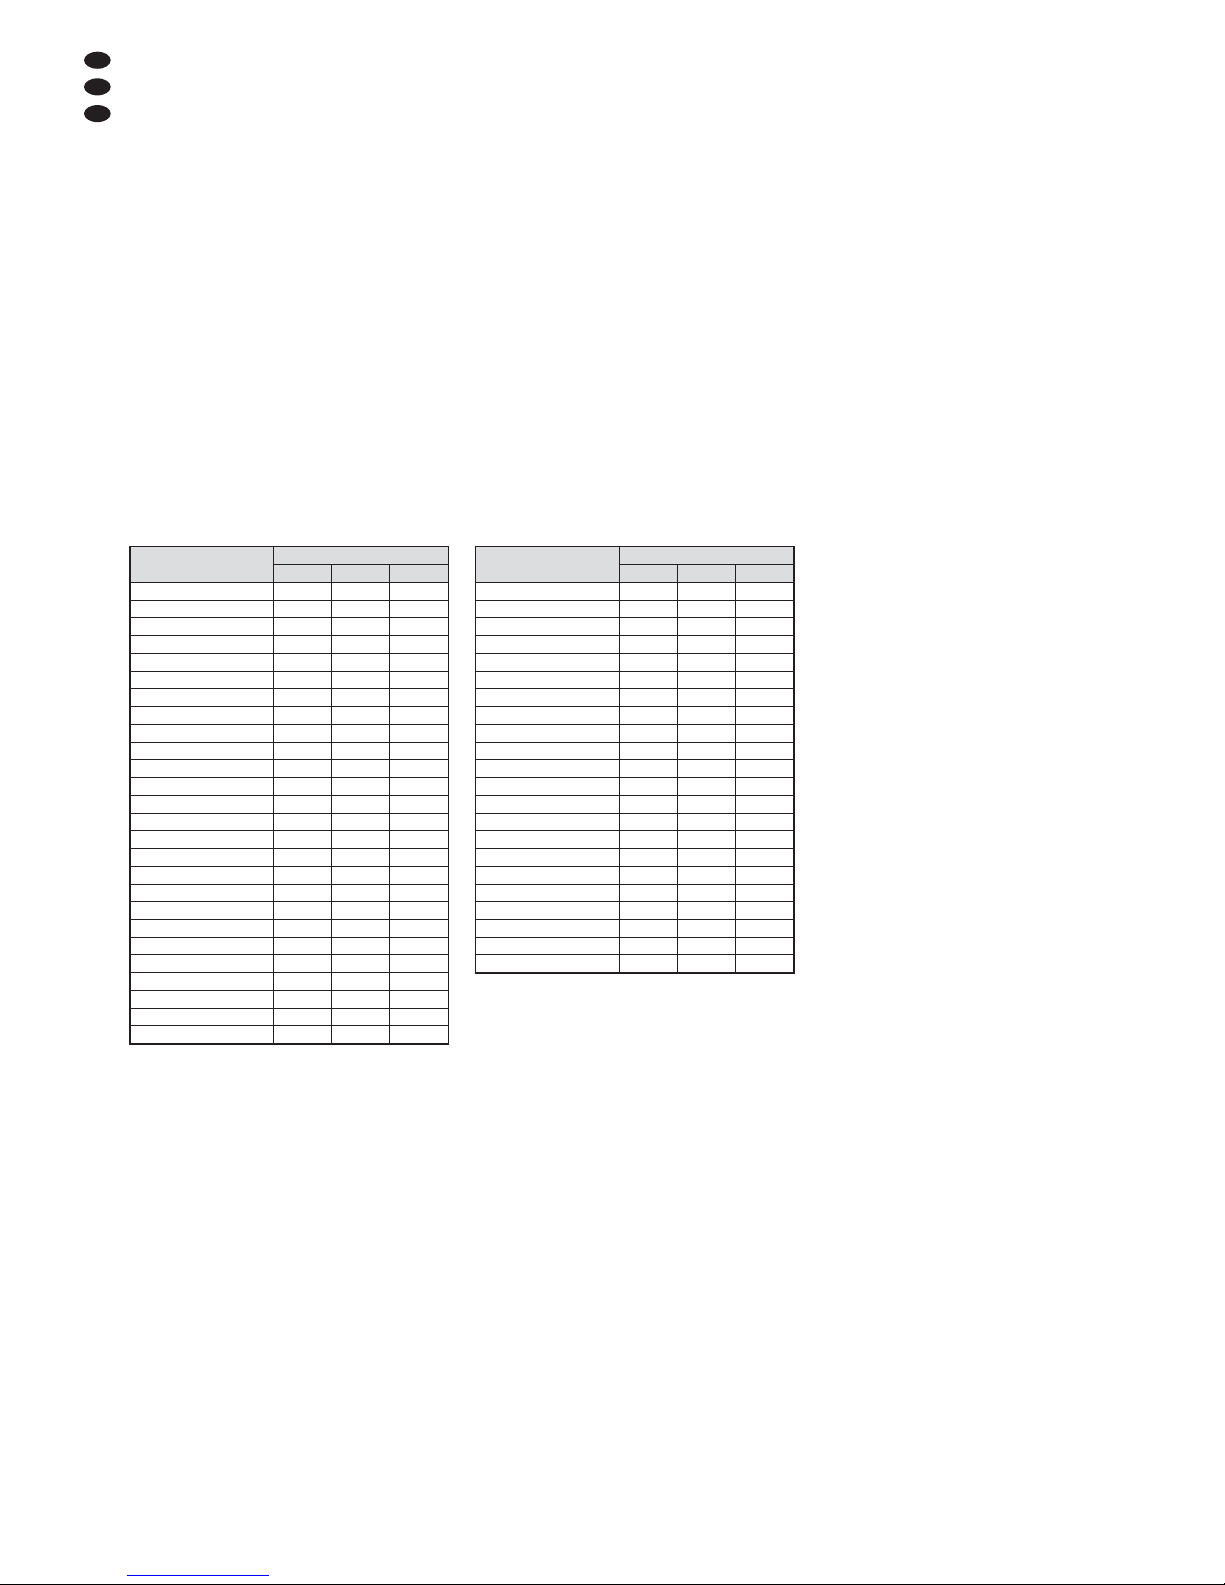
18
F
B
CH
Notice dʼutilisation protégée par le copyright de MONACOR ®INTERNATIONAL GmbH & Co. KG.
Toute reproduction même partielle à des fins commerciales est interdite.
Le CD-112RDS/BT peut être géré via un pro-
gramme terminal correspondant depuis un PC.
Reliez la prise REMOTE CONTROL (32) à lʼin-
terface RS-232 de lʼordinateur. Réglez les para-
mètres suivants dans le programme terminal :
Taux de symbole : . . . . 9600 bauds
Nombre de bits
de données : . . . . . . . . 8
Nombre de bits
dʼarrêt : . . . . . . . . . . . . . 1
Parité : . . . . . . . . . . . . . aucune
Contrôle de flux : . . . . . aucun
Les ordres de commande pour toutes les fonc-
tions du CD-112RDS/BT sont décrits dans les
tableaux suivants ; le programme terminal les
envoie en code ASCII. Il faut envoyer comme
bytes 4 et 5, les ordres “Carriage Return” (0D
hexadécimal) et “Line Feed” (0A hexadécimal)
au CD-112RDS/BT. Quelques programmes ter-
minal les effectuent automatiquement ou peu-
vent être réglés en conséquence.
Fonctions du lecteur CD/MP3 Fonctions du tuner
Fonction Ordre de commande
Byte 1 Byte 2 Byte 3
1 E C A
2 E C B
3 E C C
4 E C D
5 E C E
6 E C F
7 E C G
8 E C H
9 E C I
10/0 E C J
+10 E C K
DIRECT E C L
(TUNING) DOWN E C M
(TUNING) UP E C N
(STATION) M-UP E C 0
(STATION) M-DOWN E C 1
MEMORY (MEM) E C 2
ASM E C 3
MO/ST E C 4
SLEEP E C 5
recherche stations E C 7
recherche stations E C 8
Fonction Ordre de commande
Byte 1 Byte 2 Byte 3
FOLDER E A A
FOLDER E A B
SKIP REV E A C
SKIP CUE E A D
STOP E A E
PLAY/PAUSE E A F
EJECT E A G
PROG E A H
ESP E A I
FIND E A J
MUTE E A K
REPEAT E A L
FUNC E A M
DISPLAY E A N
bloquer EJECT E A P
débloquer EJECT E A Q
0 E A 0
1 E A 1
2 E A 2
3 E A 3
4 E A 4
5 E A 5
6 E A 6
7 E A 7
8 E A 8
9 E A 9
8 Entretien
Protégez lʼappareil de la poussière, des vibra-
tions, de lʼhumidité et de la chaleur (température
de fonctionnement admissible 0 – 40 °C). Pour le
nettoyer, utilisez uniquement un chiffon sec et
doux, en aucun cas, de produits chimiques ou
dʼeau.
Remarque sur les coupures du son et les
erreurs de lecture
La fumée de cigarettes et la poussière sʼintro-
duisent facilement dans les ouvertures du lec-
teur et se dépose sur lʼoptique du système laser.
Cela peut générer des erreurs de lecture et des
coupures de son. Dans ce cas, confiez impérati-
vement le nettoyage du lecteur à un technicien
spécialisé. Cette opération est à la charge de
lʼutilisateur, même lorsque lʼappareil est sous
garantie !
9 Caractéristiques techniques
Lecteur CD/MP3
Bande passante : . . . . . . . 20 – 20 000 Hz
Taux de distorsion : . . . . . < 0,1 %
Séparation de canaux : . . > 60 dB
Plage dynamique : . . . . . . > 96 dB
Rapport signal sur bruit : . > 70 dB
Sortie vidéo : . . . . . . . . . . 1,2 V
Tuner
Fréquence de réception : . 87,5 – 108 MHz
Généralités
Alimentation : . . . . . . . . . . 230 V~/50 Hz
Consommation : . . . . . . . 50 VA max.
Température fonc. : . . . . . 0 – 40 °C
Dimensions (L×H×P) : .. 482 × 44 × 265 mm,
1 unité
Poids : . . . . . . . . . . . . . . . 4,1 kg
Tout droit de modification réservé.
Une fois lʼordre exécuté, le CD-112RDS/BT en-
voie le message suivant, en code ASCII au PC :
+ O K “carriage Return” “Line Feed”
En cas dʼerreur de saisie, lʼappareil indique :
+ E R “Carriage Return” “Line Feed”
Remarque : Il faut une pause de 300 ms au moins entre
deux ordres. Après un ordre de recherche de stations,
il faut une pause de 800 ms minimum.
7 Gestion PC de lʼappareil via lʼinterface RS-232

A pagina 3, se aperta completamente, vedrete
sempre gli elementi di comando e i collega-
menti descritti.
1 Elementi di comando
e collegamenti
1.1 Pannello frontale
1Interruttore on/off POWER
2Zona di comando per il lettore CD/MP3
(per particolari vedi fig. 2)
3Zona di comando per il tuner
(per particolari vedi fig. 3)
1.2 Lettore CD/MP3
4Porta USB per inserire una chiavetta USB o
per il collegamento di un disco rigido
5Fessura per lʼinserimento di un CD
Spingere il CD finché non viene ritirato auto-
maticamente.
6Tasto PROG, per la compilation di una se-
quenza individuale di titoli, attivare il modo di
programmazione (Cap. 6.2.7)
7Tasti REV – SKIP – CUE per la scelta di un
titolo e per lʼavanzamento e ritorno veloce
Scelta di un titolo
Con ogni pressione del tasto CUE si salta
avanti di un titolo; premendo il tasto REV,
si salta allʼinizio del titolo e con ogni ulte-
riore pressione si salta indietro di un titolo.
Avanzamento/ritorno veloce
Per lʼavanzamento tener premuto il tasto
CUE, per il ritorno il tasto REV.
8Tasto STOP per terminare la riproduzione
9Tasto PLAY/PAUSE per cambiare fra ripro-
duzione e pausa
10 Spia CD: è accesa se il lettore CD/MP3 può
essere comandato tramite il telecomando;
vedi anche punto 46 Tasto CD/TUNER
11 Tasto EJECT per espellere il CD
12 Display del lettore CD/MP3
13 Tasto REPEAT per attivare le funzioni di ripe-
tizione e di riproduzione casuale
Impostazione base (PLAY ALL)
tutti i titoli della sorgente o di una sequenza
programmata sono riprodotti una volta
prima pressione del tasto (PLAY ALL RANDOM)
riproduzione unica dei titoli in ordine ca-
suale
ulteriore pressione del tasto (REPEAT TRACK)
ripetizione continua del titolo scelto
ulteriore pressione del tasto
(REPEAT FOLDER)
ripetizione continua di tutti i titoli della car-
tella scelta
(la funzione è presente solo per i file MP3)
ulteriore pressione del tasto (REPEAT ALL)
ripetizione continua di tutti i titoli
ulteriore pressione del tasto
(RANDOM REPEAT)
riproduzione continua dei titoli in ordine ca-
suale
ulteriore pressione del tasto (PLAY ALL)
ritorna allʼimpostazione base
14 Tasti FOLDER per la scelta della cartella con
i file MP3:
Per scegliere la cartella successiva, premere
il tasto . Per ritornare alla cartella prece-
dente azionare il tasto . In ogni caso si
salta sul primo titolo della cartella scelta.
15 Tasto FIND per la ricerca di titoli e cartelle
MP3 (Capp. 6.2.2 C e D)
16 Tasto MUTE per rendere muto il lettore
CD/MP3
17 Tasto FUNC per scegliere la sorgente (CD,
memoria USB, scheda di memoria)
18 Fessura per inserire una scheda di memoria
1.3 Tuner
19 Sensore a infrarossi per i segnali del tele-
comando
20 Spia TUNER: è accesa se il tuner può essere
comandato tramite il telecomando;
vedi anche punto 46 Tasto CD/TUNER
21 Tasto delle stazioni 1 – 5 per selezionare le
stazioni memorizzate con questi tasti
22 Tasto PAIR per il collegamento con una fonte
di segnali bluetooth (Cap. 6.3)
23 Spia PAIR:
Lampeggia con il ricevitore bluetooth acceso.
Rimane acceso con il collegamento avvenuto
con una fonte bluetooth.
24 Antenna del ricevitore bluetooth
25 Tasto BT POWER/ per accendere e spe-
gnere il ricevitore bluetooth (tener premuto il
tasto) e per interrompere o continuare la
riproduzione con funzionamento bluetooth
(premere il tasto brevemente)
26 Display del tuner
27 Tasto +5 per selezionare le stazioni delle
locazioni di memoria 6 – 30: dopo aver pre-
muto un tasto stazione (21) premere il tasto
+5 tante volte quanto necessario.
28 Tasto MEMORY (MEM)* per memorizzare le
stazioni: Dopo lʼimpostazione di una stazione
con i tasti DOWN / UP (29), premere il tasto
MEMORY, quindi scegliere il numero della
memoria con i tasti delle stazioni 1 – 5 (21) e
+5 (27). Alla fine premere nuovamente il tasto
MEMORY.
29 Tasti DOWN / UP per impostare le stazioni:
una breve pressione del tasto aumento o
riduce la frequenza di ricezione; se un tasto
viene premuto per più di 0,5 sec., viene
avviata la ricerca automatica (risp. in avanti e
indietro)
30 Tasto ASM per ricerca e memorizzazione
automatica delle stazioni
Per attivare la funzione tener premuto il tasto
brevemente.
31 Tasti DOWN/ e UP/ per la selezione
dei titoli e per lʼavanzamento e il ritorno
veloce con funzionamento bluetooth
*Scritta sul telecomando
1.4 Pannello posteriore
32 Interfaccia RS-232 per il telecomando del-
lʼapparecchio tramite un computer
33 Collegamento ANTENNA per unʼantenna FM
Una semplice antenna FM è in dotazione.
34 Prese XLR PRIORITY OUT
Qui è presente il segnale del ricevitore blue-
tooth (1. priorità) oppure quello del lettore
CD/MP3 (2. priorità) o del tuner.
35 Prese RCA BT OUT per lʼuscita audio del
ricevitore bluetooth
36 Prese RCA TUNER OUT per lʼuscita audio
del tuner
37 Prese CD PLAYER OUT per lʼuscita audio
del lettore CD/MP3
38 Presa per il collegamento con una presa di
rete (230 V~/50 Hz) tramite il cavo in dotazione
39 Portafusibile
Sostituire un fusibile difettoso solo con uno
dello stesso tipo.
1.5 Telecomando
I tasti del telecomando fino alla posizione 30
sono presenti anche sullʼapparecchio e sono
descritti nei capitoli 1.2 e 1.3. I tasti con due
numeri di posizione hanno funzioni differenti per
il comando del lettore CD/MP3 (numero a sini-
stra) e del tuner (numero a destra). Il cambio del
comando fra lettore CD/MP3 [la spia CD (10) è
accesa] e il tuner [la spia TUNER (20) è accesa]
avviene con il tasto CD/TUNER (46). I seguenti
tasti sono presenti solo sul telecomando:
40 Tasti numerici 1 – 10/0
–per il lettore CD/MP3 per la scelta diretta di
un titolo, esempi:
N. titolo Tasti
4 4, PLAY/PAUSE
10 1, 10/0, PLAY/PAUSE
135 1, 3, 5, PLAY/PAUSE
–per il tuner per la scelta delle stazioni
memorizzate 1 – 10; per scegliere le sta-
zioni 11 – 30 premere successivamente il
tasto +10 (45) tante volte quanto necessa-
rio
41 Tasto DIRECT per il tuner per la scelta diretta
di una frequenza di ricezione:
1. premere il tasto DIRECT
2. digitare la frequenza con i tasti numerici (40)
3. premere il tasto DIRECT
42 Tasti M-DOWN / M-UP per chiamare una dopo
lʼaltra le stazioni memorizzate (in avanti e
indietro)
43 Tasto DISPLAY per il lettore CD/MP3 per
cambiare le informazioni nella riga inferiore
del display durante la riproduzione di un file
MP3
Con i file MP3, la riga superiore del display
indica, scorrendo, il nome del titolo, dellʼinter-
prete (artist) e dellʼalbo.
Impostazione base
Nella riga inferiore è indicato il numero del
titolo (TR) e il tempo trascorso del titolo
1. pressione del tasto
È indicato il nome della cartella
2. pressione del tasto
È indicato il nome del file
3. pressione del tasto
È indicato il numero delle cartelle e dei titoli
4. pressione del tasto
Ritorno allʼimpostazione base
44 Tasto ESP MO/ST
–per il lettore CD/MP3 per disattivare e atti-
vare nuovamente la memoria anti-shock
(non è possibile con funzionamento MP3)
–per il tuner per cambiare fra ricezione ste-
reo e mono
45 Tasto +10 per il tuner per selezionare le sta-
zioni memorizzate 11 – 30: dopo aver pre-
muto un tasto numerico (40) premere il tasto
+10 tante volte quanto necessario.
46 Tasto CD/TUNER per cambiare la funzione
del telecomando: comando del lettore CD/
MP3 [la spia CD (10) è accesa] o del tuner [la
spia TUNER (20) è accesa]
47 Tasto SLEEP per spegnere il tuner auto-
maticamente dopo un tempo impostato
(90 – 10 minuti); con ogni pressione del tasto,
il tempo si riduce di 10 minuti
Per riattivare il tuner premere il tasto SLEEP
(Cap. 6.4.4).
48 Tasto RDS per cambiare fra varie informa-
zioni supplementari durante la ricezione RDS
19
I
2 Avvertenze di sicurezza
Questʼapparecchio è conforme a tutte le direttive
rilevanti dellʼUE e pertanto porta la sigla .
Si devono osservare assolutamente anche i
seguenti punti:
Lʼapparecchio è previsto solo per lʼuso allʼin-
terno di locali. Proteggerlo dallʼacqua goccio-
lante e dagli spruzzi dʼacqua, da alta umidità
dellʼaria e dal calore (temperatura dʼimpiego
ammessa fra 0 e 40 °C).
Non depositare sullʼapparecchio dei conteni-
tori riempiti di liquidi, p. es. bicchieri.
Non mettere in funzione lʼapparecchio e stac-
care subito la spina rete se:
1. lʼapparecchio o il cavo rete presentano dei
danni visibili;
2. dopo una caduta o dopo eventi simili sussi-
ste il sospetto di un difetto;
3. lʼapparecchio non funziona correttamente.
Per la riparazione rivolgersi sempre ad unʼof-
ficina competente.
Staccare il cavo rete afferrando la spina,
senza tirare il cavo.
Per la pulizia usare solo un panno morbido,
asciutto; non impiegare in nessun caso pro-
dotti chimici o acqua.
Nel caso dʼuso improprio, di collegamenti sba-
gliati, dʼimpiego scorretto o di riparazione non
a regola dʼarte dellʼapparecchio, non si as-
sume nessuna responsabilità per eventuali
danni consequenziali a persone o a cose e
non si assume nessuna garanzia per lʼappa-
recchio.
3 Possibilità dʼimpiego
Lʼapparecchio CD-112RDS/BT è una combina-
zione fra lettore CD/MP3, tuner FM-RDS e rice-
vitore bluetooth ed è adatto per molteplici tipi di
sonorizzazione, p. es. in teatri, ristoranti, sale
dʼattesa. A tale scopo, il lettore CD/MP3 offre
funzioni particolari, come p. es. la riproduzione
senza fine o casuale, la riproduzione MP3 da
memorie USB e da schede SD/SDHC (max.
32 GB).
Con questo apparecchio si possono ripro-
durre CD audio, CD audio masterizzati in proprio
(CD-R) nonché CD con titoli nel formato MP3.
Nel caso di CD riscrivibili (CD-RW) è possibile
che vi siano dei problemi durante la riproduzione
a seconda del tipo di CD, del masterizzatore e
del programma usato.
4 Disattivare la funzione
auto start
Il lettore CD/MP3 è equipaggiato con una fun-
zione auto-start: Dopo lʼaccensione dellʼappa-
recchio e il caricamento dei dati di un dispositivo
audio (CD, memoria USB o scheda memoria),
sʼavvia automaticamente la riproduzione del
primo titolo. Se lʼavvio automatico non è richiesto
[avvio della riproduzione solo premendo il tasto
PLAY/PAUSE (9)], si può disattivare la funzione
auto start.
Prima di aprire lʼapparecchio staccare asso-
lutamente la spina del cavo dalla presa di
rete!
Sulla scheda con lʼalimentatore e le prese audio
OUT si trova un jumper (vedi la freccia in fig. 6).
La funzione auto start è attivata se il jumper
si trova in posizione AUTO PLAY. Per disattivare
la funzione, spostare il jumper in posizione
MANUAL PLAY.
5 Collocare e
collegare lʼapparecchio
Lʼapparecchio è previsto per il montaggio in un
rack 482 mm/19″, ma può essere usato anche
come apparecchio sistemato liberamente su un
tavolo. Per il montaggio in un rack è richiesta 1 U
(U = unità dʼaltezza = 44,45 mm).
Prima del collegamento o prima di modifi-
care il collegamento spegnere il CD-112RDS/BT
e gli apparecchi da collegare.
1) Per inoltrare i segnali audio allʼapparecchio a
valle (p. es. mixer o amplificatore), sono pre-
senti quattro uscite con livello Line:
PRIORITY OUT (34)
1. Per il segnale del ricevitore bluetooth; il
segnale ha la priorità rispetto ai segnali
del lettore CD/MP3 e del tuner.
2. Se non si riceve nessun segnale blue-
tooth o se la riproduzione è messa su
pausa, qui è presente il segnale del lettore
CD/MP3.
3. Se il lettore CD/MP3 è messo su pausa o
stop, qui è presente il segnale del tuner.
BT OUT (35)
Per il segnale del ricevitore bluetooth
TUNER OUT (36)
Per il segnale del tuner
CD PLAYER OUT (37)
Per il segnale del lettore CD/MP3
2) Collegare unʼantenna FM con la presa
ANTENNA (33). Unʼantenna FM semplice è
in dotazione.
3) Alla fine inserire il cavo in dotazione nella
presa (38) e quindi in una presa di rete
(230 V~/50 Hz).
6 Funzionamento
Accendere lʼapparecchio con lʼinterruttore
POWER (1). Sul display (12) del lettore CD/MP3
si vede lʼindicazione Welcome. Il display (26)
del tuner visualizza la stazione selezionata per
ultima.
6.1 Telecomando
1) Per inserire le batterie (2 × 1,5 V, tipo AAA =
ministilo), togliere il coperchio del vano batte-
rie sul retro del telecomando. Inserire le bat-
terie come indicato nel vano stesso e richiu-
dere il vano con il coperchio.
In caso di mancato uso prolungato con-
viene togliere le batterie per non danneggiare
il telecomando se le batterie dovessero per-
dere.
2) Premendo un tasto del telecomando, tenerlo
sempre in direzione del sensore IR (19). Non
ci devono essere ostacoli fra il telecomando
e il sensore.
3) Sullʼapparecchio, i LED CD (10) e TUNER (20)
indicano se con il telecomando può essere
comandato il lettore CD/MP3 o il tuner. Per
cambiare il tipo di comando premere il tasto
CD/TUNER (46). La scritta rossa sul teleco-
mando segnala le funzioni per il tuner.
4) Se la portata del telecomando diminuisce,
significa che le batterie sono scariche e che
devono essere sostituite.
6.2 Lettore CD/MP3
Dopo lʼaccensione, il lettore CD/MP3 carica dap-
prima i dati del CD. Se non è inserito nessun CD,
sono caricati i dati della memoria USB. Se non è
collegato nessuna memoria USB, si caricano i
dati della scheda di memoria. Se è assente
anche questa, il display (12) indica NO DISC.
6.2.1 Riprodurre titoli musicali
1) Inserire un CD, con la scritta rivolta in alto,
nella fessura (5) finché non viene ritirata
automaticamente
e/o
inserire una chiavetta USB nella porta USB
(4) o collegare un disco rigido (eventual-
mente con alimentazione individuale) con la
porta USB
e/o
inserire una scheda di memoria nella fessura
SD/MMC CARD (18), con lʼangolo smussato
rivolto in alto. Per togliere nuovamente la
scheda, spingerla un poʼ indentro per sbloc-
carla.
2) Scegliere la sorgente audio (CD, memoria
USB, scheda di memoria) eventualmente con
il tasto FUNC (17).
3) Dopo il caricamento dei dati si avvia automa-
ticamente la riproduzione del primo titolo. Se
è stata disattivata la funzione auto start
(Cap. 4), avviare la riproduzione del primo
titolo con il tasto PLAY/PAUSE (9). Per sce-
gliere altri titoli, vedi capitolo 6.2.2.
4) Durante la riproduzione, nella riga superiore
del display si vede a destra il simbolo di ripro-
duzione . La riga inferiore indica il numero
(TR …) del titolo attuale e il tempo già tra-
scorso (min. : sec.). Tutto a destra, con i titoli
nel formato MP3 si vede MP3, oppure ESP
nel caso di CD audio standard.
5) Con i file MP3 si vede in più, scorrendo nella
riga superiore:
File – … = nome del file
Title – … = nome del titolo
Artist – … = nome dellʼartista
Album – … = nome dellʼalbo
Nota: Il nome del file è indicato solo dopo lʼavvio
della riproduzione. Se è assente un dato, al posto
del nome, il display segnala NONE.
Non gettare le batterie scariche nelle
immondizie di casa bensì negli appo-
siti contenitori (p. es. presso il vostro
rivenditore).
AVVERTIMENTO Dato che occorre aprire lʼappa-
recchio per questa modifica,
tale modifica deve essere fatta
solo da parte di una persona
esperta. La manipolazione scor-
retta può provocare una scossa
elettrica!
AVVERTIMENTO Lʼapparecchio funziona con
pericolosa tensione di rete.
Non intervenire mai personal-
mente al suo interno. La mani-
polazione scorretta può provo-
care delle scariche elettriche
pericolose
Se si desidera eliminare lʼapparecchio
definitivamente, consegnarlo per lo
smaltimento ad unʼistituzione locale per
il riciclaggio.
20
I
Table of contents
Languages:


