IMPETUS ZEN 5800 Series User manual


Table of Contents
WEEE WARNING:
Do not dispose of electrical appliances as unsorted municipal waste, use separate collection
facilities.
Contact your local government for information regarding the collection systems available.
If electrical appliances are disposed of in landfills or dumps, hazardous substances can leak into
the groundwater and get into the food chain, damaging your health and well-being.
When replacing old appliances with new ones, the retailer is legally obligated to take back your
old appliance for disposal at least for free of charge.
Testing specification :
Low voltage Directive - EN60335 - 1
E&E Directive - EN62233
EMC Directive - EN55014 - 1
EN55014 - 2
EN61000 - 3 - 2
EN61000 - 3 – 3
Features of product with CE mark:
Mechanical and electrical safety.
Symbol of high quality.
Reliability assurance
T a b le o f C o n t e n t s
In t r o d u c t io n / S a f e t y g u id e lin e 1
M a in te n a n c e 1 ~ 2
P a r t s lis t 3 ~ 5
U p r ig h t a n d C o m p u te r 6
M a c h in e ( D C s y s t e m Z E N - 5 8 0 0 U , 5 8 0 0 V ) 7
M a c h in e ( A C s y s t e m Z E N - 5 8 0 0 A 2 , 5 8 0 0 A 3 ) 8
A c c e s s o r ie s 9
M a c h in e a n d c a u tio n 9
M a c h in e f r a m e 9
U p r ig h t tu b e 1 0
M o n ito r 跑 步 機 調 整1 0
M a c h in e a d ju s tm e n t 1 1
R u n n in g b e lt t e n s io n a d ju s tm e n t 1 1
In c lin e a d ju s t m e n t 1 2
S a f e ty k e y a n d p u ls e o p e r a tio n o 1 2
Q u ic k s p e e d k e y o p e r a t io n 1 2
M o n ito r O p e r a t io n 1 3
M o n ito r in s t r u c t io n 1 3 ~ 1 5
P a n e l D is p la y s 1 5 ~ 2 7
F u n c t io n In s tr u c t io n 2 7
B u ilt - in m o d e p r o f ile 2 9 ~ 3 0
T r o u b le s h o o t in g 3 1
W a r m U p 3 2
O p e r a t o n in s tr u c t io n a n d c a u t io n 3 3
E x p lo d e d v ie w
A s s e m b ly

1.INTRODUCTION:
Thank you very much for choosing our product. For your benefit and safety, please read the
manual and follow the instructions carefully. You will certainly enjoy a great workout experience
and a healthy body when you are well prepared after reading the manual.
2.SAFETY GUIDELINE:
ŸAlways consult your physicians before starting your workout.
ŸRead through the operation manual and follow the instruction when using the treadmill.
ŸKeep children away from the treadmill at all times.
ŸKeep the safety key out of the reach of all children.
ŸNever start the treadmill without making sure all power cord is normal and with no damage.
ŸPlace the treadmill on a solid level surface with the rear and side away from any objects.
ŸKeep your hands away from any moving parts.
ŸDo not place any liquid near or on the treadmill.
ŸWear appropriate clothes and shoes during the workout; Do not wear any shoes that may
damage the running belt;
ŸStop the workout immediately when you feel any discomfort; consult your physicians for
advice.
ŸNever start the treadmill while you are standing on the running belt; Stand on the foot rails to
start.
ŸIf you have any questions or concerns, contact dealer.
ŸMake sure the ground-wire is properly connected during assembly.
ŸThe treadmill is intended for in-home use only. Always exercise caution during the workout.
ŸClip the safety key to your clothes during the workout.
ŸHold onto the handrails or stand on the foot rails during any emergency, or step off the
treadmill.
ŸContact your dealer for professional help if you have any question.
ŸPlace the treadmill on a level surface with enough clearance behind it, 2M is needed, and on
both sides of the treadmill is 0.6M.
ŸThe optimal place to stand on the treadmill is at about 1/3 of the length of the running belt to
the front of the treadmill. You might step on the motor cover if you stand too close to the front
and crush the cover, or be tripped by the running belt. If you stand too close to the back of the
running deck, you might not catch the speed and fall off.
ŸThe maximum weight allowed on this machine is 150kg. Warranty will not be honored when
this advice is not carefully followed.
ŸThis machine is not intended for use by persons (including children) with reduced physical,
sensory or mental capabilities, or lack of experience and knowledge, unless they have been
given supervision or instruction concerning use of the machine by a person responsible for
their safety. Children should be supervised to ensure that they do not play with the machine.
3. MAINTENANCE:
A. Regular Maintenance:
a. Clean and lubricate the running deck after each 20-hour of use or on a monthly basis, which
ever comes first (SEE TREADMILL LUBRICATION INSTRUCTIONS). Clean both sides of the
running belt daily will prevent dirt from getting underneath the running belt.
b. To keep the dust off, clean the treadmill both on the surface and beneath it; Place a mat under
the treadmill to keep the dust off and to protect the floor.
c. Keep the liquid from the monitor or the running belt.
d. Contact your dealer for any service assistance.
1

C.Silicone Lubricant
Silicon Lubricant Warning …….. KEEP OUT OF REACH OF CHILDREN !
If swallowed or applied directly on face, seek medical advice immediately.
If spilt, clean up immediately, as slippage hazard may result.
a. Apply 2 cc of silicon lubricant on each lubrication point (the lubrication point situated under the
running belt, which is 10 cm from sides of the belt and 30 cm from the near end of motor
cover). Apply on both left and right sides of the belt.
b. Walk on the treadmill for 2 minutes at about 5 km/h in order spread the lubricant evenly.
** Note: This product may cause danger if used otherwise than strictly in accordance with the
directions for its use.
This product is sold only subject to these conditions and upon the basis that it is used solely at
the purchaser's own risk and the manufacturers and distributors hereby exclude themselves from
all liability in relation to this product howsoever arising.
B. Cleaning and Lubrication:
a. Use a clean towel, slide it between the running belt and deck of the treadmill at the motor
end, so that one end of the towel hangs over each side of the machine.
b. Hold both ends of the towel, pull it back and forth under the belt, and move toward the other
end of the running belt; make sure the belt stay in place.
c. When you reach the rear roller, hold the belt down and move the towel toward the front of the
treadmill, repeat these steps a few more time. This will clean both the belt and treadmill
deck.
d. Take the lubricant and apply to the treadmill bed.
e. Walk on the treadmill for 2 minutes at about 5 km/h in order spread the lubricant evenly.
f. Belt slippage may occurred for a short time. If it persists, adjust the running belt tension
according to the owner's manual (adjust belt tension). Do not over-tighten, as this will
decrease the life of the belt. Always make sure the belt is not over-tightened.
g. If you are not certain of any procedure or lack of correct tools, please contact your dealer.
2

6.Assembly:(Completion Drawing)
A. Caution:
a. Before the assembly is complete, do not tighten all the screws.
b. Before the assembly is complete, do not connect to any power source.
c. After the assembly is complete, make sure all the screws are tightened.
B. Main Frame
Place the main frame (101) on a level surface to keep the treadmill steady during the
assembly.
101
Accessories
c. part box
1 Hex. screw PC 8 M8*1.25-50 904
2 Allen bolt PC 6 M6*1.0*16 917
3 Sound source cable PC 1 A01
d. tool box
Description unit Q’ty Spec. No.
1 Custom made wrench PC 1 13*17 935
2 T type wrench PC 1 M6 936
3 Hex wrench PC 1 4mm 937
9

C. Upright Tube
Place the right-side upright tube (302) to the right of the main frame (101); connect the flat cable
(B06) and the power supply flat cable (B07) from the main frame to the flat cable (B08) and flat
power supply cable (B09) from the upright tube. Attach and pre-fix the upright tube (302) to the
main frame (101) with the hex. socket bolts (904); Perform the same assembly on the left. Attach
and pre-fix the left-side upright tube (301) to the main frame with the hex. socket bolts (904). Be
careful not to over tighten the bolts before the full assembly is complete.
D. Monitor Assembly
Place the monitor frame assembly (401) on top of the two upright tubes (301 & 302); connect the
flat cable (B10) from the monitor assembly to the flat cable (B08) from the upright tube on the
right, then connect the power supply flat cable (B11) from the monitor assembly to the power
supply flat cable (B09) from the upright tube.
Attach the monitor assembly (401) to the two upright tubes and pre-fix the round-headed self-tap
screws (922). Tighten all the screws well when the assembly is complete.
302
B09
B08
B06 B07
301 101
904
10

Factors affecting the running belt alignment:
a. Whether the treadmill is on a level surface.
b. Your feet impact the belt with uneven forces, so the belt may lose
the alignment over time; the treadmill should be kept running for a
short while after the workout, so that the belt may adjust itself
back to its original alignment.
c. Whether the belt tension is well maintained.
Note: the running belt should be adjusted only by adjusting the rear roller bolts of the treadmill.
Do not adjust the front rollers bolts on your own; please consult your dealer for assistance if the
front roller bolts need to be adjusted.
How to adjust the running belt tension:
a. Pay attention to the belt tension so that the treadmill can be operated smoothly on a level
surface and to prevent the damage to the parts.
b. When you feel the belt is slipping under your feet, it means you may need to adjust its tension.
c. To increase the tension, use the L type wrench to turn both rear roller adjustment bolts
clockwise by 1 turn.
d. To decrease the tension, use the L type wrench to turn both rear roller adjustment bolts
counter-clockwise by 1 turn.
If the above steps cannot improve the tension and prevent slippage, the motor drive belt may
need to be adjusted, please consult your dealer for assistance.
Caution: Do not over tighten the belt, otherwise not only the running belt may be worn out easily,
the roller bearing can also be damaged over time due to the extra tension pressure.
The running belt should be kept at the center position to ensure a
smooth operation and to prevent any worn out. When the running
belt is off-centered, the belt needs to be manually adjusted and
aligned.
7. Running Belt Adjustment
A. Running Belt Tension Adjustment
A. Keep the treadmill running at the speed of 4-6 km/h, when the
running belt has shifted to the left:
a. Use the L type wrench to turn the left rear roller bolt clockwise ½
of a turn.
b. If more adjustment is needed, turn the right rear roller bolt
counter-clockwise ½ of a turn.
c. If more adjustment is still needed, repeat the above two steps, but
turn only at ¼ of a turn.
B. Keep the treadmill running at the speed of 4-6 km/h, when the
running belt has shifted to the right:
a. Use the L type wrench to turn the right rear roller bolt clockwise ½
of a turn;
b. If more adjustment is needed, turn the left rear roller bolt counter-
clockwise ½ of a turn;
c. If more adjustment is still needed, repeat the above two steps, but
turn only at ¼ of a turn.
B. Running Belt Alignment
11

Speed
Incline
8. Safety Key and Pulse Sensor:
Caution: when using the hand pulse sensor, the hands should be without too much moisture; so
dry your hands before doing exercise. Otherwise, it will affect the accuracy of heart rate. Also,
while using pulse, user should leave running belt and stand at safe area.
The pulse sensor is not medical device, and the estimated heart rate is for your reference only,
please use a medical device for accurate reading of your heart rate.
Attention: Please do warm-up exercise (refer to later chapter) before using treadmill in order
prevent injury.
9.Quick Handgrip Buttons:
The function of hand pulse combines with speed/incline adjustment function:
a. Change Speed: Use the buttons on the right to adjust the
speed, press or to change the workout speed; you can
easily change your speed during the workout;
b. Change Incline: Use the buttons on the left to change the
incline of the treadmill, press or to change the incline;
you can easily change your incline during the workout;
C. Incline Adjustment
To Increase the Incline: Press to increase the incline.
To Decrease the Incline: Press to decrease the incline.
Note: The incline device needs to be off for 20 minutes when it is used for over 5 minutes to keep
it from being over-heated. When the incline is over-heated, it will cut off the power supply
automatically until the temperature is back to normal.
a. Place the safety key (416) to the key pad on the monitor (401) to start the treadmill;
b. Remove the safety key when the treadmill is not in use to avoid any danger.
c. When using the pulse equipment and hold the pulse sensor, stay calm and steady. Do not run
and measure pulse at the same time. Otherwise, the figure will not be accurate due to hands
moved.
d. Suggest to measure your heart beat before and after exercise to make a comparison. Be sure
to stand on the side rail and hold the pulse sensor for five (5) seconds, the icon “ ” will show
on the screen and monitor will show the heart beat/min in real time.
12

Incline button(w/pulse sensor) Speed button (w/pulse sensor)
Safety key
Black backlit LCD display Control key pad
Speaker
USB slot
MP3 player slot
Tablet holder
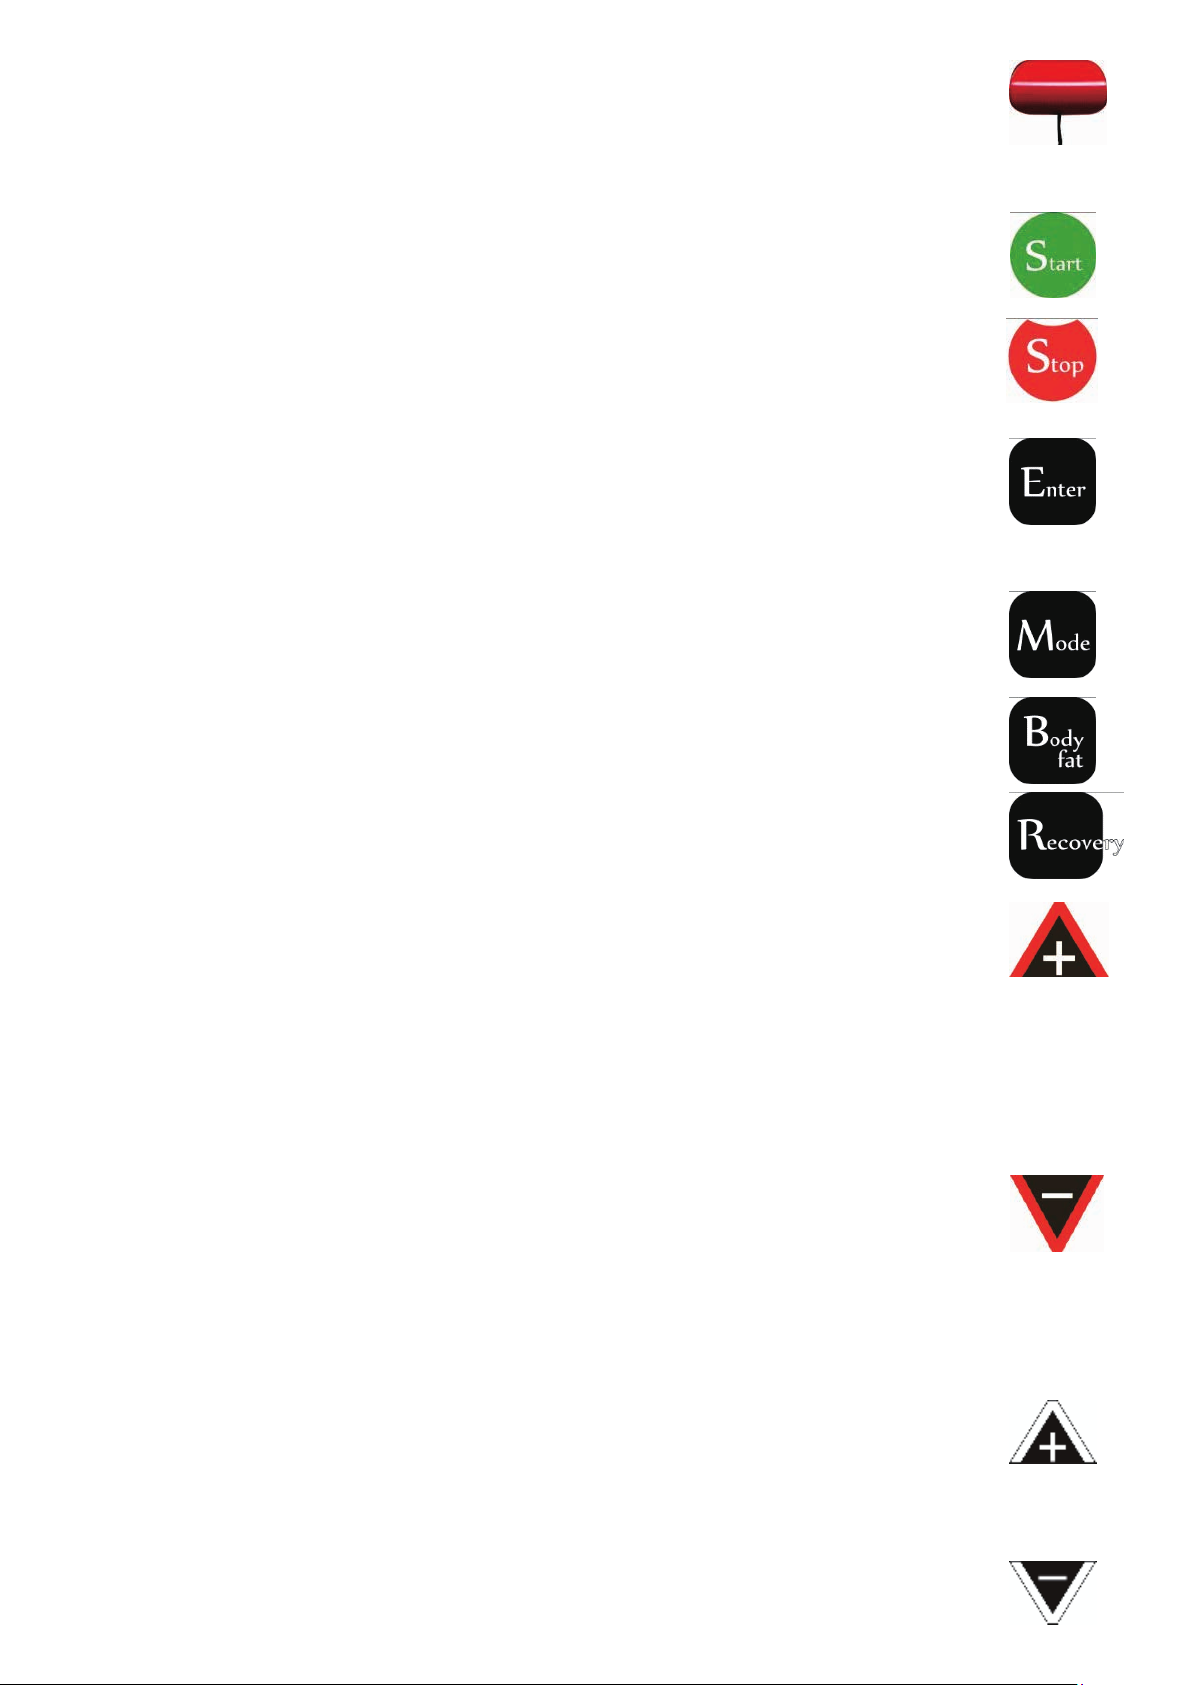
10.Monitor Operation
Speed up
Speed down
Incline up
Incline down
Quick incline Quick speed
Mode
Enter
Heart recovery Body fat
Start Stop
The Monitor is specially designed for this treadmill, and the followings are its main functions -
(Monitor instruction )
Function Introduction
There are 27 buttons, including 1 safety key, 22 function buttons and 4 handgrip buttons.
13
A. Safety Key:
a. Turn on the power and place the safety key to its position on the monitor to
start. During the workout, the treadmill stops as soon as the safety key is
removed.
B.10 Main Function buttons:
a. <Start>:
Press the button to start the workout.
b. <Stop>:
Press the button to stop the workout.
c. <Enter>:
ŸWhen the treadmill is idled, press <Enter> to start setting up for the User
Mode (P0), Built in modes (P1 - P16), Personal Favourite Modes (U1 - U3)
and the Heart Rate Control Mode (H1 - H3).
ŸDuring the setup, press <Enter> button to set desired values for speed,
time, distance, calories and target heart rate.
d. <Mode>:
During the idled state, press <Mode> button to make changes between User
Mode (P0), Personal Mode (U1), and Heart Rate Control Mode (H1).
e. <Body Fat>:
Press <Body Fat> button to enter the <Body Fat> mode
f. <Recovery>:
Press <Recovery> button to enter Heart Rate Recovery mode.
g. <Speed Up>:
Ÿ
Built in Modes (P1 - P16), Personal Favorite Modes (U1 - U3) or Heart
Rate Control Modes (H1 - H3).
ŸDuring the workout, press <Speed Up> to increase the speed; speed
increases by 0.1km/h at each press. Press and hold <Speed Up> for 2
seconds, speed continues to quickly increase until you release the
button.In Personal Favorite Mode (U1 - U3), press <Speed Up> button to
increase the speed set up for each column of workout profile diagram.
When the treadmill is idled, press this button to select User Mode (P0),
h. <Speed Dowu>:
When the treadmill is idled, press this button to select User Mode (P0),
Built in Modes (P1 - P16), Personal Favorite Modes (U1 - U3) or Heart Rate
Control Modes (H1 - H3).
During the workout, press <Speed Down> to decrease the speed, speed
decreases by 0.1km/h at each press. Press and hold the button for 2
seconds, speed continues to quickly decrease until you release the button;
In Personal Favorite Mode (U1 - U3), press <Speed down> button to
decrease the speed set up for each column of workout profile diagram.
Ÿ
Ÿ
Ÿ
I. <Incline Up>:
During the idled state or during the workout, press <Incline Up> to increase
the incline level. Press and hold the button for 2 seconds to speed up the
incline adjustment.
j. <Incline Down>:
During the idled state or during the workout, press <Incline Down> to
decrease the incline. Press and hold the button for 2 seconds to speed up the
decline adjustment. 14

Panel Displays:
I
J
A
B
C
D E F
G
H
Handgrip Buttons:
The function of hand pulse combines with speed/incline adjustment function:
a. Change speed : use the buttons on the right to adjust the speed, press to
change the workout speed, you can easily change the speed during workout.
b. Change incline : use the buttons on the left to change the incline, press to
change the incline, you can easily change the incline during workout.
A.Mode/Workout Lap Count Window:
a.The window displays the user's mode <P0> Built in mode <P1> - <P16> Personal Favorite
modes <U1> - <U3>, and Heart Rate Control modes <H1> - <H3>.
x 2
b. During the workout, the window displays the lap (LOOP) plus one when a lap is complete.
B.Heart Rate/Body Fat Percentage Window:
a. This window flashes during the set up for the target heart rate, you can press <Speed Up> or
<Speed Down> button to select your desired target workout heart rate. The available heart
rate target ranges from 60 to 220. During the workout, when your heart rate exceeds the target
heart rate, the window flashes to remind you. During the detecting, the window displays your
heart rate between the range of 40 and 240.
15
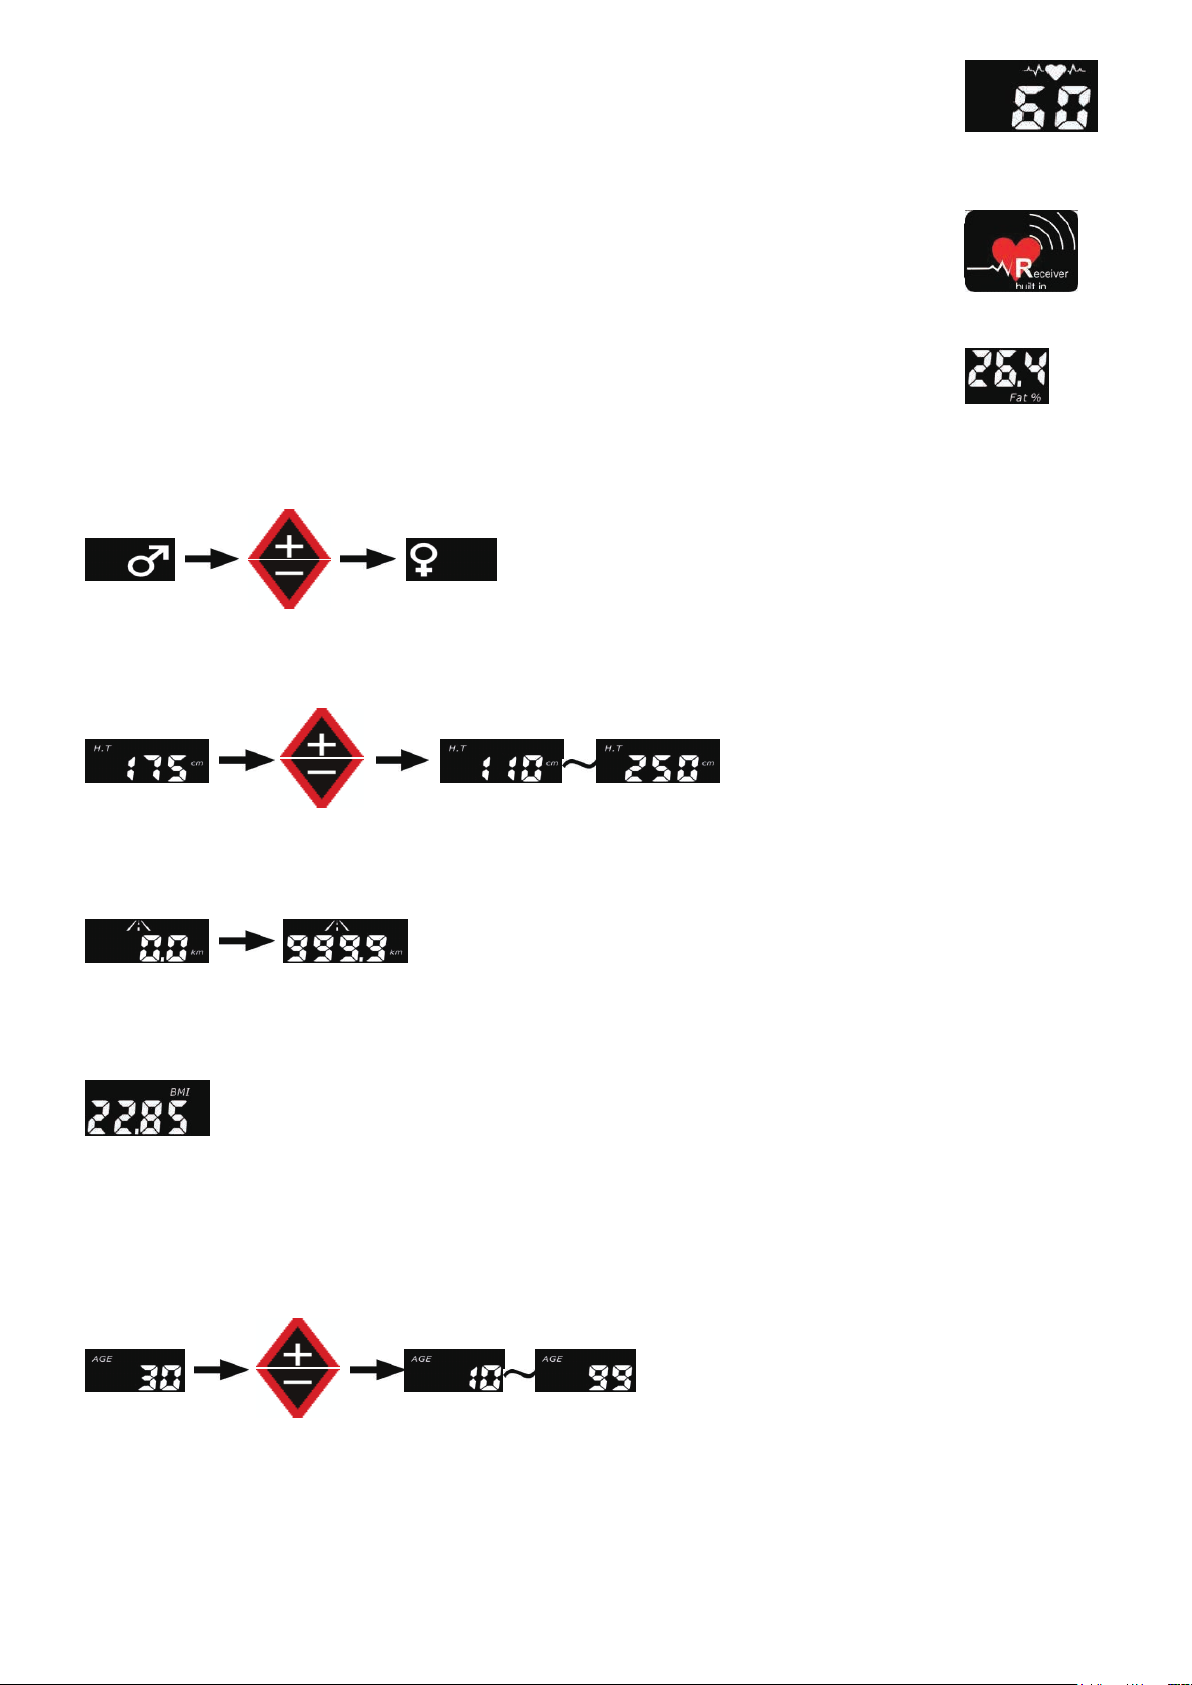
b. Use hand pulse sensor to check your heart rate, hold the hand
pulse sensors with both hands, the window displays your heart
rate after a short while.
c. Wireless measuring, use chest belt to check heart rate, the monitor will
check users's heart rate.
Note: If the machine with receiver built in, there will be one “Receiver
built in” sticker on monitor.
d. In Body Fat mode, hold the hand pulse sensor with both hands, the window
displays user's body fat percentage after a short while.
C. Gender window:
a. In Body Fat mode, use <Speed Up> or <Speed Down> button to select the gender.
D. Height/Weight/Distance/Target Heart Rate window:
a. In Body Fat mode, use the <Speed Up> or <Speed Down> button to adjust the height.
b. When press starts, the workout distance increases from 0.0km to 999.9km; when 999.9km is
reached, it starts back from 0.0km.
c. In Body Fat mode, hold the hand pulse sensors with both hands, the window displays user's
BMI after a short while.
d. In Recovery mode, the window displays the maximum detected heart rate.
E. Age/Time/Recommended Mode/Lowest Heart Rate window:
a. In Heart Rate Control mode, use <Speed Up> or <Speed Down> button to set the age
16

b.Workout time:
ŸCounting up: when the desired workout time is set to 0:00, the workout time counts up from
0:00 to 99:59; when 99:59 is reached, it starts back from 0:00.
ŸCounting down: during the setup, use the <Speed Up> or <Speed Down> button to set the
desired workout time; the workout time can be set between 10:00 and 99:00. Every time can
increase or decrease one minute, when the setup is complete, press <Start> to begin the
workout and the treadmill counts down from the set workout time. When it reaches 0:00, the
monitor beeps 3 times and stops.
c. In Body Fat mode, hold the hand pulse sensors with both hands, the monitor displays the
recommended workout mode based on user's personal settings after a short while.
d. In the Recovery mode, the window display the minimum detected heart rate.
F. Weight/Calorie/BMR window:
a. In Body Fat mode, press <Speed Up> or <Speed Down> button to set the weight.
b. When press start, the calories counts from 0.0 to 9999, then starts back from 0.0 when it
reaches 9999 calories.
c. In Body Fat mode, hold the hand pulse sensors with both hands, the monitor displays BMR
after a short while.
G. Speed profile/LOOP/Pulse/Heart Rate Diagrams window:
a. This window displays user's selected speed profile and divided to 20 columns. If the mode
selected and not set the workout time, every 30 seconds change one column; if workout time is
set, every column change time is according to the set workout time divided 20 column. While
selecting the user mode and heart rate control mode, it always changes one column every 30
seconds.
b. In P10 - P14 modes, the profile shows the loop, it flashes the runner's location on the loop.
17

c. In Body Fat mode, hold the hand pulse sensors with both hands, the window displays the heart
rate diagram.
d. In Recovery mode, the window displays the heart rate diagram.
H.Incline/LOOP/Body Fat %/Heart Rate Recovery window:
a. The window displays user's selected speed profile and divided to 20 columns. If the mode
selected and not set the workout time, every 30 seconds change one column; if workout time is
set, every column change time is according to the set workout time divided 20 column. While
selecting the user mode and heart rate control mode, it always changes one column every 30
seconds.
b. In P1 - P9 modes, the profile shows the loop, it flashes the runner's location on the loop.
c. In Body Fat mode, hold the hand pulse sensors with both hands, the window displays the heart
rate diagram.
d. In Recovery mode, hold the hand pulse sensors with both hands, the window displays the heart
rate diagram after a short while.
I. Speed Half-Circle Diagram/Workout Speed window:
a. Speed half-circle diagram shows the workout speed level.
b. The window displays the speed. When workout starts, press <Speed Up> or <Speed Down>
button to adjust the speed between 1.0km to the maximum speed.
18

J. Incline Half-Circle Diagram/Incline window:
a. Incline half-circle diagram shows the workout incline level.
b. The window displays the incline level. When workout starts, press <Incline Up> or <Incline
Down> button to adjust the incline level between L2 to L15, where L2 is a minus 2 decline.
Operation Guide:
Start: before starting the treadmill, place the safety key on the safety key slot on the monitor. All
the monitor windows light up and the program stop at user's mode (P0), press <Start> to begin
workout. You can stop the workout by removing the safety key from the monitor.
Stop: press <Stop> to stop the workout, or by removing the safety key from the monitor.
OR OR
Note: during the workout, please clip the safety key to your clothes; in case of a fall during an
emergency, the treadmill stops immediately when the safety key is pulled from the monitor.
Quick Start
A. Press <Speed Up> or <Speed Down> button to select a workout mode, and press <Start> to
start workout.
A. Turn the power on and place the safety key on the safety key slot on the monitor. All the
windows lights up, and the treadmill automatically goes into the User Mode. Press <Enter>
button to select and set the workout settings.
B.First, when the workout time window flashes, use the <Speed Up> or <Speed Down> button to
set the desired workout time. Press <Enter> to confirm the setting and move to the next setting,
User Mode (P0)
19

C.Next, when the workout distance window flashes, use <Speed Up> or <Speed Down> button to
set the desired workout distance. The available workout distance setting ranges from 0.1km to
999.9km. Press <Enter> to confirm the setting and move to the next setting.
D.When the calories window flashes, use <Speed Up> or <Speed Down> button to set the
desired calories. Setting for the calories ranges from 0 to 9,999 calories. Press <Enter> to
confirm the setting and move to the next setting.
E. When the target heart rate window flashes, use the <Speed Up> or <Speed Down> button to
set the desired target heart rate. The setting for the target heart rate ranges from 60 to 220.
During the workout, when the target heart rate is reached, this window flashes to remind you.
F.When all settings is complete, press <Start> to begin the workout;
G.During the workout, press <Speed Up> or <Speed Down> to change the speed.
H.During the workout, press <Incline Up> or <Incline Down> to change the incline level.
I. During the setup mode, press <Enter> to skip those settings you want to ignore or press
<Start> to directly begin the workout.
OR
Caution:
a. If desired workout time, workout distance and calories are not set when the workout starts, the
workout status counts up; when those values are set and start to workout, it counts down to 0.
b. When the program target heart rate is not set, the monitor will not remind user's heart rate high
or low status, only display the current heart rate.
c. When the workout is complete, the treadmill beeps and stops. Press <Start> if you want to
continue the workout.
20

A. During the treadmill's idled state, press <Speed Up> or <Speed Down> to select one of the
built-in speed modes between P1 - P16. Press <Enter> to confirm.
B. Then, the workout time window flashes. Press <Speed Up> or <Speed Down> to set the
desired workout time. Press <Enter> to confirm and move on to the next setting,
C.Next, the workout distance window flashes. Press <Speed Up> or <Speed Down> to set the
desired workout distance. The available workout distance setting ranges from 0.1km to
999.9km. Press <Enter> to confirm and move on to the next setting,
D. When the calories window flashes, use <Speed Up> or <Speed Down> button to set the
desired calories. Setting for the calories ranges from 0 to 9999 calories. Press <Enter> to
confirm the setting and move on to the next setting.
E. When the target heart rate window flashes, use the <Speed Up> or <Speed Down> button to
set the desired target heart rate. The setting for the target heart rate ranges from 60 to 220.
During the workout, when the target heart rate exceeds the setting, this window flashes to
remind the user reaching the setting. Press <Enter> to confirm the setting and move on to the
next setting.
F. If the selected workout mode is P1 - P9 or P15 - P16, you can set the highest and lowest
speeds for the diagram display, the highest and the lowest speeds on the diagram start to
flash. Use <Speed Up> or <Speed Down> to adjust the speed level, press <Enter> to confirm
and move on to the next setting.
AND AND
G. If the selected workout mode is P10 - P14 or P15 - P16, you can set the highest and lowest
incline level for the diagram display, then the highest and the lowest incline levels on the
diagram start to flash. Use <Speed Up> or <Speed Down> to adjust the incline level, press
<Enter> to confirm and move on to the next setting.
AND AND
Built-in Speed Modes (P1 - P16)
21

H.When all settings is complete, press <Start> to begin the workout.
I. During the workout, press <Speed Up> or <Speed Down> to change the speed.
J.During the workout, press <Incline Up> or <Incline Down> to change the incline level.
K. During the setup, press <Enter> to skip those settings you want to ignore or press <Start> to
directly begin the workout.
OR
Caution:
a. If the desired workout time, workout distance and calories are not set when the workout starts,
the workout status counts up; when those values are set and start to workout, it counts down
to 0.
b. When the program target heart rate is not set, the monitor will not remind user's heart rate high
or low status, only display the current heart rate.
c. When the workout is complete, the treadmill beeps and stops. Press <Start> if you want to
continue the workout.
A. During the treadmill's idled state, press <Mode> once to select one of the personal favorite
modes U1 - U3. Press <Enter> to confirm the value and move on to the next setting.
Personal Favorite Modes (U1 - U3)
B. The desired workout time window flashes. Press <Speed Up> or <Speed Down> to set the
workout time. Press <Enter> to confirm the value and move on to the next setting.
C. The desired workout distance window flashes. Press <Speed Up> or <Speed Down> to set the
workout distance. The available workout distance setting ranges from 0.1km to 999.9km.
Press <Enter> to confirm and move on to the next setting.
22

D. When the calories window flashes, use <Speed Up> or <Speed Down> button to set the
desired calories. Setting for the calories ranges from 0 to 9999 calories. Press <Enter> to
confirm the setting and move on to the next setting.
E. When the target heart rate window flashes, use the <Speed Up> or <Speed Down> button to
set the desired target heart rate. The setting for the target heart rate ranges from 60 to 220.
During the workout, when the target heart rate exceeds the setting, this window flashes to
remind the user reaching the setting. Press <Enter> to confirm the setting and move on to the
next setting.
F. The first column of the speed and incline profiles flashes. Press <Speed Up> or <Speed Down>
to adjust the speed, and press <Incline Up> or <Incline Down> to adjust the incline level;
Press <Enter> to confirm and move on to the next column setting.
G.The second column of the speed and incline profiles flashes. Press <Speed Up> or <Speed
Down> to adjust the speed, and press <Incline Up> or <Incline Down> to adjust the incline
level; Press <Enter> to confirm the values.
H.Repeat steps <F> and <G> until all 20 column are complete. This will establish your personal
workout profiles.
I. When all settings is complete, press <Start> to begin the workout.
J. During the workout, press <Speed Up> or <Speed Down> to adjust the speed.
23

K.During the workout, press <Incline Up> or <Incline Down> to adjust the incline level.
L. During the setup, press <Enter> to skip those settings you want to ignore or press <Start> to
directly begin the workout.
OR
Caution:
a. If desired workout time, workout distance and calories are not set when the workout starts, the
workout status counts up from 0; when those values are set and start to workout, it counts
down to 0.
b. When the program target heart rate is not set, the monitor will not remind user's heart rate high
or low status, only display the current heart rate.
c. When the workout is complete, the treadmill beeps and stops. Press <Start> if you want to
continue the workout.
Heart Rate Control Mode (H1 - H3)
A.During the treadmill's idled state, press <Mode> button twice, then press <Speed Up> or
<Speed Down> to select the built-in modes H1 - H3. Press <Enter> to confirm.
x2
B. The age window displays 30. Press <Speed Up> or <Speed Down> to adjust the age. The age
setting ranges from 10 to 99. Press <Enter> to confirm and move on to the next setting.
C. The heart rate window flashes. The flashed heart rate is automatically calculated based on the
age entered. Press <Speed Up> or <Speed Down> to adjust the desired target heart rate.
Press <Enter> to confirm and move on to the next setting.
D. The desired workout time window flashes. Press <Speed Up> or <Speed Down> to set the
workout time. Press <Enter> to confirm and move on to the next setting.
24
Table of contents
Other IMPETUS Treadmill manuals


