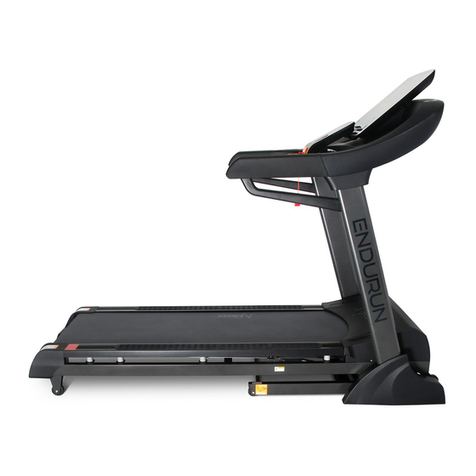
IMPETUS iT 4500 User manual

USER MANUAL

TABLE OF CONTENTS
2
INRODUCTION/SAFETY GUIDELINE
MAINTENANCE
ASSEMBLY
FOLDING AND UNFOLDING
RUNNING BELT TENSION ADJUSTMENT
SAFETY KEY AND PULSE OPERATION
QICKSPEED KEY OPERATION
WARUP
MONITOR INSTRUCTION
DEALER INFORMATION
3
3
5
8
10
10
10
11
12
16

1.INTRODUCTION:
Thank you very much for choosing our product. For your benefit and safety, please read the
manual and follow the instructions carefully. You will certainly enjoy a great workout experience
and a healthy body when you are well prepared after reading the manual.
2.SAFETY GUIDELINE:
ŸAlways consult your physicians before starting your workout.
ŸRead through the operation manual and follow the instruction when using the treadmill.
ŸKeep children away from the treadmill at all times.
ŸKeep the safety key out of the reach of all children.
ŸNever start the treadmill without making sure all power cord is normal and with no damage.
ŸPlace the treadmill on a solid level surface with the rear and side away from any objects.
ŸKeep your hands away from any moving parts.
ŸDo not place any liquid near or on the treadmill.
ŸWear appropriate clothes and shoes during the workout; Do not wear any shoes that may
damage the running belt;
ŸStop the workout immediately when you feel any discomfort; consult your physicians for
advice.
ŸNever start the treadmill while you are standing on the running belt; Stand on the foot rails to
start.
ŸIf you have any questions or concerns, contact dealer.
ŸMake sure the ground-wire is properly connected during assembly.
ŸThe treadmill is intended for in-home use only. Always exercise caution during the workout.
ŸClip the safety key to your clothes during the workout.
ŸHold onto the handrails or stand on the foot rails during any emergency, or step off the
treadmill.
ŸContact your dealer for professional help if you have any question.
ŸPlace the treadmill on a level surface with enough clearance behind it, 2M is needed, and on both
sides of the treadmill is 0.6M.
ŸThe optimal place to stand on the treadmill is at about 1/3 of the length of the running belt to the
front of the treadmill. You might step on the motor cover if you stand too close to the front and
crush the cover, or be tripped by the running belt. If you stand too close to the back of the running
deck, you might not catch the speed and fall off.
ŸThe maximum weight allowed on this machine is 130kg. Warranty will not be honored when this
advice is not carefully followed.
This machine is not intended for use by persons (including children) with reduced physical,
sensory or mental capabilities, or lack of experience and knowledge, unless they have been
given supervision or instruction concerning use of the machine by a person responsible for their
safety. Children should be supervised to ensure that they do not play with the machine.
3.MAINTENANCE:
A. Regular Maintenance:
a Clean and lubricate the running deck after each 20-hour of use or on a monthly basis, which
ever comes first (SEE TREADMILL LUBRICATION INSTRUCTIONS). Clean both sides of the
running belt daily will prevent dirt from getting underneath the running belt.
b. To keep the dust off, clean the treadmill both on the surface and beneath it; Place a mat under
the treadmill to keep the dust off and to protect the floor.
c. Keep the liquid from the monitor or the running belt.
d. Contact your dealer for any service assistance.
3

B. Cleaning and Lubrication:
a. Use a clean towel, slide it between the running belt and deck of the treadmill at the motor
end, so that one end of the towel hangs over each side of the machine.
b. Hold both ends of the towel, pull it back and forth under the belt, and move toward the
other end of the running belt; make sure the belt stay in place.
c. When you reach the rear roller, hold the belt down and move the towel toward the front of
the treadmill, repeat these steps a few more time. This will clean both the belt and
treadmill deck.
d. Take the lubricant and apply to the treadmill bed.
e. Walk on the treadmill for 2 minutes at about 5 km/h in order spread the lubricant evenly.
f. Belt slippage may occurred for a short time. If it persists, adjust the running belt tension
according to the owner's manual (adjust belt tension). Do not over-tighten, as this will
decrease the life of the belt. Always make sure the belt is not over-tightened.
g. If you are not certain of any procedure or lack of correct tools, please contact your dealer.
C. Silicone Lubricant
Silicon Lubricant Warning- - KEEP OUT OF REACH OF CHILDREN !
ŸIf swallowed or applied directly on face, seek medical advice immediately.
ŸIf spilt, clean up immediately, as slippage hazard may result.
a. Apply 2 cc of silicon lubricant on each lubrication point (the lubrication point situated
under the running belt, which is 10 cm from sides of the belt and 30 cm from the near end
of motor cover). Apply on both left and right sides of the belt.
b. Walk on the treadmill for 2 minutes at about 5 km/h in order spread the lubricant evenly.
** Note: This product may cause danger if used otherwise than strictly in accordance with
the directions for its use.
This product is sold only subject to these conditions and upon the basis that it is used solely
at the purchaser's own risk and the manufacturers and distributors hereby exclude
themselves from all liability in relation to this product howsoever arising.
4

ASSEMBLY
A. Caution:
a. Before the assembly is complete, do not tighten all the screws.
b. Before the assembly is complete, do not connect to any power source.
c. After the assembly is complete, make sure all the screws are tightened.
B. Machine Base:
Place the main frame (101) on a leveled ground to keep the treadmill steady during the assembly.
C. Upright Tubes:
a. Place the right upright tube (302) besides the main frame (101), and insert the flat cable (B03)
and the power supply flat cable (B04) through the upright tube bracket (304), and connect the
flat cable (B01) and power supply flat cable (B02) from the main frame (101), and connect the
flat cable (B03) and flat cable (B04).
b. Place the right upright tube (302) onto upright tube bracket (304), pre-fix the Hex. Screw
(925). Place the left upright tube (301) onto upright tube bracket (303), pre-fix the Hex. Screw.
c. Tighten the Hex. Screws after complete assembly.
5

1.Bring out the monitor assembly set, flip the monitor top cover to its proper position and
tighten it with (#934) M4*10 x (4 pcs.) screws.
2.Have the upper flat cables (B05) and the upper power supply flat cable (B06) to connect the
middle flat cables (B03) and power supply middle flat cables (B04). Then, attach the monitor
assembly set onto the upright tubes. Pre-fix with the (#948) M8*20 x (6pcs) and (#949)washer
x(6pcs) . Do not tighten the screws for now.
D. monitor Assembly:
934934
934
934
934
302
301
949
948 948
949
B03 B04
B05 B06
6

Press down the monitor as the arrow shown making sure
the monitor is at its right position.
Fix and tighten the
screw (#944) M4*8 x
(1 pcs.) .
Try to adjust the monitor
stand plate with no gap.
4.Attach the left support tube ornament cover (410) onto the monitor top cover (405) from the
sides <see the big picture shown>. Pre-fix the ornament cover with (#944) M4*8 x (2 pcs), and
do not tighten the screws for now. Repeat the same steps on the right side.
3. Attach the left console stand support plate (418) to the monitor assembly set and the left
upright tube (301), and tighten it with the screw(#944) M4*8 x (1pcs). Repeat the same
step on the right side.
Before
After
Insert
944
418
301
405
7

5.As shown in figure, press down the monitor along the monitor stand plate, then tighten the
screw (#944) M4*8 x (2 pcs).
6.Tighten all the screws (#948) M8*20 x (6 pcs) on both sides.
Press down the monitor as the
arrows shown making sure there
is no excessive gaps between
parts.
Minimize the gap between parts.
Tighten the screw
(#944) M4*8 x
(2pcs).
7.Folding and Unfolding:
Folding – Hold the end of the treadmill (as arrow shown ), lift and fold the base assembly (101)
up until the air pressure shaft (110) outer tube pops out and is able to support the air pressure
pole (110B).
Unfolding – Hold the treadmill and gently kick (as arrow shown B) the air pressure shaft (110)
outer tube toward you so that the air pressure shaft is gently released, and base assembly (101)
slowly lowers itself to the ground.
948
948
8

8. Running Belt Adjustment:
A. Running Belt Tension Adjustment
Factors affecting the running belt alignment:
a. Whether the treadmill is on a level surface?
b. Since your foot impacts the belt with uneven forces, the belt
may lose the alignment over time; the treadmill should be kept
running for a while after the workout, so that the belt may
adjust itself back to its original alignment;
c. Whether the belt tension is well maintained?
Note: the running belt tension should be adjusted only by adjusting the rear roller bolts of the
treadmill. Do not adjust the front rollers bolts on your own; please consult your dealer for
assistance if the front roller bolts need to be adjusted.
How to adjust the running belt tension:
a. Pay attention to the belt tension so that the treadmill can be operated smoothly on a level
surface and to prevent the damage to the parts.
b. When you feel the belt is slipping under your feet, it means you may need to adjust its tension.
c. To increase the tension, use the L type wrench to turn both rear roller adjustment bolts
clockwise by 1 turn.
d. To decrease the tension, use the L type wrench to turn both rear roller adjustment bolts
counter-clockwise by 1 turn.
If the above steps cannot improve the tension and prevent slippage, the motor drive belt may
need to be adjusted, please consult your dealer for assistance.
Caution: Do not over tighten the belt, otherwise not only the running belt may be worn out easily,
the roller bearing can also be damaged over time due to the extra tension pressure.
B. Running Belt Alignment
The running belt should be kept at the center position to ensure a smooth operation and to
prevent any worn out. When the running belt is off-centered, the belt needs to be manually
adjusted and aligned.
How to Align the Belt:
A. Keep the treadmill running at the speed of 4-6 km/h, when the belt
has shifted to the left:
a. Use the L type wrench to turn the left rear roller bolt clockwise ½ of a
turn;
b. If more adjustment is needed, turn the right rear roller bolt counter-
clockwise ½ of a turn;
c. If more adjustment is still needed, repeat the above two steps, but turn
only at ¼ of a turn.
B. Keep the treadmill running at the speed of 4-6 km/h, when the belt
has shifted to the right:
a. Use the L type wrench to turn the right rear roller bolt clockwise ½ of a
turn;
b. If more adjustment is needed, turn the left rear roller bolt counter-
clockwise ½ of a turn;
c. If more adjustment is still needed, repeat the above two steps, but turn
only at ¼ of a turn.
9

Speed
Incline
C. Incline Adjustment
To Increase the Incline: Press to increase the incline.
To Decrease the Incline: Press to decrease the incline.
Note: The incline device needs to be off for 20 minutes when it is used for over 5 minutes to keep
it from being over-heated. When the incline is over-heated, it will cut off the power supply
automatically until the temperature is back to normal.
9. Safety Key and Pulse Sensor:
a. Place the safety key (412) to the key pad top cover (403) on the monitor to start the treadmill.
b. Remove the safety key (412) when the treadmill is not in use to avoid any danger.
c. When using the pulse equipment and hold the pulse sensor, stay calm and quiet. Do not run
and measure pulse at the same time. Otherwise, the figure will not be accurate due to hands
moved.
d. Suggest to measure your heart beat before and after exercise to make a comparison. Be sure
to stand on the side rail and hold the pulse sensor for five (5) seconds, the icon “ “ will show
on the screen and monitor will show the heart beat/min in real time.
Caution: While using hand pulse, the hands should be without too much moisture, so dry your
hands before doing exercise. Otherwise, it will affect the accuracy of heart rate. Also, while using
pulse, user should leave running belt and stand at safe area.
The pulse sensor is not a medical device, and the estimated heart rate is for your reference only,
please use a medical device for accurate reading of your heart rate.
Attention : Please do warm-up exercise (refer to later chapter) before using treadmill in order
prevent injury.
10.Speed & incline adjustment and hand pulse:
The function of hand pulse combines with speed/incline adjustment function:
a. Change Speed: Use the buttons on the right to adjust the
speed, press or to change the workout speed; you can
easily change your speed during the workout;
b. Change Incline: Use the buttons on the left to change the
incline of the treadmill, press or to change the incline;
you can easily change your incline during the workout;
10

Inner Thigh Stretch
Sit with the soles of your feet together and knees pointing
outward. Pull your feet as close into the groin area as possible.
Hold for 15 counts, then relax. Repeat three times.
Stretches: Quadriceps and Hip Muscles
Toe Touches
Stand with your knees bend slightly, slowly bend forward from the
hips. Allow your back and shoulders to relax as you stretch down
toward your toes. Go as far as you can and hold for 15 counts,
then relax. Repeat three times.
Stretch: Hamstring, Back of Knees, Back
Quadriceps Stretch
Stand on one foot with one hand hold onto the wall to balance,
raise the other foot behind you, and pull up your foot as close to
your buttocks as possible. Hold for 15 counts, then relax. Repeat
three times.
Stretch: Quadriceps muscles, Hip muscle
Calf/Achilles Stretch
Stretch: Lower legs, Achilles tendons, and Ankles
With one leg in front of the other and arms out, lean against the
wall. Keep your back leg straight and back foot flat on the ground;
then bend the front leg and lean forward by moving your hips
toward the wall. Hold, then repeat on the other side. To cause
even further stretching the Achilles tendons, slightly bend back
leg as well.
Ham String Stretch
Sit with one leg extended. Bring the sole of the opposite foot
toward you, resting it against the extended leg's inner thigh.
Stretch toward your toe as far as possible, hold for 15 counts,
then relax. Repeat three times for both legs. .
Stretches: Hamstring, Lower Back and Groin
11.Warm Up
Warm up is an important part of every workout. It prepares the body for more strenuous exercise
and reduces the chance of joint and body injuries by increasing your blood flow to the muscles,
delivering more oxygen to the muscles, and increasing the body temperature.
Suggested Stretches
The following stretches provide a good warm-up and cool-down. Move slowly as you stretch.
12.Operation Instruction/Caution:
a. Never start the treadmill without making sure all wires are normal and with no damage.
b. The machine works only the Safety key attached to the monitor, remove the Safety key when
the treadmill is not in use.
c. Clip the safety key to your clothes during the workout;
d. Stand on the foot rails before starting the treadmill;
e. Never start the treadmill while you are standing on the running belt;
f. Press <Start> to start the treadmill.
Stop the workout immediately when you feel any discomfort; consult your physicians for
advice.
Please read your Monitor Operating Manual for operating the monitor. Thank you!
11

1. Feature Introduction
2. How To Start
First turn on the power and place the safety key onto the yellow slot to start. During the workout,
the treadmill stops as soon as the safety key is removed.
3. Keypad Introduction
MONITOR INSTRUCTION
Quick Speed Key with Hand Pulse
Safety Key
Blue Backlit Screen 130 x 60mm
Quick Incline Key with Hand Pulse
AUX audio in
Control Keypad
Speaker
USB port
Bluetooth Connection (optional)
Wireless Pulse Sensor
(optional)
Enter
Mode
Incline <+>
Incline <->
Speed <+>
Speed <->
Quick Speed key
Quick Incline key
Incline <+>
Incline <->
Speed <+>
Up
Speed <->
Safety Key
12

4. Function Introduction
5. Personal Settings
Under standby mode, Press <Enter> for 3 seconds to <Personal Setting> Mode; press <Speed
+>, <Speed -> to select available options, while confirmed the selection , press <Enter> to the
setting ; then press <Speed +> and <Speed -> to select the contents, press enter to confirm the
contents, press <Start/Stop> to confirm and save the settings and exit personal settings.
Personal Settings (Cd:01)
Item Function Selection
Cd:01 Adjust Speed +/- distance (KM) 0.1, 0.2, 0.5, 1.0
Cd:02 Distance adjustment in one loop 100M~900M
0: Complete no sound
1: Have keypad sound
0: No sleep
5~120: Set to auto sleep time
Bluetooth Connection 0: Turn off Bluetooth connection
(when equipped) 1: Turn on Bluetooth connection
Cd:05
2: Have sound while auto speed changes, have keypad sound
Cd:03 Column change sound/keypad sound
Cd:04 Monitor sleep time (minute)
6. Workout Mode Settings
6.1 Basic Mode:
Mode Indicator Distance/Lap Profile Calories
Loop
Pulse/Incline Time Speed
Select Modes:
MANUAL MODE: Machine powered on, the MANUAL MODE will be selected by default. Select
mode code 'M'
SPEED MODE: Machine powered on, Press <Speed +>, the select mode code P1~P9
INCLINE MODE: Machine powered on, Press <Speed +>, the select mode code P10~P14
MIXED MODE: Machine powered on, Press <Speed +>, the select mode code P15~P16
USER MODE: Machine powered on, Press < Mode> once, mode code U1; press <Speed +> ,
mode code U1~U4
PULSE MODE: Machine power on, Press < Mode> twice, mode code 65%; press <Speed +>,
mode code 65%, 75%, 85%, THR
ŸThere are 1 MANUAL MODE, 9 SPEED MODES, 5 INCLINE MODES, 2 MIXED MODES, 4
USER MODES, 4 PULSE MODES, and 1 BODY FAT MODE.
ŸUse <MP3 Player> port to play music through the speaker; please note the overly loud music
may impact your pulse display, please adjust your volume down to resolve the issue if it occurs
ŸConnect your smart phone wire to USB port (5V/2A) to recharge the power
ŸBluetooth Connection: You can use an official software App to operate a Bluetooth-equipped
treadmill. For Android devices, please go to <Google Play>, for Apple devices, go to Apple <App
Store> to download and install the official software App, <iRunning+>, to your tablet.
ŸBasic Requirement for the Tablet: Apple iOS 5.0 or later; Android 4.0 or later; Bluetooth 3.0 or
later; Resolution: 1280X800 or better.
ŸWhen the App is connected to the treadmill through the Bluetooth, the display automatically
comes off the monitor, and reappears on the tablet App. When the Bluetooth is disconnected, the
monitor comes back on and you can operate the treadmill through the treadmill buttons.
13

Operation Instruction:
1. Press <Start/Stop> to start workout, press <Start/Stop> again to stop
2. Press Speed <+> to increase the speed, press Speed <-> to slow down; Use <Quick Speed>
key to quickly select the pre-set speed.
3. Press Incline <+> to increase the incline, press Incline <-> to reduce the incline; Use <Quick
incline> key to quickly select the pre-set incline level
4. When use wireless chest belt sensor (equipped wireless system) or when workout stopped
both hands hold on handlebar pulse sensor, the incline display changed to pulse (heart rate)
to show your pulse
5. While running, the LED loop blinking, upon completion of each lap, the count of lap will be
displayed at LOOP (same window as DIST)
6.2 Setting Workout Targets
1. Under standby mode, press <Enter> to set workout target, the window is blinking while setting
2. Use <Speed +> and <Speed -> to set target increase or decrease, then press <Enter> to
confirm the setting
3. Press <Enter> directly to skip the items which you do not intend to set
4. Press <Start/Stop> to start workout after the setting is done
How to Set:
MANUAL MODE (M) and PROGRAM PROFILE MODE (P1~P16):
S e tti n gs : T im e D i st a n ce C a lo rie s P uls e S p eed In cli ne D o n e
R a n g e: 0:0 0, 1 0:00 ~9 9:0 0 0.0~ 99 9 0 ~99 99 0 , 60 ~22 0 Lo we st ~ Hig h es t Lo w ~ H ig h
Sta ndb y Ent er
E n te r
En te r
St andb y
E n te r
E n te r
Ent er
E n t er
Note: (MANUAL MODE), (SPEED MODE) and (MIXED MODE) speed profile can be set,
(INCLINE MODE) and (MIXED MODE) incline level can be set
USER MODE: (U1~U4)
S e tti n gs : Tim e D ista n ce Ca l o rie Pu ls e E d it th e Sp eed p ro file D o n e
R a n g e: 0:0 0, 1 0:00 ~9 9:0 0 0 .0 ~ 9 99 0 ~99 99 0 , 60 ~22 0 Lo w ~ High Sp ee d
St andb y St andb y
Ent er
E n te r
En te r E n te r E n te r
E n t er
PULSE MODE (65%, 75%, 85%, THR)
Caution: Please use wireless chest belt sensor during this mode.
S e tti n g: Ag e Pu lse T im e D is ta n ce C alo rie s D on e
R a n g e: 1 0~ 99 0, 6 0~2 20 0 :00 , 10: 00~ 99 :00 0.0~ 99 9.0 0 ~ 9 99 9
Sta ndb y
Sta ndb y
E n te r
E n te r
E n te r
E n te r
E n te r
Ent er
Note 1: Pulse setting will change based on the age entered, but you can still set your desired
pulse targets
Note 2: Incline will change based on the pulse detected to increase or decrease automatically,
the treadmill beeps as reminder while detected the pulse and the incline been adjusted.
Note 3: In THR (Target Heart Rate) mode, no need to set AGE (skip AGE setting).
Caution:
1. The workout profile changes to next column every 30 seconds
2. If the workout target is not set, the value counts up, while the workout target is set the value
counts down
3. When workout target counts down to 0, the monitor beeps 3 times as reminder and stops; you
can press <Start/Stop> to continue workout, then the value been counts down to 0 is going to
count up, while the other value not count down to 0 will keep count down.
14

Mode Selection:
BODY FAT MODE: Press < Mode> three times, mode code is 'FAT'.
Operation Instruction:
1. Press <Enter> to set gender, age, height, and weight; the console display blinking during the
setup, use <Speed +> and <Speed -> key to adjust the value and press <Enter> to confirm;
2. After the setup is complete, press <Start/Stop> will start to check your pulse, by holding the
hand pulse sensors with both hands to check pulse, your body fat percentage, body mass
index (BMI), body metabolic rate (BMR) and the related profiles will be displayed within
seconds; to press <Start/Stop> start workout.
3. Console displays 'Err5' when pulse detection failed; Press <Start/Stop> to check again, press
any other key to exit if you do not want to check the pulse.
G e nd er A g e H e igh t W eigh t D o ne
M a le ( 1) ; F em ale( 0) 1 0~ 99 11 0~ 25 0 1 0~ 20 0
Sta nd b y
Ch e ck P ulse
E n t er
Ent e r
E n te r
E n te r
Ent er
7. Workout Profiles
SPEED MODE INCLINE MODE MIXED MODE
Note 1: what the value means: A=10, B=11, C=12, D=13, E=14, F=15;
Note 2: P1~P9 is SPEED MODE, P10~P14 is INCLINE MODE, and P15~P16 is MIXED MODE.
8. Troubleshooting
Problems Possible Reasons Solutions
1. Safety key not plugged In 1. Plug in;
2. The plug or wires got loose 2. Well plug in the plug and wires
3. Power supply not well connected or not power on 3. Turn on the power supply
4. Controller damaged 4. Replace controller;
1. Hand pulse steel plate damaged 1. Replace sensor component or unplug and try again
2. Hand pulse sensor no good 2. Moisturize or rub your hands to try again
3. Wireless sensor no good 3. Replace wireless chest belt battery
1. No speed detect for 8 seconds 1. Well plug in the plug and wires
2. Sensor stick not sensitive enough 2. Shorten the distance between sensor stick and magnet
3. Damaged sensor stick or broken wire 3. Replace sensor stick or wire
4. Motor not running 4. Well connect the wires or replace controller
1. EEPROM does not well plug in 1. Unplug and plug in the IC again
2. EEPROM damaged 2. Replace EEPROM or IC
1. No incline reading 1. Well plug in the plug and wires
2. Incline motor malfunction 2. Replace incline motor
E4 1. Incline indicator incorrect 1. Adjust the VR signal line to right position
E5 1. Body Fat mode shows no pulse 1. Moisturize or rub your hands to try again
No Display;
No Motion
No Pulse
Reading
E1
E2
E3
Please consult your dealers if you still have issues.
6.3 Body Fat Mode
Mode Indicator Profile BMR
BMI
Body Fat Percentage
Type
SPEED MODE INCLINE MODE MIXED MODE
15

Dealer Name:
Telephone:
FAX:
Email:
Web Page:
Without our authorization, any contents of this manual are not allowed to be copied, saved or
transferred.
We reserve rights to revise specification, equipment, and maintenance information for our R&D
team keeps improving our product
quality.
We have done the best efforts on this manual to be more comprehensible for all users. However,
if it is found or wrong location of part
On somewhere in the manual, please feel to contract with the shop where you purchased this
machine.
Enjoy your fitness workout with our machine and having a healthy life.
16
DEALER INFORMATION
Table of contents
Other IMPETUS Treadmill manuals


