Infanttech Zooby 1000-SGK User manual
INSTRUCTION MANUAL
zooby® BABY MONITOR FOR CARS
*Plush style may vary
Thank you for purchasing Infanttech’s zooby® video baby monitor for cars. This unique
monitor allows parents to safely operate a vehicle by reducing the need to turn around while
driving. Your zooby® will allow you to monitor your baby while he or she is facing backwards
in a rear passenger seat. This versatile monitor can be used at home, and you can take it
with you wherever you go. Additionally, your zooby® can also be used when your baby
becomes a toddler and is facing forward in the rear passenger seat. This unit is a digital
video monitor that easily attaches to the dashboard window of any vehicle, with a convenient
car adapter charger, and a camera installed in a soft plush that can be secured in various
locations in the backseat. Both the monitor and camera are equipped with a rechargeable
battery.
Please note, that use of the zooby®does not replace a driver’s need to obey all traffic
and safety laws and use reasonable safety precautions while driving to minimize
distracted driving. It is your responsibility to to know and comply with the local and
State laws where you plan to use this device.
CAUTION:
[Model numbers 1000-SGK, 1000-SZK, 1000-GBK, 1000-
FXK, 1000-K9K]
PLEASE READ THE FOLLOWING
INSTRUCTIONS AND WARNINGS
CAREFULLY BEFORE USING YOUR ZOOBY®
BABY MONITOR. KEEP THIS INSTRUCTION
MANUAL FOR FUTURE REFERENCE.
For Technical Support email us at
For use with Children from birth to toddlers.
WARNING:
Adult installation required.
Exercise Care when unpacking and assembling
product.

KEEP SMALL PARTS OUT OF CHILD’S REACH
WARNING:
THIS PRODUCT CANNOT REPLACE RESPONSIBLE ADULT
SUPERVISION AND VEHICLE DRIVING. CHECK YOUR LOCAL
LAWS REGARDING USE OF THIS DEVICE.
•Test monitor before first use, periodically, and when changing location of the
units.
•Prevent distracted driving- before you are ready to start your vehicle, make
sure you have adjusted all of your vehicle’s options such as seats, mirrors,
seatbelts, and the position of the camera of the zooby®facing your child, etc.
•Prevent Cord entanglement- do not place any cords within arm’s reach of baby.
Never use extension cords with AC adapters. Only use the AC Adapters
provided.
•When an AC Adapter is plugged into an electrical outlet, do not touch the
exposed end.
•Do not use monitor near water.
•Keep monitor away from heat sources and make sure there is proper
ventilation.
•THIS PRODUCT IS NOT A TOY. DO NOT ALLOW CHILDREN TO PLAY WITH IT.
NOT INTENDED FOR CHILD’S PLAY.
BATTERY WARNING:
•Do not Mix old and new batteries.
•Do not mix alkaline, standard, or rechargeable batteries.
•Remove batteries and unplug the rechargeable battery pack when product is
stored for a long period of time or when batteries are exhausted.
•Dispose of exhausted batteries properly.
•Use only the original rechargeable battery pack. Warranty is void if other
batteries are used. Please contact Infanttech for a replacement battery, contact
information can be found at the end of the instruction booklet.
1

FCC Information
This device complies with part 15 of the FCC Rules. Operation is subject to the
following two conditions: (1) This device may not cause harmful interference, and (2)
this device must accept any interference received, including interference that may
cause undesired operation.
Industry Canada (IC) Compliance Statement
This device complies with Industry Canada licence-exempt RSS standard(s).
Operation is subject to the following two conditions: (1) this device may not cause
interference, and (2) this device must accept any interference, including interference
that may cause undesired operation of the device.
Industrie Canada (IC) Déclaration de conformité
Le présent appareil est conforme aux CNR d'Industrie Canada applicables aux
appareils radio exempts de licence. L'exploitation est autorisée aux deux conditions
suivantes : (1) l'appareil ne doit pas produire de brouillage, et (2) l'utilisateur de
l'appareil doit accepter tout brouillage radioélectrique subi, même si le brouillage est
susceptible d'en compromettre le fonctionnement.
CAUTION: Changes or modifications not expressly approved by infanttech will void
the users’ authority to operate this equipment.
NOTE: This equipment has been tested and found to comply with the limits for a
Class A digital device, pursuant to part 15 of the FCC Rules. These limits are
designed to provide reasonable protection against harmful interference in a
commercial environment. This equipment generates, uses, and can radiate radio
frequency energy and, if not installed and used in accordance with the instructions,
may cause harmful interference to radio communications. However, there is no
guarantee that interference will not occur in a particular installation. If this equipment
does cause harmful interference to radio reception, which can be determined by
turning the equipment on and off, the user is encouraged to correct the interference
by one or more of the following measures:
•Reorient or relocate the receiving antenna (monitor)
•Increase the separation between the equipment and the receiver
•Connect the equipment into a different circuit from that to which the receiver
is connected.
•Consult the dealer or an experienced radio/TV technician for help.
NOTE: Use only the original rechargeable battery or approved battery replacement.
Warranty void if other batteries are used. Please contact infanttech for replacement
battery, contact information can be found at the back of the instruction booklet.
2

QUICK REFERENCE FOR DAILY OPERATION:
After your initial set up (see instructions below), follow these easy steps for optimal
performance of your zooby® monitor:
In the car:
1. Always use the safety buckle straps of the plush camera and adjust to fit snugly on
any headrest posts the plush camera is mounted on. Note: If the arms are still loose
after adjusting straps on the posts, you can wrap the plush arms around the headrest
posts at least once on each side and then use the buckle to tighten up your fit.
2. Turn on the monitor by holding the power button for 3-5 seconds until the unit screen
illuminates.
3. You can toggle between the 3 screen modes by quickly pressing the power button
until you get the camera view (camera 1, camera 2, or split screen) that is paired to
your monitor. (Note: Additional camera sold separately for split screen mode.)
4. When you place your baby/toddler in the backseat, turn on the camera in the plush at
the bottom by opening the velcro enclosure and holding the power button until the
light turns green. Reattach the velcro.
5. The monitor will display the images from the camera. Adjust the camera in the plush
for the view you like by moving the bendi-neck inside the plush.
6. When exiting the vehicle, turn off the monitor by holding the power button for 3
seconds. When taking your baby out of the vehicle, turn off the camera in the plush.
This will ensure optimal battery life and performance.
7. Remember to charge monitor or camera as needed. If your vehicle is equipped with
cigarette lighter or power outlets, you can keep your monitor plugged in with the
included 2-port USB car adapter. The camera in the plush may be charged in the
vehicle when your child is not in the car. When your unit is fully charged, the "red"
charging light will turn off.
NOTE: Due to potential extreme heat in the car, we recommend that the zooby®and
monitor screnn be removed from direct heat to prevent permanent damage to the
camera or monitor screen.
3
QUICK REFERENCE FOR DAILY OPERATION
(Continued):
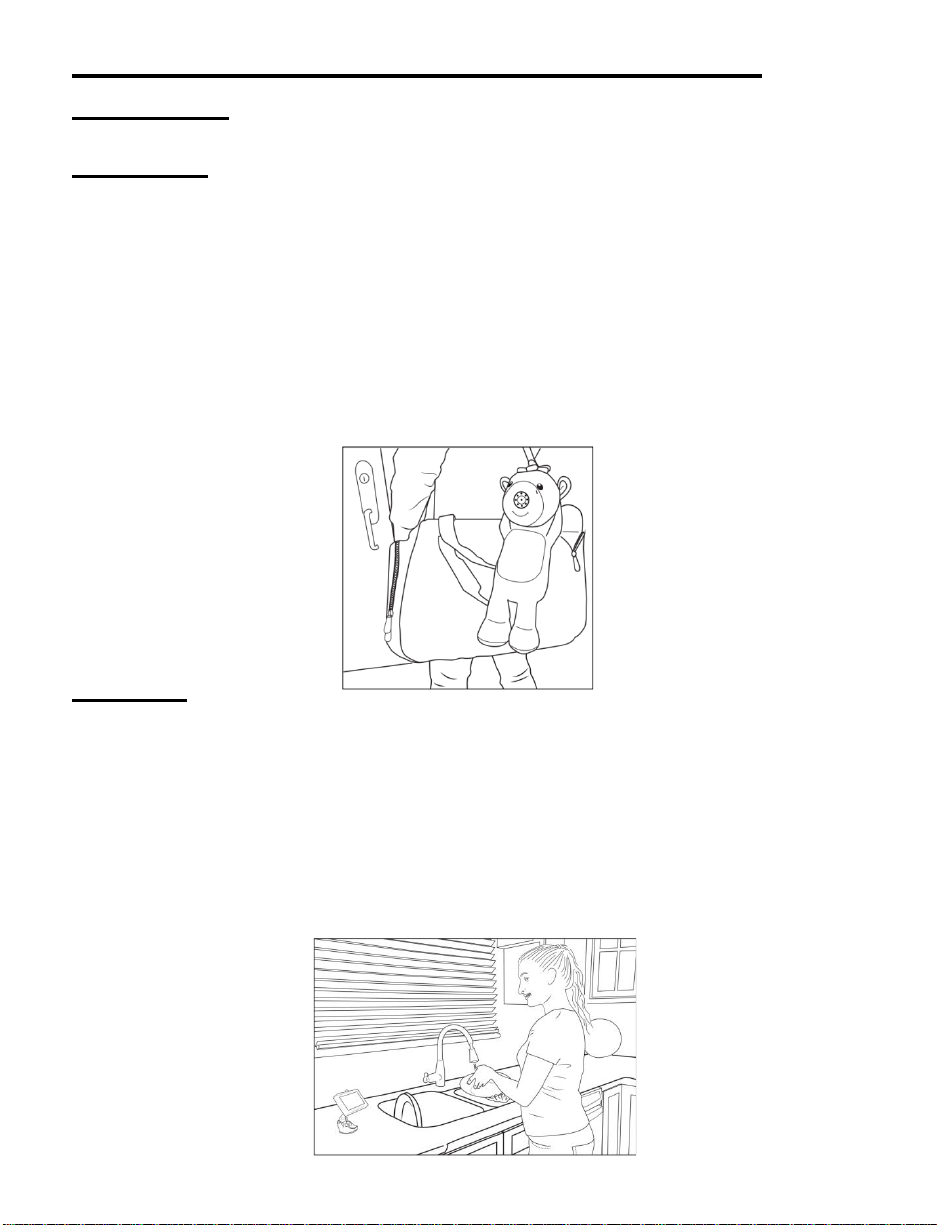
On the Go:
1. Simply unwrap and unbuckle the camera from the headrest posts of your vehicle.
2. Unclip the monitor from the bracket and carry your zooby® with you.
3. When you step inside any home you are visiting, simply place the camera plush
pointing towards the location you want to view. Keep the monitor with you or place it
in a location where you can view the screen.
4. Now your baby is Always in View while visiting a friend or even at Grandma's house.
At Home:
1. Find optimal location for the camera. (If using in the nursery, do not place the camera
in the crib. Any cables must be at least 3 feet away from your baby).
2. Place camera where you want to view your baby.
3. Place monitor on monitor kick stand if desired; adjust your volume as needed.
4. Now keep peace of mind that your baby is Always in View.
4
FEATURES AND COMPONENTS:
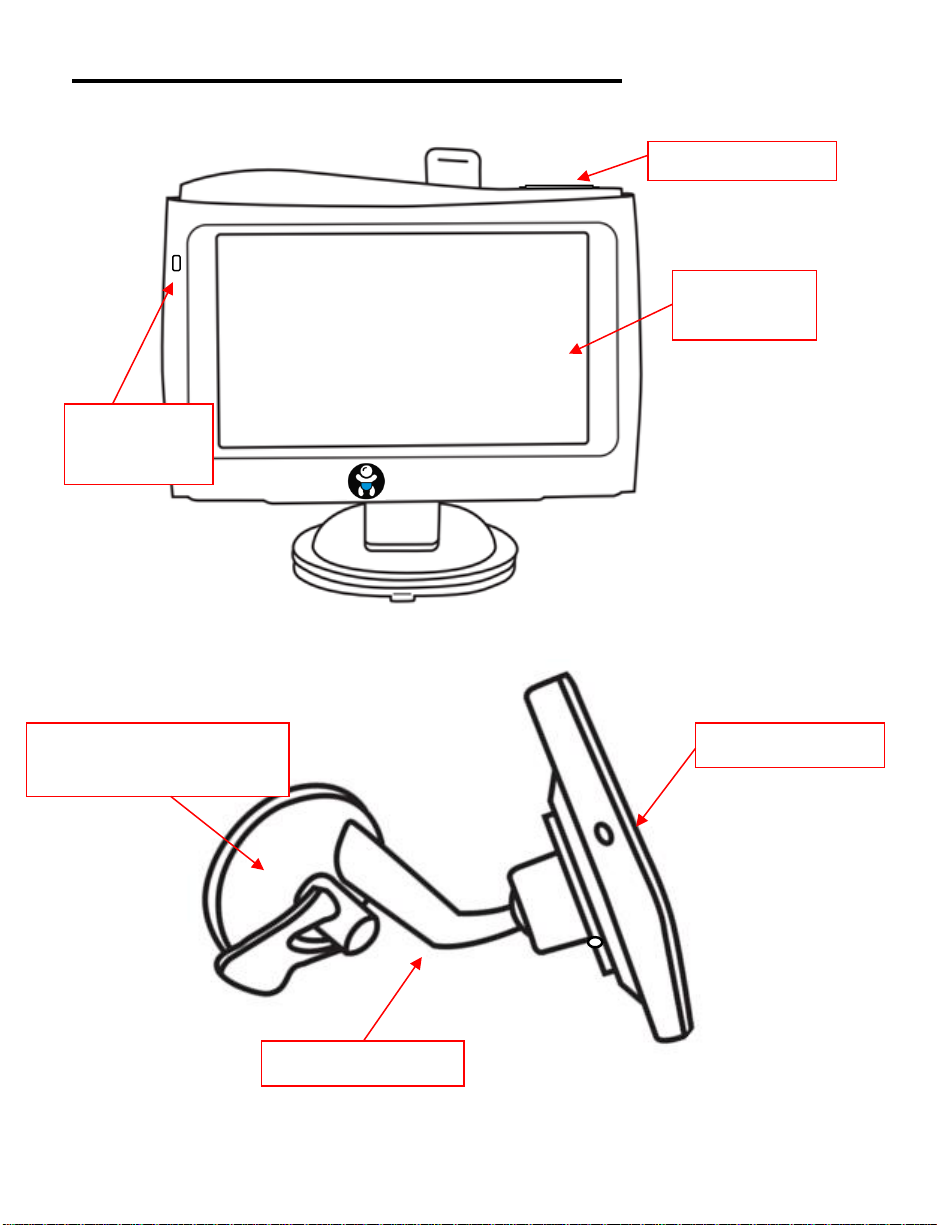
Monitor (Front View):
Zooby
Monitor (Side View):
5
Anti-glare
LED Screen
Power Button
Power LED
Indicator
Suction Cup Mount on
Monitor Bracket
Charging Port
Monitor Bracket

FEATURES AND COMPONENTS (Continued):
Monitor (Back View):
Camera Plush (Front View):
Camera Mounted in Nose
so you can see your child
Internal Bendineck
technology for optimal
viewing positioning
Super Velcro and safety
buckle straps on Paws for
ease of mounting
Bracket Slot
Pairing/ Sync port
6
Volume Control

FEATURES AND COMPONENTS (Continued):
Camera Plush (bottom View):
Battery Pack inside the Plush:
7
Velcro to access Charging Port
and Battery Pack
Power Indicator LED
USB Charging Port
Push ON/Off
Button

ACCESSORIES:
1-Port USB Car Charger (2) AC adapters (2)
3Ft AND 7Ft USB Cables (1 of Each) Monitor mount w/ suction cup (1)
NOTE: Style and designs may vary from pictures
Contents:
1- Plush with Camera
1- 1700mAh Lithium ion Battery (in plush camera)
1- 4.3" LCD Split Screen Monitor
1- Monitor bracket with suction cup mount
1- USB Charging cable for plush
1- Monitor charging cable
2- USB car adapter
2- USB AC wall adapter
1- Monitor stand for home use
1- Instruction Manual
8
NOTE: Extra camera is sold
separately to use split
screen option on Monitor

PAIRING MONITOR SCREEN AND CAMERA:
Your camera and monitor should be paired when opening, if not, please
follow these steps:
Pair Mode Camera 1:
1. Turn on monitor by holding down the power button for 5-6 seconds and
release
2. Turn on the CAMERA by pressing the power button for
approximately 5-6 seconds.
3. Now, on the right side of the monitor there is a pinhole label “Pair”.
With a paperclip, poke the hole to press pairing button. The monitor's
LED will star flashing rapidly
4. Now push down the power button on trhe CAMERA for about 3-4
seconds
5. You will see the video from the camera once the pairing is complete.
The green power light will stop flashing and turn solid green.
Pair Mode Camera 2: (PLEASE NOTE: SECOND CAMERA
SOLD SEPARATELY)
1. To Pair second camera, quickly press the power button on the
MONITOR to show screen for camera 2 (there will be a #2 on the top
left of the screen). Then repeat steps 2 - 4 above for second camera.
Camera View Options:
•Sequence of screens are:
oInitial turn on screen - Camera 1
oPress power button one time - Camera 2
oPress power button two times - Split Screen (Camera 1 and 2)
9
SET UP & USE FOR CAR:
Monitor: (Charge for 4-6 hours prior to first use)
Step 1: Plug both camera plush and monitor screen. Red charging lights will turn
off to indicate a full charge.
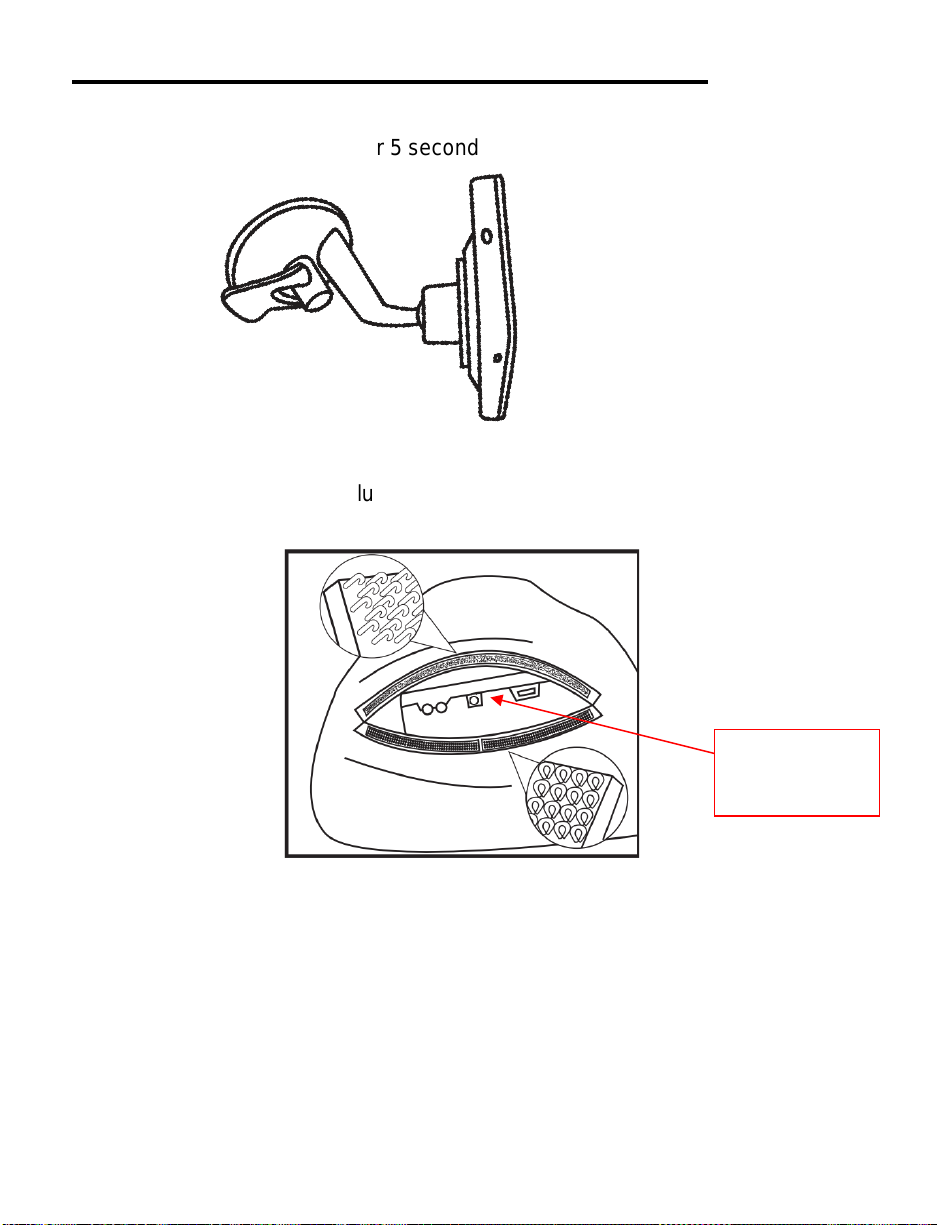
Step 2: Attach the mounting bracket to the back of the monitor slot and secure at
top of monitor.
Step 3: Attach the monitor to the windshield of the car in a secure location that does
not obstruct your view. We recommend the lower left corner of the driver’s
windshield. (only place it in a location allowed by law so that it doesn’t
interfere with vision.)
10
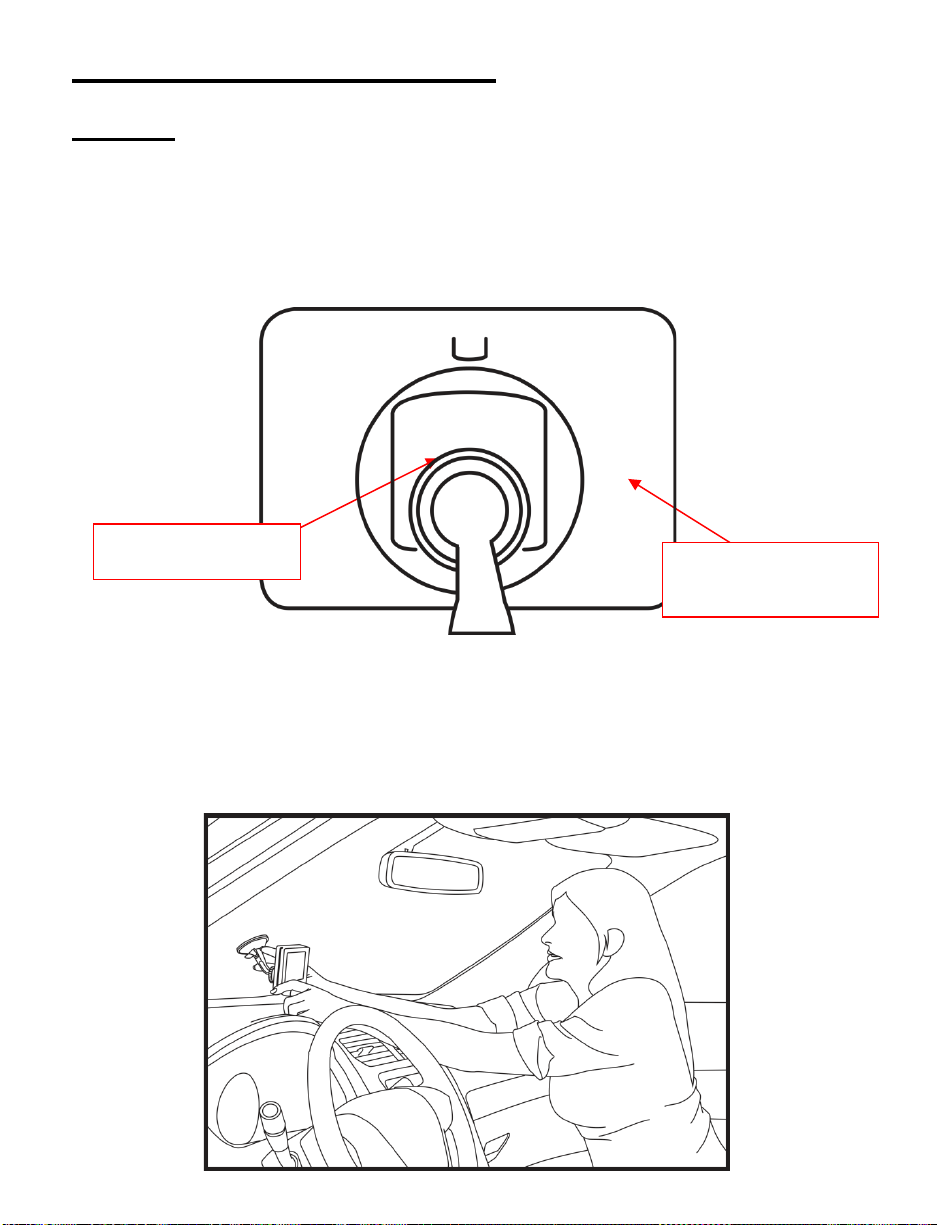
Back of Monitor;
Slot for Bracket
Mounting Bracket
SET UP & USE FOR CAR (Continued):
Step 4: Press On/Off button for 5 seconds to turn monitor On.
Step 5: unvelcro bottom of plush and push On/Off button for 2-3 seconds and
release - green light will turn on. Reclose velcro.
Step 6: Once the camera and monitor are on, they will pair. Signal strength / Battery
status will show on the LCD monitor. Meanwhile, the monitor can receive the video
from the camera.
If units do not pair, see Pairing Monitor Screen and Camera section on page 9.
11
Push On/Off
button

SET UP & USE FOR CAR (Continued):
Camera in Plush: (Charge for 6-8 hours prior to first use):
For rear facing seat installation for Infants:
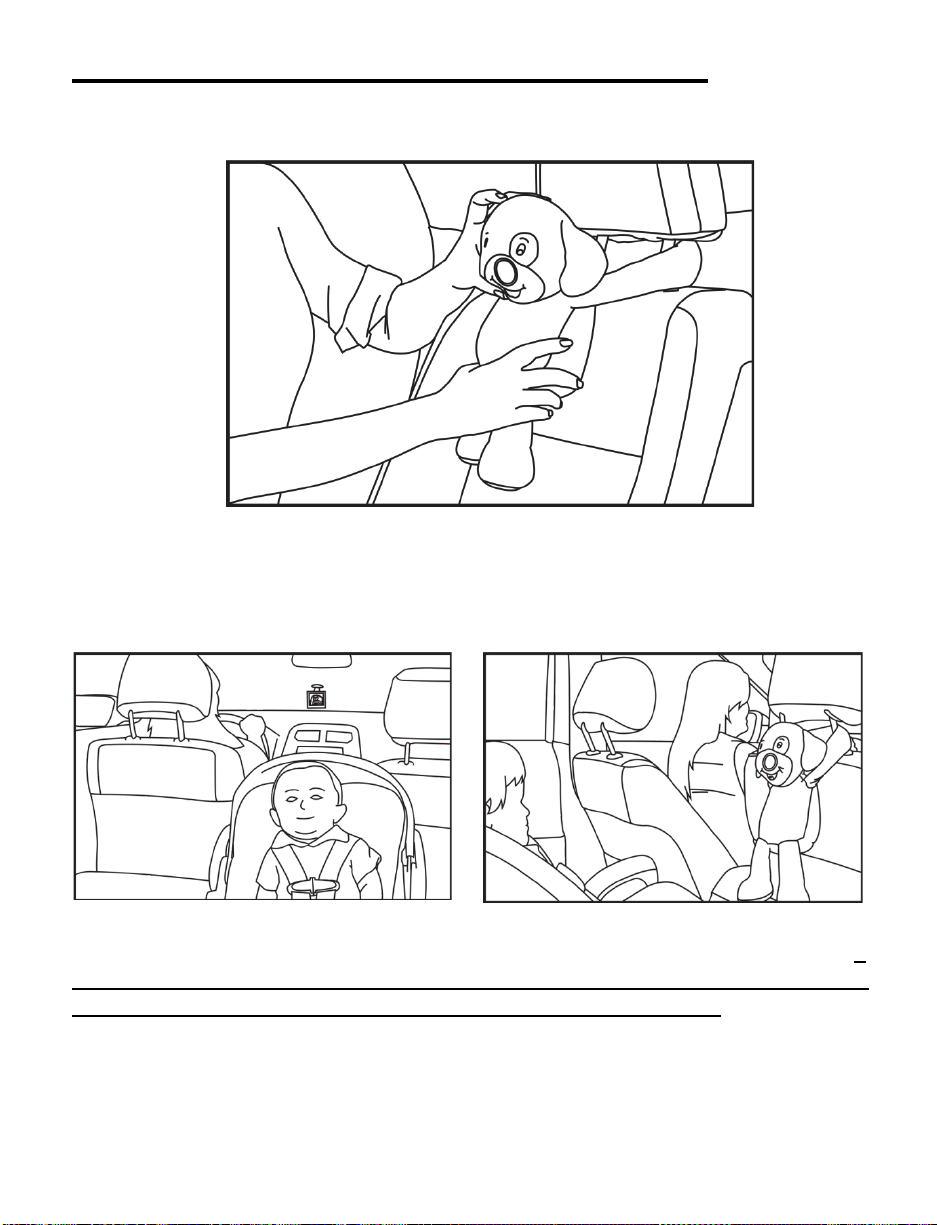
Step 7: Wrap plush’s arms around the backseat headrest posts in front of car seat
and attach palms together with the Velcro and attach the safety buckle straps and
pull for a snug fit around the headrest posts.
For forward facing seat installation for toddlers:
Step 7: Wrap plush’s arms around the front passenger’s seat headrest posts in
front of the toddler car seat and attach palms together with Velcro. Attach the plastic
safety buckle straps and pull for a snug fit around the headrest posts.
For both rear and forward facing installation. ALWAYS use the buckle straps to
ensure the camera will stay in place. Note- due to differences in headrest post
width, Velcro use may not be possible. The buckle straps should always fit.
12
SET UP & USE FOR CAR (Continued):
Step 8: Adjust plush’s head by flexing the internal bendi-neck for optimal viewing.
Step 9: Before you are ready to drive, make sure you have adjusted all of your vehicle’s
options such as seats, mirrors, seatbelts, and the position of the camera in the plush facing
your child.
Rear Facing or Forward Facing
Step 10: Drive safely and with quick glances knowing that your child is Always In View. If
you see something in the monitor that alerts you to attend to your child, continue to
follow safe driving practices, and calmly and safely pull off the road.
13
11
SET UP & USE FOR HOME:
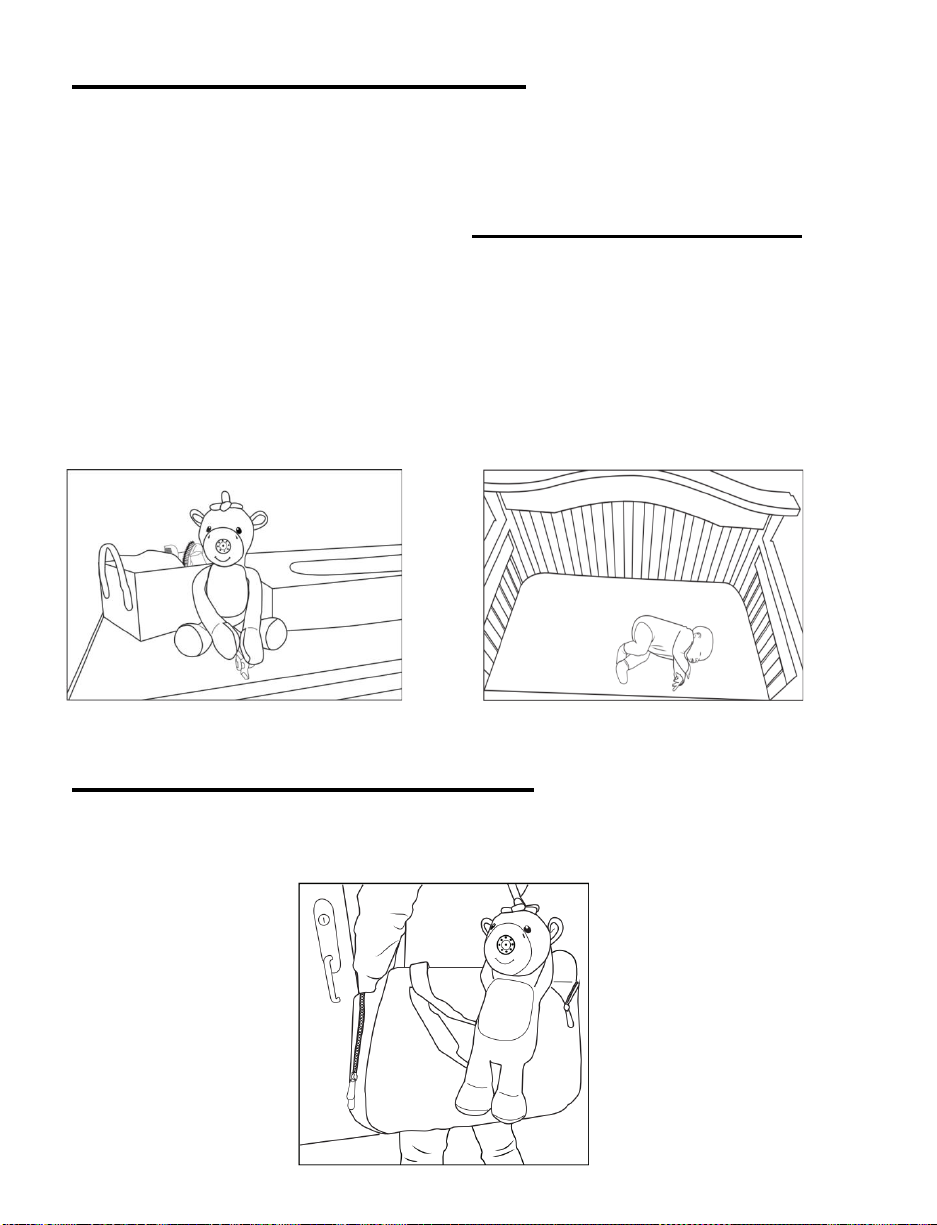
1. Find optimal location for the camera.
a. Ideally, find a location that will be close to an electrical outlet for charging
purposes.
b. Note: If using in the nursery, do not place the camera in the crib. Any
cables must be at least 3 feet away from your baby.
2. Place camera where you want to view your baby anywhere in your home.
3. Place monitor on monitor kick stand if desired, and turn up monitor sound.
4. Now keep peace of mind that your baby is Always In View
Camera in nursery dresser Monitor screen view
SET UP & USE ON THE GO:
SEE PAGE 4- QUICK REFERENCE FOR DAILY OPERATION, ON THE GO USE.
14
10

BATTERY CHARGING:
Monitor
Connect USB adapter to the monitor, the light will be red. Once charging is
complete, the RED light will turn OFF. Monitor screen indicates battery
charge.
Camera
Connect USB adapter to the camera, the light will be red. Once charging is
complete, the RED light will turn OFF.
Signal Indicators:
Signal Strength
Indicators
Description
Strong Signal
Moderate Signal
Poor Signal
Note: Verify the signal strength on the LCD monitor. Please reference
the above table.
Charging Tips:
•Charge both the plush and the monitor fully before use. Recommended
3-4 hours for initial charge until red light turns off.
•For regular use begin charging when battery has at least 5% power
left.
•Remove battery from plush when not in use for long period of time.
(over one month, you will need a Phillips screw driver to take out the
battery from the battery pack inside the plush.)
15

PROBLEM SOLVING:
Monitor View or Sound
No Sound coming from speaker
•Make sure both units are
powered on.
•Set Volume to a higher
setting.
No Video
•Check the DC power or
battery on the camera.
•Make sure the camera and
monitor are in effective range.
•Make sure you are on the
right screen mode.
Infrared (IR) Lighting
•In the dark, the IR lights will automatically work, but IR lights do not
provide light.
Plush Camera won’t stay put or constant camera repositioning
•Make sure you have adjusted the buckle straps for a tight fit. If it is still
loose, wrap the plush arms on the actual post of the headrest once on
each side and then use the buckle. The camera bendi-neck will adjust
after some use so that repositioning will be minimal.
Static
•Monitor and plush are too close together –move farther apart.
•Turn down the volume on the monitor.
•Make sure the battery is fully charged.
Flickering monitor
•Make sure monitor and camera are moved away from other wireless
devices (i.e. Wi-Fi, Bluetooth, GPS, etc).
Weak reception or no reception
•Make sure both units are turned on.
•Move plush closer to monitor.
•Make sure batteries are charged on both plush and monitor.
16
10

PROBLEM SOLVING (Continued):
Accidentally tried Pairing camera and monitor while camera is
On, or Camera is not charging
•wait until flashing green light becomes solid green (about 6-8 seconds)
•If camera isn't charging,
omake sure the cable is plugged in properly and in the right
direction
oTry using a different charging block
oTry using a different cable
oTry using a different wall outlet
oIf in the car, bring the plush camera and monitor in the home
and charge them there
•NOTE the green light will not turn on or off while holding own the
power button
NOTE: Make sure both units are fully charged for optimal performance.
See www.infanttech.com for more troubleshooting tips.
17

If you experience a problem that is not noted in this manual, please visit
www.infanttech.com for more troubleshooting tips. For more information, please
contact our via email 24 hours a day at hello@infanttech.com.
Infanttech warranty Policy
Infanttech will repair or replace your unit free of charge for 90 days from the date of purchase
if the unit is defective in workmanship or materials. Customer covers shipping to infanttech
warehouse. To claim your repair/replacement, the product must be returned to
Infanttech along with a copy of the original purchase receipt. In the absence of the
purchase receipt, the warranty will be 6 months from the date of manufacture. Please visit
www.infanttech.com to register your product.
Void Warranty:
This warranty does not apply to normal wear or damage from misuse, removal or tampering
of serial numbers, abuse, improper storage and handling, installation, accident, unauthorized
repair or alteration or units purchased through an unauthorized vendor. Visit
www.infnattech.com Terms and Conditions for a list of unauthorized vendors. If possible,
Infanttech can replace or repair unit for a fee.
For most recent manual visit www.infanttech.com
Infanttech
515 W Whittier Blvd
Montebello, CA 90640
© 2021 Infanttech Solutions, Inc.
Please retain information for future
reference. Color and styles may vary.
MADE IN CHINA

MANUAL DE INSTRUCCIONES
ZOOBY®BABY MONITOR FOR CARS
Gracias por su compra del infanttech zooby® video baby monitor for cars. Este monitor de
características únicas permite que los padres puedan mejorar la seguridad al conducir
vehículos, dado que reduce la necesidad de voltearse para mirar hacia atrás mientras se
está al volante. Este monitor versátil se puede utilizar en casa, y se puede llevar con usted
dondequiera que vaya. Su monitor zooby® le permite estar atento a su bebé mientras su
bebé está sentado en una silla para bebés en el asiento trasero del vehículo, con el bebé
mirando hacia atrás. Además, su monitor zooby® también se puede utilizar cuando el bebé
ya empieza a caminar y se sienta mirando hacia adelante en la silla para bebés en el asiento
trasero. El monitor zooby® consta de una unidad de video digital del conductor que se fija
fácilmente al parabrisas de cualquier vehículo, de un adaptador de recarga y de una cámara
incorporada a un lindo peluche suave que se puede colocar en diversos lugares del asiento
trasero. Tanto la unidad del conductor como la cámara están provistas de baterías
recargables.
Tenga presente que el uso del monitor zooby®no sustituye la exigencia del
cumplimiento por parte del conductor de todas las leyes de tránsito y de las normas
de seguridad, y la aplicación de precauciones razonables de seguridad destinadas a
reducir al mnimo las distracciones mientras conduce. Es su responsabilidad conocer
y cumplir con las leyes locales y estatales en las que planea usar este dispositivo.
[Modelos 1000-SGK, 1000-SZK, 1000-GBK, 1000-FXK, 1000-K9K]
POR FAVOR, LEA CUIDADOSAMENTE LAS INSTRUCCIONES Y
ADVERTENCIAS A CONTINUACIÓN ANTES DE UTILIZAR SU
MONITOR DE BEBÉS ZOOBY®. CONSERVE ESTE MANUAL DE
INSTRUCCIONES PARA CONSULTAS EN EL FUTURO.
Para recibir asistencia técnica, escríbanos a
Para usarse con bebés desde su nacimiento hasta que
empiecen a caminar.
ADVERTENCIA:
Un adulto debe instalar el monitor.
Sea cuidadoso al desempacar y ensamblar el producto.
This manual suits for next models
4
Table of contents
Languages:
Other Infanttech Baby Monitor manuals


