Innosource Sonair A+ User manual

Installation manual
Innosource BV
Vennestraat 17
2161 LE Lisse
Postbus 394
2160 AJ Lisse
The Netherlands
Tel.: +31 (0)252 226602
Fax.: +31 (0)252 235141
E-mail: [email protected]
Internet: www.innosource.nl

2
Installation manual Sonair
Parts
Introduction
The Sonair must be mounted on the inside of an outside
wall, and nearby a power socket. A hole must be drilled
in the wall to provide the air supply. The hole’s diameter
can vary between 104 and 125 mm. A duct is placed
inside the hole, and a grille is placed in the duct on the
outside wall.
Preparation
When deciding where to install the Sonair, please take
the following into account:
The unit must be mounted in a dry indoor area
The unit must be mounted on a smooth wall
The unit must be mounted nearby a power socket
It must be possible to place a grille on the tube on
the outside of the wall
The necessary free space above the unit is 45 mm
The necessary free space on both sides of the unit
is 60 mm
The necessary free space behind the radiator is
72 mm
Make sure that there are no pipes or electrical
wiring in the wall
Installation
Step 1
Decide where to install the Sonair.
Afbeelding 2: Minimale vrije ruimte rondom Sonair
3
Installation manual Sonair
Step 2
In the box you will find a mounting mould. This mould will
help you to determine the position of the hole for the air
inlet and the mounting screws. We advise you to stick
the mould onto the wall with tape. Determine the position
of the hole for the air inlet and the mounting screws.
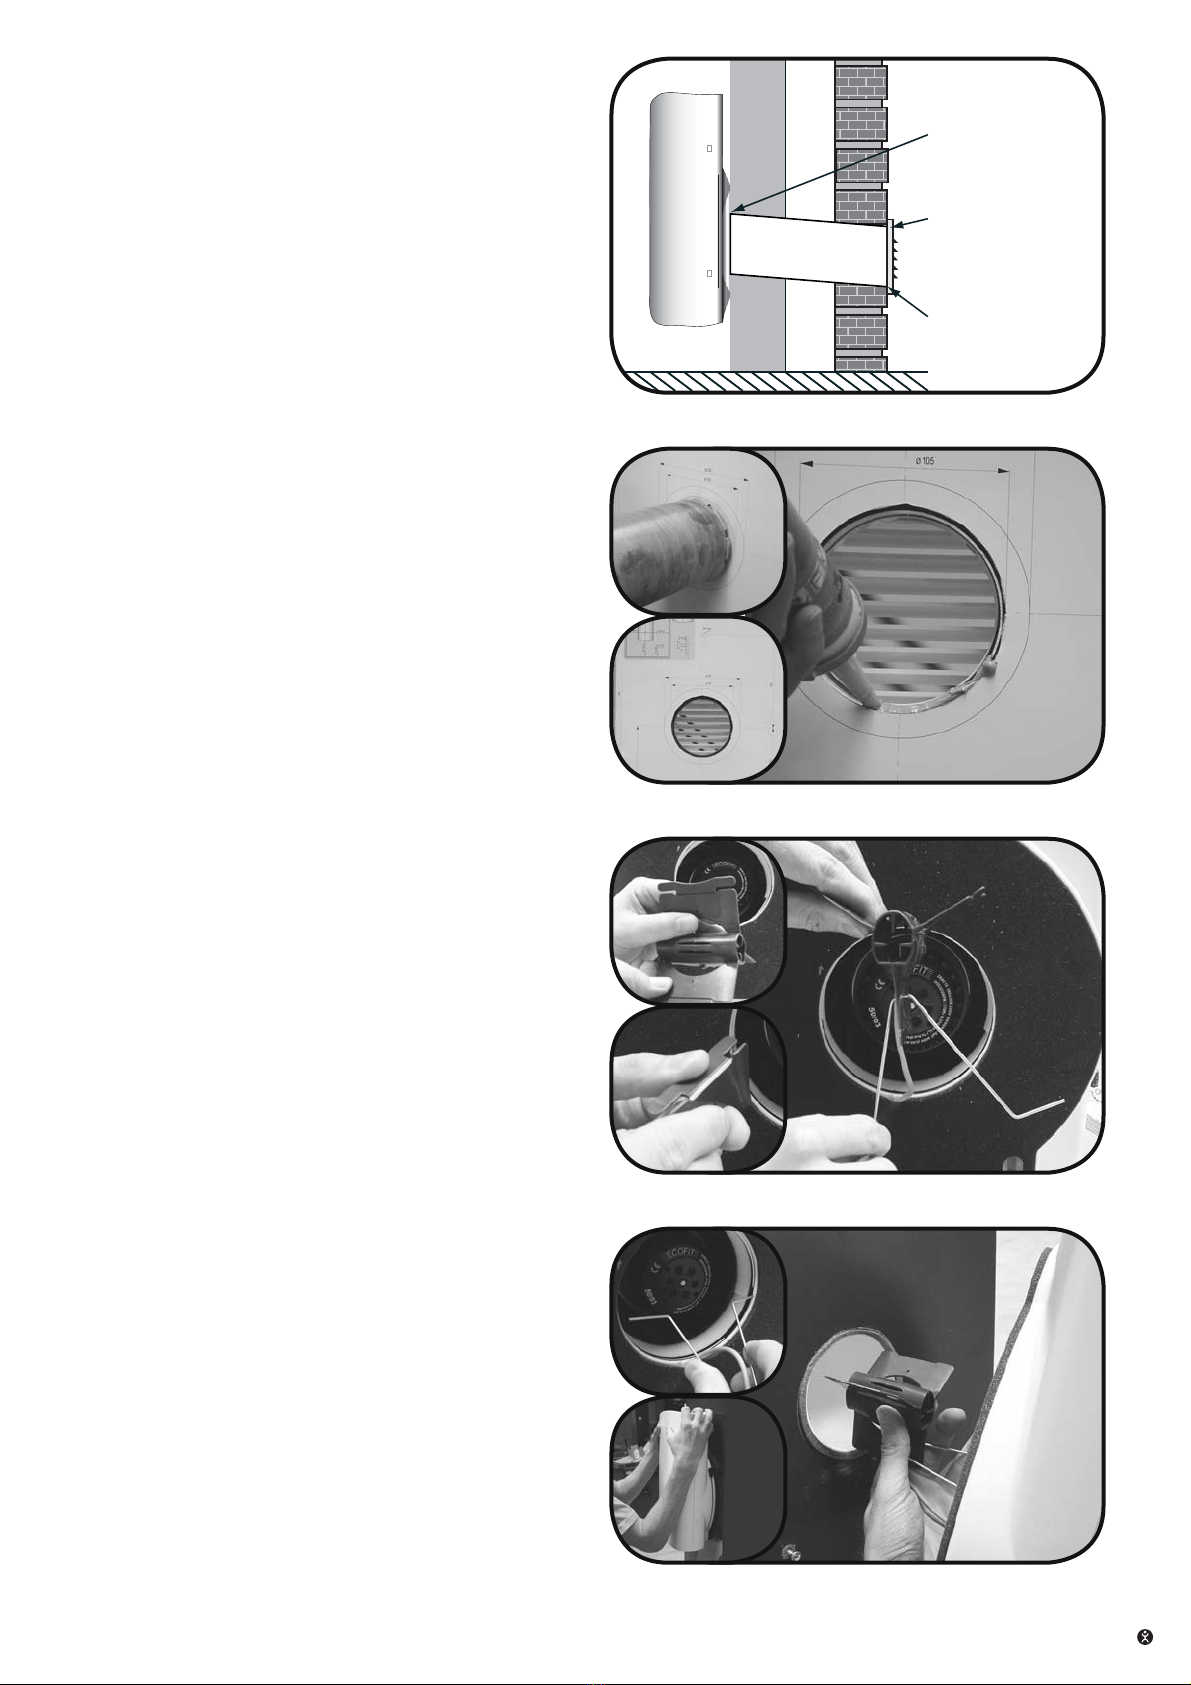
Step 3
Before drilling, make sure that there are no pipes or
electrical wiring in the wall. The hole for the air inlet
must be drilled at an angle of approximately 5 degrees
downwards from the inside to the outside. This is neces-
sary for the drainage of any water that might get into the
tube.
Step 4
Drill the holes for the plugs (8mm) horizontally and fit the
plugs. Screw the screws (min. 45 mm) into the plugs so
that the screws stick out approximately 8mm.
Step 5
Saw off the ends of the duct to the required length. Make
sure that the ends of the duct are parallel to the wall.
Now place the duct inside the hole for the air inlet. The
gaps around the duct must be sealed.
Step 6
Step 6 is only for Sonair ventilation units which form part
of the Air Comfort Control ventilation system. Click the
wings to the flow sensor. If the duct’s diameter is less
than 125 mm, then the outside edges of the wings can
be broken off. Connect the support wires to the flow sen-
sor as shown and connect the flow sensor to the Sonair
using the support wires.
Step 7
Press the Sonair firmly against the wall and down onto
the 3 screws.
Step 8
Place a grille in the duct on the outside wall.
Step 9
Plug the unit into the power socket.
rondom afkitten
buitenrooster
doorvoerset onder
hoek van 5º
This manual suits for next models
1
Table of contents


