Intec 980951 User manual
Caricabatterie · Charger ·
Chargeur
12 V - 120 A
2
9
16
980951
IT
EN
FR
· Italian
· English
· French
Italiano
English
Français

- 2 -
IT - Italiano - Istruzioni per l’uso
Utilizzare il caricabatterie esclusivamente per ricaricare batterie ricaricabili al piombo-acido
e LiFePO4 agli ioni di litio da 12 V. Non utilizzare per alcun altro scopo. Questo caricabatterie è
progettato per l’uso solo con la rete di alimentazione da 110-240 V~, 50/60 Hz.
1.
Leggere le istruzioni prima dell’uso. Conservare le presenti istruzioni per la
consultazione futura. Il presente manuale spiega come utilizzare l’apparecchio
istruzioni e linee guida di sicurezza. L’inosservanza di quanto indicato può
comportare gravi lesioni o la morte.
Leggere, comprendere e attenersi a tutte le istruzioni relative alla batteria, al
veicolo e alle apparecchiature utilizzate. Controllare le avvertenze riportate
sulla batteria e sul motore.
Solo per uso interno.
Collegare e scollegare i connettori di ricarica (morsetti, occhielli, presa
accendisigari ecc.) solo dopo aver scollegato l’apparecchio dalla rete di
alimentazione.
ventilazione adeguata durante la carica/l’uso.
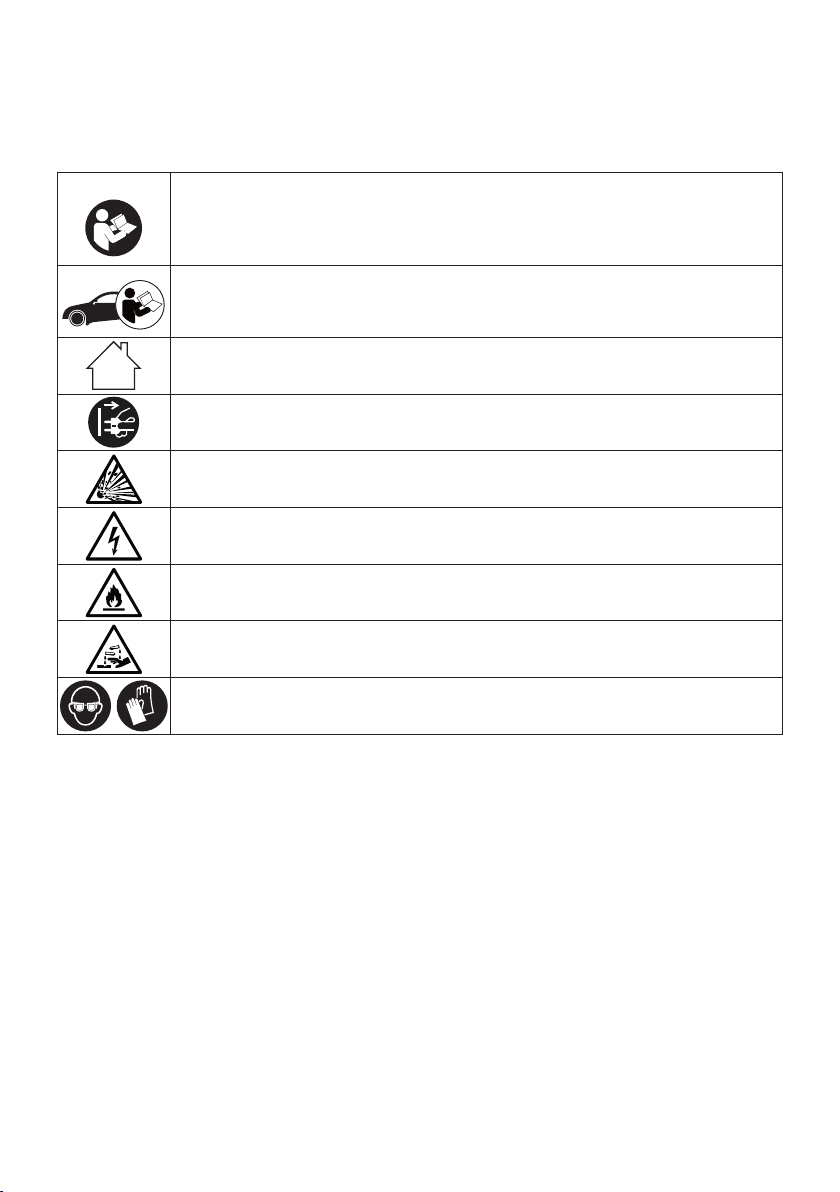
Rischio di scossa elettrica.
Rischio di incendio.
Rischio derivante da materiali pericolosi.
Indossare indumenti protettivi; protezione completa di occhi e corpo, compresi
occhiali di sicurezza.
1.1 Tenere fuori dalla portata dei bambini.
1.2 L’apparecchio non è destinato all’uso da parte di persone (compresi i bambini) con
capacità fisiche, sensoriali o mentali ridotte o che non dispongano dell’esperienza e delle
conoscenze necessarie, a meno che non abbiano ricevuto opportune istruzioni o siano
sotto la supervisione di una persona responsabile.
1.3 Non consentire ai bambini di giocare con l’apparecchio, nemmeno sotto la supervisione di
un adulto esperto.
1.4 La pulizia e la manutenzione dell’utente non devono essere eseguiti da bambini senza
supervisione.
1.5 Non caricare batterie non-ricaricabili.
1.6 Utilizzare in un’area asciutta, ben ventilata e lontano dai liquidi.
1.7 Utilizzare solo accessori raccomandati dal produttore.
1.8 Non tirare mai il cavo di alimentazione per staccare le spina dalla presa di corrente. Ciò
potrebbe danneggiare il cavo e la spina.
1.9 Non utilizzare l’apparecchio con i cavi di ingresso o uscita danneggiati.
1.10 Se il cavo di alimentazione è danneggiato, deve essere sostituito dal produttore,
dall’incaricato della manutenzione o da simili persone qualificate, in modo da evitare rischi.
IT

- 3 -
1.11 Non aprire né smontare l’apparecchio; rivolgersi a un tecnico qualificato quando sono
necessari interventi di assistenza e riparazione.
1.12 Non utilizzare l’apparecchio se questo ha subito un forte urto, è caduto o si è altrimenti
danneggiato in qualsiasi modo.
1.13 Non introdurre le dita o le mani all’interno dell’apparecchio.
1.14 Non posare mai l’apparecchio sulla batteria durante l’uso.
1.15 Non tentare di ricaricare batterie danneggiate.
1.16 Non ricaricare mai batterie congelate.
1.17 Tenere lontano dai gioielli. Togliersi oggetti personali metallici quali anelli, braccialetti,
collane e orologi quando si lavora con batterie al piombo-acido. La batteria piombo-acido
può produrre una corrente di cortocircuito sufficientemente elevata da fondere un anello
o un metallo, provocando gravi ustioni.
1.18 Tenere lontano da utensili e attrezzi. Prestare estrema cautela al fine di ridurre il rischio
di caduta di utensili metallici sulla batteria. Ciò potrebbe innescare o mandare in corto
circuito la batteria o altri componenti elettrici con il conseguente rischio di esplosione.
1.19 Evitare sempre che i morsetti si tocchino tra loro o entrino in contatto con lo stesso pezzo
di metallo.
1.20 Determinare la tensione della batteria facendo riferimento al manuale dell’utente del
veicolo e accertarsi che la tensione di uscita dell’apparecchio sia corretta.
1.21 Il morsetto della batteria non collegato al telaio deve essere collegato per primo. L’altro
collegamento deve essere effettuato al telaio, lontano dalla batteria e dal tubo del
carburante. A questo punto si collega il caricabatterie alla rete di alimentazione.
1.22 Una volta completata la carica, scollegare il caricabatterie dall’alimentazione di rete.
Rimuovere quindi il collegamento al telaio e, a seguire, quello della batteria.
1.23 Consultare le istruzioni per la pulizia e la manutenzione a cura dell’utente.
1.24 Scollegare l’apparecchio dall’alimentazione di rete prima di effettuare qualsiasi operazione
di manutenzione o pulizia.
2. INFORMAZIONI GENERALI
2.1
Sul pannello frontale del caricabatterie sono presenti 5 pulsanti e 15 LED.
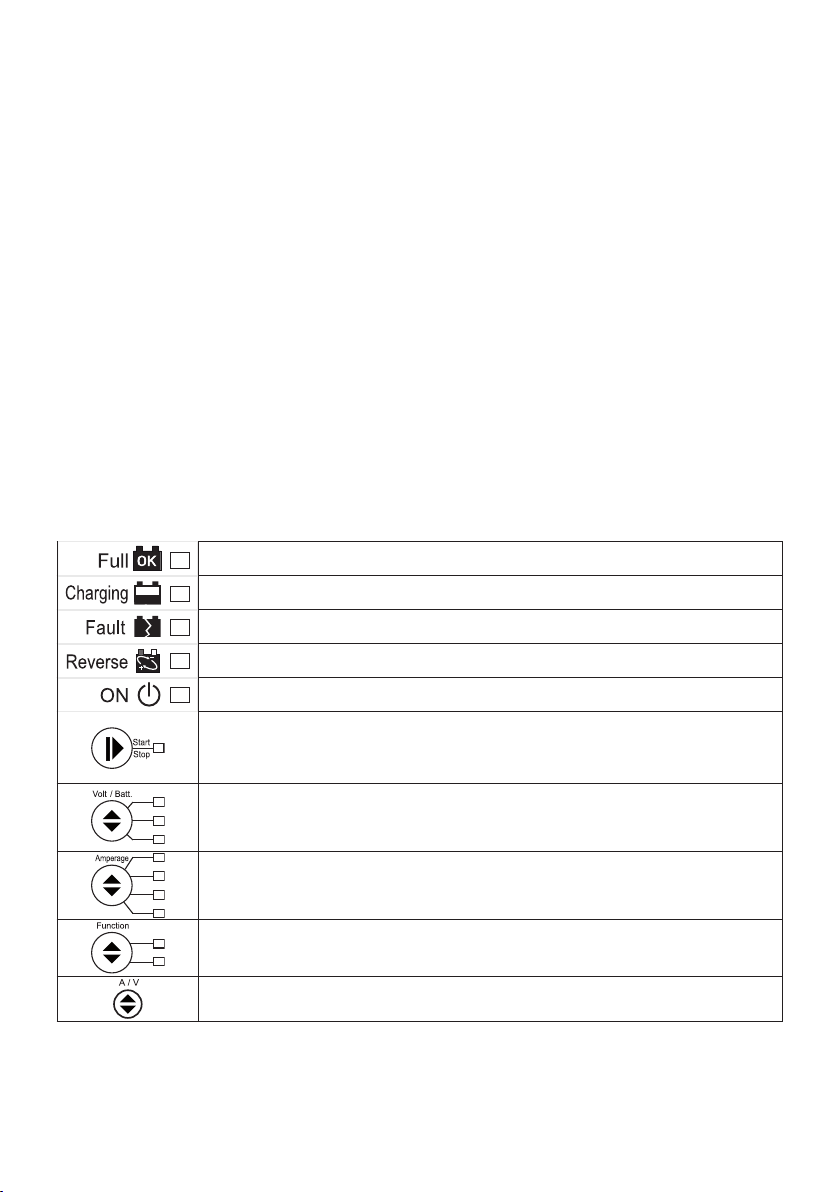
LED « Full »: La batteria è carica, ed in mantenimento.
LED « Charging »: a batteria è in carica.
LED « Fault »: La batteria è danneggiata.
LED « Reverse »: Inversione di polarità.
LED « ON »: Il caricabatterie è acceso (blu).
« Start/Stop » pulsante: Avvia o ferma l’erogazione nella modalità
selezionata.
1 LED sullo stato di funzionamento (giallo), segnala se sta erogando nella
modalità selezionata.
« Volt/Batt. » pulsante: Seleziona la tensione di 'Supply' o il tipo di batteria
da caricare.
3 LED sulla segnalazione della tensione di alimentazione e tipo di batteria
(giallo).
« Amperage » pulsante: Seleziona la corrente erogata.
4 LED sulla segnalazione di corrente erogata (giallo).
IT
- 4 -
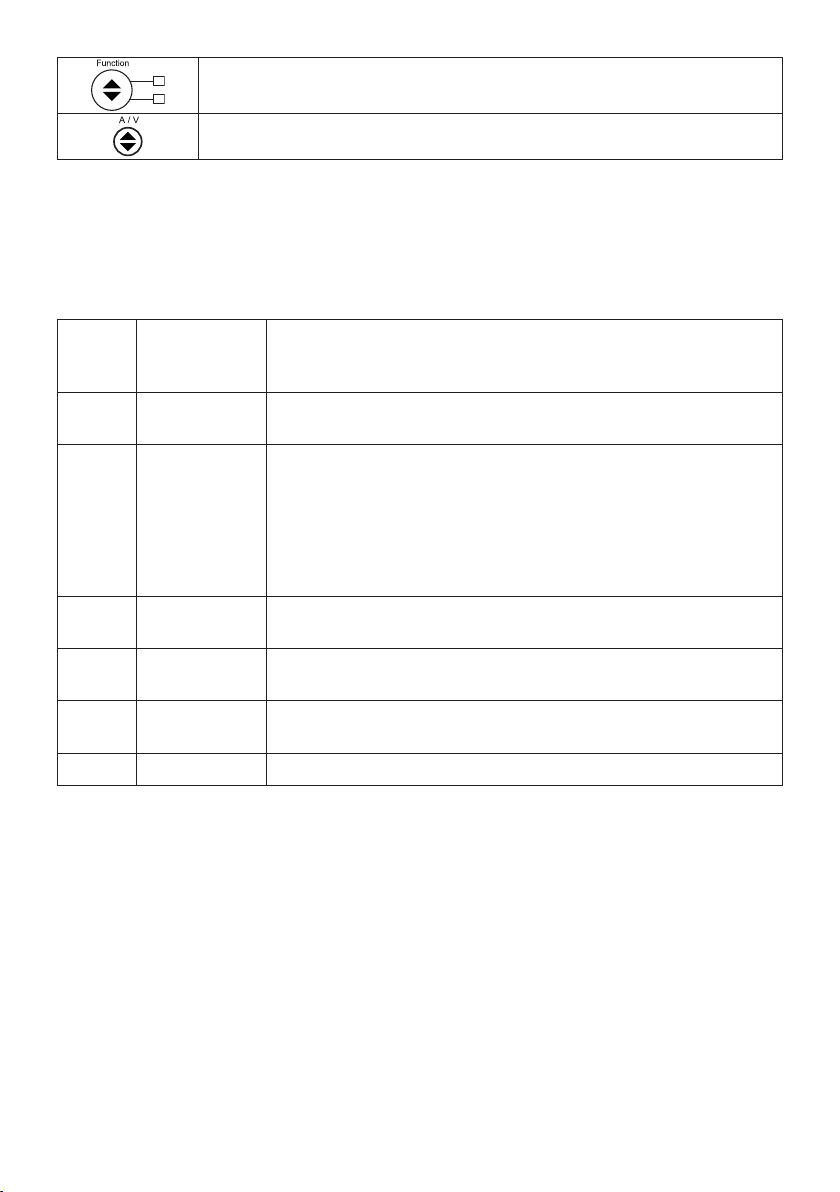
« Function » pulsante: Selezionala modalità operativa.
2 LED sulla modalità operativa (giallo): « Flash » o « Charge ».
« A/V » pulsante (display): Seleziona cosa visualizzare sul display.
2.2
Il tasto di selezione « A/V » permette di visualizzare a display la tensione o la corrente.
3.
3.1 Function »
« Charge »
Modalità di carica della batteria. Prevede 7 fasi di carica, di seguito descritte:
FASE 1 Analisi 1 Se la batteria presenta una tensione superiore ai 6,5 V, procede
con la successiva fase. Tensioni sotto i 6,5 V causano il ritorno in
'Stand-by' del dispositivo.
FASE 2 Pre-carica
batteria non raggiunge 13 V.
FASE 3 Analisi 2 Ricerca elemento in corto. Il caricabatterie stacca l’erogazione
di corrente per 5 minuti. Se durante questo arco di tempo la
tensione della batteria scende al di sotto degli 11,7 V il dispositivo
ritornerà in 'Stand-by'. Se la tensione rimane superiore agli 11,7
V si passa alla FASE 4. In caso di elemento in corto o batteria
solfatata (segnalata da "ERR02" sul display durante la FASE 3) è
consigliato ricaricare la batteria in modalità « Recovery ».
FASE 4 Carica
profonda
FASE 5 Tensione
costante
FASE 6 Tampone La tensione scende al livello di mantenimento e viene completato
il ciclo di carica. Si accende il LED verde di « Full ».
FASE 7 Ciclo a impulsi Ciclo di mantenimento batteria a impulsi (per periodi prolungati).
« Flash »
Modalità Alimentatore per assistenza nella programmazione dei veicoli. Non prevede alcuna
fase di carica al suo interno, è un puro alimentatore stabilizzato alla tensione nominale di
batteria. Il suo scopo è quello di fornire corrente in supporto alla batteria, per evitare la sua
scarica in operazioni che richiedono energia per brevi o lunghi periodi.
« »
Modalità di recupero per batterie solfatate accessibile mediante pressione prolungata del
tasto « Function ». Sullo schermo apparirà la scritta “rEC” con la visualizzazione della misura di
tensione o corrente istantanea, durante questa fase lampeggia il LED « Charge ».
Il caricabatterie esegue un ciclo di ricarica speciale nel quale vengono forzate tensioni superiori
alla media per tentare il recupero della batteria. In questa modalità non sono previsti messaggi di
errore durante il ciclo di carica, viene segnalato alla conclusione se la batteria è stata recuperata
o meno in base alla tensione e corrente assorbita. Modalità a 6 fasi di carica, di seguito descritte:
IT

- 5 -
FASE 1 Analisi 1 Se la batteria presenta una tensione superiore ai 3 V, procede
con la successiva fase. Tensioni sotto i 3 V causano il ritorno in
'Stand-by' del dispositivo.
FASE 2 Pre-carica
batteria non raggiunge 13 V.
FASE 3 Carica
profonda
FASE 4 Tensione
costante
FASE 5 Tampone La tensione scende al livello di mantenimento e viene completato
il ciclo di carica. Si accende il LED verde di « Full ».
FASE 6 Ciclo a impulsi Ciclo di mantenimento batteria a impulsi (per periodi prolungati)..
ATTENZIONE: A causa della tensione elevata che si raggiunge durante questo ciclo di ricarica,
collegata al veicolo potrebbe causare danni all'elettronica di bordo.
Tensione minima batterie: Se la tensione iniziale della batteria è inferiore a 3 V, la batteria non
può essere recuperata.
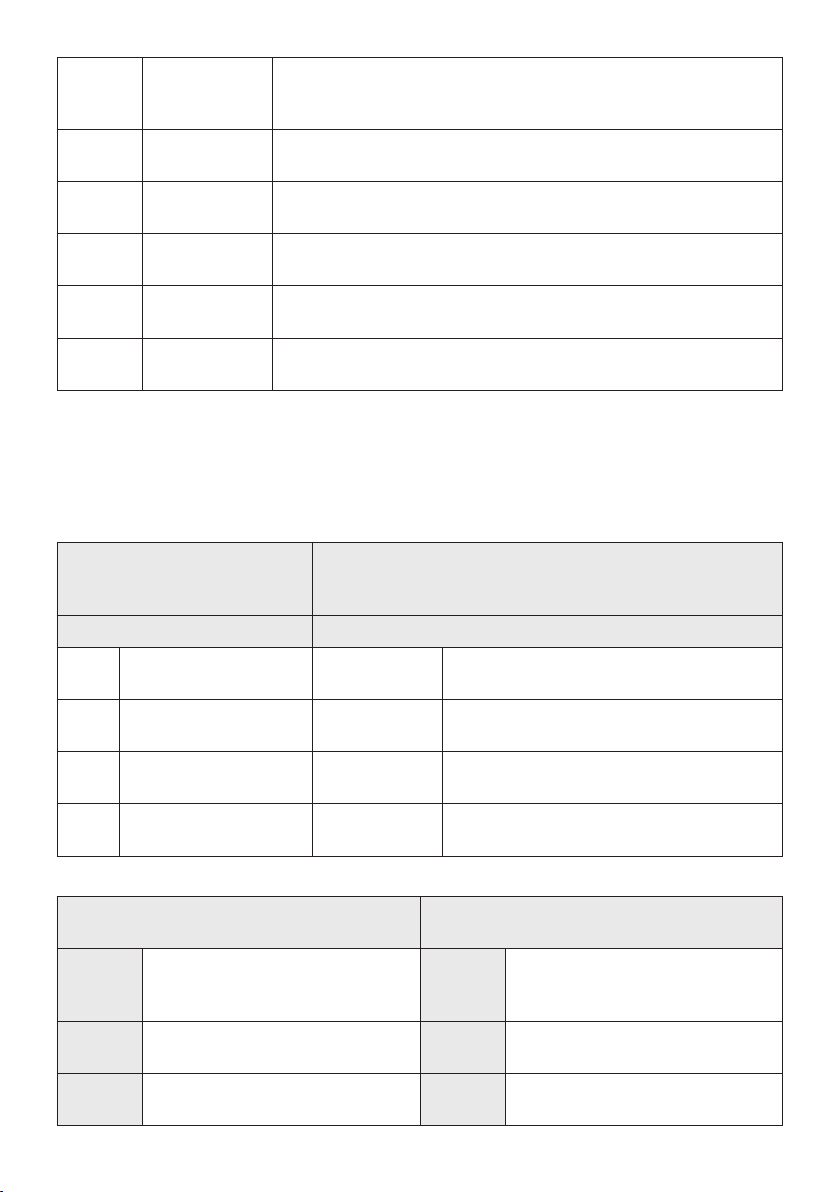
3.2 Flash »
Flash » Charge »
10 A Corrente di alimentazione
impostata a 10 A
5 - 100 Ah
Ah
30 A Corrente di alimentazione
impostata a 30 A
100 - 300 Ah
300 Ah
60 A Corrente di alimentazione
impostata a 60 A
300 - 600 Ah
600 Ah
120 A Corrente di alimentazione
impostata a 120 A
600 - 1200 Ah Supporta tutte le batterie dal minimo di
3.3 Flash »
14.8 V Tensione di alimentazione
impostata a 14,8 V
AGM Batterie AGM a piastra piana o
batterie a spirale tipo Optima. Fine
carica a 14,7 V.
14.4 V Tensione di alimentazione
impostata a 14,4 V
LiFePO4 Batterie LiFePO4. Fine carica a
14,5V.
13.8 V Tensione di alimentazione
impostata a 13,8 V
Wet Batterie con elettrolita all’acido.
Fine carica a 14,4 V.
IT

- 6 -
3.4
Il dispositivo realizza la memorizzazione delle impostazioni sul pannello frontale di controllo.
della riaccensione il caricabatterie si avvia con le ultime impostazioni memorizzate.
Con caricabatterie impostato in modalità « Flash » il ciclo di lavoro riprende automaticamente
al ritorno dell’alimentazione.
In modalità « Charge », invece, verrà visualizzato sul display l’errore "ER01" e sarà necessario
premere il tasto « Start/Stop » per riprendere il normale ciclo di ricarica.
3.5 Analisi batteria
Le analisi all'interno delle modalità operative, possono terminare con la segnalazione di alcuni
errori.
• Batteria danneggiata: Si accende il LED « Fault » e si spegne il LED « Start/Stop » , entra
in 'Stand-by', compare sul display la scritta ''Errx'' dove 'x' è il numero corrispondente alla
causa dell'errore (vedi tabella seguente). Segnale acustico singolo di due secondi.
• Inversione di polarità: Si accende il LED « Reverse » e viene visualizzato a display ''Err7''
con segnale acustico di due secondi.
4.
Segnalazione
Display
Causa possibile Rimedio
Er01
Cavi scollegati, cavi in cortocircuito. Posizionare correttamente le pinze e
riprendere la carica della batteria.
Batteria completamente in
cortocircuito.
Consultare il centro servizi della
batteria più vicino.
Er02
Batteria guasta o non recuperabile.
Non accetta corrente dopo 20h di
recovery.
La batteria può essere difettosa.
Er03
Sovratemperatura interna del
caricabatteria. Sovraccarico del
dispositivo.
Rimuovere eventuali oggetti che
coprono l'area di ventilazione
del caricabatteria o spostarlo in
una zona più fresca. Attendere
che il caricabatteria riparta
automaticamente.
Er04
Errore di tensione.
Tensione batteria troppo bassa. (Si
sta tentando di caricare una batteria
da 6 V).
Impostare un ciclo di « Recovery ».
Utilizzare il caricabatterie solo con
batterie supportate a 12 V.
Riprendere la carica della batteria.
Batteria con uno o più elementi in
cortocircuito. La batteria può essere difettosa.
Er05
Batteria con tensione troppo alta
rispetto a quella impostata. (Si sta
tentando di caricare una batteria da
24 V).
Utilizzare il caricabatterie solo con
batterie supportate a 12 V.
Riprendere la carica della batteria.
Er06 Batteria di capacità eccessiva. Non si
Utilizzare un caricabatteria con
capacità di carica maggiore.
IT

- 7 -
Er07 e LED «
Reverse »
Le pinze dei conduttori di uscita
sono collegati impropriamente alla
batteria.
Posizionare correttamente le pinze e
riprendere la carica della batteria.
Er08 Corrente di uscita troppo alta.
Corrente sopra il limite massimo.
Diminuire l’assorbimento sulla
batteria.
5.
1. Prima di collegare il caricabatterie alla batteria: assicurarsi che il cavo di alimentazione
non sia collegato alla rete di alimentazione!
2. Individuare il polo corrispondente alla massa del veicolo; in genere collegata al
morsetto negativo.
3. Carica di una batteria con morsetto negativo collegato alla massa del veicolo, nel
seguente modo:
• Collegare il conduttore di uscita con pinza rossa al polo (+) positivo della batteria.
• Collegare il conduttore di uscita con pinza nera alla massa del veicolo, lontano dalla
batteria e dal condotto del carburante.
Carica di una batteria con morsetto positivo collegato alla massa del veicolo, nel seguente
modo:
• Collegare il conduttore di uscita con pinza nera al polo (-) negativo della batteria.
• Collegare il conduttore di uscita con pinza rossa alla massa del veicolo, lontano dalla
batteria e dal condotto del carburante.
2. Collegare il conduttore di uscita con pinza rossa al polo (+) positivo della batteria.
3. Collegare il conduttore di uscita con pinza nera al polo (-) negativo della batteria.
ATTENZIONE: Assicurarsi che entrambi i morsetti dei conduttori di uscita abbiano un contatto
adeguato con i loro rispettivi terminali.
4. Una volta connessi i cavi dei conduttori di uscita alla batteria, collegare il cavo di
alimentazione dell’apparecchio alla presa di rete, assicurandosi che la tensione corrisponda
a quella nominale del caricabatterie; a questo punto, l’apparecchio emette un segnale
acustico per 0,5 secondi e tutti i led di segnalazione, posti sul pannello di comando, si
illuminano per due secondi; in questa fase il display mostra “- - - -”.
5. ON » acceso,
LED « Wet » acceso, LED « Charge » 5-50 Ah acceso. L'accensione dei led varia a seconda
dell'ultimo programma memorizzato.
6. A questo punto, con il caricabatterie in modalità 'Stand-by', settare i parametri di carica
appropriati al tipo di batteria da caricare, mediante i tasti posti sul pannello di comando. I
parametri di carica scelti sono evidenziati dall’accensione del led corrispondente.
Parametri di carica impostabili:
• Tasto
Function »
A seconda del ciclo di lavoro, selezionare: « Flash », « Charge » o « Recovery ».
• Tasto
»
- A seconda della corrente di alimentazione necessaria per sostenere la
tensione di batteria durante le operazioni di riprogrammazione. O
- A seconda della capacità della batteria da ricaricare selezionare la
funzione « Charge ».
IT

- 8 -
• Tasto
»
- A seconda della tensione di alimentazione necessaria per sostenere
la tensione di batteria durante le operazioni di riprogrammazione
(SOLO modalità « Flash »), è possibile selezionare tre diverse tensioni di
alimentazione. O
- A seconda della tecnologia costruttiva della batteria (SOLO modalità
« Charge »), selezionare: « Wet », « LiFePO4 » o « AGM ».
7. Dopo aver impostato i parametri di carica, premere il tasto « Start / Stop » per avviare
la carica della batteria. L’accensione dei led « Start/Stop » e « Charging » indicano che la
carica è in corso, il display indicherà la corrente di carica e la tensione della batteria.
8. Durante la carica della batteria nelle fasi “I” ed “U0” rimane acceso il LED « Charging ».
9. All’accensione del led « Full » la batteria sarà caricata al 100%, da questo momento il
caricabatterie entrerà nella fase di mantenimento e terrà costantemente monitorato lo
di carica. In questa fase di carica l’apparecchio può rimanere collegato per diversi mesi.
10. Se si vuole interrompere o concludere la sezione di carica seguire le istruzioni di
11. Terminata la carica premere il tasto « Start/Stop » del caricabatterie. Lo spegnimento
del led indica che il caricabatteria ha terminato il ciclo di lavoro.
12. Scollegare il cavo di alimentazione dell’apparecchio dalla presa di rete.
13. Scollegare il conduttore di uscita con pinza nera dalla massa del veicolo o dal morsetto
negativo (-) della batteria.
14. Scollegare il conduttore di uscita con pinza rossa dal morsetto positivo (+) della
batteria.
5.1
Start/
Stop
cavo di alimentazione dell'apparecchio dalla presa di rete e scollegare i conduttori di uscita dai
morsetti della batteria.
5.2
In caso di interruzioni sulla linea di rete il caricabatteria memorizza il ciclo di lavoro che stava
eseguendo in modo da poterlo riprende automaticamente (solo in modalità « Flash ») al
ritorno dell'alimentazione sulla linea di rete. Questa funzione è fondamentale nei casi in cui
il caricabatteria esegua cicli di alimentazione molto lunghi anche in assenza di operatore. In
modalità « Charge » sarà invece necessario premere il pulsante « Start/Stop » per riprendere il
ciclo di lavoro.
6.
Scollegare il caricabatterie dalla batteria e dall’alimentazione di rete. Pulire l’involucro con un
panno morbido e asciutto prima di conservarlo.
Quando il caricabatteria non viene utilizzato per lungo tempo, conservarlo in un luogo asciutto
per proteggerlo dall’umidità.
punti di raccolta. Rivolgersi alle autorità locali o al proprio rivenditore per consigli e
informazioni sul riciclo.
IT
- 9 -
EN - English - Instructions for use
Only use the charger to recharge 12 V rechargeable Wet, AGM and Lithium LiFePO4 batteries.
Do not use it for any other purpose. This charger is designed for use only with the supply mains
of 110 - 240 V~, 50/60 Hz.
1.
Read the instructions before use. Keep these instructions for future reference.
read and follow these instructions and safety guidelines carefully. Failure to do
so could result in serious injury or death.
Read, understand and follow all instructions of the battery, vehicle and any
equipment used. Review the cautionary markings on the battery and on the
engine.
For indoor use only.
Connect and disconnect the charging connectors (clamps, eyelets, cigarette
lighter plug…) only after disconnecting the appliance from the supply mains.
ventilation during charging/use.
Risk of electric shock.
Risk of hazardous materials.
Wear protective clothes; complete eyes and body protection, including safety
goggles.
1.1 Keep out of reach of children.
1.2 The appliance is not to be used by persons (including children) with reduced physical,
sensory or mental capabilities, or lack of experience and knowledge, unless they have
been given supervision or instruction.
1.3 Children being supervised not to play with the appliance.
1.4 Cleaning and user maintenance shall not be made by children without supervision.
1.5 Do not charge non-rechargeable batteries.
1.6 Use in a dry, well-ventilated area away from liquids.
1.7 Use only attachments recommended by the manufacturer.
1.8 Never pull on the power cord to remove the power plug from the main. This may damage
the cord or the plug.
1.9 Do not use the appliance with damaged input or output cables.
1.10 If the supply cord is damaged, it must be replaced by the manufacturer, its service agent
or similarly qualified persons in order to avoid a hazard.
1.11 Do not open or disassemble the appliance; take it to a qualified service person when
service or repair is required.
1.12 Do not use the appliance if it has received a sharp blow, been dropped or otherwise
damaged in any way.
1.13 Do not put fingers or hands into the appliance.
EN
- 10 -
1.14 Never put the appliance on top of the battery while using it.
1.15 Do not attempt to charge a damaged battery.
1.16 Never charge a frozen battery.
1.17 Keep away from jewelry. Remove personal metal objects such as rings, bracelets, necklaces
and watches when working with a lead-acid battery. A lead-acid battery can produce a
short-circuit current high enough to weld a ring or the like to metal, causing a severe burn.
1.18 Keep away from tools. Be extra cautious, to reduce the risk of dropping a metal tool onto
the battery. It might spark or short-circuit the battery or other electrical part that may
cause an explosion.
1.19 Never allow clamps to touch together or contact the same piece of metal.
1.20 Determine the voltage of the battery by referring to the vehicle owner’s manual and make
sure that the output voltage of the appliance is correct.
1.21 The battery terminal not connected to the chassis has to be connected first. The other
connection is to be made to the chassis, remote from the battery and fuel line. The battery
charger is then to be connected to the supply mains.
1.22 After charging, disconnect the battery charger from the supply mains. Then remove the
chassis connection and then the battery connection.
1.23 Refer to the instructions for cleaning and user maintenance.
1.24 Unplug the appliance from the supply mains before attempting any maintenance or
cleaning.
2. GENERAL INFORMATION
2.1
On the front panel of the battery charger there are 5 buttons and 15 LEDs.
« Full » LED: Battery is charged and is in charge maintenance status.
« Charging » LED: Battery is charging.
« Fault » LED: Battery is damaged.
« Reverse » LED: Polarity reversal.
« ON » LED: The battery charger is on (blue).
« Start/Stop » button: Starts or stops supply in selected mode.
1 Operating status LED (yellow) indicates if it is working in the selected
mode.
« Volt/Batt. » button: Selects supply voltage or type of battery to charge.
3 Supply voltage and battery type LEDs (yellow).
« Amperage » button: Selects supplied current.
4 Supplied current LEDs (yellow).
« Function » button: Selects operating mode.
2 Operating mode LEDs (yellow): « Flash » or « Charge ».
« A/V » button (display): Selects information to display.
2.2
The « A/V » selection button allows you to view the voltage or current on the display.
3.
EN

- 11 -
3.1 Function »
« Charge »
Battery charging mode. There are 7 charging steps, as described below:
STEP 1 Test 1 If the battery has a voltage above 6.5 V, the unit proceeds with
the next step. Voltage below 6.5 V will cause the device to revert
to stand-by.
STEP 2 Pre-charge Charge starts at a constant current, until battery voltage reaches
13 V.
STEP 3 Test 2 Checks whether the battery has short-circuited elements. The
battery charger stops supplying current for 5 minutes. If during
this time battery voltage falls below 11.7 V, the device reverts to
stand-by. If voltage remains above 11.7 V, the battery charger
moves on to STEP 4. If any element short-circuits or the battery
ERR02" on the
display during STEP 3), the battery should be charged in the
« Recovery » mode.
STEP 4 Deep cycle
charging
The battery charges until the set limit is reached.
STEP 5 Constant
voltage
Keeps the battery at charge end voltage.
STEP 6 Voltage drops to the maintenance level and the charging cycle is
completed. The green « Full » LED turns on.
STEP 7 Pulsed current
cycle
Pulsed battery maintenance cycle (over long periods).
« Flash »
Power Supplier mode assisting in motor vehicle programming. No charge phase occurs in it.
It is just a power supplier stabilized at rated battery voltage. It is designed to deliver current
short or long periods of time.
« »
Recovery mode for sulfated batteries accessible by holding down the « Function » button. The
screen displays the message “rEC” and shows the instantaneous voltage or current reading;
during this step, « Charge
The battery charger performs a special charging cycle, in which higher than average voltages
are forced, to attempt recovery of the battery. In this mode, no error messages are generated
during the charging cycle. When the cycle is completed, a message is displayed to indicate
whether or not the battery has been recovered on the basis of voltage or current absorption.
This mode has 6 charging steps, as described below:
STEP 1 Test 1 If the battery has a voltage above 3 V, the unit proceeds with the
next step. Voltage below 3 V will cause the device to revert to
stand-by.
STEP 2 Pre-charge Charge starts at a constant current, until battery voltage
reaches 13 V.
STEP 3 Deep cycle
charging
The battery charges until the set limit is reached.
EN

- 12 -
STEP 4 Constant
voltage
Keeps the battery at charge end voltage.
STEP 5 Voltage drops to the maintenance level and the charging cycle is
completed. The green « Full » LED turns on.
STEP 6 Pulsed current
cycle
Pulsed battery maintenance cycle (over long periods).
ATTENTION: Because of the high voltage reached during this charging cycle, the battery
recovery process must be performed with the battery disconnected from the vehicle. Recovery
with the battery connected to the vehicle may result in damage to the vehicle’s electronics.
Minimum battery voltage: If the initial voltage of the battery is lower than 3 V, the battery
cannot be recovered.
3.2 Flash
Flash » Charge »
10 A Supply current set to 10 A 5 - 100 Ah Supports batteries from 5 Ah to 100
Ah
30 A Supply current set to 30 A 100 - 300 Ah Supports batteries from 100 Ah to
300 Ah
60 A Supply current set to 60 A 300 - 600 Ah Supports batteries from 300 Ah to
600 Ah
120 A Supply current set to 120 A 600 - 1200 Ah Supports all batteries from a minimum
of 600 Ah to a maximum of 1200 Ah
3.3 Flash »
14.8 V Supply voltage set to 14.8 V AGM Flat plate AGM batteries or Optima
type spiral batteries. Charge end
at 14.7 V.
14.4 V Supply voltage set to 14.4 V LiFePO4 LiFePO4 batteries. End of charge
at 14.5 V.
13.8 V Supply voltage set to 13.8 V Wet Acid electrolyte batteries. Charge
end at 14.4 V.
3.4
The battery charger saves the settings on the front control panel. In the event of an accidental
saved settings.
With the battery charger set to the « Flash » mode, the work cycle will resume automatically
when the power supply is restored.
Whereas in the « Charge » mode, the screen will display the error message "ER01", and the
« Start/Stop » button will have to be pressed, to resume the normal charge cycle.
3.5
The tests within the operating modes may terminate with the signaling of some errors.
EN

- 13 -
• Damaged battery: The « Fault » LED turns on and the « Start/Stop
and the charger enters stand-by mode. The display shows the message “Errx”, where ‘x’ is
the number corresponding to the cause of the error (see table below). Single two second
audible warning.
• Polarity reversal: The « Reverse » LED switches on, and the display shows the message
“Err7” with a two second audible warning.
4.
Display
indication
Possible cause Solution
Er01
Leads disconnected, leads short-
circuited.
Position the clamps correctly and
start charging the battery again.
Battery completely short-circuited. Contact a battery service center.
Er02
Battery faulty or unrecoverable. No
current accepted after 20 hours of
recovery.
The battery may be defective.
Er03 Internal overheating of battery
charger. Battery charger overload.
Remove any objects that could be
covering the ventilation area of the
battery charger or move it to a cooler
area. Wait for the battery charger to
start again automatically.
Er04
Voltage error.
Battery voltage too low. (You are
attempting to charge a 6 V battery).
Set a « Recovery » cycle. Only use the
battery charger with supported 12 V
batteries.
Start charging the battery again.
One or more elements of the battery
has/have short-circuited. The battery may be defective.
Er05
Battery voltage too high compared
to that set. (You are attempting to
charge a 24 V battery).
Only use the battery charger with
supported 12 V batteries. Start
charging the battery again.
Er06 Battery capacity excessive. Unable
to reach end condition.
Use a battery charger with greater
capacity.
Er07 and LED
« Reverse »
The clamps of the output leads
are not connected correctly to the
battery.
Position the clamps correctly and
start charging the battery again.
Er08 Excessively high output current.
Current exceeds maximum limit. Reduce battery absorption.
5.
1. Before starting to charge the battery, make sure that the power supply lead is not
plugged into the mains supply!
2. Locate the motor vehicle’s earthing point, which is normally connected to the negative
battery terminal.
EN

- 14 -
3. Charge a battery with negative earth, grounded to the motor vehicle’s chassis, as
follows:
• Connect the output lead with the red clamp to the positive terminal (+) of the battery.
• Connect the output lead with the black clamp to the motor vehicle’s earthing point,
keeping it away from the battery and fuel pipe.
Charge a battery with positive earth, grounded to the motor vehicle’s chassis, as follows:
• Connect the output lead with the black clamp to the negative terminal (-) of the battery.
• Connect the output lead with the red clamp to the motor vehicle’s earthing point, keeping
it away from the battery and fuel pipe.
2. Connect the output lead with the red clamp to the positive terminal (+) of the battery.
3. Connect the output lead with the black clamp to the negative terminal (-) of the
battery.
ATTENTION: Make sure that both clamps of the output leads generate a suitable contact with
their corresponding terminals.
4. Once the output leads have been connected to the battery, plug the power supply lead
of the battery charger into the mains socket, making sure that the voltage matches the
rated voltage of the battery charger; having done this, the battery charger will emit an
acoustic signal for 0.5 seconds, and all the LED indicators on the control panel will switch
on for 2 seconds; at this stage, the display shows “- - - -”.
5. ON » LED on, « Wet »
LED on, « Charge » 5-50 Ah
saved.
6. At this stage, with the battery charger in stand-by mode, set the charging parameters
suitable for the type of battery to be charged, using the buttons on the control panel. The
charging parameters selected are displayed by the corresponding LED, which switches on.
Settable charging parameters:
• Function »
button
Depending on the work cycle, select: « Flash », « Charge » or « Recovery ».
• »
button
- Based on the supply current required to support the battery voltage
during reprogramming operations. OR
- Based on the capacity of the battery to charge, select the « Charge »
feature.
• »
button
- Depending on the supply voltage required to support the battery
voltage during reprogramming operations (ONLY « Flash » mode), you can
- Depending on the construction/type of the battery (ONLY « Charge »
mode), select: « Wet », « LiFePO4 » or « AGM ».
7. Once the charging parameters have been set, press the « Start/Stop » button to start
charging the battery. When the « Start/Stop » and « Charging » LEDs light up, the battery
is charging; the display will show the charging current and the voltage of the battery.
8. The « Charging » LED remains lit in phases “I” and “U0” whilst the battery is charging.
9. When the « Full » LED switches on, the battery is fully charged (100 %), and the charger
constantly monitored, so that it is always at an optimal level of charge. In this charging
phase, the appliance can be left connected to the battery for several months.
10. If you wish to end or interrupt the charging cycle, follow the charge end/interruption
EN

- 15 -
instructions (5.1 ).
11. Once the battery is charged, press the « Start/Stop » button of the battery charger.
12. Disconnect the power supply lead of the appliance from the mains socket.
13. Disconnect the output lead with the black clamp from the motor vehicle’s earthing
point or from the negative terminal (-) of the battery.
14. Disconnect the output lead with the red clamp from the positive terminal (+) of the
battery.
5.1
If you want to interrupt the battery charging cycle, simply press the « Start/Stop » button; the
lead of the appliance from the mains socket and the output leads from the battery terminals.
5.2
In the case of a mains power supply cut, the battery charger saves the work cycle it was
performing in order to restore it automatically (only in the « Flash » mode) as soon as the power
supply is restored. This feature is fundamental if the battery charger is used to charge batteries
without the operator supervising the cycle; for example, during very long charging cycles.
Whereas, in the « Charge » mode, the « Start/Stop » button must be pressed to resume the
work cycle.
6.
Disconnect the battery charger from the battery and supply mains. Clean the enclosure with a
soft, dry cloth before storage.
When the battery charger will not be used for a long time, it must be stored in a dry place to
protect it against humidity and moisture.
Electrical products should not be discarded with household products. Electrical
products used must be collected separately and disposed of at collection points
provided for this purpose. Talk with your local authorities or dealer for advice on
recycling.
EN

- 16 -FR
N’utilisez le chargeur que pour recharger des batteries au plomb rechargeables 12 V. Ne l’utilisez
en aucun cas pour recharger d’autres produits. Ce chargeur est uniquement conçu pour une
alimentation secteur de 110 - 240 V~, 50/60 Hz.
1.
Lisez ces instructions avant utilisation. Conservez-les pour pouvoir les relire
ultérieurement. Ce mode d’emploi explique comment utiliser l’appareil de
et consignes de sécurité qu’il contient. Vous risquez sinon des blessures
graves ou mortelles.
Assurez-vous de lire, comprendre et suivre toutes les instructions concernant
la batterie, le véhicule ou tout autre équipement utilisé. Lisez les marquages
d’avertissement sur la batterie et le moteur.
N’utilisez l’appareil qu’en intérieur.
cigare, etc.) qu’après avoir débranché l’appareil de l’alimentation secteur.
et d’étincelles. Prévoyez une ventilation adéquate pendant la recharge/
l’utilisation.
Risque de choc électrique.
Risque d’incendie.
Risque lié aux matières dangereuses.
Portez des vêtements de protection ainsi qu’une protection complète des
yeux et du corps, y compris des lunettes de sécurité.
1.1 Veillez à garder l’appareil hors de portée des enfants.
1.2 L’appareil ne doit pas être utilisé par des personnes (y compris des enfants) aux
capacités physiques, sensorielles ou mentales réduites ou manquant d’expérience et de
connaissances, à moins qu’elles soient supervisées ou aient reçu des instructions.
1.3 Les enfants doivent être surveillés pour qu’ils ne jouent pas avec l’appareil.
1.4 Les interventions de nettoyage et de maintenance par l’utilisateur ne doivent en aucun
cas être réalisées par des enfants sans surveillance.
1.5 Ne chargez pas de batteries non rechargeables.
1.6 Utilisez l’appareil dans un endroit sec et bien ventilé à l’abri des liquides.
1.7 Veillez a n’utiliser que les connecteurs recommandés par le fabricant.
1.8 Ne tirez jamais sur le cordon d’alimentation pour retirer la fiche d’alimentation du secteur.
Cela pourrait endommager le cordon ou la fiche.
1.9 N’utilisez pas l’appareil lorsque les câbles d’entrée ou de sortie sont endommagés.
1.10 Si le cordon d’alimentation est endommagé, remplacez-le immédiatement par un cordon
neuf obtenu auprès du fabricant, de ses techniciens de maintenance ou de techniciens
indépendants qualifiés.
1.11 N’ouvrez pas et ne démontez pas l’appareil; apportez-le chez un agent de service qualifié
si une intervention ou une réparation est nécessaire.

- 17 - FR
1.12 N’utilisez pas l’appareil s’il a reçu un coup violent, est tombé ou a été endommagé d’une
autre manière.
1.13 Ne placez pas les doigts ou les mains dans l’appareil.
1.14 Ne placez jamais l’appareil sur le dessus de la batterie en cours d’utilisation.
1.15 N’essayez jamais de charger une batterie endommagée.
1.16 Ne chargez jamais une batterie gelée.
1.17 Tenez à l’écart des bijoux. Retirez les objets métalliques personnels, comme les bagues,
bracelets, colliers et montres lors de la recharge d’une batterie au plomb. Les batteries au
plomb sont susceptibles de générer un courant de court-circuit élevé capable de souder
des objets métalliques, entraînant ainsi des brûlures cutanées.
1.18 Tenez à l’écart des outils. Soyez extrêmement prudent, pour réduire le risque de laisser
tomber un outil métallique sur la batterie. Cela peut créer des étincelles ou provoquer
un court-circuit dans la batterie ou une autre partie électrique, entraînant un risque
d’explosion.
1.19 Évitez toujours que les pinces se touchent ou entrent en contact avec la même pièce
métallique.
1.20 Déterminez le voltage de la batterie en vous référant au manuel du propriétaire du véhicule
et assurez-vous que la tension de sortie de l’appareil est correcte.
1.21 La borne de la batterie non connectée au châssis doit être branchée en premier. L’autre
connexion doit être faite au châssis, à l’écart de la batterie et de la ligne de carburant. Le
chargeur de la batterie doit ensuite être connecté à l’alimentation secteur.
1.22 Après la recharge, déconnectez le chargeur de batterie de l’alimentation secteur. Retirez
la connexion au châssis et ensuite la connexion à la batterie.
1.23 Consultez les instructions de nettoyage et de maintenance utilisateur.
1.24 Débranchez l’appareil de l’alimentation secteur avant d’entreprendre une maintenance ou
un nettoyage.
2.
2.1
Sur le panneau avant du chargeur de batterie sont présents 5 boutons et 15 LEDs.
LED « Full »: La batterie est rechargée et en maintien.
LED « Charging »: La batterie est en charge.
LED « Fault »: La batterie est endommagée.
LED « Reverse »: Inversion de polarité.
LED « ON »: Le chargeur de batterie est allumé (bleue).
Bouton « Start/Stop »: Mise en marche ou arrêt dans le mode sélectionné.
1 LED pour l'état de fonctionnement (jaune), signale s'il fonctionne dans le
mode sélectionné.
Bouton « Volt/Batt. »: Sélection de la tension de 'Supply' ou le type de
batterie à charger.
3 LEDs d'avertissement tension d'alimentation électrique (jaune) et type
de batterie.
Bouton « Amperage » : Sélection du courant distribué.
4 LEDs d'avertissement du courant (jaune).
Bouton « Function »: Sélection du mode de fonctionnement.
2 LEDs pour le mode opérationnelle (jaune): « Flash » ou « Charge ».

- 18 -
Bouton « A/V
2.2
Le bouton de sélection « A/V
3.
3.1 Function »
« Charge »
Mode de charge de la batterie. Elle prévoit 7 phases de charge, décrites ci-après :
PHASE 1 Analyse 1 Si la batterie présente une tension supérieure à 6,5 V, on passe à
la phase suivante. Des tensions inférieures à 6,5 V provoquent le
retour en 'Stand-by' du dispositif.
PHASE 2 Pré-charge Début de la charge à courant constant jusqu’à ce que la tension
de la batterie atteigne les 13 V.
PHASE 3 Analyse 2 Recherche de l’élément en court-circuit. Le chargeur de batterie
interrompt l’arrivée de courant pendant 5 minutes. Si pendant ce
laps de temps la tension de la batterie descend sous les 11,7 V, le
dispositif se remettra en 'Stand-by'. Si la tension reste supérieure
à 11,7 V, il passe à la PHASE 4. En cas d'élément en court-circuit ou
de batterie sulfatée (signalée par "ERR02
la PHASE 3), il est conseillé de recharger la batterie en mode
« Recovery ».
PHASE 4 Charge
profonde
PHASE 5 Tension
constante
PHASE 6 Tampon La tension descend au niveau de maintien et le cycle de charge
est complété. La LED verte de « Full » s’allume.
PHASE 7 Cycle à
impulsions
Cycle de maintien batterie à impulsions (pendant des périodes
prolongées).
« Flash »
Mode d'alimentation pour assistance dans la programmation des véhicules. Ne prévoit aucune
phase de charge à l’intérieur, c’est un pure alimentation stabilisée à la tension nominale de
batterie. Son but est de fournir du courant en support à la batterie pour éviter sa décharge lors
d’opérations qui demandent de l’énergie pour des périodes brèves ou longues.
« »
Mode de récupération pour les batteries sulfatées accessible en appuyant longuement sur
la touche « Function rEC” avec l'indication de la mesure de
tension ou de courant instantané. Pendant cette phase, la LED « Charge » clignote.
tensions supérieures à la moyenne pour tenter la récupération de la batterie. Les messages
d’erreur ne sont pas prévus pendant le cycle de charge pour ces modalités, le signal de
Modalité à 6 phases de charge décrites ci-après:
FR
- 19 -
PHASE 1 Analyse 1 Si la batterie présente une tension supérieure à 6,5 V, on passe à
la phase suivante. Des tensions inférieures à 6,5 V provoquent le
retour en 'Stand-by' du dispositif.
PHASE 2 Pré-charge Début de la charge à courant constant jusqu’à ce que la tension
de la batterie atteigne les 13 V.
PHASE 3 Charge
profonde
PHASE 4 Tension
constante
PHASE 5 Tampon La tension descend au niveau de maintien et le cycle de charge
est complété. La LED verte de « Full » s’allume.
PHASE 6 Cycle à
impulsions
Cycle de maintien batterie à impulsions (pendant des périodes
prolongées).
ATTENTION: A cause de la haute tension que l’on atteint pendant ce cycle de charge, il faut
branchée au véhicule pourrait provoquer des dommages à l’électronique de bord.
Tension minimum batterie: Si la tension initiale de la batterie est inférieure à 3 V, la batterie ne
peut pas être récupérée.
3.2 Flash »
Flash » Charge »
10 A Courantd’alimentation
programmé à 10 A
5 - 100 Ah Supporte les batteries de 5 Ah à 100 Ah
30 A Courantd’alimentation
programmé à 30 A
100 - 300 Ah Supporte les batteries de 100 Ah à 300 Ah
60 A Courantd’alimentation
programmé à 60 A
300 - 600 Ah Supporte les batteries de 300 Ah à 600 Ah
120 A Courantd’alimentation
programmé à 120 A
600 - 1200 Ah Supporte toutes les batteries de 600 Ah
minimum à 1200 Ah maximum.
3.3 Flash »
14.8 V Tension d’alimentation
programmée à 14.8V
AGM Batteries AGM à plaque plate ou
batteries à spirale type Optima.
Fin de charge à 14,7 V.
14.4 V Tension d’alimentation
programmée à 14.4V
LiFePO4 Batteries LiFePO4. Fin de charge à
14,5 V.
13.8 V Tension d’alimentation
programmée à 13.8 V
Wet Batteries avec électrolyte à
l’acide. Fin de charge à 14,4 V.
FR

- 20 -FR
3.4
d’interruption accidentelle ou volontaire de l’alimentation, au moment de la remise en marche,
le chargeur de batterie repart avec les derniers réglages mémorisés.
Avec le chargeur de batterie réglé en mode « Flash », le cycle de travail reprend automatiquement
au retour de l’alimentation.
Pour le mode « Charge », en revanche, l'erreur "ER01
sur le bouton « Start/Stop » pour reprendre le cycle normal de charge.
3.5
Les analyses des modes opérationnelles peuvent terminer avec l’indication de certaines
erreurs.
• Batterie endommagée: La LED « Fault » s’allume et la LED « Start/Stop » s'éteint, se met
en 'Stand-by'. L'inscription “Errx
la cause de l’erreur (voir tableau). Signal acoustique unique de deux secondes.
• Inversion de polarité: La LED « Reverse » s'allume et “Err7
acoustique de deux secondes.
4.
écran
Cause possible Solution
Er01
Câbles débranchés, câbles en court-
circuit.
Positionnez correctement les
pinces et recommencez à charger la
batterie.
Batterie complètement en court-
circuit.
Contactez un centre de service pour
batteries..
Er02
Batterieenpanneounonrécupérable.
N’accepte pas le courant après 20
heures de recovery.
La batterie peut être défectueuse.
Er03
batterie. Surcharge du dispositif.
Éliminer les éventuels objets qui
couvrent la partie de la ventilation
du chargeur de batterie ou placer
celui-ci dans un lieu plus frais.
Attendre que le chargeur de batterie
reparte automatiquement.
Er04
Erreur de tension.
Tension de batterie trop basse. (Vous
essayez de charger une batterie 6 V).
Programmer un cycle de « Recovery ».
Utiliser le chargeur de batterie
uniquement avec des batteries
supportées à 12 V.
Batterie présentant un ou plusieurs
éléments en court-circuit. La batterie peut être défectueuse.
Er05
Batterie avec tension trop élevée par
rapport à la tension programmée.
(Vous essayez de charger une
batterie de 24 V).
Utiliser le chargeur de batterie
uniquement avec des batteries
supportées à 12 V.
Reprendre la charge de la batterie.
Er06
de charge ne peut être atteinte.
Utiliser un chargeur de batterie avec
capacité de charge supérieure.
Table of contents
Languages:
Popular Batteries Charger manuals by other brands

EVEREADY
EVEREADY NiMH EVVC Product data sheet

Landscape Forms
Landscape Forms Outdoor Power installation guide

LEGRAND
LEGRAND Battery Charger 240V installation manual

Nordelettronica
Nordelettronica NE287 21A instruction manual

Schumacher Electric
Schumacher Electric SC1299 owner's manual

Pulsar
Pulsar 3 user manual


Douglas Battery
Douglas Battery LEGACY DL Series Installation and operating instructions

GN Hearing
GN Hearing C-1 user guide

Spektrum
Spektrum S1100 instruction manual

GP
GP QS0A instruction manual

Infinite Peripherals
Infinite Peripherals Infinea X quick start guide

Würth
Würth 0772 800 operating instructions