IntelliCorder SH1006 User manual

Intellicorder
User Manual
Product Model: SH1006
Utility Model Patent No.: ZL201120121587.3
Design Patent No.: ZL201130075639.3
Standard No.: EN 55022 EN 55024
GB 17626.2-2006 Q/GZ 4-2011

2
Dear Users,
Please read the user m anual carefully before using this product and Kindly safe kee p this
manual for future refe rence.
Safety Use Note:
Warning: Please install the digital door viewe r in the recom mended places to ensure safety.
To guard against the explosion, please use the original battery. Please ask for ma intenance from
qualified service profe ssionals.
Equipment Ma intenance
• Do not shake and tap equipment violently.
• If dust or wate r droplets splashing on the device, carefully wipe with a dry cloth.
• Do not use any battery charger ex cept the supplied one.
• Please cha rge with our specially equipped battery charger.

3
Chapter I: Product information
1.1 Package contents
1.2 Product appe arance
1.3 Main features, functions
1.4 Main specifications
Chapter II: Install diagram
2.1 Structure chart
2.2 Installation process
2.3 Batte ry installation and remove method
2.3.1 Battery installa tion method
2.3.2 Battery rem ove method
2.4 SD memory card insertion and remove
2.4.1 SD memory card insertion
2.4.2 SD memory card remove
2.5 Clock battery replacement
2.5.1 Clock battery remove
Catalog

4
2.5.2 Clock battery installation
2.6 Charge
Chapter III: Intellicorder use instruction
3.1 Live mode
3.1.1 System setting
3.1.2 Time se tting
3.1.3 Parameters setting
3.1.4 Playback setting
3.2 Record mode
Chapter IV: FAQ
Chapter V: Fault、solution and Precautions
Note:
Please read the user manual carefully before using this product and Kindly safe keep this manual
for future re ference.

5
1.1 Package contents
(1) Intellicorder indoor host 1pc
(2) Intellicorde r outdoor host 1pc
(3) Indoor host m ounting plate 1pc
(4) Powe r a daptor 1pc
(5) Lithium battery 1pc
(6) C lock battery 1pc (Loaded. Not installation for will loss of power, fitted when using )
(7) Fixed nut 1pc
(8) Scre w 2pcs
(9) Phillips screwdriver 1pc
(10) User manual 1pc
In the event the pack ing accessories a re incomple te to e nsure your interests, kindly contact the
dealer or the com pany imme diately.
Chapter I Product introduction

6
1.2 Product Appearance
1.3 Product features and functions

7
The intellicorder SH1006 is a new generation of visual digital recording door viewer, it
incorporated the m ost advanced technical digital chipset. W ith a unique assembly method,
user can enjoy easy and convenie nt installation without the need of any wiring and any need
to alter or modify their curre nt traditional peep-hole on their door construction. This is indeed
a sim ple, practical and yet highly technologically advanced home security product.
Main features and functions
(1) 2.8” LCD display screen
(2) Attractive & Fashionable appearance
(3) Easy to operate and install, no wiring
(4) Indoor host m onitoring outside
(5) Infrared detection video / photo
(6) O wn 256M built-in memory, easy to use
(7) Support SD card extension, up to 32G
(8) Record the date, time, the video le ngth, facilitate to provide valuable data when inquiry
(9) No radiation, low power consumption
(10) 3X digital zoom
(11) 0.3 mega pixel high resolution
(12) Automatic power saving mode
1.4 Product specifications

8
Item Spec. Rem arks
Indoor unit size
138mm *103mm*25mm
Outdoor unit size
18m m*Dia.50m m
Machine Part
Adapter plate 100mm *78mm*9.5mm
Am bient light
adaptation
Working environment
Illum ination of the outdoor unit
20 lux ~3500 lux
Resolution
The resolution of ima ges on the indoor
monitor should not be less
than 200
(Central leve l, under
800 lux condition)
MIC part
Capacitive Electret
Microphone
Diamete r 6MM Height: 2.7MM
Sensitivity: 40 + /-3dB
Camera Pixel Width:640, He ight:480 300K Pixe l
Camera Angle
Diagonal:115+/-5 degrees
Horizontal:102+/-3 degrees
Vertical: 85+/-3 degrees
Camera Part
Digital Zoom 3X digital zoom

9
Loudspeaker Part
Loudspeaker
Diamete r:20MM Power:1W
Impedance:8 O HM
Display Type 240(R+G+B)*320 Dots
LCD Type 2.8 inch TFT LCD
Viewing Direction
6 O”colock
Display Screen
Backlight 4 LED white color
water-proof
dust-proof
requirem ents
Indoor Unit: IP30;
Outdoor Unit: IP33
Door Thickness
suited
Door thickness is: 35mm -55mm ,
55m m-85mm and 85mm -105mm .
Installation Pa rt
Door peephole size
Dia.15mm
Own mem ory 256M
Memory
Memory Extension
Max im um support 32G
SD card and
back ward compatible

10
Battery C harger
(MODEL:VA8B-050
100)
Input: 110 V to 240 V 50/60 Hz, 0.3 A
Output: Dc 5.0 V 1.0A
5.0V
Battery Pack
(lithium-ion)
(MODEL:DS-L600)
Voltage/capacity: 3.7 V, 1800 m Ah
Power Part
Clock battery Dia.20.0 thick:3.2 3.0V CR 2032
Infrared mobile
monitoring
Distance Near: <1.5M ; Far: <2.5M
Am bient
tem perature
-10 ℃~+55 ℃;
Relative Hum idity
10 %~95 %;
Working
Condition
Atm ospheric
pressure
86 kPa~106 kPa
Include SD card or
not
Optional according to customer’s
request
Include battery
Include 1pc 1800mAh lithium battery
Others
Language Kinds of language to set

11
Settings function
time and date settings function
Sleep automatically
Can automatically go to sleep
File save format
JPEG,MP4

12
2.1 Intellicorder structure chart
21
host underside
131211
10
98
7
6
5
4
3
host underside
host front
16
15
14
Chapter II Install diagram

13
Explain the various parts of the structure or button:
(1) Battery Cove r (SD m emory card and lithium batte ry inside)
(2) Lock bracket for batte ry cover
(3) Color LC D screen
(4) Re turn:
(5) C ursor: △▽
(6) O K: confirm setting
(7) Powe r: power on or power off
(8) Charge indicator (red): when there the external power adaptor is connected, light on
(9) New record indicator (green): recording whe n in recording mode ,light on
(10) Speake r: Play the recorded audio sound under record m ode
(11) Charging interface
(12) R ESET – use a pointer or alike to press this button to reset the unit
(13) Mode switch key: switch btw (RECORD) and (LIVE) m ode
(14) Le ns
(15) Microphone
(16) Infrared m otion-activated Sensor – detects motion up to 2-2.5m
14
2.2 Install process
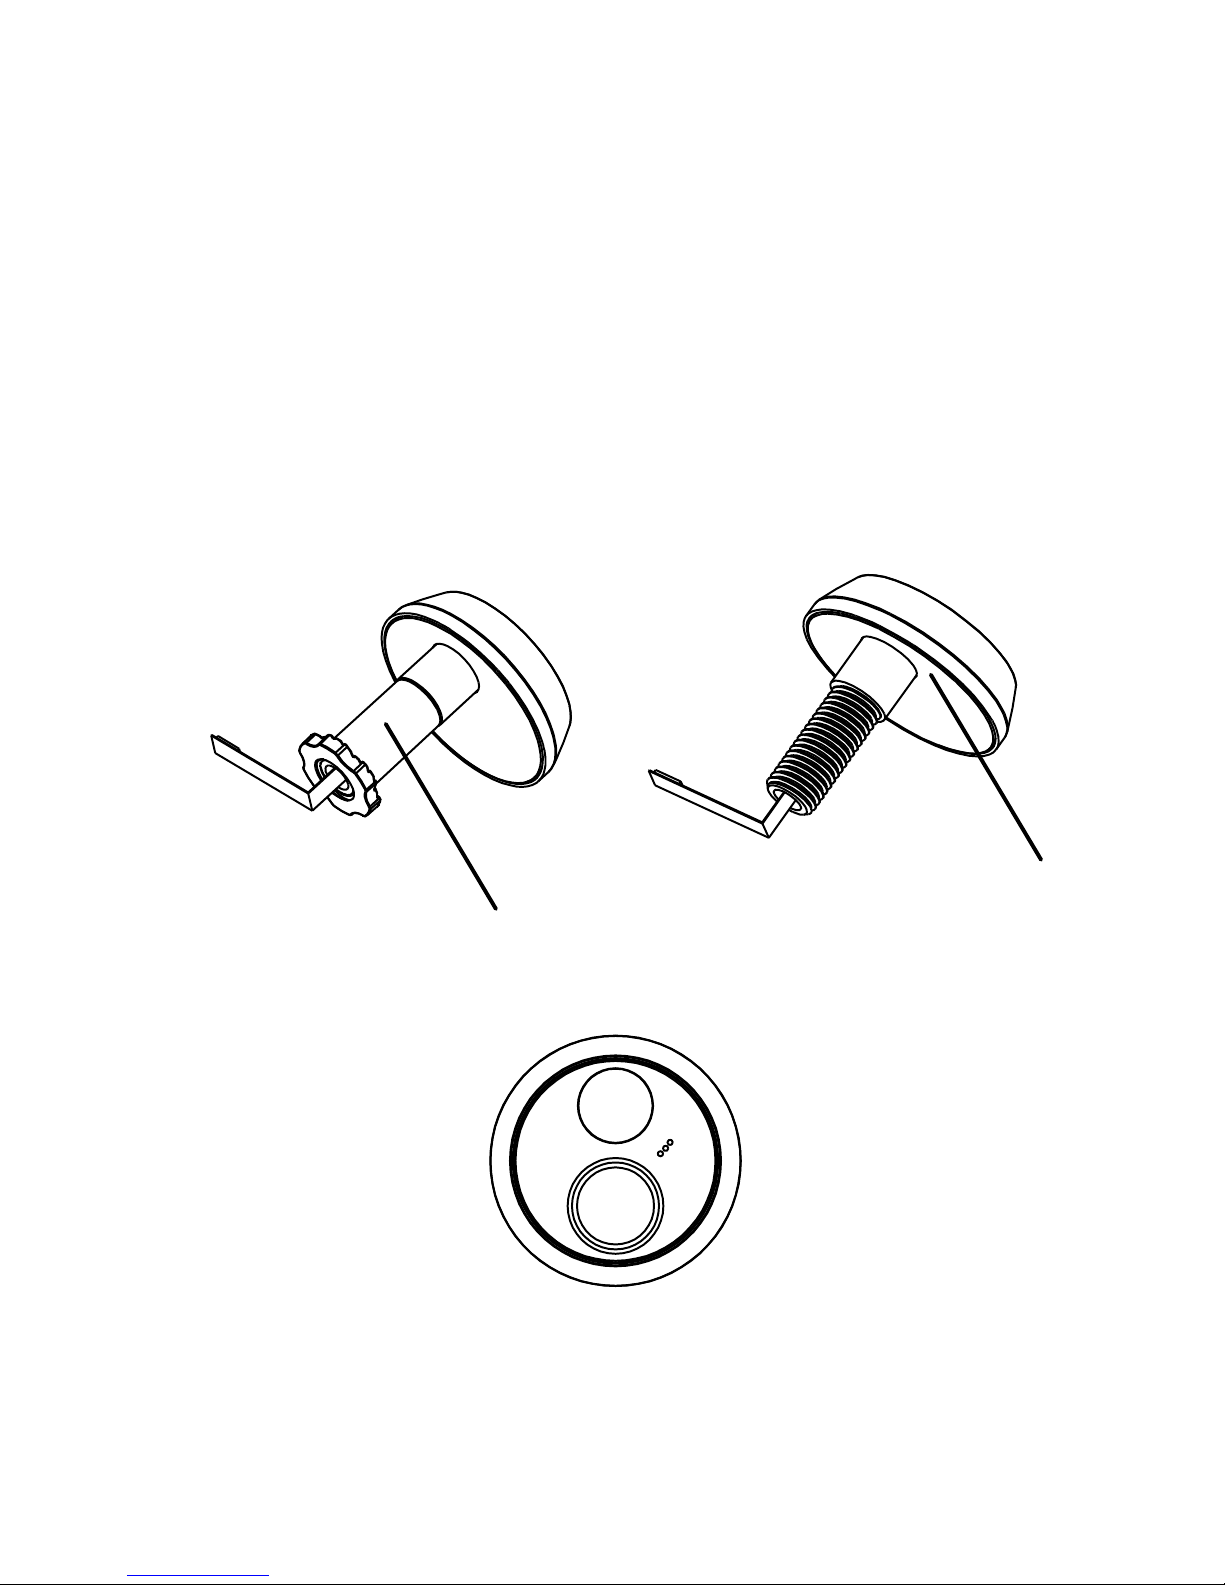
(1) Unscrew the slee ve out com pletely first from the outdoor part, Remove the ba cking of
double-sided a dhesive (pic.2.1);
(2) Pass the Outdoor slave through the peephole, and stick it to the outside of the door like
shown in pic.2.2;
sleeve
Double-sided adhesive
pic.2.2
pic.2.1

15
(3) Removing the double-sided adhesive on the mounting bracket (pic.2.3);
Double-sided adhesive
pic.2.3

16
(4) Follow pic.2.4, to stick the mounting brack et on the door, then install the Screw for
fixing, and buckle the m ale connector of the FPC with the female Connector on the
mounting bracket;
Director buckle
Door
Fixe d nut
FPC
pic.2.4

17
(5) Remove the insulate sheet on the clock battery (pic.2.5);
Insulate sheet
Squa re groove
pic.2.5

18
(6) Follow pic.2.6 install the indoor host to the mounting bracket;
pic.2.6

19
(7) Lock the screws with the Philips scre wdrive r (pic.2.7);
(8) Install finished.
Scre w
pic.2.7

20
2.3 Battery install and remove
2.3.1 Battery installation method
2.3.1.1 Push the batte ry cover lock to the left, it will open automatically (pic.3.1);
2.3.1.2 Install the battery like in Pic.3.2: push the battery Buckle outward, then install the
battery in;
2.3.1.3 Replace the battery cover, push the battery cove r lock to the right, then buckle up.
pic.3.1
Battery cove r lock pannel
Battery cover


