Intermec CV60 User manual

ii CV60 Vehicle Mount Computer Hard Drive Installation Guide
Intermec Technologies Corporation
Worldwide Headquarters
6001 36th Ave.W.
Everett, WA 98203
U.S.A.
www.intermec.com
The information contained herein is provided solely for the purpose of allowing customers to
operate and service Intermec-manufactured equipment and is not to be released, reproduced, or
used for any other purpose without written permission of Intermec Technologies Corporation.
Information and specifications contained in this document are subject to change without prior
notice and do not represent a commitment on the part of Intermec Technologies Corporation.
© 2004 - 2008 by Intermec Technologies Corporation. All rights reserved.
The word Intermec, the Intermec logo, Norand, ArciTech, Beverage Routebook, CrossBar,
dcBrowser, Duratherm, EasyADC, EasyCoder, EasySet, Fingerprint, i-gistics, INCA (under license),
Intellitag, Intellitag Gen2, JANUS, LabelShop, MobileLAN, Picolink, Ready-to-Work, RoutePower,
Sabre, ScanPlus, ShopScan, Smart Mobile Computing, SmartSystems, TE 2000, Trakker Antares,
and Vista Powered are either trademarks or registered trademarks of Intermec Technologies
Corporation.
Wi-Fi is a registered certification mark of the Wi-Fi Alliance.
Microsoft, Windows, and the Windows logo are registered trademarks of Microsoft Corporation
in the United States and/or other countries.
Bluetooth is a trademark of Bluetooth SIG, Inc., U.S.A.
This product includes software developed by the OpenSSL Project for use in the OpenSSL Toolkit
(www.openssl.org).
This product includes cryptographic software written by Eric Young (EAY@cryptsoft.com).
This product uses Regex++, Index software during its operational phases. The owner of Regex++
has granted use of the software to anyone provided such use is accompanied by the following
copyright and permission notice:
Regex++, Index. (Version 3.31, 16th Dec 2001)
Copyright © 1998-2001 Dr John Maddock
Permission to use, copy, modify, distribute and sell this software and its documentation for any
purpose is hereby granted without fee, provided that the above copyright notice appear in all
copies and that both that copyright notice and this permission notice appear in supporting
documentation. Dr John Maddock makes no representations about the suitability of this software
for any purpose. It is provided "as is" without express or implied warranty.

CV60 Vehicle Mount Computer Hard Drive Installation Guide 1
Introduction
To increase the file storage and software installation on your CV60,
you must either upgrade the hard drive or the PC card. For a CV60
with Windows XP or XPE, upgrade the hard drive. For a CV60 with
Windows CE, upgrade the PC card.
In this guide you will find the following sections:
•Upgrading the Hard Drive
•Upgrading the PC Card
•Attaching the Certificate of Authenticity (COA) Label
•Setting the Boot Device Priority
Upgrading the Hard Drive
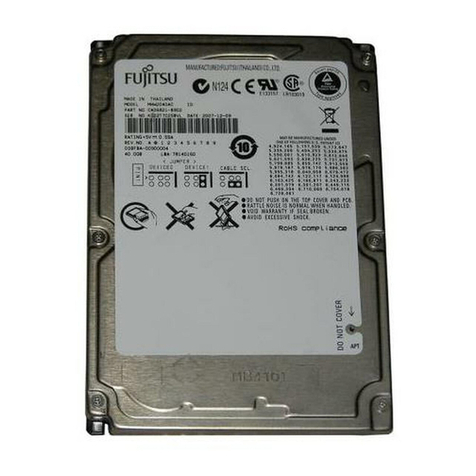
Use the following procedure to upgrade the hard drive for a CV60
with Windows XP or XPE.
There are three hard drive kits available:
•Upgrade Hard Drive Kit (40 GB, rotating drive) (P/N 237-265-001)
•Upgrade Hard Drive Kit (8 GB, solid state drive) (P/N 237-275-
001)
•Upgrade Hard Drive Kit (8 GB, IDE) (P/N 237-276-001)
Packing List
In addition to one of the three hard drive kits listed above, you need a
small Phillips screwdriver.
Each upgrade hard drive kit includes these items:
•Hard drive (1)
The following procedure in this manual may cause you to touch
components (such as printed circuit boards) that are
susceptible to damage from electrostatic discharge (ESD). You
must follow ESD guidelines to avoid damaging the equipment
you are servicing.

2 CV60 Vehicle Mount Computer Hard Drive Installation Guide
•Bracket (1)
•Ribbon cable (1)
•Ground cables (only with rotating drives) (2)
•Screws (4)
To remove the existing hard drive
1Turn off the CV60 by tapping Start > Turn Off Computer >
Turn Off.
2Detach the power cord from the CV60 to disconnect it from AC
power.
3Remove the ten screws securing the rear cover.
4Unscrew the two screws on the ribbon cable bracket.
5Unscrew the four screws attaching the bracket to the drive bay.
6Detach the ribbon cable from the drive bay.
Screw
(2 places)
Ribbon
cable
bracket
Screw
(4 places)
Screw
(10 places)
Ground cable
(2 places)
Bracket
Ribbon
cable
Drive
bay

CV60 Vehicle Mount Computer Hard Drive Installation Guide 3
To install a new hard drive
1Attach the ribbon cable to the hard drive. Make sure that the red
wire on the ribbon cable is closest to the power pins. The power
pins are a group of four pins separated from the rest of the row by
one space.
2Slip the ribbon cable through the slot in the bracket.
3Place the hard drive on top of the bracket and install each of the
four screws that secure the hard drive to the bracket. For a rotating
hard drive, attach the two ground cables using two of the four
screws.
Screw
(4 places)
Ground cable
(2 places)
Power
pins
Hard
drive
Bracket
Slot
Ribbon
cable

4 CV60 Vehicle Mount Computer Hard Drive Installation Guide
4Attach the ribbon cable to the pins in the drive bay.
5Attach the hard drive and bracket assembly to the drive bay with
four screws.
6Attach the ribbon cable bracket with two screws.
7Replace the ten screws that attach the rear cover.
8Follow procedures for attaching the Certificate of Authenticity
(COA) Label.
Upgrading the PC Card
Use the following procedures to upgrade the PC card for a CV60 with
Windows CE.
There are two upgrade card kits available:
•Upgrade Card Kit (64 MB) (P/N 237-217-001)
•Upgrade Card Kit (64 MB, Intermec Terminal Emulation) (P/N
237-219-001)
Screw
(2 places)
Ribbon
cable
bracket
Screw
(4 places)
Ground cable
(2 places)
Bracket
Ribbon
cable

CV60 Vehicle Mount Computer Hard Drive Installation Guide 5
The CV60 has a 68-pin PC card drive that can accommodate both
Type I and Type II devices. To access the card drive slots on the CV60,
you must remove the radome cover.
Packing List
To upgrade the PC card, you need a small Phillips screwdriver, and
one of the Upgrade PC Card Kits listed above.
Each of the upgrade PC card kits includes these items:
•PC card (1)
•Certificate of Authenticity (COA) label (1)
To insert a PC card
1Remove the eight screws that secure the radome cover to the CV60.
2Carefully lift the radome cover and remove the two antenna
screws. This exposes the PC card slot.
3Push the PC card into the slot until it latches into place.
4Attach the two antenna screws.
5Attach the radome with the eight screws.
6Follow the procedures for attaching the Certificate of Authenticity
(COA) label.
Screws
(2 places)
PC card
Radome
cover

6 CV60 Vehicle Mount Computer Hard Drive Installation Guide
Attaching the Certificate of Authenticity (COA)
Label
After you upgrade the hard drive or PC card, you must attach the
Certificate of Authenticity (COA) label onto the CV60. The COA label
contains the product identification number that you may use to
reinstall the operating system in the future and proves that you have
rights to the new operating system.
To attach the COA label
1Peel the COA label from the backing.
2Stick the COA label on one of the two locations in the picture
below:
Setting the Boot Device Priority
After you install a new hard drive or PC card, you need to set the boot
device priority. Before you begin, you must decide which drive to boot
from:
•For a CV60 with Windows CE, boot from the PC card.
•For a CV60 with Windows XP or XPE, boot from the hard drive.
2
1

CV60 Vehicle Mount Computer Hard Drive Installation Guide 7
To set the boot device priority
1Plug the keyboard into the CV60.
2Connect a power cord to the CV60 and connect the cord to AC
power. The CV60 automatically boots.
3While the CV60 boots, press F2. The PhoenixBIOS Setup Utility
screen appears.
4Use the left or right arrow key to select the Boot tab from the
PhoenixBIOS Setup Utility.
5Do one of the following:
•To boot from the PC card, on the Boot screen, use the up or
down arrow key to select the PC card from the left pane.
Note: You must attach a PS/2 keyboard to complete this procedure.

8 CV60 Vehicle Mount Computer Hard Drive Installation Guide
•To boot from the hard drive, on the Boot screen, use the up or
down arrow key to select the hard drive from the left pane.
6Press Shift - + to move the PC card or hard drive so it is first on the
list.
7Use the right arrow key to select the Exit tab.
8On the Exit screen, select Exit Saving Changes and press Enter.
9On the Set Up Confirmation dialog box, select Yes to save the
changes you just made.
Note: When you start the CV60 for the first time, it will take several
minutes to boot up.


Worldwide Headquarters
6001 36th Avenue West
Everett, Washington 98203
U.S.A.
tel 425.348.2600
fax 425.355.9551
www.intermec.com
© 2008 Intermec Technologies
Corporation. All rights reserved.
CV60 Vehicle Mount Computer Hard Drive Installation Guide
*932-013-001*
P/N 932-013-001
Other manuals for CV60
11
Table of contents
Popular Storage manuals by other brands

Overland Storage
Overland Storage REO Series Setup guide
Lexar
Lexar MOBILE MICROSDHC - DATASHEET REV B datasheet
Maxtor
Maxtor Maxtor OneTouch USB user guide
Supermicro
Supermicro 6048R-E1CR24N user manual
D-Link
D-Link DNS-321 - Network Storage Enclosure Hard Drive... user manual
Gates
Gates CARTRITAPE II Instructions for installing and operating
Exabyte
Exabyte 8505XL owner's guide
Huawei
Huawei LUNA2000-5-NHS0 user manual

LaCie
LaCie big disk quadra Brochure & specs
TrueNAS
TrueNAS R Series Basic Setup Guide

Transcend
Transcend StoreJet 25M3 user manual

Western Digital
Western Digital WDBAAF0010HBK - My Book Essential 1 TB External Hard... user manual
