(307IO) MODEL HP3220 HEAT PUMP ENGLISH 7.5” X 10.3” PANTONE 295U 10/10/2017
English 307
IO
SAVE THESE INSTRUCTIONS
English
Page 10
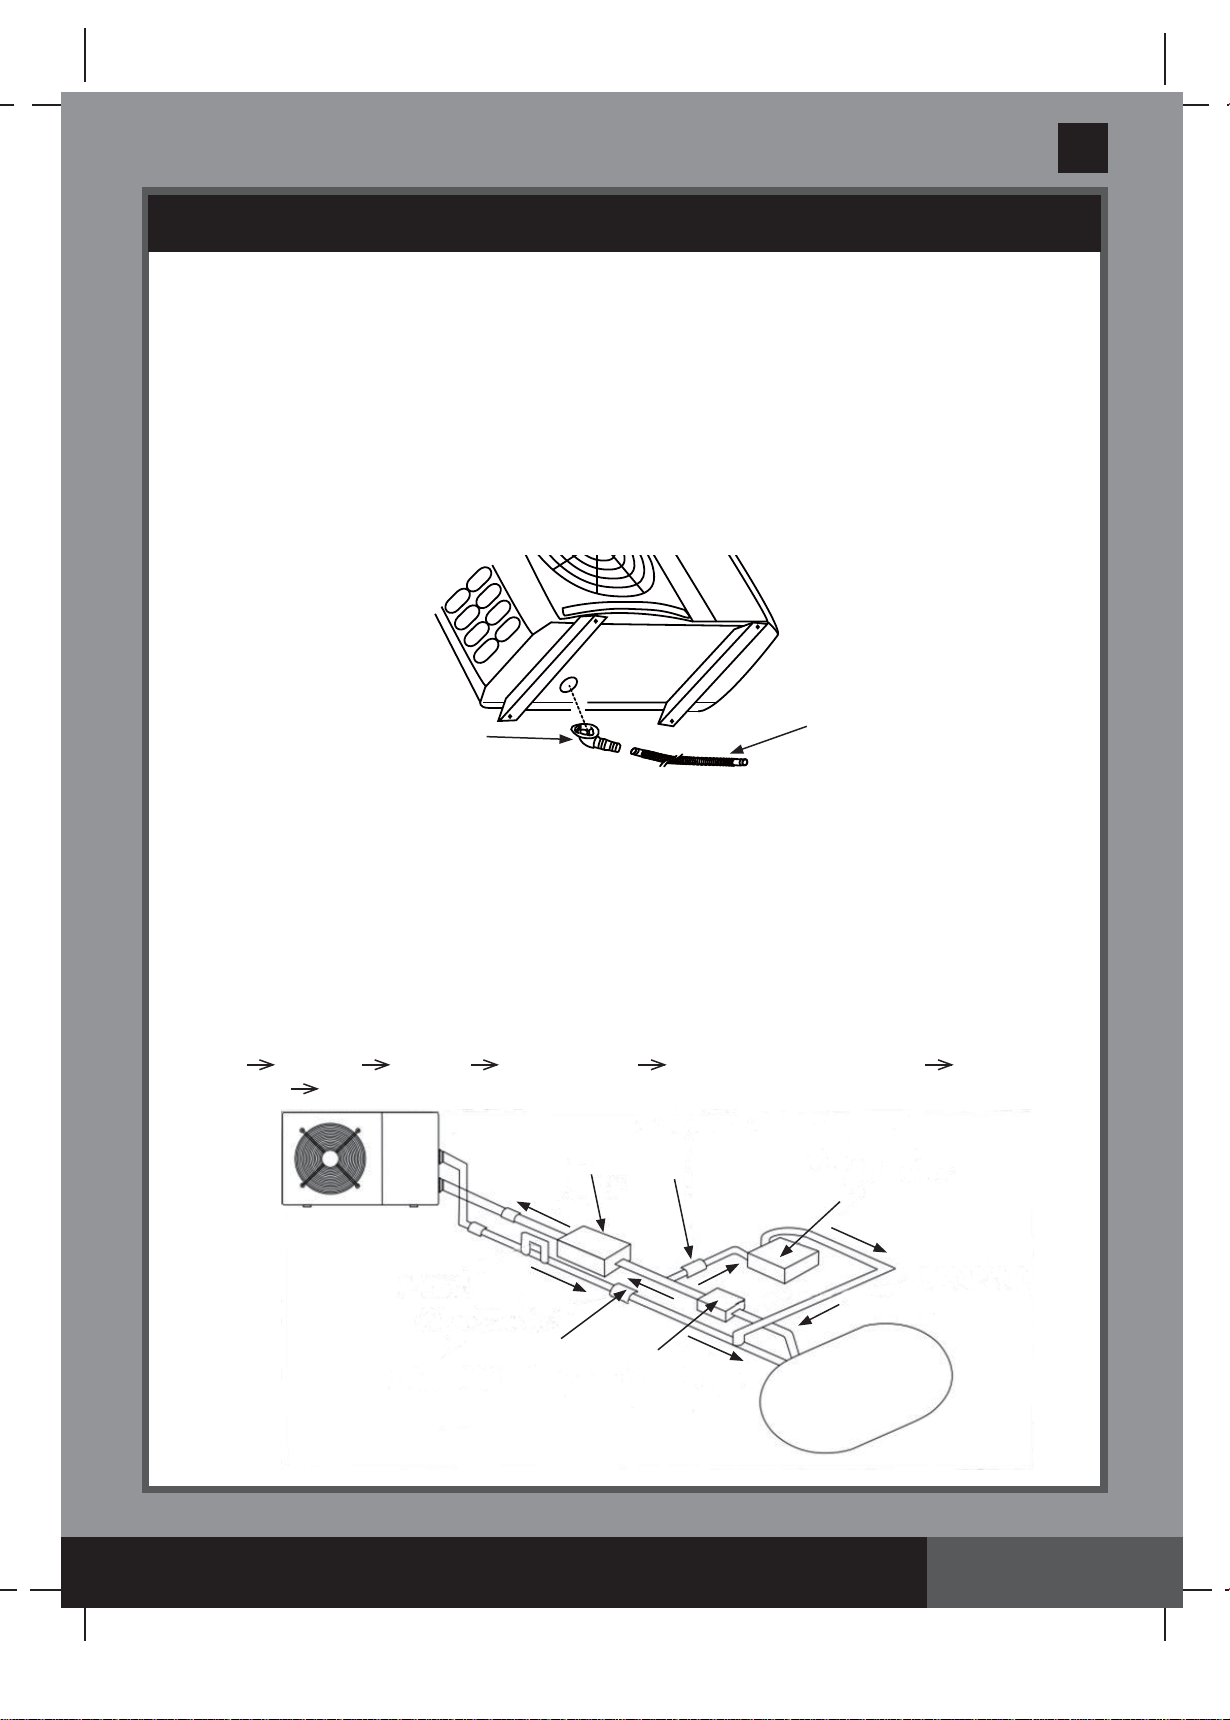
SET UP INSTRUCTIONS (continued)
Electrical Connection
Although the heat pump is electrically isolated from the rest of the swimming pool
system, this only prevents the flow of electrical current to or from the water in the pool.
Grounding the heat pump is required for protection against short-circuits inside the
unit. Always provide a good grounding connection outlet. If not sure, contact a
qualified electrician for assistance.
WARNING
Before connecting the unit, verify that the supply voltage matches the operating voltage of the heat
pump.
The heat pump must be connected to a dedicated circuit breaker rated 16 A or more. Make sure
no other appliances are connected to this circuit breaker.
The heat pump is supplied with a power cable and a standard RCD to be plugged directly into a
grounded electrical outlet. The grounded electrical outlet must have a protection grade not lower
than IPX4.
Test the RCD before use:
1. Plug the RCD into a grounded electrical outlet.
2. Press the “RESET” button. The indicator on the RCD should be “ON”.
3. Press the “TEST” button. The indicator on the RCD should be “OFF”.
4. Press the “RESET” button again to start using the heat pump.
Do not use the product if the test failed. Contact a qualified electrician to inspect the electrical
outlet socket.
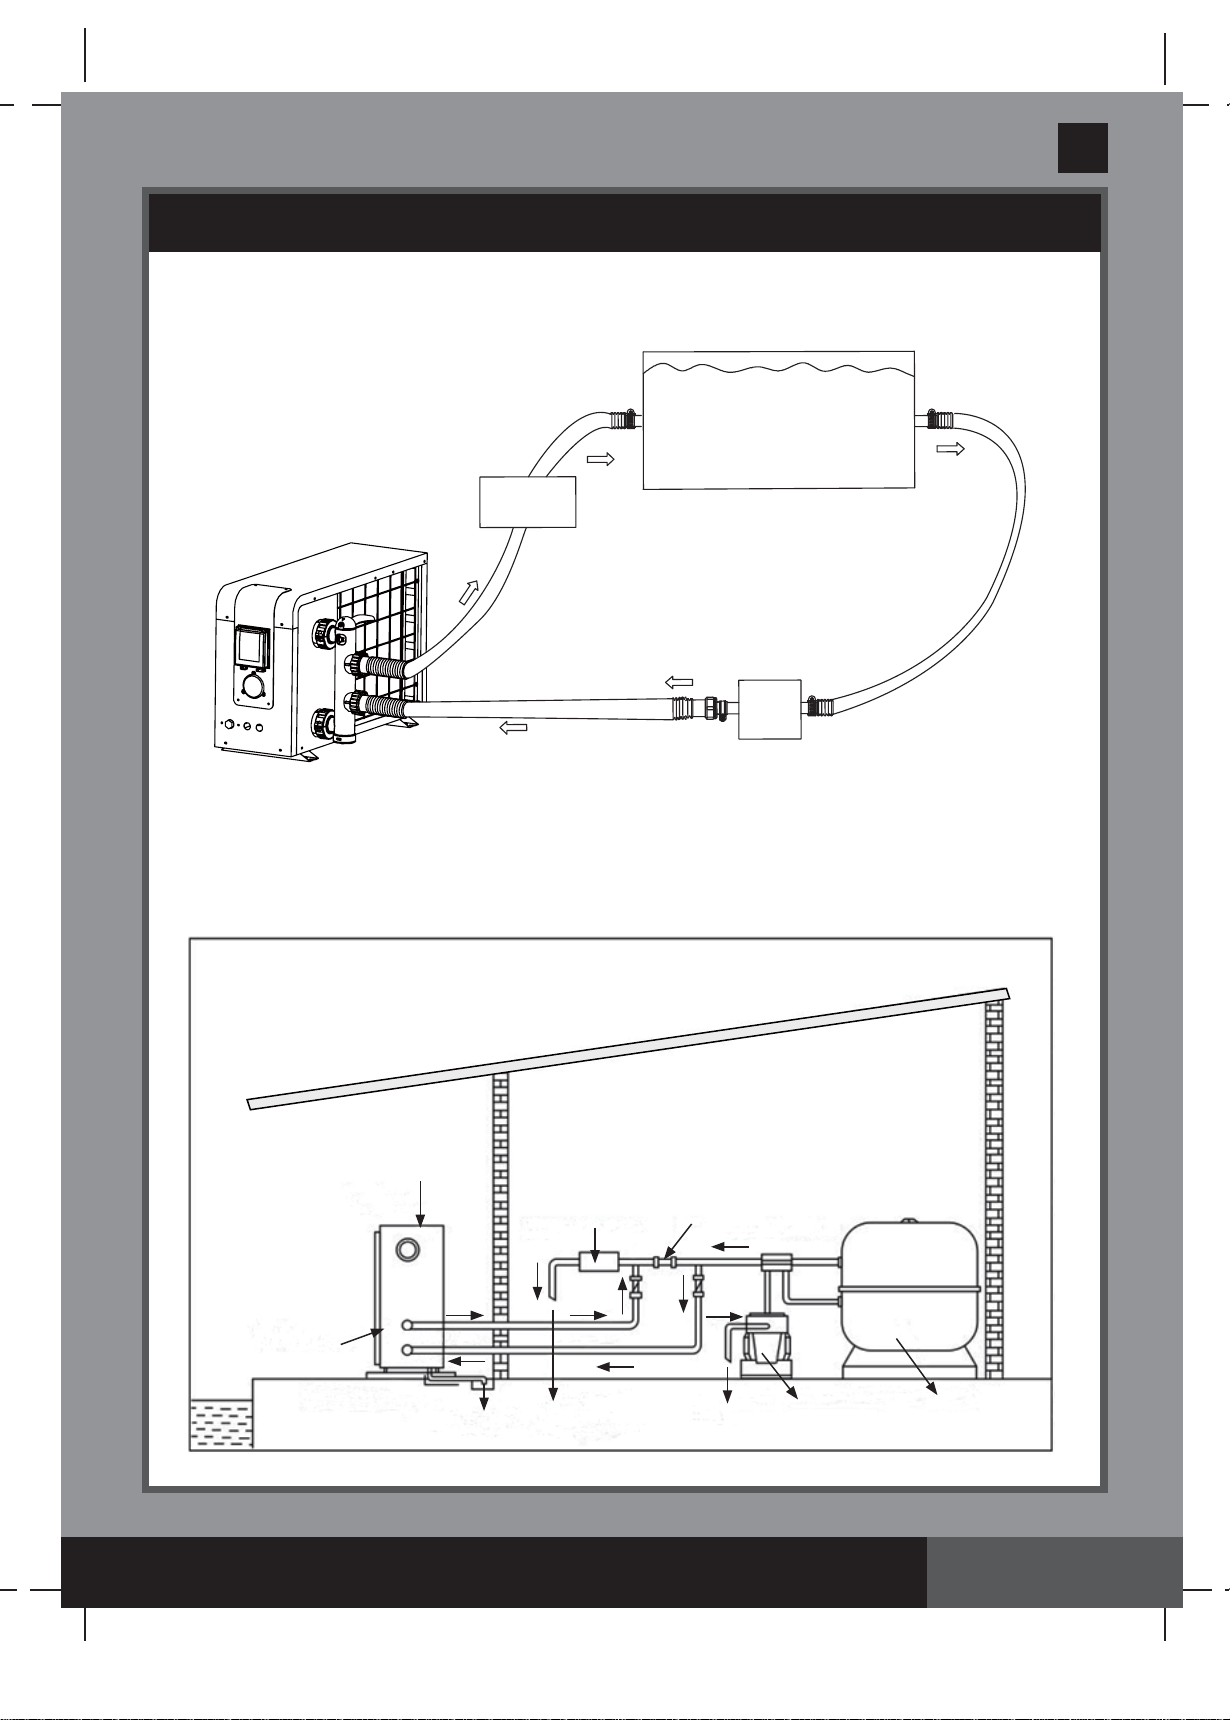
Initial Operation
Make sure the pool is filled with water to the correct level, the skimmer and suction fittings are
below the water level.
To heat the pool water, the filter pump must be running to cause the water to circulate through the
heat pump. The heat pump will not start up if the water is not circulating, therefore the heat pump
must operate together with the filter pump.
After all the water connections have been attached and checked, carry out the following
procedure:
1. Switch on the filter pump. Check for leaks and verify that water is flowing from and to the
swimming pool.
2. Plug the heat pump and test the RCD (see “Electrical Connection” section), the display panel
will show all the icons and numbers for 5 seconds and then shows the ambient room
temperature.
3. Press the On/Off button on the control unit panel to activate it, the display shows the water
inlet and outlet temperatures. The unit will start up after the time delay expires (see “Time
Delay” section).
4. After a few minutes, check whether the air blowing out of the heat pump fan is cooler.
5. When the filter pump is turned off, the heat pump should also turn off automatically, if not, then
adjust the flow switch (performed by specialist technician only).
6. Allow the heat pump and the filter pump to run 24 hours a day until the desired water
temperature is reached. The heat pump will stop running at this point. After this, it will restart
automatically (as long as the filter pump is running) whenever the swimming pool water
temperature drops 2 degrees below the set temperature.