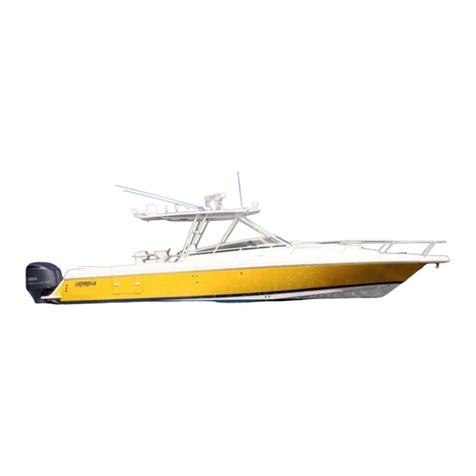
intrepid 9M User manual

INTREPID YACHTS
OWNER’S MANUAL
Intrepid 9M and 35

T A B L E O F C O N T E N T S
Letter of Welcome
Owner’s Record
Introduction
1.0 Commissioning Information
1.1. Receiving, Launching and Commissioning Checklist
1.2. Warranty Procedure
2.0 Operation and Maintenance
2.1. Hull and Deck
2.1.1. Construction
2.1.2. Maintenance
2.1.3. Bottom Paints
2.1.4. Hardware
2.1.5. Mast Step and Reinforcement
2.2. Spars and Rigging
2.2.1. Spars
2.2.2. Rigging
2.2.3. Turnbuckles
2.2.4. Tuning
2.2.5. Sheets
2.3. Sails
2.3.1. Sail Attachment
2.3.2. Reefing Mainsail
2.3.3. Sail Care
2.3.4. Battens
2.3.5. Optional Sails
2.4. Bilge Pump
2.5. Plumbing Systems
2.5.1. Fresh Water Tanks
2.5.2. Pumps
2.5.3. Head
2.6. Through-Hulls, Valves and Seacocks
2.6.1. Seacocks
2.7. Steering Gear
- 2

2.8. Electrical System
2.8.1. Battery
2.8.2. Battery Switch
2.8.3. Instrument Panel
2.8.4. Lightning Ground
2.9. Engine and Propulsion System
2.9.1. Propeller Shaft Alignment
2.10. Interior Maintenance
2.10.1. Cushions
2.10.2. Ice Box
2.10.3. Ports
2.10.4. Sinks
2.10.5. Head
2.10.6. Woodwork
2.10.7. General
2.10.8. Stove
2.11. Maintaining Teak
3.0 Safety and Equipment
3.1. Fire Extinguishers
3.2. Fueling
3.3. Weather Forecasts
3.4. Boating Safety Organizations
3.5. Charts
4.0 Winterizing
4.1. Blocking the Hull
4.2. Ice Box
4.3. Stove
4.4. Electrical System
4.5. Propeller and Shaft
4.6. Head
4.7. Water Tanks
4.8. Engine
4.9. Fuel Tanks
4.10. Covering
- 3

LETTER OF WELCOME
Dear Skipper,
Welcome to the Intrepid Fleet!
You have joined the select group of sailors who recognize the quality construction
and exceptional workmanship found in Intrepid Yachts. We appreciate your confidence
in our product and assure you that, with proper care, you should have many hears of
enjoyable sailing in your new Intrepid Yacht.
This manual has been prepared to assist you in getting to know your new yacht
before setting sail for the first time. It also is a helpful guide to follow for proper care
and maintenance in the future.
Please review the material carefully. You will enjoy your new Intrepid Yacht
more if you are familiar with the design and construction of the boat and with the
equipment used on board. Any questions you may have can be answered by your
authorized dealer as he is a knowledgeable professional and is familiar with your new
boat. He will continue to be your most important contact for information about your
yacht and for any questions should they develop.
Again, welcome to the Fleet. We wish you many years and many miles of
enjoyable sailing. May the wind always be fail.
Sincerely,
Andrew C. Vavolotis
- 4

INTREPID YACHTS OWNERS RECORD*
Complete and save this form for your records and future reference.
Yacht Name ___________________________Home Port _________________
Hull Identification Number ___________________________________________
(See introduction for location)
Dealer Name _________________________Address _____________________
Salesman _________________________Delivery Date ___________________
Date Commissioning Checklist/Warranty returned to
Intrepid Yachts ______________________________________________
* * * * * * * * * * *
Owner’s Name ___________________________________________________
Owner’s Address _________________________________________________
Registration Number _______________________________________________
Engine Manufacturer _______________________________________________
Model Number ______________________________________________
Serial Number ______________________________________________
* It is recommended that you keep one copy of the information recorded above in a
save place not on board your boat and an additional copy on board.
- 5

INTRODUCTION
Intrepid Yachts are constructed in a recently remodeled facility located in East
Taunton, Massachusetts. Intrepid Yachts is a division of Cape Dory Yachts, a long
established leader of quality constructed fiberglass yachts, which has been in business for
over fifteen years. Intrepid Yachts are assembled using modern methods, equipment, and
materials obtained from the most reputable suppliers.
Our team of managers, supervisors and quality control personnel do their very
best through every step of the construction process. We here at Intrepid Yachts strive to
build boats of outstanding quality which will provide their owners with many years of
sailing pleasure and retain high resale value.
The basic idea behind the formation of Intrepid Yachts was to bring to the sailing
community a quality built yacht using contemporary standards and design practices that
are now recognized as providing superior performance under sail. Without going to the
extremes that are possible with a fin keeled yacht, we have been able to offer designs
which are both performance oriented and suitable for racing, yet comfortable, attractive,
and seaworthy, criteria for any yacht regardless of vintage.
We are aware of the tremendous forces a sailing yacht can generate and have
taken great care to be sure that the high stress areas are substantially reinforced to give
you trouble free performance under the worst conditions.
To protect your investment and to insure the enjoyment of your new Intrepid
Yacht, we recommend that you read this manual carefully and complete the
Commissioning Checklist contained in it with your dealer. This list will serve as a guide
in determining that no loss or damage has occurred to your boat while it was being
transported from the factory to the dealer, and that all equipment is in order when you
accept delivery. the checklist is for your protection; insist that it be completed. One
copy must be returned to Intrepid Yachts as a warranty registration. Once this
registration process has been satisfactorily completed, you dealer will, if necessary, be
able to file warranty claims for part or service. He cannot do so unless the checklists are
completed and returned.
- 6

IMPORTANT
Your Intrepid Yacht is identified by a hull identification number (HIN) on the
right corner of the transom. This identifies the number of the hull and supplies the
government officials with additional information concerning the builder and the year of
manufacture. There is also a builder’s plate with the hull number located on the forward
hatchway trim. In addition, there are serial numbers on your boat’s engine (see the
engine manufacturer owner’s manual) and on some of the accessory equipment which
you may elect to have installed.
We recommend that your record these important numbers carefully and keep
copies of them at home and aboard (see “Owner’s Record” form). These numbers and an
accurate description of your property, in the event of theft, could be essential to their
recovery.
Marking an inconspicuous place such as the inside of a locker, underside of a
door or drawer, or the base of the mast with your initials, social security number, or other
unique “brand” may also aid in the prompt identification of your property, should the
need to do so ever arise.
- 7

1.0 COMMISSIONING
Intrepid dealers are chosen because they are knowledgeable professionals. Since
you are bearing the launching and commissioning expenses of your new yacht you have a
right to expect a thorough and professional job.
Please note that the checklists provided in this manual are to assist you and your
dealer with the first launching of your boat. In subsequent years, you may wish to review
this list in preparing your boat for launching.
- 8

1.1 DEALER’S COMMISSIONING CHECKLIST – PAGE 1
Model _______________________________ Hull Number _______________________
Owner’s Name and Address ________________________________________________
Dealer __________________________________________________________________
Date Sold ___________________________ Date Launched ______________________
1.1 Date Initials Receiving Record
1. ____________ ________ All items on receiving checklist received in
good order. Dealer should notify factory within
to (10) days of receipt, of any shortages or
damaged goods.
PRE-LAUNCH CHECKLIST
2. ____________ ________ Visually check underwater hull surface for any
damage sustained during trucking or handling.
3. ____________ ________ Through-hulls all tight and clear of any foreign
objects.
4. ____________ ________ Seacocks and valves all closed. Hose clamps
tight.
5. ____________ ________ Check two propeller retaining nuts for tightness.
Cotter pin in place and bent over.
Record propeller information below:
Diameter ____________ inches
Pitch __________ inches
Rotation __________ left or right hand
# of blades ________ 2, 3 or folding (optional)
6. ____________ ________ Rudder swings freely side to side.
7. ____________ ________ Stuffing box packing adjusted.
WHITE-Return to Intrepid Yachts; YELLOW-Owner’s Copy; PINK-Dealer’s Copy
DEALER’S COMMISSIONING CHECKLIST – PAGE 2
- 9

8. ____________ ________ Bottom under cradle bulkheads sanded, primed
and painted.
9. ____________ ________ Bilge dry.
10. ____________ ________ Bilge pump connections okay and handle on
board.
11. ____________ ________ Check deck and hull for any chips in gel coat.
POST-LAUNCH CHECKLIST
12. ____________ ________ Immediately after launching, check bilge for
water. If water is present, check all through-
hulls and stuffing box.
13. ____________ ________ Open seacocks one at a time and check for
leaks.
14. ____________ ________ Check stuffing box. It should drip water slowly,
approximately one drop every 10 seconds while
running to insure that the bearing and packing
gland are lubricated by water.
15. ____________ ________ Check battery switch and electrical system
operation.
16. ____________ ________ Check battery electrolyte and charge level.
17. ____________ ________ Check head operation.
18. ____________ ________ Check bilge pump operation.
ENGINE START-UP CHECKLIST
The following checklist is not intended to replace the engine manufacturer’s manual.
Refer to that manual before starting the engine.
19. ____________ ________ Check engine and transmission oil level and
condition.
20. ____________ ________ Check belt tension on all belt driven
components.
WHITE-Return to Intrepid Yachts; YELLOW-Owner’s Copy; PINK-Dealer’s Copy
DEALER’S COMMISSIONING CHECKLIST – PAGE 3
21. ____________ ________ Check that cooling water intake seacock is
open.
- 10

22. ____________ ________ Check to see that all clamps on exhaust hose are
tight (on Yanmar engines make sure that
exhaust hose enters water lock at location
marked “in”).
23. ____________ ________ Check engine mount nuts for tightness.
24. ____________ ________ Check shift and throttle cable connections.
25. ____________ ________ Check shift and throttle operation.
26. ____________ ________ With coupling disconnected, check prop shaft
alignment using feeler gauges. See manual for
instructions and tolerances.
27. ____________ ________ Check prop shaft set screws, and see that they
are wired in place.
28. ____________ ________ Start engine according to manufacturer’s
recommendations. Failure to start may be due
to air in fuel lines. Refer to manual for bleeding
directions.
29. ____________ ________ Immediately after engine starts, check to see
that water is coming out of transom exhaust
port.
30. ____________ ________ Check gauges and/or warning lights.
31. ____________ ________ Check entire system for water, oil, fuel, or
exhaust leaks. Note: sealers and paints may
burn off as engine heats up, causing a burning
odor.
32. ____________ ________ Recheck stuffing box.
33. ____________ ________ Report any unusual noises or vibrations to
factory immediately. Do not continue to run
engine if any are present.
WHITE-Return to Intrepid Yachts; YELLOW-Owner’s Copy; PINK-Dealer’s Copy
DEALER’S COMMISSIONING CHECKLIST – PAGE 4
- 11

RIGGING CHECKLIST
34. ____________ ________ Check all fasteners on spars for tightness.
35. ____________ ________ Reeve halyards.
36. ____________ ________ Attach stays, shrouds, spreaders and topping
lifts.
37. ____________ ________ Check all clevis pins and cotter pins for
security. tape all potential chafe points
including spreader bases and ends.
38. ____________ ________ Check wiring of combination deck and bow
light. Be sure bulbs work.
39. ____________ ________ Step mast and rigging.
40. ____________ ________ Check all rigging for length.
41. ____________ ________ Check all clevis and cotter pins for security. Be
sure the locking nuts on the turnbuckles are
secure. Tape all potential chafe points.
42. ____________ ________ Tune rigging to proper tensions.
43. ____________ ________ Attach boom, sheets, blocks, oars, reefing lines,
topping lifts, etc.
44. ____________ ________ Wire bow and deck lights.
MISCELLANEOUS CHECKLIST
45. ____________ ________ Fill water tank(s) and check operation of all
pumps and drains.
46. ____________ ________ Fill alcohol tank. Check for leaks and test
operation of stove.
47. ____________ ________ Water test ports and hatches.
48. ____________ ________ Recheck all through-hulls, valves, seacocks,
host clamps, hoses, and stuffing box.
WHITE-Return to Intrepid Yachts; YELLOW-Owner’s Copy; PINK-Dealer’s Copy
DEALER’S COMMISSIONING CHECKLIST – PAGE 5
- 12

49. ____________ ________ Bend on sails.
50. ____________ ________ Interior appointments complete.
51. ____________ ________ Optional equipment installed and operational.
52. ____________ ________ Owner’s packet, ship’s papers, and ignition key
given to owner.
53. ____________ ________ Checklist (warranty registration) ready for
mailing to factory.
Owner ______________________________________________________________
Date __________________________ Within seven days of launching,
RETURN CHECKLIST TO:
Intrepid Yachts
160 Middleboro Avenue
East Taunton, MA 02718
WHITE-Return to Intrepid Yachts; YELLOW-Owner’s Copy; PINK-Dealer’s Copy
- 13

1.2 WARRANTY NOTIFICATION PROCEDURES
After commissioning, you as an owner should not expect problems to develop
with your Intrepid Yacht. However, should you need assistance, there is one very
important thing to do … CONTACT YOUR INTREPID DEALER.
Your Intrepid dealer is a knowledgeable professional who is familiar with your
boat and capable of answering most of the questions which you may have. He will
communicate any problems or inquiries which you may have directly to our company so
that we can both work together toward an expeditious and satisfactory solution. Your
dealer is not, however, authorized by Intrepid Yachts to consent to repairs or the
replacement of parts without the express written approval of Intrepid Yachts.
- 14

2.0 OPERATION AND MAINTENANCE
The following sections of this manual describe briefly the structural and
functional systems of your Intrepid Yacht. We have also provided you with operating
and maintenance instructions where we thought these would be helpful. These
instructions are to serve as a guide only. For more extensive information, consult the
publications available and seek the advice of your dealer.
2.1 Hull and Deck
2.1-1 Construction
Your Intrepid Yacht has been fabricated using the widely accepted glass-
reinforced-plastic system. This system utilizes “fibrous glass” in the forms of mat
and various weight cloths and woven rovings bonded together with polyester
resins. Fiberglass is one of the stronger and most easily maintained boat building
materials. It is not subject to organic decay as is wood.
Intrepid Yachts are constructed from four major fiberglass components: hull,
deck, bunkliner, and headliner. The bunk and headliner units form the interior of
the boat and are of lighter construction than the hull and deck.
The hull of your Intrepid was fabricated in layers beginning with gel coat, mat
and woven roving. The number of plys in the hull laminate vary depending on
the size of the hull and the location in the hull. Decks are laminated using the
same basic system as the hulls, but end-grain balsa core material is added in
certain areas to increase the stiffness of flat surfaces.
The bunkliner is securely bonded to the hull along the entire keel cavity resulting
in approximately 3” of fiberglass where the keel bolts pass through the hull.
2.1-2 Maintenance
Fiberglass is one of the most maintenance-free materials utilized today in boat
construction. If given proper care and treatment, the gel coat surface will look
new for years. If not maintained, it will eventually turn to a flat, chalky texture.
We recommend that you wash the exterior fiberglass surfaces of your boat several
times each season with mild soap and plenty of warm fresh water. Rinse liberally
with fresh water. After the boat has dried, use a good quality fiberglass cleaner in
paste form, follow this process with a wax or polish prepared for marine use. A
fiberglass cleaner with a very gentle abrasive in it may help remove minute
scratches and surface wear. The continued use of cleaners containing abrasives
will gradually erode the gel coat surface. Marine wax will fill small scratches and
provide a glossy finish.
Stubborn stains may be removed with fiberglass cleaner in some instances. More
difficult stains may be worked out with judicious use of a very mild abrasive
powder such as Bon Ami. Stubborn tar and petroleum stains may be removed
- 15

with careful application of acetone. (Acetone is a powerful and extremely
flammable solvent which is available in most paint and hardware stores.)
Stress or “spider cracks” are a common occurrence on the fiberglass boats of even
the most careful skippers. Most of the time, these cracks represent no structural
problem and are limited to the gel coat surface. If you have any doubt about the
seriousness of any crack, consult your dealer. Minor gel coat repairs are not
difficult and a reasonably handy person with a little study and practice can make
adequate cosmetic repairs. Structural fiberglass repairs, however, are best left to
the experts.
If for any reason you desire to apply paint to areas of the boat other than to the
bottom or boot top, seek the advice of qualified personnel at a boat yard in your
area for information about the latest development in chemically-based paints for
fiberglass, and the recommended surface preparation procedure.
2.1-3 Bottom Paints
Your Intrepid Yacht was painted with Dolphinite #9303 Dark Blue anti-fouling
bottom paint before it left the factory. The area under the cradle bulkheads and
keel supports may require additional painting prior to launching. These areas
should be well sanded with 50 grit paper and washed with solvent to remove wax
prior to painting.
In certain geographical areas some bottom paints work much better than others.
If you intend to repaint the bottom of your boat, seek the advice of your dealer or
knowledgeable local boat owners on what brand of bottom paint works well in
your area. Caution: not all bottom paints are chemically compatible. Be sure to
tell your paint dealer what paint is currently on the bottom of your boat to be
certain that you purchase compatible anti-fouling paint. The Dolphinite bottom
paint is a vinyl-resin based vehicle.
2.1-4 Hardware
The deck hardware items on your Intrepid Yacht were engineered for their
intended purposes.
Since many deck hardware items are expected to withstand considerable strains,
they are bolted through the deck and through a back-up reinforcement where
required. The bolts securing these items should be checked frequently to be
certain that they are still tight. Be careful not to over tighten any fastener thereby
causing it to fail or be reduced in strength.
The judicious use of a silicone-type product on sail, genoa, and traveler tracks
works well to keep these running free in a salt air environment. Sheaves should
be disassembled occasionally, washed and well lubricated with a thin oil.
Turnbuckles, stanchions, rails, and other stainless steel hardware will discolor in a
salt air environment. Keeping stainless steel cleaned and polished using a marine
- 16

wax provides protection and keeps it free of rust stains. Frequent cleaning and
washing with fresh water will keep your spars and hardware in good condition,
and will help to keep your sails clean.
Lubrication on a regular basis is essential to keep winches operating freely. The
roller bearings of these winches should be cleaned and regreased (using light
grease) about every three months. Caution should be exercised in the quantity of
grease used, as excessive amounts may clog the ratchet mechanism. All winches
should be dismantled, cleaned, and inspected at least once a year. It is
recommended that winches be covered when not in use.
2.1-5 Mast Step
The mast step areas of Intrepid Yachts are carefully engineered to transmit the
loads set up by the rigging evenly to the hull with no local stress concentrations.
For boats supplied with deck stepped masts, a compression member transmits the
load directly to the keel area of the hull. For boats with keel stepped masts,
localized reinforcement is provided to distribute the load over a large area of the
hull. All mast step castings are drilled and tapped into a metal plate bedded
solidly into the glass laminate.
2.2 Spars and Rigging
2.2-1 Spars
Masts, booms, and optional spinnaker poles on all Intrepid Yachts are made of
high-grade extruded aluminum. All spars are anodized; unfortunately anodizing
is a semi-permanent process, but still the best means of protecting aluminum.
After several years of hard exposure to salt, spray and sun, the protective virtues
may diminish and a protective paint or film may be applied to the mast.
However, anodized spars have been used for many years untreated with no
apparent harm.
As a general rule, aluminum masts require minimal care and maintenance. When
they are removed from the boat for the winter, they should be thoroughly washed
with plenty of fresh water, and after all halyards and lifts have been neatly tied-
off to prevent tangling and fouling, a thorough inspection should commence.
Start at the base of the mast. Water will collect here if the drain hole in the mast
step has not been kept clear. This may hasten the breakdown of the anodizing and
start the corrosion process. If water has collected and caused corrosion, clear the
mast step drain hole and refinish the mast base or heel. Waxing will help
preserve anodizing.
Proceed up the mast noting any areas that are scratch or abraded. If these are
small they may be covered with a clear lacquer of a mastkote type product to keep
corrosion from starting or spreading. Sometimes it is recommended that you
apply to the mast a good hard wax as this helps to protect it further. As you
proceed up the mast, check every cleat and fitting for tightness, and for corrosion
which may have begun in the screw holes. Make certain that no bronze, brass, or
- 17

iron fastenings are used on the aluminum as these metals are incompatible and
electrolytic decomposition will start at once.
Check the tang fittings for lower shrouds and mounts for the spreaders as you
proceed up the mast. Carefully check all tangs, straps and fittings at the
masthead.
Examine the main and jib halyard sheaves for signs of wear or jamming. If you
see anything that looks at all unusual, ask your dealer or local boatyard for
assistance. Be certain that the boom is inspected carefully, with particular
attention to the gooseneck fittings, sheet blocks and bales. The combination bow
and deck light should also be checked. It is good practice to change the bulbs
every year as a mid-season failure is very difficult to correct. Record bulb sizes
and carry spares aboard your boat.
The spreaders that support the upper shrouds should be inspected. They are
designed to angle slightly upward to best support the mast in column. The
inboard and outboard ends should be covered with chafe tape or spreader boots to
prevent tearing sails or halyards. If any damage is sustained during mast stepping
or winter storage, replace the spreader. DO NOT sail with defective spreaders,
spar or hardware.
2.2-2 Rigging
Standing rigging consists of shrouds and stays which support the mast in an
upright position. Running rigging is used to hoist or trim sails. Standing rigging
requires attention, as a failure could result in the loss of a mast. Most failures
occur from lack of attention, poor tuning or improper maintenance rather than a
structural failure.
Before stepping your mast each season inspect all standing rigging thoroughly.
Starting at the top of the mast, systematically check each upper shroud and stay
tang and be certain that each clevis pin is secured with a cotter pin properly in
place and bent over. Wipe down each shroud and stay with bronze wool dipped
in a solution of water and mild detergent. The bronze wool will catch any broken
wire in the rigging, calling attention to potential trouble; it will not leave steel
particles to rust and soil your sails. Follow the bronze wool with a piece of
terrycloth sprayed with a water-dispersing agent, such as CRC or WD-40.
Next, see that the spreaders are firmly fastened in place, and that the upper
shrouds are locked in place on the grooved end of the spreader with a short length
of stainless steel wire. You should use a spreader boot or some other form of
chafing gear to protect your sails from the spreader tip. Check the mast tangs,
clevis pins and cotter pins for the lower shrouds and stays. The tangs for the
lower shrouds are designed to allow for some movement in them, so do not
overtighten the tang bolt.
- 18

Prior to stepping the mast, be sure the halyards are properly reeved. Tradition
dictates that the main halyard’s hauling part is always secured to the starboard
side of the mast, and the jib halyard is secured on the port side.
After checking each piece of standing rigging for broken wires, rush spots, and
for secure clevis and cotter pins, inspect the swaged terminal fittings at the ends
of each shroud and stay. These fittings should all be examined, using a
magnifying glass, for any hairline cracks. These cracks sometimes develop after
water has entered the body of the fitting (by following the lay of the wires)
causing the wire to corrode and expand. Although this problem is more prevalent
in the southern latitudes, many owners seal the space between the wire and the
swages with bees wax. Turnbuckle boots are also quite popular, but are not
recommended by Intrepid Yachts as they cover the turnbuckles which should be
inspected frequently. We do not recommend oiling or greasing the swage fittings
as a means of preventing water running inside them.
Report to your dealer any fittings that you find to be defective. Wire and fittings
with any of the following defects require replacement: kinked wire, wire with
broken strands, cracked swage fittings, bent turnbuckles, turnbuckles with
stripped threads, clevis pins with grooves worn in them, and tangs or other fittings
with distorted holes. The existence of any of the aforementioned conditions
should be investigated, the reasons for them determined, and corrective action
taken.
After completing the above inspection, the mast may be stepped and the standing
rigging secured to the chainplate. In all Intrepid Yachts the upper shrouds are
attached to the chainplate in direct line athwart from the mast step. Lower
shrouds are attached fore and aft of the upper.
All running rigging on Intrepid Yachts is Dacron. It requires only protection from
chafe and the ultraviolet rays of the sun. Stow in neat seamanlike coils when not
in use so that it will run freely without kinks or hockles when it is needed. A
rinsing in fresh water at the end of the sailing season is recommended.
2.2-3 Turnbuckles
The Intrepid 9 Meter is equipped with closed-body integral-toggle stainless steel
turnbuckles. Prior to every sail, all turnbuckles should be checked to see that they
are properly adjusted (see section 2.2-4, Tuning) and above all, locked, so that
they will not loosen. The two lock nuts should be tight against the barrel. The
threaded sections above and below the barrels may be taped once the turnbuckles
are adjusted and locked in place. This tape serves as an immediate indicator if the
turnbuckles are loosening. Engine vibration and even wave action at a mooring
or slip are enough to allow an improperly locked turnbuckle to work loose. Some
skippers thread stainless steel seizing wire through the hole in the center of the
barrel to the toggle as a back-up to the lock nuts. The threads on the studs and
barrel of all turnbuckles are both left and right handed. This is required for the
turnbuckle to serve its tightening function. Spare locking nuts should be carried
aboard in both left hand and right hand configurations. Occasionally, during the
- 19

season, you should completely disassemble and inspect all turnbuckles. Do not
attempt to do this when sea or wind conditions are placing strain on the mast.
The shroud turnbuckles (upper and lower sidestays) may be disconnected and
inspected one at a time. The remaining shrouds will provide adequate mast
support.
The Intrepid 35 is equipped with open body integral turnbuckles. The two cotter
pins should be inserted and spread open. The threaded sections above and below
the barrels as well as the cotter pins should be taped once the final adjustments
have been made.
Prior to disconnecting headstay and backstay turnbuckles for inspection, special
measures to support the mast are necessary. This can be accomplished by using
the halyards as temporary stays. Attach the jib halyard to the jib tack shackle;
haul it in tight, cleat it. This will temporarily replace the headstay, so that you
may disassemble the turnbuckles for inspection. Lead the main halyard aft to a
stern cleat and follow the above procedure to check the backstay turnbuckle.
The pipe or barrel section of the turnbuckle should be backed off entirely from the
top and bottom sections. All threads should be carefully inspected both for
broken or worn threads as well as rust, corrosion or breakdown of the metal itself.
The threads in the “pipe” should be inspected as well as those on the long,
threaded ends. The locking nut should also rotate freely. Prior to assembly,
lightly lubricate the ends, barrel and locking nuts with waterproof grease.
The enclosed insert from Spartan Marine Products, Inc. indicates the maximum
distance turnbuckles should be opened. The “Y” dimensions listed apply only to
turnbuckles with properly centered barrels. Turnbuckle barrels can be centered
by measuring the threads exposed above and below the barrel and adjusting
accordingly prior to securing the turnbuckle to the chainplate.
2.2-4 Tuning
The purpose of tuning the rig is to adjust the center of effort of the sail plan fore
or aft to obtain a slight weather helm in moderate winds, and to keep it straight
without “hooks” to port, starboard, fore or aft. Properly trimming the rig is an
important process which should be attempted only by qualified personnel; consult
your Intrepid dealer.
The fore and aft alignment of your mast can be checked by comparing it to a
vertical structure such as a radio tower, chimney, etc. Before checking the mast
alignment in this manner, be certain that the boat is resting on her design water
line. If the mast is leaning for or aft, ease the turnbuckle toward which the mast is
leaning and take up a corresponding number of turns on the opposite turnbuckle.
(Note: When adjusting turnbuckles, never use excessive force or the turnbuckle
may be contorted.) Always prevent the upper threaded turnbuckle stud from
turning. Headstays and backstays should never be taken up so tightly that they
will not “give” an inch or so if you pull on them with moderate force.
- 20
This manual suits for next models
1
Table of contents
Other intrepid Boat manuals
Popular Boat manuals by other brands

CORRECT CRAFT
CORRECT CRAFT 100077 owner's manual

Alpacka Raft
Alpacka Raft Alpacka Series owner's manual

Triton advanced
Triton advanced Vuoksa 2 advanced Assembly instruction

Gumotex
Gumotex RUBY user manual

Yamaha
Yamaha SUV1200 WaveRunner 2004 Owner's/operator's manual

Oru Kayak
Oru Kayak Beach LT owner's manual

Hobie
Hobie mirage Pro Angler owner's manual

Grady-White Boats
Grady-White Boats Chesapeake 290 owner's manual

Bestway
Bestway Hydro-Force Caspian Pro owner's manual

Jilong
Jilong FISHMAN II 500 instruction manual

SEATTLE Sailing Club
SEATTLE Sailing Club Wildflower J/35c quick guide

Fox
Fox EOS 250 instruction manual