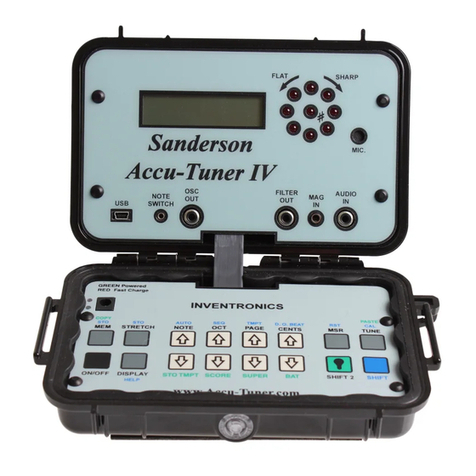
Inventronics SANDERSON ACCU-TUNER User manual

SANDERSON
ACCU-TUNER
™
OPERATING MANUAL
INVENTRONICS,INC.
130 MIDDLESEX RD, SUITE 14
TYNGSBORO, MA 01879-2725
“www.Accu-Tuner.com”
1-800-FAST-440
OR (978)649-9040

WRITTEN BY:
DR. ALBERT E. SANDERSON
PAUL L. SANDERSON
WITH SPECIAL CONTRIBUTIONS BY:
RICK BALDASSIN
JAMES W.COLEMAN,SR
ROBERT CONRAD
THIS MANUAL IS COPYRIGHTED. ALL RIGHTS ARE RESERVED. THIS
DOCUMENT MAY NOT, IN WHOLE OR PART, BE COPIED, PHOTOCOPIED,
REPRODUCED OR TRANSLATED WITHOUT PRIOR CONSENT IN WRITING FROM
INVENTRONICS, INC.
©2006 INVENTRONICS, INC.
TYNGSBORO, MA 01879

Table of Contents
SANDERSON ACCU-TUNER
™
INTRODUCTION..................................................................................................................................................2
GETTING STARTED ............................................................................................................................................3
LOW-BATTERY WARNING SIGNAL
....................................................................................................................3
THE FOUR MODES OF OPERATION .............................................................................................................3
THE TUNE MODE ................................................................................................................................................4
THE FAC MODE...................................................................................................................................................4
MEASURING AND STORING THE THREE STRETCH NUMBERS
...........................................................................5
REVIEWING THE FAC NUMBERS
.......................................................................................................................6
OFFSETTING AN FAC TUNING TO NON-STANDARD PITCH
................................................................................6
AVERAGING STRETCH NUMBERS FOR HIGHER ACCURACY
.............................................................................6
FAC TUNING FROM A0 TO C8
............................................................................................................................7
THE MEASURE MODE ........................................................................................................................................7
THE MEMORY MODE .........................................................................................................................................7
PITCH RAISING...................................................................................................................................................8
THE RESET BUTTON .........................................................................................................................................9
QUICK RESET OF CENTS WINDOW TO ZERO.................................................................................................11
PAGE NUMBER DISPLAY .................................................................................................................................11
STORING AN AURAL TUNING IN MEMORY.............................................................................................11
STORING A TUNING IN MEMORY FROM A PRINTOUT........................................................................12
UP OR DOWN MEMORY STORAGE
................................................................................................................... 12
MEMORY STORAGE WITH THE FOOT SWITCH
................................................................................................ 12
UP OR DOWN FOOTSWITCH\THUMB SWITCH
.................................................................................................. 13
PIANO SERIAL NUMBER STORAGE
.................................................................................................................. 13
TRANSMITTING PIANOS FROM ONE SAT II TO ANOTHER
................................................................................ 13
PATENT NOTICE
.............................................................................................................................................. 14
INPUT-OUTPUT JACKS
..................................................................................................................................... 14
BATTERY CHARGER INDICATOR...............................................................................................................15
BATTERY CARE................................................................................................................................................15
TWO YEAR WARRANTY*
................................................................................................................................16
APPENDIX A .......................................................................................................................................................16
Concise Step-by-Step Tables of Standard Routines
APPENDIX B .......................................................................................................................................................16
CENTS TABLES FOR SOME NON-EQUAL TEMPERAMENTS
APPENDIX C .......................................................................................................................................................18
AURAL AND VISUAL TUNING (THE BEST OF BOTH WORLDS)
APPENDIX D .......................................................................................................................................................18
WHAT ARE PARTIALS AND BEATS?
APPENDIX E .......................................................................................................................................................19
THE TWO-OCTAVE "A" TEMPERAMENT

APPENDIX F........................................................................................................................................................21
CONTIGUOUS-INTERVAL TUNING TESTS FOR ELECTRONIC PIANO TUNERS
APPENDIX G.......................................................................................................................................................22
OCTAVE TUNING
APPENDIX H.......................................................................................................................................................23
DUAL SYSTEMS FOR SMOOTHING OUT THE STRINGING BREAK
SPECIFICATIONS..............................................................................................................................................24
INPUT/OUTPUT JACKS .....................................................................................................................................24
ACCESSORIES ...................................................................................................................................................25
PROGRAM OPTIONS .........................................................................................................................................25

SANDERSON ACCU-TUNER
™
INSTRUCTION MANUAL
INTRODUCTION
The Sanderson Accu-Tuner ™(SAT) and Sanderson Accu-Tuner II ™continue to be the world's first and finest
programmable computer-controlled tuning instruments. They are designed to aid the professional tuner-technician to
achieve outstanding tuning results without spending an exorbitant amount of time doing so. Aural piano tuners can
"memorize" their finest tunings. The Sanderson Accu-Tuner stores the cents deviation as a tuning program in its memory
and recreates the settings on subsequent tunings automatically. This saves a substantial amount of time without
sacrificing accuracy.
The built-in FAC Stretch Calculator feature automatically programs the Accu-Tuner to give a complete 88-note custom-
stretch tuning. All operations of the SAT are controlled from the sealed membrane keyboard telling the computer which
functions to perform. Push the CENTS up button to raise the pitch; press the CENTS down button to lower the pitch.
Similarly, to go up a semitone, press NOTE up, or to go down an octave, press OCTAVE down. The present pitch
settings are always indicated on the pair of LCD (liquid-crystal display) windows as NOTE/OCTAVE and CENTS. Fig. 1
shows the SAT set for the note A in the fourth octave, 0.0 cents.
Fig. 1. Sanderson Accu-Tuner II ™.
The pitch difference between the SAT and the note being tuned is displayed by the circle of LEDs (light emitting diodes)
on the upper panel. Notes that are in tune with the pitch setting create a stationary pattern. Two to five lights may be on,
but the important factor is that the pattern is stationary. Notes that are sharp create a light pattern that rotates clockwise,
flat notes create a pattern that rotates counter-clockwise. The center LED flashes when the note is sharp, and is not lit
when the note is flat--this is very helpful when the pattern is rotating too fast to determine the direction of rotation.
Tuning with the SAT can be thought of as a two step process:
1. Determining the correct settings for each note of a given instrument.
2. Tuning each note of the instrument to stop the lights of the LED display.
Once the SAT is mastered the investment will be well worth it in time and labor saved on each job along with increased
pleasure in the tuning profession. The SAT will help take the drudgery out of tuning yet leave the artistry intact. This is
the first and only tuning instrument designed and built by a professional tuner for professional tuners.

GETTING STARTED
When first turned on the Sanderson Accu-Tuner will be in the calibration mode or at the exact location where the unit
previously "timed out". The SAT checks itself for accuracy during calibration. Two to five lights may be lit and any
rotation shows the variation from A-440. The SAT will also automatically shut itself off or "time out" to conserve battery
power if not used for ten minutes. The same settings it had when it turned itself off will appear when the unit is restarted.
The SAT will be fully charged when received. The Nickel Cadmium (NiCad) battery requires charging only once to twice
weekly. This battery is tolerant of deep discharge.
LOW-BATTERY WARNING SIGNAL
A low battery warning signal will appear as "LO-BAT" in the display windows when battery energy is getting low. This
indicates that there is approximately one half hour of operating time left. If the unit continues to be used, the SAT will
automatically turn off when the battery is fully discharged. If this happens in the middle of a tuning, the SAT will continue
to operate with the battery charger plugged into an AC outlet. A fully discharged NiCad battery will take approximately 12
hours to recharge.
CALIBRATION
The 440 Hz crystal oscillator verifies calibration on the LED display when the SAT is turned on in the CAL mode. If the
display is stationary, the instrument is in perfect calibration. If the pattern is rotating, use the cents buttons to slow the
pattern down until the display rotates as slowly as possible. When you press the TUNE button the calibration setting will
be stored to memory and the display will respond to external tones rather than its internal CAL signal.
THE FOUR MODES OF OPERATION
The Sanderson Accu-Tuner has four different modes of operation:
1. The TUNE mode.
2. The MEASURE mode.
3. The FAC (stretch mode).
4. The MEMORY mode.
Each mode is entered by pressing the appropriate button or sequence of buttons on the keyboard, which is shown in
figure 2.
Fig. 2. Keyboard of the Accu-Tuner II ™.
NOTE: For the moment, disregard the shift functions. Each will be explained below according to specific tuning
application.
1. The TUNE mode works like most conventional tuning instruments already available. Only the six white buttons in the
center of the keyboard are used, and they control the note, octave, and cents deviation to which the SAT is set. The
TUNE mode is the best place to start learning to use the SAT keyboard.
2. The MSR (measure) button puts the SAT into the MEASURE mode as long as it is held down. In this mode the
computer automatically stops the LEDs. Hold the MSR button down while the lights slow down and stop. When you
release the button the cents reading indicates the cents deviation of the unknown pitch.
3. The FAC mode uses three measurements called stretch numbers to create an excellent tuning. This tuning is a
complete 88 note stretch tuning from A0 to C8. The three stretch numbers are quick and easy to measure, they are
based on the inharmonicity of the notes F3, A4, and C6.

4. The MEMORY mode enables a tuner to store and retrieve complete 88-note tunings. The number of pianos that each
SAT can store depends upon the number of pages added in memory when it is purchased. The SAT II comes with 60
pages of memory, while the SAT is standard with 40. Additional pages can be added for a maximum of up to 206 pianos
in either unit. This feature is ideal for pianos that are tuned often. Retuning a piano that is in memory consists of simply
restoring each note to the pitch where the piano was previously tuned, and then verifying it aurally.
Storing a finished piano tuning to memory will take a few minutes, but the SAT will be able to recreate the same
tuning quickly on the next tuning. Tuning two or more pianos for a concert with the MEMORY mode is as easy as tuning
them separately and individually. No longer is it necessary to have the pianos side-by-side, or even in the same room
during the tuning.
THE TUNE MODE
Immediately after pressing the TUNE button to exit from the CALIBRATION mode, the displays will appear as shown in
Fig. 3.
Fig. 3. SAT display after pressing TUNE.
The NOTE/OCTAVE display shows A4 indicating that the SAT is set to A in the 4th octave. (Start counting the first A on
the keyboard as A0, not A1. The first C is C1.) The cents display shows 0.0 to indicate that the cents deviation is zero.
So the SAT is ready to tune the note A in the 4th octave at 440 Hz.
When ready to change the pitch settings from A4, zero cents, use the set of white buttons in the center of the SAT
keyboard. To go up in the note setting, press the NOTE up button (top row). Watch the display until it steps to the
desired note, then release the button. The sharps are indicated with a small square box in the top half of the display.
Also, the display uses a "b" for a "B" and "d" for "D".
Stepping the NOTE display down is accomplished by depressing the NOTE down button until you reach the desired note.
The OCT up and OCT down buttons work the same as the NOTE up and NOTE down buttons, stepping off the octaves to
get to the desired setting. The SAT will not step beyond its mode ranges which are as follows:
1. C1 to B9 in the TUNE mode.
2. A0 to C8 in the FAC mode. (C3 to F6 in old stretch mode)
3. A0 to C8 in the MEMORY mode.
The CENTS buttons step differently from the other white buttons. The CENTS buttons step up or down slowly at first to
step just 0.1 cent and accelerate as the button is held down.
To cover a large number of cents quickly, hold down the CENTS button and watch the display as the cents change.
When the correct tens digit appears, release the CENTS button. Then hold the button down again until the correct single
digit appears and release. Repeat this procedure for the tenths digit.
With these six buttons, the SAT does everything that previous tuning instruments have been able to do. Once familiar
with its operation in the TUNE mode, you can expand into more intricate modes of operation. If you get into an area of
operation that you don't understand, just press the TUNE button twice to quickly get back on track.
THE FAC MODE

Once the operation of the SAT in the TUNE mode is mastered, it is easier to understand the operation of the FAC mode.
In this mode, the SAT follows a tuning program that is derived from the measurement of three stretch numbers (F3, A4,
and C6) on the piano being tuned. This program, known as FAC, includes both an optimum partial selection and a
calculated cents setting for all 88 notes on the piano. Once the stretch numbers are measured and stored in the SAT, the
rest of the job is automatic. Every time the note or octave changes, the computer references the calculated tuning, then
sets the SAT up correctly for the new note.
In the FAC mode the NOTE/OCTAVE display shows the note on the piano that is being tuned, while the CENTS display
shows the cents deviation of the particular partial being tuned. The note and octave of the partial that the SAT is listening
to (first, second, fourth, or sixth) does not show on the display. To view the partial, press the TUNE button to see the
selected partial, but don't forget to switch back to the page in memory by pressing the MEM button before going on to the
next note, otherwise the SAT will continue in the TUNE mode.
The pitch of the stored tuning can be at standard 440 pitch, or you may add or subtract a pitch correction to obtain stored
tunings at other pitches such as 442 (eight cents sharp), early pitch (one semitone flat), or any pitch up to 100 cents flat or
sharp.
The FAC tunings are designed to fit the piano better than the old F4 stretch-number tunings, and therefore sound better
over the mid-range section as well as providing you with a beautiful bass and treble tuning. The high treble is tuned in
double octaves, which will please many tuners, and those who prefer a less stretched tuning in the treble can easily
modify the last few notes to suit your own taste.
MEASURING AND STORING THE THREE STRETCH NUMBERS
1. Set the SAT to F5, zero cents in the TUNE mode. Play and tune one string of F3 to stop the lights.
2. Go up one octave on the SAT to F6, play the note F3 again, and this time use the CENTS buttons to stop the lights.
The CENTS window now displays the F3 stretch number, the difference between the fourth and eighth partials of F3.
3. Hold the SHIFT button down, press STO-STRETCH, release STO-STRETCH, then release the SHIFT button last.
After this operation, the SAT will jump automatically to the correct settings for the next measurement, A5 and zero cents.
4. With the SAT at A5 and zero cents, tune one string of A4 to stop the lights. Now go up one octave on the SAT to A6,
play A4 again, and stop the lights with the CENTS buttons. The CENTS window now reads the A4 stretch number, the
difference between the second and fourth partials of A4.
5. Store the A4 stretch number by holding SHIFT and pressing STO-STRETCH as above. After this, the SAT will
automatically go to the correct settings for the next measurement, C6 and zero cents.
6. With the SAT at C6 and zero cents, tune one string of C6 to stop the lights. Step up one octave on the SAT to C7, and
stop the lights with the CENTS buttons. The CENTS window now reads the C6 stretch number, the difference between
the first and second partials of C6. Store the C6 stretch number by holding the SHIFT button and pressing the STO-
STRETCH button.
7. Now you have stored all three FAC stretch numbers and are ready to calculate and store the FAC tuning onto a page
in piano memory. The FAC tuning cannot be used until it is stored, so if you really do not need a permanent record of this
tuning, store it on page one, for example, and use page one for all your one-time tunings. Hold down SHIFT, and use the
PAGE buttons to select the page in piano memory that will hold this tuning.
8. To move the FAC tuning into memory, roll over from the STRETCH button to the MEM button. "Roll over" means to
hold down the first button, STRETCH, and without releasing it hold down the second button, MEM, as well, release the
STRETCH button, and release the MEM button last. The order of holding down and the order of releasing the buttons are
both essential. If you do this correctly, the SAT will act stunned. Nothing will happen for ten seconds while the SAT
calculates the FAC tuning and stores it on the selected page. The SAT comes back to life by jumping to the first note of
an FAC tuning, A0, and displaying the page number in the CENTS window.
9. If you want to store the serial number of the piano to identify the tuning permanently, now is the time to do it. Go down
two NOTE steps below A0 and the left window will indicate SEr for serial number. Use the cents buttons to set the right
window to the first three (of six maximum storable) digits of the serial number. Hold down the SHIFT button and press the
STO-MEM button to store these digits, and then change the right window to the last three digits of the serial number.
Store them in the same way, (by holding SHIFT and pressing STO-MEM).
10. You may start tuning at A0 now, just press NOTE up and NOTE down once to make the SAT look up the note
settings
for
A0
in
memory
To
start
at
any
other
note
just proceed
to
that
note
with
the
NOTE
and
OCTAVE
buttons

REVIEWING THE FAC NUMBERS
To review your FAC numbers, hold down the STRETCH button. While the STRETCH button is held, the left window will
show the note F3 and the right window will show the F3 stretch number. Release the STRETCH button and hold it again
to view the A4 stretch number. Release and hold the STRETCH button again for the C6 stretch number. After reviewing
the stretch numbers you will have to press the MEM button to get back to the FAC tuning and out of the old stretch tuing
range of C3 to F6.
It is be a good idea to write down these FAC numbers if you want to refer to them at a later date. Once the SAT is turned
off the FAC numbers can no longer be recalled using the STRETCH button.
NOTE: Some tuners have reported that the stretch numbers tend to drift lower as a piano is tuned repeatedly to the same
tuning.
Some customers have expressed a preference for starting with the A-4 measurement vs. the sequence described above.
As long as you have the correct partials set up on the SAT, you can start with any of the three F-A-C notes.
The FAC numbers are automatically inserted into the header that is part of the tuning record of each piano. If you have
an SAT II and the Piano Librarian program, you can view the FAC numbers. The format of the header is as follows:
001_________________________________10.2 8.8 7.9 FAC 000000
IF NOTHING HAPPENS
Suppose you try to store a stretch number and nothing happens? This can be disconcerting, but the problem is usually
very simple to solve. The SAT is very fussy about being on the correct note when it stores a stretch number. You must
have the SAT on F6 in the TUNE mode (by pressing the TUNE button) to store an F3 stretch number, and if you are not,
nothing at all will happen. To store an A4 stretch number you must be on A6, and to store a C6 stretch number you must
be on C7. In other words you must be on the correct note in order to store a stretch number. This requirement reduces
the possibilities for errors.
The other situation when nothing happens is if you try to transfer an FAC tuning to page zero in memory. Simply select a
valid page in memory (SHIFT and PAGE up) and repeat the STRETCH rollover to MEM procedure.
OFFSETTING AN FAC TUNING TO NON-STANDARD PITCH
Tuning and pitch-raising a piano to non-standard pitch is very easy with the FAC program. Prepare the SAT with the
RESET feature to get the SAT offset to the required pitch. For instance, to tune at 442 put 8.0 cents into the CENTS
window and then hold down SHIFT and press RST. The CENTS window is reset to zero cents, and the 8.0 cents is
stored as a pitch offset. The plus sign in the left window indicates this offset on the sharp side. Any pitch up to a
semitone sharp or flat can be used as a pitch offset this way.
Now that the pitch offset is stored, take your FAC measurements as usual. When the tuning is created, the offset will be
included in the stored number for each note, and the plus or minus sign will no longer be in the display.
AVERAGING STRETCH NUMBERS FOR HIGHER ACCURACY
The above procedure applies to one open string on each note. For greater accuracy, you may take the measurement on
each string of a note individually and average the results. If one of the strings disagrees badly (more than two or three
cents) with the others, throw out this reading before averaging.
"GOOD" FAC NUMBERS
You can tell a lot about a piano and its scale design from the FAC stretch numbers. The three numbers should be
reasonably close to each other and lie in a reasonably straight line for the best results. For example, FAC numbers such
as 10, 9, 8 or 5, 6, 7, or 8, 8, 8 represent well-scaled pianos. The lower the numbers, the lower the inharmonicity, so
spinets tend to have higher stretch numbers than grand pianos.

The FAC method, or any other method, cannot produce perfectly progressing beat rates on a piano with widely scattered
amounts of inharmonicity. The FAC tuning will be as good as one can expect or can achieve by any method given the
scale-design problems inherent in the piano itself. Aural touch up might improve the tuning depending upon where the
scale problems occur and the severity of the problems.
FAC TUNING FROM A0 TO C8
After the stretch numbers have been stored and the tuning created, you are ready to tune. Press the NOTE up once to
have the Accu-Tuner look up the settings for the tuning or use the NOTE and OCTAVE buttons to step to where you
would like to start tuning. For each semitone advanced the SAT will automatically change to show the next note to be
tuned and its cents deviation. Continue stepping and tuning this way for the entire tuning.
When using a tuning from memory you will notice that A4 is not tuned to 0.0 cents as you might assume. The reason for
this is that while the Accu-Tuner is tuning the note A4 on the piano, it is listening to the pitch of A6 (the fourth partial of
A4). Also you might notice that the cents deviation jumps lower four times when tuning the piano, this is where the partial
the Accu-Tuner is set for changes. The partials change between the note B and C of the next octave. The partial that the
Accu-Tuner is listening to is shown in the chart below:
Octave on Piano Partial Number Example
1 6 Tuning A1: listening to E4
2 6 Tuning A2: listening to E5
3 4 Tuning A3: listening to A5
4 4 Tuning A4: listening to A6
5 2 Tuning A5: listening to A6
6 1 Tuning A6: listening to A6
7 1 Tuning A7:listening to A7
UNISON TUNING
Unisons may be tuned aurally along with a stretch tuning of the center string, or each string may be tuned individually to
the SAT and the unisons checked later on. The SAT will do an excellent job of tuning unisons when the strings of a given
note are well matched. (They are on most notes.) The fact that some strings are mismatched makes it extremely
important for the tuner to check all unisons aurally when they have been tuned with the SAT. However, do not try to
check the unisons aurally during the course of a stretch tuning if there is more than a few cents pitch raise or drop
involved. Pulling up adjacent strings affects the pitch of already tuned strings. The settling process on a string is not
complete until another octave or so has been tuned.
Aural unison tuners should be aware that pulling in two outside strings to the tuned center string will affect the pitch of the
center string. The amount is roughly equal to one-fifth of the net pitch change. As a result, when there is more than a few
cents pitch change involved, tuning unisons aurally as you go can actually leave them out of tune in the end! To avoid
getting into this situation, give the piano a quick pitch raising (or lowering) before trying to do a fine tuning. If the piano is
more than five to ten cents flat, it will actually save time to do a quick pitch raise before attempting to fine-tune the piano.
THE MEASURE MODE
The MSR (measure) button makes it easy to measure an unknown pitch. If the lights are spinning around, the display can
be stopped by pressing the CENTS buttons; however, the MSR button will do this job for you. Simply hold down MSR
and wait for the LEDs to slow their rotation. Release the MSR button; the cents display will indicate the unknown pitch to
an accuracy of one cent. After releasing the MSR button, the display may still be rotating slowly. For the quickest and
most accurate results, go to within a few tenths of a cent with the MSR button, and then fine tune with the CENTS buttons.
THE MEMORY MODE
The SAT is not restricted to storing or tuning only on the fundamental pitch or a specified partial of each note. The choice
is left to the tuner. This flexibility is necessary to tune all types and kinds of pianos which vary widely in the strength and
audibility of their various partials.
The complete list of storable pitches relative to a given played note is as follows:
Fourth below

Semitone below
Fundamental, or first partial, i.e., the note itself
Octave above less one semitone
Octave above, or second partial
Double-octave less one semitone
Double-octave, or fourth partial
Seventeenth, or octave tenth, or fifth partial
Nineteenth, or double-octave fifth, or sixth partial
Double-octave diminished seventh, or seventh partial
Triple-octave, or eighth partial
Triple-octave second, or ninth partial
Triple-octave major third, or tenth partial
Triple-octave fifth, or twelfth partial
Triple-octave diminished seventh, or fourteenth partial
This list includes all partials from one to ten, plus the twelfth and fourteenth; one semitone low for the first, second and
fourth partials; and one subharmonic, the fourth below. This set is complete with all the notes necessary for tuning pianos
at pitch or below pitch, as well as pipe organs with mixture stops. Early musical instruments can be stored one semitone
low (A=415 Hz by two methods:
1. Exactly with an offset of -101.3 cents.
2. Approximately with notes stored one semitone low (on the first, second, or fourth partials.)
In general, tuning is far more accurate when done on the higher partials, specifically the partials used by aural tuners.
These vary from bass to treble with the highest partials preferable in low bass, and the fundamental preferable in the high
treble.
The tuning of a particular piano can be stored either from a written record of a tuning, or from the piano itself during the
tuning or immediately after completing a tuning. The SAT will be ready to repeat the correct settings from memory for
you, whenever you are ready to tune that piano again. Just go to the correct page (hold down the SHIFT button and
press PAGE to select the correct piano) and start to tune. Going from one note to the next is as easy as pressing the
NOTE up button once, or use the foot switch.
RANGE OF MEMORY MODE
The range of notes covered in the MEM mode is different from that of both other modes. It includes just the 88 notes on a
standard piano, known to the SAT as A0 through C8. Notice that although the three notes in octave zero can be stored in
memory, they must be tuned to a partial other than the fundamental since the lowest note in TUNE mode is C1.
NOTE: It is better practice to refrain from tuning bass notes on the fundamental anyway.
TUNING FROM MEMORY
Assume there is a complete tuning of a piano stored on a page of memory. To use this tuning, turn on the SAT, press the
TUNE button, hold SHIFT down and use the PAGE buttons to step to the page number assigned to this piano. (It is not
necessary to press MEM because selecting a page automatically puts the SAT into the MEMORY mode). Releasing the
SHIFT button sets the SAT at A0. To start tuning with the first note, go up one note and then back down to have the SAT
look up the correct settings. To start elsewhere, step up to the desired starting note and begin tuning.
When ready to tune the next note, just press NOTE up or down, and tune away. The notes can be tuned in any
sequence, up, down, or by octaves, and the previously stored values for the selected notes will appear. The fastest way
to tune is with the foot switch or thumb switch since it leaves both hands free for tuning and you don't have to touch the
SAT.
The display in MEM mode shows the note being tuned, and the cents deviation of the partial. To check the page number,
press the MEM button. To check the partial you are tuning, press the TUNE button and read the note corresponding to
the pitch of the partial in the left display. ( Note: Always remember to go back to the MEM mode by pressing the MEM
button after this check or the SAT will be left in the TUNE mode.)
PITCH RAISING
The Sanderson Accu-Tuner is able to automatically calculate the overpull or anticipated drop of a given note during the
course of a pitch raising. The SAT measures the unknown pitch first, then compares it with the corresponding note of the
tuning on the page in memory, and then calculates a pitch-raise correction.

The pitch-raise calculator is designed to be used with a tuning in memory in order to pitch raise the entire piano to a
realistic piano-tuning curve. Choose a page in memory with a piano similar to the one to be pitch raised or measure and
store an FAC tuning. The pitch-raise calculator offsets the SAT the number of cents necessary to pitch raise the piano to
the stored tuning (not just to the zero-cents line).
To access a page of memory, turn the SAT on, press the TUNE button, hold down the SHIFT button, and press PAGE up
or down to access the correct page.
Let's start at A0, so after selecting the correct page, press NOTE up, then NOTE down. To use the pitch raise calculator,
hold the MEASURE button down while striking A0 until the lights stop (or nearly stop). Continue to hold the MEASURE
button down and press (roll over to) the SHIFT button, then release MEASURE, then release SHIFT. The SAT
automatically offsets itself by one-quarter of the measured flatness. (For Example, a flatness of 40 cents will
automatically result in an offset value of 10 cents sharp). Tune with the calculated offset for an octave or so, then repeat
the measurement on the next untuned note to get a new pitch-raise correction. The correction changes quite slowly on a
normal piano, and needs to be recalculated five or six times to cover the entire keyboard.
The pitch correction factor of one-quarter is designed to work with the "unisons-as-you-go" method of pitch raising. One
quarter may be a little too much in the bass, and not quite enough in the high treble, but the error involved is never more
than a few cents. You can modify the number given by the SAT if you wish. If the SAT calculates 10 cents, but you think
8 cents is better, just enter -2 cents and store this offset (Hold SHIFT and press RST button). The net offset will be 8
cents. Usually it will not be worth the trouble to try to outguess the pitch-raise calculator.
With the "unisons-last" method of pitch raising, the calculated correction will be a little light in the plain-wire section.
Whatever the calculator gives for a correction on the plain wires, add one-third more to it. For example, if the calculator
indicates 15 cents offset, add 5 to that for a net offset of 20 cents. A word of caution about overpulling too much in the
treble as you could be close to the breaking point of a string.
Pitch lowering is just the reverse of pitch raising (to a piano), and the program works just as well for lowering pitch as for
raising it. Just follow the above procedure, no changes have to be made.
THE RESET BUTTON
The Reset Button has four major functions:
1. Resetting to Non-Standard Pitch.
2. Perfecting the A-440 of a Stretch Tuning.
3. Displaying the Cents Offset.
4. Measuring the Width of Musical Intervals.
1. Resetting to Non-Standard Pitch:
The RST (reset) button is used to reset the cents display to zero without actually changing the pitch of the instrument
itself. This is very useful in several ways. The first is setting the SAT to a non-standard pitch. For instance, to tune an
instrument to A at 442 Hz, which is 8.0 cents sharp, turn the SAT on and then press the TUNE button, then step the
CENTS display up to 8.0 cents as shown in Fig. 4.
Fig. 4. SAT just before offsetting pitch.
Now hold the SHIFT button down and press the RST button. The display will jump to zero cents as shown in Fig. 5, but
will actually be at 442 Hz (8.0 cents sharp). Now your tuning can proceed exactly as it would normally, except the tuning
will end up at 442 Hz. (This assumes your stored tuning is at 440 Hz.)

Fig. 5. Display with non-standard pitch warning.
It is also possible to tune off-pitch by accident. To help prevent this from happening, a plus sign appears in the
NOTE/OCTAVE display window as shown in Fig. 5. Whenever the instrument is offset to the sharp side, a plus sign will
appear. When the SAT is offset to the flat side, a minus sign will appear.
2. Perfecting the A-440 of Stretch Tuning:
A second use for the reset feature is to get the stretch tuning (see previous section on FAC) exactly on pitch at A-440.
Pianos are rarely perfect, and the FAC stretch tuning uses the fourth partial of A4 (A6) to tune. This is where a slight error
can occur. Sometimes the fundamental of A4 ends up as much as one-half of a cent off. If you need to correct this
problem use the following procedure.
A. Measure the stretch numbers of the piano.
B. Store the FAC numbers to a page in memory, go straight to A4 and tune all three strings.
C. Switch to the TUNE mode by pressing the TUNE button.
D. Press OCTAVE down twice, set the cents deviation to zero, and the display should read A4 0.0
E. Play A4 on the piano.
F. If the note is right on pitch, simply switch back to the page in memory where the tuning is located. (Press MEM button,
then NOTE up button). Tune the piano.
G. If the note is unacceptable, measure the pitch error with respect to A-440, and follow the instructions below.
For example: Let's assume it is 0.2 cents sharp. Store an offset that will counteract the error, namely 0.2 cents flat. Do
this by putting -0.2 in the cents window, holding the SHIFT button down and pressing the RST button. Now you can
return to the page in memory, and tune the piano knowing that A4 will wind up exactly on A-440.
If you want to save this tuning permanently at 440 Hz, store the FAC tuning again (STRETCH roll over to MEM). The
offset will be included in the stored tuning and the temporary offset will be cancelled.
3. Displaying the Cents Offset:
The offset cents number used during a pitch raise can be displayed at any time.
Set the cents window to zero. Press SHIFT, hold it down, and press RESET. As long as the SHIFT button is depressed,
the right display window will show the cents offset currently in use. Since the SAT has the ability to add or subtract
increments from the stored offset, you must return the cents display to zero before looking at the cents offset.
On the other hand, if you know what the cents offset is and wish to change it, just enter the desired difference in cents.
Press SHIFT-RESET and the new offset will be displayed in the cents window.
To set the cents offset back to zero, either recalibrate the instrument by holding the SHIFT and pressing the CAL button,
or enter an opposite offset and store that in order to cancel the original offset.
4. Measuring the Width of Musical Intervals:
The fourth major use for the RST button is to measure the width in cents of musical intervals. To measure the width of an
interval such as a third or fourth, take the following four steps.
A. Go to the note and octave of the coincident overtones of the two notes (i.e., A5 for the F3-A3 major third).
B. Stop the lights using the MSR and/or CENTS buttons on the lower of the two notes.
C. Reset the CENTS display to zero with the SHIFT and RST button.
D. Stop the lights again on the higher of the two notes.
The width of the unknown interval now appears in the CENTS display. No addition or subtraction is necessary to make
this measurement with the SAT.

QUICK RESET OF CENTS WINDOW TO ZERO
It is often convenient to be able to reset the cents reading to zero without having to go to the trouble of counting the cents
down to zero. This can be done with the CAL button. Hold the SHIFT button down, and press the CAL button quickly.
The CENTS window will revert to zero cents, but the NOTE window will remain as it was and the SAT will not go over to
the CAL function. If you want to complete the CAL operation, hold the CAL button down instead of just giving it a quick
push.
PAGE NUMBER DISPLAY
In the memory mode the CENTS display doubles as the PAGE number display. It displays the current PAGE number or
the current CENTS setting as required. To see how this works, hold SHIFT down and press PAGE up once. A numeral 1
will appear in the CENTS display, to indicate that storing or retrieving a piano can now be done on or from PAGE 1. To
change the PAGE, hold the SHIFT button down and press PAGE up or down.
NOTE: The PAGE number will step up only to the maximum number of pages installed in your particular SAT.
Stepping down, the page numbers will eventually get you to PAGE 0. PAGE 0 will not store any information and is there
to make it difficult to accidentally overwrite a valuable tuning. When the SAT is turned on, the PAGE number defaults to
0. You have to select a page before you can store a tuning to memory.
STORING AN AURAL TUNING IN MEMORY
Assuming the piano is tuned and you are storing notes from AO to C8:
1. Turn the Accu-Tuner on and press the TUNE button.
2. Select the PAGE by holding SHIFT and then using PAGE to get to the desired page in memory that you want to devote
to this piano. Press NOTE up and then NOTE down to start on AO.
3. To set the partial, press the TUNE button. Set the display for the NOTE and OCTAVE of the desired partial, such as
E3 (sixth partial) or A2 (fourth partial) to record the note A0 on the piano.
4. Now measure the pitch of the note on the piano by playing the note on the piano and using MEASURE and CENTS
buttons to stop the lights.
5. Pressing the MEMORY button will show you the NOTE and OCTAVE you want to store along with the PAGE number
you have chosen. Pressing the TUNE button will display the partial you have selected and the CENTS deviation for this
partial.
6. Switch to MEMORY mode (by pressing the MEMORY button) to correct the NOTE or OCTAVE to be tuned on the
piano.
7. Switch back to TUNE mode (by pressing the TUNE button) if you want to modify the partial setting.
8. When the settings are correct, store the tuning for this note by holding down SHIFT, then pressing and releasing STO-
MEM.
9. The Accu-Tuner will carry along the partial and the cents deviation after you store a note to memory. All you have to
do is measure the cents deviation. You determine cents deviation (by stopping the lights with the cents buttons) then
store the note by holding SHIFT and pressing STO-MEM. You will notice while you are holding down the SHIFT button
just after storing a note, the display will show the NOTE/OCTAVE of the note being stored and the PAGE in memory.
Releasing the button toggles the display back to the partial and cents deviation (allowing you to check as you store the
tuning.)
10. After you store from A0 up to around C3 you will notice the LED's will not register as clearly. When the display starts
to become vague it is time to lower the partial. Let's assume you were using the sixth partial and it is time to lower the
partial. You would accomplish this by pressing the TUNE button, then use the NOTE and/or OCTAVE buttons to get the
display to the desired partial. Next measure the cents deviation (stop the lights while playing the note). Now before you
store this, let's double check ourselves by pressing MEM button to display the note, octave and page number. Press the
TUNE button to display the partial and cents deviation. If all settings are correct, then store the setting (SHIFT and STO-
MEM).

11. You will have to lower the partial at different points on different pianos. FAC tunings use the octave fifth (sixth partial)
in the bass at A0-B2, double octave (fourth partial) C3-B4, octave (second partial) from C5-B5, and fundamental (first
partial) from C6 on up through the high treble.
12. Continue along in measuring and storing until you have stored each note on the piano.
STORING A TUNING IN MEMORY FROM A PRINTOUT
1. Turn the Sanderson Accu-Tuner on and press the TUNE button.
2. Select the PAGE by holding SHIFT and then using PAGE button to get to the desired page in memory that you want to
devote to this piano. Then press OCT and NOTE buttons to get to the first note to be recorded.
3. Press the MEM button (above the ON/OFF button) and the SAT will show you the NOTE and OCTAVE you are about
to store along with the PAGE number you have chosen. (If the display is not set up correctly, use the OCTAVE and
NOTE buttons to correct the error.)
4. Press the TUNE button and the SAT will display the partial of the note you are about to store and the CENTS deviation
for this partial. (If the display is not set up correctly use the OCTAVE, NOTE, CENTS buttons to do so.)
5. Store this note by holding down SHIFT and then press STO-MEM.
6. The SAT will carry along the partial and the cents deviation after you have stored a note to memory. All you have to do
is adjust the cents to agree with the cents listed on the tuning chart. Then store the note by holding SHIFT and pressing
STO-MEM. You will notice while you hold down the SHIFT button during storing a note, the display shows the note and
octave of the note you are storing and the PAGE in memory. This allows you to check yourself as you go along.
7. Continue along entering the cents from the printout and then storing to memory (hold SHIFT and press STO-MEM)
until there is a change in the partial to be stored.
8. In the case of an FAC tuning chart, the partial changes occur at C3, C5, C6. When you come to these points press the
TUNE button and then enter the correct the partial and the cents deviation (using the OCTAVE, NOTE, and CENTS
buttons). Then double check (as in steps 3,4) by alternating between MEM, and TUNE buttons to verify the information
before storing it (hold SHIFT and press STO-MEM).
9. Once the partial is set up correctly you only need to change the cents setting and store until the next partial change.
Continue the methods described above until the entire tuning is stored.
UP OR DOWN MEMORY STORAGE
The direction in which the memory advances while storing a tuning can also be changed at will. When the SAT is first
turned on, storing a note setting will increment the note setting to the next higher semitone. This is not convenient when
storing from the treble bridge down into the bass. To change the direction, hold down the MEM button, hold down the
NOTE down button, then release the MEM button and release the NOTE down button last. (roll over from MEM to NOTE).
This procedure "teaches" the STO-MEM button that it should store and decrement the note setting. To get back to the
normal direction, repeat the procedure using the NOTE up button instead of the NOTE down button.
MEMORY STORAGE WITH THE FOOT SWITCH
Storing a note to memory ordinarily requires two hands, one to hold the SHIFT button, and one to press the STO-MEM
button. This was done deliberately to make it difficult to store notes accidentally, possibly wiping out a valuable tuning.
When storing a piano in memory from a written record, or tuning and storing a piano as you go, you can "teach" the foot
pedal to store notes for you.
To teach the foot pedal to store notes, hold the foot pedal down, hold down SHIFT button, hold down STO-MEM, release
the foot pedal, then release STO-MEM button, then release the SHIFT button. Now be sure to use the foot pedal with
care, because it will put new information into memory whenever it is pressed, and wipe out the information that was
previously stored at that location.
If you want the footswitch to stop storing to memory, teach the footswitch a different task: hold down footswitch, hold
down NOTE up, release footswitch, and then release NOTE up.

UP OR DOWN FOOTSWITCH\THUMB SWITCH
The direction in which the foot switch progresses across the keyboard can be changed from "up" to "down" and back
again at will. When the SAT is first turned on, the foot switch moves up the keyboard. To reverse the direction, hold the
foot switch down, hold the NOTE down button, release the foot switch, and then release the NOTE down button. This
procedure "teaches" the foot switch that you want to move down the keyboard instead of up. To reverse the direction
again, repeat the above procedure holding the NOTE up button instead of NOTE down. (This procedure works for the
thumb switch as well).
PIANO SERIAL NUMBER STORAGE
The SAT can store six digits of the piano's serial number along with the tuning, to identify the tuning record with the piano.
Serial numbers are stored on a page beginning two note locations below the lowest note, A0, with a maximum of three
digits at each location. The CENTS buttons set the number and then the SHIFT and STO-MEM buttons are used to store
them.
A. To store a serial number on a page:
Go to the bottom of the memory page with OCT down. The left window will display SEr , short for Serial Number. Use the
CENTS buttons to set the right window to the first three digits of a six digit number corresponding to the serial number of
the piano. (If the number exceeds six digits, ignore digits to the left of the sixth). Then store these digits with the SHIFT
and STO-MEM buttons. The left window will still say SEr, and you can set the last three digits of the serial number with
the CENTS buttons, and then store it also. The left window will now indicate A0, the first note of the piano.
B. To read the serial number:
Go to a specific page, and use OCT down to get to the bottom of the page. Read the first three digits of the serial
number. then press NOTE up and read the second three digits.
C. To search for a specific serial number:
When the page is not known, remember the first three digits of the number while you search through memory. Look at the
bottom storage location of each page. On each page, press NOTE down to see the serial number, and then press SHIFT,
PAGE up to go to the next page. Alternate between NOTE down and SHIFT, PAGE up until the desired serial number is
found. Then press NOTE up to check the last three digits and make sure you have the right piano.
TRANSMITTING PIANOS FROM ONE SAT II TO ANOTHER
No computer is necessary to transmit pianos from one SAT II to another. Connect a MIDI cable from the MIDI OUT
connector of the transmitting SAT II to the MIDI IN connector of the SAT II that is about to receive a piano memory
transplant.
CAUTION: The receiving SAT II's pianos in memory will be lost when the transmitting SAT II writes information on top
of them.
Press the MIDI IN button of the receiving SAT II, and then press the SHIFT and MIDI OUT buttons on the transmitting
SAT to start the transmission. After 4 to 32 seconds, depending on the number of pianos, the transfer will be completed.
There is no external sign of this on either SAT II, but the keyboard of the transmitting SAT II will be locked up during
transmission and will release after transmission is completed.
The transmitting SAT II will always transmit its entire piano memory. The receiving SAT II may have the same piano
memory capacity, or it may have more or less, it doesn't make any difference to the MIDI operation.
If more pianos are transmitted than the receiving SAT II can accommodate, the pianos are received and numbered
correctly up to the receiver's maximum storage capacity. The extra pianos are transmitted but ignored, and they still
remain in the transmitting SAT II's memory.
If the receiving Accu-Tuner has greater piano capacity than the transmitting Accu-Tuner, then the pianos are received and
numbered correctly up to the maximum number transmitted. Pianos that are above the number of the transmitting pianos
will not be disturbed. If the receiving Accu-Tuner has a larger number of pianos, the keyboard of the receiving SAT II will
not unlock because it is still expecting more pianos and will wait indefinitely. To unlock the Accu-Tuner, turn off the Accu-
Tuner.
OLD F4 STRETCH TUNINGS
The SAT still does one-point F4 stretch tunings as before. From a cold start, press the TUNE button, set the SAT to F5,

tune F4. Then set the SAT to F6 and play the note F4, use the cents buttons to stop the lights on the SAT. Next hold
SHIFT button down, and press STO-STRETCH button, release STO-STRETCH, then release the SHIFT button. Next
press the STRETCH button once more to get the SAT calculating the C3 through F6 stretch tuning. Now the SAT will be
set up at C3 and ready to tune.
TUNING THE HIGH TREBLE WITHOUT FAC
Tuning the high treble without FAC is relatively easy. The best tuning for each note can be determined by referencing
one, two or three already-tuned notes. These notes lie one octave, an octave-fifth, and two octaves lower than the note
you are tuning.
1. Set the SAT to the NOTE and OCTAVE of the note being tuned.
2. Play the reference notes one at a time and see how they look on the rotating lights.
3. Step the CENTS up or down until you find a setting that is a reasonably good compromise. In other words a
setting where some of the reference notes rotate slowly sharp and some rotate slowly flat.
4. Then tune the note.
Tuning is more of a problem in the last octave because a good compromise is difficult to find. Decide which interval will
take priority and tune mainly to satisfy that partial.
At this point many tuners stick to the single octave, but tune one or two cents wide. Others prefer to tune the double
octave which gives a considerably sharper top end, or the octave-fifth, which is even sharper. The choice is up to you and
your customer.
TUNING THE BASS WITHOUT FAC
Tuning the bass is similar in principle to tuning the high treble. Set the SAT with reference to several previously tuned
notes and compromise among them to place the note being tuned.
The best reference notes lie an octave, an octave-fifth, and a double octave-fifth higher than the note being tuned. To use
these reference notes, set the SAT a double-octave-fifth higher than the note being tuned (on its sixth partial).
1. Play each reference note one at a time.
2. Step up or down with the CENTS buttons until a good compromise setting is found, one where some reference
notes are rotating slightly flat, others slightly sharp.
3. Tune the note.
4. Continue this procedure all the way down to A0.
In contrast to the situation in the high treble where the three tests diverge, the three bass tests usually work nicely all the
way to the last note.
PATENT NOTICE
The method of tuning a piano by measuring its inharmonicity and then creating a numerical tuning customized to fit that
piano are the subject of Patent No’s 3,968,719, 3,982,184, 4,014,242, 5,285,711 issued to Dr. Albert E. Sanderson of
Inventronics, Inc., and other patents pending.
INPUT-OUTPUT JACKS
There are six input-output jacks on the back of the SAT that increase the versatility of the SAT for various special
purposes. The jacks on the back of the SAT II are shown below.

Left-Side Jacks MIDI Jacks Right-Side Jacks
1. AUDIO IN: An electrical audio input jack. Signals are fed into this phono jack for silent measurements of pitch, or
tuning electronic musical instruments. This input is suitable for levels from 0.01 to 10 volts.
2. MAG IN: A miniature telephone jack for magnetic pick-ups. These typically have an output of a few millivolts, and this
input is designed only for such low-level signals. Connecting a large signal to this input will destroy the input circuit. So,
you must use the AUDIO IN jack for large signals.
3. FLTR OUT: A phono jack output from the audio filter. The audio filter amplifies sounds whose pitch corresponds to the
pitch selected on the SAT. It is useful for listening to the beats at the coincident partial of two notes forming a musical
interval. As such, this feature can be a valuable training aid for aural tuners. The speaker/amplifier that we sell is
modified just for this job.
4. OSC OUT: A phono jack which puts out a modified sawtooth wave (one that is quite pleasant to listen to) at the pitch
called for by the settings of the SAT controls. This has a variety of uses. The frequency calibration of the instrument can
be checked with this output. It can also be fed into an amplifier and broadcast, to give an aural pitch standard for any
purpose. One purpose might be as an aid to fast piano chipping or rough pitch raising.
5. NOTE SWITCH: A subminiature telephone jack, that accommodates the foot switch, or thumb switch which is used for
stepping up/down the NOTE settings one semitone at a time. A foot switch is supplied as standard equipment, but any
switch can be used for this purpose. The contacts must be the "normally open, momentary contact" type, and each time
contact is made, the NOTE setting will advance by one semitone.
6. BAT CHGR: Used for charging the battery. DO NOT use battery chargers other than ones recommended for the Accu-
Tuner, even when the plug is compatible with the SAT jack, the wrong voltage can damage the battery charging circuit in
the SAT. (The Radio Shack model 273-1767, with a 2.1 mm barrel, negative on the inside, positive on the outside, is a
compatible unit.) The battery will be fully charged after twelve hours.
BATTERY CHARGER INDICATOR
Accu-Tuners have a green LED above the battery charger jack which will light up when the battery charger is plugged in
and is charging properly. If the LED does not light up, there is likely a faulty cable on the battery charger or a faulty
electrical wall outlet. Try another wall outlet, if that doesn't help, replace the battery charger.
BATTERY CARE
NI-CAD
The standard battery used in the Sanderson Accu-Tuner is a Nickel-Cadmium (Ni-Cad) battery. The Ni-Cad will run the
SAT for 40 to 60 hours, and can be recharged hundreds of times. To achieve the longest battery life we do recommend
that the SAT be used until the "Lo-Bat" signal is displayed in the left LCD. Ni-Cad batteries do not benefit from nightly
charging and will last longer if used to capacity before recharging.

TWO YEAR WARRANTY*
INVENTRONICS offers a 2 year warranty from date of purchase, on parts and labor. We will repair or replace the Accu-
Tuner, as determined at the factory, should it be found defective. This warranty is not transferable, and applies only to the
original purchaser of the equipment. Damage from the result of misuse, modification, or tampering with the equipment will
void this warranty.
*The foot switch is not covered under this warranty.
APPENDIX A
Concise Step-by-Step Tables of Standard Routines
1. Recalibration in Tune or Stretch Mode:
SHIFT, CAL, release CAL, release SHIFT, CENTS up or down to stop lights, TUNE. You are at A4, 0.0 cents and
calibrated to 440.00 Hz.
2. Recalibration in Memory Mode or FAC Mode:
SHIFT, CAL, release CAL, release SHIFT, CENTS up or down to stop lights, TUNE, NOTE up, NOTE down. You are still
in the MEM mode, on the note where you left off, and recalibrated.
3. A. Measurement and Storage of FAC Stretch Numbers:
TUNE, NOTE=F, OCT=5, CENTS=0.0, tune F3 to stop lights, OCT up to 6, CENTS up or down to stop lights, SHIFT,
STO-STRETCH. (NOTE=A, OCT=5, CENTS=0.0) Tune A4, OCT up to 6, CENTS up or down to stop lights, SHIFT, STO-
STRETCH. (NOTE=C, OCT=6, CENTS=0.0) Tune C6. OCT up to C7, CENTS up or down to stop lights. SHIFT, STO-
STRETCH. SHIFT, PAGE up to correct page, hold STRETCH, hold MEM, release STRETCH, release MEM. After 10
seconds you are at A0, NOTE up, NOTE down, and you are ready to start a stretch tuning.
B. Measurement and Storage of F4 Stretch Number:
TUNE, NOTE=F, OCT=5, CENTS=0.0, tune F4 to stop the lights, OCT up to 6, CENTS up or down to stop the lights,
SHIFT, STO-STRETCH, press STRETCH button alone. You are at C3, ready to start tuning C3-F6.
4. Non-440 Calibration:
SHIFT, CAL, release CAL, release SHIFT, CENTS up or down to stop lights, TUNE, CENTS up or down to required offset
(i.e., 8.0 cents = 442, 4.0 cents per Hertz), SHIFT, RST, release RST, release SHIFT. Your instrument is set for non-
standard A, and the NOTE/OCTAVE window shows + or - to indicate sharp or flat. (This offset is used and changed by
pitch-raise calculator).
5. Storing One Note in Memory:
Hold SHIFT button and press PAGE up or down to page number of desired piano. Then use the OCTAVE and NOTE
buttons to get to the correct note on the piano. If you wish or need to change the partial: Press the TUNE button (then the
partial will be displayed) and use the NOTE and OCTAVE buttons to display the desired partial, and finally use the
CENTS button to get to the desired pitch. Then to store this, hold down the SHIFT button and press STO-MEM.
To check that proper note has been stored, press NOTE down, TUNE, to check partial's note, octave, and cents, then
MEM to see piano's note octave, and page number.
6. Storing Consecutive Notes on Same Partial:
Set up the first note and store as described above. The SAT automatically goes to the next semitone keeping the partial
relationship constant. To store the next note, press CENTS up or down to the new setting, SHIFT, STO-MEM. Repeat
storing consecutive notes until you need to change the partial number.
7. Changing the Partial Number in Memory Mode:
Press TUNE, then NOTE up or down to pitch of new partial, OCT up or down to pitch of new partial, CENTS up or down to
pitch of new partial, SHIFT, STO-MEM. You have stored one note at the new partial number, and may proceed with
storing consecutive notes until the partial number changes again.
8. Storing an F4 Stretch Tuning on a Page in Memory:
Measure and store F4 Stretch Number as described above (3B). Then SHIFT, PAGE up or down to correct page number.
Then hold down STRETCH button and roll over to MEM button.
APPENDIX B

Cents Tables for some Non-equal Temperaments
Pythagorean Temperament.
A 0.0 Dd -15.6 F# 5.9
A# 13.7 D -2.0 Gb -17.6
Bb -9.8 D# 11.7 G -3.9
B 3.9 Eb -11.7 G# 9.8
C -5.9 E 2.0 Ab -13.7
C# 7.8 F -7.8
The usual practice is to use only the above flats.
Meantone Temperament
A 0.0 Dd 27.4 F# -10.3
A# -24.0 D 3.5 Gb 30.8
Bb 17.1 D# -20.5 G 6.8
B -6.8 Eb 20.5 G# -17.1
C 10.3 E -3.4 Ab 23.9
C# -13.7 F 13.7
The usual sharps and flats are C#, F#, G#, Bb, and Eb.
Marpurg's Temperament 1.
A 0.0 C# 0.0 F 0.0
A# 5.9 D 5.9 F# 5.9
B 3.9 D# 3.9 G 3.9
C 2.0 E 2.0 G# 2.0
Werkmeister III, Correct Temperament No. 1
A 0.0 C# 2.0 F 9.8
A# 7.8 D 3.9 F# 0.0
B 3.9 D# 5.9 G 7.8
C 11.7 E 2.0 G# 3.9
Kirnberger III, Corrected Temperament
A 0.0 C# 2.0 F 9.8
A# 7.8 D 3.9 F# 2.0
B 0.0 D# 5.9 G 7.8
C 11.7 E -2.0 G# 3.9
Young's Temperament No.1
A 0.0 C# -3.9 F 3.9
A# 2.0 D 2.0 F# -5.9
B -3.9 D# 0.0 G 3.9
C 5.9 E -2.0 G# -2.0
Vallotti or Fairchild Temperament
(REF: Piano Technicians Journal, Oct. 82, p.20.)
This temperament was independently developed in 1982 by Steve Fairchild while looking for a temperament to smooth
out the simple keys on small pianos. It greatly reduces the harshness caused by excessive inharmonicity, and for that
reason could also be called the "Piano Teacher's Delight" temperament.
A 0.0 C# 0.0 F 7.8
A# 5.9 D 2.0 F# -2.0
B -3.9 D# 3.9 G 3.9
C 5.9 E -2.0 G# 2.0
Cents Offset for Hz at A4
Table of contents
Other Inventronics Tuner manuals