Itasca Spirit 31' User manual

RV Manual
Itasca Spirit 31’, Ford E450

Table of Contents
Vehicle Master Battery Switch
Vehicle Security Lockout
Master Battery Switch
Electric Power Source
Generator Power
AC
Water
Lavatory
Propane
Car Radio
TV / DVD Player
Cable
Backup Camera
Appliances
Fridge
Toilet & Sinks
Exit switches
Moon roofs
Slide Outs
Blinds
Night Sleep Privacy Shades
Converting Dining Table / Bed
Door Locks
Door & Bin Latches
Vehicle Fuel Tank
Awning
Bunk Ladder
Auxiliary Shower
Portable table
Roadside Assistance
Driving Tips
Smoking
Pets
Returning the RV
Comments

Vehicle Master Battery Switch
The red nob to the right of the battery is a master on/off switch for power to the entire vehicle. It is primarily
used for storage parking.
Vehicle Security Lockout
To start the RV, you must first disable the security kill switch for the ignition. To do so, use the small white
square tag on the key chain and touch it to the black patch to the right of the steering wheel on the dash panel. It
will beep and you are then able to start the RV. If you forget and attempt to start the vehicle, the horn will beep
once to remind you the security lockout is still armed.
Master Battery Switch
There is a master battery switch for cabin power located at the entrance step. Note: In addition to the generator
or city power connection, the master battery switch must be turned on for the AC and refrigerator thermostats to
function. It also needs to be on to start the generator. It is intended as a master kill switch for the cabin when
remote camping to keep the house battery from being drained when the unit is vacant.

City Electric Power Source
- The shore line hookup is located in the panel at the exterior rear on the RV driver side. The large black
cable/plug must be unattached from the internal receptacle and plugged into the park’s electric access box. The
RV uses 30 amp hookups.
- The generator should be off before plugging in cable to hook up to city/park electric power source or
reattaching the cable to the outlet inside the RV bin. Cable must be plugged in to the RV outlet to complete the
circuit for generator power to the RV.
- An adapter for use in powering to a conventional 110v outlet is in the rear access panel. I do not recommend
using this for long term or heavy use. It is primarioly for lighting, refrigerator, and charging the house batteries.
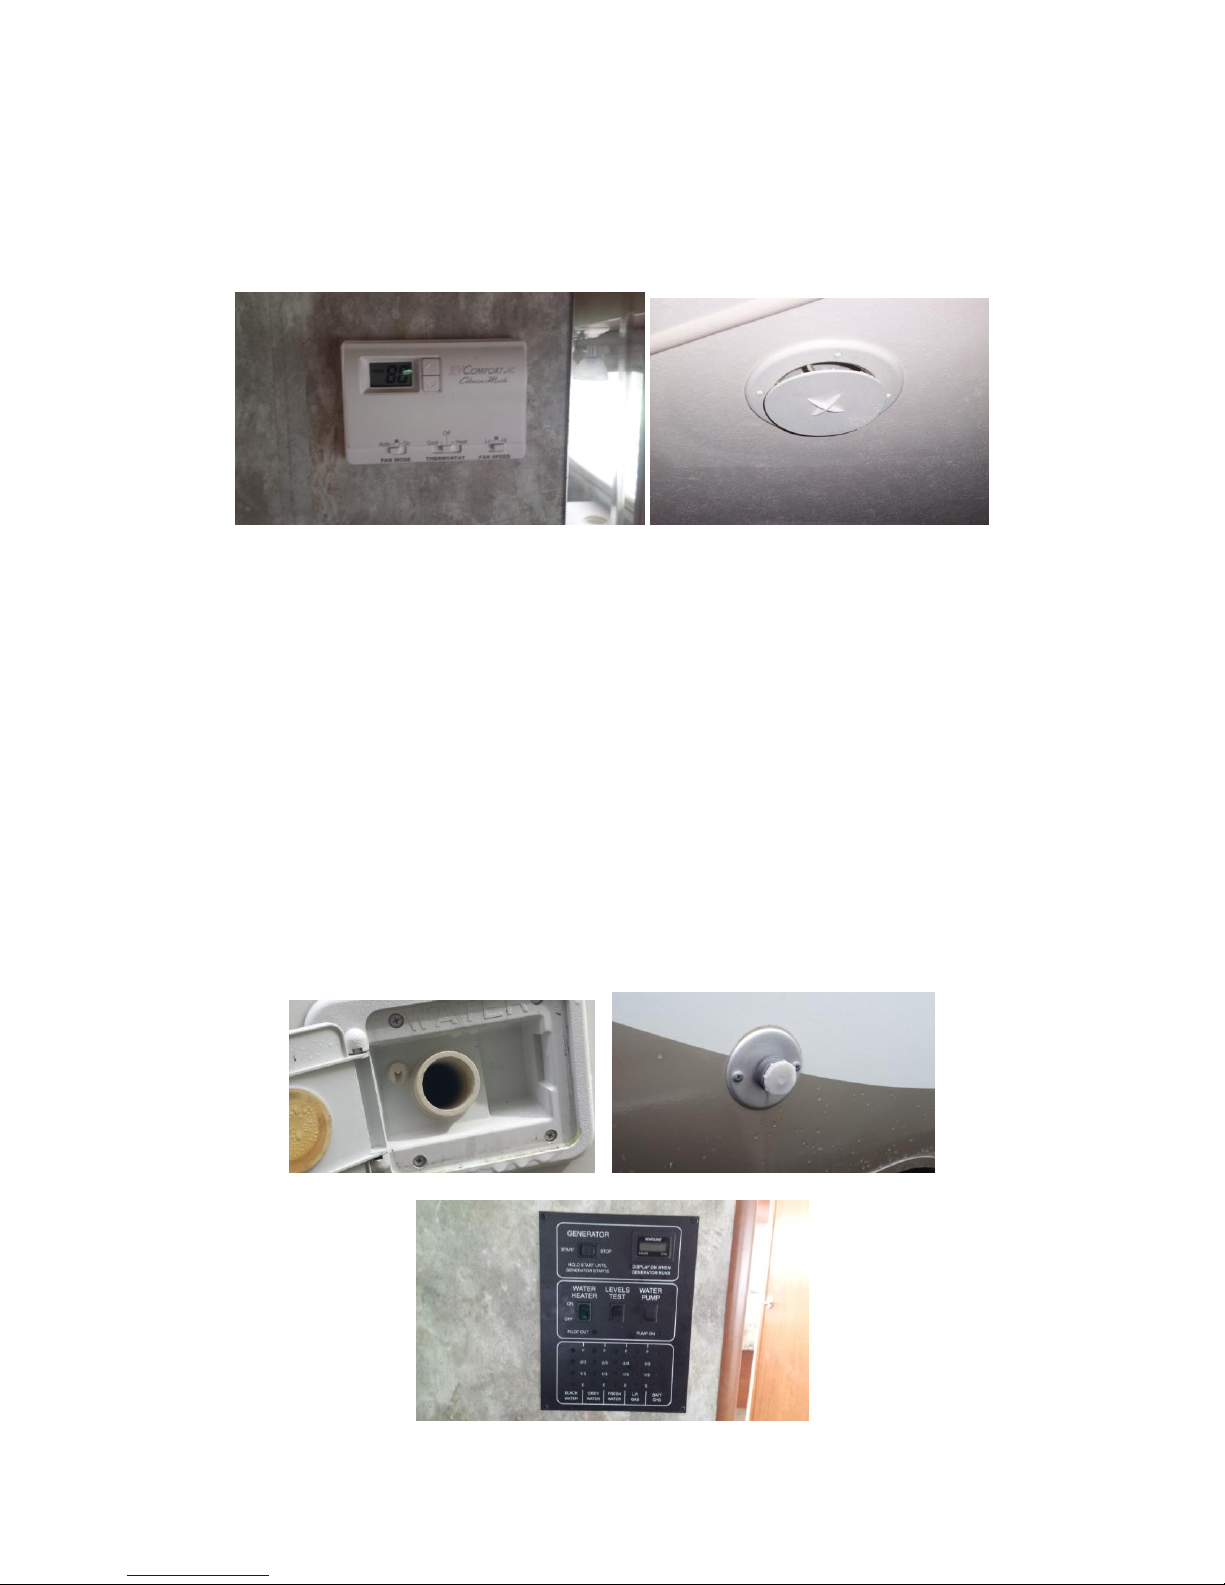
- Circuit Panel is located below the refirigerator. Extra fuses are onboard in the toolbox. There is also a master
circuit switch located directly on the generator under the acess panel, to the right side of the start button.
.
Generator Power
How to start
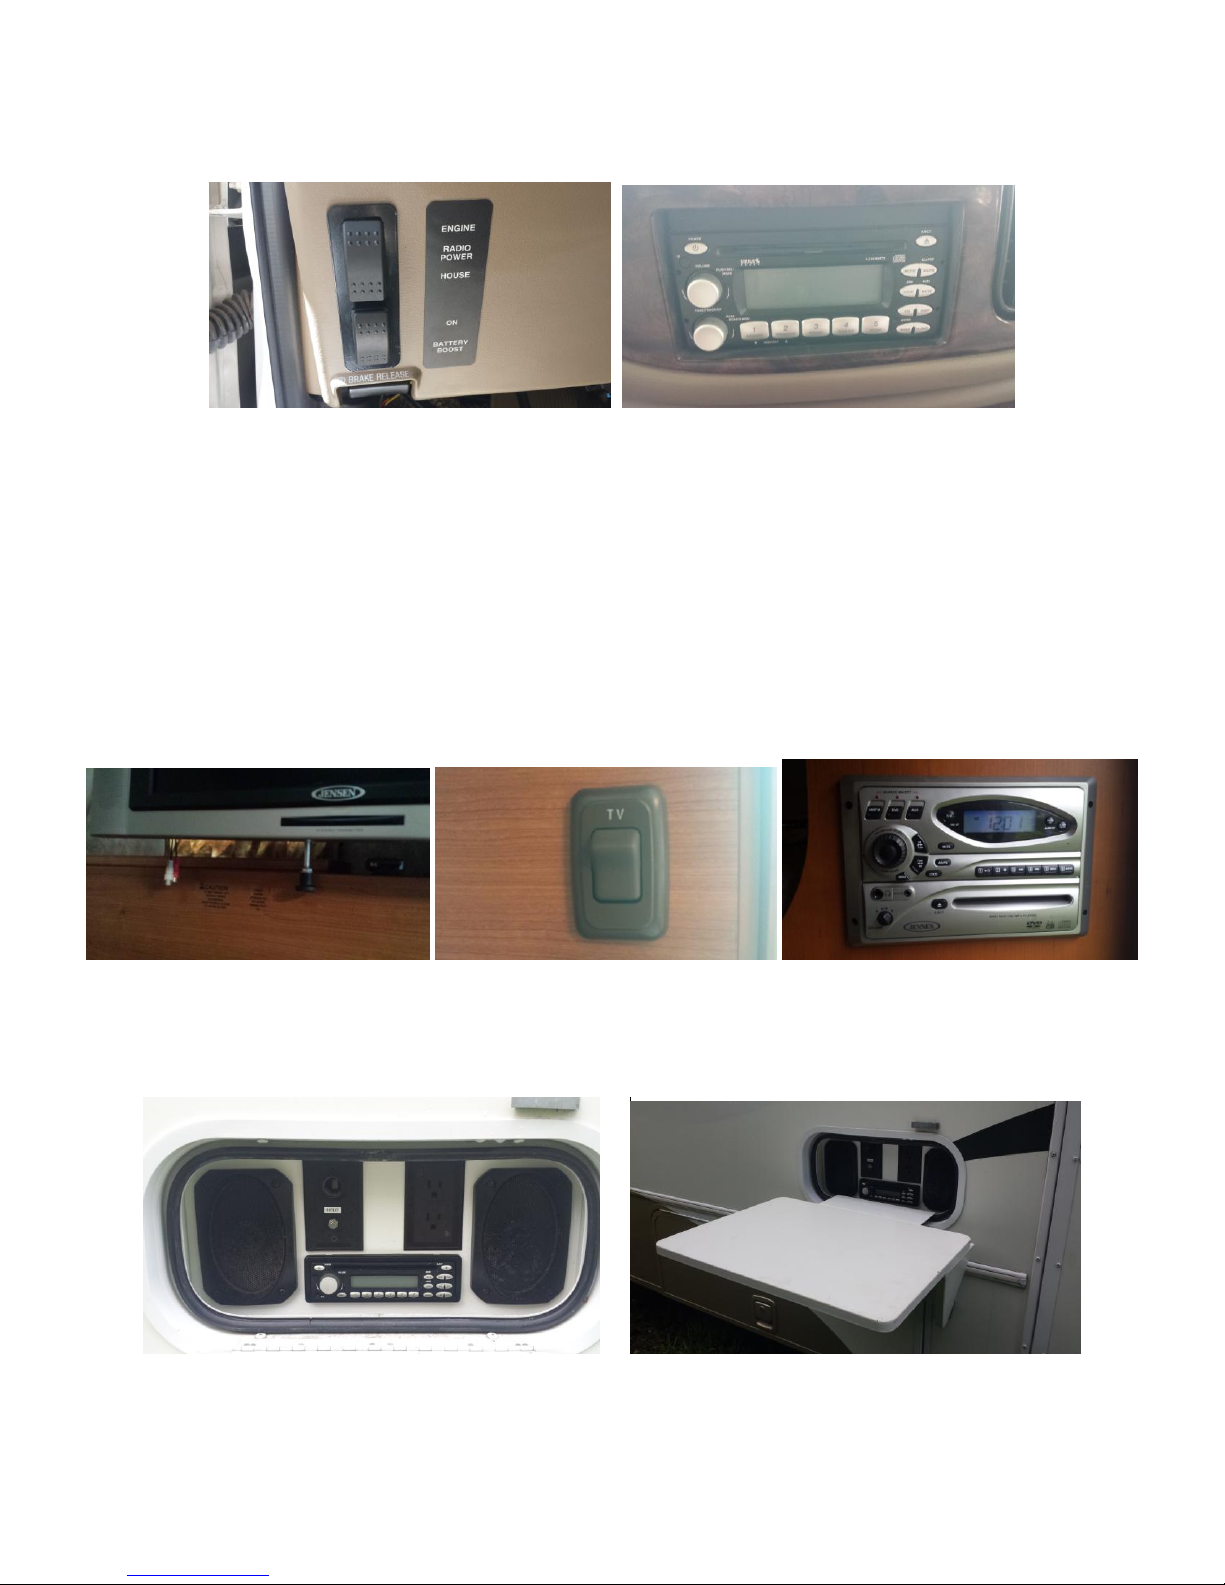
1) Start button –located by the stovetop
2) In the event of a dead generator battery, there is a battery hot swap button (emergency start) which
allows you to start the generator from the vehicle battery. It is located to the left of the steering wheel.
Start the vehicle, push the button upwards, and then re-try the generator start button. You can then turn
off the vehicle.
Note: AC should be off when starting, to minimize power draw on warm-up.
The generator has a master breaker located directly on it, underneath the access panel, which can be
checked if you experience electrical difficulty, such as the power is on but the AC will not function.
The generator battery is located under the side entry door step.
Fuel tank level - at ¼ tank, fuel supply for generator ends, as a safety feature to prevent you from depleting the
RV fuel tank and then not being able to drive to a gas station.

AC
The Thermostat is located on the wall beside the dining table. There is a time delay built in for compressor to
kick in. Please turn off when shutting down generator or disconnecting from park electric so that it is off for
future startup. If AC does not come on, check generator circuit breaker. Round AC vents are located throughout
the cabin so that you can direct the airflow. Heat ducts are located on the floor and along the bottom of
cabinetry.
Water
- The water hookup for city water is located on the exterior, mid driver side of RV. Use the hose supplied with
the RV to hook up to a city water source.
-If you are not hooked up to a city water source, the water pump (on panel beside the stove) needs to be on, for
sinks or toilet, to provide water pressure. You also need water in the onboard water tank. This step is not
necessary when hose attached to city water source. The fill valve for the onboard tank is located inside a small
bin on the rear driver side corner of the RV. It is a gravity fill system.
-Water level monitor for onboard freshwater tank, is located on the test panel beside the stove.
-Water heater needs to be turned on 5 minutes prior to use. It is propane heated. I recommend turning it off
after needed use. On/Off switch located on the test panel by the stove. Propane gas level monitor is also located
on the test panel..

Lavatory
Dump –Hoses are in a container in the main rear storage bin. Dump valves are located in exterior driver side
lav storage bin. Cap must be on during transit or risk $10K fine.
Dump lines may be connected to park facilities when camped, or some parks have a dump station which you
must drive up to upon exiting / checking out. You must dump before returning RV.
Holding tank levels- can be checked via the test panel by the stove. There are two tanks a) grey water which
comes from sink use and b) black water tank which is from toilet.
Dump hoses. Located in the exterior lav bin, have a valve to alternate which tank is dumped. It is recommended
to dump black water (larger outlet line) first, then close the valve, and then follow by dumping grey water tank
(smaller outlet) last. Valves should remain closed during camping, until you are ready to perform a dump.
Tip: Some rest stop facilities have free dump stations that you can usually be located just before the ramp back
onto the highway. The FAQ page on our website CCCRV.com has a link for Sanidumps to search for dump
facilities closest to your location.
Propane
The propane tank is located in a marked exterior bin on the passenger side of the RV. There is a master shut off
valve which is closed during the filling process as a safety measure. If you have no propane flowing to the stove
or hot water heater, it may be turned off at the source.
Tank level can be checked on the test panel, located above the sink.

Car Radio / CD Player
The vehicle radio has a power switch located to the left of the steering wheel, to select power source from either
the house battery or conventional setting from the vehicle battery.
TV/DVD Player
The TV channels need to be set by using the remote control to access the menu feature to perform a channel
scan either: through the cable when hooked up at a park, or by scanning the air using the internal digital antenna
to pick up available channels in your vicinity. The antenna on top of the RV is no longer needed, as analog
signals are no longer transmitted: the TVs now have internal digital antennas.
The TV can be rotated outwards by pressing the lever under the TV upwards, to release it from the locked
position. Always re-secure the TV before travel to avoid damage. To the right of the TV is a master power
switch. The radio located at the entry step contains the DVD player for the TV.
There is also a radio located in the exterior bin next to the side entry door. It has an optional table which can be
mounted to the side of the RV to hold a small TV. Cable and power outlets are adjacent to the radio.

Cable
A park hookup is located at the back of the power shorecord bin at the rear driverside corner of the RV. Once a
coaxial cable is attached to the RV and the park cable source, cable TV is available throughout the RV. You
must run a channel scan on the TVs to assign channels.
Backup camera
The backup camera automatically comes on when the vehicle is put in reverse. When in drive, the power button
must be depressed to turn it on or off. Always use a spotter when backing up, as the cameras cannot capture all
possible obstacles including tree branches above the line of site.
Appliances
Stove –uses propane gas and auto ignites by depressing and then turning the burner nobs. Valve on exterior
LP tank must be open for gas flow.
Microwave / Convection Oven / Half Time Oven –operates as a standard electric device

Fridge
The fridge has a setting for electric, propane, or auto adjust. The gas mode is for use when the vehicle is in a
remote setting. For park electric hookup or generator use, keep mode set on Auto only.
Note: Fridge must be level to operate properly. If you are parked on a steep incline, it will not function.
Note: The first time an RV fridge is powered on after having set several days, it may take up to 3-4 hours to
cool down initially. This is normal for this type of system. Once cool, it can be turned on and off and still
maintain proper cooling levels.
Toilet - Sinks
-These function identical to marine facilities and operate basically similar to home use. Pump can be turned on
when not hooked to park water source to provide usage pressure.
- Always uses RV/Marine TP or single ply TP as the septic systems are more sensitive than home systems. You
do not need to use any of the lav additive stowed in the bathroom but may if necessary.
Exit Switches
Switches are located at the entry step including porch and interior lights.
Battery connect master switch- turns off everything in cabin to ensure battery isn’t drained. Not needed when
hooked up to park electric source.
Stair Lock switch –keeps outer step locked open when the vehicle is parked, so that they do not retract every
time the camper door is opened or closed. Stairs automatically retract when vehicle is started.

Moon roof
Please don’t open the moonroofs during travel. They are not designed to be open while the vehicle is in motion
on the highway.
Slideouts
To operate the slide-outs, the vehicle parking brake must be on. The control panel is located on the side of the
cabinet at the entry door. Slides must be in before moving the vehicle.
In the event of an electrical failure when the slide-out is in the open position, there are two manual cranks which
can be inserted into the access panels on the outside of the slideout so that it can be manually cranked shut for
travel.
Blinds
Blinds can be closed, opened, or opened with a daytime privacy shade. Please do not untie the tension strings
located along the sides of the blind. They are required to be tightly mounted to the wall for the blinds to
function properly.

Privacy Curtains
Sleeping curtains can be drawn to enclose the sleeping compartment above the front cab. Also on board is a
privacy shade for nighttime use, to ensure no one can se inside the RV through the front windshield. It is
attached with snaps to either side of the bunk.
Converting Beds
Dining Table
The dining table can be lowered and cushions moved, to form bed. To convert, move the front table leg
rearwards to un-attach it from the floor mounting plate, then depress the button underneath the table (at the top
of the leg) so that it can swivel upwards. Lift the end of the table and it will disengage from the wall bracket.
Allow it to swivel downwards until it rests on the wood lip at the front side of each bench, so that the table fills
the gap between the two seat benches. Adjust the seat cushions so that they form the mattress for the converted
bed.
Couch bed
Grab the edge of the couch and lift so that the couch open into bed.

Door locks
-The inside of the camper door has a red and a white locking switch. The red switch locks the handles to the
door. It can be opened from the outside with the key, or from the inside red switch. The upper white switch
is an additional security bolt for in- transit travel with children, or to provide additional security. It utilizes
an internal bolt to secure the door and will not allow the door to open until unlocked. It can also be opened
from the outside with a key. Each lock on the exterior of the camper door utilizes a separate brass key (i.e.
there are two keys for the door).
Door & Bin Latches
The camper door can be latched to remain open. This especially useful for windy days, or when used in
conjunction with the screen door.
Most of the bins have bullet latches (see above right) to assist in holding the compartment hatches open when
loading / unloading the bins.
Vehicle Fuel Tank
Fuel tank for the RV is located inside a small storage bin at the rear driver side corner.

Awning
This can be opened when parked and remaining stationary. See owner for demonstration. There is an awning
metal rod for use in unlocking the security latch located at top of roller. The rod is in one of the exterior bins.
To open, unlatch the gray travel clips from the posts. Loosen the black knob at the back of each post. This is
important to allow the inner arm to travel freely as the awning is opened and closed. Using the metal rod
located in the rear bin, hook the awning directional lever which is located on the front end of the awning tube.
Pull it so that it rotates downward a half turn, in the direction of the down arrow. Using the awning rod, hook
the black canvas strap at the center of the awning, and pull the awning open. Then slide the inside arm upwards
until it clicks into place to form an A frame. The black handled levers on the main arm can be used to extend
the length of the arm.

To close the awning: loosen the black knob, depress the grey tab at the upper end of each arm to release the
inner arm. Slide the inner arm down towards the RV. Turn the directional lever on the end of the awning tube
to the up arrow position. Using the canvas strap and rod, allow the awning to roll itself up. Make sure the main
arm is properly seated against the roof of the RV. Tighten the black knobs and close the gray travel latches on
the sides of each post.
Additionally, the bottoms of the posts can be detached from the RV using the quick-disconnect clamps at the
base of the posts, after extending the awning. This allows for a squared frame awning.
Bunk Ladder
There is a ladder for use with the upper sleeping bunk. To attach it, raise it horizontally at the mounting latch
and then lower it into place.
Auxiliary Shower
On the exterior driver side of the RV, is an auxiliary shower which can be used to rinse off before entering the
RV. If the RV is hooked up to a park water source, it is functional. If you are not hooked up to a park water
source, you need water in the fresh water onboard tank, a power source (city electric or generator), and the
water pump turned on to provide water pressure.
Portable Table
Inside the main rear storage bin is a fold-up table which doubles as a lid for additional storage area. It an be
removed and utilized as a portable table.

Roadside Assistance
The RV has a spare tire in the event of a flat. By design, the RV does not include a jack due to the weight of the
vehicle. During normal daylight hours, road rangers are along the main highways and have the capability to
change the tire, usually for free. Otherwise, please call us to have a mobile service dispatched to your location
to change the tire, jumpstart the vehicle or have it towed. If you should undertake any minor issues, please have
either my name and/or the vehicle info listed on the receipt, so that I can arrange reimbursement.
Driving Tips
-Making Turns –Pull up, to account for length of RV, when rounding corners
-Dips and Steep Swells –Take at an angle so you do not bottom out the rear bumper
-Use a spotter when backing up
-Mirrors –objects are closer than they appear
-A SunPass is installed on the windshield. You will be provided a copy o the charges upon your return for
reimbursement.
Note: Wal-Mart has a policy allowing RV drivers to park overnight in Wal-Mart parking lots, should you find
yourself too tired to safely proceed driving.
The RV ladder at the rear of the vehicle is for servicing the roof and appliances only. Please no unauthorized
use, as the roof is a rubber membrane easily damaged.
Smoking
Please no smoking in the RV. This is a family vehicle and I would greatly appreciate it, if you consider that the
RV is other family’s bedroom when they vacation. Thank you.
Pets
Please no pets on board. RV is for human accommodations only.
Returning the RV
-Please fill gas to the level when you picked it up. I will charge for replacement gas.
-You must dump lav-septic tanks before returning. I will charge a $50 fee to do so.
-You do not need to fill the internal water tank prior to return and may wish to travel with minimal amount
for better gas mileage. ¼ tank is adequate for in transit use.
-Please remove any garbage and food items from fridge/freezer.
-You are welcome to use the supplies on board such as charcoal, firewood, plastic cups, paper products, ect.
If you use them up, please be sure to replace them for the next person to use the RV. Propane refill locations
are not always easily accessible, so I would be happy to refill it at a fee of $10 plus actual cost of LP.
-Please exercise a “take a penny, leave a penny” approach towards misc supplies.

Comments:
I strive to ensure that everything on the RV is in good condition and functioning as it should. Like a boat,
constant maintenance is required to fix all the little things that occasionally need replacing. It is not always easy
to know what needs to be addressed, when I am not personally using the RV. Would you please take a moment
to make notes of anything you noticed that needs attention, is broken, or ceased to function, from normal wear
and tear? That way, I can insure that the next person has a positive experience, as well. You can simply leave
this page onboard with your comments.
Thank you.
___________________________________________________________________________________
___________________________________________________________________________________
___________________________________________________________________________________
___________________________________________________________________________________
___________________________________________________________________________________
___________________________________________________________________________________
Customer Testimonials
If you had a great experience or took some great pictures that you would like to share with us, I would be
happy to post them to our website. Simply email me your pics and any comments, and I will include them in
the next scheduled web page update. Thanks
Table of contents
Other Itasca Motorhome manuals