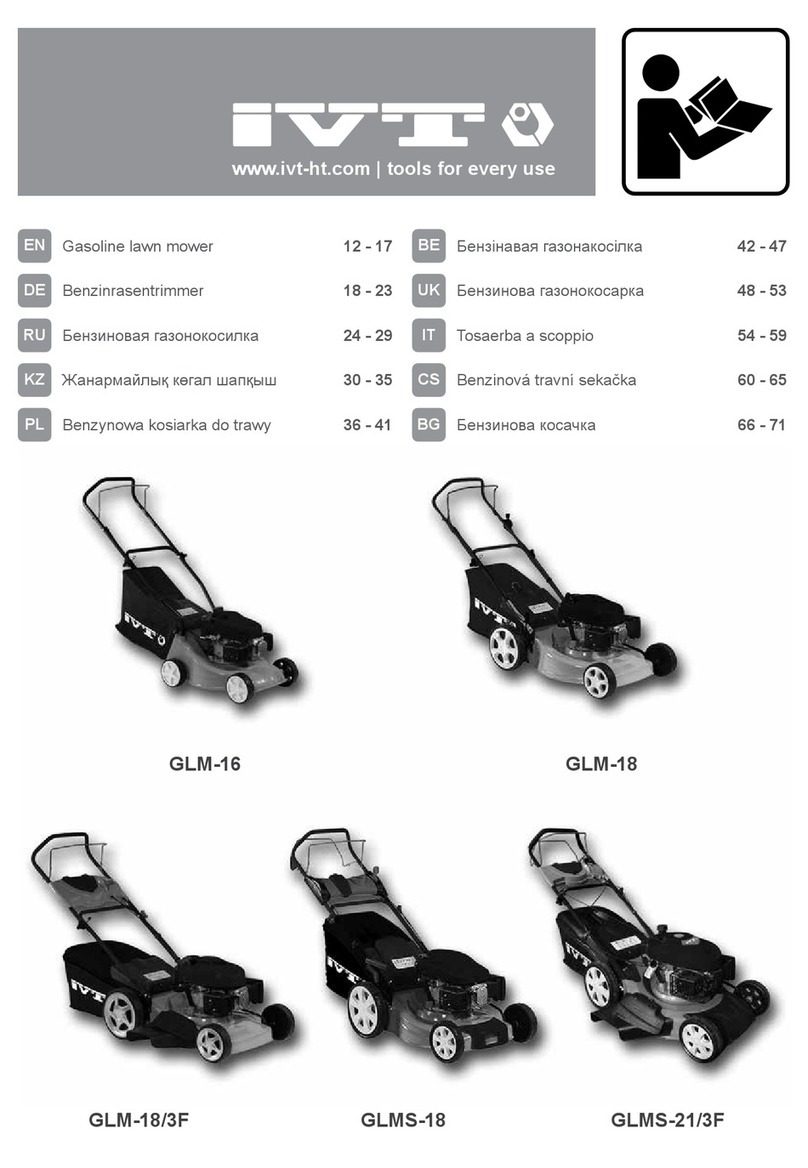
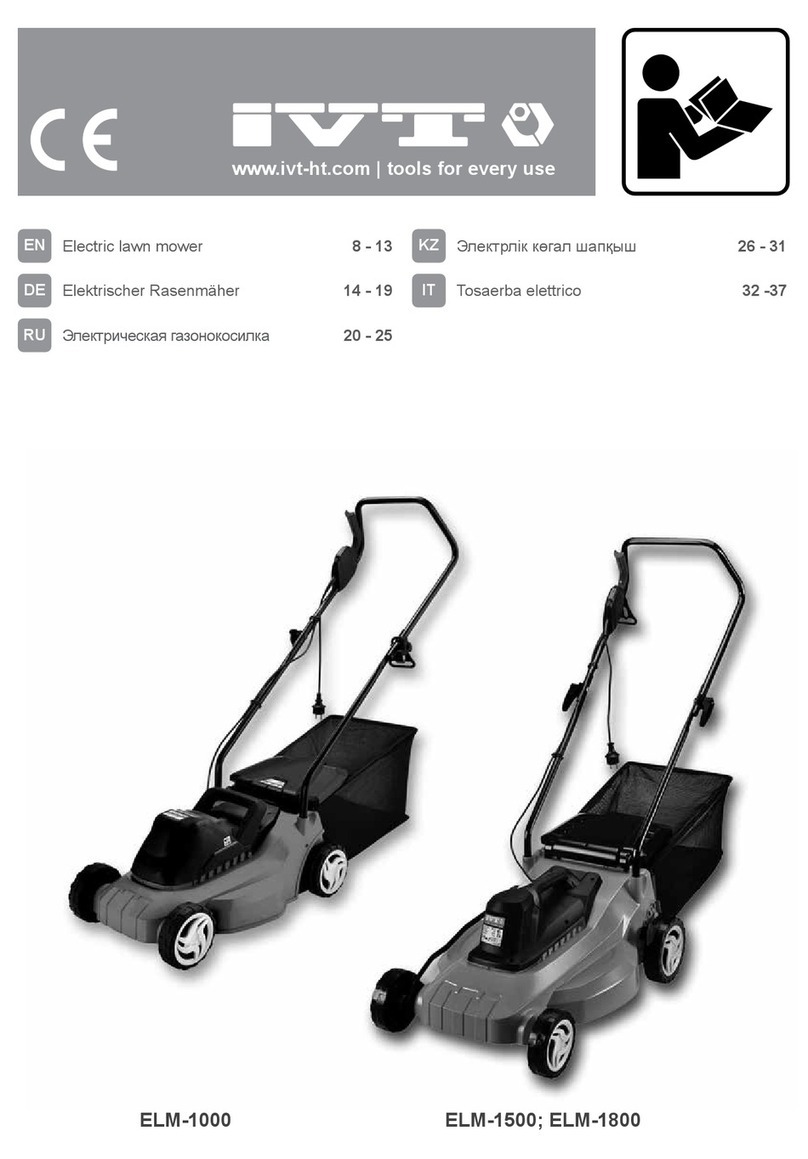
IVT ELM-1400 User manual

www.ivt-ht.com | tools for every use
ELM-900 ELM-1400
EN Electric lawn mower 8 - 15
DE Elektrischer Rasenmäher 16 - 23
RU Электрическая газонокосилка 24 - 31
KZ Электрлік көгал шапқыш 32 - 39
PL Elektryczna kosiarka 40 - 47
BE Электрычная газонакасілка 48 - 55
UK Електрична газонокосарка 56 - 63
IT Tosaerba elettrico 64 - 71
CZ Elektricky trávníkový žací strojek 72 - 79
BG Електрическа косачка за трева 80 - 87

2
EN CONGRATULATION!
Dear customer,
IVT team would like to thank you for your choice and for
the condence you put in our product.
Our aim is always to offer an innovative, high-class-strong
and prize-adequate product to the customer.
We wish you’ll get much satisfaction from all your do-it-
yourself activities, by using this tool.
Your IVT Swiss SA Team
NOTE: Illustrations, gures, photos and contents might
vary slightly due to our program of continuous product
improvements.
DE WIR GRATULIEREN!
Sehr geehrter Kunde,
das Team der Firma IVT dankt Ihnen für Ihr Vertrauen
und für die Wahl unserer Produktion.
Wir streben danach, damit unsere Kunden die Möglichkeit
haben, nur moderne, feste und hochwertige Produkte zu
benutzen.
Wir hoffen, dass mit unseren Werkzeugen Sie ein
wirkliches Vergnügen von der Arbeit bekommen.
Mit freundlichen Grüßen, Team IVT Swiss SA
ANMERKUNG: Bilder, Mengenangaben, Fotos und der
Inhalt der Anleitung können sich kraft der ständigen
Nacharbeit unserer Produktion verändern.
RU ПОЗДРАВЛЯЕМ!
Уважаемый Покупатель,
Коллектив компании IVT благодарит вас за оказанное
доверие и выбор в пользу нашей продукции.
Мы стремимся к тому, чтобы у наших покупателей была
возможность пользоваться только современными,
прочными и высококачественными продуктами.
Надеемся, что с нашими инструментами вы получите
истинное удовольствие от работы.
С уважением, коллектив IVT Swiss SA
ПРИМЕЧАНИЕ: Рисунки, количественные данные,
фотографии и содержание инструкции могут
изменяться в силу постоянного усовершенствования
нашей продукции.
KZ ҚҰТТЫҚТАЙМЫЗ!
Құрметті сатып алушы,
IVT компаниясының ұжымы Сізге бізге сенім
артқаныңыз үшін және біздің өнімімізді таңдағаныңыз
үшін алғыс білдіреді.
Біз Сіздерге инновациялық, жоғарғы классты және
жоғары сапалы өнімді тиімді бағамен ұсынуға үнемі
ұмтылып келеміз.
Біздің құралдарыңызбен сіз өз жұмысыңыздан
рахаттанасыз деп үміттенеміз.
Ізгі ниетпен, IVT Swiss SA ұжымы
ЕСКЕРТУ: Суреттер, сандық мәліметтер және
нұсқаудың мазмұны біздің өнімнің үздіксіз жетілуіне
байланысты өзгеруі мүмкін.

3
PL GRATULUJEMY!
Szanowny Kliencie,
Załoga rmy IVT dziękuje Państwu za okazane
zaufanie i wybranie naszego produktu. Dążymy do
tego, aby nasi klienci mieli możliwość użytkowania
jedynie nowoczesnych, trwałych i wysokojakościowych
produktów.
Mamy nadzieję, że używając naszych narzędzi będziecie
Państwo mieć prawdziwą satysfakcję z pracy.
Z poważaniem, załoga IVT Swiss SA
UWAGA: Rysunki, dane ilościowe, fotograe i treść
instrukcji mogą ulegać zmianom z powodu doskonalenia
naszych produktów.
BE ВІНШУЕМ!
Паважаны Кліент,
Кампанія IVT дзякуе Вам за выбар і давер, аказаны
нашай марцы. Наша мэта - заўсёды прапаноўваць
Вам інавацыйны, якасны інструмент па прымальнай
цане.
Спадзяемся, што з нашымі інструментамі вы
атрымаеце задавальненне ад працы.
Кампанія IVT Swiss SA
НАТАТКА: Малюнкі, колькасныя дадзеныя,
фатаграфіі і ўтрыманне інструкцыі могуць
змяняцца ў сілу сталага ўдасканалення нашай
тавараў.
UK ВІТАЄМО!
Шановний Клієнт,
Компанія IVT дякує Вам за вибір та довіру до нашої
марки. Наша мета - завжди пропонувати Вам
інноваційний, якісний інструмент за прийнятною
ціною.
Сподіваємося, що з нашими інструментами ви
отримаєте задоволення від роботи.
З повагою, колектив IVT Swiss SA
ПРИМІТКА: Малюнки, кількісні дані, фотографії та
зміст інструкції можуть змінюватися внаслідок
постійного удосконалення нашої продукції.
IT CONGRATULAZIONI!
Gentile cliente,
l’azienda IVT desidera ringraziarLa per la scelta e per la
ducia dimostrata nel nostro prodotto.
Il nostro obiettivo è offrire sempre prodotti innovativi che
garantiscano un adeguato rapporto qualità/prezzo.
Le auguriamo che i suoi lavori di bricolage possano
diventare un piacere, utilizzando il nostro prodotto.
La squadra IVT Swiss SA
Nota: illustrazioni, gure, foto e contenuti potrebbero
variare leggermente a causa del nostro programma di
continuo miglioramento del prodotto.

4
CS GRATULUJEME!
Vážený zákazníku,
tým IVT vám chce poděkovat za důvěru, kterou jste do
nás vložili nákupem našeho produktu. Naším cílem je
přinášet kvalitní, pokrokové, odolné a cenově výhodné
výrobky.
Přejeme vám mnoho spokojenosti při vašem kutilství s
pomocí tohoto nástroje.
Váš tým IVT Swiss SA
POZN.: ilustrace, obrázky, fotograe a obsah se mohou
mírně lišit od skutečnosti, neboť své produkty neustále
vyvíjíme a vylepšujeme.
BG ПОЗДРАВЛЕНИЯ!
Уважаеми клиенти,
Колективът на фирма IVT ви благодари за оказаното
доверие и за избора, направен в полза на нашия
продукт. Ние винаги се стремим да предоставим на
клиентите си само иновационна, висококачествена
продукция от най-висок клас.
Надяваме се, че с нашите инструменти ще получавате
истинско удоволствие от работата.
С уважение, колективът на IVT Swiss SA
ЗАБЕЛЕЖКА: Рисунките, количествените данни,
снимките и съдържанието на инструкцията
могат да бъдат променяни поради постоянното
усъвършенстване на нашата продукция.

5
ELM-900
ELM-1400
11
4
7
2
5
1
14
9
15
16
6
8
3
10
11
4
7
2
5
1
14
13
15
16
6
8
3
10

6
[F1] [F2]
[F3] [F4]
[F5]
(ELM-900)
(ELM-1400)
STEP 3
STEP 2
STEP 1
910
29
12
3
14
17
28
13
11
24
15
4
7
8
2
23
22
15
6
3
16
19
6
18
20

7
[F6] [F7]
max. 20°
26
25
27

8
EN
Instruction manual
PART LIST
1. Cover
2. Lower part of handle
3. Upper part of handle
4. Knob
5. Aperture for handle
6. Switch box
7. Cable hook
8. Cable clips
9. Grass catcher
10. Deector
11. Wheel
12. Metal frame
13. Nylon bag
14. Motor housing
15. Safety button
16. Trigger lever
17. Handle tapping screws
18. Handle bolts
19. Switch box screws
20. Ferrule nut
21. Height adjustment panel
22. Wheel hub
23. Sprocket
24. Holes for selecting the cutting height
25. Blade
26. Blade xing screw
27. Fan
28. Grass catcher clamp
29. Leather surface
CONTENT OF THE BOX
Instruction manual (1 pc), grass catcher (1 pc.).
INTENDED USE
This model of electric lawn mower is intended for grass
mowing, other uses are not permitted. It is only suitable
for private use in home and hobby gardens. Mowers for
private home and hobby garden use are considered to
be those used for the care of private grass areas and
lawns, but not for use in public areas, parks, sports
areas, and in agriculture and forestry.
SAFETY REGULATION FOR THE USE
General safety rules
The following listed safety instructions should serve you
for the right use of the tool and for the protection of your
own safety, therefore, please read this very carefully.
When passing this tool to a third person, these
instructions must be handed too.
Retain this user’s manual and all other literature supplied
with your tool for any future reference.
Comply with all the safety information and the warnings
on the tool.
Be familiar with the controls and the proper use of the
tool before attempting to use it and above all, make sure
you know how to stop to use it in case of emergency.
Following these simple instructions will also maintain
your tool in good working order.
∙The tool must be assembled correctly before use.
∙Only use the tool for its designed purposes.
TOOL SPECIFICATIONS
Model ELM-900 ELM-1400
Voltage ~ Frequency [V ~ Hz] 230 ~ 50 230 ~ 50
Rated power [W] 900 1400
No-load speed [RPM] 2950 2950
Grass catcher capacity [L] 27 40
Cutting width [mm] 320 400
Height of cut [mm] 25 - 40 - 60 25 - 40 - 62
Number of cutting steps 3 3
Wheel diameter [mm] 127 - 152 152 - 152
Carter material plastic plastic
Drive system hand push hand push
Sound pressure level [dB(A)] 87.73 (K=1.06) 92.27 (K=1.12)
Sound power level [dB(A)] 88.38 (K=1.06) 93.09 (K=1.12)
Weight [Kg] 10.5 15.5
Safety class II II

9
EN
Instruction manual
∙On the tool, there may be also decals and further
indications about the safety equipment to use that
must be considered. The prevention of accidents is
dependent upon the awareness, common sense and
proper training of everyone involved in the operation,
transport, maintenance and storage of the tool.
∙Never leave the tool unattended.
∙Never allow children to use the tool. Children
should be supervised to ensure that they do not play
with the tool.
∙Keep children and pets away. All onlookers should be
kept at a safe distance away from the tool when it is in use.
∙The user is responsible for third parties while
working with the tool.
∙People who aren’t acquainted with the operating
instructions, children, juveniles who have not yet
reached the minimum age for using this tool and people
under the inuence of alcohol, drugs or medication
are not allowed to use the tool. Local regulations may
restrict the age of the operator.
WARNING! The consumption of
alcohol, medication and drugs, plus
states of illness, fever and fatigue will
affect your ability to react. Do not use
this tool in any of these situations.
∙Make sure that all the protective devices (if present)
are tted and are in good condition.
∙Never operate the tool with defective safety devices
or guards (if present), or without safety devices in
place.
∙Inspect the entire tool to look for loose parts (e.g.
nuts, bolts, screws, etc.) and for any damage. Check
at frequent intervals if screws and bolts (if present)
are properly tight to be sure the equipment is in safe
working condition. Repair or replace them, if necessary,
before using the tool. Serious injury to the operator and
to the bystanders could result if there’s any damage to
the tool.
∙While using the tool, dress properly. Do not
wear loose clothing or jewelery that could become
caught by the tool. Wear suitable working clothes.
It is recommended that legs and feet are covered, to
protect them from eventual ying debris. Do not work
barefoot or wearing open sandals. Long air should be
tided back.
∙Keep handles and grips dry, clean and free from
oil and grease.
∙Use proper protective equipment. Use safety
glasses and safety gloves. Also use a dust mask during
pulverulent operations or if exhaust gases are present.
When necessary, use also non-slipping boots or shoes,
hardhat and earplugs. If the noise level exceeds 85
dB(A), ear protection is obligatory.
WARNING! Use personal protective
equipment! Safety devices and
personal protective equipment protect
your own health and the health of
others and ensure a trouble-free
operation of the tool.
∙Do not start to use the tool if it is in an inverted
position or it is not in the right working order.
∙Ensure that you have a good stand, while you
operate with the tool. Keep proper footing and balance
at all times.
∙Keep work area clean. Cluttered areas invite
injuries. Before use, all foreign bodies must be removed
from the working area, also pay attention to foreign
objects during operation.
∙Do not force the tool.
∙Only work in daylight or sufciently good articial
light. Never operate the tool without good visibility.
∙Be careful not to drop the tool or hit it against
obstacles.
ATTENTION! Stay alert. Watch what you are doing.
Distraction can cause you to lose control. Use
common sense.
Electrical safety rules
ATTENTION! When using electrical tools, the
following safety instructions should be observed to
prevent the risk of electric shock, personal injury
and re. Read and observe these instructions
carefully before using the tool.
∙It is recommended for increased electrical safety
to use a Residual Current Device (RCD) with a tripping
current of not more than 30 mA. Always check your RCD
every time you use it. Consult a reliable electrician.
WARNING! The use of an RCD or
other circuit breaker unit does not
release the operator from the safety
instructions and safe working
practices given in this manual.
∙The main voltage must correspond to the one
marked on the labels and on this manual. Do not use
other sources of power.
∙Before inserting the plug in the main socket, make
sure that the socket ratings are correct and correspond
to those indicated on the rating label on the appliance.
∙Avoid body contact with grounded surfaces such as

10
EN
Instruction manual
pipes, radiators, ranges and refrigerators. This increases
risk of electric shock if your body is grounded.
CAUTION! Touching electried parts
may cause death by electric shock or
burn.
∙Never move the appliance by pulling at the cables.
∙Do not abuse the cord. Keep it away from heat, oil,
sharp edges or moving parts.
∙Always guide the connection line safely.
∙Do not use power tools near ammable liquids or
gases.
∙Always disconnect the appliance from the mains
supply before transporting it to other places.
CAUTION! The appliance should
always be switched off at the mains
before disconnecting any plug and
socket connector or extension
cables.
∙Never pass the appliance over its own cord or
extension cable, while the tool is working. Make sure
you always know where the cable is.
∙Do not wire a power cable directly into your device
yourself. Instead, take the device to your nearest
authorized Service Center.
∙To avoid danger, damaged power cord should
be replaced by manufacturer or its agent, or similar
qualied person.
∙Immediately unplug the tool when its cable is
damaged or cut.
ATTENTION! DANGER OF ELECTRIC
SHOCK!
Consider working area environment. Do not expose
power tools to rain. Do not use power tools in damp
or wet locations. Keep work area well lit and dry. Try
to prevent the device from getting wet or being
exposed to humidity. Do not leave it outside
overnight. Water entering a power tool will increase
the risk of electric shock.
∙The power supply cable should be checked
regularly and, before using it, make sure the cable is
not damaged or worn out. If the cable is not in good
condition, do not use the appliance; take it to an
authorized service Center.
∙When tool is used outdoor, only use an extension
cable that is suitable for outdoor use and which is
marked for this specic use. Keep it away from the
working area, from damp, wet or oily surfaces and away
from heat and ammable materials.
∙Avoid any accidental starting: make sure that the
power switch (if present) is in the «off» position, before
plugging the tool in.
∙Remove adjusting keys or wrenches before turning
the tool on.
∙Do not use the tool if the switch does not turn the
tool on or off. Any tool that cannot be controlled with the
switch is dangerous and must be repaired.
WARNING! During the use of certain
power tools, some dust containing
chemicals known to cause cancer,
may occur.
Some of these chemicals are: lead from lead based
paints, crystalline silica from bricks and cement and
other masonry products, arsenic and chromium from
chemically treated lumber and other dangerous
products. If dust is present, your risk from these
exposures varies, depending on how often you do this
type of work. To reduce your exposure to these
chemicals, any time you do pulverulent operations,
work in a well ventilated area and work with
approved safety equipment, such as dust masks
that are specially designed to lter out microscopic
particles.
∙If the appliance strikes a foreign body, examine the
device for signs of damage and carry out any necessary
repairs before restarting and continuing to work.
∙If the appliance starts to vibrate abnormally, turn
it off and check for the cause immediately. Vibration is
generally a warning of trouble.
∙Always switch off the appliance and wait until
the device completely stops whenever you leave
the machine, before carrying out maintenance,
before changing accessories, checking, cleaning,
troubleshooting or working on the appliance.
∙It is forbidden to move or modify any of the internal
parts of the device.
Specic safety rules
∙Do not put hands and feet in the vicinity of rotating
parts.
∙The use of the appliance is only permitted if the
safety distance provided by the guide bar is complied
with.
∙Always guide the connection line safely.
∙Do not operate the appliance in wet grass.
∙Ensure that you have a good a stand, especially
on slopes.
∙Always walk across the face of slopes, never up

11
EN
Instruction manual
and down. Exercise extreme caution when changing
direction on slopes. Do not operate the appliance on
excessively steep slopes.
∙Only guide the appliance at walking pace, never
run.
∙Use extreme caution when reversing or pulling the
appliance towards you.
∙Always switch off the appliance, disconnect the
plug and wait until the cutting blade stops whenever you
leave the machine; before carrying out maintenance,
before clearing a blockage, before checking, cleaning
or working on the appliance.
∙Never pick up or carry an appliance while the motor
is running. Pull the plug from the socket.
∙Stop the rotating parts if the appliance has to be
tilted for transportation. Do not operate the cutting
means when crossing surfaces other than grass, and
when transporting the appliance to and from the working
area.
∙Use caution when cleaning or performing
maintenance on the appliance.
UNPACKING
When unpacking, check to make sure that all
components are included. Refer to the drawings on this
manual. If any parts are missing or broken, please call
an IVT assistance center.
ASSEMBLY INSTRUCTIONS
Mounting the handle [F1]
∙Thread the cable hook (7) in the upper part of
handle (3) and slide it along the upper part of the handle
(3) to the top.
∙Place the lower part of handle (2) in the apertures
for the handles (5) and lock the position using the
handle self-tapping screws (17).
∙Mount the upper part of the handle (3), fastening
it to the lower part of handle (2) using handle bolts (18)
and knobs (4).
∙Ensure that the cable is fastened to the lower part
of handle (2) using the cable clips (8) in the package.
∙Anchor the cable in cable hook (7), which eliminates
any tension thereon. Ensure that the cable is sufciently
slack.
∙Ensure that the cable does not get tangled up when
folding the upper part of the handle (3) up and down.
Mounting the switch box (6) and connecting the
mains [F2]
∙Fix the switch box (6) to the upper part of the
handle (3) using the supplied switch box screws (19).
∙Secure the appliance connection line with the cable
clips (8).
∙Plug the appliance connection line into the switch
box (6) and secure it with the cable hook (7), which
eliminates any tension thereon.
The loop of the mains wire must be long enough for
the cable hook (7) to be able to slide from one side
to the other. Ensure that the cable is sufciently
slack.
Mounting the grass catcher (9) [F3]
(ELM-900)
∙Put both parts of the grass catcher (9) together, so
that they could wedge in each other and block them with
the grass catcher clamps (28) (if present).
∙Lift up the deector (10) and, whilst holding it in
this position, insert grass catcher (9). The plastic clips
should engage.
(ELM-1400)
∙Put the nylon bag (13) of the grass catcher (9) onto
the metal frame (12), let the leather surface (29) at the
underside.
∙Unclench each leather side using a tool (for
example, a screwdriver), make them to wrap the four
metal wires on the metal frame (12).
∙Snap plastic latches.
∙Open the deector (10) and, while keeping it, place
the grass catcher (9) at that, the rods of the metal frame
(12) must t completely into the plastic hooks of the case.
Setting the cutting height [F4]
CAUTION! Make the adjustment of
cutting height only with the motor
switched off and the blade shaft at a
standstill.
The cutting height is adjusted directly at the four wheels
(11). Three different cutting height settings are available
for each individual wheel (11).
All wheels (11) should be adjusted on the same position
for mowing.
To adjust the cutting height:
∙Unscrew the wheel hubs (22) by turning anti-
clockwise and pull off together with wheels (11).
∙Position the wheel hubs (22) and wheels (11) into
one of the holes for selecting the cutting height (24) and
choose the desired height.
∙Ensure that all sprockets (23) are placed at the
same height.

12
EN
Instruction manual
INITIAL OPERATION
Always use the correct supply voltage: the power supply
voltage must match the information quoted on the tool
identication plate.
SWITCHING ON / OFF [F5]
Before connecting up the lawn mower to the electric
power supply, make sure that the mains supply voltage
is 230V/50Hz and being suitable for use only in premises
having a service current capacity equal to or greater
than 100A per phase with a normal voltage of 400/230V.
CAUTION! Do not start the appliance if
it is standing in long grass.
Switching ON
∙Press the safety button (15) of the switch box (6)
and then pull the trigger lever (16) against the upper part
of the handle (3).
∙Keep the trigger lever (16) hold while you release
the safety button (15). If you release the trigger lever
(16), the motor will stop.
∙Once the motor is running, push the lawn mower
manually.
Switching OFF
∙To stop the appliance, release the trigger lever (16)
and it automatically returns to its start position and the
motor will stop.
INSTRUCTION FOR USE [F6]
Mowing tips [F6]
CAUTION! Before starting work, make
sure that the area to be cut is free of
stones, debris, wires and any other
objects.
∙Make sure all fasteners (screws, nuts, etc.) are
always fully tightened so that you can work safely with
the appliance.
∙Check the grass catcher for wear and tear at
regular intervals.
∙Always operate with the deector (10) or grass
catcher (9) in the correct position.
∙Select the working depth depending upon the state
of the lawn and the actual height of the grass.
∙High grass should be cut in layers, always beginning
from the top. The recommended cutting depth of one go
is 4 cm maximum.
∙To start the appliance, the cutting device must be
completely free to move.
∙Do not cut damp or wet grass. Dry grass will give
excellent results.
∙Always let the cutting blade (25) rotate at top speed;
do not work in such a way as to overload the appliance.
∙Never pass the appliance over the extension cable
while it is running; make sure it is always in a safe
position behind your back. Place the extension cord
safely on a path or the area already mowed.
∙Guide the appliance forward slowly from the
beginning, pay attention to the cutting speed; when
notice the cutting speed is dropping or even the motor
stops, the wrong moving speed or cutting depth has
been selected.
∙Empty the grass catcher (9) once it is full in order to
prevent the blade (25) from becoming clogged and the
motor from being overload.
Blade (25) [F7]
∙Worn blade (25) invites poor performance and
overload of motor.
∙Check the blade (25) before each use. Sharpen it
frequently (with a grind wheel) or replace the blade (25)
with a new one when necessary.
∙It is recommended to do this by a specialist.
∙Ensure that it is always balanced (an unbalanced
blade (25) will cause dangerous vibrations). To check
for balance, insert a round rod through the central hole
and support the blade (25) horizontally. A balanced
blade (25) will remain horizontal. If the blade (25) is
not balanced the heavy end will rotate downwards.
Reshape the heavy end until the blade (25) is currently
balanced.
CAUTION! Disconnect the mains and
wear protective gloves.
To disassemble the blade (25):
∙Hold the blade (25) with a gardening glove (not
included) so that it could not rotate while unscrewing
the blade xing screw (26) by turning anti-clockwise the
spanner.
∙Check the condition of the fan (27), and replace any
parts, which are damaged.
∙If necessary, take the blade (25) out and replace it
with a new one.
∙The blade xing screw (26) must be torque to
15Nm.
∙When reassembling, make sure that the cutting
edges face in the direction of the motor rotation.

13
EN
Instruction manual
MAINTENANCE AND STORAGE
Before any work on the device itself,
pull the mains plug.
∙Always keep the tool and the ventilation slots (if
present) cleaned. Regular cleaning and maintenance of
the appliance will ensure efciency and prolong the life
of your tool.
∙If the tool should fail despite the rigorous
manufacturing and testing procedures, the repair should
be carried out by an authorized IVT customer service.
∙Keep all nuts, bolts, and screws tight, to be sure the
tool is in safe working condition.
∙Replace worn or damaged parts for safety.
∙Use only original spare parts. Parts not produced
by manufacturer may cause poor t and possible injury.
∙Store the tool in a dry room out of reach of kids and
away from any ammable material.
∙Never wet the device or spray water on it!
ENVIRONMENTAL PROTECTION
Recycle raw materials instead of
disposing as waste.
Tool, accessories and packaging should be sorted for
environment-friendly recycling.
The plastic components are labeled for categorized
recycling. These instructions are printed on recycled
paper manufactured without chlorine.

14
EN
Instruction manual
TROUBLESHOOTING
CAUTION! Switch off and remove plug from mains before investigating fault.
Conventional trouble Trouble reason Remedy
Motor does not start ∙Power supply is absent.
∙The outlet is defective.
∙The extension cord is damaged.
∙The grass is too long.
∙The safety button has been
tripped.
∙Check power supply.
∙Try another outlet, replace the
outlet if necessary
∙Check the cable, replace if
necessary.
∙Increase the mowing height.
∙Allow the engine to cool then
increase the cutting speed.
Motor shuts down ∙Line voltage does not
correspond to the rating on the data
plate.
∙The extension cord is damaged.
∙Internal wiring defect.
∙Use the proper line voltage
∙Check the cable, replace if
necessary.
∙Contact an authorized Service
Center.
The machine leaves an unevenly
cut path
∙The cutting height is too low.
∙The blade (25) is dulled.
∙The lower part of the machine
is blocked.
∙The blade is incorrectly
mounted (reversed).
∙Change the mowing height.
∙Replace the blade (25).
∙Clean the machine.
∙Turn the blade (25) round and
mount it correctly.
The blade (25) won’t turn ∙The blade (25) is blocked with
grass.
∙The blade-xing screw (26) has
come undone.
∙Remove the grass.
∙Tighten the blade-xing screw
(26).
If the problem cannot be remedied on the basis of the information above, please take the device to an authorized
IVT Service Center.

15
EN
Instruction manual
ATTENTION! DO NOT ATTEMPT TO REPAIR THE PRODUCT BY YOURSELF AND DO NOT
TAMPER WITH IT! Any operation of repairing or extraordinary maintenance must be carried
out only by a qualied and authorized IVT Service Center. Do not try to modify any internal
part of the product! THIS WILL COMPLETELY VOID THE WARRANTY AND IT COULD CAUSE
SERIOUS INJURY AND DAMAGE.

16
DE
Bedienungsanleitung
ZUBEHÖRTEILE
1. Deckel
2. Unterteil des Griffes
3. Oberteil des Griffes
4. Spannügel
5. Öffnung für Griff
6. Vermittlungstechnisches Gehäuse
7. Haken für Kabel
8. Klamern für Kabel
9. Sammelbehälter des abgeschiedenen Gras
10. Schieber
11. Rad
12. Metallische Einfassung
13. Nylonsammelbehälter
14. Körper der Kraftmaschiene
15. Schuztknopf
16. Hebel
17. Holzschrauben für Griff
18. Schrauben für Griff
19. Schrauben für vermittlungstechnisches Gehäuse
20. Spannmutter
21. Regulierungspanel
22. Radbock
23. Kettennuß
24. Öffnungen für Wahl des Schnittes
25. Messer
26. Fixierschraube für Messer
27. Ventilator
28. Abstützen Sammelbehälter des abgeschiedenen
Gras
29. Lederwand
BOXGEHALT
Bedienungsanleitung (1 St.), Sammelbehälter des
abgeschiedenen Gras (1 St.).
VORAUSSICHTLICHE BENUTZUNG
Gegebene elektrische Rasenmäher sindnur für
Grasschäftung beabsichtigt. Rasenmäher ist
für Individuelgebrauch in den Garten und in den
Nebenwirtschahten beabsichtigt. Rasenmäher für
private Anwendung werden für Aufrechterhaltung
private Rasenlattformen und Rasenächen
gebrauchen; sie sind für die Plätze des sozialen
Gebrauches, Parks, athletischer Felder, ebensogut
wie landwirtschaftlichenLändereien und Wälder nicht
beabsichtigt.
ARBEITSSICHERHEIT BEI DER
BENUTZUNG
Allgemeine Regeln der Arbeitssicherheit
Folgende Anleitungen zur Arbeitssicherheit helfen
Ihnen das Werkzeug richtig benutzen und Ihre eigene
Sicherheit gewährleisten. Deswegen lesen Sie sie
besonnen und aufmerksam.
Im Falle der Übergabe des Werkzeuges für die
Benutzung eines Dritten, geben Sie ihm auch
vorliegende Anleitungen der Arbeitssicherheit.
Behalten Sie diese Anleitung und sonstige Literatur, die
mitgeliefert werden. Wenden Sie sich an sie, wenn die
Fragen entstehen.
Folgen Sie strikt den Regeln der Arbeitssicherheit und
TECHNISCHE DATEN DES WERKZEUGES
Modell ELM-900 ELM-1400
Nennspannung ~ Frequenz [V ~ Hz] 230 ~ 50 230 ~ 50
Nennaufnahmeleistung [W] 900 1400
Leerlaufdrehzahl [1 min−1]2950 2950
Volum der Sammelbehälter [l] 27 40
Spanungsbreite [mm] 320 400
Schnitthöhenbereich [mm] 25 - 40 - 60 25 - 40 - 62
Anzahl der Schritte des Schnittes 3 3
Raddurchmesser [mm] 127 - 152 152 - 152
Gehäusematerial Kunststoff Kunststoff
Antriebssystem manuelles Schieben manuelles Schieben
Schalldruck [dB(A)] 87.73 (K=1.06) 92.27 (K=1.12)
Schalleistung [dB(A)] 88.38 (K=1.06) 93.09 (K=1.12)
Gewicht [kg] 10.5 15.5
Schutzklasse II II

17
DE
Bedienungsanleitung
Warnungen, die am Werkzeug angegeben sind.
Vor der Arbeit machen Sie sich mit der
Werkzeugsteuerung bekannt, aber, vor allem, studieren
Sie die Verfahren seines Nothalts.
Indem Sie diesen einfachen Anleitungen folgen, werden
Sie Ihr Werkzeug im einwandfreien Zustand halten.
∙Vor dem Einsatz ist das Werkzeug richtig zu
montieren.
∙Setzten Sie das Werkzeug streng zweckgemäß.
∙Nehmen Sie Warnungstafeln und Hinweise
am Werkzeug und studieren Sie sie aufmerksam.
Aufmerksamkeit, vernünftiges Herangehen zur Arbeit
und eine entsprechende Ausbildung von Personen,
die am Betrieb, Transportieren, an der Wartung und
Lagerhaltung des Werkzeuges teilnehmen, helfen
Unfälle verhindern.
∙Lassen Sie das Werkzeug ohne Aufsicht nicht.
∙Lassen Sie die Benutzung des Werkzeuges durch
Kinder nicht zu. Erlauben Sie den Kindern nicht, mit
dem Werkzeug zu spielen. играть с инструментом.
∙Lassen Sie das Aufnden von Kindern und
Tieren in der Nähe des Werkzeuges nicht zu. Die, die
den Wunsch haben, die Arbeit des Werkzeuges zu
beobachten, sollen sich im sicheren Abstand von ihm
benden.
∙Bei der Arbeit mit dem Werkzeug haftet der
Benutzer für die Sicherheit von Dritten.
∙Personen, die Bedienungsanleitung nicht studiert
haben, Kinder, Minderjährige, die das Alter, das die
Benutzung des Werkzeuges erlaubt, nicht erreicht
haben, sowie Personen, die sich im Alkohol- oder
Rauschzustand oder unter Wirkung medizinischer
Präparate benden, werden zur Arbeit mit dem
Werkzeug nicht zugelassen. Das Alter des Bedienenden
wird durch örtliche Rechtsvorschriften bestimmt.
VORSICHT! Alkohol, einige
Heilmittelpräparate und berauschende
Mittel sowie Krankheit, Fieber
und Müdigkeit vermindern die
Geschwindigkeit der Reaktion. In
oben genannten Fällen benutzen Sie
das Werkzeug nicht.
∙Versichern Sie sich, dass alle Schutzeinrichtungen
(falls vorhanden) installiert und nutzungsfähig sind.
∙Benutzen Sie das Werkzeug ohne
Schutzeinrichtungen (falls vorhanden), oder falls sie
beschädigt sind, nicht.
∙Prüfen Sie das Werkzeug in bezug auf den Bestand
von losen Teilstücken (Muttern, Bolzen, Schrauben
usw.) oder Beschädigungen. Um sichere Arbeit des
Werkzeuges zu gewährleisten, prüfen Sie regelmäßig,
ob Bolzen und Schrauben gut festgezogen sind (falls
vorhanden). Bei Bedarf führen Sie vor dem Einsatz
des Werkzeuges ihre Reparatur oder ihren Austausch
durch. Im Falle des Einsatzes des beschädigten
Werkzeuges können dem Bedienenden oder Dritten
ernste Verletzungen zugefügt werden.
∙Verwenden Sie bei der Arbeit eine entsprechende
Arbeitskleidung. Weite Kleidung, Schmuckstücke können
von beweglichen Teilen mitgenommen werden. Arbeiten
Sie nur in entsprechender Arbeitskleidung. Schützen
Sie ihre Beine und Füße vor auseinanderiegender
Feine. Arbeiten Sie barfuß oder in offenen Sandalen
nicht. Tragen Sie langes Haar hinten zusammen.
∙Halten Sie Haltegriffe und Halter trocken und
sauber.
∙Verwenden Sie entsprechende PSA. Verwenden
Sie Schutzbrille und Handschuhe. Bei der Arbeit mit
Pulvern oder bei dem Auswurf von Abgasen verwenden
Sie den Staubrespirator. Bei Bedarf ziehen Sie
gleitsichere Schuhe, den Schutzhelm und schützen Sie
ihre Gehörorgane mit Ohrstöpseln. Wenn die Lautstärke
85 dB(A) überschreitet, verwenden Sie unbedingt
Gehörschütze.
VORSICHT! Verwenden Sie
persönliche Schutzausrüstung!
Die Schutzeinrichtungen und PSA
gewährleisten die Sicherung ihrer
Gesundheit und die Gesundheit der
Umstehenden sowie garantieren
störungsfreie Arbeit des Werkzeuges.
∙Lassen Sie das Werkzeug nicht an, wenn es
umgedreht oder im Ruhezustand ist.
∙Während der Arbeit nehmen Sie die
Beharrungsstellung. Halten Sie immer das
Gleichgewicht.
∙Halten Sie die Sauberkeit im Arbeitsbereich ein.
Auf den gesperrten Abschnitten ist ein hohes Niveau
von Unfällen. Vor dem Einsatz des Werkzeuges räumen
Sie von der Arbeitsäche alle Fremdkörper auf sowie
vermeiden Sie den Eintritt von Fremdkörpern unter das
Werkzeug während der Arbeit.
∙Drücken Sie stark auf das Werkzeug während der
Arbeit nicht.
∙Benutzen Sie das Werkzeug nur bei gutem Tages-
oder Kunstlicht. Benutzen Sie das Werkzeug bei
schlechter Sicht nicht.
∙Lassen Sie das Werkzeug nicht fallen, lassen
Sie den Anstoß des Werkzeuges auf irgendwelche
Hindernisse nicht zu.
VORSICHT! Gut aufpassen. Schauen Sie von dem
durch das Werkzeug bearbeitenden Stück nicht
weg. Indem man ablenkt, kann man die Steuerung
verlieren. Arbeiten Sie vernünftig.

18
DE
Bedienungsanleitung
Regeln der elektrischen Sicherheit
ACHTUNG! Um den Stromschlag, die
Schadenzufügung der Gesundheit oder
die Entammung bei der Verwendung von
Elektroinstrumenten zu vermeiden, muss man
folgende Arbeitsschutzvorschriften beachten.
Vor dem Einsatz des Werkzeuges lesen Sie diese
Anleitungen und folgen Sie ihnen streng.
∙Um ein entsprechendes Sicherheitsniveau
sicherzustellen, empehlt es sich, die
Differentialschutzanlage (DSA) zu verwenden, die auf
den Abschaltstrom nicht mehr als 30 mA errechnet
ist. Prüfen Sie die Einsatzfähigkeit der DSA bei jedem
Einsatz. Lassen Sie sich von einem qualizierten
Elektriker beraten.
ACHTUNG! Der Einsatz der PSA
oder einer anderen Einrichtung
der Schutzabschaltung entbindet
den Bedienenden von der
obligatorischen Bekanntmachung
mit Arbeitsschutzvorschriften und
Methoden unfallfreier Arbeit, die in
dieser Anleitung angegeben sind.
∙Die Netzspannung soll dem Wert, der auf dem
Etikett und in der Anleitung angegeben ist, entsprechen.
Verwenden Sie andere Speisungsquellen nicht.
∙Vor der Anschaltung des Werkzeuges an das Netz
versichern Sie sich, dass die Steckdose den Angaben,
die auf dem Etikett angegeben sind, entspricht.
∙Berühren Sie mit dem Körper geerdete Flächen
(Röhre, Heizkörper und Kältevorrichtungen) nicht. Bei
der Erdung durch den Körper erhöht sich das Risiko des
Stromschlages.
VORSICHT! Zur Vermeidung der
VerbrennungoderderStromschädigung
Leitstücke nicht berühren.
∙Ziehen Sie für die Netzschnur bei der Verschiebung
des Werkzeuges nicht.
∙Benutzen Sie die Netzschnur mit Vorsicht. Schützen
Sie die Netzschnur vor Wärmeeinwirkung, vermeiden
Sie ihren Kontakt mit Schmierstoffen sowie mit scharfen
Sachen oder beweglichen Teilen.
∙Seien Sie mit der Netzschnur vorsichtig.
∙Verwenden Sie Elektroinstrumente in der Nähe
von leichtentammbaren Flüssigkeiten und Brenngasen
nicht.
∙Bevor Sie das Werkzeug auf einen anderen Platz
übertragen, schalten Sie es von dem Netz frei.
VORSICHT! Das Werkzeug ist zuerst
auszuschalten und dann von der
Steckdose oder Verlängerungsschnur
freizuschalten.
∙Drücken Sie die Netzschnur oder die
Verlängerungsschnur während der Arbeit des
Werkzeuges nicht durch und verwickeln Sie sie nicht.
Haben Sie das Kabel immer im Auge.
∙Schließen Sie das Netzkabel unmittelbar an das
Werkzeug selbständig nicht an. Wenden Sie sich an das
nächste ofzielle Dienstleistungszentrum.
∙Bei der Schnurbeschädigung soll sie unbedingt
der Hersteller oder sein Agent, oder eine andere
sachkundige Person austauschen.
∙Ziehen Sie umgehend den Stecker aus der
Steckdose heraus, wenn die Netzschnur beschädigt
oder eingeschnitten ist.
ACHTUNG! STROMSCHLAGGEFAHR!
Lenken Sie Ihre Aufmerksamkeit auf Ihren
Arbeitsplatz. Benutzen Sie Elektroinstrumente unter
Regen nicht. Benutzen Sie Elektroinstrumente in
feuchten und nassen Räumen nicht. Halten Sie
ihren Arbeitsbereich trocken, sichern Sie gute
Beleuchtung. Schützen Sie das Werkzeug vor
Feuchtigkeit. Lassen Sie das Werkzeug in der
Freiluft über Nacht nicht. Beim Wassereindringen in
das Werkzeug erhöht sich das Risiko des
Stromschlages.
∙Prüfen Sie die Netzschnur auf das
Vorhandensein von Beschädigungen und Zeichen
der Abnutzung regelmäßig und vor jedem Einsatz.
Benutzen Sie das Werkzeug mit der beschädigten
Netzschnur nicht; Wenden Sie sich an das ofzielle
Dienstleistungszentrum.
∙Bei der Arbeit draußen verwenden Sie nur
dafür bestimmte Verlängerungsschnur mit einer
entsprechenden Markierung. Vermeiden Sie den
Eintritt der Verlängerungsschnur unter das Werkzeug,
schützen Sie sie vor Feuchtigkeit, vor Wärmeeinwirkung,
vermeiden Sie den Kontakt mit Schmierstoffen und
leichtentammenden Stoffen.
∙Vermeiden Sie zufälliges Anlassen des
Werkzeuges: vor dem Anschluss des Werkzeuges an
das Netz versichern Sie sich, dass der Schalter (falls
vorhanden) in die Position ‘off’ (AUS) umgeschaltet ist.
∙Vor dem Anlass des Werkzeuges entfernen Sie

19
DE
Bedienungsanleitung
Einstellkeile und Stellschlüssel.
∙Benutzen Sie das Werkzeug mit dem gestörten
Schalter nicht. Das Werkzeug mit dem gestörten
Schalter ist gefährlich und erfordert die Reparatur.
ACHTUNG! Manchmal während
der Arbeit mit Elektroinstrumenten
bildet sich Staub, der die den Krebs
erregende Stoffe enthält.
Zu solchen chemischen Stoffen gehören: Blei in
Bleioxid, Quarz, der zum Bestand des Backsteins und
des Zements gehört, Arsen und Chrom, die im
Schnittholz, das durch chemische Reagens behandelt
ist, enthalten sind, und sonstige schädliche Stoffe. Das
Risiko der Einwirkung dieser chemischen Stoffe hängt
von der Häugkeit der Durchführung der mit ihnen
verbundenen Arbeiten ab.
Um ihre schädliche Einwirkung zu reduzieren,
arbeiten Sie in einem gut gelüfteten Raum und
benutzen Sie entsprechende fehlerfreie PSA, z.B.,
Staubrespiratoren, die speziell für die Auslterung
von mikroskopischen Teilchen entwickelt sind.
∙Bei dem Eintritt eines Fremdkörpers unter das
Werkzeug prüfen Sie es auf das Vorhandensein von
Beschädigungen und machen Sie eine notwendige
Reparatur.
∙Bei dem Entstehen der Übervibration schalten
Sie das Werkzeug aus und stellen Sie umgehend die
Ursache fest. Die Vibration ist gewöhnlich ein Zeichen
der Störung.
∙Bevor Sie Ihren Arbeitsplatz verlassen, führen
Sie die Reparatur, Sichtkontrolle oder Reinigung des
Werkzeuges, schalten Sie es aus und warten Sie auf
vollständiges Stoppen von beweglichen Teilen.
∙Es ist verboten, die Innenteile des Werkzeuges
abzumontieren und zu ändern.
Besondere Arbeitsschutzvorschriften
∙Halten Sie Hände und Beine in der Nähe von
rotieren gelassenen Teilen nicht.
∙An der Arbeit mit dem Gerät ist es notwendig
sichere Entfernung zu beachten.
∙Seid Sie vorsichtig mit der Schnur.
∙Benutzen Sie das Gerät für Schnitt des feuchten
Grases nicht.
∙Erhalten Sie standfeste Stellung, esonders bei der
Arbeit auf aufgelegten Oberächen.
∙Schneiden Sie Gras querdurch Hang ab, bewegen
Sie Rasenmäher aufwärts und Abfahrtslauf nicht. Seien
Sie besonders vorsichtig an Änderung der Richtung der
Bewegung auf Hang. Gebrauchen Sie das Gerät, um
Gras auf zu abschüssigen Hänge abzuschneiden nicht.
∙Bewegen Sie sich langsam.
∙Seien Sie besonders vorsichtig bei dem Wenden
und bei der Bewegung des Rasenhämers gegen sie.
∙Vordem die Arbeitsplatz zu verlassen, Reparatur,
Reinigung oder Besichtigung zu machen,schalten Sie
das Gerät ab und ziehen Sie Stecker von der Rosette
aus und warten Sie, bis der Messer völlig anhalten wird.
∙Übertragen Sie das Gerät mit in Gang gesetzte
Kraftmaschiene nicht hin. Ziehen Sie Stecker von der
Rosette aus.
∙Wenn für Beförderung des Geräts gebogen
werden soll, warten Sie auf völligen Stoppen von
rotieren gelassenen Details. An Schnittpunkt durch
ungesichertes Oberächengras, ebensogut wie an
Beförderung des Geräts sollen Schneidelemente
stationär sein.
∙Seien Sie vorsichtig an Reinigung und Reparatur
des Geräts.
AUFSCHLUSS DER VERPACKUNG
Bei dem Aufschluss der Verpackung prüfen Sie das
Vorhandensein des Zubehörs. Vgl. Zeichnungen zu dieser
Anleitung. Bei dem Fehlen oder Defekt von einigen Teilen
wenden Sie sich an das Dienstleistungszentrum IVT.
WEISUNG ÜBER ZUSAMMENBAU
Anstellen des Griffes [F1]
∙Ziehen Sie Haken für Kabel (7) auf dem Oberteil
des Griffes (3) an und stellen Sie oben nach dem Griff
(3) um.
∙Stellen Sie Unterteil des Griffes (2) in Öffnung
für Griff (5) ein und xieren Sie mit der Hilfe von
Holzschrauben für Griff (17).
∙Befestigen Sie Oberteil des Griffes (3) und Unterteil
des Griffes (2) mit der Hilfe von Schrauben für Griff (18)
und Spannügel (4).
∙Befestigen Sie Verlängerungskabel auf dem
Unterteil des Griffes (2) mit der Hilfe von Klamern für
Kabel (8), die im Satz hineingehen.
∙Hängen Sie Verlängerungskabel an Haken für
Kabel (7) an, damit seiner übermäßigen Spannung
vorzubeugen. Verlängerungskabel soll schwach
gespannt sein.
∙Überzeugen Sie sich, dass das Kabel nicht
abdekemmelt bei Bewegung des Oberteils des Griffes
(3) nach oben und nach unten wied.
Aufstellung des Vermittlungstechnischen Gehäuse
(6) und Netzzuschalten [F2]
∙Befestigen Sie Vermittlungstechnischen Gehäuse
(6) auf Oberteil des Griffes (3) mit der Hilfe von
Schrauben für vermittlungstechnisches Gehäuse (19).
∙Befestigen Sie die Gerätsschnur mit der Hilfe von
Klamern für Kabel (8).

20
DE
Bedienungsanleitung
∙Stellen Sie die Gerätsschnur im
Vermittlungstechnischen Gehäuse (6) und befestigen
Sie mit der Hilfe von Haken für Kabel (7), der die
Spannung reduziert.
Länge der Schlinge aus der Speiseleitung soll
genügend sein, damit Haken für Kabel (7) sich frei
auf Griff verlagern. Kabel soll schwach gespannt
werden.
Aufstellung des Sammelbehälters des
abgeschiedenen Gras (9) [F3]
(ELM-900)
∙Verbringen Sie die beide Teile des Sammelbehälter
des abgeschiedenen Gras (9) und befestigen Sie
mit der Hilfe von Abstützen Sammelbehälter des
abgeschiedenen Gras (28).
∙Erheben Sie Schieber (10) und halten Sie fest,
stellen Sie Sammelbehälter des abgeschiedenen Gras
(9) ein. Gebrauchen Sie Plastklemmen.
(ELM-1400)
∙Setzen Sie ein Nylonsammelbehälter für Gras (13)
in metallischer Einfassung, Lederwand (29) hinaub.
∙Befreien Sie die Kante der Lederwand (29) mit
der Hilfe von Schraubenzieher, wickeln Sie ihn vier
metallische Gerte auf metallische Einfassung ein.
∙Fixieren Sie mit der Hilfe von Plastklemmen.
∙Öffnen Sie Schieber (10) und halten Sie fest, stellen
Sie unter ihn Sammelbehälter des abgeschiedenen Gras
(9) ein, metallische Gerte auf metallische Einfassung
ein sollen in Plasthacken eingestellen werden.
Aufstellung von Schnitthöhe [F4]
VORSICHT! Um Schnitthöhe
zu regulieren, schalten Sie die
Kraftmaschiene ab und bleiben zu
völligem Anhalten des Messers auf!
Schnitthöhe wird auf Kosten von Rädern (11) geordnet.
Auf jedem Rad (11) ist es möglich, einen von drei
Bedeutungen der Schnitthöhe aufzustellen.
Alle Räder (11) sollen ebenso geordnet werden.
Um Schnitthöhe aufzustellen:
∙Drehen Sie Radbock (22) ab, sie entgegen dem
Uhrzeigersinn drehend, und zusammen mit Rädern (11)
umziehen.
∙Einsätzen Sie Radbock (22) und Rades (11) in
einer der Öffnungen für Wahl der Schnitthöhe (24) und
wählen Sie eine notwendige Höhe.
∙Überzeugen Sie sich, dass alle Kettennüße (23)
auf einer Höhe installiert werden.
BEGINN DES BETRIEBS
Der Spannungswert soll dem auf dem Schild der
Passangaben angegebenen Wert des Werkzeuges
entsprechen.
EINBEZIEHUNG / AUSSCHALTEN [F5]
Vor Verbindung des Gerätes zur Energieversorgung
überzeugen Sie sich, dass Bedeutung Hauptspannung
des verpegnetzes ist gleich 230 /50 Hertz und
entspricht für Gebrauch nur in jenen Räumen, wo
sichere Strombelastbarkeit gleich ist oder steigt 100
Ampere für Phase mit Nennspannung 400/230 Wolt.
VORSICHT! Stellen Sie das Gerät in
hohem Gras nicht.
Einbeziehung:
∙Drücken Sie auf Schuztknopf (15) auf
Vermittlungstechnisches Gehäuse (6) und drücken Sie
Hebel (16) zu Oberteil des Griffes (3).
∙Halten Sie des Hebels (16), lassen Sie einen
Schuztknopf (15). Lassen Sie das Hebel (16), um die
Kraftmaschiene einzuhüllen.
∙Während der Arbeit der Kraftmaschiene, bringen
Sie manuell Mäher vor.
Ausschalten:
∙Um das Rasenmäher zu stoppen, lassen Sie das
Hebel (16), das selbsständig in Ausgangsstellung
wiederkehrt und die Kraftmaschiene wird gestoppelt.
ANWEISUNGEN ZUM BETRIEB
Ratschläge um Gras zu schneiden [F6]
Vor Anfang von Arbeit reinigen Sie
eine arbeitende Plattform von Steinen,
Staub, Leitung und anderen
fremden Gegenständen
∙Prüfen Sie, ob alle Befestigendetails fest
zugezogen sind (Schrauben, Mutter und so weter).
∙Prüfen Sie regelmäßig Sammelbehälter des
abgeschiedenen Gras zu Anwesenheit von Zeichen der
Abnutzung nach.
∙Folgen Sie der Lage des Schiebers (10) und des
Sammelbehälters des abgeschiedenen Gras (9).
∙Schnitthöhe wird gewählt, von Zustand des Rasens
und tatsächlicher Grashöhe abhängend.
∙Hochgras wird zu einigen Annäherungen
This manual suits for next models
1
Table of contents
Languages:
Other IVT Lawn Mower manuals