IXLA Digital SuperPro 640 User manual

We’ve got the tools, you bring the imagination.

ii
Important Notice
IXLA Limited and its licensors retain all ownership rights to the IXLA computer
software and documentation. Use of IXLA software is governed by the license
agreement accompanying your original media.
Your right to copy IXLA software and this publication is limited by copyright law
and your end user license agreement. Making copies, adaptations or
compilation works (except for archival purposes or as an essential step in the
utilization of the software in conjunction with the equipment), without prior
written authorization of IXLA Limited, is prohibited by law and constitutes a
punishable violation of the law.
IXLA Limited provides this publication “as is” without warranty of any kind,
either express or implied, including but not limited to the implied warranties or
conditions of merchantability or fitness for a particular purpose. In no event
shall IXLA Limited be liable for any loss of profits, loss of business, loss of use
of data, interruption of business, or for any indirect special, incidental or
consequential damages of any kind, even if IXLA Limited has been advised of
such damages arising from any defect or error in this publication or in the IXLA
software.
IXLA Limited may revise this publication from time to time without notice.
Some states or jurisdictions do not allow disclaimer of express or implied
warranties in certain transactions; therefore, this statement may not apply to
you.
© 2000 IXLA Limited. All rights reserved.
01-30080
User Manual Digital SuperPro 640

1
Table of Contents
1 Getting Started ...............................2
Introduction ...........................2
Digital SuperPro 640 features ..................3
Typical uses for your Digital SuperPro 640 camera .......4
2 The Camera .................................5
Overview of your Digital SuperPro 640 Camera.........5
Loading batteries ........................7
Turning the camera on and off..................7
LCD character display ......................8
3 Taking photos ................................9
Camera memory.........................9
Focus..............................10
Flash ..............................10
Self Timer ...........................11
Power Saver ..........................11
4 Transferring photos to the computer...................12
5 Camera maintenance and safety .....................14
Tips for camera maintenance and safety............14
Cleaning the Digital SuperPro 640 ...............14
6 Tips and troubleshooting .........................15
Monitor adjustment.......................15
Printing .............................15
Troubleshooting ........................16
Error Messages ........................19
7 Getting Help ................................20
8 Camera Specifications...........................21
9 Warranty Information ...........................23
Index .....................................25
User Manual Digital SuperPro 640
Table of Contents

2
1 Getting Started
Introduction
Congratulations on purchasing the Digital SuperPro 640 camera. With the
Digital SuperPro 640 camera you can take your photos and see the results
within minutes. There is no need for film and no need to get your photos
developed and printed at service bureaus.
The Digital SuperPro 640 is easy to use – just point the camera and click the
shutter, like a conventional camera. Then import your photos to your computer
and use the IXLA software to edit, print and more.
Here are a few examples of what you can do with your Digital SuperPro 640
camera:
•Take photos and view them on your PC.
•Take photos and print them out on your home printer.
•Take photos and e-mail them to family and friends.
•Take photos and organize them in electronic photo albums or slide
shows.
•Take photos and create a Web site with them.
•Take photos and place them in your letters and documents.
•Take photos and enhance and manipulate them on your computer.
•Take photos and order prints and photo gifts over the Internet.
Digital SuperPro 640 User Manual
1 Getting Started

3
Digital SuperPro 640 features
•Built in flash
•Self timer
•Fixed focus from 3 feet to infinity
•LCD character display
•640 x 480 pixel resolution
•Stores 30 photos
•Serial and USB connector to your computer
System requirements
•Pentium® processor or equivalent
•Microsoft® Windows® 95, Windows® 98, Windows NT® 4.0 (SP3+)
or Windows® 2000.
•16MB RAM (32 MB or higher recommended)
•CD-ROM drive
•Mouse
•256 color or higher graphics card (16 bit is highly recommended)
•Internet access required for on-line components
•Windows compatible printer (optional)
•Serial or USB port
•USB requires Microsoft® Windows® 98 or Windows® 2000.
User Manual Digital SuperPro 640
1 Getting Started
4
Typical uses for your Digital SuperPro 640 camera
Here is a typical scenario of what you might do with your Digital SuperPro 640
camera:
1Load your batteries. Load 4 AAA batteries. See page 7.
2Turn on your camera. Push the Power button. See page 7.
3Set the flash settings. Push the Flash button to toggle
between settings. See page 10.
4Take a photo. Push the Shutter button. See page 9.
5Connect your camera to your
computer. You can use a serial or USB
connection. See page 13.
6Transfer your photo to the
computer. Use the software to download your
photos to the computer. See page 12.
7Work with your photo on your
computer. Print your photo on your home printer,
or send it to others by e-mail. Use it in a
document, edit it, use it in a Web site,
place it in an electronic photo album
and much more.
Digital SuperPro 640 User Manual
1 Getting Started
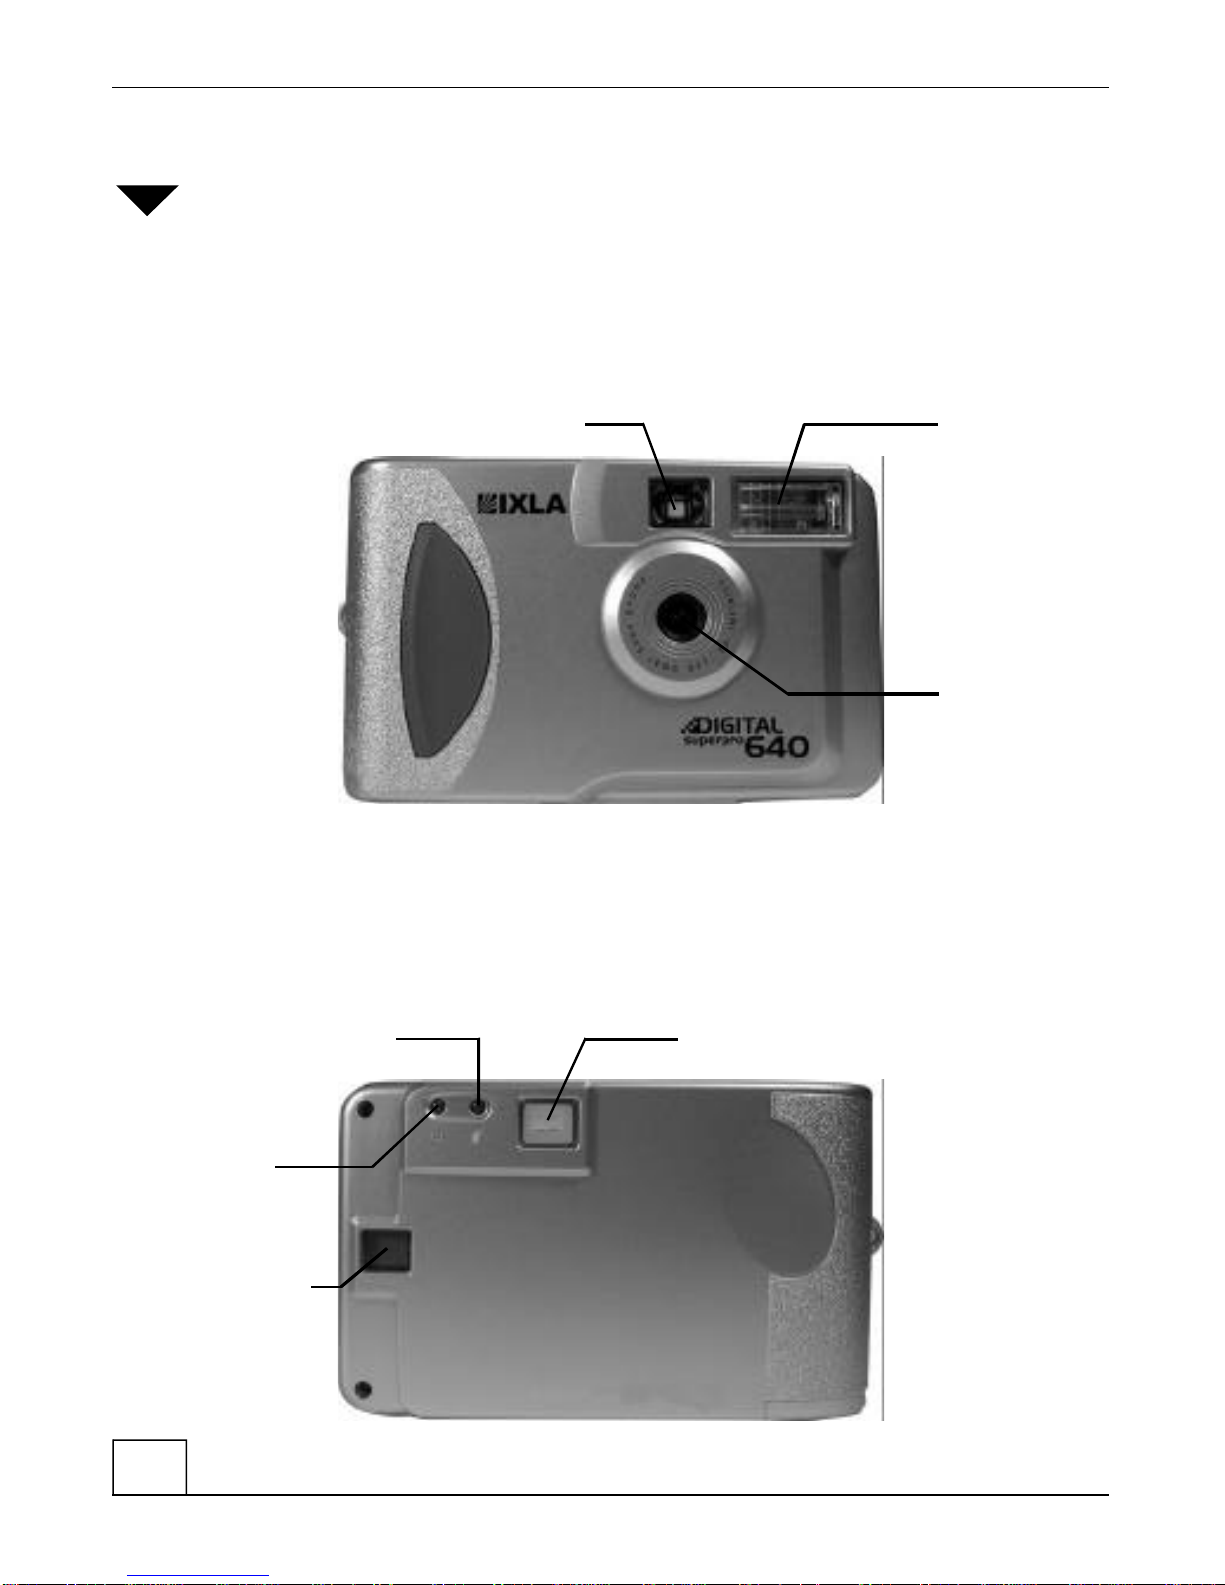
View finder Flash
Camera lens
5
2 The Camera
Overview of your Digital SuperPro 640 Camera
Camera front
Camera back
User Manual Digital SuperPro 640
2 The Camera
View finderFlash display light
Power
display light
LCD display

6
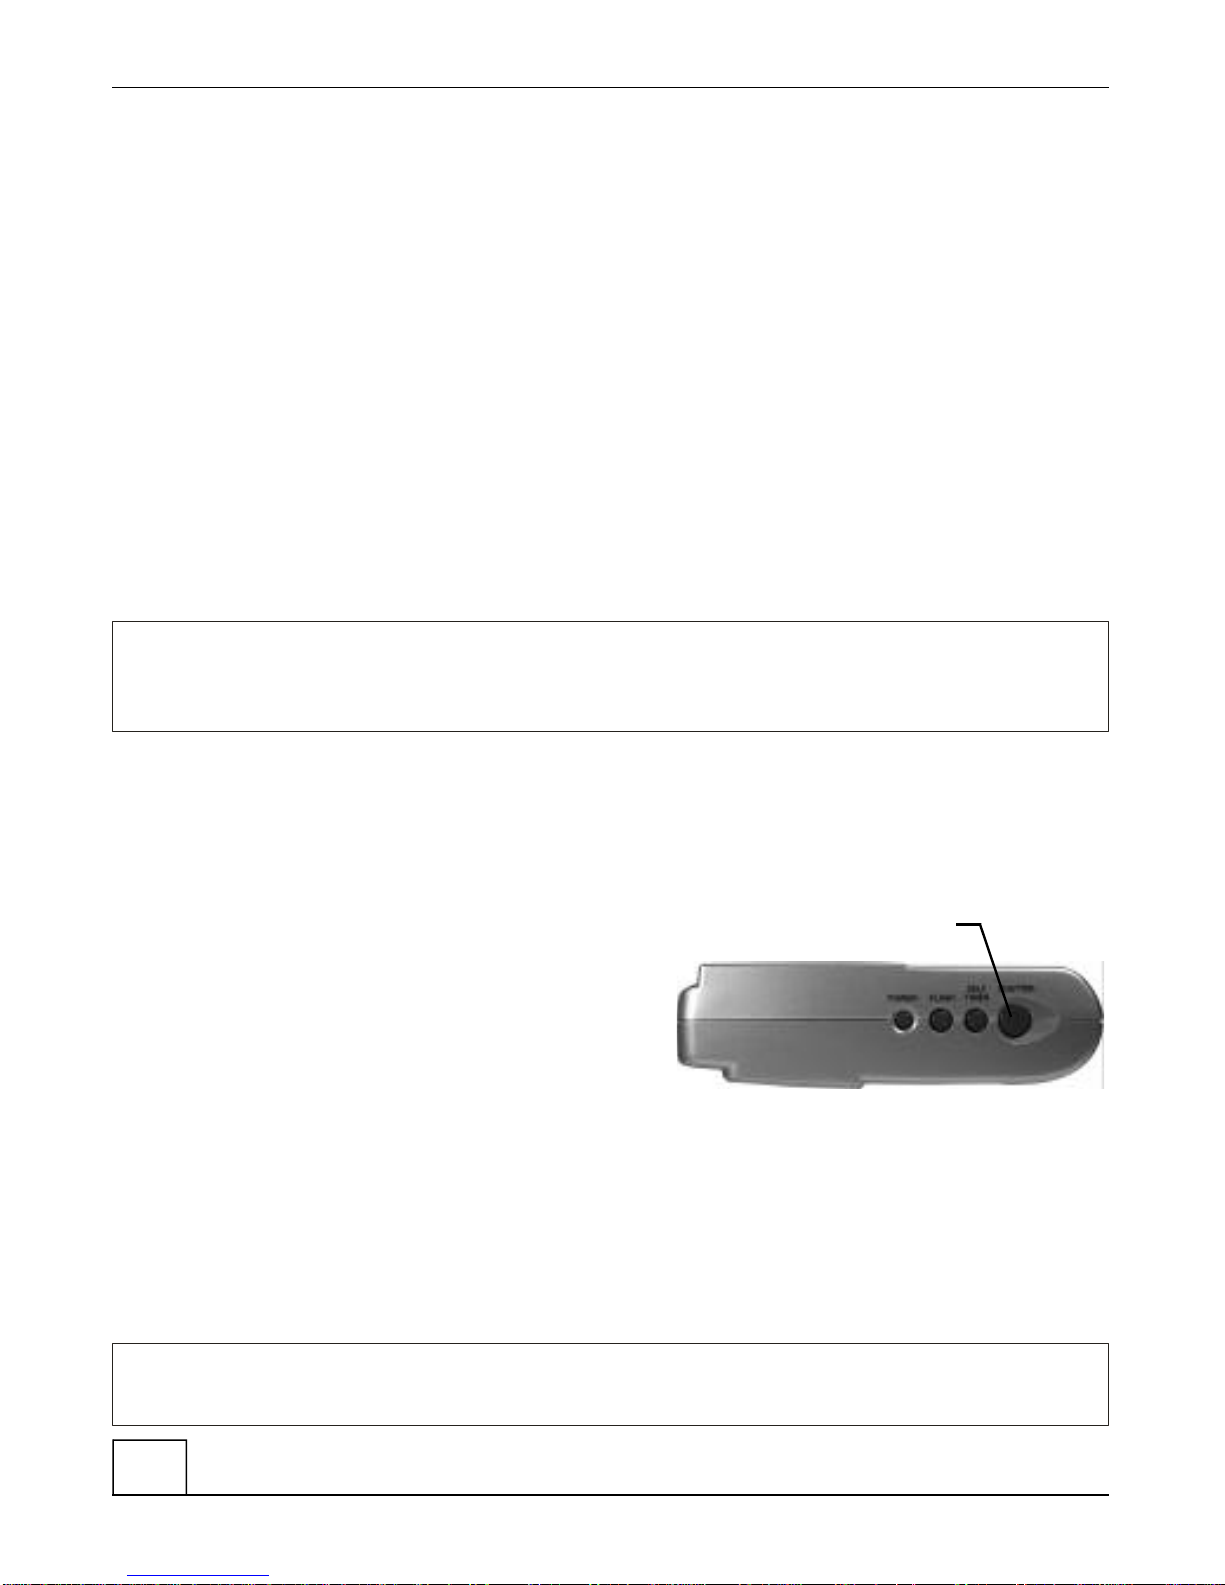
Camera top
Camera side
Bottom of camera
Digital SuperPro 640 User Manual
2 The Camera
Flash
Power
Self Timer
Shutter button
Serial and USB connection
Battery cover
7
Loading batteries
Digital SuperPro 640 uses 4 standard AAA batteries.
To load the batteries
1Locate the battery cover on the bottom of the camera.
2Press the cover down and push it sideways, in the direction of the arrow.
3Flip the cover open.
4Insert the batteries with the positive terminals toward the + signs, and the
negative terminals toward the – signs.
5Flip the cover closed.
Note Remove the batteries if you will not be using the Digital SuperPro
640 for an extended period of time. This prevents corrosion or
battery leaks.
Turning the camera on and off
Turn the camera on and off using the Power button on the top of the camera.
To turn on the camera
1Click the Power button.
2Hold it down for a moment.
3Check that the camera is on by
looking for the green Power display light on the back of the camera.
To turn off the camera
The Power button is used for turning the camera both on and off. When the
camera is on, pressing the Power button will turn it off.
Note After the camera is switched off, the flash display light may stay lit for
up to a minute. It will turn itself off as the flash gradually discharges.
User Manual Digital SuperPro 640
2 The Camera
Power

8
LCD character display
The Digital SuperPro 640 comes equipped with a Liquid Crystal
Display (LCD) that displays important information. The LCD
display window is located on the back of the camera on the left
side. It displays information about:
•The number of photos that you have taken with the camera. After you
have taken the first photo, 01 appears in the LCD display window. As
you take more photos the number changes to 02, 03, and so on.
When the memory is full, FL is displayed.
•The flash mode. When you
click the flash button to toggle
between modes, the current
mode is displayed in the LCD
window.
•The battery condition. When
the battery power is low, bL is
displayed.
•The light condition. The LCD
displays LL when there is not
enough light.
•System reset. rS is displayed
when an unexpected error
occurs.
Note If you see b1 or b2 in the LCD, it means that you have entered the
camera’s diagnostic mode. Turn the power off and on again to exit
this mode.
Digital SuperPro 640 User Manual
2 The Camera
Display Meaning
FL Memory full
YF Flash always on
nF no Flash
AF Auto-Flash
FE Flash memory error
rS System Reset
LL Low light condition
bL Battery power low
Table of contents


