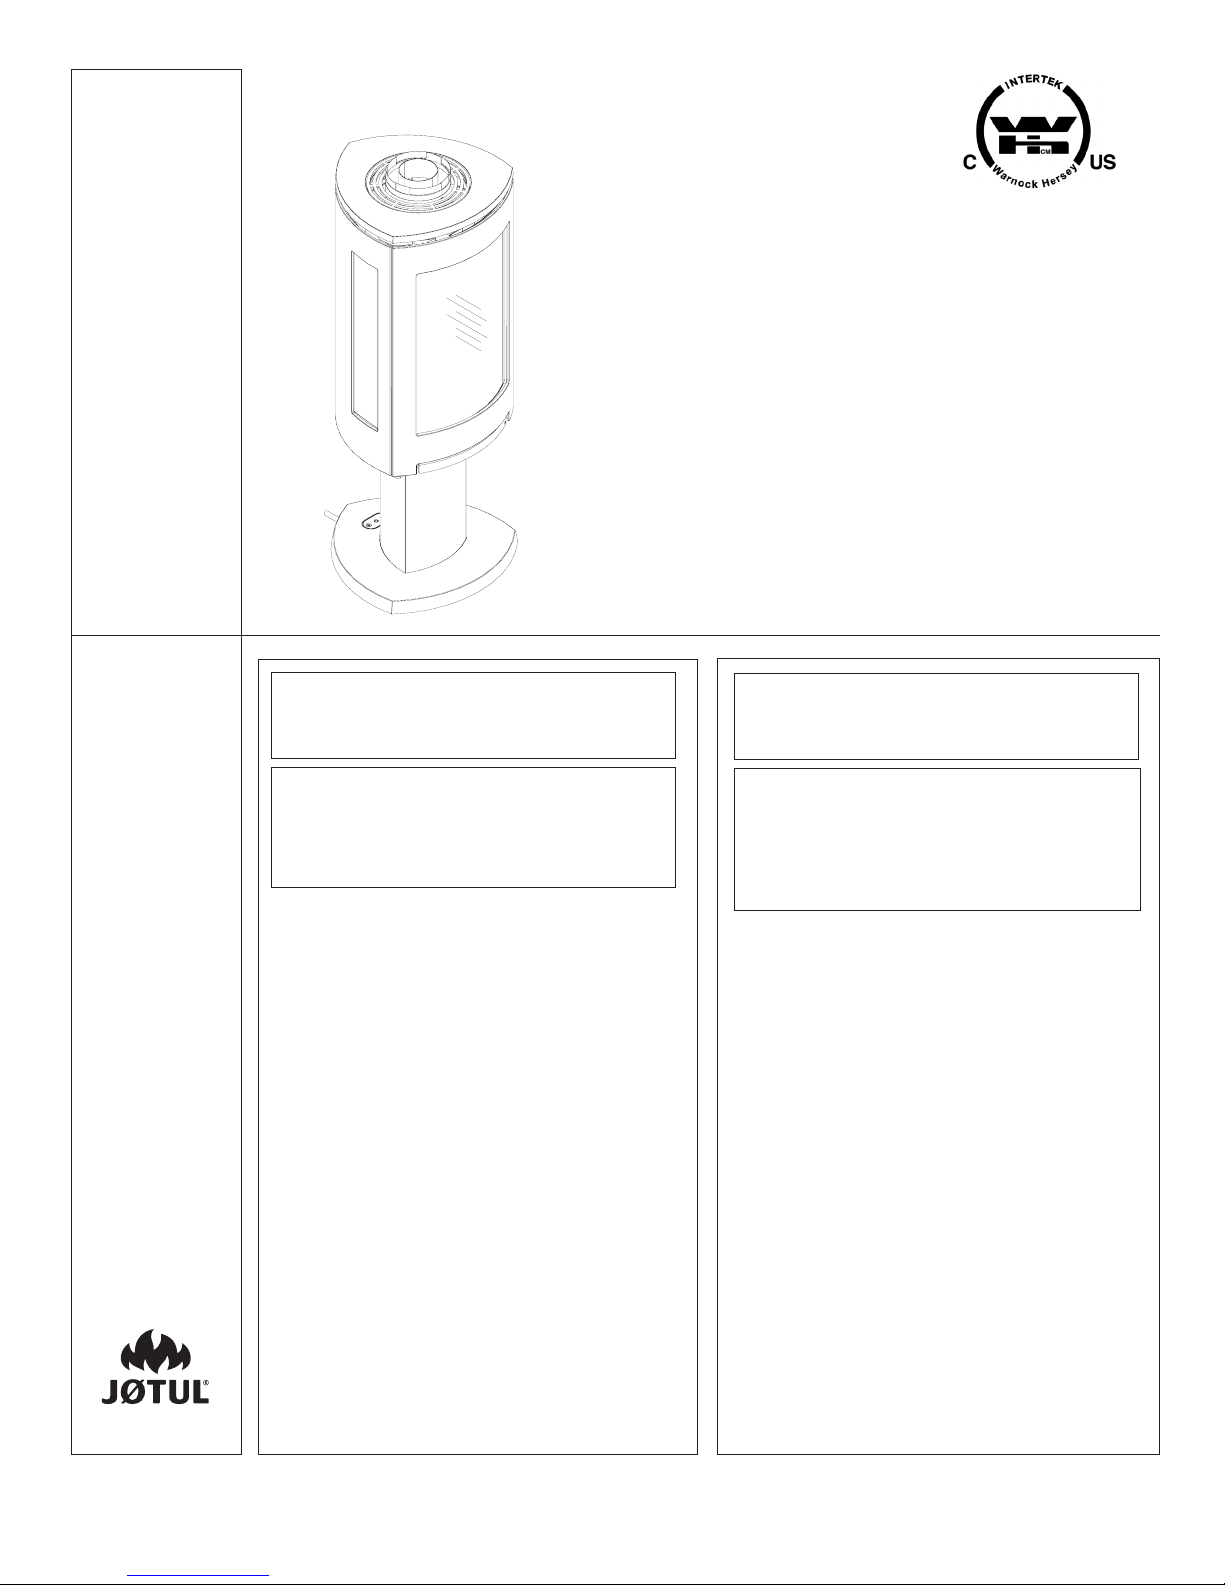
Jøtul GF 370 DV User manual

Jøtul GF 370 DV
Direct Vent Gas Stove
Installation and
Operation Instructions
Do not store or use gasoline or other
flammable vapors and liquids in the vicinity
of this or any other appliance.
WHAT TO DO IF YOU SMELL GAS:
• Do not try to light any appliance.
• Do not touch any electrical switch; do not
use any phone in your building.
• Immediately call you gas supplier from a
neighbor’s phone. Follow the gas supplier’s
instruction.
• If you cannot reach your gas supplier, call
the fire department.
Installation and service must be performed
by a qualified installer, service agency or the
gas supplier.
In the Commonwealth of Massachusetts,
a carbon monoxide (CO) detector shall be
installed in the same room as the appliance.
WARNING: If the information in these
instructions is not followed exactly, a fire
or explosion may result causing property
damage, personal injury or loss of life.
QUE FAIRE SI VOUS SENTEZ UNE ODEUR
DE GAZ:
• Ne pas tenter d’allumer l’appareil.
• Ne touchez à aucum interrupteur. Ne
pas vous servir des téléphones se trou-
vant dans le bâtiment où vous trouvez.
• Appelez immédiatement votre
fournisseur de gaz depuis un voisin.
Suivez les instructions du fournisseur.
• Sivounepouvezrejoindrelefournisseur
degaz,appelezleservicedesincendies.
L’installatione l’entretien doivent être
assurés par un installateur ou un service
d’entretien qualifié ou par le fournis-
seur de gaz.
Ne pas entreposer ni utiliser d’essence ni
d’autres vapeurs ou liquides inflammables
dans le voisinage de cet appareil ou de tout
autre appareil.
AVERTISSEMENT: Assurez-vous de bien suiv-
reles instructions données dans cette notice
pour réduire auninimum le risque d’incendie
ou d’explosion ou pour éviter tout dommage
matériel, toute blessure ou la mort.
ATTENTION : CES INSTRUCTIONS DOIVENT
DEMUERER AVEC LE PROPRIÉTERE D’UNE
MAISON.
CAUTION:THESE INSTRUCTIONS ARE TO
REMAIN WITH THE HOMEOWNER.

2
Suggested Tools for
Installation and Service
• External regulator (for Propane only)
• Piping which complies with local code
• Manual shut-off valve -
T-Handle required in Massachusetts
• Sediment trap
• Tee joint
• Pipe wrench
• Pipe sealant
• 10 mm open end wrench
• 1/2”, 7/16” open end wrench
• Phillips head screwdWishing
• Flat head screwdWishing
• 1/4” nut driver
• Gloves
• Safety glasses
• Torx T-20 screwdWishing
PLEASE READ THESE INSTRUCTIONS IN THEIR
ENTIRETY AND MAKE THEM AVAILABLE TO
ANYONE USING OR SERVICING THIS APPLIANCE.
THIS PRODUCT MUST BE INSTALLED BY A
LICENSED MASTER OR JOURNEYMAN PLUMBER
OR GAS-FITTER WHEN INSTALLED IN THE COM-
MONWEALTH OF MASSACHUSETTS.
�
We recommend that our gas
products be installed and
serviced by professionals who
are certified in the U.S. by the
National Fireplace Institute®
(NFI) as NFI Gas Specialists.
Your stove has a unique serial number stamped
on the rating plate which is located in the valve com-
partment under the firebox. Please record the serial
number in the space below.
MODEL NAME: Jøtul GF 370 DV Gas Stove
SERIAL NUMBER:_______________________________
DATE OF PURCHASE:____________________________
AUTHORIZED DEALER:__________________________
NAME OF INSTALLER:___________________________
TYPE OF FUEL:_________________________________
WAS FIREPLACE CONVERTED?____________________
Rating Plate&Operating
Instructions
INSTALLER PLEASE NOTE:
The Remote Control and
Ignition system have been
tested at the factory. The
batteries associated with
those components have
been left in place.
We recommend that you
check the build date on the
shipping crate label. If more
than 6 months have passed
since the build date, please
be prepared to replace the
Receiver and Transmitter
batteries.
See battery specifications
on page 4.

3
Table of Contents
Installation & Service Tools ..................2
Specifications .................................................. 4
General Information.......................................5
Safety Information ........................................ 6
Installation
Hearth Requirements .........................7
Clearances...............................................7
Vent Requirements
Approved Vent Manufacturers ......... 8
Vertical Termination............................ 8
Masonry Chimney Conversion.......... 9
Horizontal Termination .....................10
Vent Termination Clearances............11
Vent Restriction Adjustments.......... 12
Vent Termination Diagram............... 13
Stove Assembly
1. Glass Frame Removal ..................14
2. Routing the Power Supply .........14
3. Gas Connection..............................14
4. Gas Pressure................................... 15
5. Fuel Conversion .............................16
6. High Altitude Adjustment..........18
7. Skamol Panel Installation...........19
8. Reflective Panel Installation.......19
9. Wishing Rock Installation...........19
10. Starfire Glass Installation...........19
11. Log Set Installation .....................20
12. Outer Decorative Glass Panels ..21
13. System Check ............................... 22
14. Flame Picture Adjustment ..........23
Operation
System Overview ............................... 24
Control Functions................................25
Wiring Diagrams................................ 28
Maintenance
Annual Cleaning.................................30
Glass Replacement ............................30
Battery Replacement ......................... 31
Accent Lamp Replacement .............. 31
Illustrated Replacement Parts........... 32 - 35
Appendix
Mobile Home Installation................ 36
Correct Optional Flame Pictures ...36
Lighting Instructions ................................. 39
Unpacking the Stove
1. Before beginning the installation, inspect the
stove for shipping damage and immediately report
any evidence of damage to your dealer.
2. Confirm stove contents.
The Jøtul GF 370 DV includes the following loose
items shipped in the Miscellaneous Hardware bag;
• 4 mm hex key - used to remove the
front glass panel for access to the firebox.
• Remote Control Transmitter
• Anti-seize Lubricant
• Extension Power Cord
• M6 x 12 mm hex bolts, 4 - used with
Outer Decorative Glass Panels.
3. Confirm Firebox Components.
The firebox accessories have been packed in
separate boxes, and will include one or more of the
following items:
• Traditional Log Set 156789
• Starfire Glass 156815
• Wishing Rocks 156814
• Skamol Panels 156816
• Reflective Glass Panels 156817
4. Confirm Fuel Type.
This stove has been factory-configured to burn
either Natural gas or Propane. The fuel type is indi-
cated on the shipping label, and on labels applied
to the supply line, valve compartment and Rating
Plate. Be sure that the correct fuel source is avail-
able for this appliance.
5. Remove Pallet Screw.
Figure 1.
Pallet screw location

4
Specifications
Input Rates
Natural Gas
28,000 BTU/hr. maximum input
18,173 BTU/hr. minimum input
Propane
28,000 BTU/hr. maximum input
21,802 BTU/hr. minimum input
Inlet Pressure: MIN MAX
Natural Gas: 5.0 WC (1.24 kPa) 7.0 WC (1.74 kPa)
Propane: 12.0 WC (2.99 kPa) 14.0 WC (3.48 kPa)
Manifold Pressure: MIN MAX
Natural Gas: 1.6 WC (.398 kPa) 3.5 WC (0.87 kPa)
Propane: 6.4 WC (1.59 kPa) 10.0 WC (2.48 kPa)
• Steady State Efficiency: 74.7% NG / 79.3% LP
• AFUE Efficiency: 71.2% NG / 75.6% LP
• Intermittent Pilot Ignition ( IPI )
• Continuous Pilot Ignition Mode ( CPI or“standing
pilot”) is available.
• Power Requirement: 120 VAC for Fan, Lamp, and
Burner Control Module
• Remote ControlTransmitter batteries preinstalled,
3, AAA - 1.5 v
• Remote Control Receiver batteries supplied: 4, AA
• Fan Control Module: 120V / 60 Hz
Jøtul GF 370 DV
Direct Vent Gas Stove
Manufactured and Distributed by:
Jøtul North America
Gorham, Maine USA
Jøtul AS
Fredrikstad, Norway
Test Standards
This appliance complies with
National Safety standards and
is tested and listed by Intertek
Testing Services of Middleton,
Wisconsin.
In addition, the Jøtul GF 370 DV has been tested
and listed as a direct vent gas fireplace heater and
listed to ANSI Z21.88-2005, ANSI z21.88a/CSA 2.33a-
2007, CAN/CGA 2.17-M91.
Traditional Log Set ................................................ #156789
Wishing Rocks Set .................................................#156814
Starfire Glass Kit .................................................... #156815
Skamol Panel Firebox Liner ..................................#156816
Reflective Glass Firebox Liner ............................. #156817
Decorative Outer Glass Panel Kit .................... #350995
Fuel Conversion Kit, Propane - 33% TD............ #156800
Fuel Conversion Kit, Natural Gas - 33% TD .......#156801
High Altitude Adjustment Kit, LP ....................... #156821
High Altitude Adjustment Kit, NG .................... #156822
Accessories
Figure 2. Overall dimensions

5
and legal installation. Some areas require a permit
to install a gas burning appliance. Always consult
your local building inspector or authority having
jurisdiction to determine what regulations apply in
your area.
In the absence of local codes, the installation re-
quirements must comply with the current National
codes. In the U.S., these requirements are estab-
lished in the National Fuel Code, ANSI Z223.1.(NFPA
54). In Canada, the codes have been established in
CAN/CGA B149 Fuel Installation Code.
Installer l’appareil selon les codes ou reglements
locaux, ou, en l’absence de tels reglements, selon
les Codes d’installation CAN/CGA-B149.
5. Do not operate this fireplace if any part of it has
been under water..
Immediately call a qualified service technician to
inspect the heater and to replace any part of the
control system and any gas control which has been
under water.
Ne pas se servir de cet appareil s’il a ete’ plonge
dans l’eau, completement ou en partie. Appeler
un technicien qualifie pour inspecter l’appareil et
remplacer toute partie du syste’me de controle et
toute commande qui ont ete plonges dans l’eau.
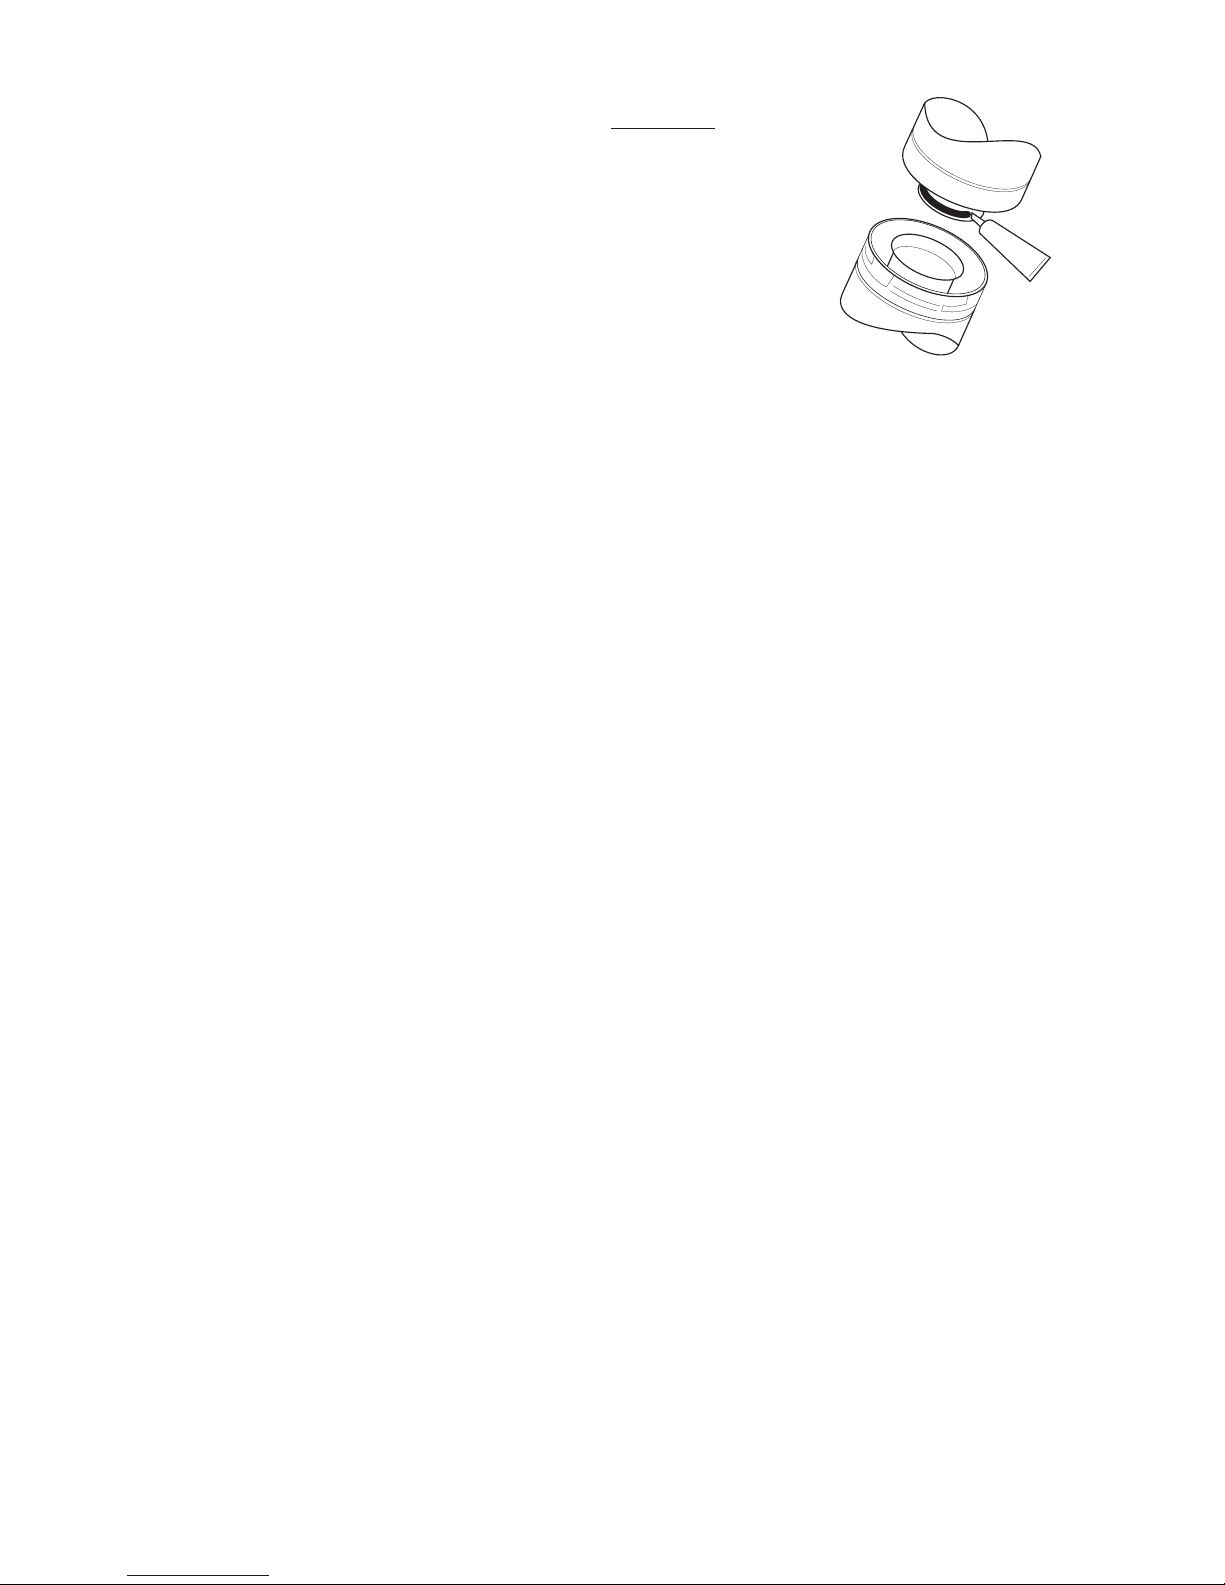
6. Do not operate the fireplace with the glass front
removed, cracked or broken. Replacement of the
glass should be done by a licensed or qualified ser-
vice person. Only remove glass for routine service.
Always handle glass carefully.
Pour utilisation avec les portes en verre cerifiers
aved l’appareil seulemend ou. Ne pas utiliser avec
des portes on verre.
7. Notify your insurance company before proceding
with installation of this fireplace.
General Information
IMPORTANT: SAVE THESE INSTRUCTIONS.
1. The installation and repair of this appliance must
be done by a qualified service person. Failure to
properly install and maintain this heater could re-
sult in an unsafe or hazardous installation, which
may result in a fire, explosion, property damage,
personal injury or loss of life.
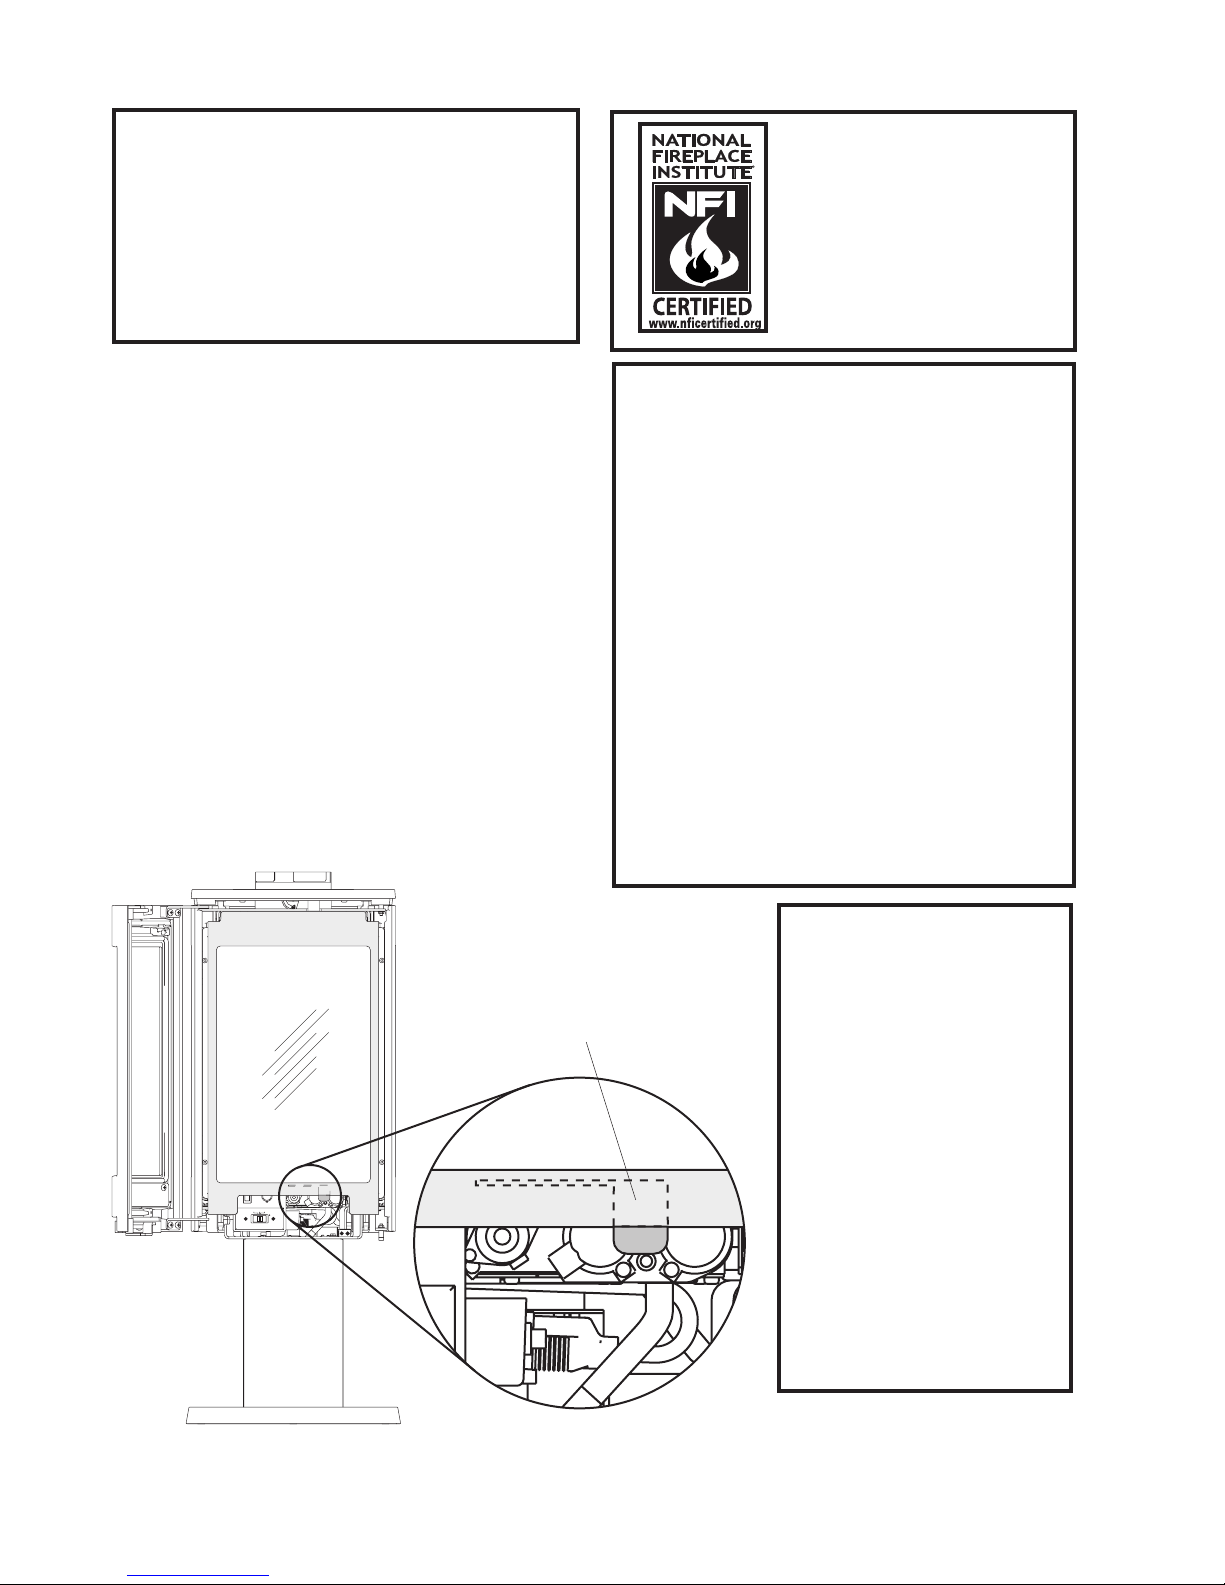
2. This appliance should be inspected before use and
at least annually. More frequent cleaning may
be required due to excessive lint from carpeting,
bedding material, etc. It is imperative that control
compartments, burners and circulating air pas-
sageways of the appliance be kept clean.
`S’assurer que le bruleur et le compartiment des
commandes sont propres. Voir les instructions
d’installation et d’utilisation qui accompagnent
l’appareil.
3. This appliance may be installed in an aftermar-
ket permanently located, manufactured (mobile)
home, where not prohibited by local codes.
This appliance is only for use with the type(s) of
gas indicated on the rating plate. This appliance is
not convertible for use with other gases, unless a
certified kit is used.
Cetappareil peut être installé dans un maison
préfabriquée (mobile) déjà installée à demeure si
les règlements locaux le permettent.
Cet appareil doit être utilisé uniquement avec les
types de gas indiqués sur la plaque signalétique.
Ne pas l’utiliser avec d’autres gas sauf si un kitde
conversion certifié est installé.
4. The installation must conform to local codes. Your
local Jøtul authorized dealer can assist you in de-
termining what is required in your area for a safe
THIS HEATER MUST BE INSTALLED AND MAIN-
TAINED BY A QUALIFIED SERVICE AGENCY.
DO NOT ATTEMPT TO ALTER OR MODIFY THE
CONSTRUCTION OF THIS APPLIANCE OR ITS COM-
PONENTS. ANY MODIFICATION OR ALTERATION
WILL VOID THE WARRANTY, CERTIFICATION AND
LISTING OF THIS APPLIANCE.
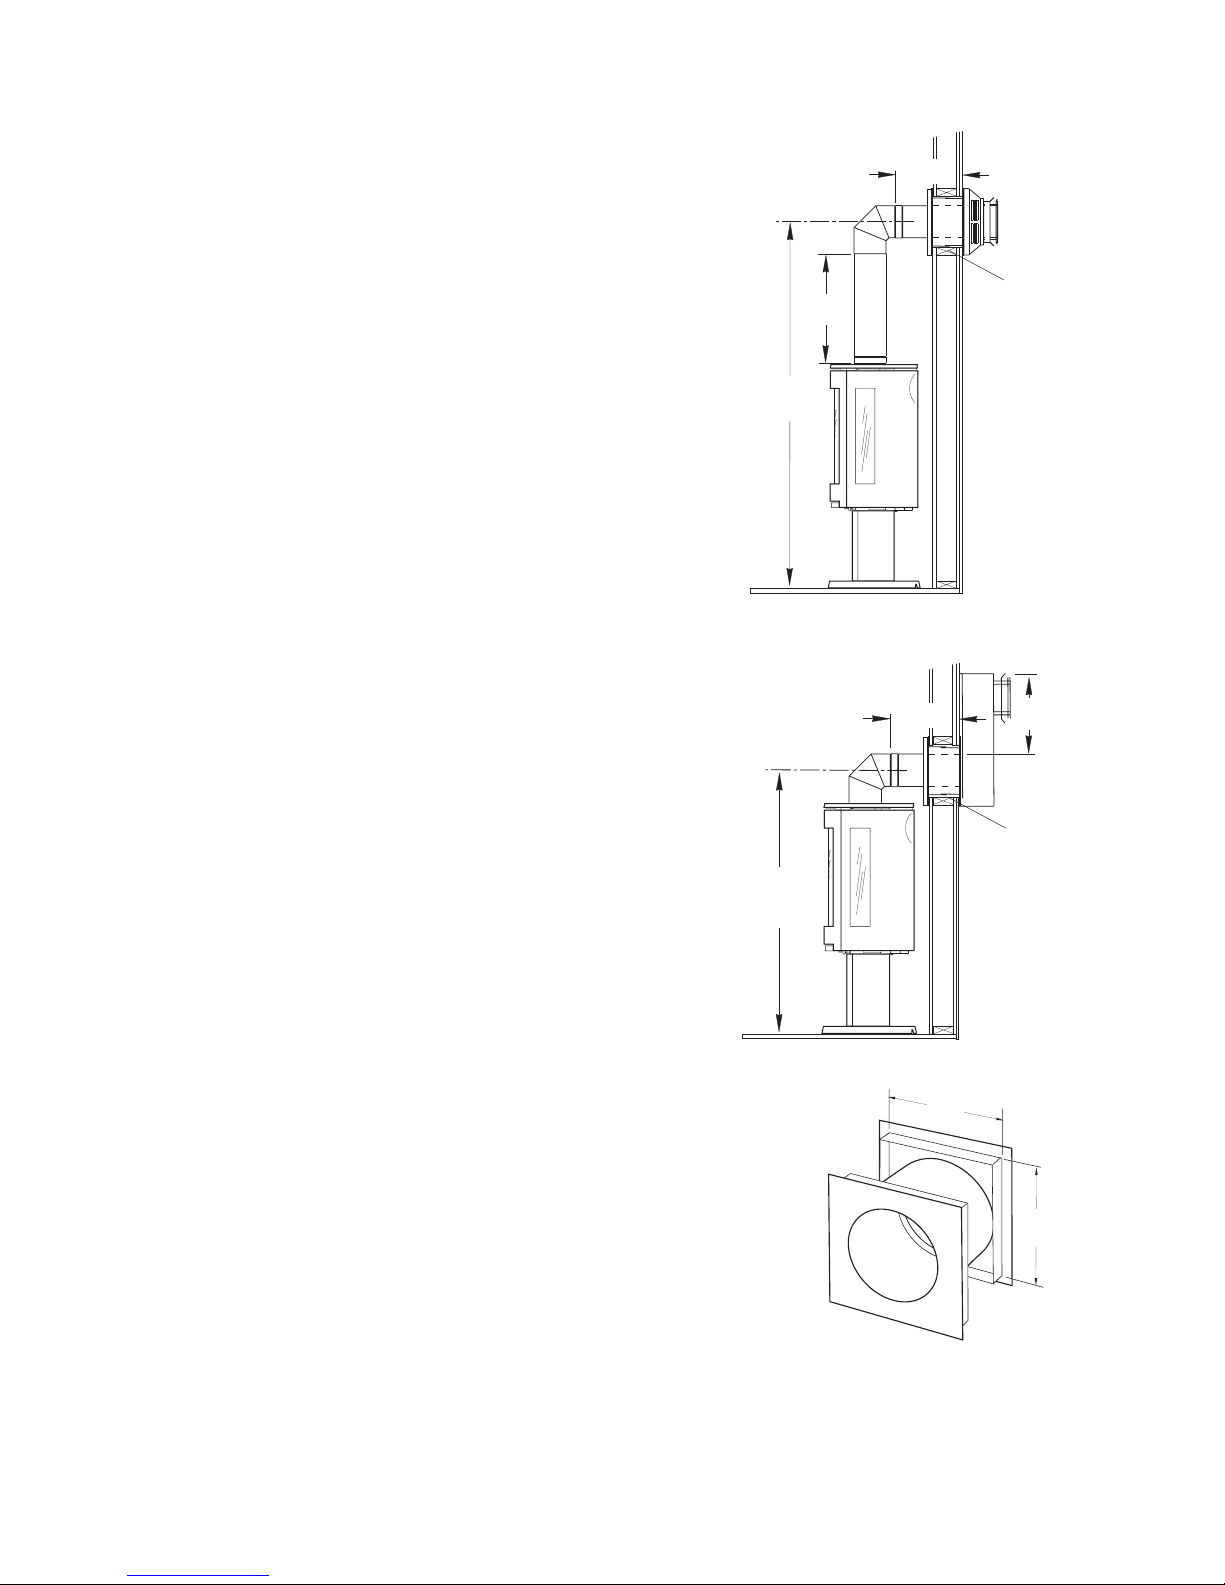
WARNING: FAILURE TO POSITION THE PARTS IN
ACCORDANCE WITH THE DIAGRAMS HEREIN OR
FAILURE TO USE ONLY PARTS SPECIFICALLY AP-
PROVED WITH THIS APPLIANCE MAY RESULT IN
PROPERTY DAMAGE OR PERSONAL INJURY.

6
Safety Information
Due to the high operating temperatures this ap-
pliance should be located out of traffic and away
from furniture, draperies, etc. Maintain proper
clearance to combustible mantels and fireplace
trim.
Children and adults should be alerted to the haz-
ards of high surface temperatures and should stay
away to avoid burns or clothing ignition.
Young children should be supervised while they
are in the same room as the fireplace.
Clothing or other flammable materials should not
be placed on or near the fireplace.
Surveiller les enfants. Garder les vêtements, les
meubles, l’essence ou autres liquides à vapeur
inflammables lin de l’appareil.
Never allow anyone to use the fireplace if they are
unfamiliar with its operation.
NEVER store or use gasoline or any other flam-
mable vapors or liquids in the vicinity of the fire-
place.
Never burn any solid materials (wood, cardboard,
paper, coal, etc.) in this gas fireplace. Use with
natural gas or propane fuel ONLY.
Any safety screen, glass or guard removed for
servicing the appliance must be replaced prior to
operating the appliance.
Do not slam or strike the glass panel.
This appliance is NOT for use with aftermarket
glass doors.This appliance is approved for use only
with the door facings, interior panels and glass
panel options listed on page 3 of this manual.
Cet appareil ne sert pas avec des portes en verre
de marché des accessoires. Cet appareil est ap-
prouvé pour l’usage seulement avec les revête-
ments de porte, entoure les options de panneau et
en verre de panneau énumérées à la page 3 de ce
manuel.
Wear gloves and safety glasses while performing
maintenance procedures.
Electrical Hazards
Be aware of electrical wiring locations when
cutting holes in walls and ceilings for termi-
nation.
This appliance power supply must be electri-
cally grounded in accordance with local codes
or, in the absence of local codes, with the cur-
rent ANSI/NFPA 70, National Electrical Code
or CSA C22.1-Canadian Electrical Code.
This appliance power supply incorporates a
three-prong (grounding) plug for protection
against shock hazard and should be plugged
directly into a properly grounded three-prong
receptacle. DO NOT CUT OR REMOVE THE
GROUNDING PRONG FROM THE PLUG.
Do not disconnect the lamp and fan power
cords from the appliance power supply (Fan
Control Module). Use the rocker switch to
control power to these parts.
Always disconnect (unplug) the main power
supply from its outlet when performing rou-
tine service on this appliance.
WARNING!
Shock Hazard. Can cause severe injury or death.
This appliance is powered by line voltage. Do
not try to repair the components in this appli-
ance. In no way are the component enclosures
to be tampered with or opened. Disconnect
from line voltage during installation or per-
forming any maintenance.
ATTENTION!
Shut off the main gas supply to the appli-
ance during battery replacement to the
receiver or burner control.
Always shut off the main gas supply to the
appliance during inspection, maintenance,
or cleaning.

7
Installation
Hearth Requirements
The Jøtul GF 370 DV has been approved for installa-
tion directly on combustible floor materials, including
carpeting. No additional floor protection is required,
however, we recommend that the stove be installed
on a solid surface.
Stove Location
In selecting a location for the stove, consider the
following points:
1) Heat distribution
2) Vent termination requirements
3) Gas supply routing
4) Traffic areas, furniture, draperies, etc.
5) 120V electrical outlet availability
This stove may be located on or near conventional
construction materials, however, proper clearance to
combustibles must be maintained in order to provide
adequate air circulation around the appliance. Also, it
is important to provide adequate access around the
stove for servicing and proper operation.
The clearances specified in this manual are the
minimum requirements established as a result of
safety testing. A combustible material is anything
that can burn; i.e. sheet rock , wall paper, wood, fab-
rics, etc. These surfaces are not limited to those that
are visible and also include materials that may be
located behind non-combustible materials.
If you are not sure of the combustible nature of
a material, consult your local fire officials.“Fire-re-
sistant” materials are considered to be combustible.
They may be difficult to ignite, but will burn. “Fire
-rated” sheet rock is also considered combustible.
Stove and Vent Clearance
Requirements
Minimum Clearances: See figs. 3-5.
Rear: 3” (76 mm) - from Rear of the unit
Ceiling: 16 3/4” (425 mm) - from Stove Top
Corner: 5” (127 mm) - from Stove Top
Sides: 7” (178 mm) - from Stove Top
Minimum Clearances from the Vent Pipe
to Combustibles:
Horizontal Run:
Off the top of the pipe - 2” (51 mm) Alcove - 7”(178mm)
Off the sides and bottom - 1” (25 mm)
Vertical Run:
All sides - 1” (25 mm)
ALCOVE SPECIFICATIONS:
Maximum Alcove Depth: 21 3/4” (55.2 cm)
Minimum Alcove Width: 31 1/4” (79.3 cm)
Minimum Ceiling Height: 62 1/4” (158.1 cm)
Figure 3. Corner Clearances.
Figure 4. Alcove and Wall Clearances.
Figure 5. Parallel Wall Clearances.

8
Venting Requirements
There are three types of venting configurations ap-
proved for use with this appliance:
• Vertical Venting / Vertical Termination
• Vertical Venting / Horizontal Termination
• Horizontal Venting / Snorkel Termination
This appliance is approved for use with the 4/6
direct vent systems manufactured by the companies
listed on page 8. Use parts of one manufacturer only
- DO NOT MIX VENT COMPONENTS FROM DIFFERENT
MANUFACTURERS WITHIN THE SAME SYSTEM.
Installation of any components not manufac-
tured or approved by Jøtul or failure to meet all clear-
ance requirements will void all warranties and could
result in property damage or bodily injury.
The approved vent configurations described
in this manual are derived from extensive testing
under controlled laboratory conditions. Gas appliance
performance can be negatively affected by variables
present in the installation environment, i.e.; atmo-
spheric pressure, strong prevailing winds, adjacent
structures and trees, snow accumulation, etc. These
conditions should be taken into consideration by the
installer and stove owner when planning the vent
system design.
Vertical Venting and Termination
The Jøtul GF 370 DV can be vertically vented through
a roof or ceiling. Follow these guidelines
Steep roofs, nearby trees, or predominantly windy
conditions, can promote poor draft or down
draft conditions. In such cases, an increase to the
height of the vent may improve performance.
If an offset or elbow is necessary in the vertical
rise, the vent pipe must be supported everythree feet
to avoid excessive stress on the offsets. Use listedWall
Straps from any of the approved vent suppliers.
A maximum of two 90° or four 45° elbows may be
used in a vertical temination. Whenever possible,
use 45° elbows instead of 90° elbows as they
offer less restriction to the flow of flue gases and
intake air.
A listed firestop is required at any floor penetra-
tion. The opening should be framed in according
to the manufacturer’s instructions.
Always maintain a minimum 1" clearance from all
sides of the vertical vent system to any combus-
tible material.
Minimum vertical termination height: 6 ft. of
vent pipe.
Approved Vent Manufacturers
The Jøtul GF 370 DV stove is approved for installation
with direct vent chimney components supplied by
the following manufacturers:
Simpson Dura-Vent, Inc.
P.O. Box 1510
Vacaville, CA 95696-1510 800-835-4429
Selkirk Corporation
1301 W. President George Bush Hwy, Suite 330
Richardson, TX 75080-1139 800-992-8368
American Metal Products (Amerivent)
8601 Hacks Cross Rd.
Olive Branch, MS 38654 800-423-4270
Security Chimneys International Limited
2125 Monterey, Laval, Québec
Canada, H7L 3T6 450-973-9999
Metal-Fab, Inc.
P.O. Box 1138
Wichita, KS 67201 316-943-2351
ICC, Inc.
400 J-F Kennedy St. Jerome, Quebec
Canada, J7Y 4B7 450-565 6336
IMPORTANT
• JOINT SEALING
REQUIREMENT:
APPLY A 1/8” BEAD
OF HIGH-TEMPERA-
TURE SEALANT OR
MIL-PAC®TOTHEMALE
SECTION OFTHEINNER
VENTPIPE. THECE-
MENTSHOULDFORM
ASEAL BETWEENTHE
INNER ANDOUTER PIPES.SEEFIG.5.SEEVENTMANUFAC-
TURER’SINSTRUCTIONS.
• NEVER MODIFY ANY VENTING COMPONENT, OR
USE ANY DAMAGED VENTING PRODUCT.
• THE GAS APPLIANCE AND VENT SYSTEM MUST BE
VENTED DIRECTLY TO THE OUTSIDE OF THE BUILD-
ING AND NEVER ATTACHED TO A CHIMNEY SERV-
ING A SOLID FUEL OR GAS BURNING APPLIANCE.
EACH DIRECT VENT GAS APPLIANCE MUST HAVE
ITS OWN SEPARATE VENT SYSTEM. COMMON VENT
SYSTEMS ARE PROHIBITED.
• IF VENTING SYSTEM IS DISASSEMBLED FOR ANY
REASON, REINSTALL PER THE MANUFACTURER’S
INSTRUCTIONS PROVIDED FOR THE INITIAL INSTAL-
LATION.
Figure 6.

9
Figure 7. Minimum roof pen-
etration height and clearance
from adjacent surfaces - vertical
termination.
IT IS NECESSARY to add restriction to a vertical vent
installation to compensate for excessive draft. See
page 13; Exhaust Restriction Adjustment.
GAS VENT HEIGHT: In no case shall any discharge
opening on the cap be less than 18” (457 mm) hori-
zontally from the roof surface. See fig. 7.
Maximum Vent Height: 35 ft. above the appliance.
Masonry or Prefabricated Chimney
Conversion
The GF 370 DV is approved for use with direct vent
chimney conversion kits in a masonry chimney or
a prefabricated solid fuel listed chimney. These are
available from any of the manufacurer’s listed on
page 8.
The following installation requirements must be
followed:
1. Use the restrictor zone guidelines in the Vent
Window Diagram, fig. 17. In masonry chimney, a
fireclay liner or listed steel liner, must be present
the entire length of the chimney.
3. Overall venting should not exceed 35 ft. (10.67 m).
4. The liner must have an inside dimension of 6”
round or greater.
5. Prefabricated chimneys must be UL 103 or ULC
S-629 listed and have a minimum INSIDE diam-
eter of 6 inches, (150 mm). Prefabricated chimneys
must be listed for the specific manufacturer’s
conversion kit.
Figure 8. Vent System through a masonry chimney
using the Simpson Dura-Vent Chimney Conversion Kit
#934. Other manufacturers use similar designs. May
also be used in listed prefabricated chimneys.
#991 Vertical Termination Cap
Cap Adaptor-
included in
#934 Kit
Support/Wall
Thimble Cover
- included
in#934 Kit
Exhaust Gas
Intake Air
Use Standard
Simpson Dura-
Vent GS Pipe
from stove to
thimble
4” Flex Pipe
not included
in kit
IMPORTANT NOTICE
THE USE OF AN EXISTING CHIMNEY AS AN AIR
INTAKE IS NOT COVERED UNDER THE ANSI
Z21.88-1999-CSA 2.33-M99 TEST METHODS
AND RESULTING ITS/WHI PRODUCT CERTI-
FICATION.THE CODE AUTHORITY HAVING
JURISDICTION MUST BE CONSULTED PRIOR
TO PROCEEDING WITH THIS INSTALLATION
METHOD.

10
Horizontal Termination
Minimum vertical rise from the vent collar is a 24”
section vent pipe. See fig. 9.
A maximum of two 90° or four 45° elbows may be
used in a horizontal termination.Whenever pos-
sible, use 45° elbows instead a 90° elbow as they
offer less restriction to the flow of flue gases and
intake air. Reduce the overall horizontal run by
4 feet for each 90° elbow, and 2 feet for each 45°
elbow.
Snorkel Termination ( 14” or 36”): A horizontal vent
run may be made with a 90° elbow directly to the
rear of the stove only when terminated by a 14 or
36 inch snorkel cap. Fig. 10 shows the minimum
vent pipe requirements.
14” Snorkel: The maximum horizontal vent run
must not exceed a 24”section of pipe and must be
a minimum of 12”.
36” Snorkel: The maximum horizontal vent run
must not exceed 5 feetand must be a minimum of
12”.
The termination cap must not be recessed into
the wall or siding. Do not fill air space in wall around
termination cap with any type of insulation.
Wall Cut-out: A minimum 10” X 10” square hole is
adequate for proper pipe clearance through a wall,
provided the vent is positioned to maintain 2” min-
imum clearance at the top. A 1” minimum clear-
ance must be maintained to combustible material
around the other sides. See fig. 11.
Any horizontal run of vent must have a 1/4” rise for
every foot of run toward the termination cap.
All horizontal terminations must comply with the
clearance specifications to adjacent structures as
indicated in fig. 12.
Installation of a Vinyl Siding Standoff is required
to prevent damage to vinyl siding between the
vent cap and the exterior wall.
A horizontal terminationcap must maintaina 3”clear-
ance toany overhead combustible projections that are
21/2”or less. It must also maintain a 12”clearance from
projections that exceed 2 1/2”. See fig.13.
Vinyl siding projections require a default clearance of
18”to the vent terminal.
Figure 10. Minimum vent
pipe sections required for a
14” Snorkel termination.
Figure 9. Minmum vent
pipe sections required for
horizontal termination.
Figure 11. Install a
listed wall thimble
according to manu-
facturer’s instructions
to maintain required
clearance to combus-
tible materials.
Listed Wall
Thimble
Listed Wall
Thimble

11
Figure 13.
Termination clearance to overhangs.
A = Clearance above grade, veranda, porch , deck, or balcony
: 12 inches (30 cm) minimum.
B = Clearance to window or door that may be opened:
**Min. 9 inches, U.S. / *12 inches (30 cm) CAN.
We recommend 12 in. minimum to prevent condensation
on the window.
C = Clearance to permanently closed window:
**Min. 9 inches, U.S. / *12 inches (30 cm) CAN
We recommend 12 in. minimum to prevent condensation
on the window.
D = Vertical clearance to ventilated soffit located above the
terminal within a horizontal distance of 2 feet (60 cm)
from the center line of the terminal: 18 inches
(46 cm) minimum.
E = Clearance to unventilated soffit: 12 inches (30 cm)
minimum.
F = Clearance to outside corner: **Min. 9 inches, U.S. / *12
inches (30 cm) CAN.We strongly recommend 12 inches,
particularly where windy conditions prevail.
G = Clearance to inside corner: ** Min. 6 inches, U.S. / *12
inches (30 cm) CAN.We strongly recommend 12 inches,
particularly where windy conditions prevail.
H = *Not to be installed within 15 feet (4.5 m) above a me-
ter/regulator assembly within 3 feet (90 cm) horizontally
from the center line of the regulator.
I = Clearance to service regulator vent outlet:
3 feet (91 cm) minimum.
J = Clearance to non-mechanical air supply inlet to building
or the combustion air inlet to any other appliance:
12 inches (30 cm) minimum.
K = Clearance to a mechanical air supply inlet:
**Min. 3 feet (91 cm) above if within 10 feet horizontally,
U.S. / *6 feet (1.83 m) minimum / CAN
L = 1Clearance above paved sidewalk or a paved driveway
located on public property: 7 feet (2.1 m) min.
M = Clearance under veranda, porch, deck, or balcony:
12 inches (30 cm) minimum.2
* In accordance with CSA B149 Installation Codes.
** In accordance with the current ANSI Z223.1/NFPA 54, National
Fuel Gas Code. Note: Local Codes and Regulations may require
different clearances.
1A vent shall not terminate directly above a sidewalk or driveway
which is located between two single family dwellings and serves
both dwellings.
2Only permitted if veranda, porch, deck, or balcony, is fully open
on a minimum of two sides beneath the floor.*
Figure 12. Horizontal termination clearances

12
Intake Air Adjustment
An Intake Air shutter plate allows further burner
adjustment for taller vent runs. It is located under the
firebox floor and is set fully open at the factory. See
fig. 16.
The shutter has an adjustment range of 1 inch.
To change the setting, loosen the wingnut and slide
the gasketed shutter stem backward to the half or
fully closed positions, depending on which vent zone
is appropriate. Retighten the wingnut before lighting
the burner to seal the gasket. Allow the flame pattern
to settle in for 10- 15 minutes between each setting
change.
Figure 15. Exhaust Restrictor settings
Figure 14. The Exhaust Restrictor is located within the
vent adaptor collar.
Exhaust Restrictor Adjustment
1. Remove the Trim Rings from the Top Plate.
2. Loosen the locking screw and turn the restrictor
pivot plate to the appropriate indicator point as
specified in the vent window diagram, figure 17.
After the burner has been operating for 15 minutes,
make any further adjustment in 1/8” increments
until the desired flame picture is achieved. Do not
exceed the fully closed setting as shown in fig. 15.
Operate the burner for 10-15 minutes between ad-
ditional adjustments.
3. Tighten the locking screw and replace the Trim
Rings.
Vent Restriction Adjustments
The Jøtul GF 370 DV features adjustment controls for
both intake air and exhaust to accommodate a variety
of conditions that result from variables inherent in the
vent configuration and environment. Both controls
can be accessed from outside the firebox to allow the
burner to be “dialed-in” under operation. See figures 14
and 16.
Use the Vent Termination Diagram, fig. 17, to
determine which zone your vent termination falls
within and make the appropriate exhaust and air
intake setting adjustments. Use these settings as
general guidelines to start from. The final settings
will ultimately be determined by the individual
characteristics of your particular installation.
There are no hard and fast rules.
Figure 16. Air intake shutter location.
Zone D
Vent terminations within Zone D are susceptible
to draft conditions that may interfere with the
intermittent Pilot Ignition functionality. In such
cases, we recommend that the stove be operated
only in Continuous Pilot Ignition mode.
Exhaust Vent Restriction
Exhaust restriction prevents overly strong draft
that can interfere with pilot function, cause poor
combustion or a weak flame picture. The shutter is
set in the fully open position at the factory. The final
position of the restriction shutter is determined by
where the vent termination falls within the vent
window diagram.
For example, if the vent rise is 20 feet and
includes one elbow in a horizontal run of 5 feet, the
appropriate exhaust setting will be Full Restriction.
Top Plate
Pivot Plate

13
Figure 17 . Vent Termination Diagram.
ANY VENTING WITH A VERTICAL RISE MUST
TERMINATE (END) WITHIN THE SHADED AREAS.
A maximum of two
90° or four 45° elbows
may be used.When-
ever possible, use 45°
elbows instead of 90°
elbows as they of-
fer less restriction to
the flow of flue gases
and intake air. Use of
elbows may adversely
affect IPI functional-
ity. In such cases, CPI
mode should be used.
Reduce the overall
horizontal run by
4 feet for each 90°
elbow, and 2 feet for
each 45° elbow.
When two or more
elbows are used in a
horizontal run, a less
restricted setting may
be more effective than
that indicated by the
termination zone dia-
gram.

14
Stove Assembly
1. Glass Frame Removal
To access the firebox, use the 4 mm hex key to
remove the four socket head screws that attach the
glass frame to the firebox. See fig. 18.
2. Routing the Power Supply
The power cord located in the valve compartment is
connected to the Fan Control Module which is the
main power supply for all stove operating functions.
Route the cord through the pedestal and out the rear
of the pedestal base as in fig. 18, or through the floor.
CAUTION:Take care that the pedestal base does not
pinch the power cord. You should be able to feel free
play in the cord.
The 10 foot extension power cord, supplied in
the hardware bag, is intended to connect the interior
cord to the nearest 120V house current outlet.
DO NOT CONNECT THE STOVE TO HOUSE CUR-
RENT UNTIL THE INSTALLATION IS COMPLETE AND
YOU ARE READY TO INITIATE THE FIRST BURN.
Figure 18.
Glass frame
removal.
3. Connecting the Gas Supply
Gas Supply Requirements
ALL INSTALLATIONS MUST COMPLY WITH LOCAL
CODE OR IN THE ABSENCE OF LOCAL CODE, MUST
COMPLY WITH THE MOST RECENT EDITION OF THE
NATIONAL FUEL GAS CODE ANSI Z223.1/NFPA 54 OR
CAN-B149.
Shut-off Valve
All codes require a gas hut-off valve (gas cock)
and union to be installed in the supply line within 6
feet of the appliance. This allows for the disconnec-
tion of the stove for servicing and maintenance. See
Fig. 19.
A T-HANDLE GAS SHUT-OFF VALVE IS RE-
QUIRED IN MASSACHUSETTS IN COMPLIANCE
WITH CODE 248CMR.
THIS PRODUCT MUST BE INSTALLED BY A
LICENSED MASTER OR JOURNEYMAN PLUMBER
OR GAS-FITTER WHEN INSTALLED IN THE
COMMONWEALTH OF MASSACHUSETTS.
The stove and gas control valve must be discon-
nected from the gas supply piping during any pres-
sure testing of the system at test pressures in excess
of 1/2 psig. For pressures lower than 1/2 psig, isolate
the gas supply by closing the manual shut-off valve.
Control Valve Connection
The gas supply line connection to the stove flex
line can be made at the rear of the base plate or
through the floor. The gas supply line should be a
minimum 3/8” inside diameter, or the appropriate
size to provide sufficient gas pressure to the valve
regardless of the input setting.
The use of flexible gas appliance connectors is ac-
ceptable in many areas in the U.S. In Canada, methods
vary depending on local code. If local codes permit,
use flexible gas line for ease of installation and ser-
vice. For those locales where flexible gas lines are not
permitted, use the 3/8” iron fitting to make the con-
nection at the top side of the Control Valve. See fig. 19.
Secure all joints tightly using appropriate tools
and sealing compounds (for propane units, be sure to
use compounds that are propane resistant). Turn on
gas supply and test for gas leaks using a 50/50 soapy
water solution or a gas detector.

15
Figure 19. Gas supply valve types and fittings.
Soap Solution Leak Test
• Mix a 50-50 solution of water and dish soap.
• Light appliance - see lighting instructions on the
back cover of this manual or on the rating plate.
• Brush or spray all joints and connections with the
soapy water solution.
• If bubbles appear at any connection or seam or a
gas odor is detected, immediately turn gas control
knob to the OFF position.
Tighten or reconnect the leaking joint and retest
for any gas leaks.
The line must be isolated from the gas supply line
by closing the main supply manual gas shut-off valve
(gas cock) during any pressure testing of the gas sup-
ply piping system that is equal to or exceeds pressures
of 1/2 psig (3.5 kPa).
4.Testing Gas Pressure
Proper gas pressure provides a consistent flow of gas
to the appliance and is instrumental in checking for
gas leaks.There are two pressure test points on the
front of the stove control valve where test gauge con-
nections are made. See Fig. 20. Gauge connections
are identified by:
• E for inlet or supply pressure ( the amount of gas
coming to the valve.)
• A for manifold pressure (the amount of gas that is
coming out of the valve to the burner.)
WARNING
DO NOT ALLOW THE INLET GAS PRESSURE TO
EXCEED 14.0”WC (OR 1/2 PSIG) AS SERIOUS
DAMAGE TO THE VALVE MAY RESULT.
NEVER USE AN OPEN FLAME TO CHECK FOR GAS
LEAKS.
ALWAYS REFER TO THE LIGHTING INSTRUCTIONS
ON THE INSIDE BACK COVER OF THIS MANUAL
WHEN LIGHTING THE STOVE.
Figure 20. Pressure test points located on the front
of the valve.
Manifold
Inlet Pilot Adjustment
E
A
Inlet Pressure
MIN MAX
Natural Gas: 5.0 WC (1.24 kPa) 7.0 WC (1.74 kPa)
Propane: 12.0 WC (2.99 kPa) 14.0 WC (3.48 kPa)
Manifold Pressure
MIN MAX
Natural Gas: 1.6 WC (0.398 kPa) 3.5 WC (.87 kPa)
Propane: 6.4 WC (1.59 kPa) 10.0 WC (2.48 kPa)
ALWAYS TEST PRESSURES WITH VALVE REGULATOR
CONTROL AT THE HIGHEST SETTING.
Symptoms of incorrect gas pressure include:
Insufficient gas pressure:
• Small pilot flame which can result in insufficient
millivolts.
• Little variation in flame picture between HI and LO
regulator settings.
• Insufficient gas to support more than one appli-
ance causing nuisance outages or gas surges.
Excessive gas pressure:
• Permanent damage to valve causing complete ap-
pliance shut down.
• Too large a pilot flame resulting in overheating of
the power generator and consequent shut down.
• Sooting due to impingement and/or incorrect fuel
to air mix.

16
• Label B - apply to the rating plate in the space indi-
cated on the plate.
• Small valve label - apply to valve body
• Conversion instructions
5. Fuel Conversion
The GF 370 DV gas stove is shipped from the factory
equipped to burn either Natural or Propane gas. Fuel
Conversion Kits are available to convert to the alter-
nate fuel.The kit contains all the necessary compo-
nents needed to complete the task and ensure safe
operation, including labels that must be affixed to the
stove.
CAUTION: Before proceeding with this conversion,
the gas supply must be shut off prior to disconnecting
the electrical power.
This conversion kit shall be installed by a qualified
service agency in accordance with the manufacturer’s
instructions and all applicable codes and requirements
of the authority having jurisdiction.If the informa-
tion in these instructions is not followed exactly, a fire,
explosion, or production of carbon monoxide may result
causing property damage,personal injury or loss of life.
The qualified service agency is responsible for the proper
installation of this kit.The installation is not proper and
complete until the operation of the converted appliance
is checked as specified in the manufacturer’s instructions
supplied with the kit.
Cet équipement de conversion sera installé par une
agence qualifiée de service conformément aux instruc-
tions du fabricant et toutes exigences et codes appli-
cables de l’autorisés avoir la juridiction. Si l’information
dans cette Instruction n’est pas suivie exactement,un
feu,explosion ou production de protoxyde de carbone
peut résulter le dommages causer de propriété, pert ou
blessure personnelle de vie. L’agence qualifiée do service
est esponsable de l’installation propre de cet équipe-
metn.L’installation n’est pas propre et complète jusqu’à
l’operation de l’appareil converi est chéque suivant les
critères établis dans les instruction de propriétaire provi-
sion nées avel l’équipement.
Fuel Conversion Procedure
1. Turn off gas supply to the stove and disconnect
from electrical power source.
2. Remove the glass frame. See fig. 18.
3. Loosen the primary air shutter wingnut and push
the stem all the way back. Fig. 21.
4. Pull the Burner Plate forward to disengage it from
the burner orifice and lift it out of the firebox.
5. Locate the main burner injector. See fig. 23 on
page 17. Slide the Air Shutter out of the way and
use a 1/2” open end wrench or deep-well socket to
remove the burner orifice from the brass orifice
holder. Replace with the orifice supplied in the
kit. Tighten securely.
6. Change the Air Shutter position: Lift the shutter
tube up in its hinge pin slots and turn the tube
over, so that the appropriate fuel type indicator
(LP or NG) is oriented facing you. See fig. 22. Push
the shutter all the way back over the injector.
7. Change the Pilot Orifice. Pull the Pilot Hood off of
its base. It will snap by the retainer clip shown in
Fig. 23. Using a 4 mm allen wrench, unscrew the
Figure 21.
Figure 22. Primary air shutter orientation must be
changed for fuel type.
Conversion Kit (LP #156800, NG #156801)
Tools required:
• 1/2” & 13 mm open end wrench or deep-well socket
• Torx T20 or slotted screwdWishing
• 7/16”open end wrench
• 3 mm allen wrench
Conversion Kit Contents:
• 1 regulator tower labeled for the appropriate fuel
• 2 regulator tower Torx screws
• 1 burner injector (#38 mm for NG, #52 for LP)
• 1 pilot orifice (#51 for NG, #35 for LP)
• Label A - to be completed and applied to the base
of the valve compartment
• 1/4” nut driver
• 4 mm allen wrench

17
pilot orifice. Replace it with the orifice from the
kit. Be sure the new orifice is tightly secured to
prevent by-pass leakage.
Replace the pilot hood by simply pushing it
back into place on its base.
8. Reinstall the Burner Plate by engaging the ven-
turi tube with the Air Shutter. BE CERTAIN THE
BURNER IS LEVEL AND SECURELY SEATED ON THE
SUPPORT LEGS ON THE FIREBOX FLOOR.
9. Replace the variable regulator. Using a Torx T-20
screwdriver, remove the two specialty screws
from the regulator tower on the front of the
valve.Note:To help identify which screws to remove,
refer to the new regulator in the kit.See fig.23.
10. Remove the regulator tower and the rubber
diaphragm. Be sure to remove the black rubber
gasket from the valve.
11. Install the new variable regulator tower from the
kit. Be sure that the gasket is properly positioned
and tighten screws securely.
12 .Applytheidentificationlabelsto thestovesothat theycan
beseenbyanyperson that maybeservicingthestove.
•Label“A”: Apply to front lipofthe valve compartment.
• Label “B”: Apply to the Rating Plate.
• Small valve sticker: Apply to valve.
13. Install the accessory panels and burner media as
appropriate. See pages 19-21.
14. Apply anti-seize lubricant to the socket head glass
frame screws before reinstalling the glass frame.
15. Apply gas to the system and check for leaks using
a soapy water solution or gas sensor.
16.Follow the System Check instructions on pages 22-23
for initial start-up and flame picture adjustment.
Flame Sensor
Pilot Orifice
Injector
Figure 23. Fuel conversion components and assemblies
Primary Air
Shutter
Regulator
Diaphragm
Regulator
Tower
Use new Torx
screws supplied
Apply Label
“A” Here
Retainer Clip
Ignitor
Pilot Head

18
6. High Altitude Adjustment
The decreased atmospheric pressure of higher alti-
tudes affects heat value of gaseous fuels. Most gas
suppliers derate the gas intended for use at eleva-
tions above 2000 feet. Check with your gas supplier
before performing derate adjustment to the burner.
This appliance may be adjusted for altitude over
2000 ft. (610 - 1371 m) for natural gas or propane.
If the gas supplier does not derate fuels, install High
Altitude Adjustment Kit 156821 for Propane and Kit
156822 for Natural gas.
U.S & Canada per
ANSI Z21.88-2005•CSA 2.33-2005,CAN/CGA 2.17
For installations from 610-1370 meters (2000-4500
ft.) the orifice sizes (DMS) for natural and propane
gas are #39 and #53 respectively. See data plate for
additional information.For high altitude installations
consult the local gas distributor or the authority
having jurisdiction for proper rating methods. If the
installer must convert the unit to adjust for varying
altitudes, the information sticker must be filled
out and applied to the appliance at the time of the
conversion.
INSTALLER: Fill out the appropriate information
and apply the high altitude conversion label provid-
ed to the rating plate on the appliance. See fig. 24.
Derating Procedure
• Follow Steps 1-6 of the Fuel Conversion procedure
on pages 16 to change the burner injector. Use the
injector supplied with the kit. Detailed instruc-
tions are also included in the kit.
• Conduct gas leak and gas pressure tests as de-
tailed on page 15 of this manual.
• Conduct system check and flame picture adjust-
ments as specified on pages 22-23.
Figure 24. High Altitude Conversion Label.
This appliance has been converted for use at an
altitude of___________ .
Orifice Size: __________ Manifold Press. _______
Input Btu/Hr. _________ Fuel Type ___________
Date: ___/___/___ Converted by:_____________
Cet appreeil a été converti au _____ Injecteur_____
Pression à la tubulure d’alimentation ___________
Déoit calorifique ___________
7. Firebox Panel Installation
for Skamol Kit 156816
or
Reflective Glass Kit 156817
You will need to remove the pilot hood and burner
plate to provide clearance to install either panel kit.
Pull the pilot hood off of the pilot base - it will slip
past its retainer clip. Simply lift the burner up and out
of the firebox.
Skamol Panels
1. Install the Rear Panel.
Orient the panel with the bevelled edges facing
back, matching the angles of the firebox walls.
Tilt the panel to engage the upper edge behind
the two retainer brackets at the top of the fire-
box. Push the panel all the way back and centered
against the firebox wall. See fig. 25a.
2. Install the Side Panels.
Orient each panel with the rounded edge facing
forward. Tilt the panel to engage the upper edge
behind the retainer clip at the top of the firebox.
See fig. 25b.
3. Replace the burner plate. When properly located, it
will be level and secure.
4. Replace the pilot head. It will just snap back into
place on the base.
Reflective Glass Panels
Use the cotton gloves to handle the panels to prevent
fingerprints on the surfaces. Fingerprints are difficult
to remove. Use a clean cloth to remove any dust from
the glass panels.
1. Orient the rear panel, shiny side out, textured side
in. Tilt the panel to engage its upper edge behind
the retainer brackets.See fig. 26a. Each bracket is se-
cured to the top of the firebox by a sheet metal screw,
located behind the forward flange.It may be necessary
to slightly loosen the screw to adjust the bracket to
accommodate the rear panel.
2. Orient the side panels, shiny side out, tilting each
to first engage the top edge behind the retainer
bracket, and then swinging the panel up against
the wall. Retighten the screws if appropriate. See
Fig. 26b.
3. Replace the burner plate. When properly located, it
will be level and secure.
4. Replace the pilot head. It will just snap back into
place on the base.
Cet appareil est equippé pour des altitudes compries
entre 0 et 2000 pieds (0-610 m ) seulement.

19
8. Install Burner Media
Wishing Rock
CAUTION:THE ROCKS ARE FRAGILE! SUPPORT THE
ASSEMBLY FROM THE BOTTOM AND HANDLE CARE-
FULLY!
1. Engage the Wishing Rock bed with the two center
burner pins as shown in fig. 27.
2. Evenly disperse the Ember Stones supplied over
the burner plate around the log parts. DO NOT
ALLOW EMBER STONES TO BLOCK THE PILOT AS-
SEMBLY AREA. The carry-over ports directly in front
of the pilot must remain clear for proper pilot
ignition. See figs. 29 and 65 for examples.
Starfire Glass
Do not use more than the four pounds (in two, 2 lb.
bags) of glass media provided. For best results, evenly
spread the contents of the bag over the entire burner
plate and rear skirt, mounding a crown toward the
center. DO NOT COVER THE AREA IMMEDIATELY IN
FRONT OF THE PILOT ASSEMBLY. The carry-over ports
directly in front of the pilot assembly must be clear to
ensure proper pilot ignition. See fig.66 page 34.
Figure 27. Set Wishing Rock assembly on
Figure 25a.
Install Rear Skamol
Panel.
Rear Panel
Retainer Brackets
Side Panel
Figure 25b.
Install Rear Skamol
Panels.
Figure 26a.
Install Rear Glass
Panel.
Figure 26b.
Install Side Glass
Panels.
Bracket screws
may be loosened
slightly to ease
panel installation.

20
Figure 28. Engage the Bottom Log with the two
center pins in the burner plate.
Install the Log Set
The three-piece log set includes a bag of ember
stones that simulate glowing coals when the burner
is operating.
Use workgloves and handle the individual logs
carefully, supporting each with both hands. Install
the Logset and Ember Stones as shown in figures
28-31.
Figure 29. Lean the Right Log up against the upper
right corner of the firebox and engage its toe with the
indentation in the Bottom Log.
Figure 30. Engage the Left Log with the rear burner
plate pin.
Figure 31.
Evenly disperse the Ember Stones evenly over the
burner plate around the log parts. DO NOT ALLOW
EMBER STONES TO BLOCK THE PILOT ASSEMBLY AREA.
The carry-over ports directly in front of the pilot must
remain clear for proper pilot ignition.
Replace the Glass Frame.
Apply a small amount of the anti-seize lubricant
supplied to each of the socket head screws and rein-
stall the glass frame using the 4 mm hex key.
Other manuals for GF 370 DV
4
Table of contents
Popular Cooktop manuals by other brands

Whirlpool
Whirlpool KICU509 installation instructions

St George
St George BISG801 Appliance operation manual

GE
GE JGP932 installation instructions

KitchenAid
KitchenAid KGCS166GAL1 parts list

Smeg
Smeg SUK81MBL5 Instructions for installation and use

KitchenAid
KitchenAid Architect Series II KGRS807S Dimensions