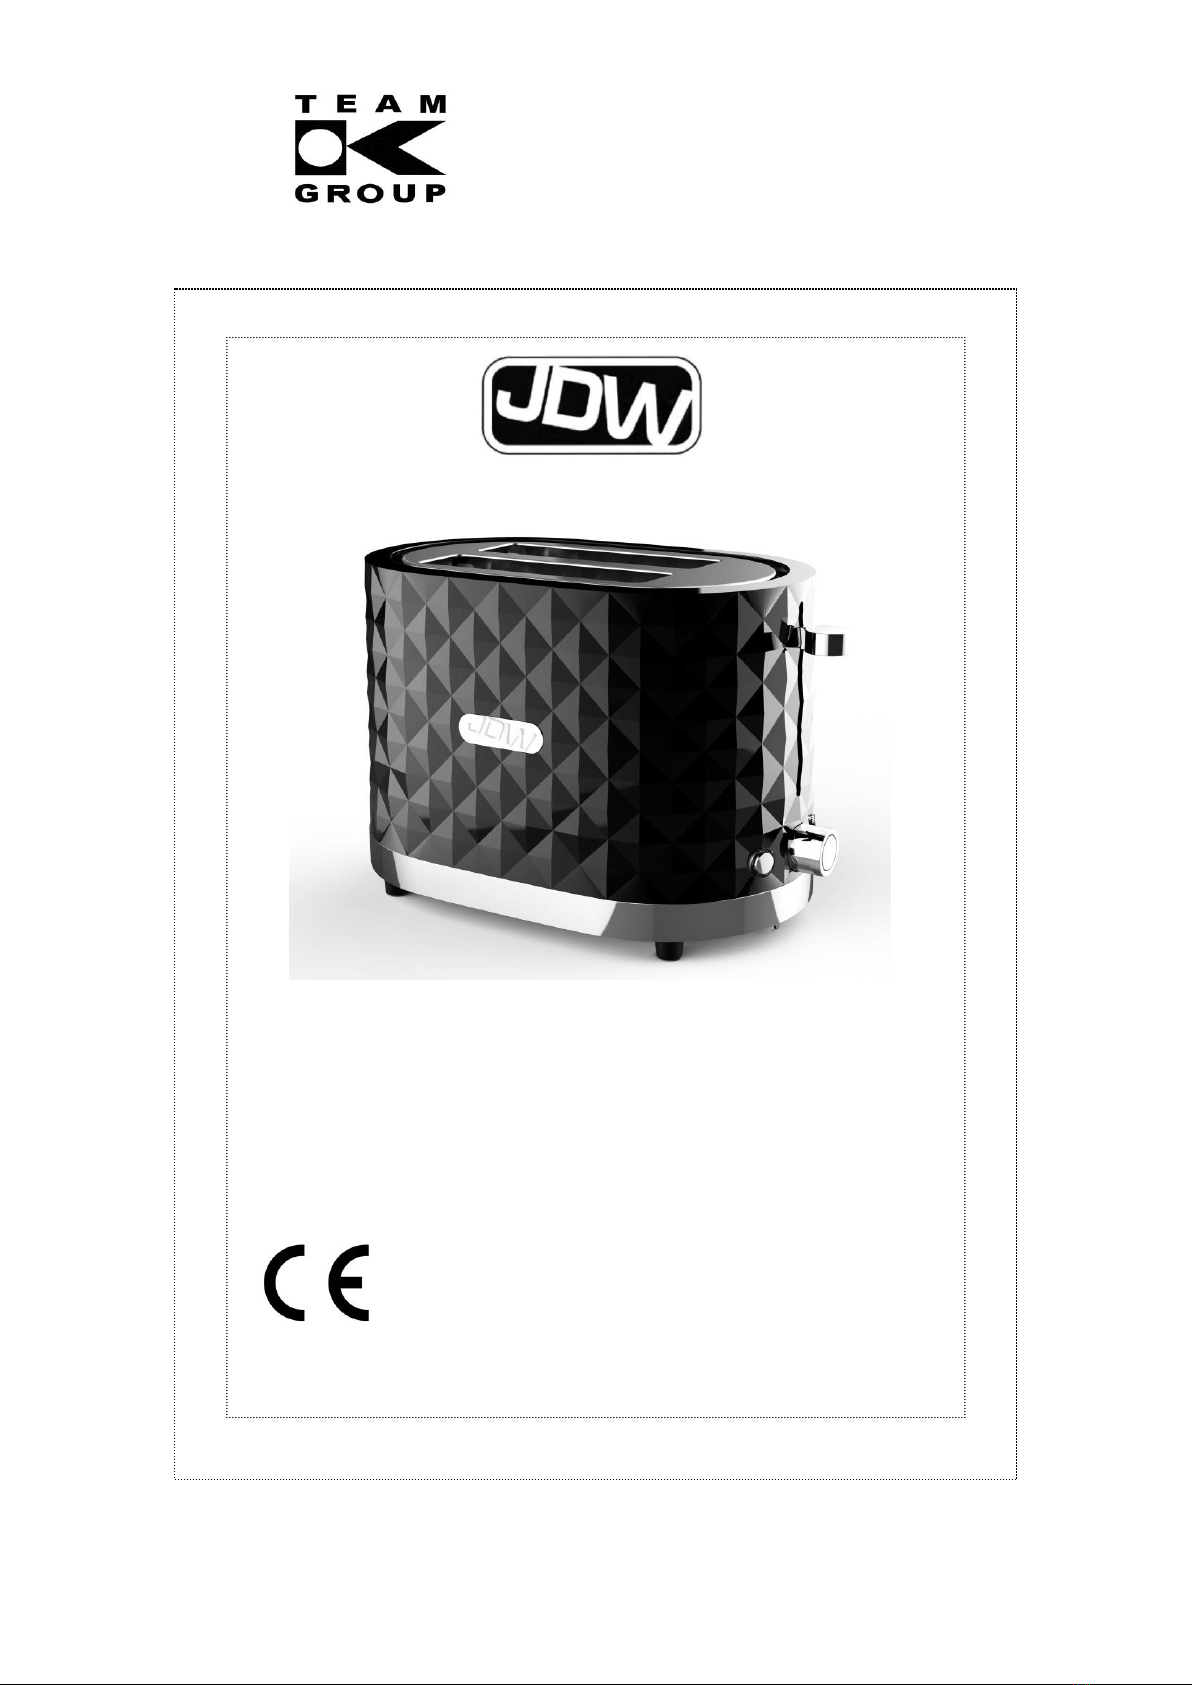
JDW Diamond Cut 2 Slice Toaster User manual
Copies of the I/B. Please reproduce them without any
changes except under special instruction from Team
International BELGIUM. The pages must be reproduced
and folded in order to obtain a booklet A5 (+/- 148.5 mm
width x 210 mm height). When folding, make sure you
keep the good numbering when you turn the pages of
the I/B. Don’t change the page numbering. Keep the
language integrity.
Front cover page (first page)
Assembly page 1/8
Fax +32 2 359 95 50
I/B Version
150217
Diamond Cut
2 Slice Toaster
Cool Touch Plastic
230V~ 50Hz 1000W
Copies of the I/B. Please reproduce them without any
changes except under special instruction from Team
International BELGIUM. The pages must be reproduced
and folded in order to obtain a booklet A5 (+/- 148.5 mm
width x 210 mm height). When folding, make sure you
keep the good numbering when you turn the pages of
the I/B. Don’t change the page numbering. Keep the
language integrity.
2 150217
Assembly page 2/8
Fax +32 2 359 95 50
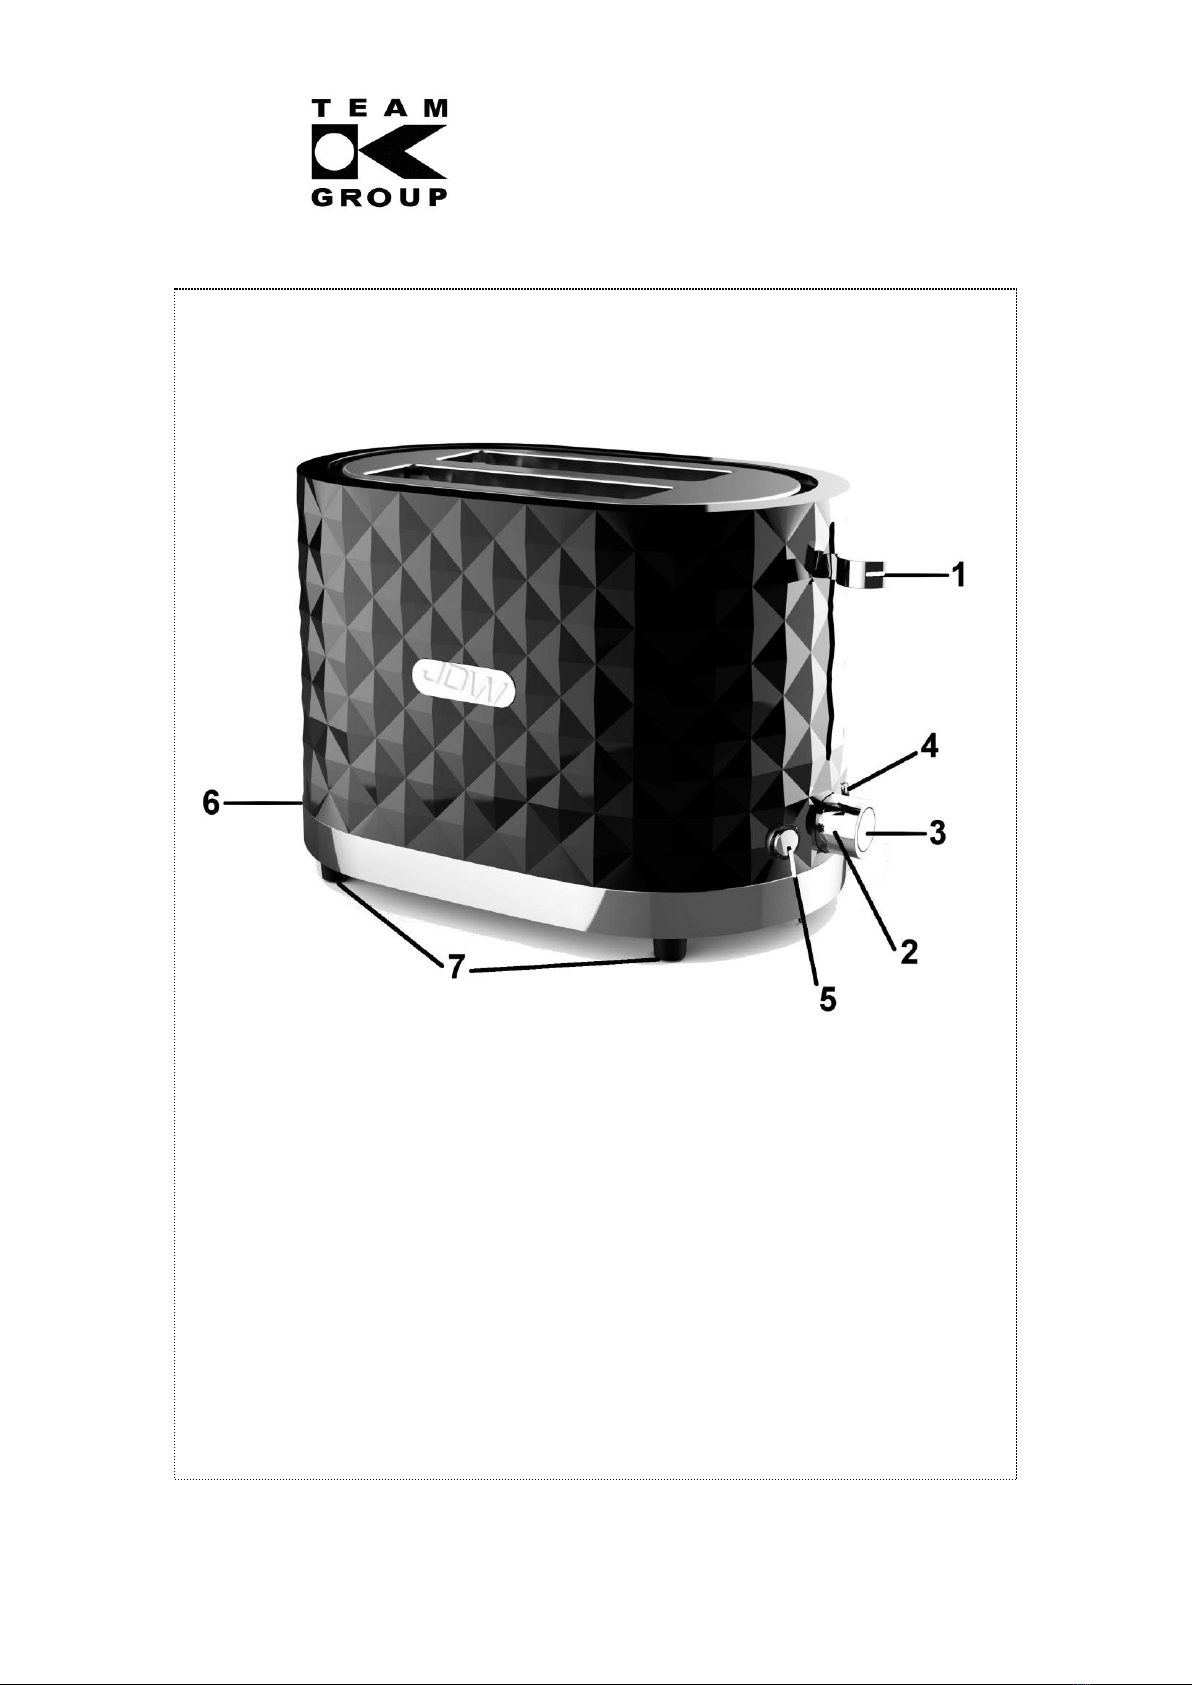
Know Your Appliance
1. Bread Carriage Lever
2. Rotary Browning Control
3. Cancel button
4. Defrost / Frozen Bread Button
5. Reheat Button
6. Removable Crumb Tray
7. Non-slip feet
Please note that the pattern / colour of your product may differ to as shown above.
These user instructions apply regardless of pattern / colour.
Copies of the I/B. Please reproduce them without any
changes except under special instruction from Team
International BELGIUM. The pages must be reproduced
and folded in order to obtain a booklet A5 (+/- 148.5 mm
width x 210 mm height). When folding, make sure you
keep the good numbering when you turn the pages of
the I/B. Don’t change the page numbering. Keep the
language integrity.
3 150217
Assembly page 3/8
Fax +32 2 359 95 50
IMPORTANT SAFEGUARDS
Please read these instructions carefully before using the appliance,
and always follow the safety and operating instructions.
Important: This appliance can be used by children over 8 years old
and people with reduced physical, sensory or mental capacities or
with a lack of experience or knowledge if they have been given
supervision or instructions concerning the safe use of the appliance
and the risks involved. Children shall not play with the appliance.
Cleaning and user maintenance shall not be made by children unless
they are older than 8 years and supervised. Never leave the
appliance and its cord unsupervised and within reach of children less
than 8 years old or irresponsible persons, especially when it is
plugged into the wall or when it is cooling down.
Check that your mains voltage corresponds to that stated on the
appliance.
Never leave the appliance unsupervised when in use.
IMPORTANT: If the bread carriage handle gets blocked
during use (e.g. because the bread slices are too thick) and
the bread starts burning, unplug the appliance immediately
and let it cool down before emptying and cleaning it. Should
the problem persist, contact a competent qualified electrician
(*).
Check the cord for damages from time to time. Never use the
appliance if the cord or appliance shows any signs of damage.
Should the cord be damaged, it must be replaced by a competent
qualified electrician(*). All repairs should be made by a competent
qualified electrician(*).
Use the appliance for domestic purposes only and in the way
indicated in these instructions.
Never immerse the appliance in water or any other liquid for any
reason whatsoever. Never place it into the dishwasher.
Never use the appliance near hot surfaces.
Before cleaning, always unplug the appliance from the power
supply.

Copies of the I/B. Please reproduce them without any
changes except under special instruction from Team
International BELGIUM. The pages must be reproduced
and folded in order to obtain a booklet A5 (+/- 148.5 mm
width x 210 mm height). When folding, make sure you
keep the good numbering when you turn the pages of
the I/B. Don’t change the page numbering. Keep the
language integrity.
4 150217
Assembly page 4/8
Fax +32 2 359 95 50
Never use the appliance outside and always place it in a dry
environment.
Never use accessories which are not recommended by the
producer. They could constitute a danger to the user and risk to
damage the appliance.
Never move the appliance by pulling the cord. Make sure the cord
cannot get caught in any way. Do not wind the cord around the
appliance and do not bend it.
Stand the appliance on a table or flat surface.
Make sure the appliance has cooled down before cleaning and
storing it.
Make sure the cord never comes into contact with the hot parts of
the appliance. Never touch the hot parts of the appliance.
Make sure the appliance never comes into contact with
inflammable materials, such as curtains, cloth, etc. when it is in
use, as a fire might occur. Keep a distance of at least 1 metre
between the appliance and the curtains.
Do not use the appliance for defrosting food other than bread
slices, and only insert unbuttered slices of bread of which the
thickness does not prevent the bread from coming up. Be
extremely strict about this as toasters are the cause of many fires
when these elementary safety precautions are not observed.
Empty the appliance frequently of breadcrumbs. Make sure the
appliance is always unplugged before emptying it. Check the
“Maintenance and Cleaning” section.
When cleaning the appliance, do not use metallic scourers in
order to avoid any future risk of electric short circuit.
Your appliance must never be switched on through an external
timer or any kind of separate remote control system.
Please note: Should the symbol be indicated on a certain
surface, you need to be careful when handling the product. This
symbol means: CAUTION, this surface may get very hot during
use.
The symbol is always put on the surface with the highest
temperature, however the other metallic or non-metallic surfaces
can also become very hot during use and it is therefore advisable
to always handle them with care and if possible with the help of
isothermal gloves or other thermal protection. In case of doubt

Copies of the I/B. Please reproduce them without any
changes except under special instruction from Team
International BELGIUM. The pages must be reproduced
and folded in order to obtain a booklet A5 (+/- 148.5 mm
width x 210 mm height). When folding, make sure you
keep the good numbering when you turn the pages of
the I/B. Don’t change the page numbering. Keep the
language integrity.
5 150217
Assembly page 5/8
Fax +32 2 359 95 50
concerning the temperature of a certain surface it is always
preferable to protect oneself.
(*) Competent qualified service: after-sales department of the
producer or importer or any person who is qualified, approved and
competent to perform this kind of repairs in order to avoid all danger.
In case of need you should return the appliance to this service.
UK STYLE PLUG WIRING INSTRUCTIONS (IN THE UK ONLY)
This product must only be used from a 13 amp power socket. If a BS1363 approved 13 amp
plug is used, it should be fitted with a 13 amp fuse conforming to BS1362 and be ASTA
approved. The wires on the power cord are colour coded:
blue = neutral, brown = live, green or green & yellow = earth.
The blue wire must be connected to the terminal marked N or coloured in black.
The brown wire must be connected to the terminal marked L or coloured in red.
The green (& yellow) wire must be connected to the terminal marked E or coloured in green (&
yellow).
CAUTION: the bread carriage handle will not stay down if the appliance is not plugged in!
BEFORE USING THE TOASTER FOR THE FIRST TIME
In order to eliminate any manufacturing residues, operate the toaster a couple of times without
bread with the browning control selector on a medium power level. Some smoke might
escape.
OPERATION
Before using your appliance for the first time, check if it is clean (see “Maintenance and
cleaning”) as it comes into direct contact with bread. Check if any object has fallen into
the slot.
Connect the appliance only to a mains earthed wall socket.
Place the bread slices in the carriage ensuring that their thickness and their length are
thinner and shorter than the slot.
Press the bread carriage handle down until it stops (at the same time, the grid inside the
slot will tighten around the bread in order to keep it away from the heating wires). Then
release the pressure and the handle will stay in the lower position, which means that the
heating process has begun. If the handle comes up immediately, check if the appliance is
plugged in as it holds only when the unit is plugged in.
You can adjust the browning intensity to obtain a more or less toasted bread by
positioning the browning control selector to one of the degrees marked from 1 to 7.
Therefore you only have to turn clockwise to increase the intensity, and anticlockwise to
decrease it. The higher the number is, the more toasted the bread will be.
During the functioning, if you think that the bread is toasted enough or for another reason,
you can break the heating process simply by pressing the cancel button.
The defrost button allows you to toast bread that has been frozen beforehand.
Always unplug the appliance after use and let it cool down before handling, storing, or
cleaning it.
When storing your appliance, when cool wind the cord around the hooks located under
the base of the product.

Copies of the I/B. Please reproduce them without any
changes except under special instruction from Team
International BELGIUM. The pages must be reproduced
and folded in order to obtain a booklet A5 (+/- 148.5 mm
width x 210 mm height). When folding, make sure you
keep the good numbering when you turn the pages of
the I/B. Don’t change the page numbering. Keep the
language integrity.
6 150217
Assembly page 6/8
Fax +32 2 359 95 50
TOASTING FROZEN BREAD
To toast frozen bread, place the bread into the bread slots and select the desired
browning setting. Press the bread carriage handle down until it clicks into place and then
press the defrost button.
REHEATING TOAST
The toaster allows you to reheat toast without additional toasting. To reheat, place toast
into bread slots, lower the bread carriage handle until it clicks into place and press the
Reheat button.
HINTS
If the toast is too dark, use a lower toast setting.
Dry bread will require a lower setting than normal.
Thick bread, fresh or whole wheat bread will require a higher setting than normal.
Remove any loose fruit or nuts before toasting to prevent pieces falling into the toaster or
sticking to the heating element and causing damage.
Never force the bread into the bread toasting slot. Bread should fit freely between the
bread guards.
Uneven toasting is usually done to bread slices of uneven thickness.
MAINTENANCE AND CLEANING
Before attempting any cleaning operation, make sure the toaster is unplugged from the
supply socket and fully cooled down.
To remove bread crumbs, slide the crumb tray situated on the side of the appliance.
Caution! It is very important to empty the crumb tray regularly. Crumbs that have
accumulated in the toaster might burn and the appliance might catch fire.
Never use sharp objects to clean. Doing so could damage the appliance.
To clean the exterior surfaces, simply wipe over with a soft damp cloth. ON NO ACCOUNT
MUST THE TOASTER BE IMMERSED IN WATER OR ANY OTHER LIQUID.
All other maintenance and repair should be performed by a qualified technician. No
guarantee claims will be accepted if the appliance has been tampered with or
damaged previously.
PROTECTION OF THE ENVIRONMENT –DIRECTIVE 2012/19/EU
In order to preserve our environment and protect human health, the waste electrical and
electronic equipment should be disposed of in accordance with specific rules with the
implication of both suppliers and users. For this reason, as indicated by the symbol on the
rating label or on the packaging, your appliance should not be disposed of as unsorted
municipal waste. The user has the right to bring it to a municipal collection point performing
waste recovery by means of reuse, recycling or use for other applications in accordance with
the directive.
ErP Declaration –Regulation 1275/2008/EC
We, JD Williams Ltd., hereby confirm that our product meets the requirements of regulation
1275/2008/EC. Our product does not dispose of a standby mode as the toaster switches off
completely immediately after the toasting is finished and as a consequence does not
consume electricity!

Copies of the I/B. Please reproduce them without any
changes except under special instruction from Team
International BELGIUM. The pages must be reproduced
and folded in order to obtain a booklet A5 (+/- 148.5 mm
width x 210 mm height). When folding, make sure you
keep the good numbering when you turn the pages of
the I/B. Don’t change the page numbering. Keep the
language integrity.
7 150217
Assembly page 7/8
Fax +32 2 359 95 50
GUARANTEE
This product is guaranteed against manufacturing defects for a period of 1 year.
This does not cover the product where the fault is due to misuse, abuse, use in contravention of
the instructions, or where the product has been the subject of unauthorised modifications or
alterations, or has been the subject of commercial use.
In the unlikely event of a problem with the product within the guarantee period please return it
to the place of purchase. If the item is shown to have had an inherent defect present at the
time of sale, the seller will provide you with a replacement. Your statutory rights remain
unaffected.
Guarantor:
JD Williams Ltd.,
Griffin House, 40 Lever Street, Manchester, M60 6ES
The user manual is by simple request also available in electronic format from the after-sales
service (see warranty card).

Copies of the I/B. Please reproduce them without any
changes except under special instruction from Team
International BELGIUM. The pages must be reproduced
and folded in order to obtain a booklet A5 (+/- 148.5 mm
width x 210 mm height). When folding, make sure you
keep the good numbering when you turn the pages of
the I/B. Don’t change the page numbering. Keep the
language integrity.
Back cover page (last page)
Assembly page 8/8
Fax +32 2 359 95 50
Table of contents


