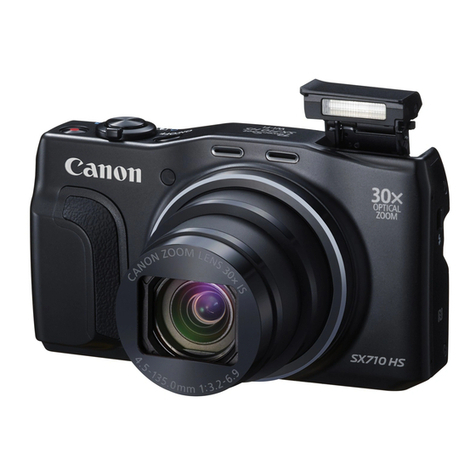
Jeasun SmartCam User manual

~ 1 ~
User Manual
Please read the user manual clearly for avoiding any wrong opeartion, current manual is not the newest
and not complete, please contact us if any query.

~ 2 ~
Catalog
Main Features...................................................................................................................................... 3
Install & Use ....................................................................................................................................... 4
Camera Body Instruction .................................................................................................................. 4
Remote Controller(Optional).......................................................................................................... 5
Install the battery............................................................................................................................ 6
Close the battery cover .................................................................................................................... 6
Install the Mount ............................................................................................................................ 7
Install the Waterproof case................................................................................................................ 8
Install the Memory card.................................................................................................................... 9
Power charge.............................................................................................................................. 10
Record & Capture......................................................................................................................... 12
Media Playback ........................................................................................................................... 13
Delete Files................................................................................................................................. 15
Connect with TV .......................................................................................................................... 16
Connect with PC .......................................................................................................................... 17
System Icons .................................................................................................................................... 18
Booting Picture............................................................................................................................ 18
Icons........................................................................................................................................ 18
Main Menu................................................................................................................................. 19
System Setting .................................................................................................................................. 20
Fast Setting ................................................................................................................................ 20
Date & Time ............................................................................................................................... 21
Video System.............................................................................................................................. 23
Wi-Fi ........................................................................................................................................ 24
Download & Install the APP............................................................................................................. 25
Screenshot of APP works ............................................................................................................... 26
REC Mode:................................................................................................................................. 27
Specifications.................................................................................................................................... 30
Standard Accessories .................................................................................................错误!未定义书签。

~ 3 ~
Main Features
480 x 240,1.5” TFT LCD Screen Display
14MP HD CMOS Image Sensor
150°Super Wide angle under 720P; 118°under 1080P
Full HD 1080P H.264 Video compression to MP4 format
Waterproof, shockproof, support 50M depth diving
Wireless RF remote controller
Support Multi-mode video record and picture shot
Built in WIFI, real-time video display and setting
Optional Video resolution
16:9 FULL HD 1920 x 1080p 30FPS
4:3 FULL HD 1280 x 960p 30FPS
16:9 FULL HD 1280 x 720p 60FPS
16:9 FULL HD 1280 x 720p 30FPS
16 : 9 WVGA 848 x 480 60FPS
Optional Picture resolution:14MP/12MP/8MP
Audio & Video playback
Support 1GB~32GB SDHC TF Storage card
USB2.0 for data transfer and power charge
HDMI & RCA Video output

~ 4 ~
Install & Use
Camera Body Instruction
1. Speaker
2. REC & Remote Indicator
3. USB Port
4. TF card slot
5. HDMI Port
6. Up key
7. Menu
8. Down Key
9. Power / Picture Shot
10.Power charge indicator
11.REC / Power Indicator
12.1.5” TFT LCD
13.REC/REC Indicator
14.MIC

~ 5 ~
Remote Controller(Optional)
REC button
Power button
Picture Shot
①Press and hold the button for 3 seconds to Power on the remote controller ( or Power
off) , the green indicator will turn on if powered on.
②Single press the button to power on the camera, the green indicator on remote will flash if
camera was powered up successfully, single press the POWER button again to turn off the
camera.
③Start video record. Press the button to start the video record, the indicator will turn on
the flash beside, press again to stop and video will be saved automatically, indicator will turn
off at the same time.
④Picture Shot. Single press button to take a picture, the indicator beside will flash once in
every successfully shot.
Note: Here has a indicator beside every button, if the indicator was not display or flash as the
instruction above, then that means the distance exceeded or the camera was not successfully
controlled by the remote.
⑤Open the Remote Mode of camera.
Press & hold the UP button 2 seconds
on the camera to enter the Remote Mode,
big blue indicator of camera will turn on.
Press & Hold the UP button 2 seconds
to exit the Remote Mode after power off
the camera, green indicator will turn off.
Charge the Remote Controller: Place the remote controller to the offered base charger,
another USB side to DC 5V, red indicator will turn on beside the POWER button, and will
power off after full charged.

~ 6 ~
Install the battery
Please install the battery correctly according to pictures below:
Open the face battery cover
Place the battery ( Character side up )
Close the battery cover

~ 7 ~
Install the Mount
Pull the both arms towards to outside like below, place the camera into it.

~ 8 ~
Install the Waterproof case
Close the back door
Note:
Power on the camera first and then place into the waterproof case, or use the remote to power on
the camera.
Single press REC button to stop/start video record.

~ 9 ~
Install the Memory card
a. Please install the memory card correctly as picture below:
b. Camera does not built in storage, support 1~32GB SDHC TF card.
c. Available storage volume could be seen on the screen.
No memory card icon displayed on the
screen if valid TF card detected.
The corner will show the icon if valid TF
card detected, and volume numbers will
display
Note:
Please format the storage card before using for regular work.

~ 10 ~
Power charge
①Put the battery into the camera, use the offered USB cable connect with 3rd party 5V
charger or PC to do the power charge.
②The red LED indicator of charger will turn on if power connected, means in normal charging.
③LED indicator will turn OFF if fully charged.
④Put the battery into the charger. use a dedicated USB cable connect with 3rd party 5V
charger or PC to do the power charge.

~ 11 ~
Battery fully charging time and usage time
Fully charging time
Standby time
Recording time
Approximately 2 Hours
Approximately 3.5
Hours
Approximately 110 minutes
Battery Icon
Full power
75% power
35% power
Low power
Note:
a ,Please do not keep the battery in the camera if long time aside.
b ,Please do not use up the power completely.
c ,Please fully charge the battery on first time use, it will help to extend the battery life.

~ 12 ~
Record & Capture
①Press Power button to turn on the camera, press REC button to start video record, when the
red icon displayed on the left corner of screen, that means the camera is doing normally
record.
②Camera could start video record immediately if Wi-Fi turned OFF, but if Wi-Fi turned ON,
camera will only available to start video record after Wi-Fi boot up completely, more details
please check the Wi-Fi setting page.
③Press POWER button to turn on the camera, press POWER button again to start taking picture.
If here has record icon on the screen, that means camera under recording state, means not if
no such icon.
Camera is not available to take picture if placed in the waterproof case, please use the remote
controller to do this.
Remote to take picture or record video, please check the Remote Controller instruction.
Picture taking function is not effected whatever the Wi-Fi is opened or not.

~ 13 ~
Media Playback
Press MENU button to enter the main menu, use < & > button to select the video folder like
below:
Press REC button to enter the folder, the video files display like below:
Use < & > to select the video, press REC button to confirm, press REC button again to play the
video.
About how to delete the files, please turn to page 16.

~ 14 ~
Picture playback
Press MENU button to enter the main menu, use < & > button to select the picture folder like
below.
Press REC button to enter the folder, the picture files display like below:
Use < & > to select the picture, press REC button to confirm, press REC button again to play the
picture.

~ 15 ~
Delete Files
Under playback or browse mode, press and hold the MENU button for 2 seconds, the delete
option menu will appear.
Use < & > button to select suitable option, press REC button to confirm.
Yes:Confirm to delete
Cancel:Drop current operation
Press REC button to confirm the operation.
Note:
Please think carefully before use this function, files can not be recovered after deleted, advise to
back up files in computer in advance.

~ 16 ~
Connect with TV
A,USB&RCA cable connect with TV
Insert the USB side to camera, insert the RCA head to TV ( Yellow-video; White-Audio), like below:
B,HDMI cable connect with TV
Insert the Micro-HDMI head to camera, insert the standard HDMI head to TV, like picture below:
Note:
The video output resolution is 1080P when play the recorded video clip, the real-time output
resolution is 480i.

~ 17 ~
Connect with PC
Camera connect with computer by USB cable, could browse the files in camera or charge the
power.
Power ON the camera after connect it with the computer by USB cable, the screen will display
connecting graphic like below:
Please choose the suitable option according to need.
USB : Mass storage Read the media in the SD card
USB:USB Charge Charging the camera via the USB
AV OUT USB RCA video output

~ 18 ~
System Icons
Booting Picture
Icons
1080P/30
Video size and FPS
REC icon
28000M
Available storage
Picture taking mode
00:33:24
Recorded time
Burst
2010/09/21
Date
TF Card
16:18
Time
Battery
Wi-Fi OFF
Wi-Fi ON

~ 19 ~
Main Menu
Icons
Video folder
Picture folder
REC setting
System Setting

~ 20 ~
System Setting
Fast Setting
Press & Hold the POWER button 2 seconds to turn on the camera, press MENU to enter the main
menu, use < & > button to select “System Setting” and press REC button to confirm & enter.
1,Language Setting
Press REC button to enter language setting, use < & > button to select, press REC button to
confirm and save the setting.
Here has 9 kinds of language in system, please make choice according to need.
Table of contents
