manuals.online logo
Brands
  1. Home
  2. •
  3. Brands
  4. •
  5. Jensen
  6. •
  7. Car Receiver
  8. •
  9. Jensen VM9413 User manual

Jensen VM9413 User manual

Other manuals for VM9413

2

Other Jensen Car Receiver manuals

Jensen cd3010x User manual

Jensen

Jensen cd3010x User manual

Jensen CR560X User manual

Jensen

Jensen CR560X User manual

Jensen VM9215BT User manual

Jensen

Jensen VM9215BT User manual

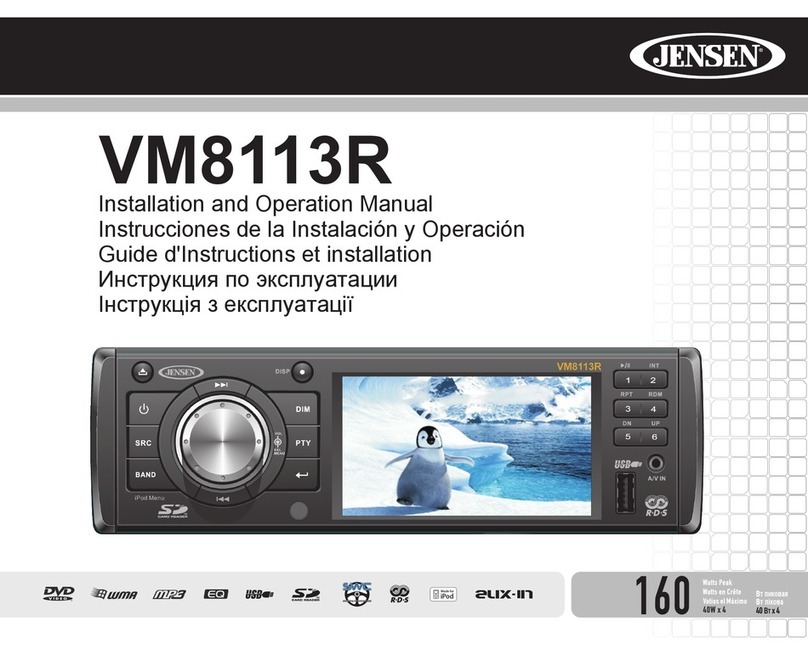
Jensen VM8113R User manual

Jensen

Jensen VM8113R User manual

Jensen HR9000PKG User manual

Jensen

Jensen HR9000PKG User manual

Jensen VM9424BT User manual

Jensen

Jensen VM9424BT User manual

Jensen VM9413 User manual

Jensen

Jensen VM9413 User manual

Jensen AWM968 User manual

Jensen

Jensen AWM968 User manual

Jensen MP6312I - Ipod/Mp3/Wma Receiver User manual

Jensen

Jensen MP6312I - Ipod/Mp3/Wma Receiver User manual

Jensen CD315X Instruction Manual

Jensen

Jensen CD315X Instruction Manual

Jensen PADIN4 User manual

Jensen

Jensen PADIN4 User manual

Jensen HR9000PKG User manual

Jensen

Jensen HR9000PKG User manual

Jensen VM9214BT User manual

Jensen

Jensen VM9214BT User manual

Jensen JCD3007 User manual

Jensen

Jensen JCD3007 User manual

Jensen VX302 User manual

Jensen

Jensen VX302 User manual

Jensen VX5228 User manual

Jensen

Jensen VX5228 User manual

Jensen JCD3050 User manual

Jensen

Jensen JCD3050 User manual

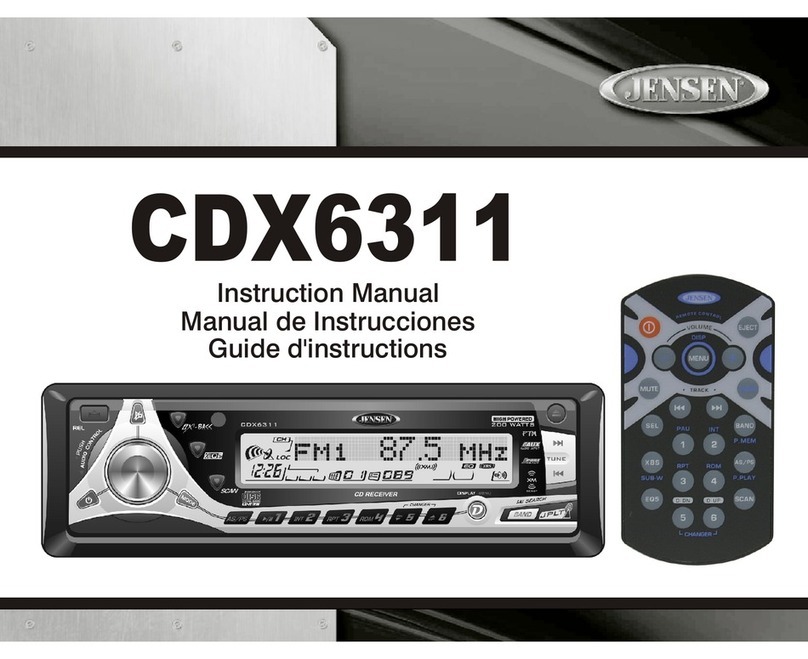
Jensen CDX6311 - Radio / CD Player User manual

Jensen

Jensen CDX6311 - Radio / CD Player User manual

Jensen CD510K Instruction Manual

Jensen

Jensen CD510K Instruction Manual

Jensen VM9312 - DVD Player With LCD Monitor User manual

Jensen

Jensen VM9312 - DVD Player With LCD Monitor User manual

Jensen VM9116 User manual

Jensen

Jensen VM9116 User manual

Jensen Phase Linear SD1413 User manual

Jensen

Jensen Phase Linear SD1413 User manual

Jensen VM9413 User manual

Jensen

Jensen VM9413 User manual

Jensen CD315X Instruction Manual

Jensen

Jensen CD315X Instruction Manual

Popular Car Receiver manuals by other brands

Linear Series LS5050 Operation and installation manual

Linear Series

Linear Series LS5050 Operation and installation manual

Kenwood KRC-160 instruction manual

Kenwood

Kenwood KRC-160 instruction manual

Sony XR-CA430X Service manual

Sony

Sony XR-CA430X Service manual

T+A Elektroakustik K1 CD-RECEIVER operating instructions

T+A Elektroakustik

T+A Elektroakustik K1 CD-RECEIVER operating instructions

SoundMax SM-CDM1052 instruction manual

SoundMax

SoundMax SM-CDM1052 instruction manual

Xtrons HD107HD user manual

Xtrons

Xtrons HD107HD user manual

Mopar RB3 manual

Mopar

Mopar RB3 manual

Clarion ADDZEST DMZ615 owner's manual

Clarion

Clarion ADDZEST DMZ615 owner's manual

Sony XAV-601BT Specifications

Sony

Sony XAV-601BT Specifications

PIE GM12-POD/S Operation manual

PIE

PIE GM12-POD/S Operation manual

Hyundai H-910H instruction manual

Hyundai

Hyundai H-910H instruction manual

Sony XR-C6100 Service manual

Sony

Sony XR-C6100 Service manual

Sony CDX-L600X - Fm/am Compact Disc Player Installation/connections

Sony

Sony CDX-L600X - Fm/am Compact Disc Player Installation/connections

Motorola VWA63 Service manual

Motorola

Motorola VWA63 Service manual

Sound Storm STM93R user manual

Sound Storm

Sound Storm STM93R user manual

Nextar D3201 instruction manual

Nextar

Nextar D3201 instruction manual

Alpine CDE-163BT owner's manual

Alpine

Alpine CDE-163BT owner's manual

Kenwood KDC-X303 quick start guide

Kenwood

Kenwood KDC-X303 quick start guide

manuals.online logo
manuals.online logoBrands
  • About & Mission
  • Contact us
  • Privacy Policy
  • Terms and Conditions

Copyright 2025 Manuals.Online. All Rights Reserved.

,
J~i
r
r-
-'-E
_l_
_L
"-[
'l
~,~L
I
--I
r-;--.
L
_,~,i
,
'-I
7
"----J[
-'[
-"-}-
)r-
~L-
--r-
==1
f-
-~i
-;
JL
I~.I_JL
,-
'L
-'-
1604DWX4
VM9413
Instructions
d'operation
Manual
de
Operaci6n
Operation
Manual
TOUCH8CRIf.~
~
H)
Radio'
fl
~l[-
CONTENTS
Thank you forchoosing aJensen product. We hope you will find the instructions in this owner's
manual clear and easy to follow.
If
you take afew minutes to look through it, you'll learn how to
use aIHhe features
of
your
new
Jensen
VM9413 Mooite Muttimedia Receiver
for
maximum
enjoyment.
Introduction 1
Anti-Theft Feature 2
Controls and Indicators 3
Remote Control 5
Using the TFT Monitor 7
Operating Instructions 9
Setup Menu
11
Tuner Operation 14
Satellite Radio Operation
17
DVDNCD
Video Operation 19
DVD/CD Audio Operation 22
Playing MP3IWMA Files 23
iPod Operation 26
Bluetooth Operation 28
Troubleshooting
31
Specifications 34
CONTENIDO
Gracias par elegir los productos Jensen. Esperamos que encuentre en este manual
instrucciones claras y
f.kiles
de seguir. Si se toma unos pocos minutos para leerlo, aprendera
c6mo utilizar todas las funciones de su nuevo radio Jensen VM9413 para
su
maximo
entretenimiento.
Preparaci6n 35
Dispositivo anti-robo 37
Controles eIndicadores
38
Control Remota 40
C6mo Usar
el
Monitor TFT.. 43
Instrucciones de Funcionamiento 45
Menu de Configuraci6n 47
Operaci6n de Sintonizador 50
Operaci6n de Radio Satelital 53
Operaci6n de Video
de
DVDNCD
55
Operaci6n de Audio de DVD/CD 58
C6mo
reproducir archivos MP3IWMA 60
Operaci6n de iPod 63
Operaci6n de Bluetooth 65
Resoluci6n de Problemas 68
Especificaciones
71
TABLE
DES
MATIERES
Merci d'avoir choisi
un
produit Jensen. Nous esperons que vous allez trouver les instructions
dans ce guide de proprietaire c1aires et faciles it suivre. Prenez
q~elques
minutes it
Ie
consulter, vous apprendrez autiliser toutes les fonctions de votre nouvelle radio Jensen
VM9413 pour
en
tirer une jouissance maximum.
Preparation 73
Fonctions anti-vol........................................................................................................ 75
Commandes et indicateurs 76
Telecommande 78
Utilisation du moniteur TFT
81
Instructions d'operation 83
Menu configuration (Setup)........................ 85
Operation Tuner 88
Operation radio Satellite............................................................................................
91
Operation video DVDNCD.. 93
Operation audio DVD/CD 96
Jouer des fichiers MP3IWMA............................................................................................. 98
Operation iPod
101
Operation Bluetooth 103
Depannage 106
Specifications................................................................................................................... 110
~
VM9413
INTRODUCTION
Congratulations on your purchase ofthe Jensen VM9413
e:MebiIe~,
It's agood idea to read all
of
the instructions before beginning
the installation. We recommend having your head unit
installed by areputable installation shop.
Features
DVDAspect Ratio -Cinema, Normal and OFF (Standby)
Fast Forward, Fast Reverse -2X, 4X, 6X and 8X
Slow Forward, Slow Reverse -2X, 4X and 8X
Play, Pause, Stop, Next Chapter and Previous Chapter
ESP -2MB Buffer
CD
IMP31
WMA
103
Tag
Compatible
Directory Search (MP3 /WMA Only)
Direct Track Access via Remote control
Burn Up
To
1500 MP3 and WMA Files onto aDVD+R /
RW
Audible Forward fReverse Track Search
Random, Repeat and Intro
Play, Pause, Stop, Next Track and Previous Track
ESP -2MB Buffer
Tuner
HDRM-2 HD Radio Module*
USAfEurope Frequency Spacing
24 Station Presets (18
FM
f6AM)
Auto Stereo fMono
Auto Store
Sat Radio Ready
Requires XM CNP2000UC and CNPJEN1 (Both Sold
Separately)
Satellite Channel Name, Artist, Song and Categories
Displayed on TFT Screen
iPod
High Speed Direct Connect Interface to Access iPod
Playlists, Artists, Albums and Songs. Play music and
view video files from your iPod.
Power Management Charges iPod while Connected
Requires jLink3iPod Interface Cable (included)
iTunes® Tagging
MediaLinK'
Under Dash Interface Allows Portable Media Devices to
be Connected
MediaLink4Includes the Following Connectivity:
USB -Supports Hard Drives and Flash Memory
9lWeS
jLinkDirect for iPod
RCA Audio
Nideo
Input
Chassis
1.0 DIN (Import/ISO-DIN Mountable)
7"
Motorized Swivel Flip-OuUFlip-UpTFT Active Matrix
LCD with Anti-Glare Coating
Screen TilUAngle Adjustment
Heat Management System -Forced-Air Cooling to Keep
the Chip Sets Operating at Nominal Temperatures
General
Bluetooth ready with hands-free profile for safety f
convenience and A2DP profile for streaming music from
a
PDAf
PMP
Navigation Ready (NAV102 Only)
Infrared Remote Control
Two Composite Video Outputs for Additional Screens
Compatible with MZ7TFT Rear Seat Monitors with
Touch Screen Interface
Two Audio
Nideo
Auxiliary Inputs
200-0hm
Preamp Line Output -All Audio Channels
4VRMS Line Output -All Channels
Rotary Encoder Audio Control
Seven-Band EO with Eight Preset EO Curves
Spectrum Analyzer
Front, Rear, and Subwoofer Line Output
Subwoofer Crossover and Phase Control
Programmable Volume Control
Rear Camera Input (Normal and Mirror Image View)
Auto TFT Dimmer
5-Way Joystick
SWC Interface -Compatible with
PAC
adapter SWI-PS
Steering Wheel Control Interface, sold separately
Optional
Equipment
NAV102
The head unit is "navigation ready." Before accessing
any navigation features, you must purchase and install
the NAV102 module. All installation and operating
instructions will be included with the NAV102 navigation
module.
Once the NAV102 is connected and operating properly,
the NAV source mode will become active. While the
NAV102
is
not installed, the NAV option appears gray,
indicating the function
is
not available.
1
Rear Camera
Tfre
head
unit is
·camera
reatry.*aefore
accessing
any
camera features, you must purchase and install arear
video camera. Once the rear camera is connected and
operating properly, the CAMERA source mode will
become active. While the camera is not installed, the
CAMERA option appears gray, indicating the function is
not available.
Satellite Radio Tuner
See "Satellite Radio Operation" on page 17.
iPod
See "Playing MP3IWMA Files" on page 23.
Bluetooth Phone
See "Bluetooth Operation"
on
page 28.
WARNING!
To
reduce the
risk
of
atraffic
accident
(except
when
using
for
rear
view
video camera)
never
use the
video
display
function
while driVing the vehicle. This is a
violation
of
federal
Jaw.
WARNING! Never disassemble
or
adjust
the unit.
WARNING!
To
prevent
injury
from
shock
or
fire,
never
expose this
unit
to
moisture
or
water.
WARNING! Never use irregular discs.
WARNING!
To
prevent
damage to the
mechanism
inside
this unit,
avoid
impact
to the TFT monitor.
WARNING! Using an
improper
fuse
may
cause damage
to the
unit
and
result
in afire.
WARNING! The
monitor
employs an
automatic
motorized
mechanism.
To
prevent
damage to the core mechanism,
please do
not
push,
pull
or
swivel
the
monitor
manually,
other
than in the
manner
explained
in
"Monitor
Left/Right
Angle
Adjustment"
on page
7.
*HD Radio™Technology Manufactured Under License From
iBiquity Digital Corporation. U.S. and Foreign Patents. HD
Radio
TM
and the HD and
HD
Radio logos are proprietary
trademarks
of
iBiquity Digital Corporation.
VM9413
~
ANTI-THEFT
FEATURE
The VM9413 is equipped with an anti-theft feature requiring
the user to enter apassword upon initial power on.
3.
Touch the keypad icon next to the blue box
in
the
"Password" field to open the on-screen keypad.
Enter Password: I I
s)
SETUP
~
02:40AM
"-
General
Language
I
Audio
I
Speaker
I
Bluetooth
I
Back
RDS
IPassword
CIJ~I
~00
.~R8ting.
IRating [
8.
Adult
~I
Demo
400
Hardware
ILoad Factory IReset
~I
000
P.VOL
088
TSCal
Entering
the
Default
Password
The
default
user
password
is
012345 (6 digits). Enter the
password using the on-screen keypad and then press the
Enter (arrow) button.
You
can also use the remote control
keypad to enter the password.
~
0
CD
00
00
0
SCN
ROM
00
0
Press the joystick Enter button (18) on the remote control to
confirm.
Changing
the
Password
To
change the anti-theft and RATINGS protection password,
perform the following steps:
1.
Press the SETUP button (31)
on
the remote control or
touch the
~
button
on
the screen to enter the
"SETUP" menu.
2.
Touch RATING to view the "RATING" sub-menu. An
open lock icon to the right
of
the "Password" field
indicates that auser password had not yet been
entered.
4.
Enter anew 6-digit password and press the Enter
(arrow) button.
The "lock" icon will now appear closed and the new anti-
theft password will
be
set, as well as the password for
RATING protection (see "Rating Sub-menu Features"
on page 12).
NOTE:
If
you
forget
your
password,
contact
Customer
Service
at
1-800-323-4815
for
assistance.
2
VM9413
21
19
20
,,-.,
,.-.
,
II...f(j·
I
18
7
8
---------+-------------,
;~.
~~
CONTROLS
AND
INDICATORS
Button 2J!eration
1.0PENIC[OSE
Press to activate the automatic mechanical system and move
the TFT monitor into viewing position. Press again to close
the
TFT.
2.DISP
With the TFT monitor open, press to cycle through
information available on the TFT screen.
With the TFT monitor closed, press
and
holdto view the
clock.
In
DVD Mode, press to view the top and bottom information
bars. Press again to turn "Display Off'.
3.
AS
Press to automatically store the first six strong stations in
preset memory. Applies to current band only.
4.
BAND
Press the
BAND
button to change the AM,
FM
or SAT band.
S.AUDIO
Rotate to adjust the volume. Press to access audio EQ menu.
6.SRC
Press to select playing mode.
When you change the source during navigation, the voice
prompts will still be heard, although the navigation map
cannot be seen. (The selected source audio will be muted
until the navigation voice prompt command
is
completed,
after which the source audio will resume.)
7.
LCD Display
8.
MUTE
Press to silence the receiver. Press again to resume previous
volume level.
NOTE: This head
unit
features Softmute, which
will
allow
the volume to increase
gradually
when the MUTE
function is deactivated.
9.
IR Remote
Control
Receiver
10.
(left
joystick)
DVD/Disc Mode: Press once to play back the previous
chapter/track.
TUNER Mode: Press once to auto-search for the previous
available radio station.
MENU Mode: Press once to move the cursor to the left.
3
VM9413
~
CONTROLS
AND
INDICATORS
•
AS
3
4
BAND
------+--I--------j17
,.---------+-I------{23
,.----------------jl-f-----{
24
19
20
7
I~I
Multimedia
Receiver
818
2
•
DISP
1
•
CLOSE
H2)
Radio·
usa-
o
Pr
•••
Audlo
23/24. ANGLEITILT
Press to activate the tilt function. Press once to adjust the
downward tilt angle
of
the screen one step at atime
or
press
and
hold
to adjust the angle in acontinuous motion up
or
down.
11.
(down
joystick)
DVDlDisc Mode: Press once for slow forward/slow reverse.
TUNER Mode: Press to go down one frequency step.
MENU Mode: Press once to move the cursor down.
12.
Reset
Press to reset system settings to factory default (except the
password and parental lock setting).
13.
Pause/Play/Enter
Press to pause
or
resume playback or to confirm current
selection.
14.
(right
joystick)
DVD/Disc Mode: Press once to enter the next chapter
or
track.
TUNER Mode: Press once to auto-search the next available
radio station.
MENU Mode: Press once to move the cursor to the right.
15.
(up
joystick)
DVD/Disc Mode: Press once for fast forward/fast reverse.
TUNER Mode: Press to go up one frequency step.
MENU Mode: Press once to move the cursor up.
16. A
Press once for disc insertion/ejection.
Press
and
hold to reset core mechanism position.
17.
TFT
Display
18.
NAV
When the NAV102 is connected to the head unit, press to
display the navigation user interface. The TFT screen must
be open for this function to operate.
19.
RPT
Press to control repeat playback function.
20.INT
Press to control intra playback function.
21.
SD Card
Slot
Insert
SD
card for playback
of
audio/video files.
22.
WIDE/PICTURE
Press to adjust the display aspect
of
the picture to one
of
two
settings: CINEMA, NORMAL
or
Standby (screen off). NOTE:
Only CINEMA and Standby are available for non-video
sources.
Press
and
hold to adjust Brightness and Contrast.
4
~
VM9413
REMOTE
CONTROL
Table
1:
Remote Control Functions
-
Button Function
Name Ref# DVD VCD TUNER CD/MP3/USB/SD SATELLITE
MENU 1Enterthe main menu of Turn on/off PBC when TAG HD Radio sta- Displays diagnostics
the disc playing
VCD
tions for transfer to an screen
iPod
TITLE 2Enter the title menu
of
Play first ten seconds Play first ten seconds Category list in CG
the disc
of
each chapterltitle
of
each file mode
MUTE 3Toggle on/off audio out- Toggle on/off audio out- Toggle on/off audio out- Toggle on/off audio out- Toggles on/off audio
put put put put output
POWER/C> 4Turn the power on/off Turn the power on/off Turn the power on/off Tum the power on/off Turns the power on/off
AUDIO 5Change the audio lan-
guage for disc playback
REPT A-B 6Setup to repeat play- Setup to repeat play-
back from time frame Aback from time frame A
to time frame Bto time frame B
REPT 7Repeat playback
of
Repeat playback
of
Repeat playback
of
current chapter current chapter current track
SRC 8Select playing mode Select playing mode Select playing mode Select playing mode Selects playing source
SUBTITLE 9Language selection for
subtitle
DISP/ 10 Display playback infor- Display playback infor- Displays audio mode
CLEAR mation mation Delete entry or move
Delete entry or move Delete entry or move backwards to correct
backwards to correct backwards to correct error in Direct Access
error
in
Direct Access error in Direct Access mode
mode mode
PRESET
1\
11
Navigate the preset NaVigates the preset
station list station list
PRESET V12 Navigate the preset Navigates the preset
station list station list
ANGLE 13 Play back disc in differ- Play back Picture CD Switches MEM key-
ent angle for ascene with different angle
of
pad
off
picture displayed
»14 Fast forward the disc Fast forward the disc Changes station up Fast forward the disc
content content one increment content
VOL-
15 Decrease volume Decrease volume Decrease volume Decrease volume Decreases volume
VOL+
16 Increase volume Increase volume Increase volume Increase volume Increases volume
1« 17 Select the previous Select the previous Search an available Select the previous Searches an available
chapter for playback chapter for playback radio station by track for playback radio station by
decreasing tuning fre- decreasing tuning fre-
quency quency
>/11
18 Pause playback/start Pause playback/start Pause playback/start ENTER, Toggles the
playback playback playback on-screen menu
between CATICH mode
00
o
---1+----1--j
29
o
~------1+---+---134
5
VM9413
~
Table
1:
Remote Control Functions
Button Function
Name Ref# DVD VCD TUNER CD/MP3/USB/SD SATELLITE
»1
19 Select the next chapter Select the next chapter Search an available Selectthe next track for Searches an available
for playback for playback radio station by playback radio station by
increasing tuning fre- increasing tuning fre-
quency quency
_/ea
20 Stop playback/end call Stop playback/end call End call Stop playback/end call
GOTO/~
21
Go to specific time Go
to
specific time Dial call Dial call Enters Direct Access
frame and playback/ frame and playback/ mode
dial call dial call
«22 Slow playback/fast Slow playback/fast Changes station down
rewind playback rewind playback one increment
ZOOM 23 Zoom in/out on an Zoom in/out on
an
image image
PIC 24 Display set-up parame- Display set-up parame- Displays Brightness/
ters ters Contrast Controls
OPEN/ 25 Open/close the TFT Open/close the TFT Open/close the TFT Open/close the TFT Opens/closes the TFT
CLOSE monitor monitor monitor monitor monitor
TILT
~
26 Decrease monitor tilt Decrease monitor tilt Decrease monitor tilt Decrease monitor tilt Decreases monitor tilt
angle angle angle angle angle
TILT
~
27 Increase monitor tilt Increase monitor tilt Increase monitor lilt Increase monitor tilt Increases monitor tilt
angle angle angle angle angle
WIDE 28 Select display mode: Selects display mode: Selects display mode:
FULL
or
NORMAL FULL or NORMAL CINEMA or Standby
1,2,3,4,5,
29 Directly access chapter 1-6 selects preset for Directly access track 1-6 selects preset for
6,7,8,9,0
current band current band
(Numeric
Keypad)
II~/BAND
30 Slow motion playback Slow motion playback Change AM/FM band Slow motion playback Selects SAT1, SAT2
or
SAT3 band.
SETUP
31
Display Setup menu Display Setup menu Display Setup menu Display Setup menu Displays Setup menu
EO 32 Modify equalizer set- Modify equalizer set- Modify equalizer set- Modify equalizer set-
tings tings tings tings
ROM
33 Play all chapters
in
ran- Play all tracks
in
ran-
dom order dom order
INT 34 Play the first ten sec- Preview scan
onds
of
each track
EJECT 35 Eject disc Eject disc Eject disc Eject disc Ejects disc
6'
~
VM9413
CINEMA
The entire screen
is
extended
horizontally
to
the aspect ratio of 16 to
9.
The extension ratio is the same at
any point.
NORMAL
The conventional display image has a
4to 3ratio
of
horizontal
to
vertical,
leaving ablank area on the right and
left sides
of
the display.
STANDBY
Screen becomes black. Touch screen
to resume.
Table 2: Video
Output
Modes
Aspect
Ratio
'PreSSiIle-wmElJUffuni28fon
tfilfrei1lOfe'"Coirtrot
or
WfDE
button (22)
on
the monitor to adjust the aspect ratio as
follows (only active with video source):
Image
Setting
Table 2shows the video output mode for each playing
source.
Playing Source Video Output Modes
RADIO RGB Mode
SAT RGB Mode
DISC RGB Mode
BT RGB Mode
AUX1
CVBS Mode
AUX2
CVBS Mode
NAV RGB Mode
CAMERA CVBS Mode
Extender Mechanism
•Fully Extended
Extender Mechanism
-Closed
Monitor
Left/Right
Angle
Adjustment
T&
m-anuallva6jtISttfle
lelt1tignt
angf&Ofthe
TFT
SCreen,
follow these steps:
1.
Make sure the TFT screen
in
"Out". Press the OPEN
button (1), if necessary.
2.
Locate the extender mechanism behind the screen.
3.
Firmly grasp both sides
of
the screen near the bottom.
4
...
Gently pull on either the left or right side until the
extender mechanism becomes fUlly extended.
Reverse
Driving
Use
Ifthe rear-view video camera is connected, the unit
is
on, and
the monitor is stationed inside the main compartment of the
unit, the monitor automatically moves into the viewing
position and switches to CAMERA mode upon reverse
driving. When the reverse driving stops, the monitor returns
to the main storage compartment.
Ifthe monitor is
in
display mode, the monitor automatically
switches to CAMERA mode upon reverse driving. When the
reverse driving stops, the monitor returns
to
its original input
mode.
Monitor
Tilt
Angle
Adjustment
Aknown characteristic of LCD panels is the quality of the
display
in
relationship
to
the viewing angle. The monitor
angle can be adjusted for optimum viewing using one of the
following methods.
Step
by
Step
Angle
Adjustment
Press the (
~
)
or
(
~
)button on the control panel (23, 24) or
remote control (26, 27) to adjust the tilt angle
of
the screen
one step at atime.
Continuous
Angle
Adjustment
Press
and
holdthe (
~
)or
(~
)button on the control panel or
remote control to adjust the tilt angle in acontinuous motion.
USING
THE
TFT
MONITOR
Open
/
Close
TFT
Mon
itor
~Tff
MOliitoi
Press the OPEN/CLOSE button (1) on the front panel or
press the
(.A)
button (25) on the remote control to activate
the mechanism that moves the display panel into the viewing
position.
Close TFT
Monitor
Press the OPEN/CLOSE button (1) on the front panel
or
press the
(.A)
button (25) on the remote control to load the
display panel back into the compartment
TFT
Monitor
Auto
Open
If "TFT Auto Open"
is
"on" when the unit is turned on, the
monitor automatically moves to the viewing position.
If "TFT Auto Open" is
"off"
when the unit is turned on, press
the OPEN button (1) or
(.A)
button (25)
on
the remote
control to move the monitor into the viewing position.
If "TFT Auto Open" is set to "Manual", the TFT will not close
when the key is turned off.
·CVBS -Composite Video Baseband Signal
7
VM9413
~
Parameter
Adjustment
Procedure
1.
Enter
Picture
Quality
Setting Mode:
Press the PIC button on the remote control
or
press and
holdthe WIDE/PICTURE button (22) on the monitor.
2.
Select Item
to
Set:
Use the upldown joystick buttons to select "BRIGHT"
or
"CONTRAST".
3.
Set Parameters:
Use the left/right joystick buttons to modify the settings.
4.
Exit
Picture
Quality
Setting Mode:
Press the PIC button on the remote control or the WIDE/
PICTURE button on the monitor.
Parking
Brake
Inhibit
When the pink "Parking" wire is connected to the vehicle
Parking Brake circuit, the front TFT monitor will display video
when the Parking Brake is engaged. (When the pink wire is
grounded via the Parking Brake circuit, video will
be
displayed.)
Monitor
Movement
Mechanism
If
an
obstruction occurs
in
the monitor path, the following
protective measurements can
be
executed to prevent
damage to the mechanism
or
monitor:
Table
3:
Monitor
Protective Measures
Obstruction
Self
OPEN
Button
Power
Protection
Pressed
Reconnected
Monitor load- Unit stops at Monitor fully Monitor is auto-
ing out hori- obstruction extended hori- matically
zontally point zontally loaded into unit
Monitor load- Unit stops at Monitor fully Monitor is auto-
ing
in
hori- obstruction extended hori- matically
zontally point zontally loaded into unit
Monitor load- Unit stops at Monitor swiv- Monitor swiv-
ing out verti- obstruction els back to the els back to the
cally point unit unit
Monitor load- Unit stops at Monitor swiv- Monitor swiv-
ing
in
verti- obstruction els back
to
the els back to the
cally point unit unit
After the protective procedure
is
executed, normal operation
is resumed by pressing the OPEN button (1)
or
disconnecting
and reconnecting the power.
8