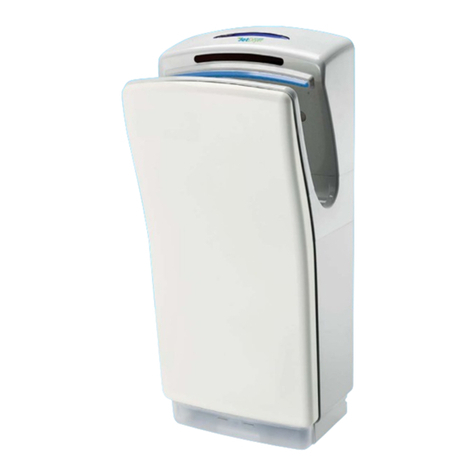
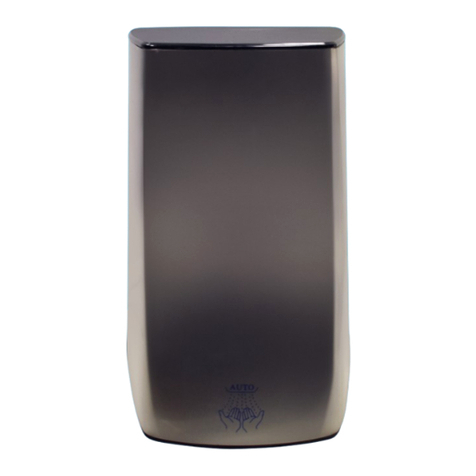
JetDryer 3DSmartDry Automatic User manual

1
Automatic
High Speed
3D
SmartDry
INSTRUCTION MANUAL
3D SmartDry manual_Dec21.qxp_Layout 1 8/12/21 3:53 pm Page 1

2
Operating Instructions and Parts Manual (Automatic)
Surface Mounted High Speed Hand Dryer
Technical Specications
Item Category Performance Data
Operating Voltage 220 - 240Vac, 50Hz, 200 - 800 WATTS
Air Speed Output 75m/s, 85 m³/h
Air Output Temperature Intelligent - based on room temperature
Motor Type 18,000 rpm, 200 Watts, BLDC brushless DC motor
Decibel Rating 70 dba @ 1 mtr
Heater Element 0-600 Watts - Intelligent Heating
Heater Thermal Protection Auto Resetting Thermostat turns unit o at, 149°F (95°C)
Drying Time Under 10 seconds
Circuit Operation Infared Automatic, self adjusting
Sensor Range 100 mm
Timing Protection 25 seconds auto shut o
Drip Proof IPX2
Isolation CLASS I
Net Weight 3.3 kg
Shipping Weight 15.7 kg
Unit Size W 228 x H 278 x D 154 mm
Certicates CE, WEEE, Greenspec
Item Code Cover Type/Finish
BSD83B Brushed Stainless Steel

3
Operating Instructions and Parts Manual (Automatic)
Surface Mounted High Speed Hand Dryer
General Safety Information
WARNING
This product is intended for installation by a
qualied service person. Use AWAG No.16 solid
conductor for wiring.
Failure to properly ground unit could result in
electrical shock and/or death.
Disconnect power at the service breaker before
installing or servicing.
NOT FOR HOUSEHOLD USE - MAY CAUSE BURNS
All units must be supplied with a 3-wire service. The
ground wire must be connected with the dryers
back plate.
NOTE: Do not install dryer over wash basin.
Type Y attachment
If the power supply cord is damaged, it must be
replaced by the manufacturer or its service agent or a
similar qualied person in order to avoid a hazard.
Means for disconnection must be incorporated in the
xed wiring in accordance with the wiring rules.
Installation
Installation must be carried out by a qualied
electrician
1. Make sure power supply breaker is switched o.
Installation must be carried out in accordance with the
current edition of the local wiring regulations code
having jurisdiction. Installation should be performed
only by a qualied electrician.
NOTE: For two or more dryers, dryers should be no
closer than 24 inches (610 mm) on centre.
2. Connect supply wires to terminal block where
indicated and connect ground wire to baseplate with
ground screw.
Connections:
a. Connect the live wire (coloured red or brown) to
the terminal block marked“L”.
b. Connect the neutral wire (coloured black or blue)
to the terminal block marked“N”.
c. Connect the ground wire (coloured green or green
and yellow) to the green screw marked“ ”.
Note that the colour of live and neutral wires depends
on voltage of supply service.

4
Operating Instructions and Parts Manual (Automatic)
Surface Mounted High Speed Hand Dryer
Installation Continued
• Before connecting to the main power install a
secondary switch with a contact distance of > 3 mm.
• This hand dryer must be earthed correctly.
• Do not install near water or in areas with high
humidity
• Ensure power is cut o before installation
1. UseanAllenkeytoremovethescrewsonbothsidesof
the hand dryer (g. 2) and remove the cover. Use the
mounting height guide and the installation template
to mark and drill 4 Ø 8 mm holes at a depth of 35 mm.
2. Fix the hand dryer backplane to the wall using
appropriate xings for the wall type.
3. Replace the cover and attach using the original
screws.
4. To install with a concealed wire knock out the pre-cut
hole in the backplate, remove the power cord, thread
through the hole and connect to the corresponding
terminals.

5
Operating Instructions and Parts Manual (Automatic)
Surface Mounted High Speed Hand Dryer
From oor to bottom of dryer.
Men’s Ladies Children, ages 11-17 Children, ages 3-10 Disabled
43” 41” 39” 33” 35”
109 cm 104 cm 99 cm 84 cm 89 cm
Recommended Mounting Heights
Intelligent Heating
The 3D Smart Dry automatically adjusts the heater
depending on the ambient temperature of the air
surrounding the dryer.
This means that in cold temperatures you have a
comfortable hand drying experience and in the warmer
weather you can reduce your energy consumption and
save money.
Room Temp Heater Power Total Power
< 10°C 600 w 800 w
10 - 15°C 450 w 650 w
15 - 20°C 300 w 500 w
20 - 25°C 150 w 350 w
> 25°C 0 w 200 w
Cleaning and Maintenance
All surfaces of the unit should be cleaned daily with a
soft cloth dampened with warm, soapy water. Polish
with a soft dry cloth.
DO NOT use caustic solutions or abrasive cleaning
materials on the drier.
Operation
• No touch operation.
• Shake excess water from hands.
• Place hands under the outlet, within 10 cm, to start
operation.
• Move hands back and forth through the air jets
• Stops automatically after hands are removed, or after
60 seconds.

6
Operating Instructions and Parts Manual (Automatic)
Surface Mounted High Speed Hand Dryer
General Safety Instructions
Warranty
This appliance is not intended for use by persons (including children) with reduced physical, sensory or mental
capabilities, or lack of experience and knowledge, unless they have been given supervision or instruction
concerning use of the appliance by a person responsible for their safety.
Children should be supervised to ensure that they do not play with the appliance.
If supply cord is damaged, it must be replaced by the manufacturer, its service agent or similarly qualied persons
in order to avoid a hazard.
MANUFACTURER’S WARRANTY
3 Years Parts, 1 Year Labour (Except Business2 which is 1 Year Parts, 1 Year Labour). Where possible, labour will be
carried out onsite within major capital cities. Otherwise the hand dryer must be returned to a JetDryer authorized
repair facility located - Queensland, Sydney & Melbourne.
Warranty is limited to 350,000 uses during warranty period.
Warranty is eective at the date of purchase. Proof of purchase and serial number must be supplied for warranty to
be valid. Without proof, all work/parts are chargeable. All parts replaced will be property of JetDryer. All work will be
carried out by JetDryer or its authorised agents.
Please note that the decision to repair or replace your machine is at the sole discretion of JetDryer. If any part is no
longer available or out of manufacture, JetDryer will replace it with a functional replacement part.
JetDryer does not guarantee the repair or replacement due to the following:
• Normal wear and tear, cosmetic damage (i.e. dents and scratches)
• If returning the unit, it is packaged up with an equal amount of protection. Failure to secure the unit in packaging
resulting in damage is not covered under warranty. Shipping charges in this instance are the responsibility of the
purchaser
• Accidental damage, faults caused by negligent use, lack of maintenance (i.e. lter changes & emptying of water
tray), misuse, vandalism, neglect, incorrect installation, careless operation or handling of the hand dryer
• Use of parts not installed by JetDryer or its authorised agents or according to JetDryer instruction manual
• Use of parts not authorised by JetDryer
• Repairs or alterations made by other than JetDryer or its authorised agents
• Costs arising from failing to adjust controls correctly or by not following operating instructions
• Costs involved with remounting and removal of unit
• Any damage caused by someone doing maintenance who is not a JetDryer authorised technician
• When exchanging parts or the actual unit the original becomes property of JetDryer
• Cosmetic design and colour may vary from unit purchased when it is replaced under warranty
• If a part is replaced under warranty, note that this does not extend the warranty or extended warranty period
• The warranty or extended warranty is transferrable, however any transfer does not extend the original term

7
Operating Instructions and Parts Manual (Automatic)
Surface Mounted High Speed Hand Dryer
Diagram
NOTES

FW3 LTD, Biodrier
Unit 3, Woodlands Business Park, Burlescombe, Devon, EX16 7LL
tel: +44(0)1823 672 970 • email: sales@biodrier.com
3D SmartDry manual_Dec21.qxp_Layout 1 8/12/21 3:53 pm Page 8
Table of contents
Other JetDryer Dryer manuals
Popular Dryer manuals by other brands

ALLIANCE
ALLIANCE Dryers installation instructions
SEMAK
SEMAK HD01 Operation and warranty booklet

GE
GE GTD72EBPNDG installation instructions

White Knight
White Knight 0312 427 15301 - 427SV Service manual
American Dryer Corp.
American Dryer Corp. AD-81 III installation manual

Maytag
Maytag MGD6400TB - Bravos Gas Dryer Use and care guide
