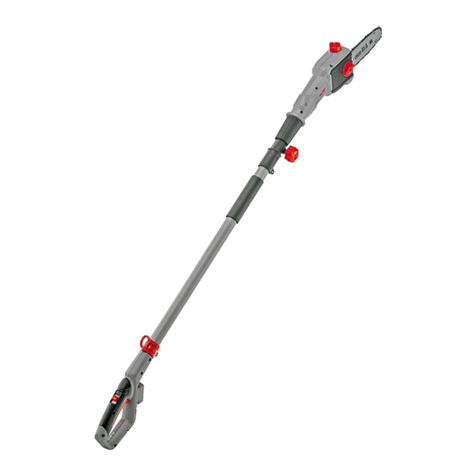
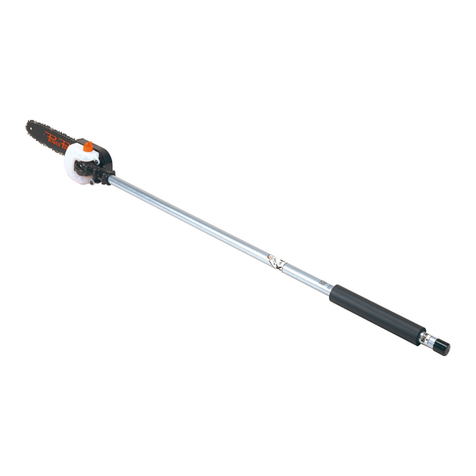
jobmate YT7602-01 User manual


2
Know Your Product.................................................................................................3
Technical Specications......................................................................................... 3
Description of Symbols...........................................................................................4
Contents of Li-ion Pole Pruner ............................................................................. 5
General Safety Instructions.................................................................................... 6
Additional Safety Instructions for Li-ion Pole Pruner ......................................... ... 8
Assembly Instructions............................................................................................ 9
Operation.............................................................................................................. 12
To Turn The Tool On....................................................................................... 12
Basic Cutting Procedure................................................................................. 13
Tips for Using Your Li-ion Pole Pruner........................................................... 14
Maintenance..........................................................................................................16
Warranty ..............................................................................................................18
CONTENTS

3
1On/Off Switch 2Telescoping Handle
3 Motor 4Chain Oil Cap
5Bar 6Chain
7Adapter Sleeve Assembly 8 Foam Grip
9 Battery
Battery: 18V Li-ion, 1500mAH
No load speed: 1800/min
Working time: 15 minutes
Bar length: 20cm
KNOW YOUR PRODUCT
TECHNICAL SPECIFICATIONS
7
1
2
34
8
9
56

4
The rating plate on your tool may show symbols. These represent important
information about the product instruction on its use.
Conforms to all relevant European Directives.
DESCRIPTION OF SYMBOLS
Disconnect from mains power immediately if the power cord becomes
damaged.
Use eye protection.
Use ear protection.
Wear sturdy, non-slip footwear.
Read the user manual.
Do not expose to rain.
Use protective gloves.
Denotes risk of personal injury, loss of life, or damage to the tool in case
of nonobservance.

5
This symbol is known as the ’Crossed-out Wheelie Bin Symbol’.
When this symbol is marked on a product or battery, it means that it
should not be disposed of with your general household waste. Some
chemicals container within electrical/electronic products or batteries
can be harmful to health and the environment. Only dispose of
electrical/electronic/battery items in separate collection schemes,
which cater for the recovery and recycling of materials container within.
Your co-operation is vital to ensure the success of these schemes and
for the protection of the environment.
1* Battery pack and charger
1* Chain and bar
1* Blade cover
1* Unit
1* Instruction manual
1* Wrench
Conforms to relevant standards for electromagnetic compatibility.
Warning! Danger from overhead electric-power lines! Keep at least 10m
distance.
DESCRIPTION OF SYMBOLS (CONT.)
CONTENTS OF LI-ION POLE PRUNER
Keep children at a distance of no less than 5m from the work area.
Disconnect from power supply when tool needs repairs.

6
WARNING! Read all instructions. Failure to follow all the instructions listed
in all of the warnings listed below refers to your mains operated (corded) power tool
or battery operated (cordless) power tool.
SAVE THESE INSTRUCTIONS
1) Work area
• Keep work area clean and well lit. Cluttered or dark areas can lead to accidents.
• Do not operate power tools in explosive atmospheres, such as in the presence of
dust or fumes.
• Keep children and bystanders away while operating a power tool. Distractions can
cause a loss of control.
2) Electrical safety
• Power tool plugs must match the outlet. Never modify the plug in any way. Do not
matching outlets will reduce risk of electric shock.
• Avoid body contact with earthed or grounded surfaces, such as pipes, radiators,
ranges and refrigerators. There is an increased risk of electric shock if your body
is earthed or grounded.
• Do not expose power tools to rain or wet conditions. Water entering a power tool
will increase the risk of electric shock.
• Do not abuse the cord. Never use the cord for carrying, pulling or unplugging the
power tool. Keep cord awayfrom heat, oil, sharp edgesor moving parts. Damaged
or entangled cords increase the risk of electric shock.
• Replacement of the supply cord. If the supply cord is damaged, it must be repl aced by
an electrician or a power tool repairer.
• When operating a power tool outdoors, use an extension cord suitable for outdoor
use. Use of a cord suitable for outdoor use reduces the risk of electric shock.
• If operating a power tool in a damp location is unavoidable, use a residual current
device (RCD) protected supply. Use of an RCD reduces the risk of electric shock.
• Have your tool repaired by an electrician or a power tool repairer. This power tool
complies with relevant safety requirements. To avoid danger, electrical appliances
this may result in considerable damage to the user.
3)Personal safety
• Stay alert, watch what you are doing and use common sense when operating a
drugs, alcohol or medication. A moment of inattention while operating power tools
may result in serious personal injury.
• Use safety equipment. Always wear eye protection. Safety equipment such as a
dust mask, non-skid safety shoes, hard hat, or hearing protection used whenever
conditions require will reduce personal injuries.
• Avoid accidental starting. Ensure the switch is in the ‘off’ position before plugging
GENERAL SAFETY INSTRUCTIONS

7
GENERAL SAFETY INSTRUCTIONS (Cont.)
that have the switch may cause an accident.
• Remove any adjusting key or wrench before turning the power tool on. A wrench
or key left attached to a rotating part of the power tool may result in personal
injury.
• Do not overreach. Keep proper footing and balance at all times. This enables
better control of the power tool in unexpected situations.
• Dress properly. Do not wear loose clothing or jewellery. Keep your hair, clothing
and gloves away from moving parts. Loose clothes, jewellery or long hair can be
caught in moving parts.
• If devices are provided for the connection of dust extraction and collection
facilities, ensure these are connected and properly used. Use of these devices
can reduce dust related hazards.
4)Power Tool Use and Care
• Do not force the power tool. Use the correct power tool for your application.
The correct power tool will do the job better and safer at the rate for which it was
designed.
• Do not use the power tool if the switch does not turn it on and off. Any power tool
that cannot be controlled with the switch is dangerous and must be repaired.
• Disconnect the plug from the power source before making any adjustments,
changing accessories or storing power tools. Such preventive safety measures
reduce the risk of starting the power tool accidentally.
• Store idle power tools out of the reach of children and do not allow persons
unfamiliar with the power tool or these instructions to operate the power tool.
Power tools are dangerous in the hands of untrained users.
• Maintain power tools. Check for misalignment or sticking of moving parts,
breakage of parts and any other condition that may affect the power tool’s
operation. If damaged, have the power tool repaired before use. Many accidents
are caused by poorly maintained power tools.
• Keep cutting tools sharp and clean. Properly maintained cutting tools with sharp
cutting edges are less likely to stick and are easier to control.
• Use the power tool, accessories and tool bits etc. in accordance with these
instructions, and in the manner intended for the particular type of power tool,
taking into account the working conditions of the work to be performed. Use of the
power tool for operations different from intended use could lead to a hazardous
situation.
5)Service
replacement parts. This will ensure that the safety of the power tool is maintained.

8
• Keep all parts of the body away when the saw is operating. Before starting the
saw, ensure that the saw chain is not touching anything. While working with a
chainsaw, one instant of negligence may result in clothing or body parts being
caught by the saw chain.
• Always hold the chainsaw with your right hand at the rear handle and your left
hand on the front handle. Holding the chainsaw the other way round enhances
the risk of injuries and should not be used.
• Wear safety goggles and ear muffs. It is recommended to use other protective
gear for the head, hands, legs and feet. Appropriate protective clothing reduces
saw chain.
• Do not work with the chainsaw on a tree. There is risk of injuries when operating
the saw on a tree.
• Always ensure a stable stance and posture and use the chainsaw only if you are
as on a ladder, may lead to loss of balance or loss of control of the chainsaw.
• Reckon with the fact that while cutting a branch under tension, it is likely to recoil
branch may hit the operator and/or snatch control of the chainsaw .
• Be particularly careful while cutting under-growth and young trees. The thin
material may get caught in the saw chain and hit you or make you lose your
balance.
• Carry the saw chain at the front handle when it is switched off so that the saw
chain is turned away from your body. Always pull the protective cover over
the saw chain when transporting it or storing it away. Working with the saw chain
carefully and diligently reduces the likelihood of touching it inadvertently while it is
operating.
• Follow the instructions for lubrication, tightening the chain and replacing
accessories. A chain that has not been tightened or lubricated properly may either
snap or enhance the risk of a rebound or recoil.
• Keep the handles dry, clean and free from oil and grease. Greasy and oily
handles are slippery and can cause loss of control. Use it to saw only wood. Do not
use the chainsaw for work that it is not designed or intended for e.g. Do
not use the chainsaw to saw plastics, brickwork or construction materials that are
not made of wood. Using the chainsaw for work that it has not been designed or
intended for may lead to hazardous situations.
without approval.
• Please note that in the case of devices that have been discharged, there is a
basic risk of injury caused by residual charge.
• These devices are not meant to be used by persons with little experience and/or
knowledge or by those with physical, sensory or mental limitations, unless they
are supervised by persons in charge of their safety or have received instructions
ADDITIONAL SAFETY INSTRUCTIONS FOR
LI-ION POLE PRUNER

9
ASSEMBLY INSTRUCTIONS
UNPACKING
This product requires assembly.
Carefully remove the product and any accessories from
the box. Make sure that all items listed in the packing list
are included.
Inspect the product carefully to make sure no breakage or
damage occurred during shipping.
Do not discard the packing material until you have
carefully inspected and satisfactorily operated the product.
WARNING: If any parts are damaged or missing, do not rotate the head knob as
directed, this could result in personal injury.
WARNING: Failure to lock telescopic pole collars could result in personal injury.
Install the Guide Bar and Chain
Danger: Never start the motor before installing the guide bar, chain and chain cover lock
to possible serious injury.
Warning: To avoid serious personal injury, read and understand all the safety
instructions provided.
Warning: Before performing any maintenance, make sure the battery pack has
been removed. Failure to heed this warning could result in serious personal injury.
Caution: Always wear gloves when handling the bar and chain; these
components are sharp and may contain burrs.
Warning: Never touch or adjust the chain while the motor is running. The saw
chain is very sharp; always wear protective gloves when performing maintenance to
the chain to avoid possible serious lacerations.
ADDITIONAL SAFETY INSTRUCTIONS FOR
LI-ION POLE PRUNER (CONT.)
from them about how these devices are to be used.
• Youth below 16 years of age should not operate the devices.
• Using the device must be avoided under poor weather conditions, particularly
when there is the risk of lightning.
exposing the user

10
ASSEMBLY INSTRUCTIONS (Cont.)
Loosen the guide bar screw.
Remove the chain cover.
Note: Make certain of the direction of chain.
• Position the chain so there is a loop at the back of the bar. (5)
• Hold the chain in position on the bar and place the loop around the sprocket.
•
slot of the bar. (6)
Note: When placing the bar on the bar studs, ensure that the adjusting pin is in the
chain tension pin hole.
• Tightening the chain tensioner. (7)
• .tnemtsujdanoisnetrofevomoteerfrabehtevaeltub,wercsrabediugehtnethgiT
(8)
• Remove all slack from the chain by turning the chain tensioner clockwise until the
chain sits snugly against the bar with the drive links in the bar groove. (9)
• Tighten the guide bar screw. (10)
The chain is correctly tensioned when there is no sag on the underside of the guide
bar, the chain is snug, but it can be turned by hand without binding.
Note: If chain is too tight, it will not rotate. Loosen the guide bar screw slightly and
turn the chain tensioner 1/4 turn counter clockwise screw. Ensure that the chain will
rotate without binding.
Note: A new chain tends to stretch, check chain tension frequently and tension as
required.

11
ASSEMBLY INSTRUCTIONS (Cont.)
Note: When replacing the guide bar and chain, use only identical replacement parts.
• Remove the battery pack from the pole saw.
• Loosen the guide bar screw.(1)
• Remove the chain cover. (2)
• Remove the bar and chain from the mounting surface.(3)
• Remove the old chain from the bar.
• Lay out the new saw chain in a loop and straighten any kinks. The cutters should
face in the direction of the chain rotation. If they face backwards, turn the loop
over. (4)
• Place the chain drive links into the bar groove.

12
OPERATION
Before you start the unit, make sure the pole saw is
not contacting any object.
TO TURN THE TOOL ON
Push the lock-off button in with your thumb and then
is running, you can release the lock-off button).
To turn the tool OFF, release the trigger.
WARNING: To guard against injury, observe the following:
• Read instruction manual before using.
• Save instruction manual.
• Keep hands away from chain.
• Keep hands on handle and pole shaft.
• Don’t overreach.
control. Grip the rear handle with your right hand whether you are right or left
control of the saw. Don’t let go.
Do not operate pole saw in a tree, on a ladder, or on a scaffold; this is extremely
dangerous.
CAUTION: Chain coasts after pole saw is turned off. Do not use under wet
conditions.
Use extreme caution when cutting small size brush, saplings or limbs under tension,
because slender and tense material may catch the saw and be whipped toward
you, pull you off balance or spring back.
Do not use the pole saw to cut vines and/or small underbrush.
WARNING: Do not allow familiarity with this type of tool to make you careless.
.
WARNING: Do not cut trees near electrical wires or buildings.
CAUTION: Failure to lubricate the chain will cause damage to the bar and
chain. Use only a good quality bar and chain oil, or if unavailable, unused SAE 30
weight motor oil may be substituted. One minute of use will consume approx. 0.15
NOTE: It is normal for oil to seep from the saw when not in use. To prevent
seepage, empty the oil tank after each use. When storing the unit for a long period
LOCK-OFF
BUTTON
SWITCH
TRIGGER

13
of time (3 months or longer) be sure the chain is lightly lubricated; this will prevent
rust on the chain and bar sprocket.
WARNING: Do not use the pole saw with any type of accessory or attachment.
Such usage might be hazardous.
ADJUSTING THE ANGLE OF THE CHAINSAW HEAD:
Turn knob on rotating head counter clockwise to loosen power head. Adjust to
desired position, turn knob clockwise to tighten. Failure to secure properly may
result in personal injury and or property damage.
WARNING: Kickback may occur when the moving chain contacts an object at
the upper portion of the tip of the guide bar or when the wood closes in and pinches
the chainsaw in the cut. Contact at the upper portion of the tip of the guide bar
can cause the chain to dig into the object and stop the chain for an instant. The
result is a lightning fast, reverse reaction which kicks the guide bar up and back
toward the operator. If the chainsaw is pinched along the top of the guide bar, the
guide bar can be driven rapidly back toward the operator.
Either of these reactions can cause loss of
saw control which can cause the operator
to be thrown off balance and result in serious
injury. Do not rely exclusively upon the safety
devices built into the saw. As a pole saw user,
you should take several steps to keep your
cutting jobs free from accident or injury.
The following precautions should be followed to minimize kickback:
Place your right hand on the rear handle and your left hand on the pole shaft
together with positioning handle against your body will help you maintain control
of the saw if kickback occurs.
2. Make sure that the area in which you are cutting is free from obstructions. Do not
let the nose of the guide bar contact a log, branch, fence or any other obstruction
that could be hit while you are operating the saw.
3. Always cut with the unit running at full speed. Fully squeeze the throttle trigger
and maintain a steady cutting speed.
4. Wear non-slip gloves for maximum grip and protection.
BASIC CUTTING PROCEDURE
See Figures 1-2
• Keep the tree between you and the chain while limbing.
Cut from the side of tree opposite to the branch you are
cutting. Do not cut from a ladder: this is extremely
dangerous. Leave this operation for professionals.
KICKBACK
DANGER ZONE
OPERATION (Cont.)

14
OPERATION (Cont.)
• Do not use the pole saw for felling or bucking.
To prevent electrocution, do not operate within 50ft.
of overhead electrical lines.
• Follow the steps below to prevent damage to tree
or shrub bark. Do not use a back-and-forth sawing
motion.
trunk until you have cut off the limb further out to reduce
the weight.
• Following proper cutting procedures will prevent stripping the bark from the main
member.
the main limb or trunk.
Continue the cut through the limb until the limb separates from the tree. Be
prepared to balance the weight of the tool when the limb falls.
against the limb being cut. This will help steady the limb and make it easier to cut.
Allow the chain to cut for you; exert only light downward pressure. If you force the
cut, damage to the bar, chain, or motor can result.
• Release the trigger as soon as the cut is completed. Failure to follow proper
cutting procedures will result in the bar and chain binding and becoming pinched or
trapped in the limb.
If this should happen:
Stop the motor and remove the battery pack.
If the limb can be reached from the ground, lift the limb while holding the saw. This
should release the “PINCH” and free the saw.
If the saw is still trapped, call a professional for assistance.
Tips for Using Your Li-ion Pole Pruner
LIMBING AND PRUNING
See Figures 3-4
This unit is designed for trimming small branches
and limbs up to 6 inches in diameter.
For best results observe the following precautions.
Plan the cut carefully. Be aware of the direction in
which the branch will fall.
Branches may fall in unexpected directions.
Do not stand directly under the branch being cut.
Remove long branches in several stages.
•

15
ADJUSTING TELESCOPIC POLE
See Figure 5
• Remove the battery pack from the pole saw.
• Rotate the collar counter clockwise to loosen.
• Push poles towards each other to shorten the pole or pull away from each to
lengthen the pole.
Note: Extend the pole only to the length required to reach the limb to be cut. Do not
extend the handle above waist height.
• When the desired length is achieved, rotate the collar clockwise to secure.
Note: Adjust hand placement on the shaft of the pole saw to keep proper balance.
Do not attempt to use the pole saw at a length which does not allow you to maintain
proper footing and balance at all times.
Charging the Battery Pack
• The 18 volt battery supplied is sealed, maintenance free and spill free.
• Charge the battery pack only with the charger provided.
• Allow at least 30-60minutes of charge time before initial use of the pole saw.
• Make sure the power supply is normal household voltage, 120volts, 60Hz or AC
only.
• The battery charger should be operated in temperatures between 50 and 100
degrees F.
• The battery should be charged in a cool, dry place.
• 2 to 3 initial charging/discharging cycles may be required to achieve maximum run
time/capacity.
• DO NOT attempt to open the charger or the unit. There are no customer
serviceable parts inside. Call customer service helpline at 1-800-313-5111 for
assistance.
• DO NOT incinerate battery packs even if they are severely damaged or
• Use the battery charger indoors only.
• Disconnect charger from the power supply when not in use to prevent damage to
the charger during a power surge.
• When fully charged, the battery can be safely stored in temperatures down to -40
degrees F for a period of up to four weeks, before requiring charging. Fully charge
battery pack every 90 days.
• If over a period of time the battery pack quickly runs down after a full 60 minutes
charging period, a replacement battery pack is needed.
• To prevent permanent damage to the battery, never store in a discharged
condition.
• WINTER STORAGE - Fully recharge for the 1 hour before storage and then again
every 90 days.
• Since the battery will not develop a memory, it does not have to be fully
discharged before recharging.

16
MAINTENANCE
BEFORE USING: Fill oil well with new quality bar and chain oil. Unused SAE30
weight motor oil may be substituted.
If you drop the pole saw, carefully inspect it for damage. If the blade is bent, housing
cracked, handles broken or if you see any other condition that may affect the
saw’s operation.
Remove the battery pack from the pole saw, then use only mild soap and a damp
cloth to clean the tool. Never let any liquid get inside the tool. Never immerse any
part of the tool into a liquid.
IMPORTANT: To assure product SAFETY and RELIABILITY, repairs, maintenance
a. A small leakage of liquid from the battery cells may occur under extreme usage,
charging or temperature conditions.
This does not indicate a failure. However, if the outerseal isbroken and thisleakage
gets on your skin:
a. Wash quickly with soap and water.
b. Neutralize with a mild acid such as lemon juice or vinegar.
of 10 minutes and seek immediate medical attention.
TO CHARGE – SEE CHARGER MANUAL FOR COMPLETE INSTRUCTIONS
TO INSTALL BATTERY PACK
Place the battery pack in your pole saw
(see picture). Ensure the latches on each
side of the battery pack snap in place and the
battery pack is securely connected to pole saw.
TO REMOVE BATTERY PACK
Press both latches on both sides of battery pack
to release battery from pole saw (see picture).
OPERATION (Cont.)

17
MAINTENANCE
replacement parts.
penetrating oils, etc. come in contact with plastic parts. They contain chemicals that
can damage, weaken or destroy plastic.
Ensure that the plastic bar cover is in place when storing. Fertilizers and other
garden chemicals contain agents which greatly accelerate the corrosion of metals.
Do not store the tool on or adjacent to fertilizers or chemicals.
For smooth and fast cutting, chain needs to be maintained properly. The chain
requires sharpening when the wood chips are small and powdery, the chain must be
forced through the wood during cutting or the chain cuts to one side. Refer to
instructions earlier in this manual for instructions on properly sharpening the chain.
LUBRICATION SYSTEM
The chain is automatically lubricated.
damage the pump, the bar and the chain which may result in serious personal injury.
If the lubrication system does not work properly, check the oil
GUIDE BAR MAINTENANCE
When the guide barshows signs of wear, reverse it onthe sawto distribute the wear
for maximum bar life. The bar should be cleaned every day of use and checked for
wear and damage.
Feathering or burring of the bar rails is a normal process of bar wear. Such faults
A bar with any of the following faults should be replaced.
- Wear inside the bar rails which permits the chain to lay over sideways.
- Bent guide bar.
- Cracked or broken rails.
- Spread rails.
In addition, guide bars with a sprocket at their tip must be lubricated weekly with a
grease syringe to extend the guide bar life. Using a grease syringe, lubricate weekly
in the lubricating hole.
Turn the guide bar and check that the lubrication holes and chain groove are free
from impurities.

18
WARRANTY POLICY
Congratulations on your purchase of Li-ion Pole Pruner. In order to get maximum
benefit from your new purchase, please be aware of the warranty provisions
outlined in this document.
2 YEAR [REPLACEMENT/REPAIR] WARRANTY
Your Li-ion Pole Pruner is guaranteed for a period of 24 months from the original
date of purchase. As the product is intended exclusively for home DIY (Do It
Yourself) use, thus use of this product for professional, industrial or high frequency
use will VOID this warranty. If your product is defective, it will be repaired or
replaced in accordance with the terms of this warranty.
The warranty is provided by Mitre 10 (New Zealand) Limited (“known as Mitre 10”)
Rights & Remedies
We are dedicated to delivering a quality product to all our customers. All of our
products are warranted for two years from date of purchase against defects in
material and workmanship.
If we determine that the product has a manufacturing fault, we will repair or replace
it free of charge to you. The decision to repair or replace is solely at the discretion of
Mitre 10 (New Zealand) Limited.
What do we require?
It is our requirement that all warranty claims are accompanied by a proof of
purchase (sales receipt) to allow verication of the date of purchase. Where proof
of purchase is not provided, Mitre 10 (New Zealand) Limited reserves the right to
charge a service fee and/or charge for parts replaced/repaired. A return freight
charge may apply.
The warranty is ‘return to base’ and not a free in-home service. This means the
customer is responsible for any inwards freight charge to return the product to the

19
Mitre 10 or Mitre 10 MEGA store where the product was purchased from, for the
warranty to be applicable.
Please retain your Proof of Purchase.
Only the original owner is covered by the manufacturer’s warranty and must have
purchased the product from a Mitre 10 or Mitre 10 MEGA store in New Zealand.
What is not covered under warranty?
• Professional, Industrial or high frequency use if the purpose of the tool is stated
as DIY (Do It Yourself) in the instruction manual.
•
If the tool has been operated on a supply voltage other than th
• If the tool has been operated with incorrect oil, fuel or fuel mix.
• If the tool shows signs of damage or defects caused by or resulting from abuse,
accidents or alterations.
• Failure to perform maintenance as set out within the instruction manual.
• If the tool is disassembled or tampered with in any way.
• General wear and tear.
• Servicing by an unauthorized service agent.
• Any consumable parts.
Exclusions
• Any consequential loss or damage to any person or property directly or indirectly
as a result of using product.
outside of the country of purchase you will be charged fees by the local provider.

This manual suits for next models
1
Table of contents
Other jobmate Pole Saw manuals