manuals.online logo
Brands
  1. Home
  2. •
  3. Brands
  4. •
  5. JOBO
  6. •
  7. Camcorder
  8. •
  9. JOBO AEE JIB 4 User manual

JOBO AEE JIB 4 User manual

www.jobo.com
1
JIB 4
JOBO HD Sports Camera
www.jobo.com
2
www.jobo.com
3
Contents Page Page
Precautions 4 Standby mode 28
Product Certification 5 AV output connection 28
unctions eatures 6 10. AV output connection 28
Product Structure 8 11. HDMI output connection 29
Start up and check the power 10 12. USB connection 29
Operating Instructions 11 13. Prompt of key tone 29
Setting of Camcorder parameter 14 14. Prompt of laser light 30
Setting of camera parameter 17 15. Turn On/Off T T Display 30
Video recording 21 cc Notices 30
Photo shooting 22 ile Storage and Play 31
Voice recording 24 Backup Battery Installation 32
Play the video 25 Specifications & Parameters 36
Browse photo file 25 Notices for Waterproof Casing 37
Play the audio file 26
Remote control (optional
accessories)
27
Cautions in Using 3M Double-Sided
oam Sticker
37
www.jobo.com
4
Precautions
1 This camera is a precision product Please do not drop it or hit it physically.
2 Keep the camera away from any object with a strong magnetic field, like magnet or electromotor, or any object
emitting strong radio waves, like antenna, as a strong magnetic field may cause failure to JIB 4 or cause damage to
image and audio data.
3 Do not expose the camera to high temperature or sunlight direct.
4 Keep the Micro SD card away from the strong magnetic field of TV, speaker, or magnet. Do not put it in any place
with potential static, or the data stored in it may be lost.
5 If the camera overheats, smokes or smell in charging, please disconnect the power supply immediately to avoid the
risk of fire.
6 Put JIB 4 beyond the reach of any child for charging, as the power cord may cause an accidental suffocation or
electric shock to the child.
7 Please keep this product in a cool, dry, and dust-free place.
www.jobo.com
5
Product Certification
As certified by such authoritative organizations as CC and CE, this product complies with the recommended standards
and thus guarantees the user's safety. Thanks for purchasing AEE hands-free mini high-definition digital camera JIB 4
With small size and integrated design, hands-free JIB 4 is easy to operate, User- riendly Interface Supported by
high-definition and dynamic image capturing technology, it can record real scenes and various activities anytime
anywhere, so that you can share wonderful recording experiences with your family and friends. This manual specifies
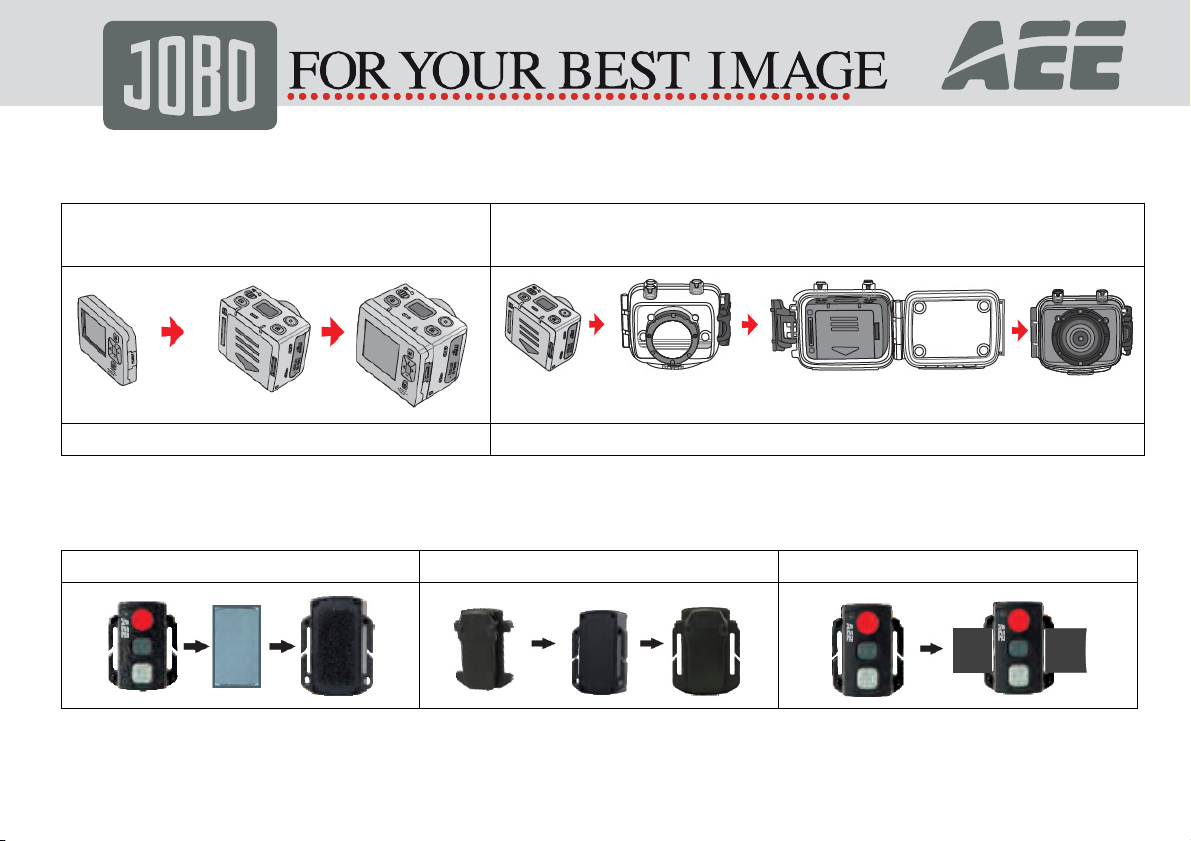
how to use and install JIB 4 and provides detailed information, including the instructions on use, operation and
installation as well as the technical specifications. Please read this Manual carefully to understand it before use and
keep it well for long-term reference.
Product Over view
As a multifunctional non-handheld high-definition digital sports video camera, this product can perform many leading
functions such as high-definition digital photographing, voice storage, real-time display, photo shooting, time display,
remote control, digital zoom, T T colour screen, multi-functional keys, laser indicating, high-speed USB data
transmission, HDMI high-definition output function, low power prompt, memory card space prompt and USB charging
Supplemented by the accessories, this product integrating multiple patented technologies can be used to photograph
anything, anytime, anywhere.
Do not litter! Please recycle them!
www.jobo.com
6
Functions & Features
170° extra-large wide-angle lens Aperture f/30.
Specialized HD Camera, supporting 1080I/1080P/960P/720P high-definition video recording.
Photo shooting function, supporting 8 Mega.
10X digital zoom function.
Various shooting modes available: Single shooting, three photos continuous shooting, auto continuous shooting.
Self-timer function.
Voice recording function.
Wireless remote control function. (optional accessory)
Photo rotation at a maximum of 180°.
Laser indicating function.
Video loop coverage function.
With LCD segment screen and split T T main screen, to display various working states in real time.
With waterproof case, the waterproof grade is IP68, the waterproof depth is up to 60 meters.
T T display screen, to play and recall videos, and shoot.
With built-in dismountable high-capacity lithium battery, it can be re-charged.
Better image effect, three video output modes available for your selection.
1080i (1920x1080) 60fps/s, 1080P (1920x1080) 30fps/s, 960P (1280x960) 30f/s, 720P (1280x720) 60f/s, 720P
www.jobo.com
7
(1280x720) 30f/s, WVGA (848x480) 120f/s, WVGA (848x480) 60f/s.
Battery power detection and Micro SD card free space detection.
High-speed dynamic video recording, supporting an instant response to bright and dark environments.
Three photo metering modes for various shooting circumstances.
HDMI interface and AV output interface, to connect a high-definition display device or TV to view files.
Supporting a Micro SD card of 64G max.
High-quality colour fidelity, clearer and more realistic image.
It can remote control video recording, stopping and shooting of JIB 4 by using wireless remote control unique code
pairing function, avoiding interference of other remote control. (optional accessory)
Recording MOV videos, to be directly played by PC or uploaded onto video websites.
Auto standby power-saving function.
Supporting fast forward and fast rewind (1/4x/1/2x/2x/4x/8x/16x), and skipping of contents in the next segment
(when connecting with T T screen player).
Supporting time setting (RTC function) and time superposition function.
Supporting USB20.
Built-in microphone, forming high-quality voice recording effect.
Steady shot: maintain the normal function after being dropped or stricken.
www.jobo.com
8
Product Structure
www.jobo.com
9
1 T T display screen 11 SD card slot 20 Shutter
2 MENU key 12 Right key 21 Stop key
3 Up key 13 AV output 22 Camera Lens
4 Left key 14 Record
23 Indicator for video
recording (blue)
5 Down key 6Recall key 15 Green indicator of video recording 24 Laser transmitter
7 OK key 16 Power switch 25 HDMI output
8 Push button of T T display screen clip 17 Microphone 26 USB output
9 Lanyard hole 18 Red indicator of working/charging 27 Thread
10 Buzzer 19 LCD segment screen
1. JIB 4 can be either handheld or realized non-hand-held use combining with various non-hand-held accessories
The camera can be installed in where you want or the camera can be installed in the water by the waterproof case
to photograph scene in the water.
www.jobo.com
10
T e installation is s own as follows:
Installation and removal of T T display screen and
main body
Installation of waterproof case and main body
2. Installation of remote control (optional accessory)
There is a separate remote control attached to JIB 4. Please install the remote control onto the correct position
based on the accessories below:
1 Velcro 2 Clip 3 Binding tape (optional)
www.jobo.com
11
Operating Instructions:
Preparations before use:
(1)Start up and c eck t e power of JIB 4
Turn the power switch to „ON”, the system comes into play after the red indicator is bright constantly, the
corresponding icons on LCD segment screen will be lightened to enter normal preview state
At this time, it can view the following items on LCD segment screen:
A. Record mode: The current record mode can be viewed on the top left corner of LCD segment screen, „ „
indicates the video recording mode and „ „ indicates the voice recording mode.
B. Photo shooting prompt: The shooting icon „ „ can be viewed on the LCD segment screen. The icon will twinkle
once when shooting one photo.
C. Power icon: The power icon „ „ can be viewed on the top right corner of LCD segment screen The icon will be
bright constantly after the system coming into play and the disappearance of the icon means JIB 4 is shut down or
enters the standby state.
D. Video recording duration: Duration of the current video recording file is displayed on the middle line of LCD
segment screen, such as „ „ The video recording duration will start displaying when pressing „Record” key
once and it will stop when pressing „stop“ key once again.
Note: The video recording duration respectively on LCD segment screen and TFT display screen is displayed
synchronously.
www.jobo.com
12
E. Indication of battery power: The battery power icon „ „ can be viewed on the bottom left corner of LCD segment
screen and it will indicate the current battery power after starting up. More black grids indicate the higher power,
and it is lower conversely.
Note: The battery power indication icon will not display under standby or shutdown state.
.USB connection: The USB mode icon „ „ can be viewed on the LCD segment screen and it indicates whether the
machine is connected with the computer. The green indicator light on left side will blink for the time of the USB
connection. The icon will be lightened after connecting with computer in start-up state and it will not be displayed
when not connecting with computer.
G. Micro SD card capacity indication: The micro SD card capacity icon „ „ can be viewed on the bottom right corner
of LCD segment screen to indicate the capacity of micro SD card. More black grids indicate the higher spare capacity,
and it is lower conversely. The green indicator light on the left remains on when the card is out of memory.
At this time, it can view the following items on T T display screen:
A. Work mode: The video recording icon „ „ on the top left corner of T T display screen indicates that it is in video
recording standby state.
B. Battery power: The battery power icon „ „ on the bottom left corner of T T display screen indicates the spare
power of battery.
C. Resolution of video recording: 1080P/1080i/960P/720P/WVGA on the bottom left corner of T T display screen
indicates that the system is in 1080P/1080i/960P/720P/WVGA resolution video recording standby state.
D.
Spare storage capacity: Information of whether it has external card „ or „ and spare storage capacity „ „ can
www.jobo.com
13
be viewed on the bottom right corner of T T display screen.
E. It cannot respond to operations of „<„ and „>„ under the preview state.
. JIB 4 can be charged with the attached power supply or USB cable. The „Red Indicator of Working/Charging“on the
top of the machine will twinkle slowly in charging and it will be bright constantly after fully charging. The charging
duration is about 3h.
Note: Before use, please check if there is enough battery power. n case of a low battery power, please charge J B 4 via
the attached power supply or USB cable. The „Red ndicator of Working/charging “will twinkle slowly in charging
and remain red with the battery icon “ ” displayed on the TFT display screen after charging.
(2) Format t e Micro SD card
Please select a high-speed Micro SD card only and format it on JIB 4 before recording any video and voice or
shooting any photo if the Micro SD card has ever been used on other devices, please format it on JIB 4 before any
operation for normal usage.
Note: Please confirm whether files in internal memory of JIB 4 and in Micro SD card are needed before operating.
Locked files of JIB 4 also can be formatted to remove.
(3) Set t e date/time
In preview mode, press „M” key to enter the menu interface, press „>„ key to shift to the setup interface „ „, press „ + „
or „ - „ key to select the menu „Date/Time“, and then press „OK” key to enter the setup interface of „Date/Time“ Then press
„OK” key again to finish. Characters/numbers showing date or time turns blue when the cursor appears Press „+“ or „-“ to
reset the date or time Press „OK” to confirm the revision Press „M” to exit from setting interface
www.jobo.com
14
Parameter Settings:
In preview mode, press „M” key to enter the menu interface, press „<„ or „>„ key to move the cursor left and right,
and press „+“or „-“key to move the cursor up and down After selecting the menu, press „OK“key to set the selected
menu and to press „M“key again can exit (The parameters set this will resume even in case the product needs to be
powered off or restarted in order to have a different mode, please ret the product manually)
(1) Setting of Camcorder parameter:
a. Video image resolution: Select 1080P, 1080i, 960P, 720P, WGA
PAL
1920x1080P
25 fps 16:9
1920x1080i
50 fps 16:9
1280x960P
25 fps 4:3
1280x720P
50 fps 16:9
1280x720P
25 fps 16:9
848x480P
100 fps 16:9
848x480P
50 fps 16:9
NTSC
1920x1080P
30 fps 16:9
1920x1080i
60 fps 16:9
1280x960P
30 fps 4:3
1280x720P
60 fps 16:9
1280x720P
30 fps 16:9
848x480P
120 fps 16:9
848x480P
60 fps 16:9
b. View. The camera support three visual angle (default setting is „Broad View „)
Broad View Medium View Narrow View
www.jobo.com
15
Same image with different visual angles:
Comparison of same scene with different View
Broad View
Medium View
Narrow View
www.jobo.com
16
c. Bit Rate: The camera supply two options (high bit rate " „and normal " „.(default setting is „high“)
Note: Clear images require high bit rate and large file size at the same time.
d. Laser SYNC video: Turn on ( ) or turn off ( ) the laser transmitter. (Default setting is „O “)
e.Exe: Select video „ „ or audio only „ „.
f. Pre-video: in preview status, press „M” to enter mode selecting interface and select „Pre-video“. Press REC key once
to enter Pre-video status when no video is saved. Press REC key again to start video recording and the clips taken in
last few seconds in Pre-video status can be saved as the beginning of the video.
g. Auto video: in preview status, press „M” to enter mode selecting interface. Select „Auto video“ mode and choose
one option from „O “, „5 Seconds“, „10 Seconds“ or „20 Seconds“ to set the time before video recording so that the
product will start recording after countdown.
h.180°photo rollover: in preview status, press „M” to enter mode selecting interface and select „180°photo
rollover“ to have upward photos when the camera is in reverse position.
I. Display time: In preview status, press „M” to enter video setting interface. If „Display time“ is activated, the shooting
date and time will automatically appear at the right bottom of the screen during video recording. Shooting date and
time will not appear on the screen in case „Display time” is not activated.
Notes:
a. Under the audio only Press „Record” key once, the system starts recording, voice recording duration is displayed on
the bottom of TFT display screen and the green indicator twinkles slowly; if press „Stop” key , the system will stop
and save the current audio file recorded, the green indicator is off and the red indicator remains bright (the
www.jobo.com
17
corresponding operating prompt is on LCD segment screen), and it returns to the audio mode.
b. During sound recording, the product is responsive only when pressing „Stop“, „Off“ or „M” key. The user may switch
to video recording and the sound recording will automatically stop and saved.
c. The laser icon will be displayed on the top left corner of the preview interface when turning on the function of laser
synchronous shooting, which indicates the system is in this shooting mode. At this time, the laser will be turned on
when starting recording and it will be turned off when stopping recording.
d. When Pre-video and Auto video are both activated, press REC key during Pre-video to start Auto video countdown.
Press REC key again to start self recording and the clips taken in last few seconds in Pre-video status can be saved as
the beginning of the video.
(2) Setting of camera parameter:
a. Image resolution: Select 3M, 5M or 8M;
b. Single shot: To press „Shutter” once can take one photo;
c. Continuous capture (three): To press „Shutter” once can take three photos continuously;
d. Auto cont capture: Take one photo every 1s/2s/3s/5s/10s/20s, till to press key to stop or the card is full, or the
power is run out.
e. Timed shooting: the user may select time to count down („3s”, „5s” or „10s”) and press „M” to return to preview
status. Press „Camera” once and the countdown starts. The self-timer indicator light flashes after the countdown to
take a snapshot. The timed shooting remains activated as default. In order to switch to single snapshot mode,
please manually turn off timed shooting.
www.jobo.com
18
f. Display time: In preview status, press „M” to enter camera setting interface. If „Display time“ is activated, the
shooting date and time will automatically appear at the right bottom of the screen during shooting. Shooting date
and time will not appear on the screen in case „Display time“ is not activated.
Notes: 1. The timed shooting remains activated as default. n order to switch to single snapshot mode, please manually
turn off timed shooting.
2. The timed shooting and auto cont capture cannot be activated at the same time.
(3) Setting of system parameter:
a. Warning tone: Turn on or turn off the key tone.
Note: Voice of photo shooting and video recording cannot be turned off through this item. t only turns off the key
operation voice and there is no switch to turn off voice of photo shooting and video recording in the machine
system.
b. Status indicator: please turn it on or off before self timing; the default setting is „ON” .
c. Video content loop: The video/audio file will be auto saved in segment once every 15 minutes when setting „Video
content loop“; and if it is not set, the video/audio file will be auto saved in segment once every 30 minutes.
Note: The current actual segment file is determined by the file size set, but not determined by the true time, that is to
say, the file will be segmented more than 15/30 minutes at a dark environment.
d. Auto to standby: Select the auto standby time of off, 2 minutes, 5 minutes or 10 minutes. In case of no any mission
and operation after selecting, the system will start timing and JIB 4 will turn off input and output to enter the
standby mode at the end of the time set. If there is any operation in timing, the system will re-time. If the video
www.jobo.com
19
recording or shutter is operated in the standby process, JIB 4 will be waked up. The default standby time is 5
minutes when selecting to restore the factory default.
e. TV output format: NTSC or PAL; the video format outputted to TV can be selected. If the selected format is changed,
please unplug the AV cable and then reinsert it to update the parameters.
f. Contrast: the product is preset with standard contrast. If necessary, the contrast can be increased for a better night
shot.
g. ISO Sensitivity: the preset ISO sensitivity is activated as default. If necessary, ISO800 can be set for a better
nightshot.
h. Metering: even metering is activated as default to achieve good exposure of the entire photo. In case the scene
looks dark in comparison with light surroundings, the user may choose central area. In case the scene looks light in
comparison with dark surroundings, the user may choose central spot.
i. Language: „English“, can be selected via left or right key;
j. Date/Time: Time can be adjusted and changed. It will be displayed on the bottom right corner of the video file or
photo file when recording or shooting;
k. ormat: After confirming that all files recorded are not needed to be saved, all files can be removed by formatting.
Note: f there is no card inserted, the memory of the machine will be formatted; after inserting card, the system will
format the card inserted, but not format the memory of the machine;
l. Recover factory setting: The operation restores the parameter settings to factory default. After restoring, the system
will set the display mode of submenu of the „Menu” in English state. Press „M” key to enter the menu selection,
www.jobo.com
20
press „ < „ or „ > „ key to enter the menu „Setup“, press „-“ key to select the option „Language“, and then it can set in
Chinese state. The system will set the time at 01.01.2012 after restoring factory default;
Note: To press „M” key under the submenu may exit from it.
1. Insert the Micro SD card.
Note: Please select branded Micro SD card such as SD card of Toshiba etc.
2. Turn the power switch to „ON” to turn on JIB 4, and the red indicator will be lightened and JIB 4 will enter the
preview mode.
Note: a. n case of low battery power, you will find the battery icon „ „ and the message „Low Power“ on the TFT
screen.
b. f no Micro SD card is inserted, you will find the Micro SD card icon „ „ on the TFT screen.

Other JOBO Camcorder manuals

JOBO Smartcam Nano User manual

JOBO

JOBO Smartcam Nano User manual

JOBO Mobile Photo Hard Drive Giga 3+ User manual

JOBO

JOBO Mobile Photo Hard Drive Giga 3+ User manual

Popular Camcorder manuals by other brands

Sony DR-CX530E Service manual

Sony

Sony DR-CX530E Service manual

HuddleCamHD 20X user manual

HuddleCamHD

HuddleCamHD 20X user manual

Yashica Super-800 electro Instruction booklet

Yashica

Yashica Super-800 electro Instruction booklet

HOME8 IPC2201 quick start guide

HOME8

HOME8 IPC2201 quick start guide

DMP V-5054D installation guide

DMP

DMP V-5054D installation guide

Panasonic NV-DS77EN operating instructions

Panasonic

Panasonic NV-DS77EN operating instructions

Sony DVCAM DSR-PD175P operating guide

Sony

Sony DVCAM DSR-PD175P operating guide

Samsung SC-HMX10C user manual

Samsung

Samsung SC-HMX10C user manual

Sony HDR-PJ200/B Specifications

Sony

Sony HDR-PJ200/B Specifications

JVC GR-DVM76 instructions

JVC

JVC GR-DVM76 instructions

AIPTEK Pocket DV5900 user guide

AIPTEK

AIPTEK Pocket DV5900 user guide

Samsung SC-HMX20 quick start guide

Samsung

Samsung SC-HMX20 quick start guide

Technaxx TX-164 user manual

Technaxx

Technaxx TX-164 user manual

AIPTEK IS-DV user guide

AIPTEK

AIPTEK IS-DV user guide

Samsung DC173(U) Owner's instruction book

Samsung

Samsung DC173(U) Owner's instruction book

Panasonic P2HD AG-HPX250 manual

Panasonic

Panasonic P2HD AG-HPX250 manual

RCA EZ205 Small Wonder quick start guide

RCA

RCA EZ205 Small Wonder quick start guide

Panasonic NV-MX2 operating instructions

Panasonic

Panasonic NV-MX2 operating instructions

manuals.online logo
manuals.online logoBrands
  • About & Mission
  • Contact us
  • Privacy Policy
  • Terms and Conditions

Copyright 2025 Manuals.Online. All Rights Reserved.