14
Clean solution tank filter
Cleaning the tools
Removing and cleaning the squeegee
Cleaning the machine
Storage / parking of machine (machine is idle)
Store the machine with the tank cap slightly open, by:
• lifting the tank cap, unscrewing the sieve, and placing it in the hollow
provided.
• Then replace the tank cap on the sieve.
Service, maintenance and care
The machine's maintenance is pre-condition for trouble-free running and a long
life.
Service intervals
TASKI machines are builtto the highest quality standards. This is supported by
internationallyrecognised quality control procedures. Electrical and mechanical
parts are subject to wear or aging if used for long periods of time.
Service centre
Should you contact us due to a malfunction or for placing an order, please
always state the type, description and the serial number of your machine.
You can find this information on the name plate of your machine, and the
address of your nearest TASKI partner can be found on the last page of this
manual.
Blades replacement
Blade on the inner radius.
• Check the float is functioning correctly and that the suction filter (yellow) is
clean.
In case of damage or soiling of the float and suction filter, please refer to
Page 15.
• Afterdraining andcleaning,screw the redand bluecaps onagain, andhang
the hoses from their holders again.
Caution:
Clogged filters reduce the flow of the cleaning solution. As a
consequence you may damage the floor coating.
• Switch the machine off. • Once the solution tank has been drained, screw
the yellow cap from the solution tank filter and
pull it away from its holder.
• Rinse the filter under running water.
If necessary, the filter should be descaled with a 10% TASKI calcacid
solution.
The filter is lower than the tank outflow. A residual amount of
solution will flow out once the filter cap has been unscrewed.
• Refit the solution filter.
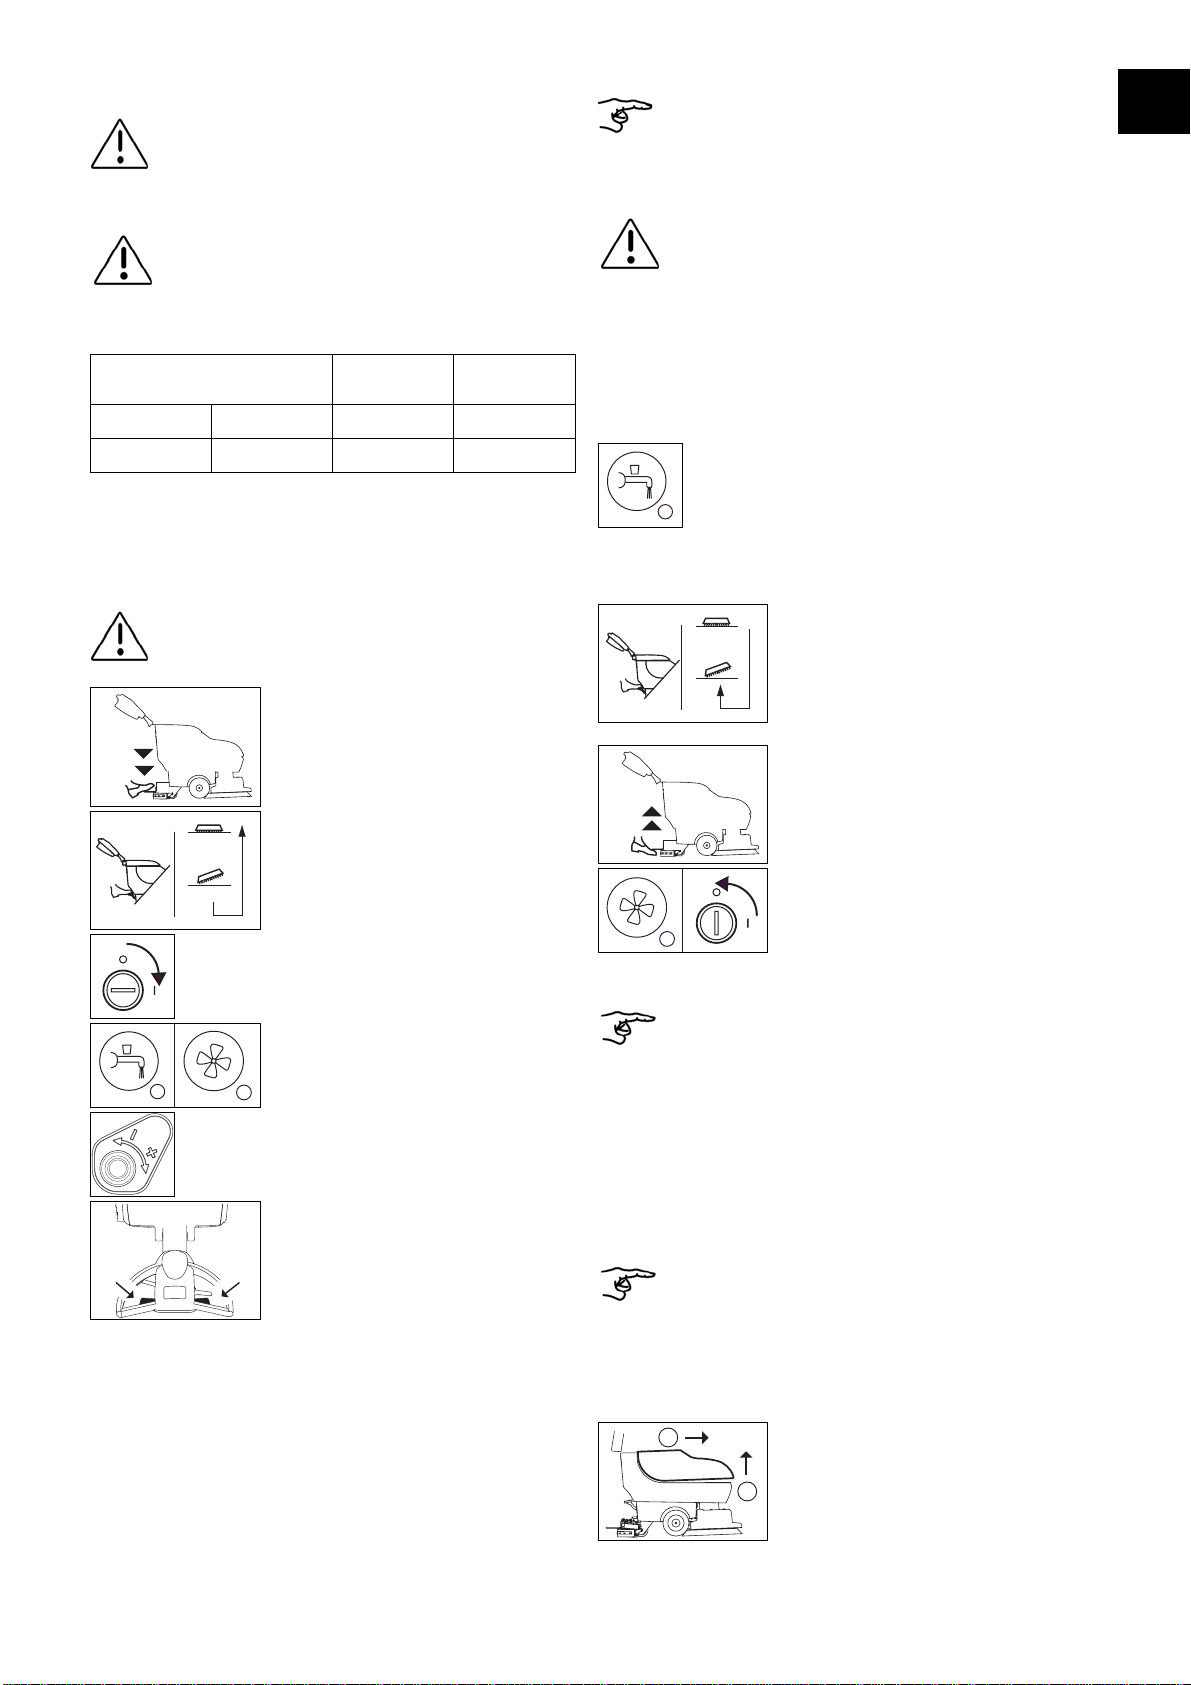
• Switch the machine off using the keyswitch and remove the key.
• Press down the pedal and lock it in place to
raise the tool.
• Turn the tool anticlockwise away from the tool
coupling using your foot.
• Clean the tool with water.
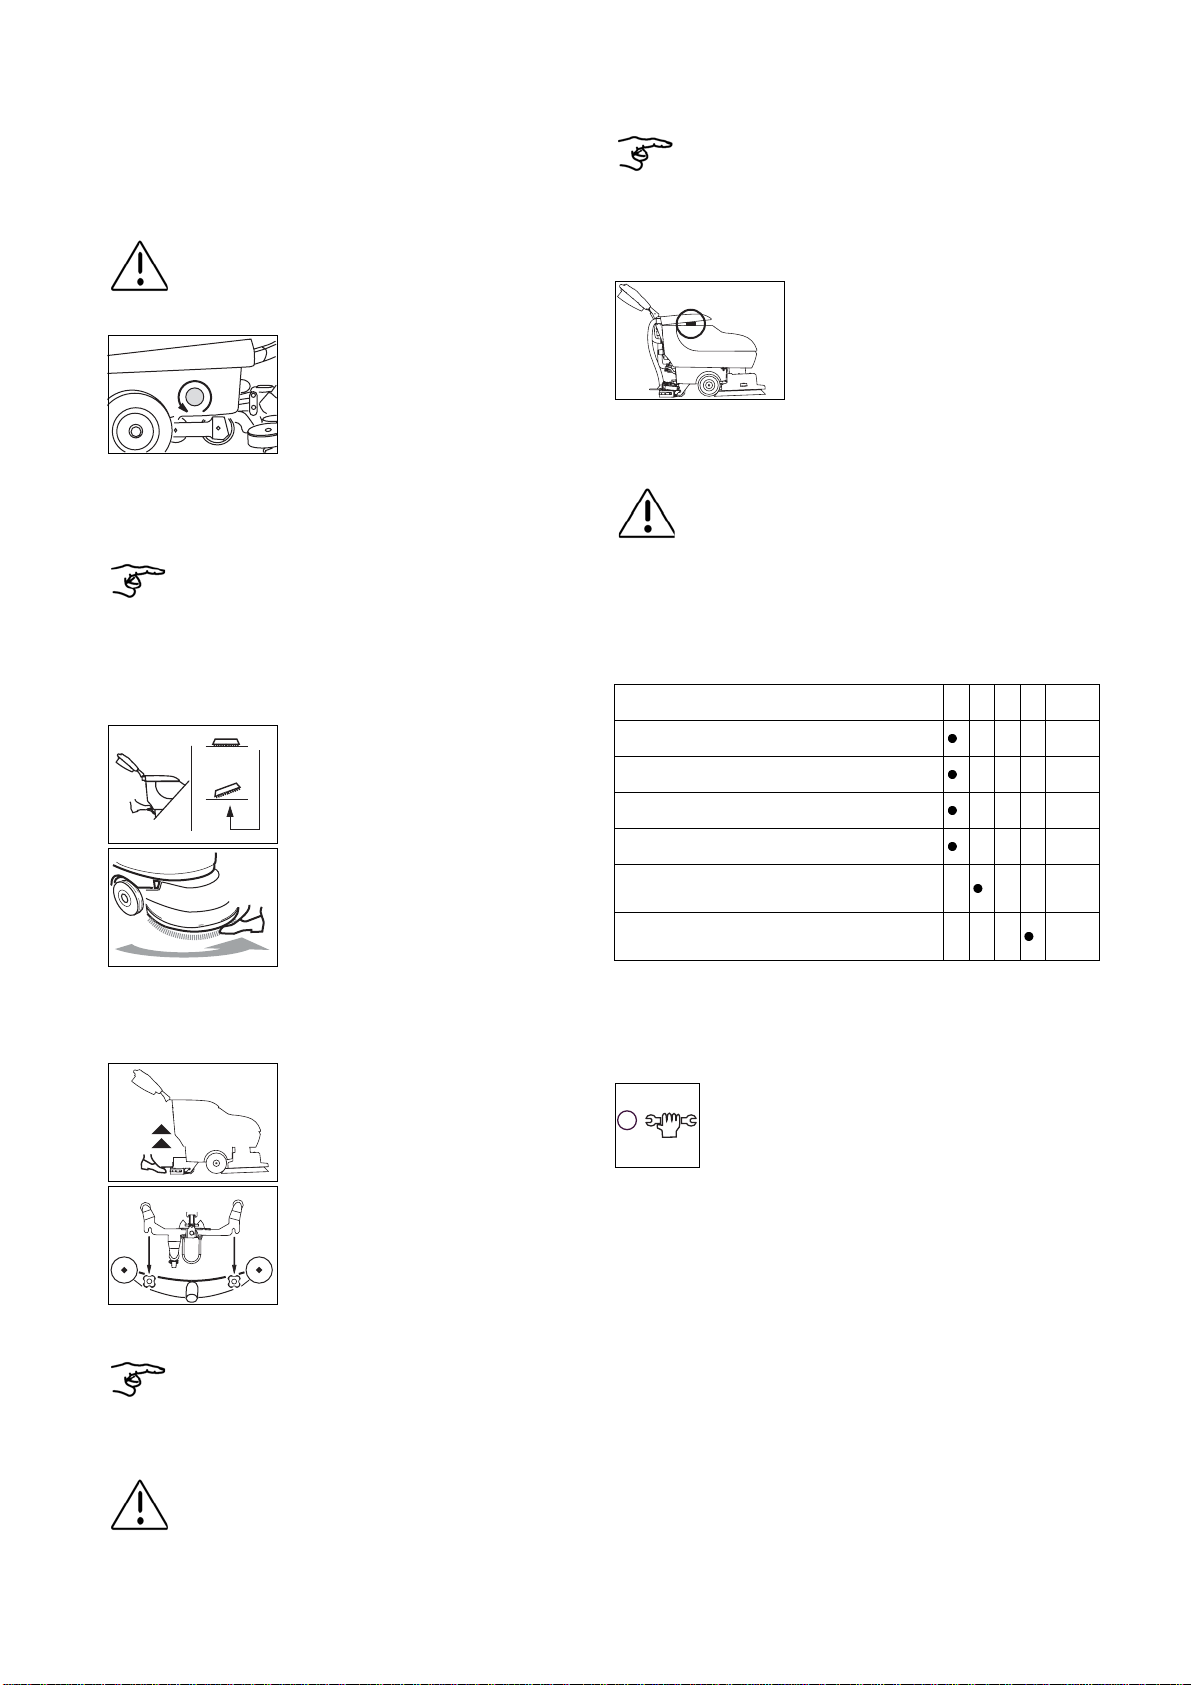
• Switch the machine off.
• Pull the suction hose away from the squeegee support.
• Raise the squeegee and loosen the fixing
screws on the squeegee.
The squeegee support wheel must be in the
direction of movement.
• Remove the squeegee from the squeegee
support.
• Clean the squeegee with water using a brush.
Optimal result can only be obtained with clean and intact blades!
Caution:
Never clean the machine with high water pressure or a water
hose.
The ingress of water into the machine might cause considerable
damage to mechanical or electrical parts.
• Wipe down the machine with a damp cloth.
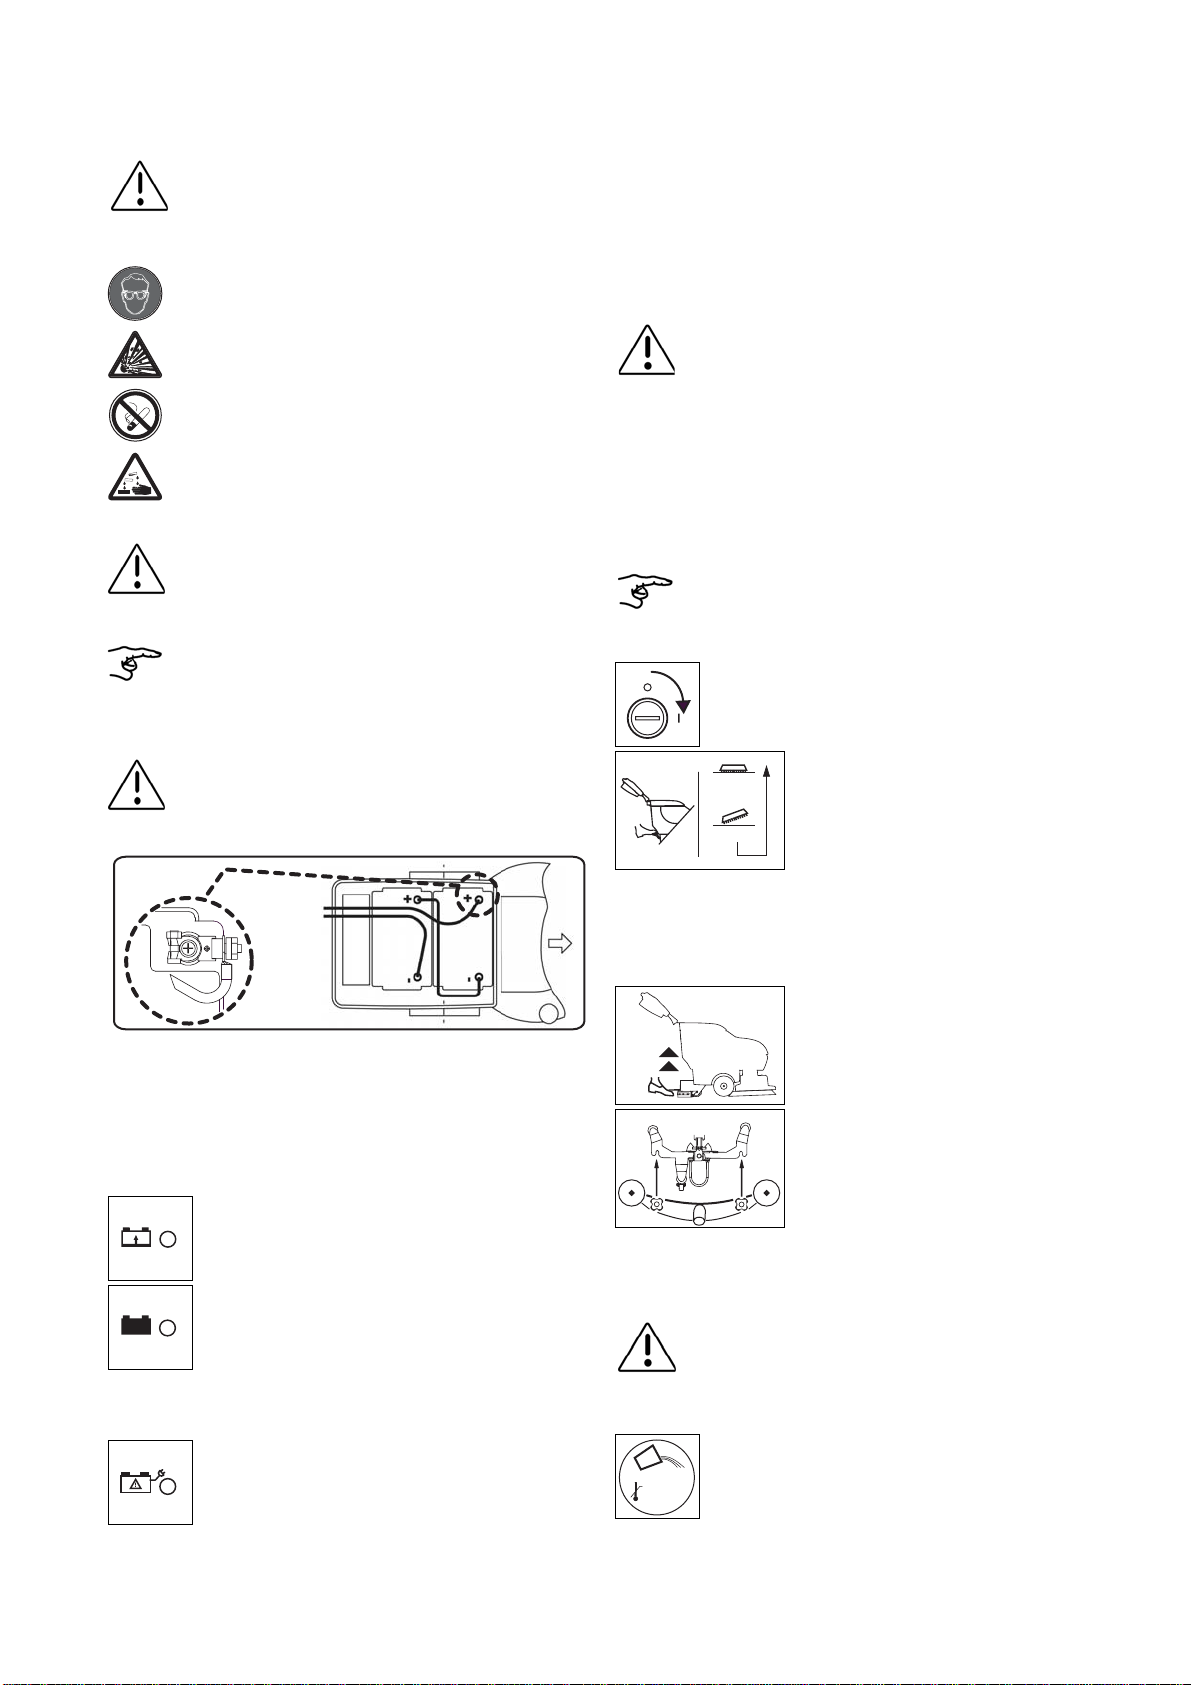
We recommend that you disconnect the battery from the machine
using the battery disconnectionsocket when storing / parking the
machine and when charging the battery.
The sieve holds the tank lid slightly open,
allowing the tank to dry out. As a result, the
formation of mould and unpleasant smells can
be reduced.
Caution:
Only TASKI branded spare parts must be used, otherwise
warranties and liabilities will be omitted!
Symbols:
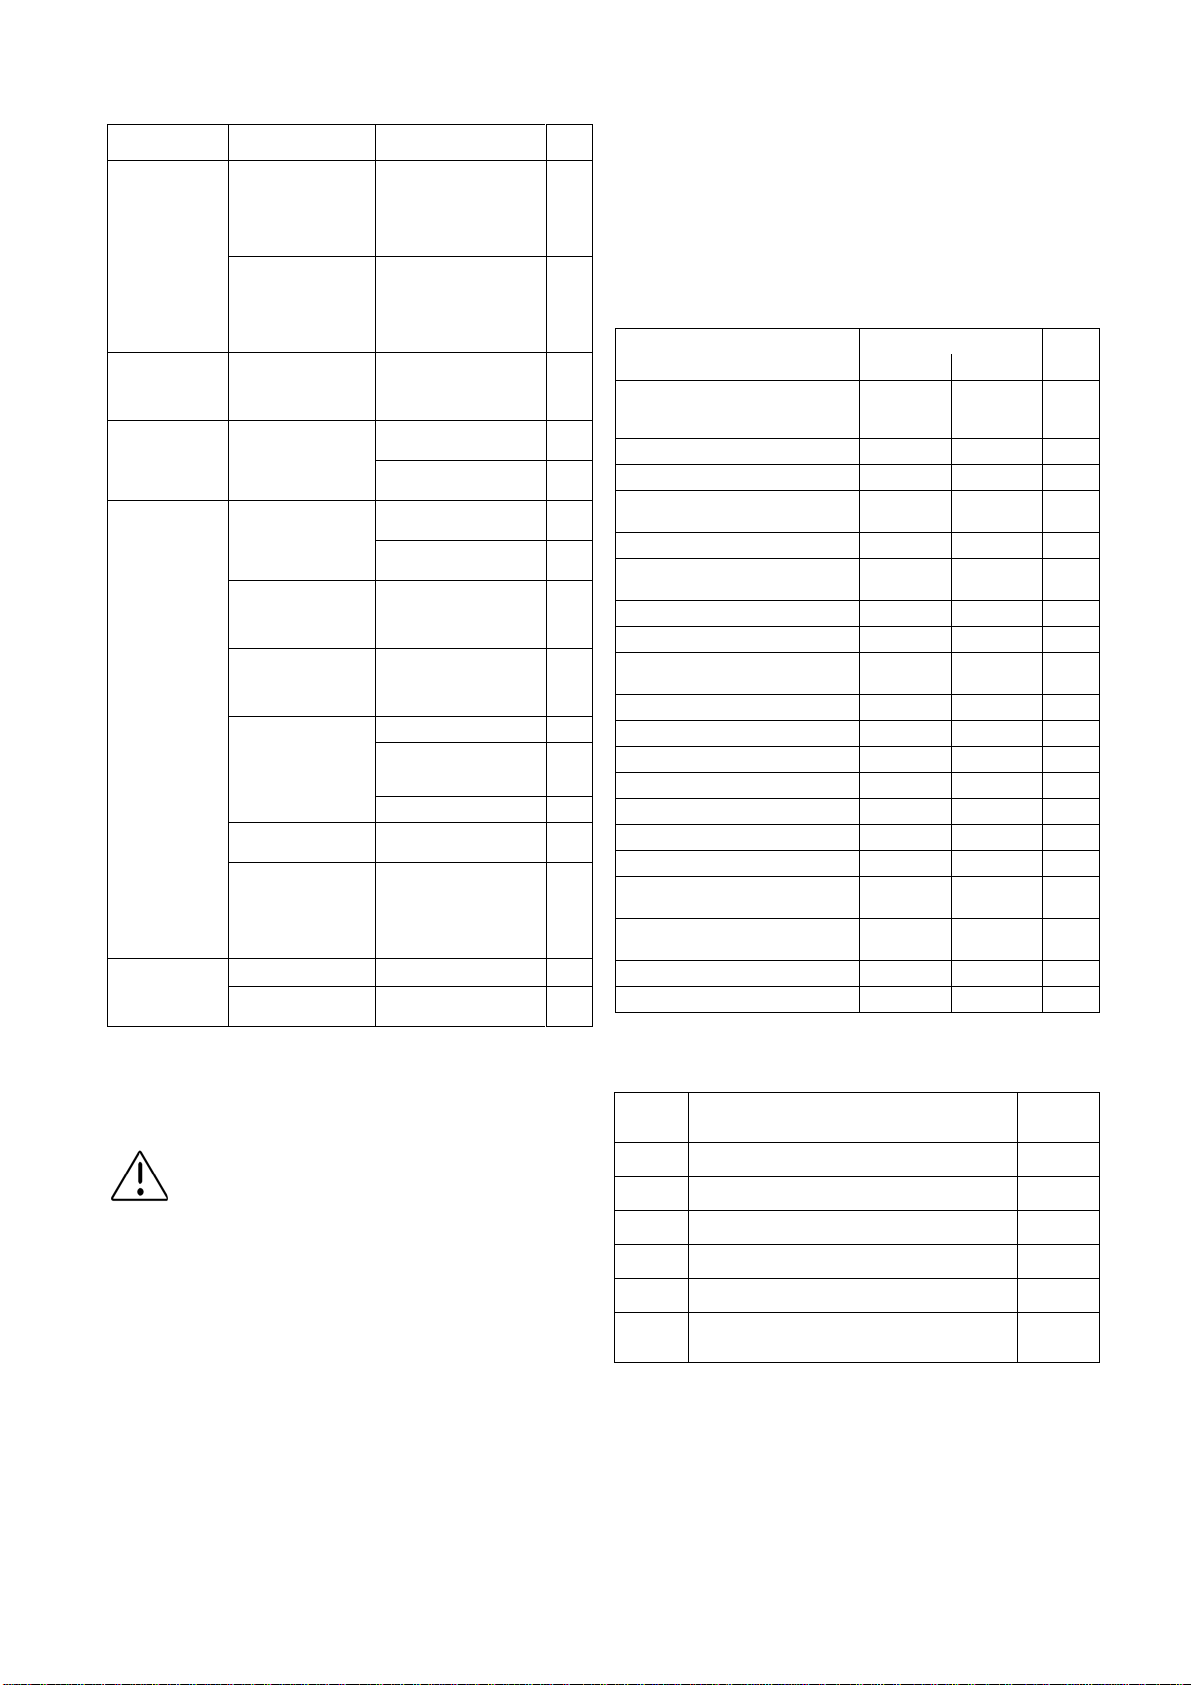
◊= After use, ◊◊ = Every week, ◊◊◊ = Every month,
⊗= Service light
Activity ◊◊◊◊◊◊⊗ page
Recharge batteries 12
Clean all parts marked yellow
Drain and clean the tanks 13
Wipe down the machine with a damp cloth 14
Clean the tank lid seal, check for cracks and
replace if necessary
Maintenance programsby TASKI service made by
TASKI technician
• In order to maintain operational reliability and
availability for use, the service must be carried
out after 450 working hours (option: only with
installed operating hours counter) or at least
once a year.
Underroughor extremeworkingconditionsand /or insufficientmaintenance,
shorter intervals may be necessary.
• Place the clean squeegee unit with the outer radius face down on a solid
surface e.g. table, floor.
• Press one hand onto the squeegee body by the hose connector.
• Grasp the blade with your thumb and forefinger inthe middle of the arch and
pull strongly until the metal band clicks open andthe blade is released from
the squeegee body.
• Release the metal strap and pull the blade off the squeegee body.
• Clean squeegee (body, metal straps and blades) with a brush.
• Mount the "rotated" or replaced blade onto the squeegee body.